
There’s something truly special about a classic dessert that feels rich and elegant but doesn’t demand an entire afternoon just to assemble. You know, the kind of showstopper you can pull out for a big dinner party or a holiday gathering. That’s exactly what I wanted when I perfected this tiramisu recipe. For thirty years as a teacher, I learned that if you break something complicated down into simple, clear steps, anyone can achieve wonderful results. This Easy No-Bake Classic Tiramisu Recipe is the result of that philosophy—it delivers that deep, coffee-soaked Italian flavor without any fuss or the worry of raw eggs.
- Why This Easy Tiramisu Recipe is a Home Cook Favorite
- Gathering Ingredients for Your Classic Tiramisu Recipe
- Mastering the Mascarpone Cream Recipe for Creamy Italian Tiramisu
- Preparing Espresso Soaked Ladyfingers for the Best Tiramisu Recipe
- Step-by-Step Assembly for Your No Bake Tiramisu
- Chilling Time: The Secret to a Perfect Tiramisu Recipe
- Serving and Storing This Authentic Italian Dessert
- Frequently Asked Questions About Our Tiramisu Recipe
- Sharing Your Homemade Tiramisu Experience
Why This Easy Tiramisu Recipe is a Home Cook Favorite
When I designed this recipe, I really focused on what makes dessert time stressful at home. We want deliciousness without the worry or the cleanup, right? That’s why this particular no-bake tiramisu is such a winner for my family and friends.
- It’s completely safe! We skip traditional raw egg custards, giving you peace of mind, especially when feeding grandkids.
- Zero baking means less time fussing near the oven and no risk of dry edges.
- It’s the ultimate make-ahead dessert—it actually improves overnight, making it the perfect Dessert for Dinner Party solution.
- The resulting Creamy Italian Tiramisu texture is unbelievably light and rich.
Simple Tiramisu Instructions for Beginners
Trust me on this one—if you can whisk cream, you can master this dessert. I spent years teaching kids how to follow directions clearly, and I’ve translated all that patience into these steps. You won’t find any confusing jargon here, only clear guidance. If you’ve ever been nervous to try an elegant Italian dessert, I promise this streamlined approach will give you beautiful, reliable results every single time.
Gathering Ingredients for Your Classic Tiramisu Recipe
Before we even think about dipping cookies, we need to make sure we have all our beautiful components ready to go. When I develop a recipe like this Classic Tiramisu Recipe, I stress quality, especially for the coffee and the mascarpone. Everything should be measured out before assembly starts—it’s called mise en place, and it keeps the process stress-free!
Here’s what you’ll need for this wonderful little treat:
- 1 1/2 cups strong brewed espresso, cooled completely
- 1/4 cup coffee liqueur or dark rum (if you like a grown-up kick!)
- 2 large egg yolks (these are just for richness in the cream, we use heavy cream for lift!)
- 1/2 cup granulated sugar
- 8 ounces mascarpone cheese, softened slightly so it mixes smoothly
- 1 cup heavy whipping cream, very cold—this is important for volume!
- 1 teaspoon vanilla extract
- 1 package (about 7 ounces) ladyfingers (you’ll need about 24 to 30 of them)
- Unsweetened cocoa powder, for that beautiful dusting right before serving
Having these items ready for your next easy homemade chocolate pudding recipe equivalent makes the assembly feel like a breeze.
Mastering the Mascarpone Cream Recipe for Creamy Italian Tiramisu
This cream is truly the heart of our tiramisu recipe, and getting it right ensures that luxurious, velvety mouthfeel we all crave. Remember how I mentioned we skip the traditional raw eggs? That’s because we build our lift and richness using heavy cream, which is much simpler and safer for home cooks like us! First, you’ll whisk those two egg yolks with the sugar until they lighten up and get nice and fluffy—that pale yellow color means you’re doing great. If you’re ever looking for other decadent ways to finish a meal, you might check out my recipe for fluffy buttercream frosting, but for this dessert, we focus on smooth richness.
Next, gently fold in that softened mascarpone until it’s just smooth. Now, here is where the magic happens: in a separate, very cold bowl, whip your heavy cream with the vanilla until you get stiff peaks. You want firm peaks so they hold their air! Then, you gently fold that whipped cream right into the mascarpone base. Take your time doing this folding motion; we are incorporating air, not mixing cement here. This technique keeps our Creamy Italian Tiramisu gorgeously light yet incredibly decadent.
Expert Tip: Achieving the Perfect Mascarpone Consistency
The biggest mistake I see people make is over-mixing the mascarpone once the heavy cream goes in. If you mix too long, that beautiful air you just whipped into the cream will deflate right out, and you’ll end up with a soupy puddle instead of a thick layer for assembling. Stop folding the second you don’t see streaks of plain white cream anymore. If your heavy cream isn’t cold enough when you start whipping, it just won’t whip to stiff peaks, and your whole cream layer will struggle to hold its shape later on. Keep everything chilled until the very last moment!
Preparing Espresso Soaked Ladyfingers for the Best Tiramisu Recipe
Alright, this is where we inject that signature coffee flavor right into the soul of our dessert. This step is crucial for the tiramisu recipe, but it’s also the trickiest part if you aren’t careful! You need strong, cooled espresso, and if you’re using it, that little splash of liqueur goes right in there for extra depth. Remember how I always talk about not over-mixing? Well, here we talk about not over-soaking!
The ladyfingers are like little sponges, and they will greedily drink up that coffee if you let them. You want a quick dip—just a second on the bottom, a quick flip to the top, and immediately out onto your tray. If you leave them sitting, they turn to sweet, brown mush, and you’ll end up with a soupy mess instead of distinct layers. Trust me, no one wants soggy bottoms in their Italian dessert! If you love coffee flavors, you might enjoy seeing how I handle coffee in my moist coffee cake recipe, but for this, keep the dip speedy!
If you want to see how another wonderful cook handles her dipping technique, I often check out Natasha’s Tiramisu for technique inspiration!
Step-by-Step Assembly for Your No Bake Tiramisu
This is the fun part where everything comes together! Once your coffee soak is ready and your beautiful, airy mascarpone cream is waiting, it’s time to build your layers. If you followed my advice and kept your dipping quick, this layering goes together faster than you can imagine. Think of this as building a delicious, edible brick structure. We want stability and rich flavor in every row of our tiramisu recipe assembly.
First things first, take an 8×8 inch dish—that size works perfectly for the amount of cream we made. Give the bottom a very light dusting of cocoa powder. This little trick I learned stops the bottom layer of cookies from sticking, which is important when you get to the serving stage! Now, start laying those quick-dipped espresso ladyfingers side-by-side. Break a few pieces if you need to, just make sure the base is covered.
Spread half of that glorious mascarpone cream evenly over that first layer of cookies. Try to make it look as flat as possible—it helps the next layer sit nicely. Repeat the dipping process a second time for your top layer of ladyfingers. Then, smooth out the remaining cream right over the top. That’s it for the building! You can see how these no-bake chocolate mousse pie style desserts come together quickly. I always admire how straightforward the assembly is for this style of dessert.
Chilling Time: The Secret to a Perfect Tiramisu Recipe
We are nearly done! But please, don’t peek at this dessert for at least six hours. I know it’s hard when something smells that good, but chilling is the non-negotiable step for a perfect tiramisu recipe. That time in the cold is when the magic truly happens. The espresso soaks fully into the ladyfingers, turning them into soft, rich cake layers, and the mascarpone cream firms up beautifully.
If you are planning for a make-ahead dessert, know that this tastes even better the next day! I often assemble mine the night before a party, which frees up my whole morning. Think of the refrigerator as the final stage of cooking where all those wonderful coffee and cream flavors finally marry together.
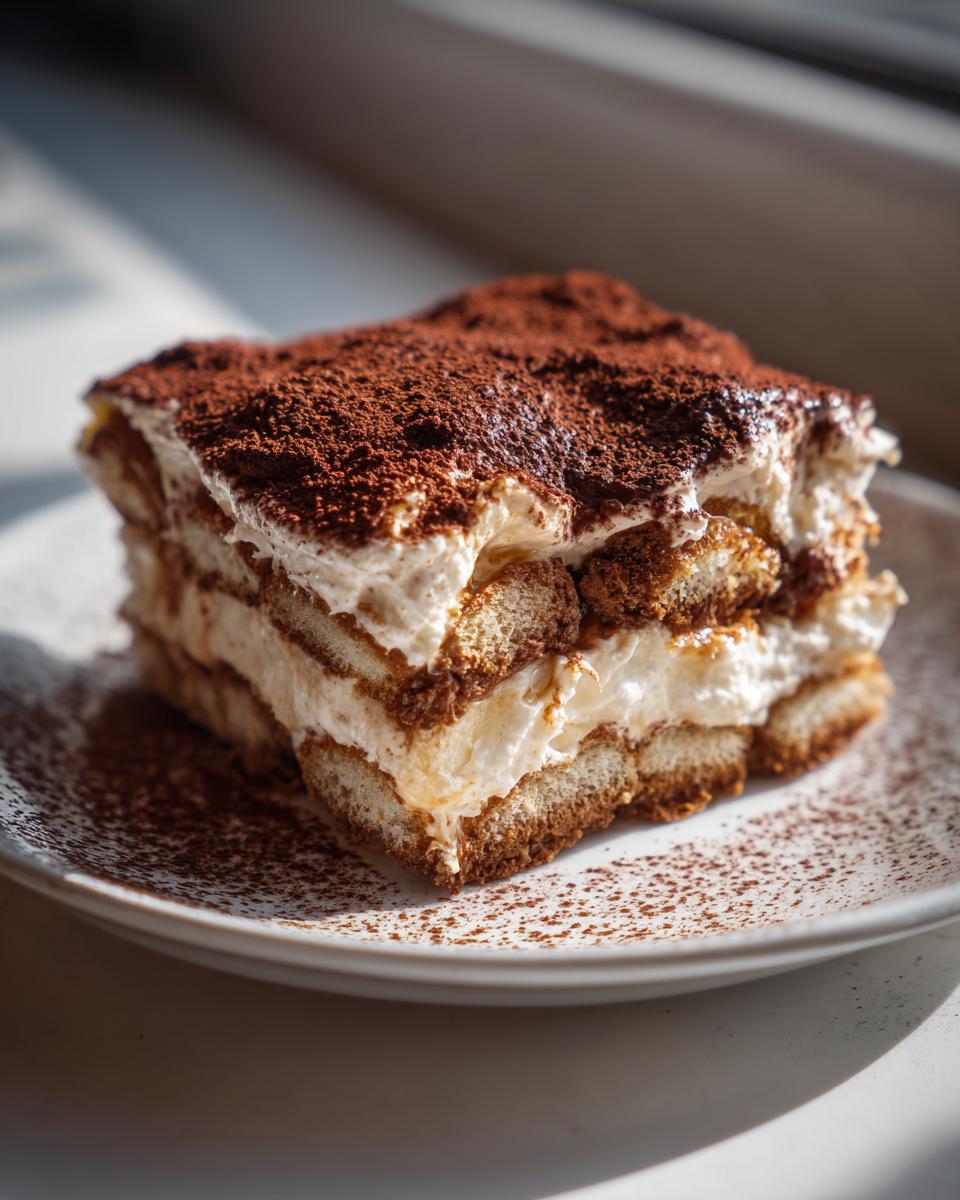
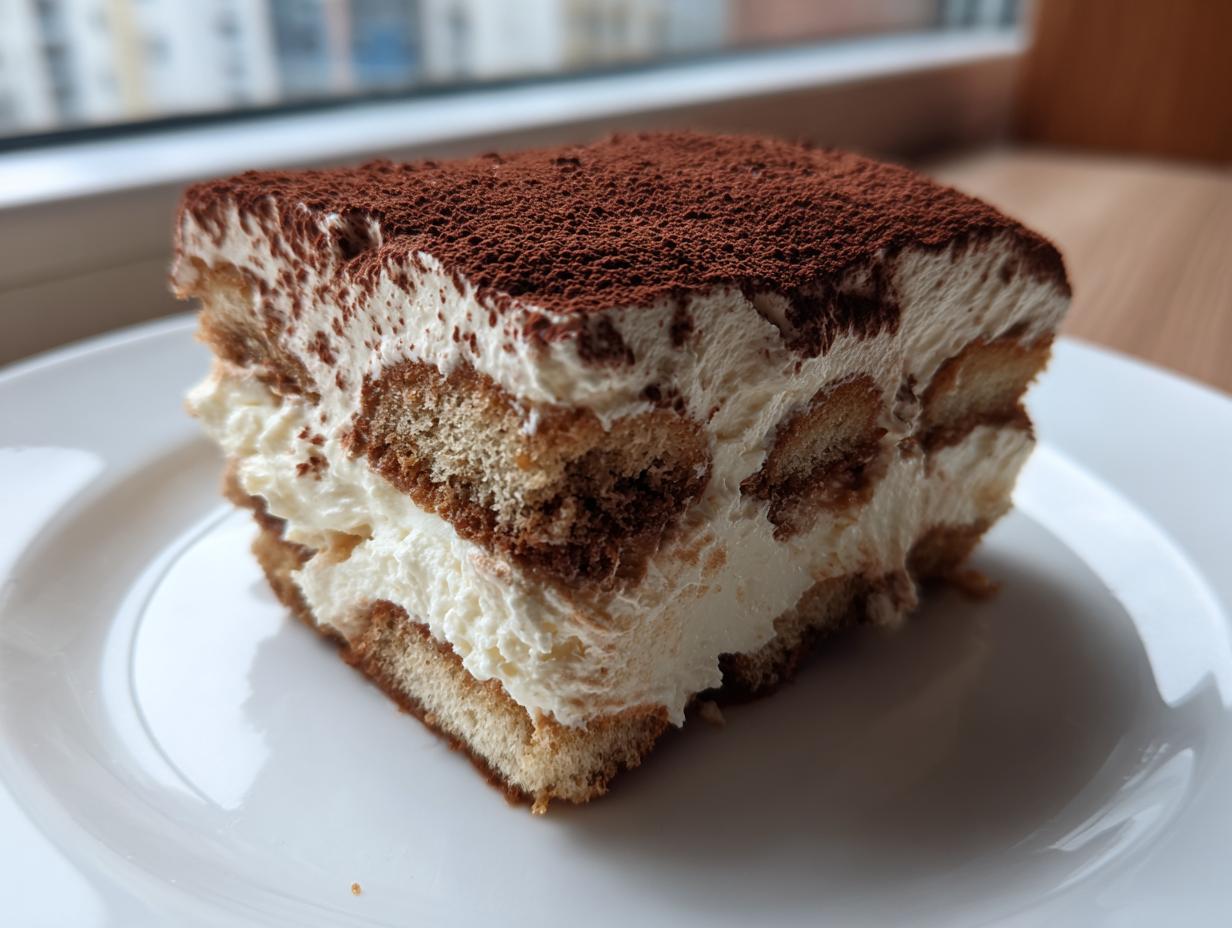
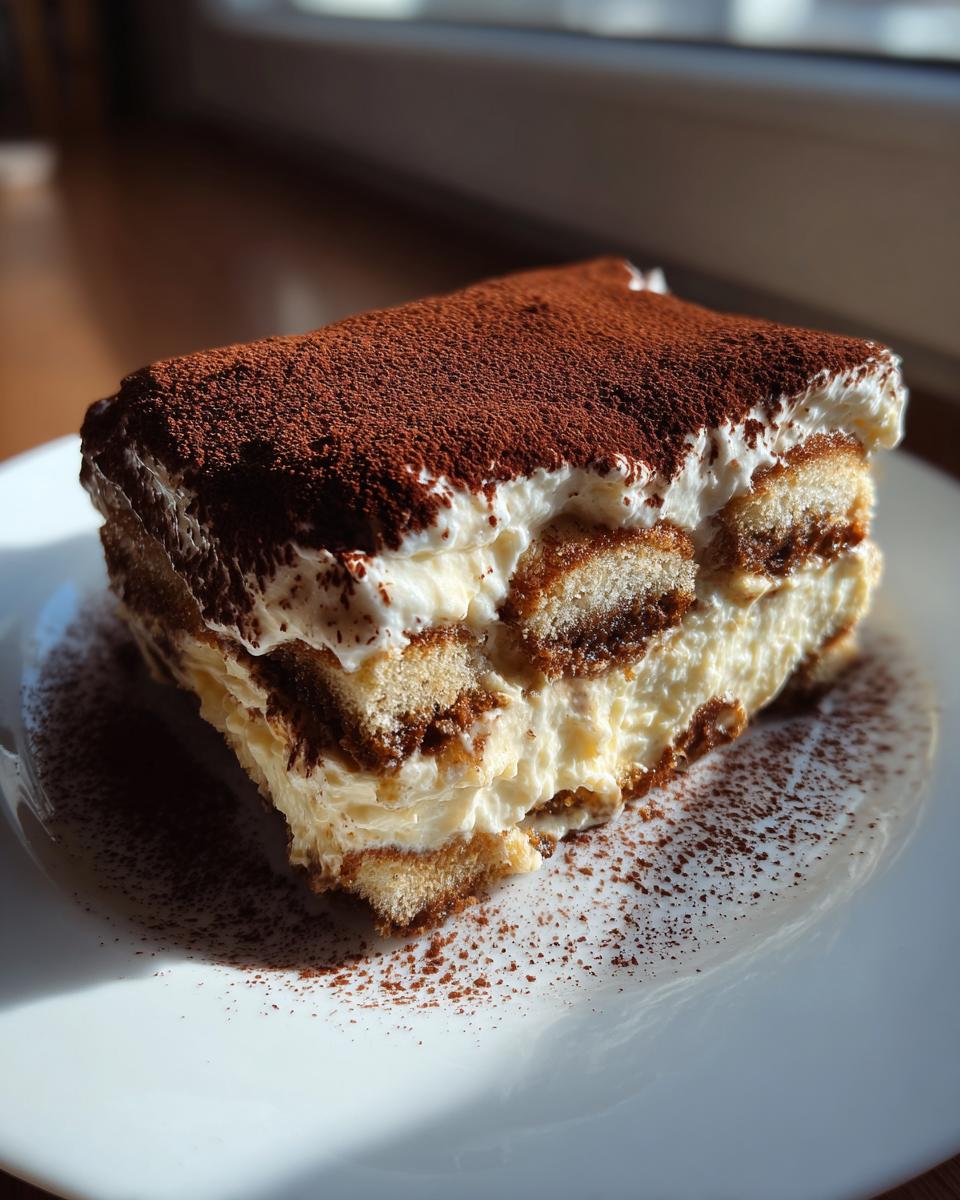
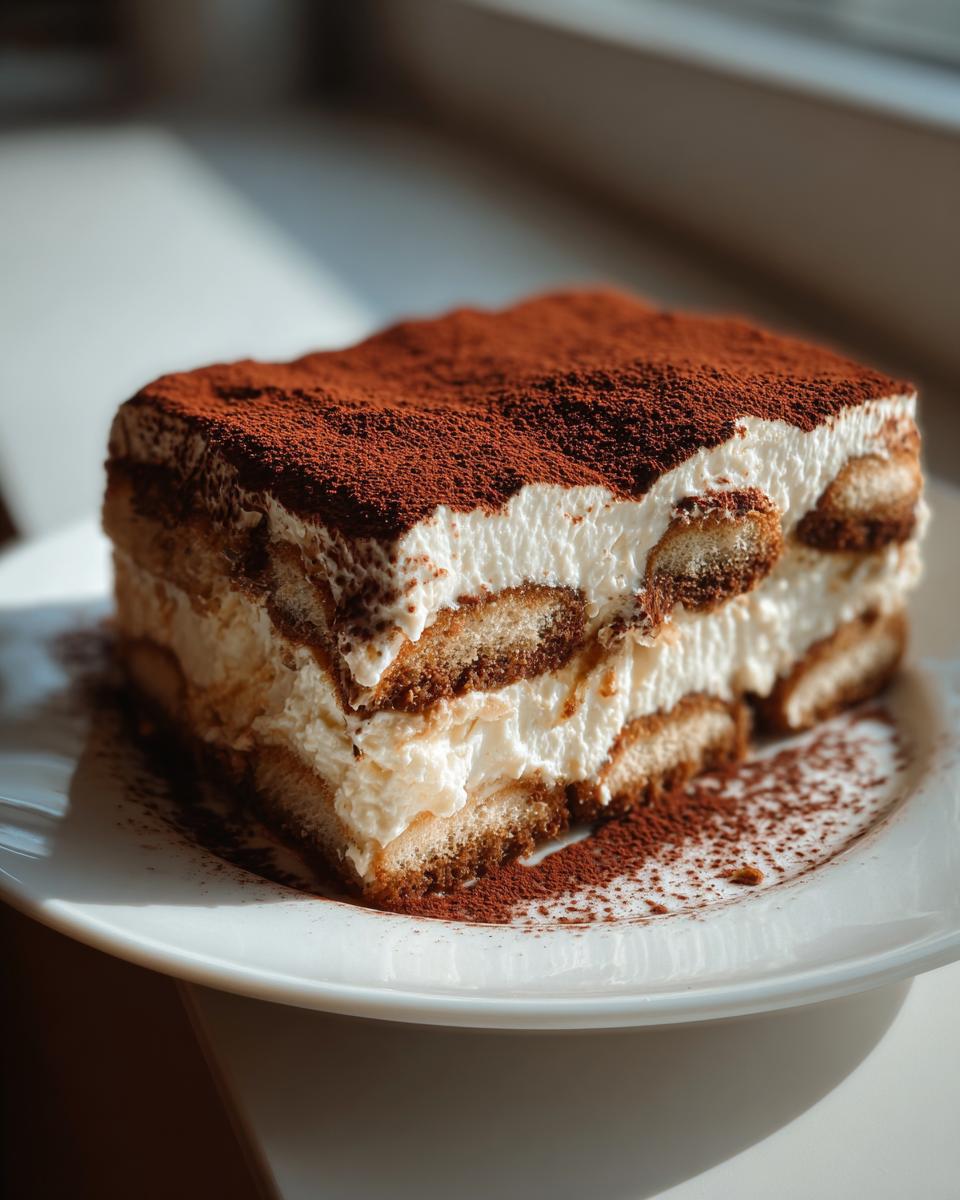
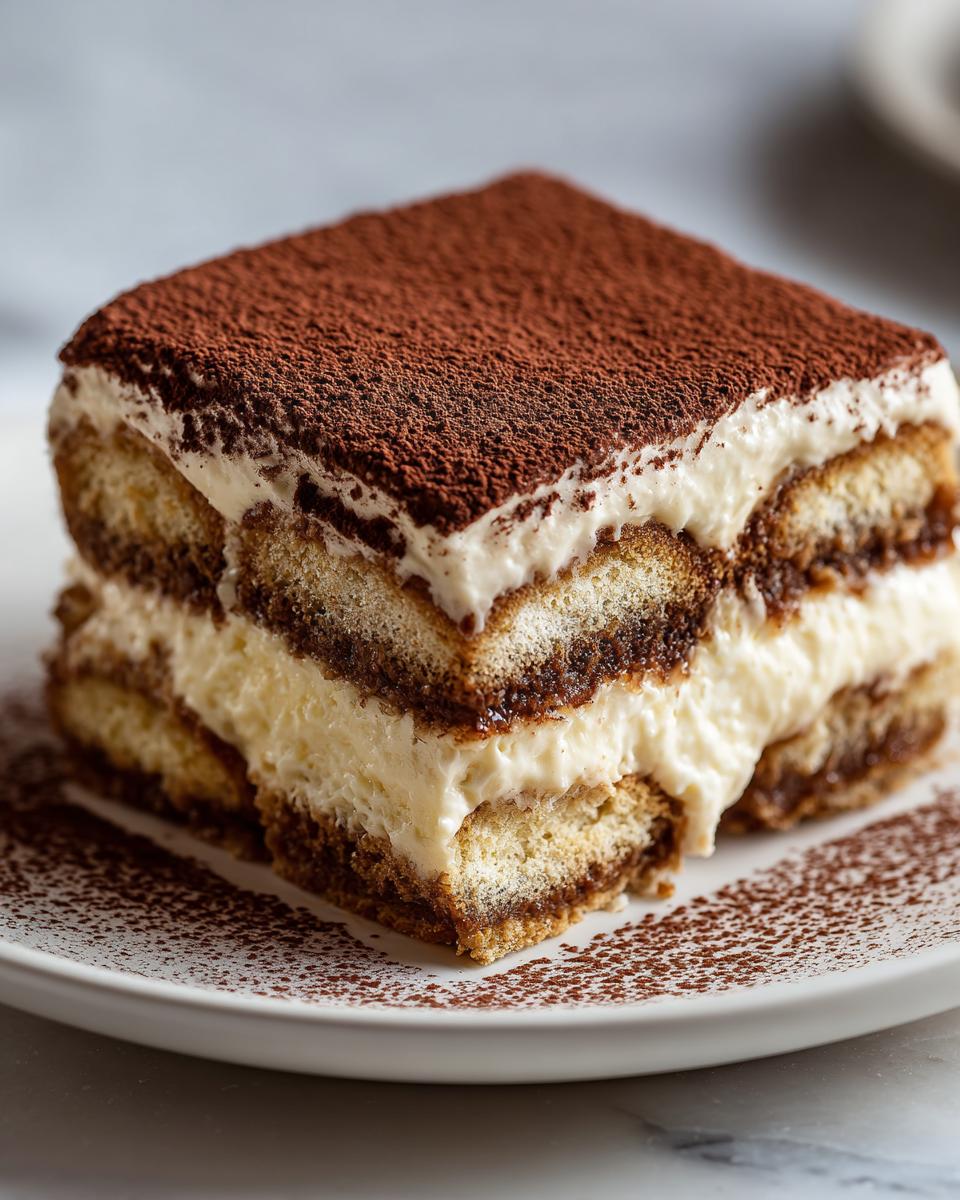
Once you’ve let it set up properly, you’ll find it cuts into clean, gorgeous slices, exactly like you see in pictures. You can find my thoughts on another set-it-and-forget-it favorite, peanut butter fudge, right here, but chilling is key for both!
Serving and Storing This Authentic Italian Dessert
We’ve done the hard work of mixing and layering, and now it’s time for the presentation! The final touch that makes this Authentic Italian Dessert look professional is the dusting of cocoa powder. You must wait until *just* before you serve it to do this. If you dust too early, the moisture from the cream layer will soak up the cocoa, leaving you with a dull, brownish top layer instead of that striking, dark contrast we want.
Grab a fine-mesh sieve—the smaller the holes, the better the dusting will look. Hold the sieve high over the dish, maybe six or eight inches up, and tap it gently. This creates a lovely, even, powdery blanket over the whole thing. It makes the dessert look incredibly tempting when you bring it to the table!
When it comes to storing leftovers—and trust me, there might be some, though often there isn’t!—this dessert actually thrives in the cold. Always keep it tightly covered with plastic wrap directly on the surface if possible. This prevents it from drying out or picking up any stray smells from the refrigerator. I find the flavors are just as good, if not better, on day two. If you see my method for easy honey butter skillet corn storage, it’s the same principle: airtight is best!
Make Ahead Dessert Timing Guide
This is such a wonderful make-ahead dessert because you can assemble it fully one day ahead, and it’s perfect. The full overnight chill (around 12 hours) is my absolute favorite because the coffee flavor deepens beautifully without being overwhelmingly strong. Can you make it two days in advance? Yes, you absolutely can! It stays perfectly fresh in the fridge for up to 48 hours.
However, I wouldn’t push it past that two-day mark. While the mascarpone is stable, the ladyfingers will eventually start to break down too much, turning the texture less distinct layer by layer. Save the final cocoa dusting until the day you plan to serve it, no matter how early you assemble it. That way, you get a professional presentation every single time.
Frequently Asked Questions About Our Tiramisu Recipe
When I first started tinkering with this recipe, I had so many questions myself! It’s normal to wonder about swaps, especially when you want the very Best Tiramisu Recipe for your table. I hope clearing these up helps you feel super confident before you start assembling your beautiful layers.
Can I make this tiramisu recipe without alcohol?
Oh yes, absolutely! If you need a non-alcoholic version for the family or simply don’t like the taste of coffee liqueur, just leave it out—no problem at all. To make sure you don’t lose that little bit of depth that the alcohol provides, I suggest adding an extra teaspoon of vanilla extract right into your cooled espresso soak. Sometimes, just to be playful, I’ll add a tiny splash of almond extract instead if I know my guests enjoy that subtle nutty flavor that pairs so well with coffee.
What is the difference between this and a Classic Tiramisu Recipe?
That’s a wonderful question about what makes this an Easy Tiramisu! Traditionally, an Authentic Italian Dessert uses a technique called *zabaglione*, which involves whisking egg yolks over heat (or even sometimes raw) with sugar to create a custard base. Because I want to keep things simple and safe for everyone, my version swaps that step by whipping heavy cream into stiff peaks and folding it into the yolk/mascarpone mix instead. It creates a wonderfully fluffy and creamy texture without any of the fuss or worry associated with raw eggs. It’s the reliable path to a stunning Coffee Dessert Idea every single time!
For more thoughts on embracing tradition while keeping things practical, I always enjoy reading the insights over at My Home Made Dishes about their take on the classics. You can also learn more about my kitchen philosophy over on my About Page!
Sharing Your Homemade Tiramisu Experience
Well now, that’s the final step in making this wonderful tiramisu recipe! Seeing you all bring this classic Italian dessert to life in your own kitchens is truly the best part of running Cooking by Carla. I pour so much love and testing into these recipes, and knowing they end up on your tables for special moments feels like the greatest compliment.
I truly want to hear all about it! Once you’ve let it chill and given it that beautiful final dusting of cocoa, tell me how it went. Did it disappear instantly at your dinner party? Was it the star centerpiece for a holiday gathering? Don’t be shy!
If you have a moment, please leave a star rating down below. It helps other folks know this is a reliable, easy tiramisu worth trying. And if you snapped a picture of your beautiful layers, I’d love to see them! You can always send photos or ask any late-game questions over on my Contact Page. Seeing your successful assembly reminds me that good food shared with love always tastes best.
If you are looking for more ideas on how to present elegant coffee desserts, I always like seeing what other wonderful home cooks are doing, like the approach shown by Sarah’s Best Recipes. Happy eating, dear friends!
PrintEasy No-Bake Classic Tiramisu Recipe

You can make this creamy, no-bake Italian dessert with simple steps. This classic tiramisu recipe uses espresso-soaked ladyfingers and a rich mascarpone cream, perfect for making ahead for dinner parties.
- Prep Time: 25 min
- Cook Time: 0 min
- Total Time: 6 hr 25 min
- Yield: 8 servings 1x
- Category: Dessert
- Method: No-Bake
- Cuisine: Italian
- Diet: Vegetarian
Ingredients
- 1 1/2 cups strong brewed espresso, cooled
- 1/4 cup coffee liqueur or dark rum (optional)
- 2 large egg yolks
- 1/2 cup granulated sugar
- 8 ounces mascarpone cheese, softened
- 1 cup heavy whipping cream, cold
- 1 teaspoon vanilla extract
- 1 package (7 ounces) ladyfingers (about 24–30 cookies)
- Unsweetened cocoa powder, for dusting
Instructions
- Prepare the coffee soak: In a shallow bowl, combine the cooled espresso and the coffee liqueur or rum, if using. Set aside.
- Make the mascarpone cream: In a medium bowl, whisk the egg yolks and granulated sugar together until the mixture is pale yellow and thick. This takes about 3 minutes.
- Gently mix the softened mascarpone cheese into the egg yolk mixture until smooth. Do not overmix.
- In a separate, chilled bowl, whip the cold heavy cream and vanilla extract until stiff peaks form.
- Fold one-third of the whipped cream into the mascarpone mixture to lighten it. Then, gently fold in the remaining whipped cream until just combined. You want a smooth, creamy texture.
- Assemble the tiramisu: Lightly dust the bottom of an 8×8 inch baking dish with cocoa powder.
- Quickly dip one ladyfinger at a time into the espresso mixture, turning to coat both sides. Do not let them soak too long, or they will become soggy.
- Arrange a single layer of the dipped ladyfingers in the bottom of the dish. Break cookies if necessary to fit the space.
- Spread half of the mascarpone cream evenly over the layer of ladyfingers.
- Repeat the process: Dip and arrange a second layer of espresso-soaked ladyfingers over the cream.
- Spread the remaining mascarpone cream over the second layer of ladyfingers.
- Cover the dish tightly with plastic wrap. Chill the tiramisu in the refrigerator for at least 6 hours, but preferably overnight, to allow the flavors to blend and the dessert to set.
- Before serving, dust the top generously with unsweetened cocoa powder using a fine-mesh sieve. Slice and serve your homemade tiramisu.
Notes
- For the best flavor, use high-quality espresso or very strong brewed coffee.
- Chilling time is important; this make-ahead dessert tastes much better after the flavors have fully developed overnight.
- If you skip the liqueur, add 1 teaspoon of vanilla extract to the espresso soak for depth.
Nutrition
- Serving Size: 1 slice
- Calories: 350
- Sugar: 25
- Sodium: 80
- Fat: 22
- Saturated Fat: 14
- Unsaturated Fat: 8
- Trans Fat: 0.5
- Carbohydrates: 30
- Fiber: 1
- Protein: 7
- Cholesterol: 110