
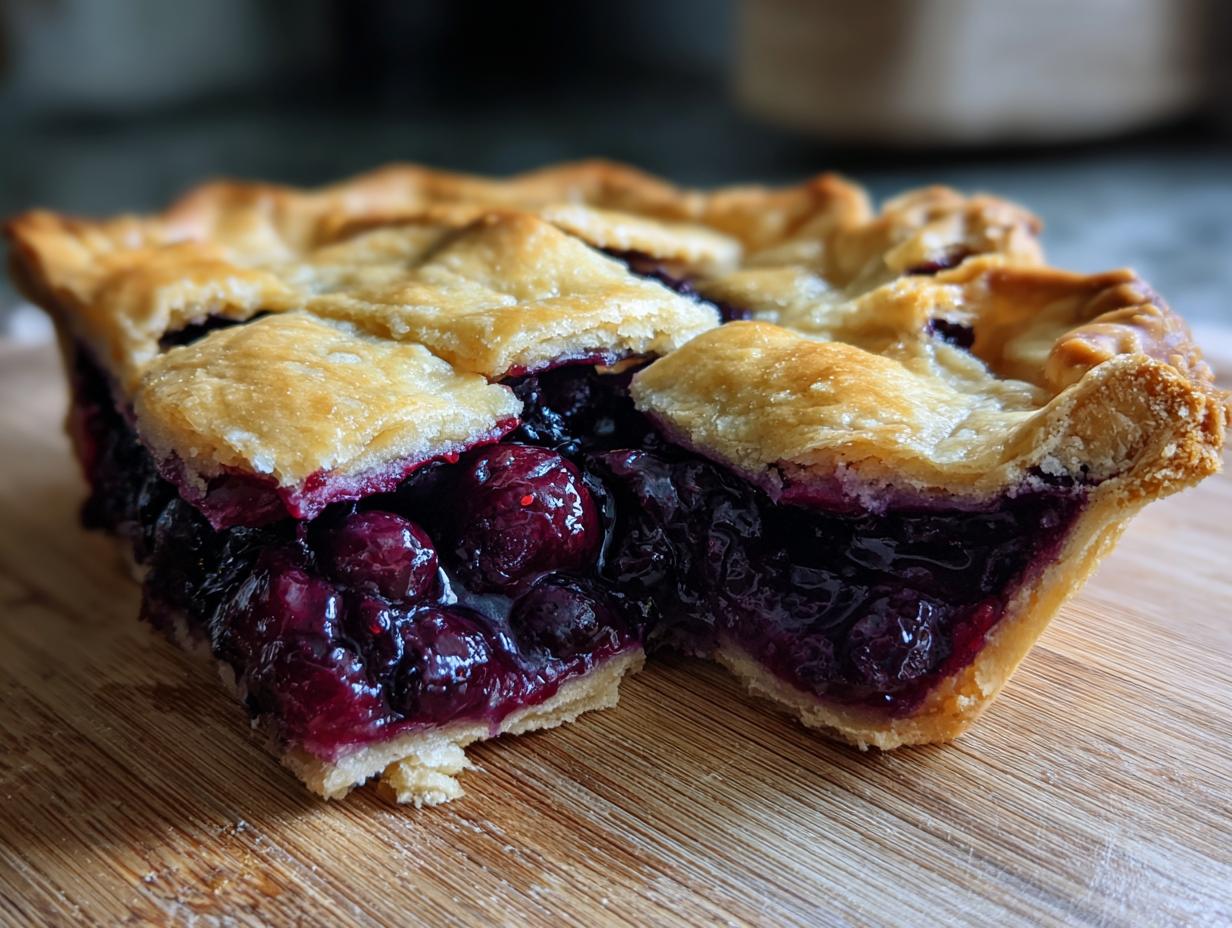
Oh, the sheer joy of a truly classic American dessert! When the season is right, nothing says ‘home’ quite like a deep-dish pie bursting with bright, sweet fruit. I know so many of you search high and low for a dependable blueberry pie recipe that just works, and trust me, this is the one you’ve been waiting for. We aren’t playing around with fancy twists here; this is about a buttery, flaky crust that holds its shape and a filling that sets up beautifully—no soupy slices allowed! As someone who values simplicity, I promise you, this straightforward approach is how you create those treasured, reliable family favorites.
- Why This Classic Blueberry Pie Recipe Works Every Time
- Gathering Ingredients for Your blueberry pie recipe
- Step-by-Step Instructions for This Homemade Blueberry Pie Recipe
- Tips for Success with Your Classic Blueberry Pie Recipe
- Variations on the Classic Blueberry Pie Recipe
- Serving Suggestions for This Summer Fruit Pie
- Storing and Reheating Your Homemade Blueberry Pie Recipe
- Frequently Asked Questions About This Blueberry Pie Recipe
- Estimated Nutritional Information for This Homemade Blueberry Pie Recipe
- Share Your Homemade Blueberry Pie Experience
Why This Classic Blueberry Pie Recipe Works Every Time
It’s not magic; it’s technique! I’ve seen too many beautiful pies leak juice everywhere or come out with a soggy bottom. That’s why I want to share the secret behind this specific blueberry pie recipe. It’s dependable, and it delivers that perfect slice every single time, making it essential for those big summer gatherings or when you want that pure, comforting dessert taste.
Achieving the Perfect Flaky Pie Crust
The star of the show, besides those gorgeous berries, has to be the crust. To get that light, shattering effect—a truly flaky pie crust—the temperature of your ingredients is everything. You *must* use butter straight from the freezer, cut into small cubes. When you mix it into the flour without completely blending it in, those little frozen chunks melt during baking, creating steam pockets. That steam is what pushes the layers apart! Don’t overwork it; we’re aiming for coarse crumbs with some visible, pea-like pieces of butter still rattling around in there.
Tips for the Best Blueberry Filling
When it comes to the filling, runniness is the enemy! That’s where our little bit of cornstarch comes into play. It thickens everything up beautifully as it bakes, ensuring you get that thick, luscious texture that holds its shape when you cut into it. This is how you get the best blueberry filling. Whether you’re using glistening fresh blueberries or pulling some straight from the freezer—and trust me, you don’t thaw the frozen ones, just toss ’em right in—the cornstarch balances the sugar and that bright lemon juice so you hit that perfect level of sweet and tart pie flavor we all love.
Gathering Ingredients for Your blueberry pie recipe
Before we even think about rolling dough, we need to gather our supplies! For a recipe this classic, precision really matters, especially when you are aiming for that perfect slice. Don’t swap out ingredients willy-nilly, because every single element here is chosen to make sure your crust is flaky and your filling sets up just right. If you’ve already mastered my strawberry rhubarb pie recipe, you know how important the right butter temperature is!
Flaky Pie Crust Ingredients
This is the foundation of a great pie, so pay attention to temperature, folks! Everything needs to be cold, cold, cold for the crust.
- 2 1/2 cups all-purpose flour
- 1 teaspoon salt
- 1 cup (2 sticks!) unsalted butter, cold and cubed
- 1/2 cup ice water – yes, ice water, not just tap water!
The Sweet and Tart Blueberry Filling Ingredients
This combination gives you that signature deep color and just the right snap of flavor. And don’t worry if you can only find frozen—this recipe handles it beautifully!
- 6 cups fresh or frozen blueberries (remember, if frozen, don’t thaw them!)
- 1 1/2 cups granulated sugar
- 1/4 cup cornstarch (this is our thickening secret weapon!)
- 1 tablespoon lemon juice and 1 teaspoon lemon zest (hello, balance!)
- 1/4 teaspoon ground cinnamon
- 1 large egg, beaten (for that glorious golden egg wash)
- 1 tablespoon coarse sugar for sprinkling on top—it gives it a little crunch!
Step-by-Step Instructions for This Homemade Blueberry Pie Recipe
Alright, let’s get down to the good part! Following these steps for your blueberry pie recipe means you are setting yourself up for success. I always tell my grandkids that baking is just following directions until you understand the *why* behind them. Pay attention to the timing here, especially for chilling the dough—it makes all the difference!
Making the Flaky Pie Crust Dough
This is where your flaky pie crust starts. Follow Step 1 exactly. You must whisk the flour and salt, then cut in that ice-cold butter until you get those lovely coarse crumbs with that pea-sized butter still visible. Don’t grab the mixer here; just use your hands or a pastry blender. Once you add the ice water slowly, just until it clumps together, stop mixing! Seriously, stop! Then, you wrap those two disks tight and get them into the fridge for at least one hour. That chilling time lets the gluten relax, which is honestly non-negotiable for flakiness.
Mixing the Best Blueberry Filling
While the dough is getting cool and happy, go ahead and tackle Step 2. In a separate bowl, gently combine your blueberries, sugar, cornstarch, lemon zest and juice, and cinnamon. I say gently because we want whole berries, not blueberry mush! If you crush them now, you’ll never get that perfect texture in the final pie. Just toss it all lightly until everything is coated in that sweet, tart mixture.
Assembling and Baking the Blueberry Pie Recipe
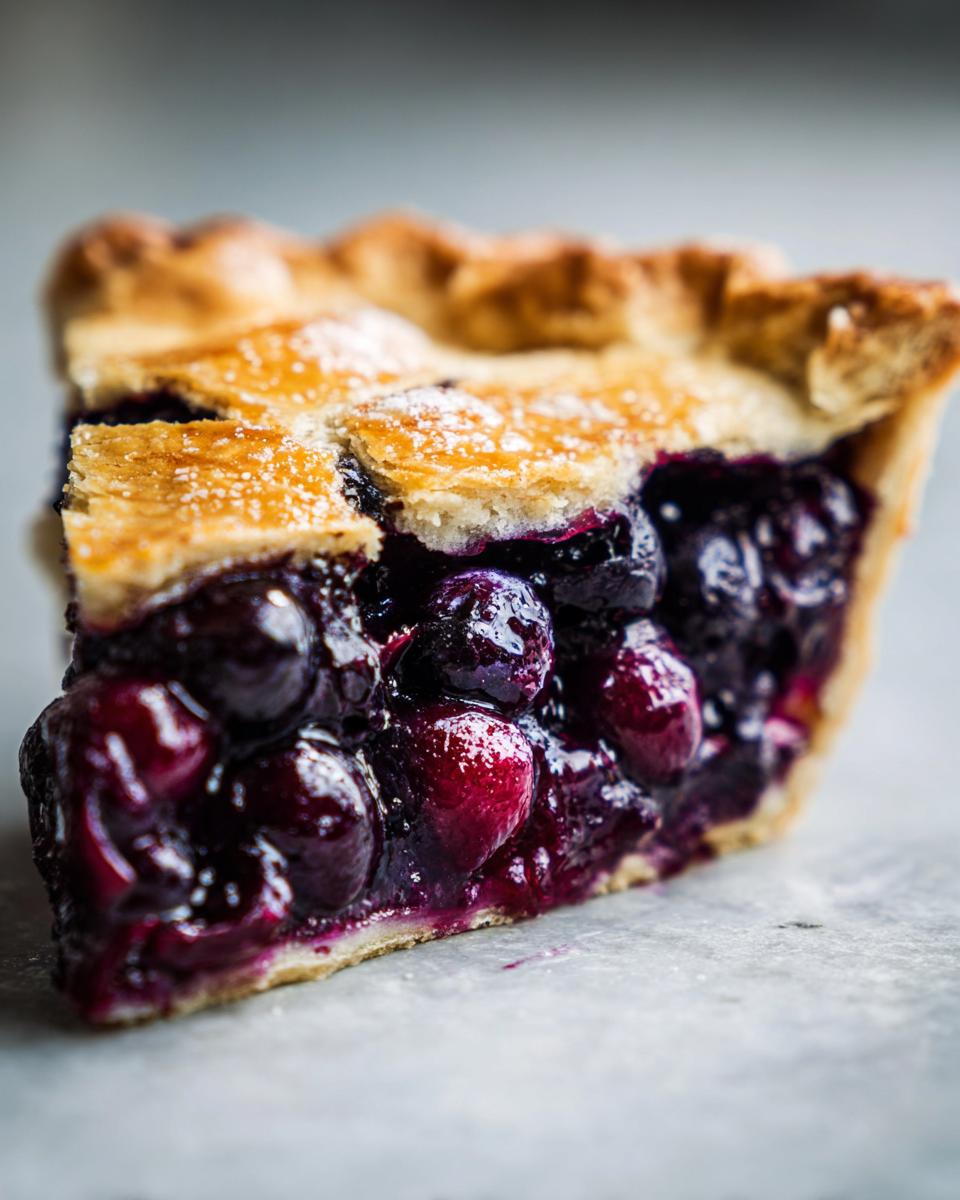
Now for the assembly! Preheat your oven to a hot 400°F (200°C). Roll out your first chilled disk and nestle it into your 9-inch pie plate. Pour in all that beautiful filling. Then comes the top crust, which you can vent or make into a pretty lattice—your choice! Make sure you crimp those edges tight; we want to seal that juice in for flavor. Brush the top generously with that beaten egg wash and sprinkle on the coarse sugar for sparkle. Bake it for 20 minutes at 400°F. Right after that initial blast, drop the heat down to 375°F (190°C) and let it bake another 35 to 45 minutes. You’ll know it’s done when that filling is bubbling thick and the crust is deep golden brown. That thick bubble tells you the cornstarch has truly activated!
The Critical Cooling Period for Setting the Pie
This might be the hardest step of all because it smells divine, but listen to me: Step 6 is critical for a clean slice. You have to let this pie cool completely, and I mean completely—at least four hours on a wire rack. If you cut it sooner, the filling hasn’t had time to fully set from thickening. Trying to rush this leaves you with a beautiful mess instead of the gorgeous slice this Homemade Blueberry Pie Recipe promises.

Tips for Success with Your Classic Blueberry Pie Recipe
I’ve taught my own grandchildren to bake this wonderful pie, and I’ve learned that just a few little tricks can take a good pie to an absolutely *fantastic* one. Think about the best Old Fashioned Blueberry Pie you ever tasted—it was all about those small details, wasn’t it?
First, remember how I mentioned using frozen fruit? If you opt for frozen blueberries, please don’t even think about thawing them first! Thawing releases too much liquid, and that could compromise our perfectly thickened filling. Just toss them in straight from the freezer so the cooking time stays accurate.
Next, watch that crust while it bakes! If you notice the edges getting dark—maybe a little too quickly—don’t panic. Just cut a few thin strips of aluminum foil and gently tuck them around the rim of the pie plate. This shields those edges so the rest of your crust can turn that beautiful, perfect golden brown we are aiming for. This lets you focus on getting the filling bubbly and thick without worrying about burning your beautiful work! For all my tips on making reliable home recipes, you can always check out my general baking advice.
Variations on the Classic Blueberry Pie Recipe
While this double-crust, classic blueberry pie recipe is my go-to for that nostalgic taste, I know sometimes you want a different texture on top. Especially in the summer, baking can feel heavy, so swapping out that solid top crust for something a little more decadent or rustic is a wonderful way to change things up. Don’t worry, even when we change the topping, the sweet and tart filling stays the centerpiece!
If you love a textured topping, you are in luck! I have lots of experience with different fruit toppings, like the lovely one on my pumpkin pecan cobbler, and that same spirit applies here.
Creating a Blueberry Crumble Pie Topping
If you’re looking for that rustic, beautifully crunchy finish, skip the top rolling pin entirely and go straight for a crumble! This easily transforms your pie into what some call a Blueberry Crumble Pie. It’s so satisfying because it requires zero precision—it’s meant to look messy and delicious.
To make the topping, just mix together about one cup of flour, a half a cup of sugar (I prefer brown sugar here!), a touch of cinnamon, and maybe a quarter cup of rolled oats if you have them for extra texture. Then, cut in about a half a stick of cold butter until you get big, coarse crumbs. When your luscious blueberry filling is in the bottom crust, just sprinkle this crumble generously over the top. It bakes up golden and crunchy, and it pairs absolutely perfectly with the set blueberry filling underneath. It’s a wonderful way to serve a summer fruit pie that feels less formal!
Serving Suggestions for This Summer Fruit Pie
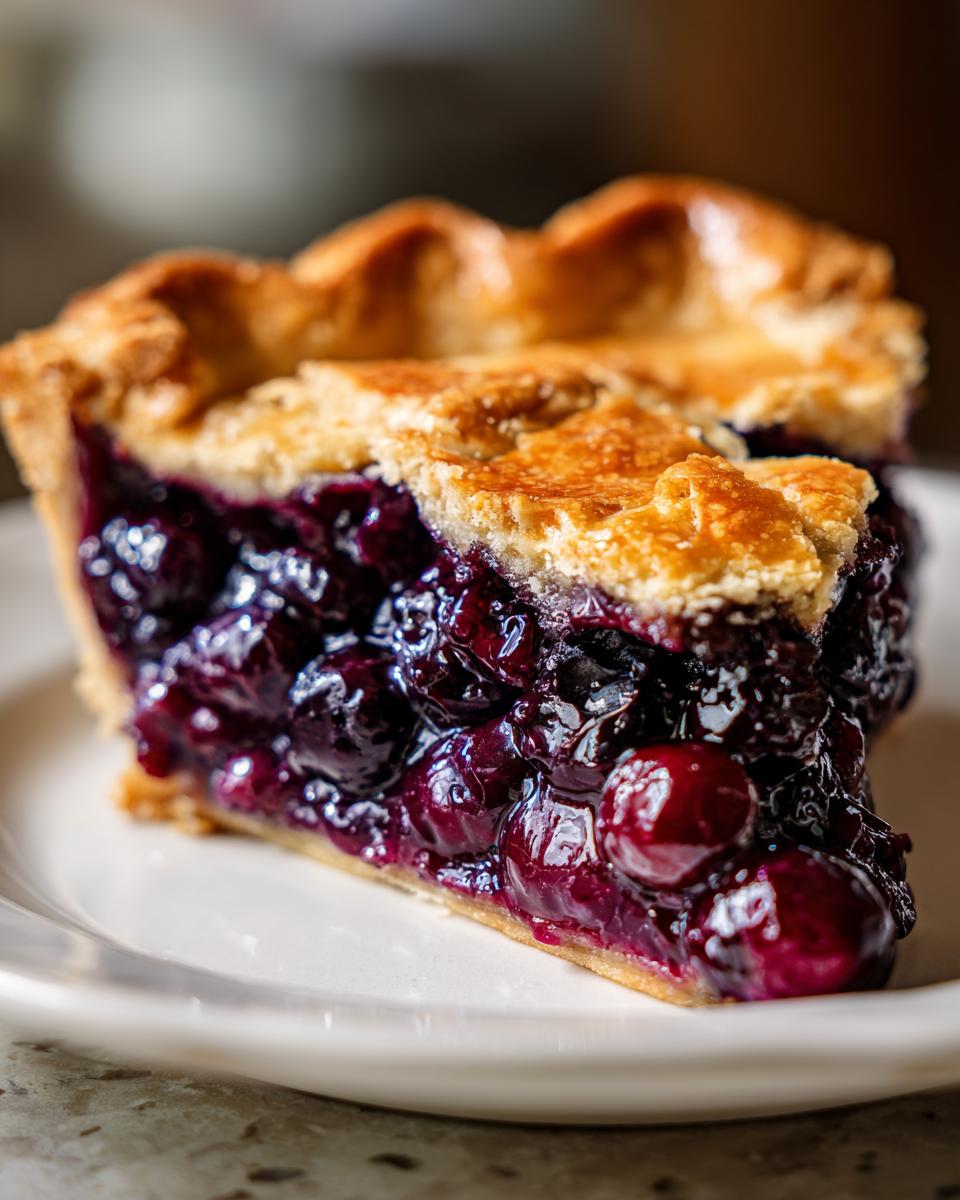
Oh, the best part! After all that waiting for the pie to cool down properly, we finally get to enjoy the fruits of our labor. This pie, with its perfect balance of sweet fruit and that bright, tangy zip from the lemon, doesn’t really *need* much else, but sometimes a little addition just makes the whole experience feel extra special, doesn’t it?
I’ve found that the temperature you serve it at really changes the texture. While it *must* cool for four hours to set, serving it at room temperature is my absolute favorite. That’s when the crust texture is at its peak—still flaky but holding firm. If you’re serving it slightly warm, just let it sit out for about an hour after the initial cooling time, or pop a slice in a warm oven for just a few minutes. Never microwave the whole thing, or you risk ruining that beautiful set filling!
Of course, when thinking about great dessert pairings, you can’t go wrong with something simple and creamy to cut through the intense berry flavor. A generous scoop of good vanilla bean ice cream is classic for a reason—the cold creaminess against the warm spice is sublime. If you’re feeling fancy, a dollop of freshly whipped cream, maybe lightly sweetened, works wonderfully too. I once served slices next to a little drizzle of my homemade sweetened cream, and everyone raved about the texture contrast!
This pie is hearty enough that it stands up beautifully on its own at any gathering, whether we’re talking holiday desserts or just a casual weeknight treat. It’s truly the quintessential summer fruit pie.
Storing and Reheating Your Homemade Blueberry Pie Recipe
It is such a good problem to have when you have leftover pie! But how we store and reheat our blueberry pie recipe makes a huge difference in how delicious that second piece tastes the next day. Remember, since this is a fruit pie with a high-moisture filling, we have to be careful not to let the crust get soggy.
Here is my advice, passed down from my mom. Once your pie has cooled completely (and remember, that’s the rule—four hours minimum!), you need to decide how long you plan on keeping it around. If you plan on eating the whole thing within 24 hours, keeping it on the counter loosely tented with foil is usually fine. The high sugar and acid content helps preserve the filling.
However, if you want to keep those beautiful slices firm for three to four days, the refrigerator is your best friend. Wrap the slices tightly in plastic wrap or put them in an airtight container. This keeps any fridge smells out and really helps lock in some of the remaining structure of that flaky crust.
Warming Leftover Slices
Serving pie straight from the cold fridge just doesn’t feel right, does it? It chills the butter in the crust and dulls the flavor of those sweet berries. When I reheat a slice, I always go for the oven or toaster oven—never the microwave for the main slice, unless I’m in a real rush!
To reheat one or two slices, set your oven—or toaster oven—to a gentle 300°F (150°C). Lay the slices on a baking sheet lined with foil. Heat them for about 8 to 10 minutes. This gentle heat warms the filling all the way through without making the crust soggy or overly brown. You want that gentle warmth to come back, not a hot mess!
What About Freezing?
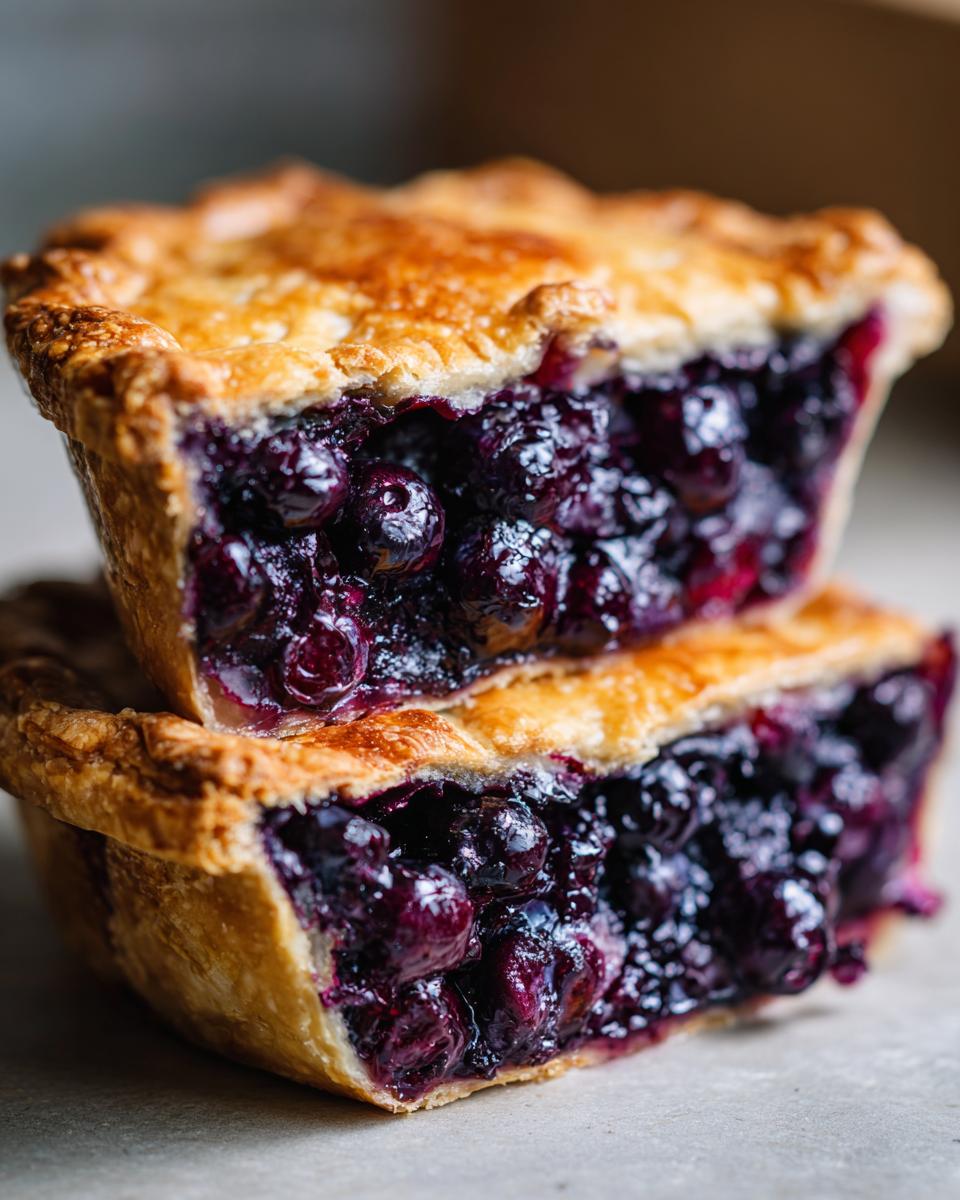
Yes, you absolutely can freeze this! If you’ve made a whole pie and know you won’t eat it right away, let it cool completely, then double-wrap the whole pie tightly in plastic cling wrap, followed by a layer of heavy-duty aluminum foil. This double barrier stops freezer burn in its tracks. It keeps beautifully for about three months this way. When thawing, always bring it to room temperature very slowly on the counter before popping it in a low oven to finish warming up. That slow defrost helps the crust maintain some of its beautiful texture!
Frequently Asked Questions About This Blueberry Pie Recipe
It’s completely normal to have questions when you are baking something classic like this! I love hearing from all of you—it means my blueberry pie recipe is hitting tables across the country. If you’re looking for more reliable recipes for any time of day, including my easy breakfast recipes, you can always find those too!
Can I use frozen blueberries in this blueberry pie recipe?
Absolutely, yes! This is one of the best things about this recipe, making it one of my favorite Pie Recipes from Scratch to rely on year-round. The absolute key, though, is this: do not thaw them first! If you thaw the berries, they release too much liquid upfront, and even with the cornstarch, you risk a watery filling. Just measure them straight from the freezer, toss them with the sugar and thickeners, and trust the process. They cook down perfectly fine, I promise!
How do I prevent the bottom crust from getting soggy?
Ah, the dreaded soggy bottom! This is where you need a little insurance. If you want a genuinely golden, crisp bottom crust that can stand up to that lovely, juicy filling, here’s what I do. Once your bottom crust is settled in the pie plate, take a small, clean pastry brush—or even a paper towel—and lightly brush the entire surface of the dough with a thin layer of that beaten egg white (the part you saved from the egg wash). Just a thin coating acts like a moisture barrier. The egg sets instantly when it hits the crust, sealing it up beautifully so the blueberry juices can’t seep down and ruin your lovely flaky pie crust!
What is the best way to get a truly flaky pie crust?
If you want this Classic Blueberry Pie to really sing, you must keep your fats cold. I cannot stress this enough! When cutting in the butter for the crust, the goal isn’t smooth dough; the goal is *shards* of butter suspended in the flour. Those butter pieces, which should be no bigger than a small pea, melt while baking and create steam pockets. That steam is what forces the layers of dough apart, giving you that incredible flakiness. So, before you even start, make sure your butter is rock-hard cold, and use the iciest water you can manage. If your kitchen is warm, you might even want to pop your mixing bowl in the fridge for fifteen minutes before starting!
Estimated Nutritional Information for This Homemade Blueberry Pie Recipe
Now, I always tell folks that counting calories isn’t the most important part of baking—sharing the joy is! But for those of you who like to keep track, figuring out the nutrition is just good housekeeping. Remember, this is just an estimate based on the amounts listed in the recipe card, and it can change depending on exactly what brand of butter or sugar you use. When you look at these numbers for our blueberry pie recipe, just keep in mind that a slice of pure homemade comfort is worth every single bite!
This section breaks down the numbers for one generous slice of the pie:
- Serving Size: 1 slice
- Calories: 420
- Fat: 22g
- Saturated Fat: 13g
- Trans Fat: 0g
- Cholesterol: 55mg
- Sodium: 250mg
- Carbohydrates: 55g
- Fiber: 3g
- Sugar: 35g
- Protein: 5g
See? Not too bad for such a gorgeous, old-fashioned dessert! That high sugar count comes mostly from the fruit and the lovely amount of sugar we need to balance the tartness. I hope seeing those numbers in the open makes you feel even better about baking up this wonderful Classic Blueberry Pie for your family this week.
Share Your Homemade Blueberry Pie Experience
Honestly, the best part of sharing these recipes isn’t pulling the pie out of the oven—it’s hearing from you when you’ve had success! Baking should be connecting us, whether it’s across the table or across the country. When you sit down to enjoy this Summer Fruit Pie, I truly want to know how it went for you at your table.
Did that crust turn out perfectly flaky? Did your family ask for seconds? Did you manage to save a slice for the fridge, or did it disappear too fast? Please don’t be shy! Drop a rating right here on the recipe card—I use those stars to know which traditional recipes to keep improving and which ones to feature in my next update. Your feedback helps me help all the other home cooks out there!
If you put your beautiful pie on Instagram or Facebook, tag me! I absolutely love seeing your creations, whether you used a rustic lattice or went all out with braiding the edges. It reminds me so much of sharing my own mother’s baking with the community back home. If you’ve made this pie and want to see how others have adapted it, you can see some fantastic versions shared by other bakers over at this helpful sharing spot, like this great example of a classic homemade version.
If you have any burning questions that still linger after reading all these notes—maybe about substituting sugar or adjusting baking times for a higher altitude—please reach out! You can always send me a note through my contact page. Happy baking, friends. I’m sending you the warmest wishes for a wonderfully sweet and tart dessert!
PrintClassic Homemade Blueberry Pie Recipe with Flaky Crust

This is a dependable, classic blueberry pie recipe featuring a buttery, flaky crust and a sweet and tart filling made from fresh or frozen blueberries. It is designed to produce a filling that sets well, making it perfect for summer gatherings or holiday tables.
- Prep Time: 45 min
- Cook Time: 55 min
- Total Time: 5 hours 40 min
- Yield: 8 servings 1x
- Category: Dessert
- Method: Baking
- Cuisine: American
- Diet: Vegetarian
Ingredients
- 2 1/2 cups all-purpose flour
- 1 teaspoon salt
- 1 cup (2 sticks) unsalted butter, cold and cubed
- 1/2 cup ice water
- 6 cups fresh or frozen blueberries (do not thaw if frozen)
- 1 1/2 cups granulated sugar
- 1/4 cup cornstarch
- 1 tablespoon lemon juice
- 1 teaspoon lemon zest
- 1/4 teaspoon ground cinnamon
- 1 large egg, beaten (for egg wash)
- 1 tablespoon coarse sugar (for sprinkling)
Instructions
- Prepare the Flaky Pie Crust: In a large bowl, whisk together the flour and salt. Cut in the cold butter using a pastry blender or your fingers until the mixture resembles coarse crumbs with some pea-sized pieces of butter remaining. Gradually add the ice water, mixing until the dough just comes together. Divide the dough in half, flatten each half into a disk, wrap in plastic, and chill for at least 1 hour.
- Prepare the Blueberry Filling: In a separate bowl, gently combine the blueberries, granulated sugar, cornstarch, lemon juice, lemon zest, and cinnamon. Mix until the berries are evenly coated.
- Assemble the Pie: Preheat your oven to 400°F (200°C). On a lightly floured surface, roll out one disk of dough to fit a 9-inch pie plate. Carefully place the bottom crust into the plate. Pour the blueberry filling into the crust.
- Create the Top Crust: Roll out the second disk of dough. You can cut vents in the top or create a lattice design. Place the top crust over the filling. Trim the edges, then crimp the top and bottom crusts together to seal.
- Bake the Pie: Brush the top crust with the beaten egg wash and sprinkle evenly with coarse sugar. Place the pie on a baking sheet to catch any drips. Bake at 400°F (200°C) for 20 minutes. Reduce the oven temperature to 375°F (190°C) and continue baking for another 35 to 45 minutes, or until the crust is golden brown and the filling is bubbling thickly.
- Cool Completely: Let the pie cool on a wire rack for at least 4 hours before slicing. This cooling time allows the filling to set properly.
Notes
- If you use frozen blueberries, do not thaw them first; this helps prevent the filling from becoming too watery.
- If the edges of the crust start browning too quickly during baking, cover them loosely with strips of aluminum foil.
- This pie tastes wonderful served slightly warm or at room temperature with a scoop of vanilla ice cream.
Nutrition
- Serving Size: 1 slice
- Calories: 420
- Sugar: 35g
- Sodium: 250mg
- Fat: 22g
- Saturated Fat: 13g
- Unsaturated Fat: 9g
- Trans Fat: 0g
- Carbohydrates: 55g
- Fiber: 3g
- Protein: 5g
- Cholesterol: 55mg