
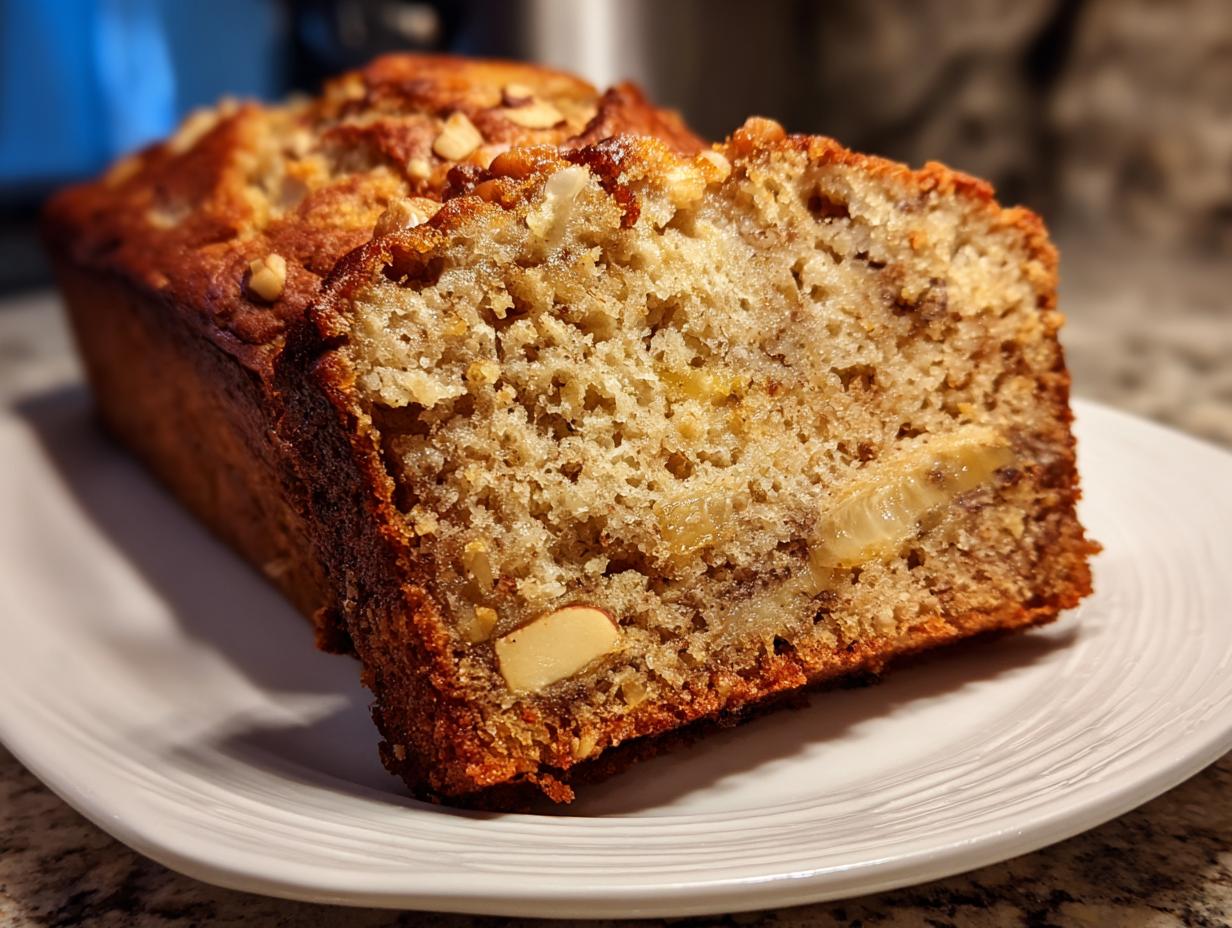
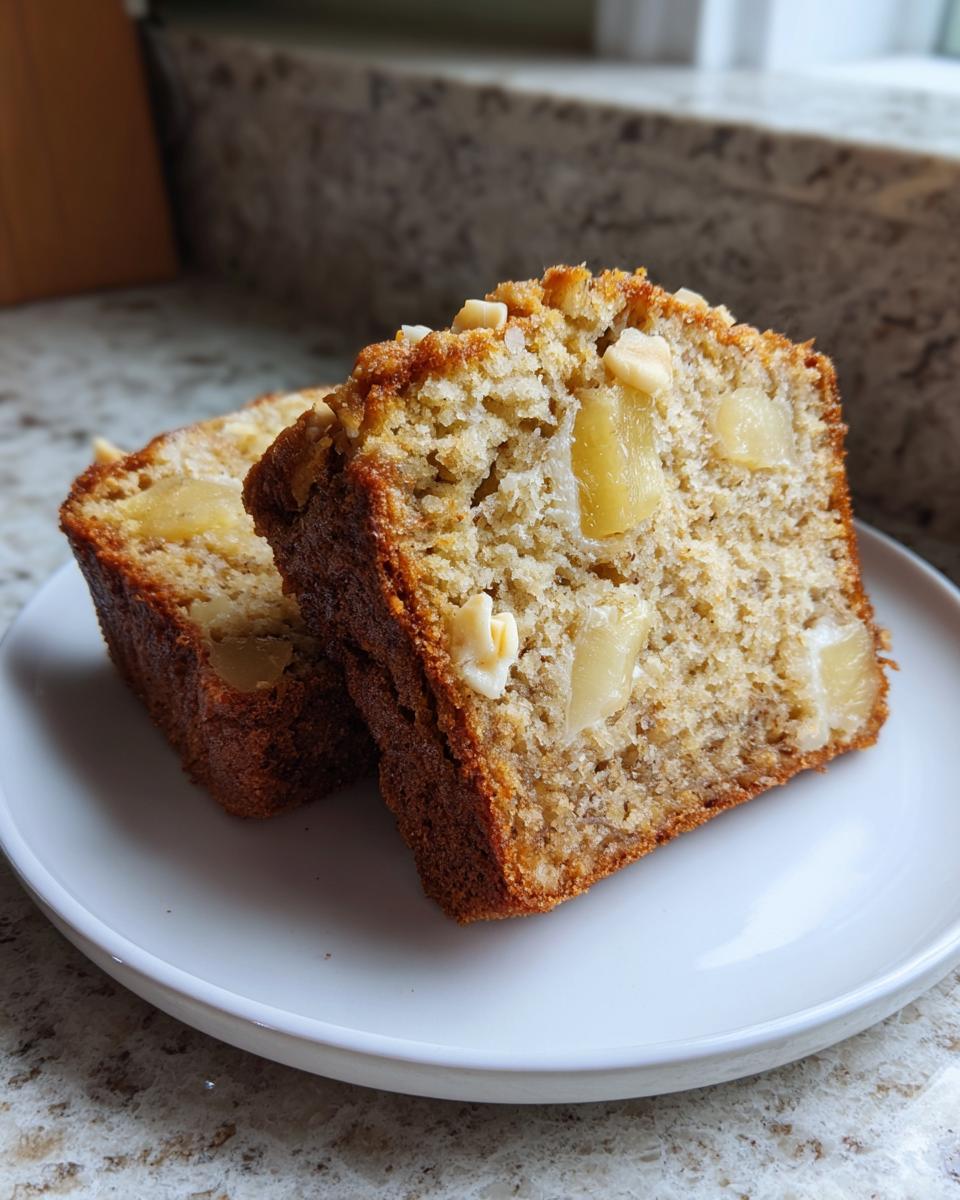
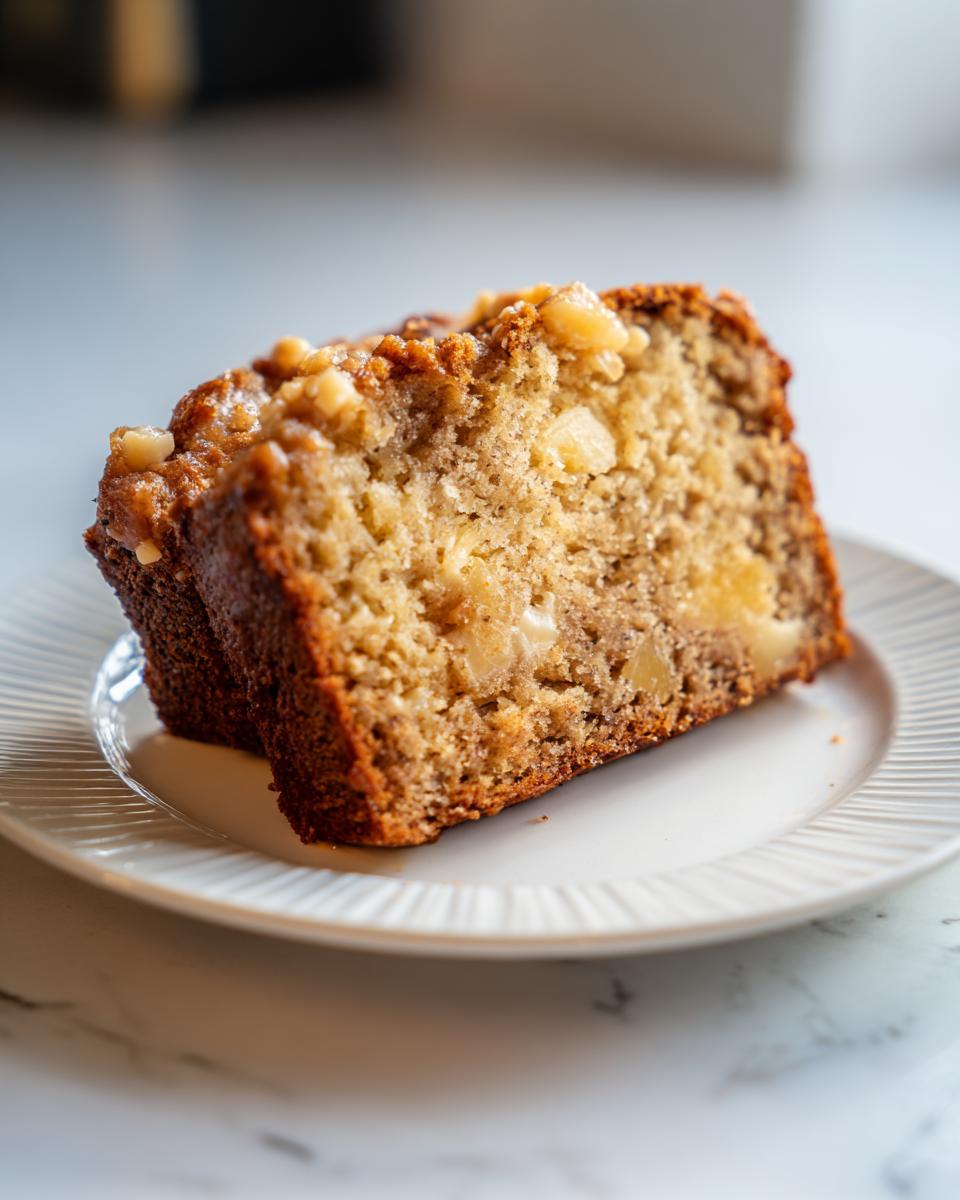
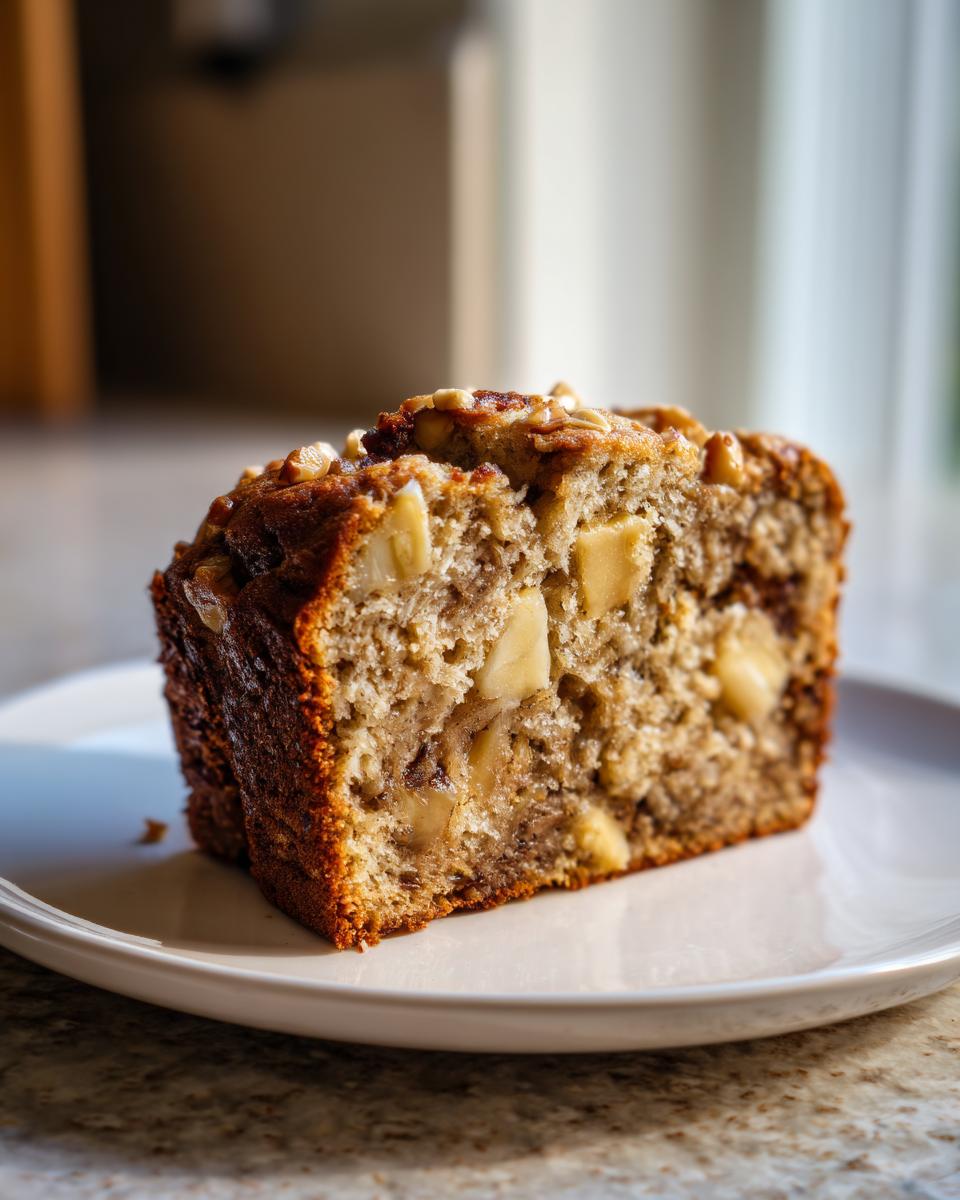
Oh, there is just something about the tropics that makes everything feel a little bit more special, isn’t there? That sweet, warm air, the hint of coconut… I’ve always tried to bring a bit of that aloha spirit right into my kitchen, and you know what lets me do that perfectly? This recipe. Seriously, forget everything else you thought you knew about quick breads, because this is The Ultimate Moist Hawaiian Banana Bread we’re making today. As a teacher for so many years, I learned that clarity equals confidence, and I promise, this recipe is so straightforward. You’ll have that unbelievably tender, pineapple-packed loaf ready for breakfast before you can even finish your first cup of coffee. If you want to know more about my baking journey, you can always peek over at my About page anytime, but for now, let’s just bake!
- Why This Hawaiian Banana Bread Recipe is Your New Favorite (E-E-A-T)
- Gathering Ingredients for Your Hawaiian Banana Bread Loaf Recipe
- Step-by-Step Preparation for Your Moist Banana Bread with Pineapple
- Baking Time and Cooling for the Best Hawaiian Quick Bread
- Tips for Perfect Coconut Banana Bread Baking Success
- Serving Suggestions for Your Homemade Tropical Loaf
- Storage and Freezing Instructions for Hawaiian Banana Bread
- Frequently Asked Questions About This Tropical Banana Bread Recipe
- Sharing Your Hawaiian Banana Bread Experience
- Sharing Your Hawaiian Banana Bread Experience
Why This Hawaiian Banana Bread Recipe is Your New Favorite (E-E-A-T)
I developed this recipe because plain banana bread just wasn’t exciting enough for my grandkids anymore! We needed that taste of sunshine, and this version absolutely delivers. It’s truly the best Hawaiian quick bread because we manage to get incredible moisture without any fuss. Trust me, this is easy island style baking at its very best, and it’s perfect for when you need a reliable quick bread for a weekend morning or an impromptu gathering. You can find some other speedy ideas over on my easy breakfast recipes page, but this loaf is always a standout.

Guaranteed Moistness: The Secret to Perfect Hawaiian Banana Bread
The secret to achieving that unbelievably soft texture in your Hawaiian banana bread is twofold. First, you must use bananas that look almost offensively spotted—the browner, the sweeter, the better. Second, and this is crucial for any moist banana bread with pineapple, you have to drain that crushed pineapple really, really well. I mean it! If you skip draining it, you end up steaming the loaf instead of baking it, and nobody wants a gummy bread center.
Tropical Flavor Profile: Pineapple, Coconut, and Nuts
When you want that genuine tropical feel, you can’t cheat the mix-ins! The crushed pineapple is non-negotiable for that unique tanginess that plays so nicely with the sweet bananas. Then we add shredded coconut because, well, we’re aiming for island vibes! The macadamia nuts are my splurge—they give the loveliest buttery crunch. If you can’t find them, walnuts are just fine, but macadamias truly elevate this from a great bread to paradise in a slice.
Gathering Ingredients for Your Hawaiian Banana Bread Loaf Recipe
Before we even think about turning on the oven, we need to gather our treasures! Remember what I always say? Good baking starts with quality ingredients, which is especially true for this flavorful Hawaiian banana bread. The ripeness of your bananas and how well you drain that pineapple are the things that decide if this loaf is just good or truly spectacular!
Ingredient Clarity: Measurements and Prep
We need to be precise here, folks. I’ve written down every measurement exactly as I use it, so please follow these amounts for the best results:
- 3 very ripe large bananas, mashed (you want them soft!)
- 1 cup crushed pineapple, well drained (press out that liquid!)
- 1 cup all-purpose flour
- 1 cup granulated sugar
- 1/2 cup all-purpose flour (Yes, two separate flour additions!)
- 1 teaspoon baking soda
- 1/2 teaspoon salt
- 1/2 cup unsalted butter, melted
- 2 large eggs, lightly beaten
- 1 teaspoon vanilla extract
- 1/2 cup sweetened shredded coconut
- 1/2 cup chopped macadamia nuts (or walnuts if you must!)
Make sure those bananas are ready for action and that pineapple isn’t dripping wet—that’s half the battle won right there!
Step-by-Step Preparation for Your Moist Banana Bread with Pineapple
Now that we have all our wonderful tropical ingredients assembled, let’s get this show on the road! Working systematically is key to the texture of any good moist banana bread with pineapple, and we don’t want to rush those beautiful wet ingredients into the dry ones too soon. The first thing you should always do, right before you even mash that first banana, is get your oven ready. We need a steady heat!
Go ahead and preheat that oven to 350 degrees F. While it’s warming up, take your 9-inch by 5-inch loaf pan. I learned early on that even with butter and flour, sometimes those sticky tropical loaves try to cling on for dear life! So, grease it thoroughly, dust it with a nice coating of flour, and give it a little rap to knock out the excess. It’s just good insurance we can get this loaf out in one piece.
Mixing the Wet and Dry Components
In your biggest bowl—the one where everything will eventually meet—gently mash those ripe bananas. Now, add in that well-drained crushed pineapple. Give that a little stir just to incorporate them. Remember, we are keeping things gentle!
In a separate bowl, take a moment to whisk together all your dry components: the sugar, both portions of flour, the baking soda, and the salt. Whisking them together ensures the leavening agent, the baking soda, is distributed evenly. If you skip this, you might end up with a dense lump where the soda decided to hang out!
Next, pour your melted butter right into that banana-pineapple mix. That warm butter helps everything melt together nicely. Then we add the eggs and the splash of vanilla. Stir this wet side until it looks happy and uniform. Now comes the moment for combining! You’re going to add the dry ingredients to the wet ingredients slowly. Mix this only until you see the last bit of flour streak disappear. I mean it: stop mixing! Any extra stirring here develops gluten, and we want tender bread, not tough bread. If you have a little flour hiding, don’t panic; the next step covers it.
Folding in the Tropical Additions
This is the fun part where we bring in the island flavor! Take your shredded coconut and your chopped macadamia nuts. You’re going to gently fold them right into that batter. Use a spatula, and use slow, sweeping motions. We are not beating the batter anymore; we are just tucking the nuts and coconut in so they are evenly distributed throughout our hawaiian banana bread. This gentle handling is what keeps that final product so lovely and delicate.
Once everything is just combined—and I mean just combined—pour that glorious, fragrant batter right into your prepared pan. It smells amazing already, doesn’t it?
I always send my loaves to bake with a little inspiration from my banana nut muffin days, ensuring everything gets a nice, light mix before baking.
Baking Time and Cooling for the Best Hawaiian Quick Bread
Alright, our tropical batter is tucked snugly into the pan, and now it’s time for the magic to happen in the oven. This loaf needs steady, even heat to puff up perfectly and set that irresistible interior. We are aiming for the best Hawaiian quick bread here, and patience pays off!
Pop that pan into your preheated 350-degree oven. Now, you need to keep an eye on the time, but remember, every oven is just a little bit different, so setting a timer for 55 minutes is a good starting point. It could take up to 65 minutes for the center to be fully cooked through. We don’t want it underdone, but we certainly don’t want to dry out all that wonderful banana moisture we worked so hard to capture!
The most important step once the timer goes off is testing for doneness. Forget guessing! You must use a wooden skewer or a thin, clean knife and poke it right into the very center of your Hawaiian banana bread loaf. If it comes out clean, or maybe with just a couple of moist, tender crumbs clinging to it—that means we are done! If you see any wet batter, slide it back in for another 5 to 7 minutes and check again. Never rush this final check; it’s the difference between perfect and disappointing.
Once that skewer test passes, pull the loaf out onto your stovetop for a little rest. I insist you let it cool right there in the pan for a full 10 minutes. This short “in-pan cooling time” lets the structure of the loaf firm up slightly. If you try to dump it out immediately, the weight of the pineapple can cause the edges to tear away. After those 10 minutes, gently run a butter knife around the edges if you need to, and then cautiously invert the bread onto a wire cooling rack. Let it cool completely on that rack before you even think about slicing it—though I know that’s the hardest part!
For more tips on achieving that perfect texture in baked goods, you can look over my thoughts on getting the perfect crumble in my coffee cake post; the principles of not overbaking are universal!
Tips for Perfect Coconut Banana Bread Baking Success
Now that you’ve mastered putting this beautiful loaf together, I want to give you a few extra finishing thoughts so your coconut banana bread baking adventure is a total success every single time. When you’re working with tropical fruit, you have to respect the moisture content, which is really the key to keeping this bread flavorful long after you’ve pulled it out of the oven. Trust me, these little bits of knowledge I share here are what move a recipe from ‘good’ to ‘must-make-again,’ which is what we aim for here at Cooking by Carla!
I’ve found that these extra layering steps really give you that peace of mind, especially when you’re baking for company. If you want a peek at another recipe where moisture really matters, check out my tips for making a great moist date nut bread; the strategies for keeping things from drying out are surprisingly similar.
Ingredient Substitutions for Hawaiian Banana Bread
I know sometimes you open your pantry and that specialty item just isn’t there, and that’s okay! Life happens, and we adapt. For this Hawaiian banana bread, the main substitution concern is usually those crunchy nuts. If you can’t find—or don’t want to use—the macadamia nuts, walnuts are absolutely a fine choice. They still provide that necessary textural crunch that keeps the bread from being just one soft texture.
The other thing people often ask about is using frozen bananas. You certainly can! Just make sure they are fully thawed and drained of any excess liquid before you mash them up. If you see a lot of liquid swimming around at the bottom of your bowl, pour most of that off. We learned with the pineapple, didn’t we? Too much liquid floating free means we risk a gummy texture right in the middle of our perfect tropical loaf!
Serving Suggestions for Your Homemade Tropical Loaf
Once this beautiful homemade tropical loaf has cooled down completely—and I know how hard that is to wait for—the real fun begins: figuring out the best way to enjoy it! This bread is so versatile; it truly fits any time of day you happen to be hungry for something sweet and comforting.
For a proper Sunday brunch, there’s nothing better than slicing it thick and serving it warm with a smear of real, good butter. While you could certainly eat it plain, I have a couple of favorite pairings that really bring out the pineapple and coconut notes.
If you happen to be making my simple honey butter recipe, save a tiny dollop for this bread—it melts beautifully into the crumb, much like I do with my honey butter skillet corn. It adds just the right touch of sweetness and richness.
For dessert, and this is a bit decadent but oh, so good, try serving a piece right alongside a scoop of vanilla bean ice cream. On a summer evening, that combination is just heavenly. If you’re feeling extra ambitious, a drizzle of plain or even a quick chocolate sauce works wonders too. Speaking of treats, if you’re looking for another dessert idea entirely, you must try my recipe for easy homemade chocolate pudding sometime!
Honestly, though, it’s perfectly tasty just tucked into a napkin with a cup of strong black coffee. It travels well, too, making it a fantastic breakfast bread recipe to bring to a friend’s house or pack for an afternoon snack when you are out and about.
Storage and Freezing Instructions for Hawaiian Banana Bread
This Hawaiian banana bread is such a winner because, just like a great family recipe should, it tastes even better the next day! I always bake one loaf just for immediate enjoyment and wrap the second one up right away. We want to protect all that wonderful moisture we worked so hard to keep in there, especially with all that pineapple and coconut!
If you plan on eating it within three or four days, just wrapping it tightly is usually enough. Wait until the bread has cooled completely—and I mean completely, otherwise the trapped warmth creates condensation which makes the crust soggy. Once it’s cool, wrap that loaf tightly in plastic wrap, making sure there are no gaps. Then, I like to wrap it a second time in aluminum foil. That double layer is my little trick for keeping that island flavor locked in. Store it on the counter or in a cool pantry.
However, if you know you won’t get to the second loaf for a while, freezing is your absolute best friend. The notes on this recipe specifically mention that it can be frozen beautifully, and I agree wholeheartedly! You can find more tips on saving breakfast meals on my easy French toast quick breakfast recipe page, which often uses similar storage tricks.
To freeze, wrap that completely cooled loaf precisely as I described: first, tight plastic wrap, pressing out any air pockets against the bread itself. Then, wrap it tightly again in heavy-duty aluminum foil. If you’re feeling extra careful, you can toss the whole thing into a large freezer bag and squeeze out all the air there, too. It truly freezes well for up to three months!
When you’re ready to enjoy it weeks later, just pull that foil package out of the freezer and let it thaw overnight on the counter—still wrapped! Don’t unwrap it until it’s fully thawed; this protects it from any condensation again. It thaws out tasting almost exactly like it just came out of the oven. It makes a wonderful emergency breakfast when you’re running late!
Frequently Asked Questions About This Tropical Banana Bread Recipe
I always get so many wonderful questions after sharing a recipe, and for a beloved treat like this tropical banana bread recipe, I’ve gathered a few of the most common ones people ask me about making their own Hawaiian banana bread masterpiece!
Can I use frozen bananas instead of fresh ripe ones?
Absolutely, honey, you can! Frozen bananas actually work very well in bread because they are usually softer when thawed than even the ripest bananas on the counter. The key thing you must remember is to thaw those bananas completely and then drain off any extra water that collects in the bowl. We want the flavor, not the watery excess, remember? Too much liquid swimming around means a gummy center for your otherwise perfect loaf.
What if I don’t want to use nuts in my bread?
Oh, skipping nuts is no problem at all! While I personally love that crunch from the macadamia nuts or walnuts, this Hawaiian banana bread is delicious even without them. If you skip them, you might want to add an extra quarter cup of the coconut just to balance out the texture a little bit, or maybe even a few more chunks of pineapple if you drain them extra well. It’s your creation!
What makes this recipe stay so incredibly moist?
That’s the million-dollar question, isn’t it? This bread stays outrageously moist because of two things we talked about: the natural moisture from overripe bananas that breaks down so beautifully, and the crushed pineapple we sneak in there. Pineapple is fantastic because it adds flavor and liquid without making the batter watery, which is a wonderful trick for quick bread baking. I certainly apply similar principles when whipping up my buttermilk pancakes—balance is everything!
Does this taste very strongly of pineapple?
That’s a fair worry! People sometimes think adding fruit like that makes the bread taste like a dessert you’d get at a luau, but the flavor is actually very subtle when baked correctly. We are using well-drained pineapple so that its acidity brightens up the banana flavor, rather than making it taste overtly fruity. It just brings a lovely, fresh note that keeps the bread from being too heavy. If you want to read more about achieving that perfect tropical balance, my friends over at that other resource have some great insights on the flavor profile, too!
Sharing Your Hawaiian Banana Bread Experience
Isn’t it just the best feeling when you pull a perfect, golden loaf of bread out of the oven? I truly hope this recipe brings a little bit of that sunny, tropical vacation feeling straight to your table. Now that you’ve tried it, I’d love to hear what you thought! Please leave a rating below and let me know how your Hawaiian banana bread turned out for you, or send me a note if you have any questions at all!
PrintThe Ultimate Moist Hawaiian Banana Bread with Pineapple, Coconut, and Macadamia Nuts
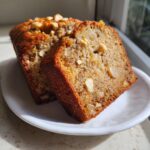
This recipe delivers an unbelievably moist loaf packed with tropical pineapple, sweet coconut, and crunchy macadamia nuts. It is a delightful twist on classic banana bread, perfect for breakfast or dessert.
- Prep Time: 15 min
- Cook Time: 60 min
- Total Time: 75 min
- Yield: 1 loaf (about 10 servings) 1x
- Category: Dessert
- Method: Baking
- Cuisine: American
- Diet: Vegetarian
Ingredients
- 3 very ripe large bananas, mashed
- 1 cup crushed pineapple, well drained
- 1 cup all-purpose flour
- 1 cup granulated sugar
- 1/2 cup all-purpose flour
- 1 teaspoon baking soda
- 1/2 teaspoon salt
- 1/2 cup unsalted butter, melted
- 2 large eggs, lightly beaten
- 1 teaspoon vanilla extract
- 1/2 cup sweetened shredded coconut
- 1/2 cup chopped macadamia nuts (or walnuts)
Instructions
- Preheat your oven to 350 degrees F. Grease and flour a 9×5 inch loaf pan.
- In a large bowl, combine the mashed bananas and the drained crushed pineapple.
- In a separate medium bowl, whisk together the flour, sugar, baking soda, and salt.
- Pour the melted butter into the banana-pineapple mixture and stir until just combined.
- Add the beaten eggs and vanilla extract to the wet ingredients and mix well.
- Gradually add the dry ingredients to the wet ingredients, mixing only until the flour streaks disappear. Do not overmix.
- Gently fold in the shredded coconut and chopped macadamia nuts.
- Pour the batter into the prepared loaf pan.
- Bake for 55 to 65 minutes, or until a wooden skewer inserted into the center comes out clean.
- Let the bread cool in the pan for 10 minutes before turning it out onto a wire rack to cool completely.
Notes
- For the moistest banana bread, make sure you drain the crushed pineapple very well before adding it to the batter. Press out excess liquid with a paper towel or spoon.
- If you do not have macadamia nuts, walnuts make a good substitute in this tropical banana bread recipe.
- This bread freezes well. Wrap the cooled loaf tightly in plastic wrap and then foil before freezing for up to three months.
Nutrition
- Serving Size: 1 slice
- Calories: 320
- Sugar: 25
- Sodium: 210
- Fat: 15
- Saturated Fat: 8
- Unsaturated Fat: 7
- Trans Fat: 0
- Carbohydrates: 46
- Fiber: 2
- Protein: 4
- Cholesterol: 55