
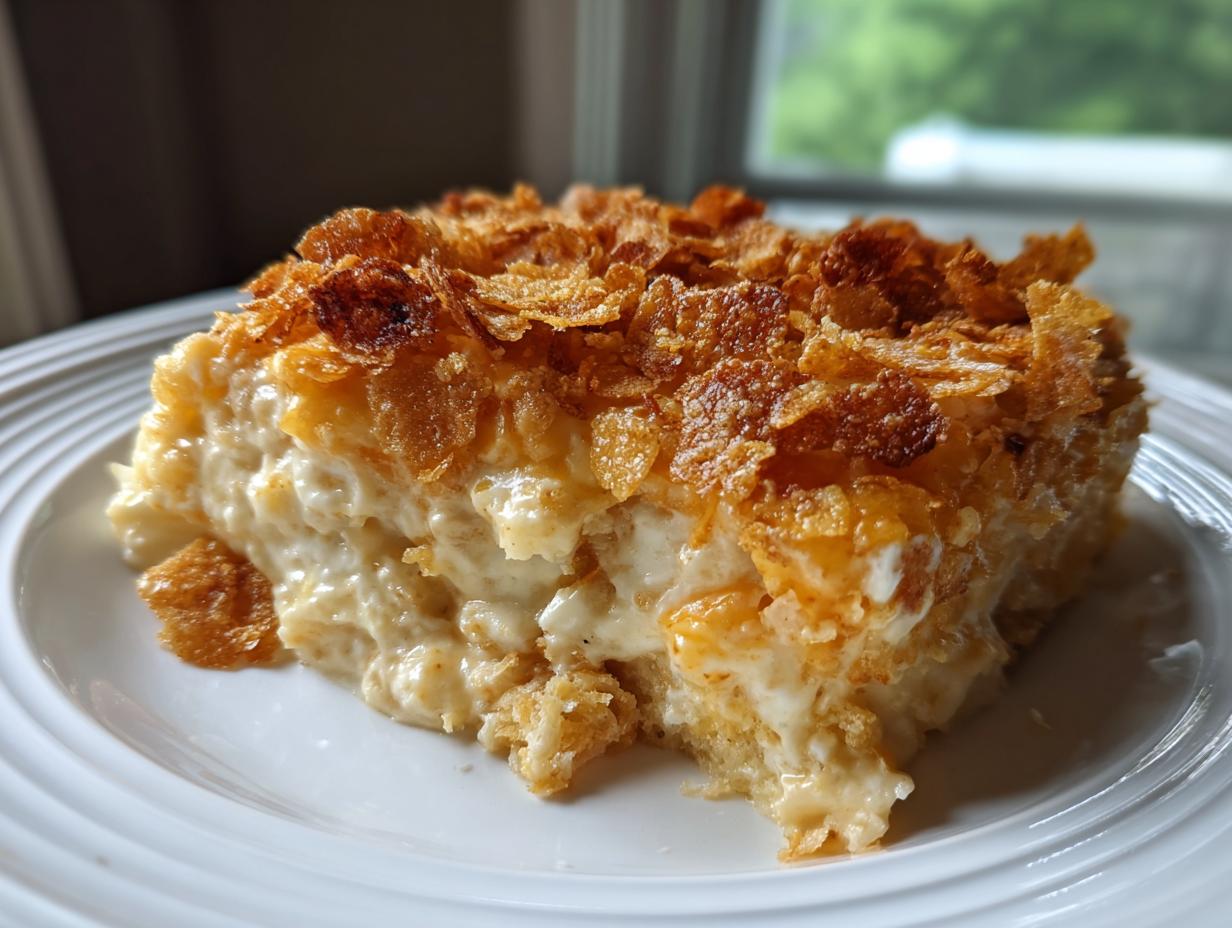
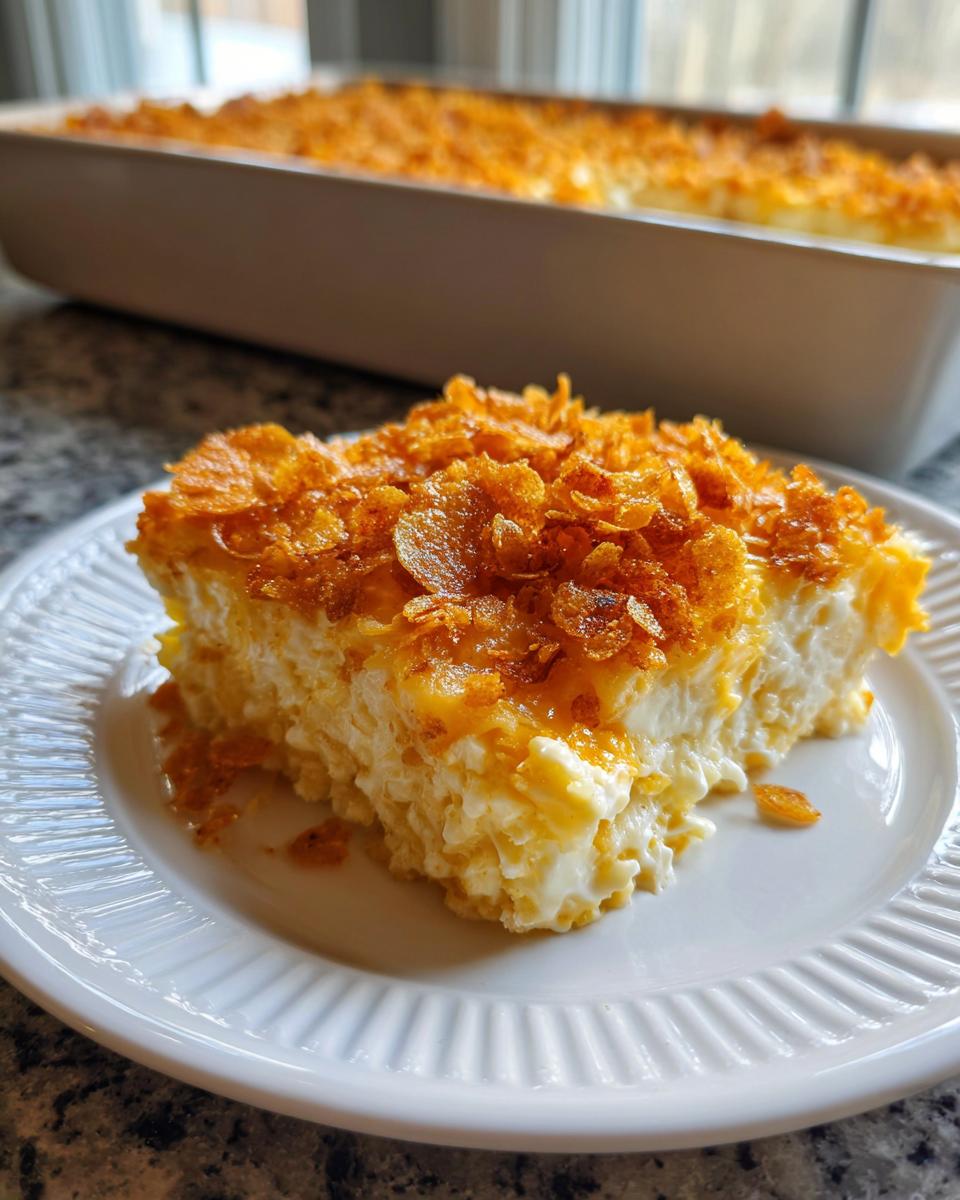
When you need a dish that instantly brings everyone to the table, nothing beats pure, unadulterated comfort food. And when I think of comfort food that truly travels well—from a quiet family dinner to a big church potluck—my mind always snaps right to this amazing casserole. I’m sharing my absolute best funeral potatoes recipe with you today. Trust me on this one; this isn’t just any hashbrown casserole. This is the classic, creamy, cheesy version, topped with that shatteringly crisp, buttery cornflake layer everyone hopes to find at any large gathering. Over my years of teaching and raising my own family, I’ve learned that simple, recognizable food tastes the most like home, and this recipe is the keeper. You can read more about my cooking philosophy here.
- Why This Funeral Potatoes Recipe is a Potluck Favorite (E-E-A-T)
- Gathering Your Ingredients for the Classic Funeral Potatoes Recipe
- Step-by-Step Instructions for the Best Funeral Potatoes Recipe
- Tips for the Ultimate Make Ahead Casserole Version of Funeral Potatoes Recipe
- Ingredient Notes and Substitutions for Your Shredded Potato Bake
- Serving Suggestions for This Comforting Potato Dish
- Storing Leftover Cheesy Hashbrown Casserole
- Frequently Asked Questions About the Funeral Potatoes Recipe
- Nutritional Estimates for Your Classic Potato Casserole
- Share Your Experience with This Funeral Potatoes Recipe
Why This Funeral Potatoes Recipe is a Potluck Favorite (E-E-A-T)
There is a reason why this dish ends up on every single holiday table and neighborhood gathering—it’s the ultimate comfort food side dish. I developed this version because I needed something reliable that never failed to make the plates pile high. It hits every note you want in a good side: super creamy, wonderfully cheesy, and that amazing crunch from the topping. That textural contrast is what makes it one of my top potluck favorites.
Perfect for Feeding a Crowd
You never want to show up to an event with a half-portion, right? This recipe yields a generous 10 servings right out of one 9×13 pan! If you are heading to a huge family reunion, honestly, just double it. It holds up beautifully, and people often prefer savory casseroles over more complicated sides. Since timing is crucial when everyone is eating at once, you can be sure this dish stays presentable!
If you’re looking for some easy handheld bites to serve alongside this casserole, check out my favorite easy appetizers and snacks recipes.
Gathering Your Ingredients for the Classic Funeral Potatoes Recipe
Now that we know this is the dish everyone asks for, we need to make sure we have everything ready before we start mixing. Good results just happen when you pay attention to the details right here in the ingredient gathering stage. For this truly classic funeral potatoes recipe, precise measurement is key to getting that irresistible creamy texture inside that perfectly contrasts with the crispy top layer. Don’t eyeball anything!
Core Casserole Components
You might be tempted to grab shortcuts, but these specific components help build that amazing flavor base. Here’s what you’ll need for the actual casserole mixture:
- Potatoes: You absolutely must start with 2 pounds of frozen shredded hash brown potatoes, and this is important—they need to be fully thawed before they go into the bowl.
- Soup Base: One standard can (10.5 ounces) of cream of chicken soup. This adds salt and richness.
- Dairy Duo: One cup of sharp Cheddar cheese, shredded, and one cup of Monterey Jack cheese, also shredded. I like having two cheeses for depth!
- Moisture: About one cup of sour cream and 1/2 cup of milk to keep everything smooth as silk.
- Seasoning: Just a pinch of salt (remember the soup is salty!) and pepper.
Creating the Buttery Topping for Your Funeral Potatoes Recipe
This is where the magic happens! The topping is what separates a good casserole from the *best* funeral potatoes recipe. You want that golden, crunch factor, and that comes from these two simple ingredients:
- The Crunch: 1 cup of cornflakes. Make sure they are crushed up pretty well, but not totally dust!
- The Glue: You need 1/2 cup of butter, melted completely. We’ll toss those flakes in that melted butter to get them golden and ready for baking. Trust me, skipping the butter here means skipping the best part!
Step-by-Step Instructions for the Best Funeral Potatoes Recipe
Okay, now that we have all our ingredients hanging out nicely, it’s time to put this wonderful funeral potatoes recipe together. It really is simple, but timing is what makes sure those potatoes come out creamy and not watery. I’ve timed this out dozens of times over the years, so follow these steps exactly, and you won’t have any worries at all. We want that beautiful consistency, and that starts with a hot oven!
Prepping the Dish and Mixing the Creamy Cheesy Potatoes
First things first, we need to get serious about the heat! Go ahead and preheat your oven to 350 degrees F. While that’s warming up, take your 9×13 inch baking dish and give it a good, thorough grease. I use butter or cooking spray—I don’t want any sticking surprises later on!
Now for Step two, the main event! In one very large bowl—and I mean large, because we need room to stir—you’re going to combine everything that isn’t the topping. Add those thawed hash browns right in there, followed by your cream of chicken soup, the sour cream, both the Cheddar and Monterey Jack cheeses, the milk, salt, and pepper. You need to mix this until it’s all uniform. My teaching background kicks in here: mix just until you see no more dry spots of potato peeking through. If you fuss with it too much, those starches get angry and sticky, and we want creamy comfort, not glue!
If you want to see how I get my breakfast potatoes perfectly crispy without the cream, check out my oven roasted breakfast potatoes. It’s a totally different technique, but the potato prep matters!
Assembling and Baking the Funeral Potatoes Recipe
Once your potato mixture looks happy and blended, carefully pour it all into that prepared dish. Remember how we talked about spreading it evenly? Use a spatula and just gently coax the mixture so it fills the bottom corners. Don’t pack it down hard, we want some air pockets in there for that fluffy texture!
Next up is our crunchy crown. Take those crushed cornflakes and toss them immediately with your melted butter. You want every flake to be glistening! Sprinkle this buttery mixture evenly over the top of the potatoes. Try to create an even layer from edge to edge so every serving gets some crunch.
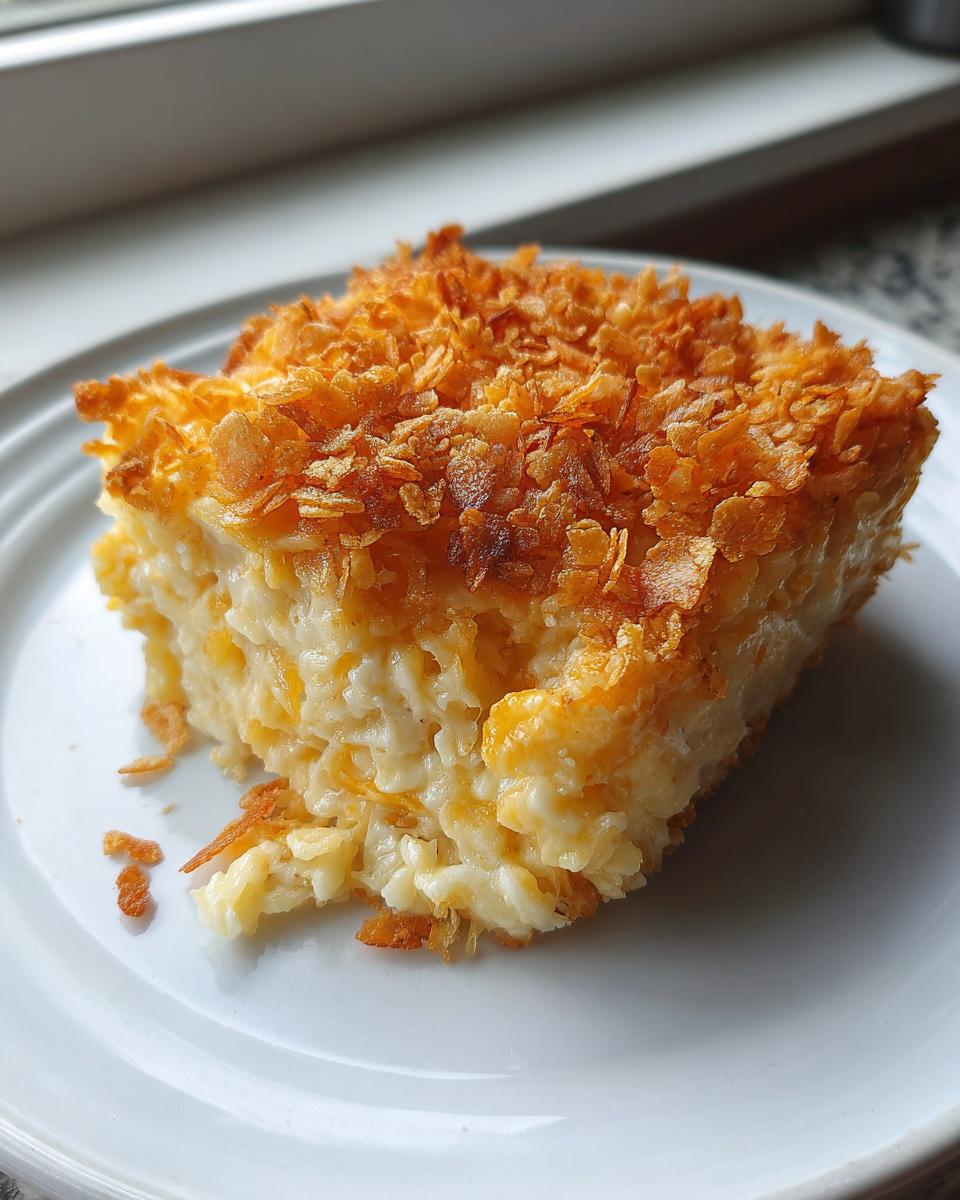
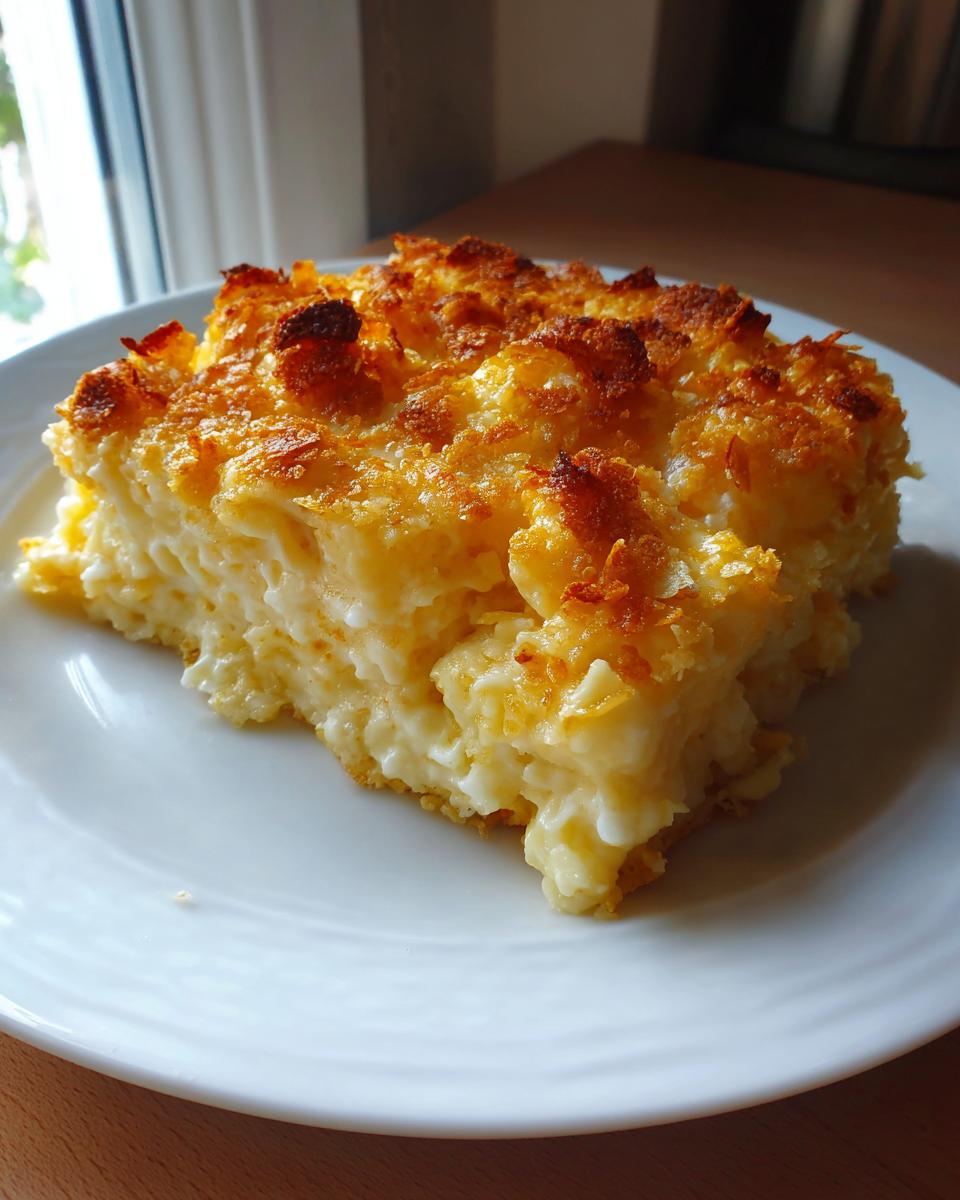
Pop the whole dish into the preheated oven. Bake this funeral potatoes recipe batch for about 45 to 55 minutes. You’re looking for two main signs: the edges should be visibly bubbly, and the cornflake topping absolutely needs to be golden brown and toasted. Once it’s out, please, please let it rest for five to ten minutes before serving! It stops the casserole from running all over the plate when you scoop it out.
Tips for the Ultimate Make Ahead Casserole Version of Funeral Potatoes Recipe
I love a side dish that lets me clean up the kitchen the night before a big event, don’t you? This is one of the reasons I keep returning to this casserole recipe time and again. It works wonderfully as a true make ahead casserole, which is a lifesaver when the day of the gathering arrives and you’re juggling a turkey or a ham in the oven!
Here’s my best advice for prepping this dish in advance. You can assemble the entire potato mixture *without* the topping, cover it tightly with plastic wrap—I usually use two layers just to be safe—and tuck it into the refrigerator for up to 24 hours. Since everything is cold, you will need to make some adjustments when it comes time to bake it off.
When you pull that cold dish out of the fridge, don’t just throw it straight into the 350-degree oven, or the center will still be chilly when the edges burn! You need to add about 10 to 15 minutes to the total baking time. Keep an eye on it, and look for that same bubbly edge. If you’re short on time and need to bake it straight from cold (which happens to the best of us!), I highly recommend covering the dish with foil for the first 30 minutes. This traps the heat and helps everything thaw and warm evenly before you uncover it for that beautiful golden finish.
But wait—the topping! This is critical for texture. If you mix the cornflakes with the butter and put them on when you cover it for the night, the topping will get soggy and heavy overnight. Do yourself a huge favor: keep the cornflakes and butter separate in a small Ziploc bag. The next morning, just melt the butter, toss the flakes, and sprinkle them on right before the casserole goes into the oven. That way, you get that perfect crunch every single time. For other make-ahead ideas that save you stress, you might enjoy my recipe for easy homemade chocolate pudding.
Ingredient Notes and Substitutions for Your Shredded Potato Bake
When you’re whipping up a big batch of this shredded potato bake, sometimes you run into a little snag—maybe you’re out of chicken soup, or maybe you realize you only have ruffled potato chips instead of cornflakes. Don’t panic! While I stick pretty closely to my original recipe because the balance of sharp Cheddar and Monterey Jack is just wonderful, I know life happens. I’ve learned a few things over the years about easy swaps that keep the casserole tasting great.
For instance, you might see some recipes call for crushed potato chips instead of cornflakes. That’s a perfectly fine adaptation! The *Pioneer Woman* style often leans toward chips, and it gives you a slightly different, saltier crunch. If you go that route, just make sure you use a plain, lightly salted chip so you don’t overwhelm the creamy base. You still toss those chips in melted butter just like the cornflakes. It’s all about getting that golden, crispy layer!
If cream of chicken soup isn’t available, cream of celery or cream of mushroom works in a pinch, though the flavor profile shifts just a touch. You might need to bump up the salt a tiny bit if you use cream of mushroom. My main rule is: if you change a major component, taste the mixture before you bake it!
Handling Frozen Hash Browns
Honestly, the frozen hash browns are the secret sauce to how easy this Comfort Food Side Dish is. Them being frozen means they have the exact moisture content we need. But you asked about thawing, and that’s an excellent question!
Yes, they need to be thawed. If you mix rock-solid frozen potatoes into that wet mixture, you’ll end up with chilly pockets right in the middle of your hot casserole. However, don’t sweat a few ice crystals! If you take them out of the freezer to thaw on the counter for about 30 minutes, they will usually be soft enough to mix well. If you see a few little icy bits when you’re stirring everything together, it’s okay—they usually melt and blend right into the creamy sauce as the casserole bakes. Just try not to add a big block of ice to your bowl, or you’ll have to extend that baking time quite a bit!
If you’re interested in trying a variation on potatoes that involves frying them later on, you might love my recipe for crispy ham and cheese potato croquettes. It’s a bit more work, but so delicious!
Serving Suggestions for This Comforting Potato Dish
Now that we’ve got this incredibly rich and satisfying comforting potato dish hot and bubbly out of the oven, the next big question is: What goes with it? Since this kind of family gathering side dish is so hearty and cheesy, you don’t need a complicated main course. In fact, heavy mains just sink you! I always pair this casserole with something that roasts up nicely and doesn’t require too much attention while the casserole rests.
My number one pick for the holidays is a good, simple brown sugar ham. The salty, sweet flavors of the ham just sing right next to this creamy potato bake. If it’s a regular Sunday dinner, you absolutely cannot go wrong with a perfectly cooked roast chicken. Because the casserole is so decadent, you need something lighter and brighter on the side to cut through all that cream and cheese, right?
I highly recommend keeping your green vegetable simple. Think about fresh steamed green beans tossed with just a little lemon zest and almonds. Or maybe a crisp, simple side salad with a vinegary dressing. Anything sharp and fresh will balance out the richness of the cheese so you can enjoy every last bite without feeling too heavy at the end of the meal. If you want a main dish that is equally comforting but maybe a little different than a roast, you should try my best juicy meatloaf recipe—it’s fantastic alongside this, too!
Storing Leftover Cheesy Hashbrown Casserole
Oh, the glorious problem of having leftovers! Even though this creamy cheesy potatoes casserole is usually devoured quickly, sometimes there are a few scoops hiding in the pan the next day. And guess what? It’s still fantastic, provided you store it correctly. My philosophy is that if it’s worth making, it’s worth keeping fresh for tomorrow’s lunch, too!
The key here, especially since this is a dairy and potato-heavy dish, is airtight storage. Once the casserole has cooled down to room temperature—and I mean really cooled; don’t put a piping hot dish straight into the fridge, that’s just asking for trouble—cover it tightly. Get some plastic wrap right against the surface if you can, maybe even a layer of foil underneath that, before sealing it up in the refrigerator. You can expect your leftovers to stay perfectly good for about three to four days tucked away in the fridge.
Reheating Your Delicious Casserole
When you’re ready to bring those cheesy potatoes back to life, you generally have two options: the oven or the microwave. Which one you choose depends entirely on how much time you have and how much you care about that lovely crispy topping!
If you managed to save any of that buttery topping separately, use that whole method. If not, don’t fret, we can fix it! For the best, most comforting result, I always prefer the oven. Pop a scoop (or the whole remaining portion) onto an oven-safe plate or into a small baking dish. Cover it loosely with foil—you want to protect the remaining topping but allow the inside to heat through evenly. Bake it at a moderate temperature, like 325 degrees F, until it’s steaming hot all the way through. This usually takes about 20 minutes for a single serving, maybe 30 if you’re reheating the whole pan.
If you are starving *right now*, the microwave is quick. Just scoop out what you want and microwave it in short, 30-second bursts, stirring in between. Be warned, though: the microwave makes the topping soft almost instantly. If you’re microwaving a single serving, you can try popping the resulting soft potato scoop under the broiler for just one or two minutes after heating to attempt to crisp the top back up, but it’s never quite the same as fresh from the oven. It still tastes wonderful, though!
If you’re looking for other amazing dishes that reheat well—like my favorite chicken and dumpling recipe—make sure you store them properly too!
Frequently Asked Questions About the Funeral Potatoes Recipe
As a teacher, I always know that the best way to learn is by asking questions! I’ve gathered the most common things people ask me when they’re making this wonderful funeral potatoes recipe for the first time. We want this to be foolproof, so let’s clear up any confusion so you can serve the best cheesy hash brown casserole ever!
Can I use fresh shredded potatoes instead of frozen for this funeral potatoes recipe?
That’s a great question about fresh versus frozen. While I love using fresh vegetables whenever I can, for this specific recipe, I wholeheartedly suggest sticking to the frozen, thawed hash browns. The reason is moisture control. Those pre-shredded frozen bags have a very consistent moisture level that’s calibrated perfectly for this creamy base. If you use fresh potatoes, you have to peel, shred (which takes forever!), and you’d likely need to blanch or pre-cook them to leech out some of that raw moisture. If you don’t, you end up with a watery casserole instead of the rich, creamy texture we aim for.
What is the best way to prevent a soggy topping on this Easy Potato Casserole?
Oh, the soggy topping struggle is real! That crunchy cornflake layer is vital for a great easy potato casserole experience. I have two big rules that solve this problem. Number one: if you are making this a make-ahead dish, do NOT put the buttered topping on until the morning you plan to serve it. Store the topping mixture separately! If you cover it overnight, the moisture from the dairy beneath will soak right into those flakes.
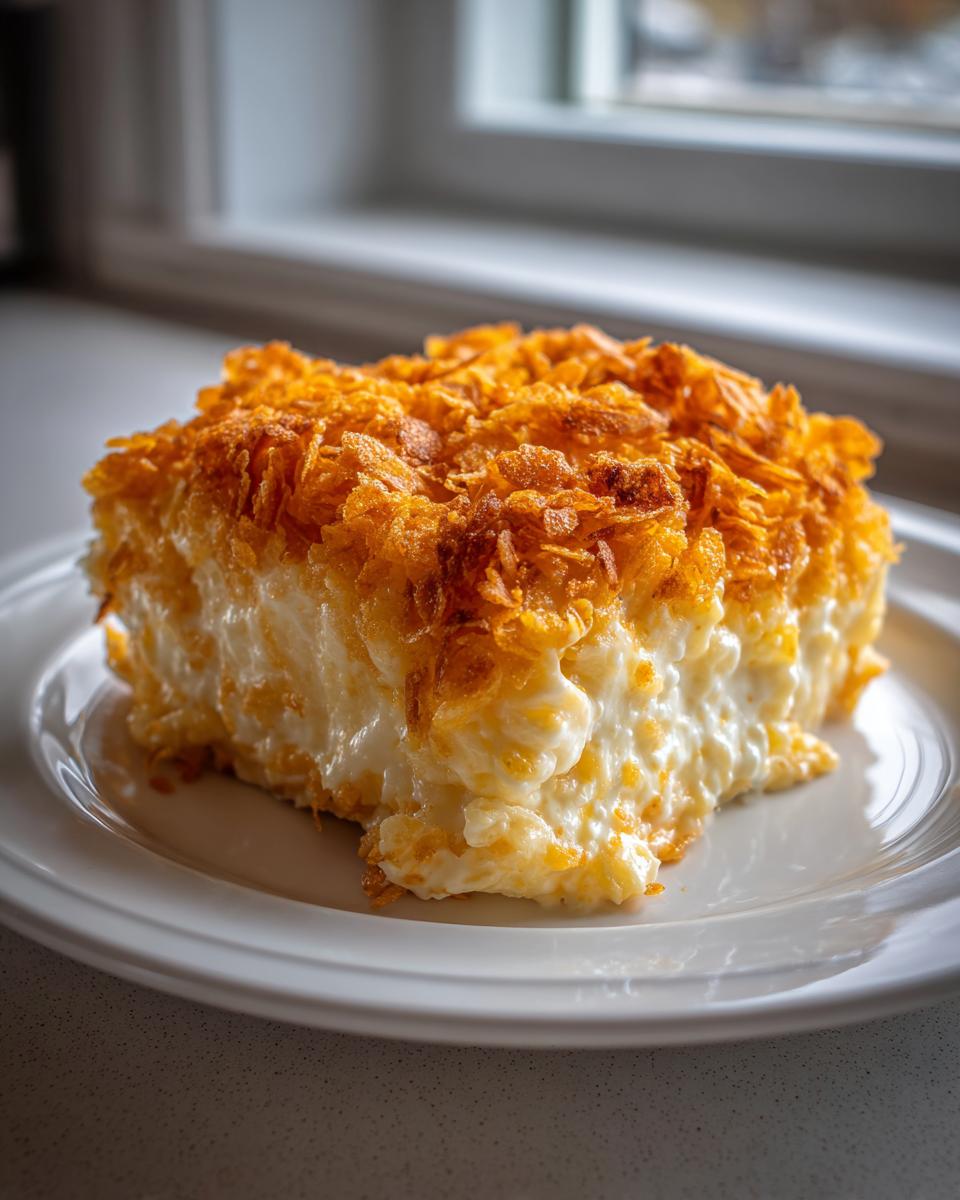
Number two, when you do bake it, use the upper-middle rack in your oven. This positioning ensures that the heat radiates directly onto that topping, making it toast quickly and become beautifully crisp before the potatoes underneath are completely dried out. Patience with the oven placement really pays off here!
Can I make Slow Cooker Funeral Potatoes instead of baking?
Yes, you absolutely can adapt this recipe for the slow cooker! If you’re making this for a holiday when your oven is totally packed, the slow cooker is your best friend. You can mix everything—the potatoes, the soup, the cheeses—just like normal. I highly recommend lining your slow cooker insert with foil first; it makes cleanup such a dream. You’ll cook it on LOW for about three to four hours. Now, here’s the catch on the topping: the slow cooker lid traps all the steam, so if you mix the buttered cornflakes in at the start, they will absolutely get soggy. You have two options: either mix the topping on during the last 30 minutes of cooking, or, my favorite way, bake just the topping separately on a baking sheet until brown and then sprinkle that crispy heaven on top right before you serve.
If you have any more questions about ingredient ratios or timing, please don’t hesitate to reach out to me on my contact page!
Nutritional Estimates for Your Classic Potato Casserole
I always hear from folks who want to serve their family recipes but still keep an eye on what they’re eating, which is so smart! While this classic potato casserole is true comfort food, knowing the basics helps when you’re planning a big meal, especially around the holidays.
Please remember, these numbers are based strictly on the ingredients listed in my recipe above—using standard cream of chicken and the specific cheese amounts. If you use a low-fat sour cream or opt for different cheeses, those numbers will shift a bit. Since I used specific brands when calculating these, consider this your handy roadmap instead of a strict nutritional label. I always aim for honest, homemade quality over processed perfection!
Here is what you can generally expect per serving (this recipe yields 10 servings):
- Calories: Around 350
- Fat: About 24g (with 13g being saturated fat)
- Carbohydrates: Roughly 28g
- Protein: About 10g
- Sugar: Very low, around 3g
- Sodium: This is the highest number, around 550mg, due to the cheese and canned soup—something to be aware of if you are watching salt intake!
I always share this information because transparency matters to me, just like teaching my grandchildren that they should know what they are putting into their bodies. It’s all about balance, after all!
If you decide to change out ingredients or change the serving size, remember you’ll need to recalculate those values. You can always review my site’s information policy about how we handle data and recipes here.
Share Your Experience with This Funeral Potatoes Recipe
Well, that’s it! We’ve gone from frozen potatoes to that stunning, golden, bubbling casserole dish. I truly hope you’ll give this ultimate comfort side a try for your next big event, whether it’s a big family picnic or just a Tuesday night when you need something truly satisfying.
When you make this funeral potatoes recipe, I need to know how it turned out for you! Did your family devour every last scoop? Did the cornflake topping stay wonderfully crisp?
Please take a moment to leave a rating right at the bottom of the page—five stars if it earned its keep on your table! Drop a comment and tell me what you served it alongside; I love hearing what main dishes pair well with this cheesy classic. And if you snap a picture, share it on social media and tag me! It just warms my old teacher’s heart to see my recipes making memories at your tables. If you need an easy rice side to serve alongside it next time, check out my thoughts on easy creamy one-pan cheesy rice!
PrintClassic Cheesy Funeral Potatoes Casserole with Buttery Cornflake Topping

This is the ultimate comfort food side dish, often called Cheesy Hashbrown Casserole. It is creamy, cheesy, and perfect for feeding a crowd at holidays or potlucks.
- Prep Time: 15 min
- Cook Time: 55 min
- Total Time: 70 min
- Yield: 10 servings 1x
- Category: Side Dish
- Method: Baking
- Cuisine: American
- Diet: Vegetarian
Ingredients
- 2 pounds frozen shredded hash brown potatoes, thawed
- 1 can (10.5 ounces) cream of chicken soup
- 1 cup sour cream
- 1 cup shredded sharp Cheddar cheese
- 1 cup shredded Monterey Jack cheese
- 1/2 cup milk
- 1/2 cup butter, melted
- 1/2 teaspoon salt
- 1/4 teaspoon black pepper
- 1 cup crushed cornflakes
Instructions
- Preheat your oven to 350 degrees F. Lightly grease a 9×13 inch baking dish.
- In a large bowl, combine the thawed hash brown potatoes, cream of chicken soup, sour cream, Cheddar cheese, Monterey Jack cheese, milk, salt, and pepper. Mix until everything is well combined.
- Spread the potato mixture evenly into the prepared baking dish.
- In a small bowl, mix the crushed cornflakes with the melted butter until the flakes are coated. Sprinkle this buttery topping evenly over the potato mixture.
- Bake for 45 to 55 minutes, or until the casserole is bubbly throughout and the topping is golden brown.
- Let the casserole rest for 5 to 10 minutes before you serve it. This is a great make ahead casserole.
Notes
- For an overnight make ahead casserole, assemble the entire dish, cover it, and refrigerate for up to 24 hours. Add 10 to 15 minutes to the baking time if baking directly from the refrigerator.
- You can substitute crushed potato chips for cornflakes in the topping for a different texture.
- This recipe is easy to double for a very large gathering. Use two separate 9×13 dishes.
Nutrition
- Serving Size: 1 serving
- Calories: 350
- Sugar: 3
- Sodium: 550
- Fat: 24
- Saturated Fat: 13
- Unsaturated Fat: 11
- Trans Fat: 0.5
- Carbohydrates: 28
- Fiber: 2
- Protein: 10
- Cholesterol: 55