
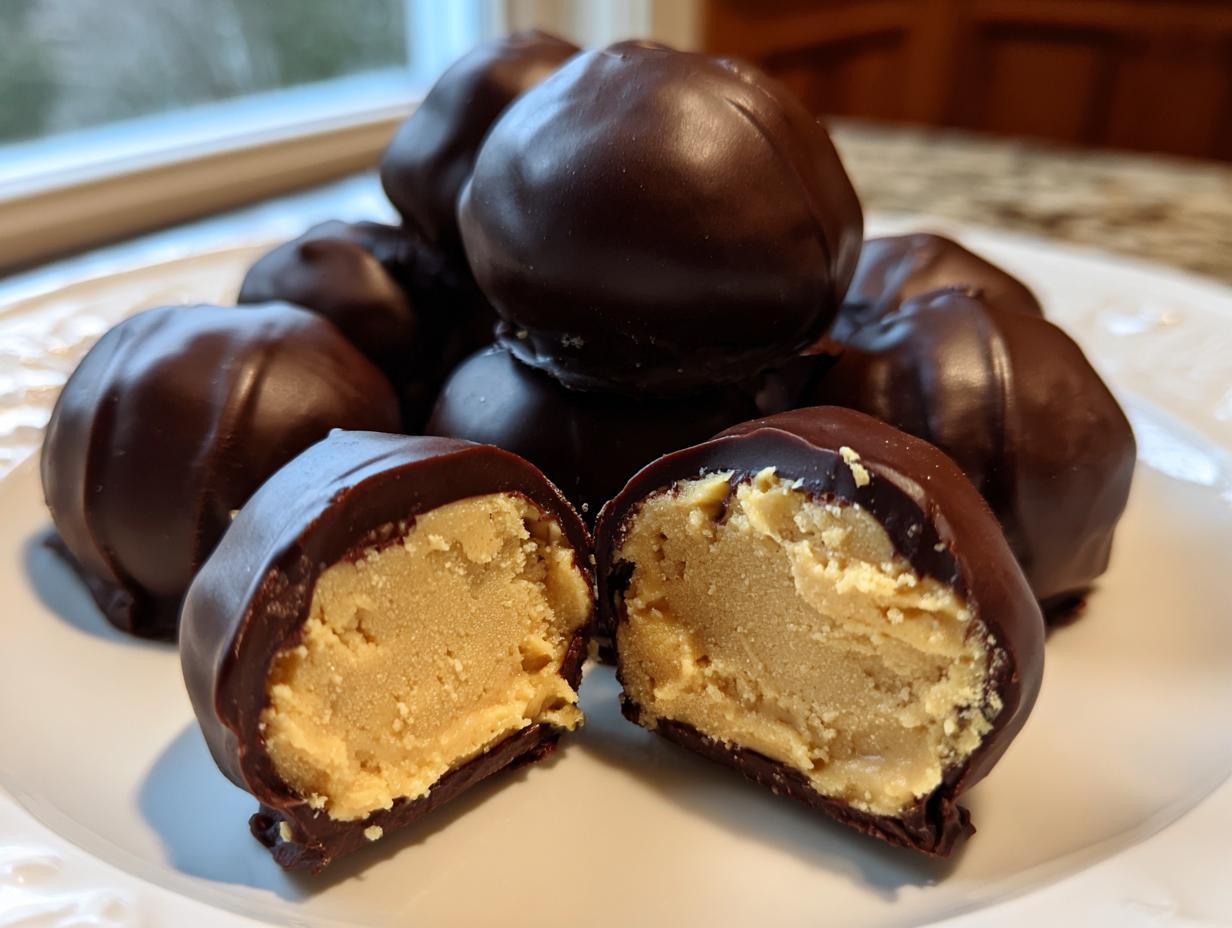
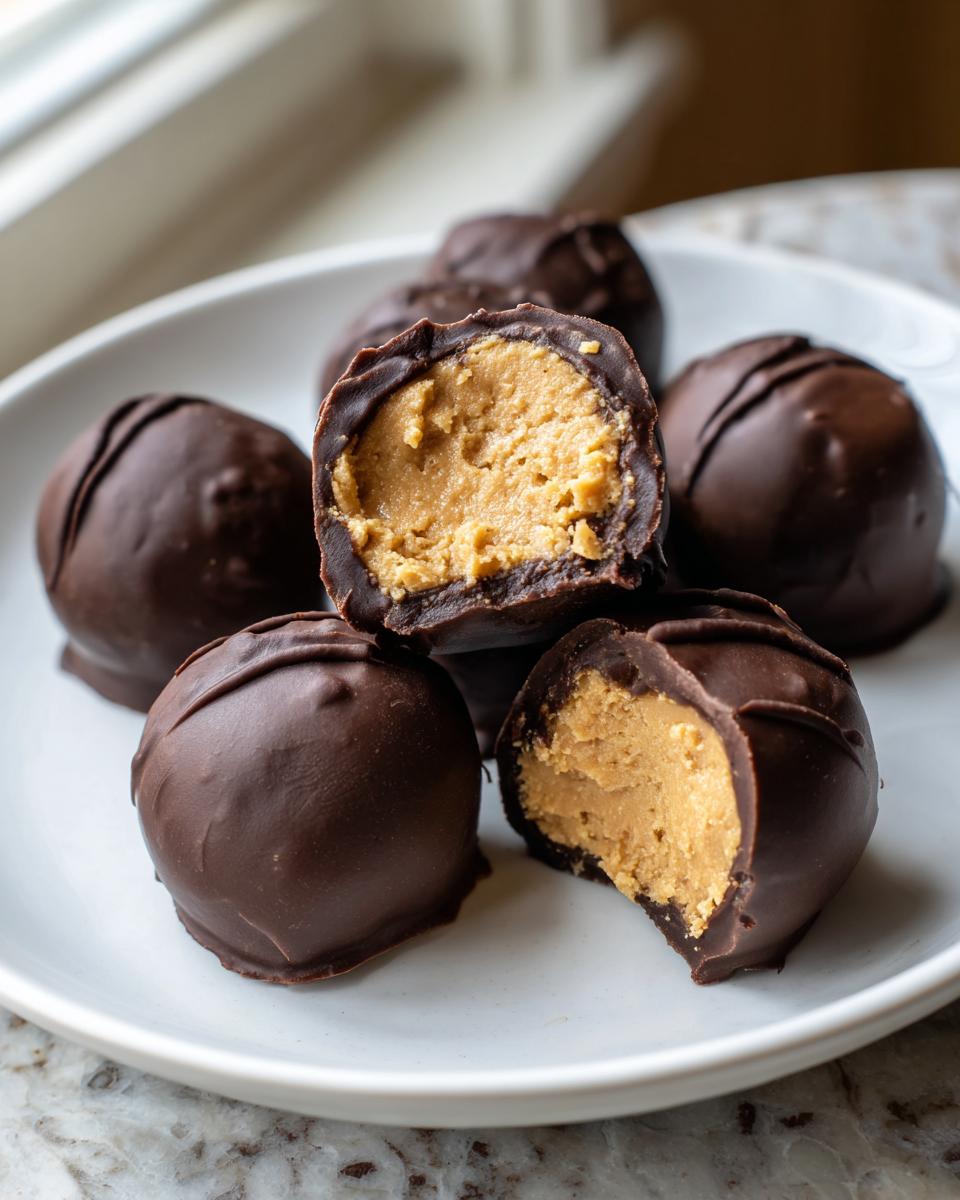
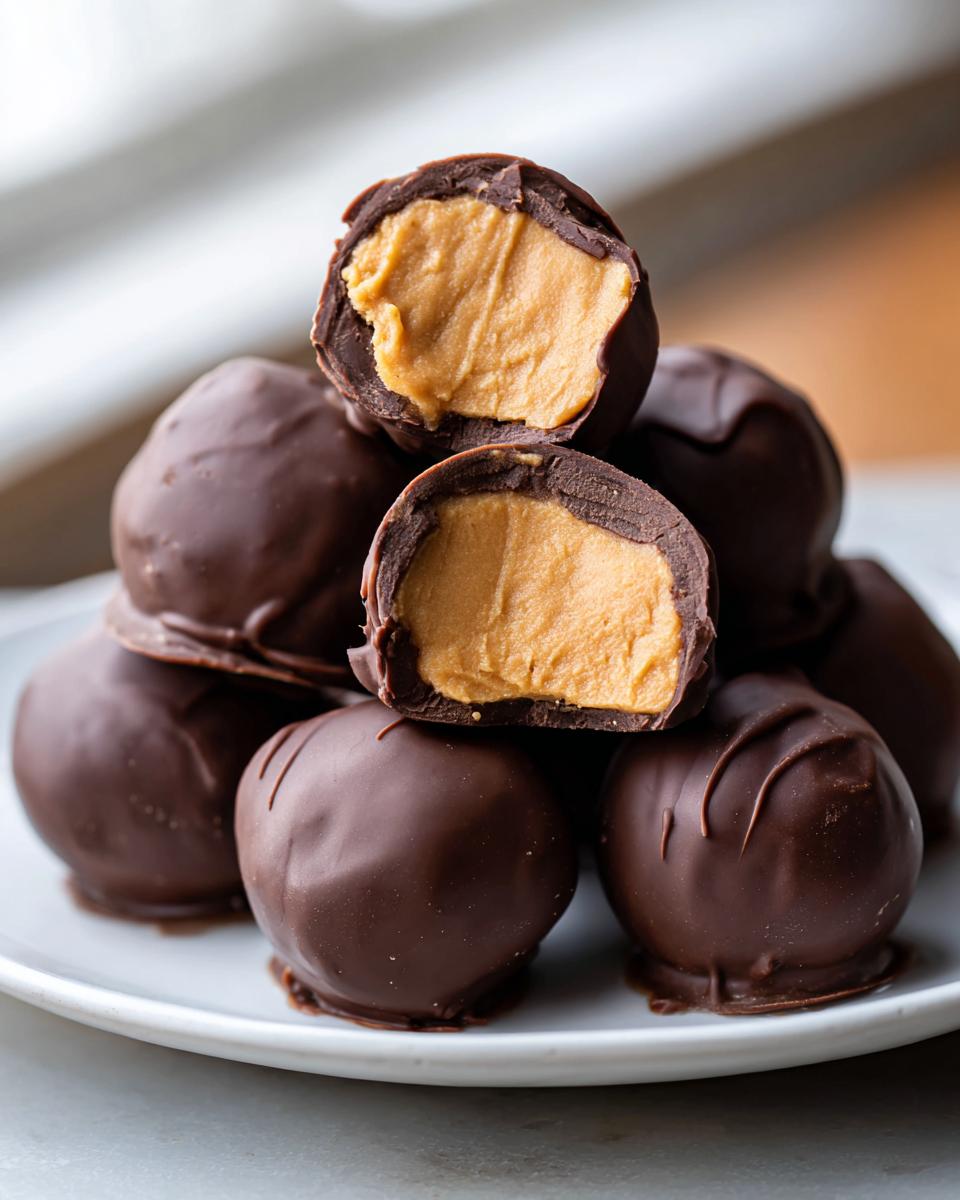
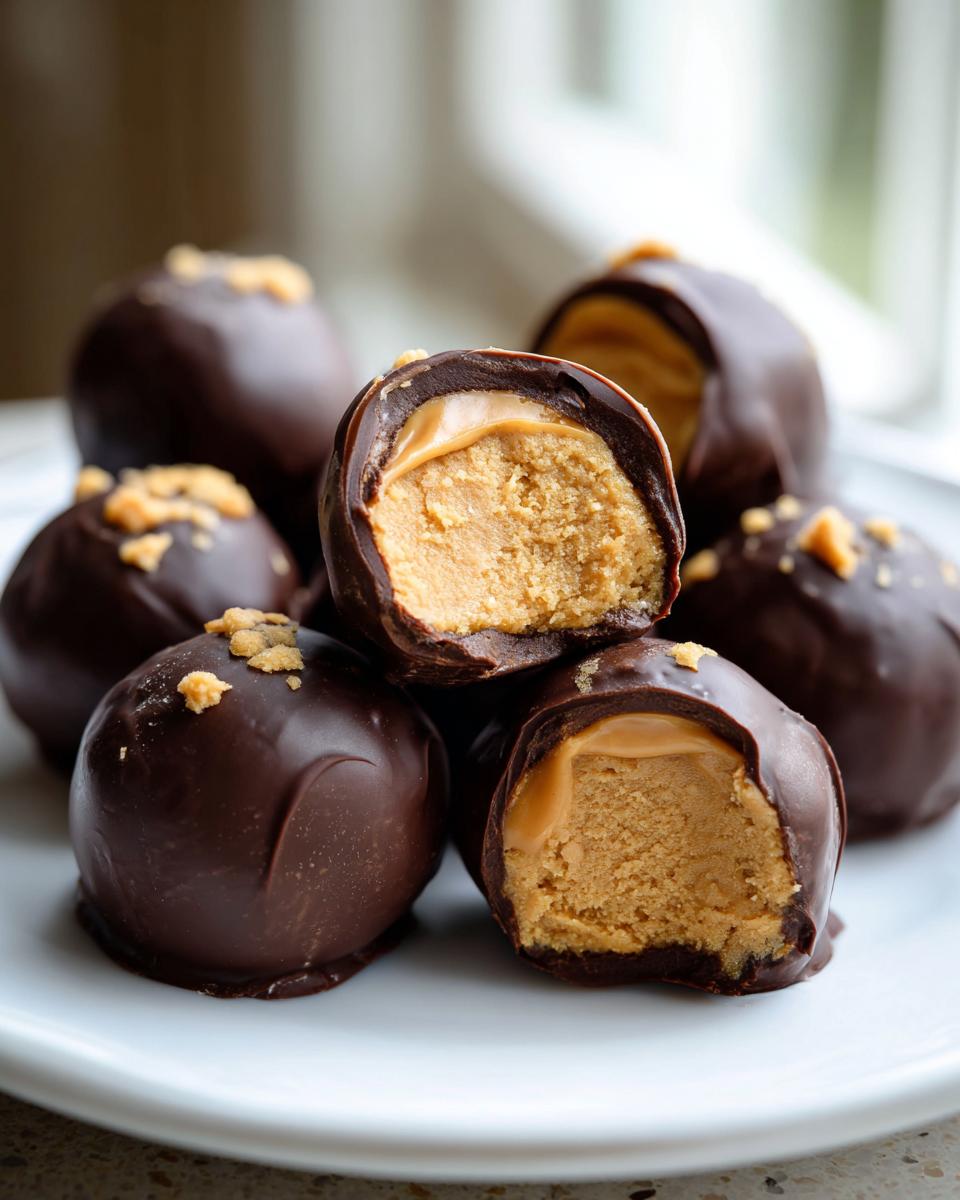
When the holidays roll around, nothing beats that satisfying snap of chocolate giving way to a rich, creamy center. I’m talking, of course, about the absolute best, easiest **peanut butter balls** you’ll ever make! These taste exactly like those fancy “Buckeyes” candy, or honestly, a homemade Reese’s cup condensed into one perfect bite. It’s why I keep this recipe front and center. My background might be in teaching, but my real passion has always been reliable kitchen magic for busy home cooks like you. This is simple, foolproof, no-bake goodness. If you love this melt-in-your-mouth style, you seriously need to check out my recipe for easy peanut butter fudge, too!
- Why Our No Bake Peanut Butter Balls Are Your New Favorite Treat
- Ingredients for Classic Chocolate Peanut Butter Balls
- Step-by-Step Instructions for Making Peanut Butter Balls
- Expert Tips for the Best Peanut Butter Balls Ever
- Buckeye Balls Recipe Variations for Parties
- Serving Suggestions for Your Peanut Butter Balls
- Storage and Making Ahead for Peanut Butter Balls
- Frequently Asked Questions About No Bake Peanut Butter Balls
- Estimated Nutrition for Peanut Butter Balls
Why Our No Bake Peanut Butter Balls Are Your New Favorite Treat
Honestly, between teaching and keeping up with the grandkids, who has time for fussy baking during the holidays? That’s why these **peanut butter balls** are a lifesaver. They fly off the party plate every single time, and the best part is they don’t even need the oven! They are just so satisfying.
- They are unbelievably quick to put together—seriously fast.
- The texture is that perfect, creamy, melt-in-your-mouth center.
- The chocolate coating makes them look beautiful for holiday trays or gifting.
Quick Prep Time for Easy Peanut Butter Candy
You truly only need about 20 minutes of active time to mix up the filling for these **Easy Peanut Butter Candy** bites. After that, it’s just waiting for the chill, which is time you can spend wrapping gifts or relaxing! Because there’s no baking involved, these come together so quickly, making them perfect for last-minute needs.
Ingredients for Classic Chocolate Peanut Butter Balls
When I put together this list for my famous **peanut butter balls**, I’m very specific about the texture we are aiming for—that classic, creamy center. If you look at my recipe for classic butter cookies, you know texture matters! Don’t skimp on the quality here, and make sure your butter is actually softened!
- 1 cup creamy peanut butter
- 1/2 cup (1 stick) unsalted butter, softened
- 3 cups powdered sugar
- 1 teaspoon vanilla extract
- 12 ounces semi-sweet chocolate chips
- 1 tablespoon shortening or coconut oil (for melting chocolate)
Ingredient Notes and Substitutions for Perfect Peanut Butter Balls
Let’s talk about making these **peanut butter balls** perfect. The most important thing for the chocolate dip is that little bit of shortening or the coconut oil. It’s not just filler—it makes the chocolate thinner, which means you get a beautiful, thin coat instead of a thick, clunky shell. Trust me, don’t skip it! If you want a richer flavor, you can absolutely swap semi-sweet chips for dark chocolate, but I almost always stick to semi-sweet because this candy is so sweet already.
Step-by-Step Instructions for Making Peanut Butter Balls
Okay, now for the fun part! Making these **peanut butter balls** is almost ridiculously easy, but structure matters, especially since we aren’t baking anything. We need that filling to hold up when it meets the hot chocolate. We want smooth and unified, not stressed out! If you’ve ever struggled with a thick frosting, check out my advice for fluffy buttercream—the mixing principle is similar!
Mixing the Creamy Peanut Butter Filling
First things first, dump your peanut butter, softened butter, powdered sugar, and vanilla into a big bowl. Use your electric mixer—it really helps here—and start slow! Mix it until everything is completely smooth and looks like a thick dough. You’re done when you don’t see any powdery spots of sugar left. Don’t overdo it once it’s combined; we aren’t whipping air in there, just making sure it’s perfectly uniform.
Chilling and Coating Your Chocolate Covered Peanut Butter Balls
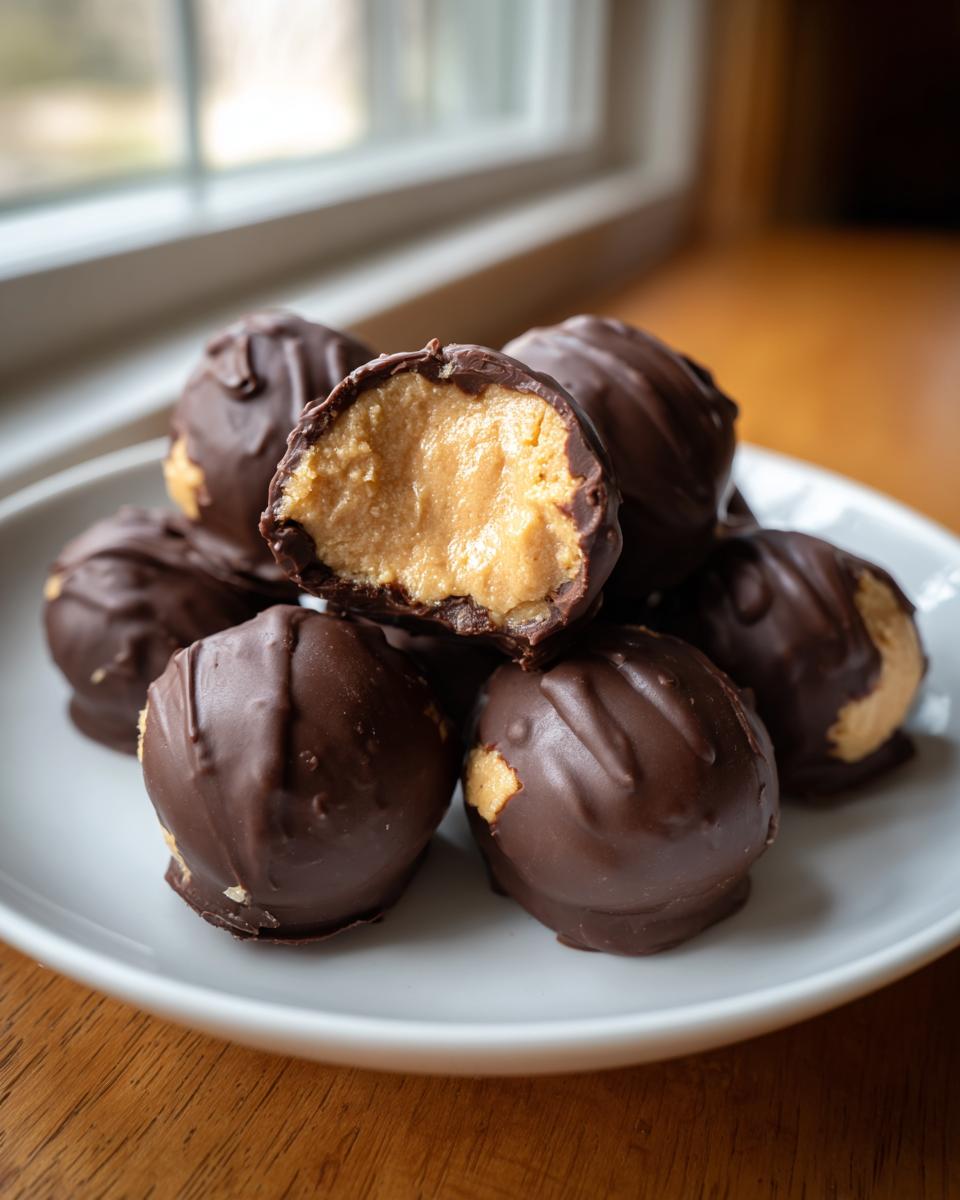
Take that dough and roll it into small balls, about an inch wide, and pop them onto a sheet lined with parchment paper. They absolutely *must* go into the fridge for at least 30 minutes. If they aren’t firm, they will melt right off your dipping fork! Next, melt your chocolate chips and shortening together slowly in the microwave. When they are firm, dip them right in, but here’s the trick to the classic look: leave a tiny circle of the peanut butter peeking out at the top. That little peek of tan makes these the perfect **Chocolate Covered Peanut Butter Balls**!
Expert Tips for the Best Peanut Butter Balls Ever
Carla’s kitchen secrets aren’t just for reading; they’re for ensuring your **peanut butter balls** are winners every time. The biggest issue people run into is a filling that’s too soft, usually because the butter wasn’t quite cold enough when rolling, or maybe you used natural peanut butter. Speaking of soft fillings, if yours is looking a bit sloppy after mixing, just pop the whole bowl back in the fridge for twenty minutes before rolling.
When you are melting that chocolate, watch it carefully! A microwave can go from perfect chocolate coating to seized, gritty mess in about five seconds. Always use the shorter 30-second bursts and stir thoroughly between heating. If you want that super glossy finish, you might want to try dipping them in good quality melting wafers instead of chips—it makes for the smoothest coating. If you’re having trouble with sinking centers later, sometimes reading up on chocolate pudding consistency can help you understand why that fat content is so important! These little tips turn good **peanut butter balls** into the absolute best ones, I promise!
Buckeye Balls Recipe Variations for Parties
While the classic, plain **Buckeye Balls Recipe** is my go-to—you know, the creamy filling coated in chocolate—I totally get that sometimes you want to mix things up for a big party spread! It’s fun to offer something a little different, especially when you need a recipe that uses up what you have on hand. I’ve heard of people adding all sorts of things to the filling, making these even better than the original. If you’re looking for another simple candy recipe, my homemade peanut butter fudge is made just as easily!
My favorite addition for a little crunch is crushed vanilla wafers. They don’t change the flavor much, but they add this subtle, almost shortbread-like texture to the creamy center! Just fold in about one cup of finely crushed wafers along with the powdered sugar. It gives the filling a little more stability too, though you still need to chill them properly.
You can also totally change up the chocolate coating. Instead of melting chips, grab some peanut butter candy coating or even white chocolate if you want a fun contrast. If you check out this great recipe for Buckeye Balls, they talk about some cool drizzling ideas you can try too! Just remember, if you change the coating, the chilling time might need a quick check.
Serving Suggestions for Your Peanut Butter Balls
These **peanut butter balls** are seriously a champion among **Holiday Peanut Butter Treats**. They look so festive piled high on a platter! Because they are so rich, they love a good partner. I almost always serve them alongside my famous classic butter cookies because those are light and delicate, offering a nice side contrast.
They are also absolutely divine with a hot cup of coffee or a tall glass of cold milk. We usually set plates of these out when friends drop by in the afternoon during December. Honestly, they never last long, no matter how large the batch is!
Storage and Making Ahead for Peanut Butter Balls
One thing I love about these simple **peanut butter balls** is that they are wonderful make-aheads, which is major when you’re trying to juggle holiday menus! You can totally whip up the whole batch—filling and chocolate coating included—and keep them tucked away in an airtight container in the refrigerator for up to a full week. That means you can get them done before the craziness starts!
If you need to keep them longer, freezing actually works really well too. Just make sure they are fully set and in a freezer-safe container. They usually taste best if you thaw them in the fridge for about an hour before serving. If you’re ever worried about keeping chocolate things firm, take a look at my pointers for chocolate pudding; the science behind keeping that fat solid applies here too!
Frequently Asked Questions About No Bake Peanut Butter Balls
I get so many questions about these fantastic treats! They are so popular because they fit into so many plans, whether you need **No Bake Peanut Butter Balls** for a quick afternoon snack or a huge batch for gifts. Here are a few things folks always ask me about making the best batch of these **peanut butter balls**.
Can I use crunchy peanut butter in these peanut butter balls?
You certainly can, but just be ready for a totally different bite! The recipe is written around creamy peanut butter because we want that signature, velvety smooth center—like a Reese’s cup, right? Crunchy peanut butter will work fine in terms of mixing and chilling, but you’ll get little hard nut pieces throughout your filling, which changes the whole experience. If you love texture, go for it, but for the classic result, stick with creamy peanut butter.
How long do these simple peanut butter dessert bites last?
These **simple peanut butter dessert** bites last quite well, which is perfect for making ahead! Because they are stored in the fridge, you can easily keep them sealed up tight for about a week. The chocolate coating helps seal in the moisture. If you want to store them longer, I find they freeze like a charm, too! Honestly, between my leftovers and what I give away, they rarely last that long in my house!
If you’re looking for more quick fixes for parties and gatherings, be sure to peek at my ideas for easy appetizers and snacks. Sometimes you need something savory to balance out the candy!
Estimated Nutrition for Peanut Butter Balls
Because we are talking about a wonderful, rich candy, I always like to give you guys a heads-up on the nutrition side of things, just so you know what you are enjoying! Remember, these are always estimates, and they depend on if you use milk chocolate or dark chocolate, and exactly how big you roll those little **peanut butter balls**. I calculated these based on the standard recipe using semi-sweet chocolate chips.
- Serving Size: 1 ball
- Calories: 180
- Fat: 11g
- Carbohydrates: 19g
- Protein: 4g
- Sugar: 18g
Just keep in mind that this is a treat, not a health food! The sugar content is higher because of the powdered sugar in the filling and the chocolate coating. But honestly, when you taste how decadent these **chocolate covered peanut butter balls** are, you really won’t worry about the numbers much!
PrintEasy No-Bake Chocolate Peanut Butter Balls (Classic Buckeye Recipe)

Make these simple, no-bake peanut butter balls coated in chocolate. This recipe delivers a creamy, classic candy treat perfect for holidays, parties, or gifting.
- Prep Time: 20 min
- Cook Time: 5 min
- Total Time: 55 min
- Yield: About 30 balls 1x
- Category: Dessert
- Method: No Bake
- Cuisine: American
- Diet: Vegetarian
Ingredients
- 1 cup creamy peanut butter
- 1/2 cup (1 stick) unsalted butter, softened
- 3 cups powdered sugar
- 1 teaspoon vanilla extract
- 12 ounces semi-sweet chocolate chips
- 1 tablespoon shortening or coconut oil (for melting chocolate)
Instructions
- Combine the peanut butter, softened butter, powdered sugar, and vanilla extract in a large bowl.
- Mix the ingredients with an electric mixer or by hand until the mixture is smooth and fully combined.
- Roll the peanut butter mixture into small balls, about 1 inch in diameter. Place them on a baking sheet lined with parchment paper.
- Chill the peanut butter balls in the refrigerator for at least 30 minutes until firm. This step prevents them from falling apart when dipped.
- In a microwave-safe bowl, combine the chocolate chips and shortening (or coconut oil). Microwave in 30-second intervals, stirring well after each interval, until the chocolate is smooth and fully melted.
- Dip each chilled peanut butter ball into the melted chocolate, leaving a small circle of peanut butter exposed at the top (to resemble a Buckeye nut). Alternatively, you can fully coat the balls.
- Return the coated balls to the parchment-lined baking sheet.
- Refrigerate the chocolate peanut butter balls for about 15 minutes, or until the chocolate coating is set.
Notes
- For a smoother chocolate coating, use high-quality melting wafers instead of chocolate chips.
- If you prefer a fully coated ball, skip leaving the peanut butter exposed at the top.
- You can substitute milk chocolate or dark chocolate for the semi-sweet chips.
- Store finished peanut butter balls in an airtight container in the refrigerator for up to one week.
Nutrition
- Serving Size: 1 ball
- Calories: 180
- Sugar: 18
- Sodium: 85
- Fat: 11
- Saturated Fat: 4
- Unsaturated Fat: 7
- Trans Fat: 0
- Carbohydrates: 19
- Fiber: 1
- Protein: 4
- Cholesterol: 12