
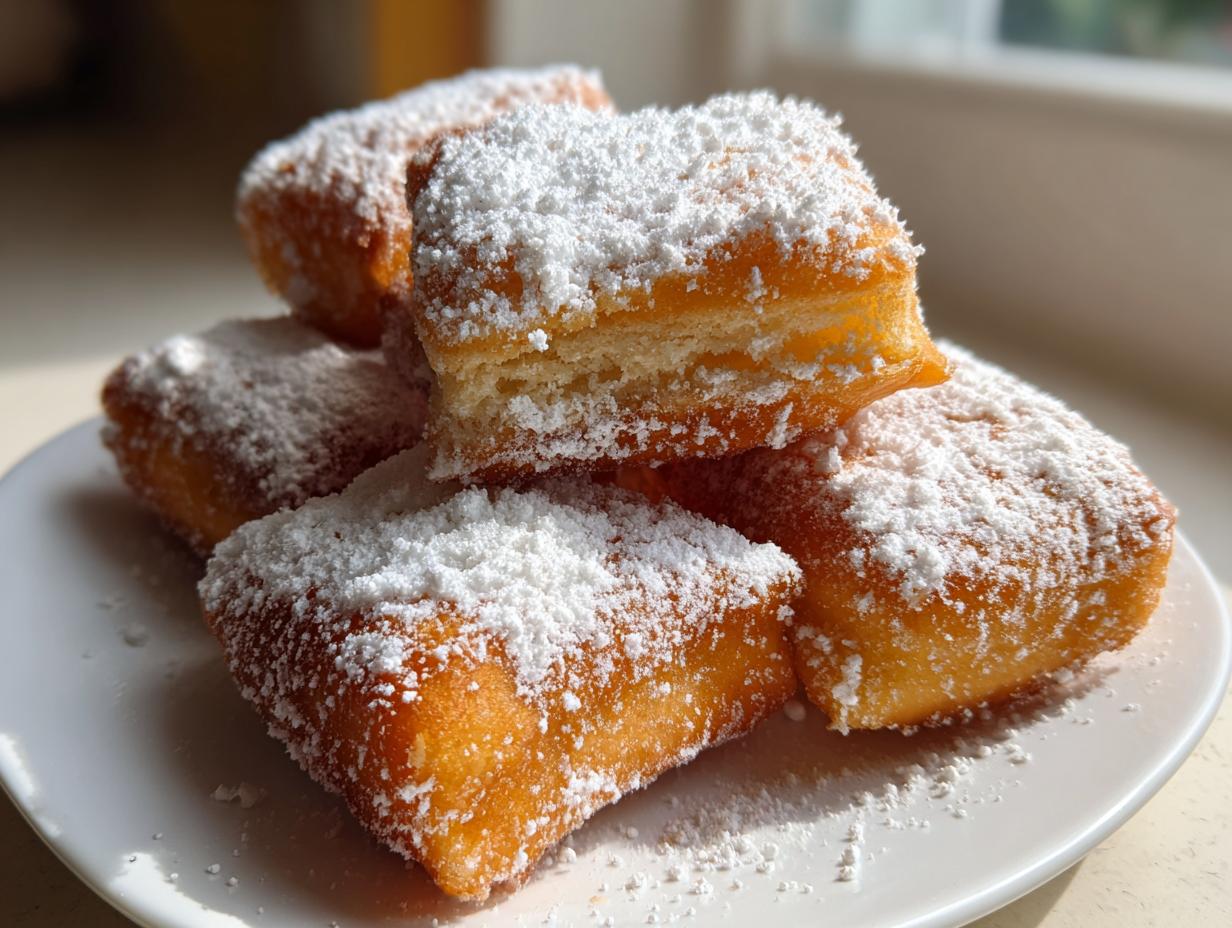
Oh, there is simply nothing that beats biting into a genuinely airy, fresh-from-the-fryer pastry dusted with snow-white sugar. If you know me, you know that patience is key in the kitchen, and that goes double for yeast doughs! But trust me, the wait is absolutely worth it for these vanilla french beignets. We aren’t just using a drop of extract here; we are infusing the dough with real vanilla bean flavor so that cloud-like pastry sings with that rich, warm profile. This recipe is truly the one that brings that cozy, melt-in-your-mouth feeling right to your own table, just like a quiet Sunday morning used to be.
- Why You Will Make These Vanilla French Beignets Again and Again
- Essential Ingredients for Perfect Vanilla French Beignets
- Mastering the Vanilla French Beignets Dough: Step-by-Step
- Frying Technique for Authentic Deep Fried Pastries
- Finishing Touches for Your Classic French Beignet Recipe
- Tips for Success When Making Vanilla French Beignets
- Storage and Reheating Instructions for Fried Dough
- Frequently Asked Questions About Making Vanilla French Beignets
- Serving Suggestions for Traditional French Breakfast Sweets
Why You Will Make These Vanilla French Beignets Again and Again
I’ve tried shortcuts, trust me, but these always win out. Why should this be your go-to recipe for the perfect fried dough?
- That Signature Light Texture: We use a yeast-raised dough that, with the right handling, puffs up perfectly in the oil, giving you that airy center that defines an Authentic Deep Fried Pastry. They practically float off the plate!
- Intense, Real Vanilla Flavor: This isn’t just sweet bread—it’s a flavor experience. By stirring vanilla bean seeds or paste right into the warm milk, that beautiful flavor permeates every single bite. This is what makes them special compared to Homemade Powdered Sugar Donuts.
- Truly Step-by-Step Guidance: As a former teacher, my goal is clarity. I break down the yeast proofing and the frying process so clearly that even if you’ve never worked with yeast, you won’t feel lost making this Classic French Beignet Recipe.
- They Taste Like Tradition: This method honors the classic French technique for Sweet Fried Bread Recipe, giving you that satisfying, slightly chewy crust without ever feeling heavy or greasy.
- They Don’t Wait For You: Beignets are best right now! This recipe is designed so that once the dough is rested, the frying and dusting goes quickly, meaning you get to enjoy your Traditional French Breakfast Sweets at their absolute peak.
Essential Ingredients for Perfect Vanilla French Beignets
When we talk about making bakery-quality vanilla french beignets at home, the quality of what you put in matters a lot. Remember, there are only a handful of things here, so we need to make sure they are the right things! Skip the imitation flavors here; we want the real deal to shine through.
Here is what you’ll need gathered on your counter before we even think about warming the milk:
- One full cup of whole milk—none of that skim business, please! Fat helps the texture stay rich.
- The star! One teaspoon of vanilla bean paste or the seeds scraped from one whole vanilla bean. This is non-negotiable for that deep flavor!
- Two and a quarter teaspoons of active dry yeast. Make sure it’s fresh so we get a good, happy foam later on.
- A quarter cup of regular granulated sugar, plus one extra tablespoon we’ll use later for sprinkling on top.
- A half teaspoon of salt to balance out all that wonderful sweetness.
- One large egg, just lightly beaten—we don’t want meringue here, just combined yolk and white.
- Three cups of all-purpose flour, plus extra for dusting when we roll it out later.
- A quarter cup of unsalted butter that has been melted nice and slow.
- Plenty of vegetable oil for the final step of deep frying.
- And finally, a big bag of confectioners’ sugar for that classic snowy top.
See? Nothing too scary! Just good, honest ingredients that work together to make this Yeast Dough Fritters recipe sing.
Mastering the Vanilla French Beignets Dough: Step-by-Step
Alright, this is where my years of teaching come in handy! Making this Recipe for light pastry dough is much like learning long division—follow the steps precisely, and you’ll get the right answer every time. We start with the yeast, which is the breath of life for these pastries. You need to treat it gently so it wakes up happy and ready to work its magic. We aren’t looking for stiff, heavy dough; we want *tender* dough that promises those airy results, much like the dough I use for my soft, fluffy dinner rolls.
Activating the Yeast and Flavor Infusion
First thing, warm up your whole milk until it feels just right against your wrist—you want it somewhere between 105 and 115 degrees Fahrenheit. If it’s too hot, you’ll kill the yeast, and that’s a sad way to start! Once it’s warmed up, stir in that beautiful vanilla bean paste or the lovely black specks from your scraped bean. Then, dissolve that tablespoon of sugar in there and sprinkle the yeast on top. Give it a quick stir and just let it sit for about five to ten minutes. When you come back, it should look foamy and smell slightly yeasty. That means our vanilla-milk bath is ready for the rest of the ingredients!
Kneading and First Rise for Light and Fluffy Fried Dough
After you mix in the egg, melted butter, and the flour, you’ll have a soft, slightly sticky dough. Don’t panic if it clings a little! That slight stickiness is actually desirable for achieving that authentic lightness. You need to turn it out onto a lightly floured surface and knead it steadily for about five to seven minutes. We aren’t making dense bread here, but we do need to develop structure, which is what gives you that satisfying chewiness later on. Once it feels smooth and elastic, place it in an oiled bowl, cover it tightly, and find a warm, draft-free spot. Let it sit for almost an hour and a half before you check it—we are waiting for it to double in size. When it looks nicely puffed up, we can move on to the frying stage!
Frying Technique for Authentic Deep Fried Pastries
Now we get to the part that makes these vanilla french beignets truly different from a standard donut: the fry! If you have followed my advice on the dough, you have a beautiful, airy base ready to puff up like a happy cloud. When it comes to frying, precision is everything. I learned this the hard way years ago when my oil was too cool, and I ended up with heavy, greasy bread instead of light, ethereal puffs. We have to respect the oil temperature if we want that perfect, authentic result.
Cutting and Preparing Dough Squares
First, gently punch down that pillow of risen dough and let it rest for just a minute while you get your counter ready. Dust your work surface very lightly—we don’t want to incorporate too much extra flour now! Roll the dough out evenly until it’s about 1/4-inch thick. Cut this into neat 3-inch squares. Don’t worry if they aren’t perfect; part of the charm of these sweet fried bread recipe pieces is that rustic look. Try to keep your cuts clean so the edges puff up nicely when they hit the hot oil.

Achieving Golden Perfection: Deep Frying the Vanilla French Beignets
This step demands a thermometer, friends. Heat about two to three inches of vegetable oil in a heavy Dutch oven until it hits exactly 360 degrees Fahrenheit. If it dips much lower than 355°F, they will soak up oil! If it climbs past 365°F, they will burn before the middle cooks. Carefully drop just three or four squares into the oil at a time. Do not try to rush this by overcrowding the pot; that causes the temperature to crash immediately. They cook fast—seriously fast! You’ll see them puff almost instantly. Fry for just a minute or two per side until they achieve a gorgeous, even golden brown color. Use a slotted spoon to pull them out and place them immediately onto a wire rack stacked with paper towels. That drainage time is crucial to wick away any surface grease before we dust them.
Finishing Touches for Your Classic French Beignet Recipe
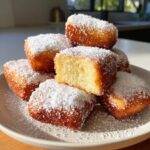
We’ve done the hard work—the mixing, the rising, the careful frying! Now for the grand finale where these pastries go from excellent to absolutely breathtaking. Honestly, a proper beignet relies almost entirely on presentation, and that means sugar, sugar, and more sugar. My favorite way, the way I always served them when the grandchildren came over for a Traditional French Breakfast Sweet, is simple dusting.
Take your warm, drained beignets and work in small batches. Lay them on a large serving platter lined with a fresh paper towel, and take that big canister of confectioners’ sugar. Don’t just sprinkle it lightly; you need to dust them generously until they look like they were just pulled from a fresh winter snowfall! This is part of the fun!
However, if you’re feeling a little extra gourmet, or perhaps you need something a bit more substantial than sugar, we can whip up a quick vanilla glaze. This adds a lovely sheen and another layer of that wonderful vanilla flavor we worked so hard to bake into the dough. This glaze is so simple, taking just minutes, and it’s perfect for when you want something a little richer than a simple dusting.
To make this easy glaze, you’ll need about one cup of sifted confectioners’ sugar. Into that, whisk two tablespoons of milk—just enough to start loosening it up—and then add about half a teaspoon of pure vanilla extract. If you have some extra vanilla buttercream frosting ingredients handy, you can certainly improvise! Whisk until it’s completely smooth and slightly thick, but still runny enough to drizzle beautifully over the warm pastries. A little zigzag pattern makes them look like they came straight from a French bakery!
Whether you choose the classic snow-drift look or the drizzled vanilla glaze, remember that beignets are meant to be eaten immediately. The steam trapped inside starts to collapse the interior structure quickly, so serve them right away and enjoy that perfect, airy bite!
Tips for Success When Making Vanilla French Beignets
I know that the process of working with yeast and deep frying can feel a bit intimidating, but honestly, these vanilla french beignets are all about paying attention to a few key details. Like when I taught third grade, the fundamentals are what give you the best results! If you follow these tips from my kitchen, you’ll be rewarded with the lightest, most flavorful fried dough possible.
First and foremost, let’s talk about temperature control while frying. This is where most people fall down. Remember I mentioned using a thermometer? You simply must keep that oil between 355°F and 365°F. I recall one time, before I trusted my thermometer completely, I fried a batch too hot—they came out looking golden in about 30 seconds, but when I bit into one? It was raw dough inside! A disaster! Too cool, and they drink the oil and become heavy. Stick to that sweet spot for that wonderful light and fluffy fried dough.
Remember what I said about kneading? Don’t overdo it once the flour goes in. We need enough kneading to build structure so the dough can hold that beautiful puffiness when it hits the heat, but too much develops too much gluten and you end up with tough pastries instead of airy ones. Mix just until smooth!
Also, be gentle when rolling out the dough. We are aiming for that 1/4-inch thickness. If you press too hard, you squeeze out all those lovely air bubbles we encouraged during the long rise. This gentle handling helps produce that gourmet French bakery style sweet right at home.
Finally, and this is the hardest part: timing. These pastries deflate eventually, just like a popped balloon. Once they come out of the fryer and drain for just a moment, they need that sugar bath immediately, and then they need to be eaten! Don’t save them for later if you can help it. The magic of these Authentic Deep Fried Pastries is that immediate contrast between the warm, soft interior and the cool, sweet powdered sugar exterior. Gather everyone around the kitchen counter the minute they’re ready!
Storage and Reheating Instructions for Fried Dough
Bless your heart if you have leftovers! Honestly, these vanilla french beignets are famous because they are meant to be eaten piping hot a minute after they leave the oil. They are at their absolute peak when they are golden brown and still billowing steam before you dust them. That airy structure just doesn’t like to hang around for long!
If, by some miracle, you have a few squares left over after breakfast, you need to handle them gently so they don’t lose all that wonderful lightness that took us three hours to develop. Don’t even think about wrapping them tightly in plastic wrap while they are still warm; that traps residual moisture and they will turn soft and chewy in the worst way.
For short-term storage—meaning, eating them the same day, maybe for a little mid-afternoon treat—place them in a paper bag on the counter. The paper lets them breathe just a tiny bit while protecting them. An airtight container is okay if you must, but keep it to just a few hours.
Now, here is my absolute rule for reheating this sweet fried bread recipe: The microwave is forbidden! It turns them into rubbery little hockey pucks, and we worked too hard on this Classic French Beignet Recipe for that to happen. If you truly want to bring them back to life, use the oven. Set your oven to a very low temperature, maybe 250 degrees Fahrenheit, and place the beignets directly onto a baking sheet, perhaps with a little rack if you have one handy. Let them warm through for just about 5 to 7 minutes.
This gentle heat coaxes out any slight softness from the storage process and re-crisps the exterior just enough. As soon as they are warm, pull them out and dust them with a fresh shower of confectioners’ sugar. They won’t have that original glorious puff, but they will still taste wonderful!
Frequently Asked Questions About Making Vanilla French Beignets
When you’re tackling a truly wonderful recipe like this, you often have a few worries pop up along the way. That’s perfectly normal! I’ve collected some of the questions I usually get about this vanilla french beignets process to put your mind at ease. Think of this like a little extra help session right after class!
Can I substitute the vanilla bean paste in this Classic French Beignet Recipe?
You certainly can substitute, but you have to know what you are swapping for! If you don’t have paste or a fresh bean, pure vanilla extract works in a pinch. Just remember, the extract is more volatile and some flavor might bake off during the frying, so it won’t have that deep, lingering warmth that the paste provides. If you use extract, I’d start with 1 1/2 teaspoons, tasting the milk mixture before you add the yeast, just to make sure the vanilla note is strong enough for you. We want these to taste like they came from a Gourmet French Bakery Style Sweet shop!
What oil temperature is necessary for Airy Fried Dough Tutorial?
This is the non-negotiable part! For this Light and Fluffy Fried Dough, you absolutely must keep your oil between 355 and 365 degrees Fahrenheit. This narrow window is the difference between a lovely, puffy confection and a heavy, greasy mess. If the oil is too cool, the dough sits there and absorbs fat before it can set, making them heavy. Too hot, and the exterior burns immediately, leaving you with uncooked centers. Use that thermometer, check every batch, and you’ll master this Homemade New Orleans Style Donuts technique in no time!
Can I use instant yeast instead of active dry yeast?
Yes, you can! Instant yeast is wonderful because it doesn’t need that proofing bath, but you still need to pay attention to the milk temperature so you don’t hurt it. If using instant yeast, you can skip the step where you wait 10 minutes for the foam. Just mix the instant yeast right in with your dry flour mixture first, and then add that mixture to the warmed vanilla milk. It saves a little time on your front end!
Are these really different from other Recipe for Light Pastry Dough fritters?
Oh yes, they are! The main difference is the yeast and the texture goal. Standard fruit fritters or quick doughs are often made with baking powder or soda, which gives them a denser, cake-like crumb. Because beignets rely on yeast, they get that beautiful, elastic quality that allows them to inflate into large, hollow-ish pillows when fried. That yeast dough is what officially makes them Traditional French Breakfast Sweets and not just any fried bread!
Serving Suggestions for Traditional French Breakfast Sweets
Once you’ve pulled these beautiful vanilla french beignets from the oil and dusted them until they look like they belong on a postcard, the real question becomes: what do you serve them with? In my family, the answer always starts with coffee that is strong enough to stand a spoon up in! Tradition demands a cup of dark roast, or even better, a big bowl of steaming hot café au lait. There is just something about dipping that warm, sugary pastry into hot coffee that just sings “weekend morning.”
When I was teaching, this recipe was my go-to special treat for parent-teacher nights. The aroma alone would bring everyone running! For those moments, I always paired them simply with coffee, but I know sometimes you want a little something extra to balance out all that wonderful richness.
If you find yourself wanting just a touch of something bright to cut through that fried goodness—and I won’t judge, sometimes that sweetness needs a friend—a simple fruit pairing works magic. Think about fresh raspberries or maybe some sliced strawberries. They bring a little tartness that complements the dark vanilla so nicely. Another wonderful choice is a nice homemade fruit compote. If you’re feeling ambitious and want a little extra chocolate decadence for the adults, you can whip up a quick drizzle using my recipe for easy homemade chocolate sauce. A little drizzle of that dark richness over the bright white sugar is just heavenly.
No matter what you pair them with, though, remember that these Traditional French Breakfast Sweets are best enjoyed slowly, with company, and definitely while they are still warm. Now that you know how to make them perfectly, I hope they bring as much joy to your kitchen as they’ve always brought to mine!
PrintAuthentic Vanilla Bean French Beignets
Make light, airy, yeast-raised French beignets flavored with real vanilla bean, perfect for a traditional breakfast treat.
- Prep Time: 25 min
- Cook Time: 15 min
- Total Time: 1 hour 55 min
- Yield: About 18 beignets 1x
- Category: Dessert
- Method: Deep Frying
- Cuisine: French
- Diet: Vegetarian
Ingredients
- 1 cup whole milk
- 1 teaspoon vanilla bean paste (or seeds scraped from 1 vanilla bean)
- 2 1/4 teaspoons active dry yeast
- 1/4 cup granulated sugar, plus 1 tablespoon for sprinkling
- 1/2 teaspoon salt
- 1 large egg, lightly beaten
- 3 cups all-purpose flour, plus more for dusting
- 1/4 cup unsalted butter, melted
- Vegetable oil, for deep frying
- Confectioners’ sugar, for dusting
Instructions
- Warm the milk in a small saucepan until it is lukewarm, about 105 to 115 degrees Fahrenheit. Remove from heat and stir in the vanilla bean paste or seeds.
- In a large bowl, dissolve the yeast and 1 tablespoon of the granulated sugar in the warm vanilla milk. Let stand for 5 to 10 minutes until foamy.
- Stir in the remaining 1/4 cup of sugar, salt, melted butter, and the beaten egg into the yeast mixture.
- Gradually add the flour, mixing until a soft, slightly sticky dough forms.
- Turn the dough out onto a lightly floured surface and knead for about 5 to 7 minutes until the dough is smooth and elastic.
- Place the dough in a lightly oiled bowl, turning to coat. Cover the bowl with plastic wrap or a clean kitchen towel and let it rise in a warm place for 1 to 1.5 hours, or until doubled in size.
- Gently punch down the risen dough. On a lightly floured surface, roll the dough out to about 1/4-inch thickness.
- Use a sharp knife or a 3-inch square cutter to cut the dough into squares.
- Heat 2 to 3 inches of vegetable oil in a deep, heavy-bottomed pot or Dutch oven to 360 degrees Fahrenheit. Use a thermometer to maintain this temperature.
- Carefully drop 3 or 4 dough squares into the hot oil, being careful not to overcrowd the pot. Fry for about 1 to 2 minutes per side, until they puff up and turn golden brown.
- Use a slotted spoon to remove the beignets from the oil and place them on a wire rack lined with paper towels to drain excess oil.
- While still warm, dust the beignets generously with confectioners’ sugar. Serve immediately.
Notes
- For the lightest texture, do not over-knead the dough once the flour is incorporated.
- Maintain the oil temperature strictly between 355 and 365 degrees Fahrenheit; oil that is too cool results in greasy beignets, and oil that is too hot burns the outside before the inside cooks.
- If you prefer a vanilla glaze instead of powdered sugar, mix 1 cup confectioners’ sugar with 2 tablespoons milk and 1/2 teaspoon vanilla extract, then drizzle over the cooled beignets.
Nutrition
- Serving Size: 1 beignet
- Calories: 180
- Sugar: 8
- Sodium: 120
- Fat: 8
- Saturated Fat: 2
- Unsaturated Fat: 6
- Trans Fat: 0
- Carbohydrates: 24
- Fiber: 1
- Protein: 3
- Cholesterol: 25