
Oh, friends, there are dishes that simply feed the body, and then there are those that feed the soul. For me, nothing says ‘welcome home’ quite like a big, warm bowl of creamy grits. When I think about my childhood growing up in the Midwest, I didn’t have grits often, but when my Southern friends made them, I understood immediately why they were a staple. They are the ultimate comfort food side dish, but only if you get the texture just right!
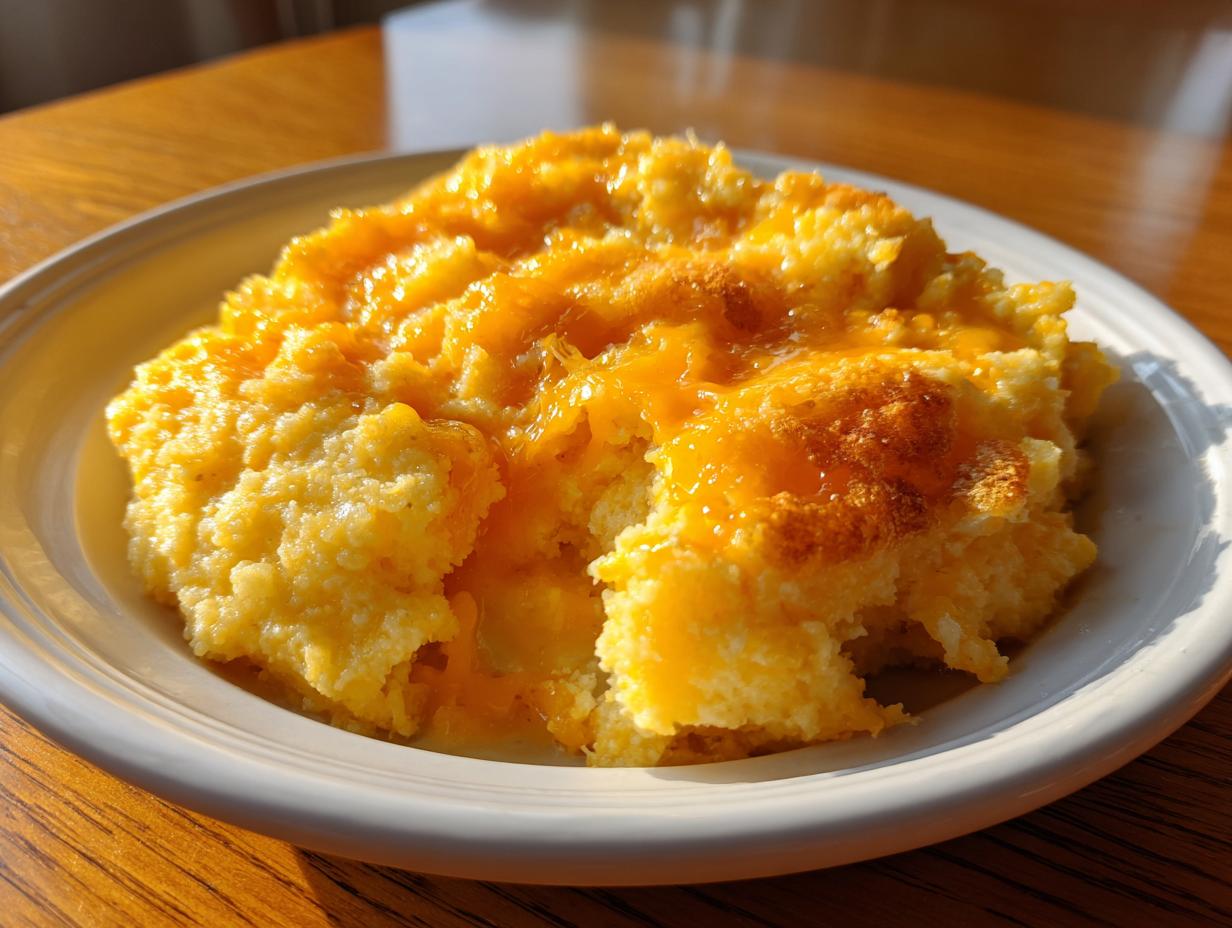
Today, I’m sharing what I’ve found to be the definitive recipe: the Ultimate Creamy Southern Cheese Grits. This isn’t some thin, watery mess that slides off your spoon, goodness no! My teaching career taught me patience, and Southern cooking demands patience, especially when it comes to texture. If you follow along, I promise you these cheese grits will be rich, satisfying, and velvety smooth every single time. This recipe uses sharp cheddar and a secret touch of heavy cream to make sure you get that authentic, deeply comforting result we all crave.

- Why This is the Best Cheese Grits Recipe You Will Make
- Gathering Ingredients for Rich and Buttery Cheese Grits
- How to Make Cheese Grits: The Stovetop Method
- Tips for Success with Southern Cheese Grits
- Serving Suggestions for Your Savory Grits Side Dish
- Storage and Reheating Creamy Cheese Grits
- Variations on Classic Cheese Grits
- Frequently Asked Questions About Homemade Grits Recipe
- Nutritional Estimate for Ultimate Creamy Cheese Grits
Why This is the Best Cheese Grits Recipe You Will Make
Look, I’ve tried recipes where the grits tasted mostly like salty water, and I know you want to avoid those too! My goal here is authentic Southern flavor. That means we lean heavily on freshly grated, sharp cheddar cheese; it cuts through the richness perfectly. If you’ve been searching for a truly great Creamy Grits Recipe, you’ve found it. We are focusing on a rich and buttery profile that stands up as a marvelous savory side dish, whether it’s breakfast or dinner on your table.
We want these to be the standard by which you judge all other Sharp Cheddar Grits. If you’re prepping for a brunch gathering, you can even look at my Southern Cheese Straws recipe for another classic appetizer!
Achieving Ultimate Creamy Cheese Grits Texture
The secret to that unbelievably silky texture isn’t a fancy gadget; it’s about managing temperature and richness. We cook these slowly, stirring often, which allows the starches to release beautifully. Adding heavy cream right near the end, coupled with low, gentle heat, ensures the fats emulsify instead of breaking. This keeps everything smooth, never grainy!
Gathering Ingredients for Rich and Buttery Cheese Grits
When we make something as essential as Southern Cheese Grits, we simply must start with the best building blocks. Quality in equals quality out, that’s what my mom always said, whether we were making grits or homemade mayonnaise. Using fresh, good ingredients makes these Comfort Food Grits taste like they came straight from a Southern kitchen.
Here is everything you need for four generous servings. Measure everything out, and let’s get these beauties cooking!
- 1 cup stone-ground grits (Don’t substitute yet, stick with me for now!)
- 4 cups water
- 1 cup whole milk
- 1 cup heavy cream (This is where the magic happens!)
- 1 teaspoon salt
- 1/2 teaspoon black pepper
- 1/2 cup unsalted butter (Needs to be real butter, please!)
- 2 cups sharp cheddar cheese, freshly grated (And I mean freshly grated off a block!)
Ingredient Notes and Substitutions for Your Cheese Grits
Now that you see the list, let me give you a few quick pointers, kind of like those little tips I used to share with my third-graders!
First, about those grits: If you want that fantastic, slightly rustic texture that holds up beautifully, you absolutely need stone-ground grits. Quick-cooking grits will be ready faster, sure, but they break down too much, and you won’t get that proper, satisfying chew. For the Best Cheese Grits experience, the longer slow cook with stone-ground is worth it!
Second, the cheese! I cannot stress this enough: buy a block of sharp cheddar and grate it yourself. The pre-shredded kinds are coated in starches so they don’t stick together in the bag, but those coatings stop them from melting into a perfectly smooth sauce for your cheese grits. We want smooth elegance here, not clumps!
Finally, for a little extra depth that really complements the dairy, I sometimes replace half of the water with good quality chicken or vegetable broth. It adds a lovely savory note to the final bowl. Just don’t skip the liquids, or you’ll end up with a brick instead of delicious Creamy Grits Recipe!
How to Make Cheese Grits: The Stovetop Method
It’s time to stop fearing the pot! I know grits can seem intimidating—they can splatter, they can stick, and if you walk away for two minutes, they can turn into something you need a chisel to serve. That’s why I teach this method with the clarity I used for my second graders; we go slow, and we pay attention. This is a classic Stovetop Grits process that guarantees a perfect final texture.
Remember, good things take time. If you rush the cooking, you rush the flavor, and you definitely rush the creaminess. We’re aiming for rich, buttery results, not a fast-food imitation.
Step 1: Simmering the Liquid Base for Creamy Grits Recipe
First things first, grab your heavy-bottomed saucepan. I always pick the thickest pot I own because those hold heat more evenly, which is better for preventing scorching on the bottom. We are combining the water and the whole milk together in that pot.
Put that mixture over medium heat and let it come up to a gentle simmer—you’ll start seeing tiny bubbles hugging the sides of the pan. We don’t want a rolling boil yet, just gently warming it up before we introduce the grits themselves.
Step 2: Cooking the Grits and Adding Richness to Your Cheese Grits
Once that liquid is happy (simmering gently!), grab your salt and whisk it in quickly. Now, take your 1 cup of stone-ground grits and whisk them in steadily. As soon as they are mixed in, drop that heat way down to low. Why low? Because we are slowly coaxing the starch out of those corn kernels, not aggressively boiling them!
This is where your patience comes in. You need to cook these for a good 25 to 30 minutes. You must stir frequently—maybe every minute or so at first, then every couple of minutes—especially scraping the bottom so nothing burns or sticks. If they get too stiff before the time is up, just splash in a tiny bit more water or milk to keep them movable.
Once the grits are totally tender, turn the heat off completely. Now, stir in that heavy cream and all the butter until they melt right into the mixture. If you want to check out some other easy breakfast recipes while they cook, that’s a fine distraction!
Step 3: Incorporating the Sharp Cheddar for Perfect Cheese Grits
Okay, this is the most important part for avoiding that gritty, clumpy texture! Always remove the pot from the heat source before you add the cheese. If the liquid is too hot when the cheese goes in, the proteins tighten up, and you get clumps instead of smooth sauce. That’s a tragedy!
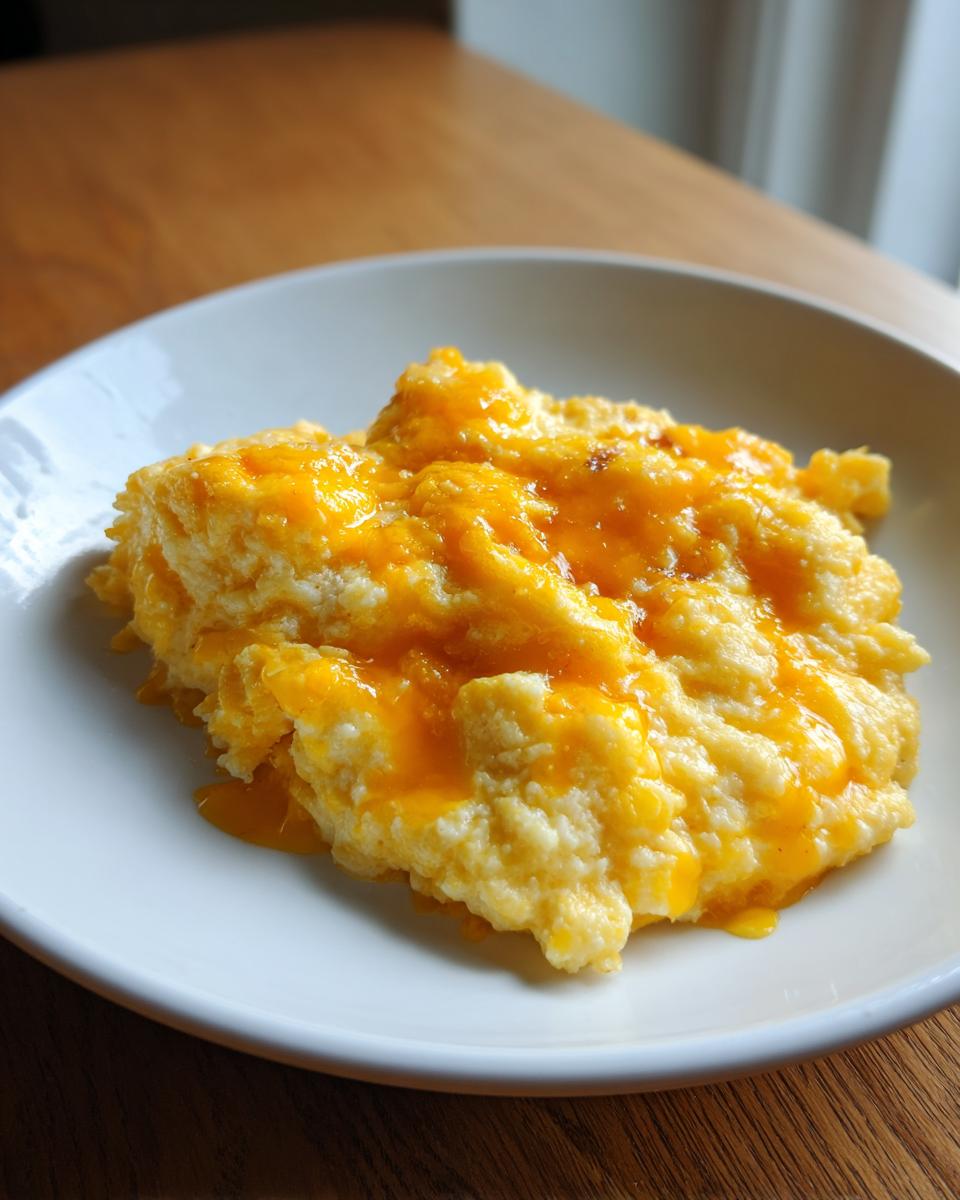
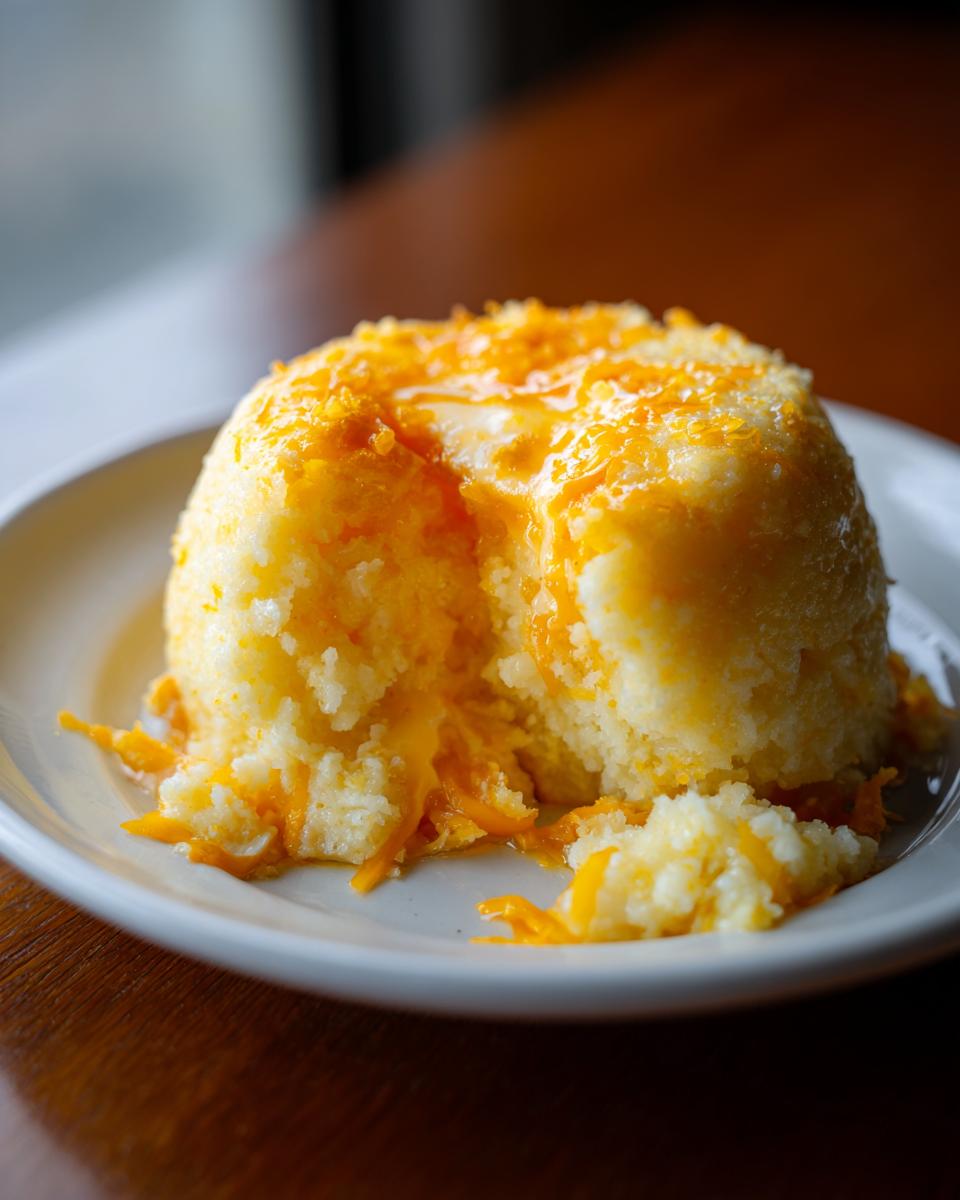
Add your 2 cups of freshly grated sharp cheddar cheese in handfuls, stirring gently but thoroughly after each addition until it vanishes and makes your cheese grits perfectly smooth and gooey. Once it’s all melted beautifully, taste them! They usually need a bit more salt now that the flavor is concentrated, and definitely finish with that black pepper. You can see Paula Deen’s version for inspiration over at this site, but mine is all about that finishing smoothness!
Tips for Success with Southern Cheese Grits
We’ve made the batch, and now we want to ensure that every time you pull out that saucepan for more Comfort Food Grits, it comes out exactly the same way—creamy, savory, and oh so satisfying. I’ve learned a few things over the years that turn a good bowl of grits into the Best Cheese Grits you’ll ever have. These aren’t complicated science experiments; they are just tried-and-true methods that work in a real home kitchen, just like those tips I always gave my students before a big test.
If you want to serve these alongside some amazing cornbread, you should really check out my recipe for Sourdough Cornbread! It holds up perfectly to the richness of these grits.
Choosing the Right Grits for Your Cheese Grits
This is probably the most common mistake I see people make when trying to recreate authentic Southern Cheese Grits. You have options: quick-cooking, regular, or stone-ground. Quick-cooking grits are my last resort; they cook fast, sure, but they taste mushy and they break down too quickly when you add cheese, which is how you get that watery texture we are trying to beat!
For the richest, most satisfying mouthfeel—that slight structure that lets you know you’re eating real corn—you must use stone-ground grits. Yes, they take longer, usually 30 minutes or so on the stove, but that longer cooking time allows the whole corn kernel to hydrate slowly and release the starches that act as your natural thickening agent. That careful process is what gives you that thick, luxurious base before the butter and cheese even come into play. Think of it as the foundation of a really sturdy house; you need the right materials from the start!
If you want to see the exact creaminess we are aiming for, check out the detailed texture description over at this article. It truly captures that smooth, rich goal!
Serving Suggestions for Your Savory Grits Side Dish
Now that you have achieved perfect, rich, cheesy perfection, the world is your oyster! These aren’t just for breakfast anymore, though they certainly shine beside scrambled eggs and biscuits. When I serve these at dinner, folks always ask what magical ingredient I used to make them so wonderfully luxurious. The secret, as we know, is just technique and good, sharp cheddar!
These are wonderful utilized as a fantastic Savory Grits Side for almost any centerpiece protein. They soak up sauce beautifully, which is why they are the star of so many classic Southern dishes. If you are looking for a wonderful main dish to pair them with, my recipe for Shrimp Creole is divine spooned right over a generous bed of these cheese grits.
For brunch occasions or larger family meals, I love presenting these as part of the spread. They pair well with almost anything savory or slightly sweet. Here are a few of my family’s favorite ways to enjoy these Southern Comfort Food Sides:
- Shrimp and Grits: Of course! Make sure you have a little extra butter ready to swirl in right before serving if they’ve sat too long.
- With Bacon and Eggs: The king of breakfast! Skip the toast and use these instead. Check out some general easy breakfast recipes for other ideas to round out your morning plate.
- Accompanying Roasted Meats: They function beautifully in place of potatoes or rice next to grilled chicken or roasted pork loin. The cheese sauce is just so satisfying!
- As a Base for Toppings: Feel free to top them with sautéed mushrooms, crumbled bacon, or a fried egg for an intensely flavorful light meal.
Honestly, once you learn how to make these Creamy Grits Recipe just right, you’ll find yourself wanting to serve them with everything. They truly elevate a simple meal!
Storage and Reheating Creamy Cheese Grits
Now, I want to talk a little bit about the numbers behind these luscious cheese grits. I worked hard as a teacher, and I know that keeping track of what we eat matters, even when we are enjoying deep comfort food meant for the soul! Please remember that these figures are what I’ve calculated based on the usual brands I purchase in my kitchen. Because we are using rich ingredients like heavy cream and sharp cheddar, these are definitely a splurge, but oh, are they worth it!
If you do have any of this ultimate creamy goodness left, you can store it in an airtight container in the refrigerator for up to three days. Be warned, though: like many wonderful dairy-based dishes, they will firm up considerably as they cool down. They won’t look like the luxurious, pourable dish you just made, but don’t panic!
When you’re ready to enjoy them again, you can’t just microwave them dry. That is the fastest way to end up with rubbery, clumpy grits, and we simply cannot allow that to happen to our beautiful Comfort Food Grits.
Take the amount you want to eat and place it in a saucepan—yes, the stovetop works best here! Add a splash, and I mean just a small splash, of extra liquid for every serving you are reheating. I usually grab a little extra milk or water, but leftover chicken broth works wonders too, adding flavor back into the starch.
Heat them slowly over medium-low heat, stirring constantly. As the liquid warms up, it gently rehydrates those cooked corn particles, bringing them back to that beautiful, smooth consistency. You’ll be amazed at how close they come back to the original texture. If you do use the microwave, add the liquid, cover the bowl loosely, and heat in short 30-second bursts, stirring well between each zap to ensure you don’t create any dry, hot spots. Enjoy reusing your fantastic Rich and Buttery Grits!
Variations on Classic Cheese Grits
The beauty of mastering something as foundational as cheese grits is that once you know the base technique—the slow cook, the right liquids, and adding cheese off the heat—you can start playing with flavors! My approach is always to respect the original Southern Comfort Food Sides while adding a little something new, kind of like how I experiment with different flavors in my corn fritter recipes.
You don’t have to stick solely to sharp cheddar, though I’ll always argue that sharp is the best starting point for that deep, savory punch. Feel free to introduce other cheeses for complexity or add some savory mix-ins when you stir in that wonderful cheddar.
If you’re looking for a German twist, try swapping out a third of that cheddar for some nutty Gruyère. The way Gruyère melts is just fabulous. Or, if you want to take these up a notch for a brunch centerpiece, try stirring in a half cup of your favorite pimiento cheese right at the end! Oh my goodness, that adds such a delightful tang and creaminess. I saw a wonderful variation on a German site that used some unique spices too, you can peek at what they were doing over at this page.
For texture and savory notes, you can absolutely fold in cooked, crumbled bacon right before serving—bacon makes everything better, doesn’t it? Similarly, a light sprinkle of finely chopped fresh chives or green onion tops adds a wonderful freshness that cuts through the richness of the dairy, making those Rich and Buttery Grits feel instantly lighter and brighter. Experiment, my dear cooks, you’ve mastered the base recipe, now let’s have some fun with flavor!
Frequently Asked Questions About Homemade Grits Recipe
I know sometimes when you are standing over the pot, questions just pop right into your head! That’s completely normal, especially when trying to nail that perfect richness in a dish like this. We want these Comfort Food Grits to be perfect for you, whether you are making them for a slow weekend breakfast or using them as a simple savory side dish tonight. Here are a few things folks ask me most often about getting these cheese grits just right.
Can I make these cheese grits faster than 30 minutes?
Oh, honey, I wish! The answer depends entirely on the type of grits you start with. Remember how I went on and on about stone-ground? Those are the ones that take that 25 to 30 minutes on the stovetop to soften properly and release their starches for that creamy texture we absolutely love. If you use quick-cooking grits, you can certainly get an edible bowl in about 5 minutes!
However, here is the trade-off: those Quick Grits usually lack the body and chew of the stone-ground variety. They often end up either too soupy or too gluey because the quick-cooking process doesn’t allow the starch granules to swell and break down as beautifully. If you are short on time, yes, you can use them, but you likely won’t achieve this recipe’s ‘Ultimate Creamy’ status. For the Best Cheese Grits, it’s worth the wait!
What is the best cheese to use for Southern Cheese Grits?
This is where you shouldn’t skimp! I am a firm believer that you need sharp cheddar cheese for this recipe. Why sharp? Because we are loading these grits up with butter, heavy cream, and milk. If you use a mild cheddar, the final product tastes overwhelmingly rich and buttery, but you lose that wonderful, tangy, savory punch that makes Southern Cheese Grits so addictive.
The sharpness of the cheddar stands up perfectly to all that dairy fat. And please, please, please, remember to grate it yourself! That pre-shredded stuff clumps up when it melts because of the anti-caking agents. We want maximum melt and maximum flavor contrast against all that creaminess. If you need some ideas for quick meals, I keep a running list of quick, healthy lunch ideas for busy days, but these grits are best when you take your time!
Nutritional Estimate for Ultimate Creamy Cheese Grits
Now, I want to talk a little bit about the numbers behind these luscious cheese grits. I worked hard as a teacher, and I know that keeping track of what we eat matters, even when we are enjoying deep comfort food meant for the soul! Please remember that these figures are what I’ve calculated based on the usual brands I purchase in my kitchen. Because we are using rich ingredients like heavy cream and sharp cheddar, these are definitely a splurge, but oh, are they worth it!
The estimates below are for one of the four servings, assuming you follow this exact recipe down to the letter. If you use less butter or swap out the heavy cream for half-and-half, things will certainly change!
- Serving Size: 1 serving
- Calories: 550
- Fat: 40g
- Saturated Fat: 24g
- Trans Fat: 1g
- Cholesterol: 110mg
- Sodium: 750mg
- Carbohydrates: 38g
- Fiber: 3g
- Sugar: 3g
- Protein: 18g
These estimates are just a guide for you as you plan your meals around this delicious Southern staple. They show you that while these are a fantastic source of energy (hello, carbs from the corn!), they are naturally rich in fat, which is what gives our Creamy Grits Recipe that wonderful, satisfying mouthfeel. If you are trying to keep the sodium down, remember that the salt content will rise or fall based on the saltiness of your broth or the butter you choose. Enjoy this homemade goodness, knowing exactly what you’re getting!
PrintUltimate Creamy Southern Cheese Grits

Make rich, comforting Southern Cheese Grits using sharp cheddar and heavy cream for an authentic, smooth texture. This stovetop recipe is perfect as a savory side dish or a hearty breakfast.
- Prep Time: 5 min
- Cook Time: 35 min
- Total Time: 40 min
- Yield: 4 servings 1x
- Category: Side Dish
- Method: Stovetop
- Cuisine: American Southern
- Diet: Vegetarian
Ingredients
- 1 cup stone-ground grits
- 4 cups water
- 1 cup whole milk
- 1 cup heavy cream
- 1 teaspoon salt
- 1/2 teaspoon black pepper
- 1/2 cup unsalted butter
- 2 cups sharp cheddar cheese, freshly grated
Instructions
- Combine water and milk in a heavy-bottomed saucepan. Bring the liquid to a simmer over medium heat.
- Slowly whisk in the grits and salt. Reduce the heat to low.
- Cook, stirring frequently to prevent sticking, for 25 to 30 minutes, or until the grits are thick and tender. If the mixture becomes too thick, add a splash more water or milk.
- Stir in the heavy cream and butter until the butter is fully melted and incorporated.
- Remove the saucepan from the heat. Stir in the grated sharp cheddar cheese until it melts completely and the grits are smooth and creamy.
- Season with black pepper. Taste and add more salt if needed. Serve immediately as a savory side dish or breakfast staple.
Notes
- Use freshly grated sharp cheddar cheese for the best melt and flavor. Pre-shredded cheese contains additives that prevent smooth melting.
- For extra richness, substitute half of the water with chicken or vegetable broth.
- If you prefer a less thick texture, increase the initial water/milk ratio slightly.
Nutrition
- Serving Size: 1 serving
- Calories: 550
- Sugar: 3
- Sodium: 750
- Fat: 40
- Saturated Fat: 24
- Unsaturated Fat: 16
- Trans Fat: 1
- Carbohydrates: 38
- Fiber: 3
- Protein: 18
- Cholesterol: 110