
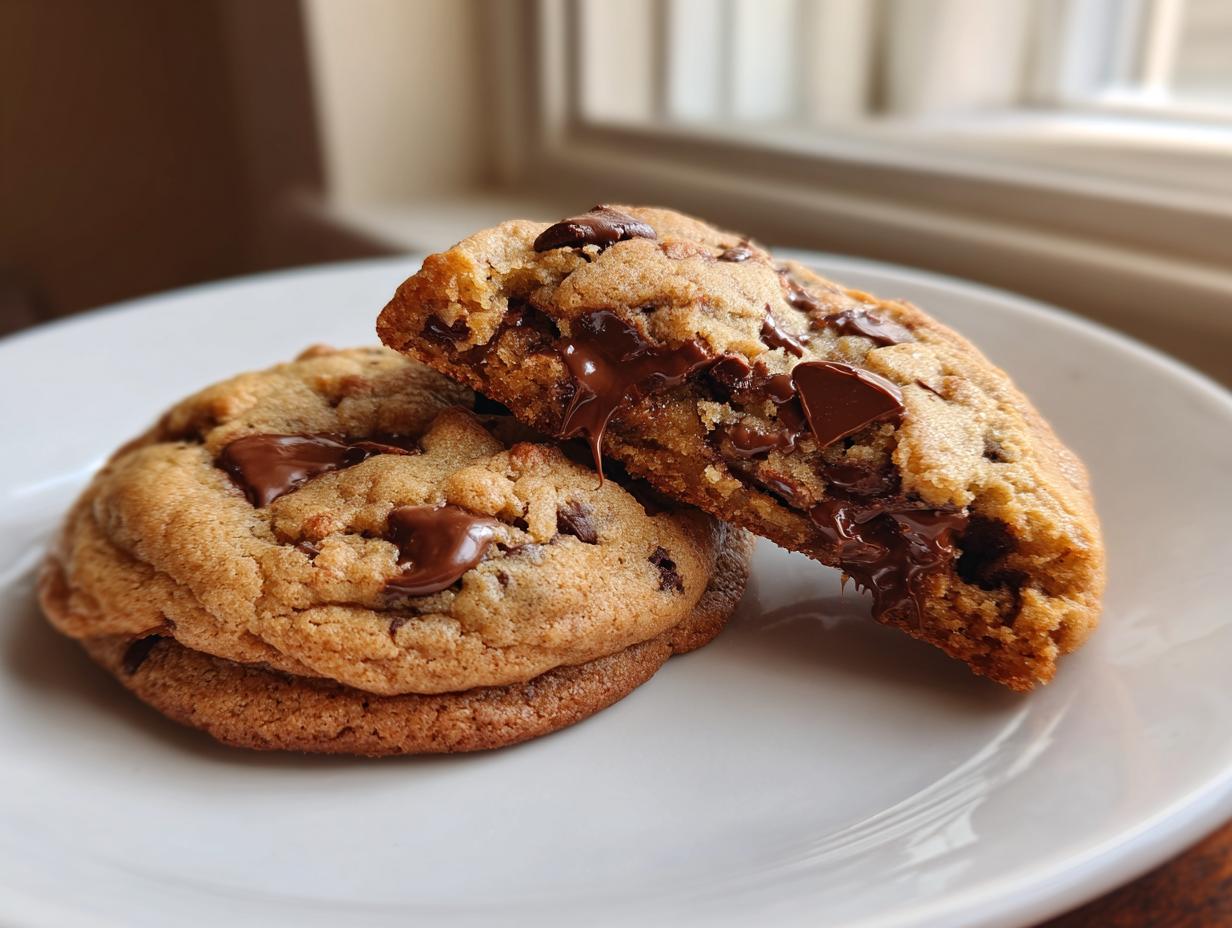
Oh, friends, if you’ve ever stood in front of an open cookie jar wishing your homemade treats had that perfect loft—crispy on the outside, wonderfully chewy, and a melted, gooey center—then you’ve come to the right place. I’ve finally landed on what I call the ultimate bakery style chocolate chip cookies. After years of teaching and testing, I can tell you these are far superior to any classic cookie recipe you might have tried before. Forget those flat, sandy things that come out of the package; we are making cookies that taste like they were handed to you warm from the counter at the best local shop!
My own grandchildren always ask for these when they visit, and I love watching them try to hold the thick cookie together before it all melts in their hands. We are going to achieve that thick, soft batch texture using just a few simple, foolproof steps when we bake these from scratch.
If you are looking for more delightful sweets to wow your family, please check out my collection of my best dessert recipes!
- Why This Ultimate Recipe Makes the Best Chocolate Chip Cookies
- Ingredients for Perfect Bakery Style Chocolate Chip Cookies
- Step-by-Step Instructions for Ultimate Chocolate Chip Cookies
- Tips for Success When Making Homemade Chocolate Chip Cookies
- Making Ahead and Storing Your Chocolate Chip Cookies
- Variations on Classic Chocolate Chip Cookies
- Frequently Asked Questions About These Chocolate Chip Cookies
- Serving Suggestions for Your Chocolate Chip Cookies
- Nutritional Estimate for These Chocolate Chip Cookies
- Share Your Ultimate Chocolate Chip Cookies Experience
Why This Ultimate Recipe Makes the Best Chocolate Chip Cookies
Now, I know what you might be thinking: “Another chocolate chip cookie recipe?” Trust me when I say this method is different. We aren’t just guessing here; we are following some tried-and-true principles to ensure every cookie is picture-perfect—thick, chewy, and with those melty, gooey centers everyone loves. It’s about technique, dear ones, and once you master these few things, you’ll never go back to the standard recipe again.
Here is what sets these bakery style cookies apart from the ones that just melt into a puddle:
- The chilling time is non-negotiable for that beautiful height.
- We use a specific balance of sugars to guarantee chewiness, not crispiness all the way through.
- The extra egg yolk adds richness and structure, keeping the cookie soft.
For more reliable baking results that always turn out wonderfully, remember to look at my guide on making a classic melt-in-your-mouth butter cookie, too!
The Secret to Thick Chocolate Chip Cookies: Dough Chilling
This is probably the most important trick I learned for making these rich, thick chocolate chip cookies. When you mix the dough briefly and then let it rest in the refrigerator, the flour has time to fully hydrate. What does that mean for you? It means the dough won’t spread out too much in the heat of the oven!
If you’re rushing, chill for at least 30 minutes. That will help. But for the absolute best thickness and that true bakery style cookie look, I always tell people to leave it overnight. When you chill the dough longer, the fats firm up, and you get those gorgeous high edges around the cookie.
Achieving Chewy Chocolate Chip Cookie Texture with Sugar Ratios
The secret weapon for chewiness, besides chilling, is the sugar ratio. We use much more light brown sugar than white sugar in this recipe. Brown sugar has molasses in it, and molasses is naturally acidic and holds moisture better than plain white sugar.
That ratio ensures two things: a deep, almost caramel-like flavor, and that soft, wonderfully chewy inside texture we are aiming for. The little bit of white sugar we do use helps those edges get just a tiny bit crisp, giving you that perfect bite contrast in your homemade chocolate chip cookies.
Ingredients for Perfect Bakery Style Chocolate Chip Cookies
Gathering your ingredients is the next step, and just like when I taught my third-grade class, having everything measured out and ready makes the actual process so much calmer! This recipe for the ultimate chocolate chip cookies relies on fresh, quality items. We are looking for specific temperatures and preparations here, so nothing is accidental.
I always use unsalted butter because I like to control the salt myself, and make sure you let that butter get soft—not melted, just able to leave a dent when you press on it. And please, remember to set out your eggs ahead of time! When they are room temperature, they mix much better with the fat, creating a smoother batter that holds air.
For richer flavors in your dessert, you can always find lovely inspiration in my easy homemade chocolate pudding recipe while you are preheating the oven!
Here is what you need to assemble your dough:
- 1 cup (2 sticks) unsalted butter, softened
- 1 cup packed light brown sugar
- 1/2 cup granulated white sugar
- 2 large eggs, room temperature
- 1 large egg yolk, room temperature
- 1 tablespoon vanilla extract
- 2 1/4 cups all-purpose flour
- 1 teaspoon baking soda
- 1 teaspoon salt
- 2 cups semi-sweet chocolate chips (or a mix of chips and chunks)
- Flaky sea salt for topping (optional)
Ingredient Notes and Substitutions for Chocolate Chip Cookies
Let’s talk specifics, because those little details really push these over the edge into the “best cookie in the world” category. First, that extra egg yolk I listed? That is absolutely crucial! It adds fat and protein, which translates directly to that thick structure and amazing chewiness we want in our homemade chocolate chip cookies. Do not skip it!
Also, room temperature eggs are key because cold eggs can cause the creamed butter and sugar to seize up. We want smooth mixing! When it comes to the chocolate chips, I often use a mix. I use semi-sweet chips along with some roughly chopped milk chocolate chunks if I have them. This creates those wonderful pockets of melty chocolate chip cookies when you bite into them.
Finally, don’t skip the flaky sea salt on top if you can help it. It’s not just for looks! Sprinkling just a tiny pinch on top of the dough balls before baking balances the intense sweetness perfectly and makes them look just like those wonderful bakery style cookies.
Step-by-Step Instructions for Ultimate Chocolate Chip Cookies
Alright, now that we have all of our beautiful ingredients ready, it’s time to bring this dream cookie dough together! Remember what I always tell the grandkids: baking is like following a good map—if you follow the directions carefully, you’ll end up somewhere wonderful. We are baking the ultimate chocolate chip cookies today, and precision in the mixing stage is what keeps them thick and prevents them from becoming tough little crackers.
First thing’s first, if you haven’t already, make sure that dough has been chilling for at least two hours, or preferably overnight. That rest time is what gives us bakery style cookies. If you are jumping straight in, you can always check out my easy French toast recipe for a quick morning treat instead!
Mixing the Dough for Soft Batch Cookies
Start by getting your mixer (or a sturdy hand and whisk!) going on that softened butter, light brown sugar, and granulated sugar. You really need to cream these together until they look light and fluffy—kind of like pale yellow whipped clouds. That usually takes a good three minutes with the mixer. That fluffiness is trapping air, and that air is what gives structure!
Next, carefully beat in your eggs, the extra yolk, and the vanilla. Just beat it in until it looks combined. Now for the dry things: flour, baking soda, and salt, all whisked together in a separate bowl. Add that dry mixture slowly, mixing on the very lowest speed. The second you stop seeing white streaks of flour, stop the mixer! Overmixing at this stage develops gluten, and gluten makes bread—we want soft batch cookies, not hockey pucks!
Finally, grab a good rubber spatula and gently fold those chocolate chips right into the dough. Be patient here; stir just enough to distribute them evenly. You want that dough to look wonderfully chunky!
Baking Tips for Crispy Edge Chewy Center Cookies
Preheat your oven to 375°F (190°C) and get your baking sheets lined with parchment paper. Parchment paper is your best friend; it keeps everything uniform and prevents sticking. Now, scoop your chilled dough—about three tablespoons per cookie. Don’t flatten them! For that extra thickness that everyone raves about, I gently press the dough balls slightly around the top and sides to make a little dome shape before they go onto the sheet.
Bake these babies for 10 to 13 minutes. This is where you have to trust your eyes more than the timer. The goal is for the edges to look nicely golden brown, that lovely color you see on bakery style cookies, but the very center should still look a little puffy and maybe even a tiny bit underbaked. That’s the secret to that gooey center!
When they come out, don’t move them! Let them sit right there on the hot pan for a full five minutes. They will set up beautifully on the tray, solidifying those crispy edges while keeping the insides soft and melty. Then, transfer them gently to a wire rack to cool the rest of the way.
Tips for Success When Making Homemade Chocolate Chip Cookies
Baking is wonderful because it gives us a chance to practice patience, and these little tips are things I’ve learned over many, many batches of chocolate chip cookies. They are small changes that make a huge difference in getting that perfect, thick, chewy result that you just can’t beat.
First off, let’s talk consistency when scooping. We are making large, bakery style cookies here, so you want to use a good, sturdy scoop—about three tablespoons worth of dough. If your dough is too cold from being chilled too long, it might be hard to scoop cleanly, so let it sit on the counter for about 10 minutes while the oven heats up. You want nicely rounded balls of dough.
And please, please use parchment paper! My mother used to grease her pans, but honestly, parchment paper makes clean-up a breeze and—more importantly—it helps the cookies bake evenly across the bottom. This prevents those sad, dark bottoms when you are striving for perfectly golden edges.
When they come out of the oven, that short five-minute rest on the baking sheet is vital for handling. If you try to move them straight from the oven to the cooling rack, they will usually fall apart because the centers are still too molten. Give them that time to firm up just enough so they don’t deflate too much when you transfer them. You know they’re ready to move when the edges look set and golden.
If you want to try another classic cookie that handles chilling and scooping just as well, you should really look at my classic snickerdoodle recipe next!
Making Ahead and Storing Your Chocolate Chip Cookies
Life gets busy, doesn’t it? Sometimes you want those wonderful homemade chocolate chip cookies ready right when a craving hits, or maybe you just need to break up the baking process. The good news is that this dough is fantastic for making ahead! In fact, I already told you that chilling overnight is best, but we can push that even further.
If you’re making a big batch of dough for later, roll the dough into balls right after you fold in those chips. Place the scooped dough balls on a parchment-lined baking sheet and pop that right into the freezer until they are solid—maybe an hour or two. Once they are frozen solid, you can scoop the frozen balls into a freezer-safe bag or airtight container. They keep beautifully for up to three months!
When you’re ready to bake those frozen chocolate chip cookie dough balls, just pull out what you need. You don’t even need to thaw them! You just add a few extra minutes to the baking time—maybe 3 to 5 extra minutes—to account for the deep chill. Keep checking those edges for that golden color, and you will still get those amazing gooey centers.
As for storing the finished cookies? Well, if they last long enough to store, that’s a win! Keep your baked cookies in a completely airtight container at room temperature. If you store them next to a slice of fresh bread or half an apple slice, it helps keep them soft, but honestly, these stay wonderfully soft and chewy for three or four days on their own. If you’re looking for other simple make-again treats, you might enjoy my recipe for easy peanut butter fudge!
Variations on Classic Chocolate Chip Cookies
While I stand by this recipe as the ultimate chocolate chip cookie just as it is written, baking should always be fun and allow for a little bit of your own personality to shine through! The structure of this dough—thick, chewy, and rich—is so dependable that it handles additions beautifully without collapsing into a flat mess. You can certainly customize these favorite homemade chocolate chip cookies without worrying about throwing off that perfect texture we worked so hard to create.
For instance, if you want a deeper, more complex flavor that borders on spicy, try mixing in about half a teaspoon of ground cinnamon right along with your flour. It complements the brown sugar so nicely, almost giving it a little autumnal hug. It’s subtle, but wonderful!
If you love nuts, this is certainly the time to add them. I suggest toasting your pecans or walnuts slightly before chopping and folding them in with the chocolate chips. Toasting wakes up their flavor, so you get a nice nutty crunch along with that melty chocolate. Just don’t add too much—keep the nut ratio balanced so the dough still holds its dome shape.

And for those who want an extra blast of chocolate goodness—because we all know that’s nearly impossible to overdo—try swapping out half of those semi-sweet chips for white chocolate chips or even dark chocolate chunks. The contrast in melt points makes for an incredible bite. Remember, when you’re looking for new ideas, even my recipe for apple pie cookies offers great inspiration for flavor pairings!
If you’re curious to see another famous take on thick cookies that gets rave reviews, you can check out this excellent recipe for ultra thick bakery style chocolate chip cookies while you’re deciding what variation to try first!
Frequently Asked Questions About These Chocolate Chip Cookies
I always love hearing from you all after you bake up a batch! It’s rewarding to know these are becoming your go-to, no fail cookie recipe. Here are a few questions I’ve received recently about achieving that perfect texture in your bakery style cookies.
Can I skip chilling the dough for these chocolate chip cookies?
Oh, I wish I could say yes, but for these specific chocolate chip cookies, I really advise against skipping the chill time! Remember how we talked about wanting them thick? If you bake the dough straight from the mixer, those fats haven’t firmed up properly, and the dough spreads out way too much in the oven. You’ll end up with thinner cookies that are crispier all around, and we are aiming for those delightful, soft centers!
What makes this recipe better than a classic cookie recipe?
That’s a wonderful question. What truly elevates these from a classic cookie recipe is the combination of two things: the one extra egg yolk and the creaming method at the start. That extra yolk is pure gold for texture; it’s pure fat and protein, which adds incredible richness and chewiness without making the cookie cakey. Furthermore, when we spend those necessary three minutes creaming the butter and sugars, we incorporate just the right amount of air. That air creates structure so when they bake, they balloon up nicely and stay thick—that’s your gooey center foundation right there!
If you’re looking for other reliable treats that don’t require any oven time at all, you might enjoy taking a look at my no bake cookie recipes collection!
And if you’re still searching for the ultimate chew, this recipe from dishicious is also known for truly chewy chocolate chip cookies!
Serving Suggestions for Your Chocolate Chip Cookies
Now that you have pulled these magnificent, thick chocolate chip cookies out of the oven, the best part is deciding how to serve them! Goodness knows, they are absolutely perfect just warm in your hand, maybe snagging one before they even fully cool down. But honestly, elevating the experience just a tiny bit makes those cozy moments feel extra special.
When I serve these to the grandchildren, it’s always tradition to have a tall, cold glass of milk right next to the cooling rack. You can’t beat that classic pairing—the cold, creamy milk cutting right through the rich, sweet chocolate and the buttery cookie dough. It’s simple, comforting, and exactly what a homemade treat should be.
For the adults in the house, or maybe for a quiet afternoon moment to yourself, these cookies are just divine alongside a hot cup of coffee. The slight bitterness of the coffee really brings out the molasses notes from that brown sugar we used. If you’re looking to make a whole cozy afternoon experience, you absolutely must check out my recipe for the best homemade rich and creamy hot chocolate—imagine dipping one of these gooey wonders straight into that!
Another thing you can do, especially if you are serving them slightly warm, is to break one right in half and top it with a small scoop of good vanilla bean ice cream. That hot-cold contrast makes for such a delightful dessert. It’s simple, it’s comforting, and it makes these already wonderful chocolate chip cookies feel celebratory!
Nutritional Estimate for These Chocolate Chip Cookies
Now, I always tell folks that when you are baking from scratch with real butter and sugar, the main goal is love and flavor, not counting grams! But since so many of you have asked for a general idea of what’s in these lovely homemade chocolate chip cookies, I ran the numbers through a calculator based on the ingredients listed above.
Please remember, this is just an estimate, especially since the exact size your cookie scoops turn out can change things! However, this gives you a good baseline for what you are enjoying when you savor one of these thick, chewy treats.
Here are the approximate figures based on a serving being one large cookie:
- Serving Size: 1 cookie
- Calories: 280
- Fat: 16g
- Carbohydrates: 33g
- Protein: 3g
It’s a rich count, yes, but just look at that flavor payoff! These are meant to be special occasion cookies, not everyday snacks, so enjoy every delicious, melty bite when you pull that next batch of bakery style cookies out of the oven!
Share Your Ultimate Chocolate Chip Cookies Experience
Now that you have finished baking what I truly believe are the best chocolate chip cookies you’ll ever make at home—thick, delightfully chewy, and loaded with those irresistible pools of melted chocolate—I would just love to hear all about them!
This is where our cooking community really shines. I pour my heart and soul into making these recipes reliable for you, and seeing your triumphs brings me so much joy. Did they turn out perfectly thick? Did you manage to keep some of those gooey centers intact when they cooled?
Please take a moment to leave a rating and a comment right below this recipe. Tell me what you thought! I read every single one, and your feedback helps other home cooks feel confident when they tackle a new recipe.
If you snapped a picture of your beautiful bakery style cookies—maybe you caught them just after they came out of the oven with that sprinkle of sea salt—please share it on social media! Tag us so I can see what you’ve been up to in your kitchen. Seeing your creations, whether you followed the recipe to the letter or added a little twist, makes my day!
If you’re interested in learning more about the home kitchen philosophy behind these reliable recipes and our community, feel free to read a little bit about Cooking by Carla. And hey, if you’re still dreaming about that soft, chewy texture, you might also enjoy seeing the beautiful results from sweet craft recipes!
PrintUltimate Bakery Style Chocolate Chip Cookies: Thick, Chewy, and Gooey

Make the best homemade chocolate chip cookies that are thick, chewy, and have soft, gooey centers, just like your favorite bakery. This no-fail recipe delivers superior results every time you bake from scratch.
- Prep Time: 20 min
- Cook Time: 12 min
- Total Time: 2 hours 32 min (includes minimum chill time)
- Yield: 18 large cookies 1x
- Category: Dessert
- Method: Baking
- Cuisine: American
- Diet: Vegetarian
Ingredients
- 1 cup (2 sticks) unsalted butter, softened
- 1 cup packed light brown sugar
- 1/2 cup granulated white sugar
- 2 large eggs, room temperature
- 1 large egg yolk, room temperature
- 1 tablespoon vanilla extract
- 2 1/4 cups all-purpose flour
- 1 teaspoon baking soda
- 1 teaspoon salt
- 2 cups semi-sweet chocolate chips (or a mix of chips and chunks)
- Flaky sea salt for topping (optional)
Instructions
- In a large bowl, cream together the softened butter, brown sugar, and white sugar with an electric mixer until light and fluffy, about 3 minutes.
- Beat in the two eggs, the extra egg yolk, and vanilla extract until just combined. Do not overmix.
- In a separate medium bowl, whisk together the flour, baking soda, and salt.
- Gradually add the dry ingredients to the wet ingredients, mixing on low speed until just incorporated. Stop mixing as soon as no streaks of flour remain.
- Fold in the chocolate chips using a spatula.
- Cover the dough and chill in the refrigerator for at least 2 hours, or preferably overnight. Chilling is key for thick cookies.
- When ready to bake, preheat your oven to 375°F (190°C). Line baking sheets with parchment paper.
- Scoop the chilled dough into balls, about 3 tablespoons each, and place them 2 inches apart on the prepared sheets. For extra thickness, press the dough balls slightly on the top and sides to create a dome shape.
- Bake for 10 to 13 minutes. The edges should be golden brown, but the centers should still look slightly underbaked and puffy for a gooey center.
- Remove the baking sheets from the oven. Immediately sprinkle the tops with flaky sea salt, if using. Let the cookies cool on the baking sheet for 5 minutes before transferring them to a wire rack to cool completely.
Notes
- For the best chewy texture, make sure your brown sugar is packed firmly when measuring.
- Using a mix of room temperature eggs and an extra yolk adds richness and chewiness, preventing flat cookies.
- If you are in a hurry, chill the dough for a minimum of 30 minutes, but longer chilling yields thicker, bakery style cookies.
- For melty chocolate chips, press a few extra chips onto the tops of the dough balls right before they go into the oven.
Nutrition
- Serving Size: 1 cookie
- Calories: 280
- Sugar: 24g
- Sodium: 180mg
- Fat: 16g
- Saturated Fat: 10g
- Unsaturated Fat: 6g
- Trans Fat: 0.2g
- Carbohydrates: 33g
- Fiber: 1g
- Protein: 3g
- Cholesterol: 65mg