
Sometimes you just want to bring a little bit of that fancy restaurant magic right into your dining room, don’t you? Well, I promise you, making something truly impressive doesn’t require spending hours in the kitchen. My background as a teacher taught me that the best instructions are clear, patient, and don’t leave anything to guesswork. That’s why I love this Sesame Crusted Tuna Tataki recipe so much! In just about 12 minutes total, you create an elegant, beautifully seared dish that tastes expensive but is actually so simple. This tuna tataki will quickly become your go-to when you need a delicious, healthy seafood meal pronto.
- Why This Sesame Crusted Tuna Tataki Recipe Works for Home Cooks
- Gathering Ingredients for Perfect Tuna Tataki
- How To Make Tuna Tataki: Step-by-Step Instructions
- Tips for Restaurant Style Tuna Success
- Serving Suggestions for Your Tuna Tataki
- Storage & Reheating Instructions for Leftover Tuna Tataki
- Frequently Asked Questions About Making Tuna Tataki
- Nutritional Estimates for This Healthy Seared Tuna
- Share Your Perfect Tuna Tataki Experience
Why This Sesame Crusted Tuna Tataki Recipe Works for Home Cooks
I know how discouraging it can be when a recipe claims to be fast but ends up needing twenty steps and a long chill time. That’s just not my style, and it certainly isn’t the style of this perfect tuna tataki.
- It’s incredibly fast! You’re looking at just minutes on the heat, which means dinner is ready almost instantly. You can check out some other speedy ideas over here at quick healthy lunch ideas if you’re looking for more fast meals.
- You get that show-stopping, restaurant-style presentation without needing to learn any complicated knife skills. It always looks like I spent hours on it!
- The sesame crust seals in all that wonderful flavor, which is why people love following guides like the one I found over at this sesame-crusted recipe.
Achieving the Perfect Tuna Sear Every Time
This is where we earn our stripes! The secret to that beautiful contrast—dark, crispy outside and cool, nearly raw inside—is pure, aggressive heat. You need your skillet smoking hot before that tuna even thinks about touching the oil. Don’t be shy; high heat for a very short time does all the work.
Easy Tuna Tataki for a Quick Fish Dinner
Seriously, this qualifies as an Easy Tuna Tataki for a reason. When you have only 12 minutes total, this becomes my favorite answer for a Quick Fish Dinner when the grandkids pop over unexpectedly. Making this elegant tuna tataki feels like cheating because it takes so little effort for such massive flavor payoff.
Gathering Ingredients for Perfect Tuna Tataki
Now listen, since we are only searing this fish for mere seconds, the quality of what you start with matters more than anything else. When making tuna tataki, you simply cannot cut corners on the main ingredient. To build trust and get that incredible texture, we need clarity in our list. I’ve broken down what you need for the gorgeous sesame crust and that beautifully bright dipping sauce we talked about.
For the star of the show, you’ll want exactly 1 pound of sushi-grade Ahi tuna loin. The coating is a simple mix: half white sesame seeds and half black sesame seeds—about a quarter cup of each. Then for our sauce, make sure you have fresh lemon juice; it really makes a difference when you are aiming for that light, Shoyu-style flavor. If you’re looking for other ways to use tuna that aren’t seared, perhaps check out my recipe for healthy tuna salad!
Sourcing Sushi Grade Tuna Recipe Essentials
This is the most important point, folks, so please listen closely. If you are making a dish like tuna tataki where the inside stays raw, you absolutely must buy “sushi-grade” or “sashimi-grade” tuna from a reputable fish counter. I have learned the hard way that this isn’t the time to use whatever you found on sale unlabeled. Always ask the fishmonger! We are using the beautiful, lean Ahi tuna loin for this and keeping it chilled right up until the moment it hits that hot pan.
Making the Bright Tuna with Ponzu Sauce
The sauce is what brings everything together, balancing the richness of the sesame crust. We’re making a classic dipping sauce that gives you that wonderful Shoyu depth. Beyond the soy sauce base, we need about 2 tablespoons of freshly squeezed lemon juice and a splash of vinegar. Don’t forget the grated fresh ginger—it adds a little zing that makes all the difference in this Tuna with Ponzu Sauce. Whisk it all together well until those basic flavors marry; it’s so easy! For a deeper dive into that kind of flavor profile, you can look at how others achieve that beautiful soy balance, like over at this Shoyu Ahi recipe.
How To Make Tuna Tataki: Step-by-Step Instructions
Now we get to the fun part—the making part! Don’t let that high-heat sear intimidate you; we are moving fast here. If you follow these steps exactly, you’ll achieve that wonderful contrast that defines great tuna tataki. Remember what I always say: preparation is everything, especially when you’re working with such a beautiful piece of fish. If you want to see another gorgeous way to sear ahi, check out my notes on the seared ahi tuna recipe quick gourmet!
Coating and Seasoning the Sesame Crusted Tuna
First things first, make sure that lovely piece of Ahi tuna loin is patted completely, utterly dry. Any water sitting on the surface will just steam the fish instead of searing it, and we definitely don’t want that! Take your mixed sesame seeds—the white and black ones—and spread them out on a wide plate. Press all sides of that dry tuna firmly into the seeds until it’s coated nicely all around. Then, just before it hits the pan, sprinkle on the salt and pepper. Keep it simple; we want the sesame flavor to shine through this whole Sesame Crusted Tuna experience.
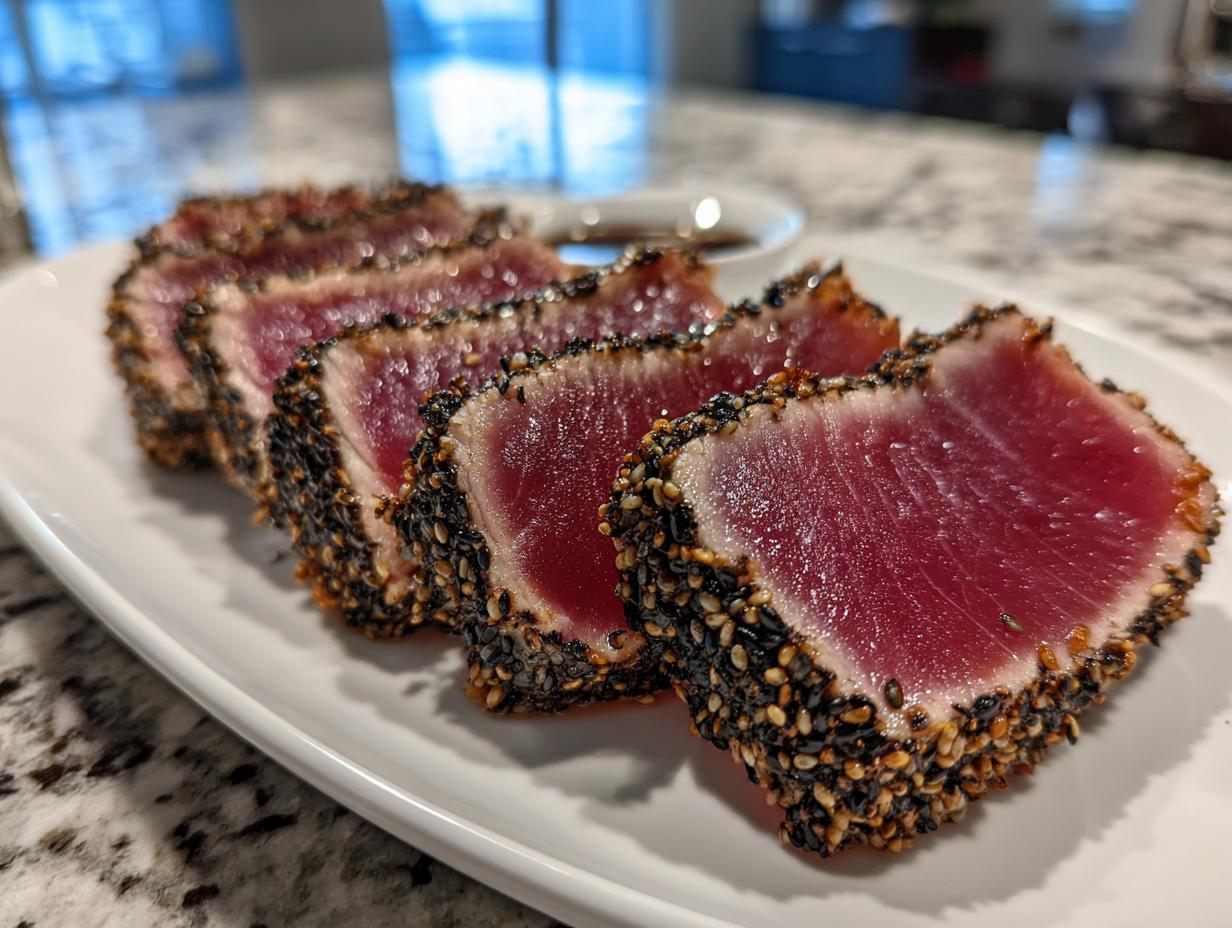
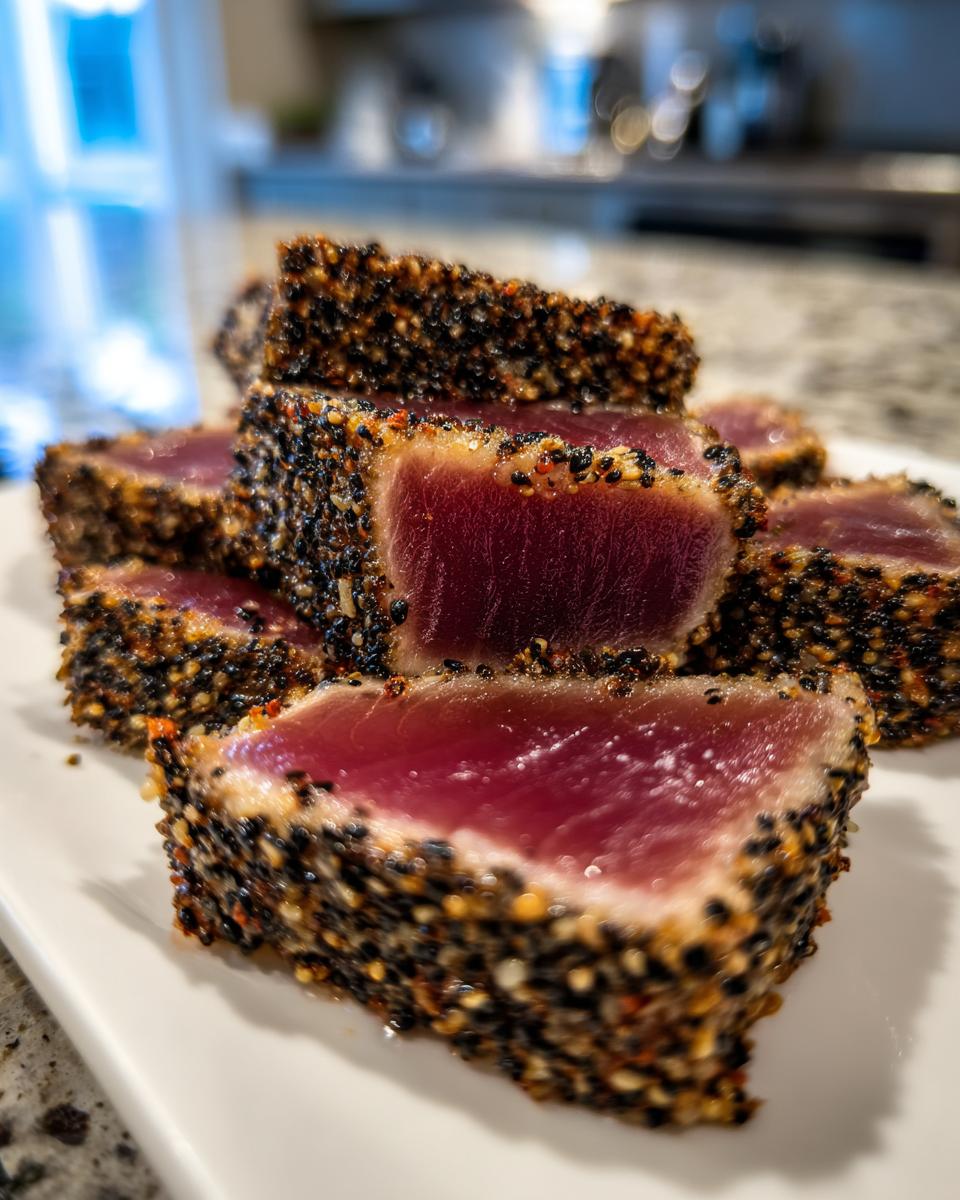
Slicing for a Velvety Inside Tuna Presentation
Heat your skillet over high heat—I mean really hot—with just a tiny bit of oil. Sear the tuna for only about 30 to 45 seconds on each of the four long sides. Don’t breathe! Time it! As soon as you pull that tuna out—it will look slightly charred on the outside—place it on a cutting board and let it rest for two minutes. This tiny rest is so important! Then, grab your sharpest knife. To get that perfect Velvety Inside Tuna texture that melts in your mouth, you must slice the fish thinly against the grain. Seeing those beautifully pale pink centers in your finished tuna tataki is the best reward! Getting the timing right for that sear is a big part of yielding a Restaurant Style Tuna result, which experienced cooks often discuss, much like what you’d find detailed in this guide on making perfect tuna tataki.
Tips for Restaurant Style Tuna Success
Listen, getting that Restaurant Style Tuna look at home is really all about maximizing heat and moving quickly. You asked how to tell when the sear is right, and honestly, you have to trust your eyes and your nose! If you’re using a heavy skillet, like my favorite cast iron, make sure that oil is absolutely shimmering—almost smoking—before the tuna goes in. That initial contact should make a sharp sizzle, not a soft hiss. That perfect, thin crust on your tuna tataki only takes seconds to form on each side.
Don’t let the tuna sit on the board too long after searing! You want the interior to stay cool. If you’re looking for other ways to introduce intense, fast flavors into your meals, I have a great recipe for quick fried noodles that shares that speedy Asian flavor profile. Checking out what experts do helps too; Just One Cookbook has fantastic visuals on achieving that textbook sear for this dish.
Serving Suggestions for Your Tuna Tataki
We’ve created this gorgeous, flavorful dish, but now we have to show it off a little, right? That’s the fun part! This Sesame Crusted Tuna Tataki shines as an appetizer, but it’s sturdy enough to be the star of a light meal, too. I always aim for something visually appealing because we really do eat with our eyes first, even when we are just having a casual Tuesday dinner.
When setting the platter, don’t be afraid of color! A little green, maybe a sprinkle of bright red chili flakes if you like a kick, makes all the difference. For easy cleanup and a beautiful presentation, check out my favorite tips for easy appetizers and snacks that always impress my family.
Building Beautiful Tuna Tataki Bowls
If you want to turn this into something more substantial, building a bowl is a wonderful idea. We don’t want to mask the taste of the tuna, though, so keep the base simple. Cooked sushi rice is traditional and lovely, absorbing all those delicious drips of ponzu sauce. Or, if you’re looking for something lighter, use a bed of crisp, peppery salad greens instead.
Add some thinly sliced avocado—it just melts into the fish—and maybe a few slices of cool cucumber for crunch. You aren’t just making a meal; you are assembling a delightful mosaic of texture and cool, fresh taste!
Storage & Reheating Instructions for Leftover Tuna Tataki
Now, if you happen to have any leftover Seared Ahi Tuna Recipe from the night before, I need to be very upfront with you: this is a dish where fresh is always best. That beautiful, cool, velvety center of the fish changes texture almost immediately once it’s sliced and exposed to the air.
However, if you simply must save some—maybe you made a huge batch for a party—here is what you do. Immediately, before anything else, place the sliced tuna into a very clean, air-tight container. You want minimal air exposure. I’d stick a small square of wax paper directly on top of the slices just to cushion them a bit before sealing the lid tightly. Keep it right in the coldest part of your refrigerator.
You should plan to eat any leftovers within 24 hours, tops. I really can’t recommend reheating this at all. Since it’s only seared on the outside, reheating it will just cook the raw center, turning your lovely tuna rubbery and grey. If they are only slightly overdone, you might slice them thin and chill them right before drizzling them with a fresh batch of that quick healthy lunch ideas sauce for an Asian Flavored Seafood bite the next day, but reheating in a microwave or pan is a hard pass for me.
Frequently Asked Questions About Making Tuna Tataki
It is perfectly normal to have a few questions before you try something that looks as fancy as tuna tataki for the first time! I remember my first time I worried I’d ruin a beautiful piece of fish. Don’t fret; that’s why I’ve compiled these common questions. We want your experience to result in that beautiful, Healthy Seared Tuna everyone loves. If you’re planning this for a weeknight, remember these simple steps will keep your dinner prep smooth, check out my notes on simple weeknight dinners!
Can I use frozen tuna for tuna tataki?
Oh, absolutely not, dear reader! This is crucial for your safety and for the texture. Because we are barely cooking this fish, you must start with the freshest, highest quality product. Please only use fresh, *sushi-grade tuna*. If you start with frozen tuna, even if you thaw it perfectly, the freezing and thawing process changes the structure of the flesh. When you go to sear it, it won’t hold its shape or that beautiful, cool center you are after—it often ends up soggy or mushy instead.
What is the difference between tuna tataki and seared ahi tuna?
That’s a fantastic question, and honestly, they overlap a lot! When you look for a Seared Ahi Tuna Recipe, you are usually just asking for tuna that has been quickly seared on the outside and left raw inside. However, tuna tataki implies a specific Japanese preparation, often meaning it’s been coated in seeds (which we did!) and traditionally served with a bright, vinegary sauce like our ponzu example. So, while a seared ahi tuna can be served any way, tataki has a bit more presentation tradition involved. Both lead to a wonderful, light meal, however!
Nutritional Estimates for This Healthy Seared Tuna
When you are serving up something this fresh and light, it’s wonderful to know exactly what you are eating. I always crunch the numbers after writing a recipe down, just so I know I’m providing a genuinely helpful, Healthy Seared Tuna option for my readers. Remember, these figures are just estimates, since how much soy sauce you use or the exact size of your tuna loin can shift things slightly.
This recipe, served as four moderate portions, is proof that elegant eating doesn’t mean heavy eating. For instance, it’s naturally low in carbohydrates because we aren’t adding rice or breading to the tuna itself. If you’re counting points or macros, this is a marvelous option that keeps you feeling nourished. For other fast, healthy ideas, you can always visit my page on quick healthy lunch ideas!
Here is a quick breakdown based on the ingredients listed for this recipe:
- Calories: About 220 per serving
- Protein: A whopping 30 grams! That keeps you satisfied.
- Fat: Around 10 grams total (mostly those healthy unsaturated fats from the tuna itself).
- Carbohydrates and Fiber: Very low, generally less than 5 grams of carbs before you add any sides like rice or veggies.
- Sodium: This runs higher, around 450mg, coming almost entirely from the soy sauce in the ponzu. If you are watching sodium, use a reduced-sodium soy sauce!
See? A beautiful, filling, high-protein meal that keeps things clean and simple. Enjoy knowing this wonderful fish is treating your body right!
Share Your Perfect Tuna Tataki Experience
Oh, I truly hope you get a chance to make this dish soon! It brings me so much joy knowing you’re bringing this tuna tataki elegance into your own home. Once you’ve sliced that beautiful fish and dipped it in the bright sauce, please come back and let me know how it went. Did the sear turn out perfect? Don’t forget to hit that rating button or drop me a line on the contact page. Happy cooking, dear friend!
PrintSesame Crusted Tuna Tataki with Ponzu Dipping Sauce
Make restaurant-style Tuna Tataki at home quickly. This recipe features sushi-grade tuna lightly seared with a sesame crust and served with a bright ponzu sauce for an elegant, healthy seafood meal.
- Prep Time: 10 min
- Cook Time: 2 min
- Total Time: 12 min
- Yield: 4 servings 1x
- Category: Appetizer
- Method: Pan Searing
- Cuisine: Japanese
- Diet: Low Fat
Ingredients
- 1 pound sushi-grade Ahi tuna loin
- 1/4 cup white sesame seeds
- 1/4 cup black sesame seeds
- 1 tablespoon olive oil
- 1 teaspoon coarse salt
- 1/2 teaspoon black pepper
- For the Ponzu Sauce:
- 1/4 cup soy sauce (Shoyu)
- 2 tablespoons fresh lemon juice
- 1 tablespoon rice vinegar
- 1 teaspoon grated fresh ginger
- 1 teaspoon brown sugar
Instructions
- Prepare the dipping sauce: In a small bowl, whisk together the soy sauce, lemon juice, rice vinegar, grated ginger, and brown sugar until the sugar dissolves. Set the ponzu sauce aside.
- Prepare the tuna: Pat the tuna loin completely dry with paper towels. Mix the white and black sesame seeds on a shallow plate. Press all sides of the tuna loin firmly into the sesame seeds until it is evenly coated.
- Season the tuna: Sprinkle the salt and pepper evenly over the sesame-crusted tuna.
- Sear the tuna: Heat the olive oil in a heavy-bottomed skillet (cast iron works well) over high heat until it is shimmering hot.
- Carefully place the crusted tuna in the hot skillet. Sear for 30 to 45 seconds on each of the four long sides. You want a thin, dark crust while keeping the center raw and cool.
- Remove the tuna from the pan immediately and place it on a cutting board. Let it rest for 2 minutes.
- Slice the tuna: Using a very sharp knife, slice the tuna against the grain into 1/4-inch thick pieces.
- Serve immediately: Arrange the slices on a platter and serve with the prepared ponzu dipping sauce on the side.
Notes
- Use only sushi-grade or sashimi-grade tuna for this preparation to ensure safety.
- For an extra layer of flavor, you can add a dash of toasted sesame oil to your ponzu sauce.
- If you prefer a spicy kick, add a small amount of wasabi paste to the dipping sauce.
Nutrition
- Serving Size: 4 oz
- Calories: 220
- Sugar: 3
- Sodium: 450
- Fat: 10
- Saturated Fat: 1.5
- Unsaturated Fat: 8.5
- Trans Fat: 0
- Carbohydrates: 5
- Fiber: 1
- Protein: 30
- Cholesterol: 65