
There is just something magical about that first slice of homemade bread, isn’t there? That crackle of the crust, the soft, pillowy inside—it feels like you’ve accomplished something truly grand. But the secret to that greatness isn’t some complex kneading technique; it’s the living culture you nurture right on your counter! Creating your own sourdough starter from scratch sounds intimidating, I know. Believe me, as a former teacher, my goal here is to break down the science into simple, encouraging steps. This isn’t meant to be fussy or hard. This is the ultimate, simple, day-by-day guide designed specifically for beginners. By the end of the week, you’ll have your very own reliable wild yeast culture ready to bake with!
- Why You Will Love This Easy Sourdough Starter Recipe
- Gathering Supplies for Your Sourdough Starter Creation
- How to Make Sourdough Starter Day by Day: The 7-Day Routine
- Sourdough Starter Maintenance Tips for Long-Term Health
- Sourdough Starter Troubleshooting Guide for Beginners
- Activating Sourdough Starter: From Slumber to Peak Performance
- Simple Sourdough Basics: What to Bake First
- Frequently Asked Questions About Your Homemade Sourdough Starter
- Estimated Nutritional Data for Sourdough Starter (Unbaked)
- Share Your Sourdough Starter Success
Why You Will Love This Easy Sourdough Starter Recipe
When I first started baking with wild yeast, I felt like I needed a chemistry set just to keep the jar happy! But I promise you, this method strips away all the confusion. My aim with these homemade sourdough starter instructions is pure simplicity, so you can focus on the fun part—baking!
Here is why I think you’re going to enjoy creating your very own sourdough starter guide for beginners:
- It’s Truly Just Flour and Water: Forget fancy additions! We start with the basics. You don’t need anything complicated to capture that natural wild yeast bread culture.
- Minimal Time Commitment Daily: Yes, it takes about a week to establish, but your active involvement each day is only about five minutes. I kept mine going easily while juggling my teaching schedule!
- No Guesswork with Measurements: We rely on weight, not volume, so your measurements are spot-on every single time. Consistency is the secret weapon behind a perpetually bubbly active sourdough starter.
- Built-in Troubleshooting: This guide walks you through exactly what to expect day-by-day, making it the perfect sourdough 101 for beginners resource. You know when to panic (rarely!) and when to just wait patiently.
If you’re looking for that initial push into the world of artisan bread starter creation, this is your no-fail starting point. It really is the easy sourdough starter recipe from scratch you’ve been searching for. Trust me, once you see that jar start bubbling, you’ll be hooked!
If you’re curious about diving deeper into quick ways to use your new culture once it’s ready, you might want to peek at some other beginner-friendly ideas, like quick guides for starter recipes; they really simplify things for a new baker!
Gathering Supplies for Your Sourdough Starter Creation
Okay, let’s talk gear! You might think you need a whole bakery setup, but trust me, that’s not the case when you are making a sourdough starter from scratch. I like to keep things simple. Think of this as a science experiment where the ingredients are totally natural. We need just a few things to get this wild yeast culture going strong. If you want to see what other folks gathered for their initial setup, this list is a great visual check for you!
Essential Equipment for Making Your Sourdough Starter
You don’t need fancy Dutch ovens yet, just things you probably already own. The most important thing here is accuracy, which brings us to the scale!
- A Clean Glass Jar: I use a wide-mouth, straight-sided glass jar. A 1-quart (about 4-cup) size is perfect because when your starter starts rising, you need room to see that growth. Don’t seal it tight; we need air flow!
- A Digital Kitchen Scale: This is non-negotiable, friends. Measuring flour and water by weight (grams) ensures your hydration ratio is exact every time. Scooping flour is just too inconsistent for this critical first step.
- A Rubber Spatula or Small Whisk: You need something to gently mix everything together. Nothing metal is required, just something that lets you scrape down the sides of the jar well.
- A Loose Cover: This can be the jar lid just resting on top, a paper towel secured with a rubber band, or a piece of breathable cloth. We want to keep dust out but let the natural microbes in!
Choosing the Right Flour and Water for Your Sourdough Starter
The ingredients matter, but they are simple ones! What you feed your new culture determines how quickly it wakes up and how healthy it stays. When it comes to the best flour for sourdough starter, I recommend starting with something robust.
For Day 1, we are using a whole grain flour—either rye or whole wheat. These have more of the natural yeasts and bacteria clinging to them, which gives your brand-new sourdough starter a better jump start. After Day 2, we switch over to something lighter, like regular unbleached all-purpose flour for the daily feedings.
And please, pay attention to your water! Tap water often has chlorine, and that stuff is designed to kill off those helpful microbes we are trying to capture. Always use filtered, bottled, or tap water that has sat out on the counter for 24 hours to let the chlorine evaporate. Clean water keeps your wild yeast culture happy!
How to Make Sourdough Starter Day by Day: The 7-Day Routine
Alright, roll up your sleeves! This is where the exciting transformation begins. I always tell my grandkids that patience is your secret ingredient here, even more so than the flour. We are capturing wild yeast, and little critters work on their own schedule! As a teacher, I know structure helps, so we’re following a predictable 7-day routine to build that perfect, lively sourdough starter. If you have followed the initial steps, you know what flour (whole grain) and water you are using. Take a deep breath; you’ve got this! For a detailed look that complements these steps perfectly, feel free to check out this day-by-day visual guide, too.
Days 1 & 2: Mixing and Observing Your New Sourdough Starter
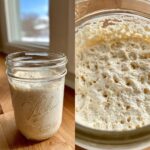
On Day 1, we mix up our first batch. Grab your clean jar and weigh out 50 grams of that whole grain flour—that good, hearty stuff—and 50 grams of room-temperature water. Mix it until it looks like thick pancake batter, making sure there’s no dry flour hiding anywhere. Cover it loosely; we aren’t suffocating it! Place it somewhere cozy, ideally between 70 and 75 degrees Fahrenheit. Then, Day 2 is a rest day! Do not feed it! Just peek in and see what happened overnight. Maybe you see a tiny bubble or two. If it smells a little funky, don’t panic; that’s normal as the bad bacteria fight it out!
Days 3 & 4: Establishing the Feeding Rhythm for Your Sourdough Starter
By Day 3, we start the real maintenance! First, you must discard all but 100 grams of that mixture. I know it feels wasteful, but we need to keep the ecosystem balanced and manageable for our new sourdough starter. To the remaining 100g, feed it 50g of the unbleached all-purpose flour and 50g of water. Mix that baby up well. Day 4 is exactly the same routine: measure out 100g starter, discard the rest, and feed it 50g flour and 50g water. By now, you should be seeing some more consistent bubbling activity—little signs that your wild yeast is waking up!
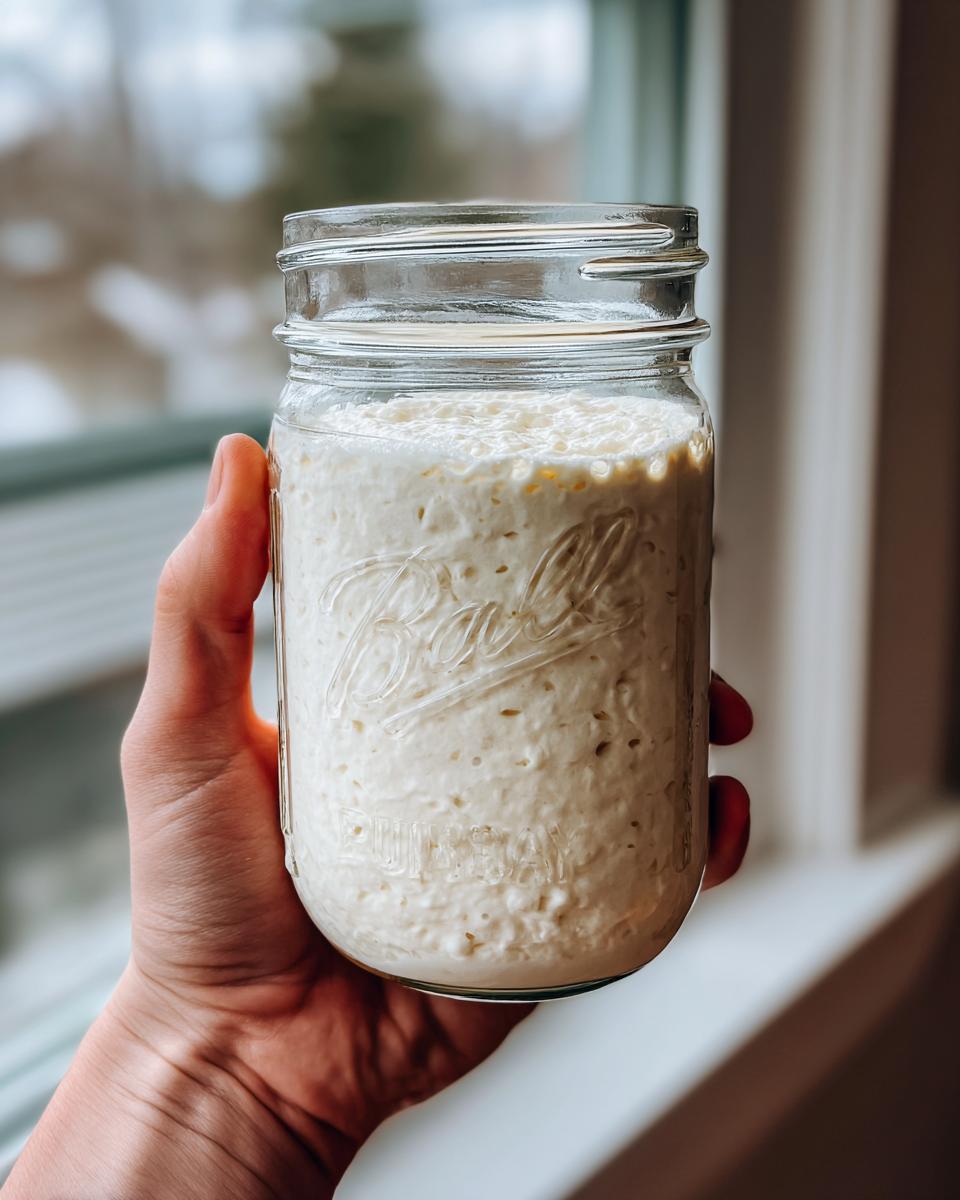
Days 5, 6, & 7: Building a Bubbly Active Sourdough Starter
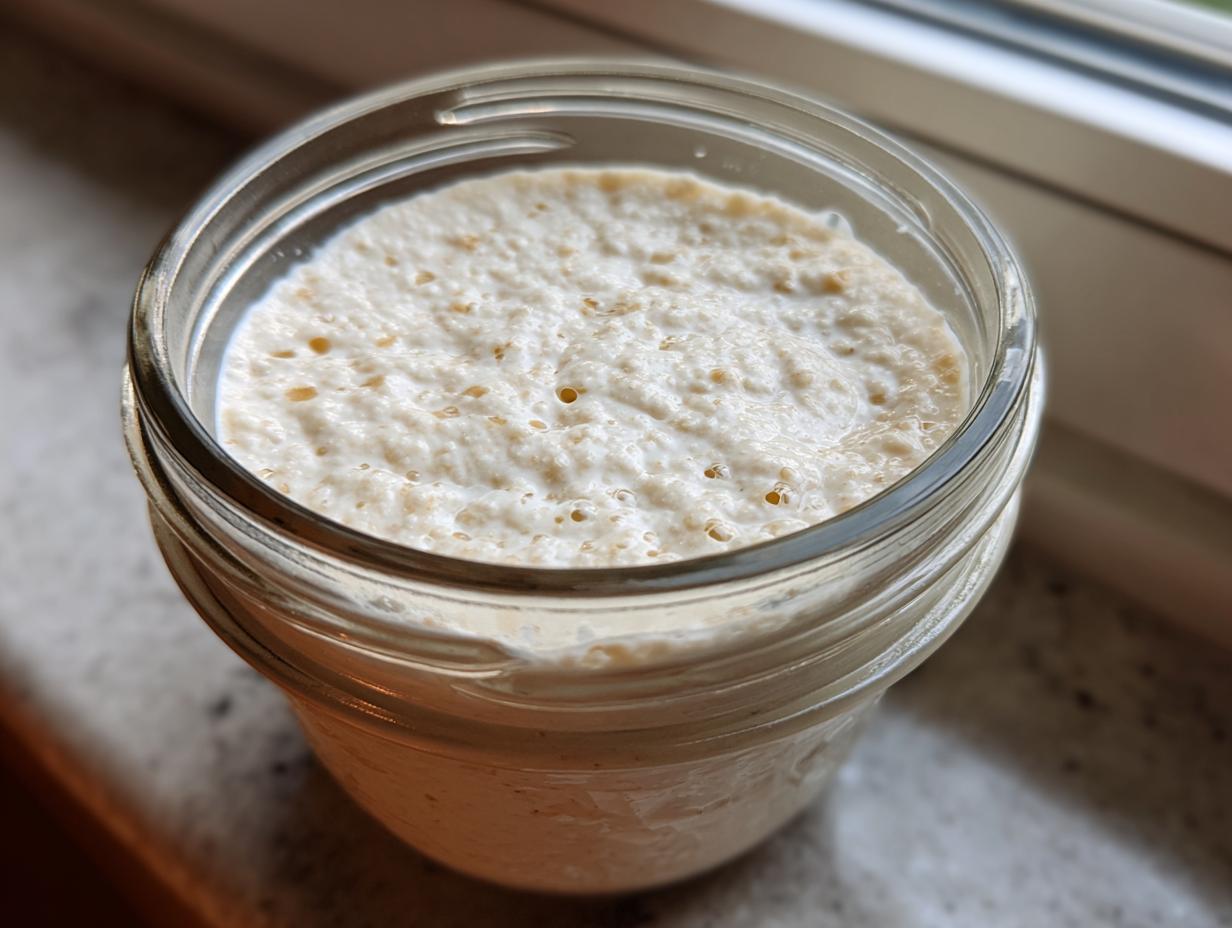
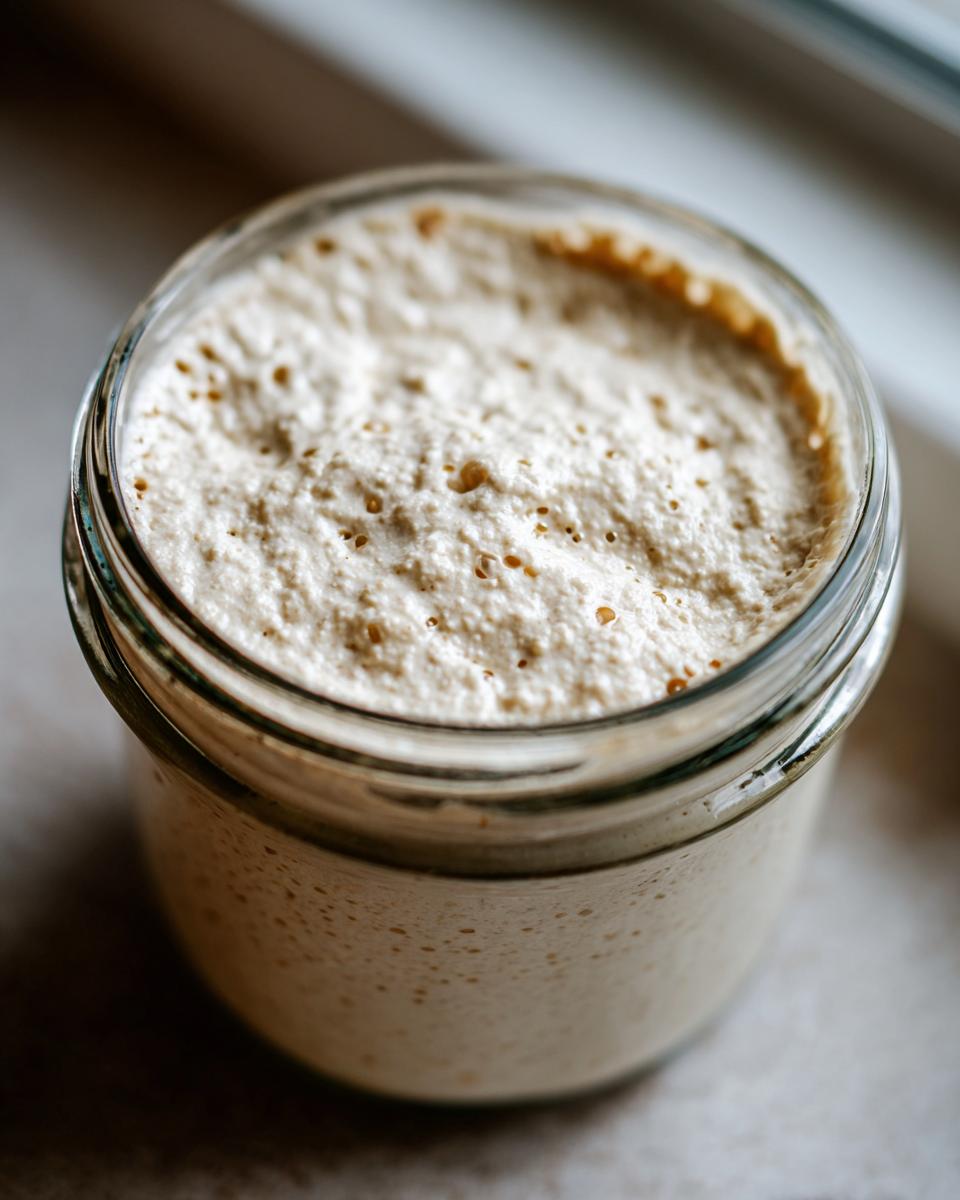
If your starter is reliably doubling in size within 8 hours, we move to twice-daily feedings starting on Day 5. This is the crucial final push! Feed it every 12 hours—same ratio, just more often. By Day 6 and 7, you should be aiming for that beautiful, robust activity. A ready starter doesn’t just bubble; it reliably doubles its entire volume within about 4 to 6 hours after a feeding. It should smell pleasantly sour, like yogurt or even a little fruity. Once it shows that reliable doubling strength, congratulations, you have a perfectly established sourdough starter ready to make incredible bread!
If you want to read about even more professional tips for dealing with stubborn starters, I found this interesting article on sourdough secrets that might give you an extra layer of confidence when things seem slow!
Sourdough Starter Maintenance Tips for Long-Term Health
Now that you’ve done the hard work of creating this amazing living culture, you need to learn how to keep it happy! Having a healthy sourdough starter means having bread ready whenever the mood strikes. I’ve found that the best sourdough starter maintenance tips revolve around choosing how often you plan to bake. Will you be a weekend baker, or do you want the option to bake almost every day? Your answer dictates where your jar lives—on the counter or in the fridge.
If you’re just starting out, keeping it on the counter is best so you can watch it work! But remember, if you’re not using it every day, you need a consistent feeding schedule. If you want to skip ahead and see some yummy ways to use up the discard before you even get to this stage, check out my recipe for sourdough pancakes—they are the best way to use what you remove!
The Daily Sourdough Starter Feeding Schedule (Room Temperature)
When your starter lives on the counter, it’s enjoying the warmer temperatures and needs regular meals to stay strong. You’ll want to stick to a simple 1:1:1 feeding ratio—that means one part starter, one part flour, and one part water, all by weight. For example, if you keep 100 grams of starter in the jar, you discard down to 100g, and then feed it 100g of flour and 100g of water. This keeps the balance just right so all those wild yeasts are fed and happy all day long. Keep an eye on it, especially on warmer days, because you might need to feed it twice!
Storing Your Sourdough Starter in the Refrigerator
If life gets busy or you’re going on vacation, the refrigerator is your friend! Once you put your starter in the cold, fermentation slows way down. You only need to feed it once a week, maybe every 10 days if you’re pushing it. Make sure to use a good, solid meal right before it goes in the fridge. When you pull it out to bake, it will look a little sluggish, maybe even have some clear liquid (called ‘hooch’) on top—that’s totally fine! Just pour the hooch off, give it one or two regular feedings at room temperature, and watch it wake up. For amazing tips on maintaining your starter during slower baking seasons, this guide on winter baking and maintenance is really helpful.
Sourdough Starter Troubleshooting Guide for Beginners
Oh, sweet friend, I know that feeling when you look into your jar on Day 4 and see absolutely nothing happening. You start thinking, ‘Did I kill the entire ecosystem?’ Don’t you worry one bit! Every single person who has ever made a sourdough starter has been right here, staring at a dormant jar, wondering if they missed a step. That is why I put together this little sourdough starter troubleshooting guide. Most of the time, it’s just patience or temperature playing tricks on us, not a major failure.
Remember, we are working with wild yeast, which is unpredictable. If you’re seeing any of these classic signs, here is my tried-and-true advice, based on years of kitchen trial-and-error:
- The Starter Isn’t Bubbling at All: This is a common speed bump, especially if your kitchen is chilly. Yeast loves warmth! If your room temperature is below 70°F, your starter is going to take its sweet time. Try moving your jar to a warmer spot—maybe near the pilot light of the oven, or on top of the refrigerator. Also, make sure you used whole grain flour for those first couple of feedings; sometimes the stronger microbes in rye or wheat are needed to kickstart the process.
- I See ‘Hooch’—Is That Bad? Nope! That murky, sometimes grey or clear liquid sitting on top is called ‘hooch.’ It’s just alcohol created by hungry yeast doing their job! It means your starter has eaten all its food and is asking for a fresh meal. Just pour that liquid off before you feed it, or stir it right in if you want your resulting bread to be a touch tangier.
- It Smells Really Bad: On Days 2 and 3 especially, your starter might smell like old gym socks, rancid cheese, or even paint thinner. That’s the competition! Early on, a few unsavory bacteria bloom before the lactic acid bacteria take over. Just keep feeding it consistently on schedule, and that smell should fade dramatically by Day 5, replaced by a pleasant, tangy aroma.
- It Rises Quickly and Then Collapses Very Fast: This means it’s hungry! If it’s doubling and then shrinking down to nothing within a couple of hours, you’re waiting too long between meals. Switch immediately to a 12-hour feeding schedule, sticking strictly to the 1:1:1 ratio we talked about.
If you want to read about even more professional tips for dealing with stubborn starters, I found this interesting article on sourdough secrets that might give you an extra layer of confidence when things seem slow!
Activating Sourdough Starter: From Slumber to Peak Performance
So, your starter has been chilling in the fridge for a month, or maybe you just finished the 7-day routine but life got busy and it’s looking a little flat. Don’t you dare throw it out! Even dormant cultures are just sleeping, not dead. Learning the process of activating sourdough starter is one of the most important skills past the initial creation phase. Think of it like waking up a sleepy puppy; it just needs a little coaxing and a good meal to get its energy back.
If you’re ready to bake that first loaf after a break, follow these easy steps to bring your wild yeast culture back to its bubbling best. You really only need two or three feedings to get it fully reliable again.
First things first: If you see that liquid (‘hooch’) on top, pour it off—unless you really like a super tart flavor! Then, give it a normal feeding using that good 1:1:1 ratio we discussed (equal parts starter, flour, and water by weight). Leave it on the counter, not in the fridge, for this wake-up call. If it was refrigerated, you might need to do this feeding twice, about 12 hours apart, just to get the yeast populations fully revived and hungry again.
The real confirmation that your starter is ready for baking isn’t just visual anymore; it’s physical. This is where the famous ‘float test’ comes in, and I use this every single time before I commit batter to my loaf pans. Take a small spoonful of your starter—just a teaspoon really—right at its peak (when it’s doubled and jiggly) and gently drop it into a glass of room-temperature water. If you have captured the right level of carbon dioxide and the yeast is active enough, that little dollop will float right on top!
If it sinks, it just means it hasn’t built up enough airy structure yet. Don’t worry! Give it one more feeding cycle and try the float test again in 6 to 8 hours. Seeing that starter bob on the surface tells me, Carla, that those wild yeasts are strong enough to lift a whole loaf of bread. It’s such a reassuring little test, and once it floats, you know your sourdough starter is ready to go!
Simple Sourdough Basics: What to Bake First
Well, hello there, Baker! Look at you, you’ve got a happy, bubbly, active sourdough starter! That’s the hardest part done. I know the next thought in your head is probably, “Now what do I DO with this thing?” It’s easy to feel pressured to jump straight into a crusty artisan boule, but I always say, start small and build that confidence!
For your very first bake, I strongly suggest you do *not* try a full-on loaf of sourdough bread. Those usually require precise shaping and scoring, and honestly, they can be frustrating when you’re still learning your starter’s peak performance time. Instead, let’s use a little of that discard and transition gently into baking with our new culture.
My favorite thing to suggest for a brand-new baker is something that is forgiving and wonderfully tasty—sourdough cornbread! You don’t have to worry about gluten development or shaping at all. You just mix your ingredients, stir in some of that discard you removed during the last few feedings, and bake it up. It gives you that slight tang that sourdough is famous for, but in a quick, familiar format. You can find my tried-and-true recipe for super moist sourdough cornbread right here. It’s such a great bridge between making the starter and tackling your first loaf.
Once you’ve nailed something simple like cornbread or maybe even some sourdough pancakes, you’ll know exactly how much your starter is rising and how quickly it consumes the flour. That little success will give you the confidence you need to tackle that first loaf of bread next week. Remember, every great baker started exactly where you are right now: staring at a jar of flour and water and hoping for the best!
Frequently Asked Questions About Your Homemade Sourdough Starter
It’s natural to have questions when you are nurturing something living for the very first time! I’ve collected some of the things I hear most often about creating and maintaining a successful sourdough starter. Remember, I taught big groups of kids for years, so I promise to be as clear as possible here. Don’t feel silly asking—every baker has had these exact worries!
Can I make a sourdough starter without yeast?
That’s a wonderful question that gets right to the heart of what we are doing! The short answer is no, you can’t make a sourdough starter without yeast, but you don’t need to buy any jarred yeast from the store. What we are doing here is capturing the naturally occurring wild yeast bread culture that is already floating around us all the time—in the air, on the grains of flour, and on your hands! By mixing flour and water, we create the perfect environment for those natural microbes to thrive. So, you are using yeast, but it’s wild and free, not the commercial packet kind!
What does a healthy sourdough starter smell like?
This is one of the best ways to tell if your culture is happy! A healthy, active sourdough starter should smell pleasantly sour, almost like ripe yogurt or maybe even a little fruity or like vinegar, but not overwhelmingly sharp. That tangy scent tells you the beneficial lactic acid bacteria are winning the microbial battle. If it smells overwhelmingly like acetone, paint thinner, or really rancid garbage, it means those wild yeasts are stressed and hungry. That’s when you need to get on a stricter feeding schedule. If you’re enjoying baking but haven’t tackled sourdough bread yet, you might want to look at recipes like this simple artisan bread which is a great confidence booster!
How long does it take to create a reliable sourdough starter?
The routine I laid out for you is based on a steady 7-day timeline. That week allows us to weed out the less desirable bacteria and give the strong lactobacilli and yeast plenty of time to establish a good foothold. However, I always tell people that your environment plays a huge role! If your kitchen is naturally very warm—say, over 78°F—you might hit peak activity closer to Day 5. If it’s cool, like in the winter, it might take a full 10 days before you see that robust doubling. The key isn’t rushing the clock; it’s getting to that point where it consistently doubles in size after feeding. You’ll know it when you see it!
Estimated Nutritional Data for Sourdough Starter (Unbaked)
Alright, let’s talk quickly about what is actually in that jar! Since we are still in the creation phase, this nutritional information is just for the unbaked mixture—that beautiful, wild yeast culture made of just flour and water that you’ve been feeding. This is definitely sourdough 101 for beginners information, and it’s good to know what you’re working with!
Please remember, this data is only an estimate for one 50-gram serving of the mixture at this stage. Once we bake this up into glorious bread or even those discard pancakes, the whole nutritional profile changes when you add real ingredients like salt and fat. But for the starter itself, here are the general numbers based on serving size:
- Serving Size: 50g
- Calories: 110
- Carbohydrates: 23g
- Protein: 3.5g
- Fat: 0.3g
- Sugar: 0.1g
- Sodium: 1mg
- Fiber: 1.5g
See? Mostly wholesome carbohydrates from the flour powering those little yeast colonies! It’s just flour and water doing their magic dance. Keep nurturing that little culture, and soon enough, you’ll be looking at baked goods with a whole different set of nutrition labels. Don’t weigh it too heavily right now; just focus on getting those bubbles strong!
Share Your Sourdough Starter Success
Oh, I just love hearing from you all! Knowing that you’ve successfully captured that amazing wild yeast culture and have a thriving sourdough starter living happily on your counter brings me so much joy. It feels like we’ve done this together, doesn’t it? Creating something so fundamental with just flour and water is a real accomplishment, and I want to celebrate that with you!
Now that you’re officially part of the sourdough family, please don’t be shy! I genuinely want to see how your culture is looking. Did you get those big, beautiful bubbles on Day 6? I encourage you to snap a picture of your established sourdough starter and share it in the comments below. It helps other new bakers see what a healthy culture looks like!
If you followed all the steps and still have a lingering question about your feeding schedule or *why* your starter smelled like nail polish remover on Day 3, please ask away! I check the comments daily, and I love helping you troubleshoot those last few tricky spots. Think of this comment section as our ongoing class—your questions help me refine these simple sourdough basics for the next person picking up the flour bag.
If you need to reach out directly for something personal, or just want to send me a note about how your first loaf turned out, you can always find my contact information right here. Happy feeding, and I can’t wait to see that bubbly jar!
PrintUltimate Beginner’s Guide: How to Make and Maintain a Healthy Sourdough Starter From Scratch (7-Day Routine)
Learn the simple, step-by-step process for creating your own active sourdough starter using only flour and water. This guide is perfect for beginners and covers daily feeding and maintenance for a reliable wild yeast culture.
- Prep Time: 10 min
- Cook Time: 0 min
- Total Time: 7 days (active time is minimal)
- Yield: Approximately 200g active starter 1x
- Category: Baking Basics
- Method: Wild Fermentation
- Cuisine: American Home Cooking
- Diet: Vegetarian
Ingredients
- 100g Whole Grain Flour (Rye or Whole Wheat recommended for Day 1)
- 100g Unbleached All-Purpose Flour (for subsequent feedings)
- 100g Unchlorinated Water (room temperature)
Instructions
- Day 1: Initial Mix. In a clean glass jar, combine 50g of whole grain flour and 50g of room temperature water. Mix thoroughly until no dry flour remains. Cover loosely (use a lid resting on top or cheesecloth secured with a band) and leave it at room temperature (ideally 70-75°F or 21-24°C) for 24 hours.
- Day 2: Rest. Do not feed the starter today. Simply observe it. You might see a few small bubbles, or nothing at all. Leave it covered loosely at room temperature for another 24 hours.
- Day 3: First Feeding. You should see some activity. Discard all but 100g of the starter mixture. To the remaining 100g, add 50g of unbleached all-purpose flour and 50g of water. Mix well, cover loosely, and let sit for 24 hours.
- Day 4: Consistent Feeding. Discard all but 100g of the starter. Feed it with 50g of unbleached all-purpose flour and 50g of water. Mix well. You should see more consistent bubbling now.
- Day 5: Twice Daily Feeding Begins. If your starter is doubling in size between feedings, switch to feeding every 12 hours. Discard all but 100g of starter. Feed with 50g flour and 50g water. Repeat this feeding in 12 hours.
- Day 6: Building Strength. Continue the 12-hour feeding schedule. Your starter should be very active, showing large bubbles, and reliably doubling in volume within 4-8 hours after feeding. This is when you are building a strong, active sourdough starter.
- Day 7: Ready to Use. Your homemade sourdough starter is ready when it consistently doubles in size within 4-6 hours after feeding and smells pleasantly sour, not foul. You can now use it for baking or transition to a maintenance schedule.
Notes
- Use filtered or bottled water if your tap water is heavily chlorinated, as chlorine can inhibit wild yeast growth.
- A consistent room temperature is key; cooler temperatures slow fermentation, warmer temperatures speed it up.
- If you see mold or pink/orange streaks, discard the entire batch and start over. Healthy starters only show white or clear liquid (hooch) on top.
- To keep your starter active long-term, feed it daily if kept on the counter, or once a week if stored in the refrigerator.
Nutrition
- Serving Size: 50g
- Calories: 110
- Sugar: 0.1
- Sodium: 1
- Fat: 0.3
- Saturated Fat: 0.05
- Unsaturated Fat: 0.25
- Trans Fat: 0
- Carbohydrates: 23
- Fiber: 1.5
- Protein: 3.5
- Cholesterol: 0