
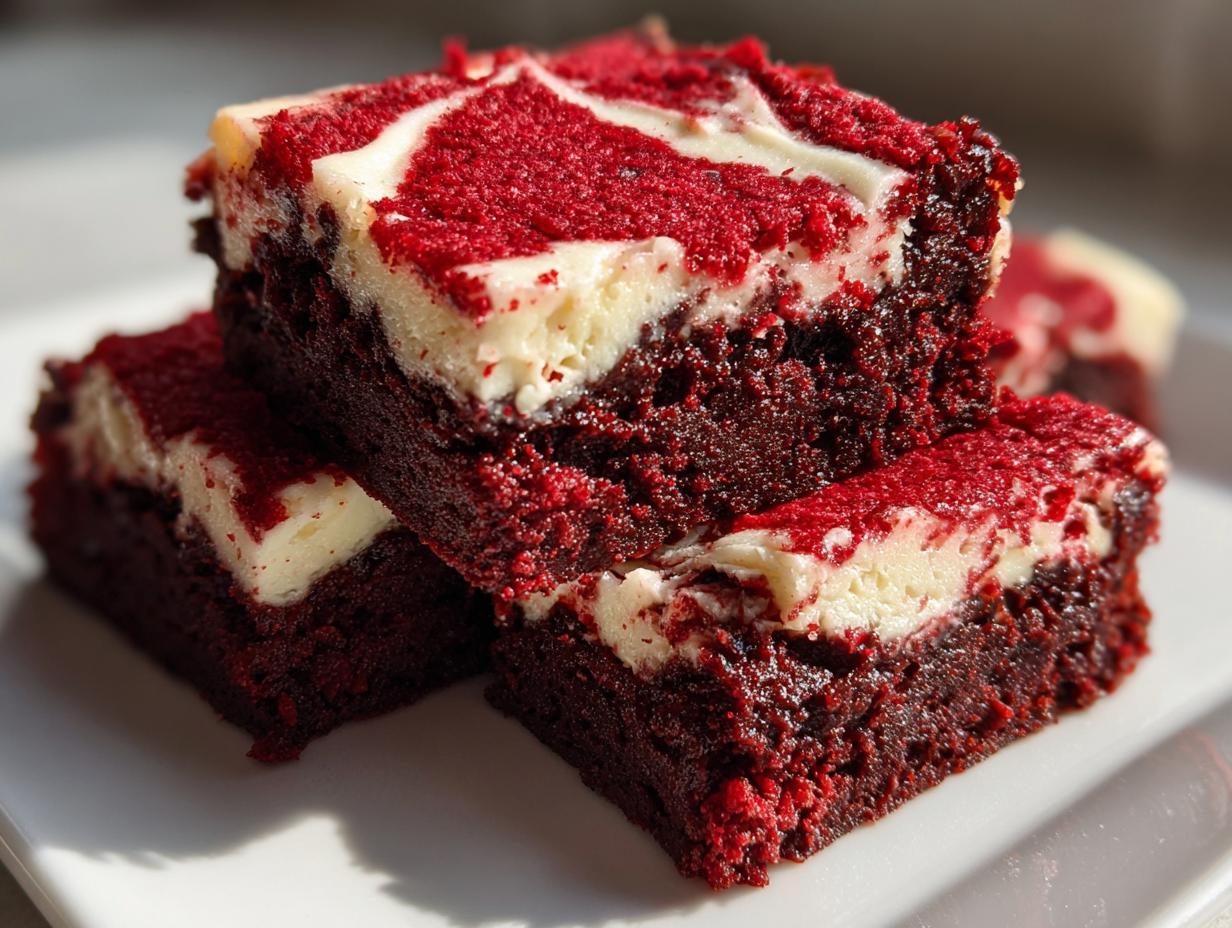
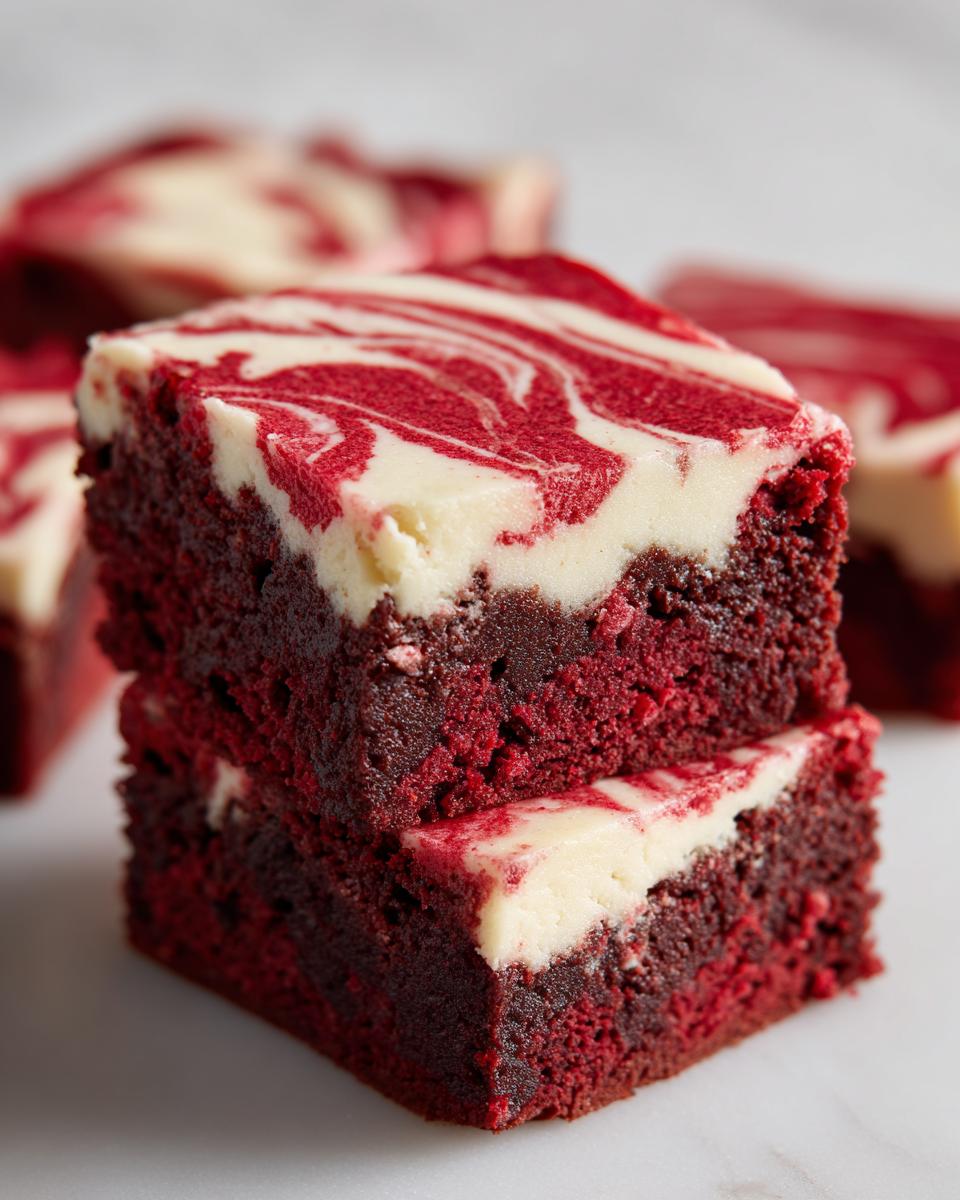
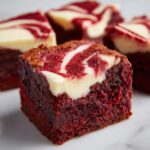
Sometimes, you just need a dessert that feels incredibly special without spending half the day in the kitchen fussing over it. That’s exactly what these red velvet brownies are! They hit that perfect sweet spot: incredibly fudgy texture, a stunning, deep red color, and that tangy homemade cream cheese frosting swirl that just melts in your mouth. I’ve spent years perfecting simple, dependable recipes here at Cooking by Carla, and I promise you, this is the most straightforward way to achieve these decadent brownies. Trust me, they taste like they came straight from a high-end bakery, but you made them right here at home.
If you’re looking for stunning dessert ideas for parties or maybe just a really luxurious weekend treat, you’ve found the winner. They are rich, they are chewy, and they will certainly impress!
- Why You Will Love This Fudgy Red Velvet Brownies Recipe
- Gathering Ingredients for Your Red Velvet Brownies
- Step-by-Step Instructions for Perfect Red Velvet Brownies
- Tips for Achieving the Best Fudgy Red Velvet Brownies
- Ingredient Notes and Substitutions for Red Velvet Brownies
- Serving Suggestions for Rich Chocolate Desserts
- Storage and Reheating Instructions for Homemade Brownies
- Frequently Asked Questions About Red Velvet Brownies
- Estimated Nutritional Information for Red Velvet Brownies
- Share Your Decadent Brownies Experience
Why You Will Love This Fudgy Red Velvet Brownies Recipe
Honestly, these are quickly becoming one of my family’s favorite treats, especially when we need something eye-catching! You don’t need to be a professional baker to nail this one. Look at what you get:
- They are genuinely fudgy brownies—not cakey, not dry, just perfectly dense and chewy.
- The color is always vibrant and consistent, perfect for any holiday like Christmas or Valentine’s Day.
- The cream cheese swirl topping adds that necessary tangy punch to balance the richness.
- It’s a straightforward, one-pan recipe that makes cleanup a breeze!
What’s not to adore?
Gathering Ingredients for Your Red Velvet Brownies
Alright, let’s get down to the good stuff. Making something this decadent means we need quality ingredients, but don’t panic! I’ve kept this list as straightforward as possible. We are making two main parts: the rich, fudgy brownie base, and the tangy, bright cream cheese topping. Getting the temperature and type of ingredients right here is how we guarantee these turn out beautifully.
If you’re looking for other simple sweets, you might adore my easy peanut butter fudge recipe, but for now, gather these items for our main event!
Ingredients for the Rich Red Velvet Brownie Batter
For this base, we need things that bring in moisture and that deep chocolate undertone. Remember, the melted butter is key here!
- 1 cup (2 sticks) unsalted butter, melted
- 1 3/4 cups granulated sugar
- 1 cup packed light brown sugar
- 4 large eggs
- 1 tablespoon vanilla extract
- 1 teaspoon white vinegar
- 2 tablespoons red food coloring (I insist you use the gel kind if you have it—it keeps the color brighter!)
- 1 1/2 cups all-purpose flour
- 3/4 cup unsweetened cocoa powder
- 1 teaspoon salt
Ingredients for the Cream Cheese Frosting Brownies Topping
This simple frosting gets dropped right on top of the batter before baking, which is what creates that lovely swirl. Make sure your dairy items are actually soft so you aren’t dealing with lumps!
- 8 ounces cream cheese, softened
- 1/4 cup (1/2 stick) unsalted butter, softened
- 1 1/2 cups powdered sugar
- 1/2 teaspoon vanilla extract
Step-by-Step Instructions for Perfect Red Velvet Brownies
When you are finally ready to bake, this process moves quite quickly, which is why I love these as emergency holiday treats! We need to mix these components in the right order to ensure we don’t accidentally turn our beautiful batter into cake. Remember, the goal here is decadent brownies, which means minimal mixing once the flour goes in. For inspiration on other great chocolate toppings, check out my guide on fluffy buttercream, but for now, let’s focus on these reds!
Preparing the Pan and Mixing the Wet Ingredients for Red Velvet Brownies
First things first: get that oven preheated to 350 degrees F. You’ll want to line your 9×13 inch baking pan with parchment paper, leaving a nice overhang on the sides—this is my non-negotiable trick for getting them out in one piece! Lightly grease that paper, just in case. Now, grab a large bowl. Whisk the melted butter, granulated sugar, and that packed brown sugar together until they look happy. Then, one by one, whisk in the eggs until they are completely mixed in. Don’t rush this part; we want those ingredients integrated! Finally, stir in the vanilla, white vinegar, and then add all that gorgeous red food coloring. Keep mixing until you have a truly deep, vibrant red color coating everything.
Combining Dry Ingredients and Making the Final Brownie Batter
In a separate bowl, just give the flour, cocoa powder, and salt a quick whisk together so they are evenly distributed. Now, start adding those dry ingredients to your wet mixture slowly. Here is the most crucial part for fudginess: mix *just* until they combine. I mean it! If you see a few streaks of flour left, that’s okay—leave them! Overmixing develops gluten, and gluten makes cake, not fudgy brownies. Spread that slightly streaky batter evenly into your prepared pan and move on to the frosting layer.
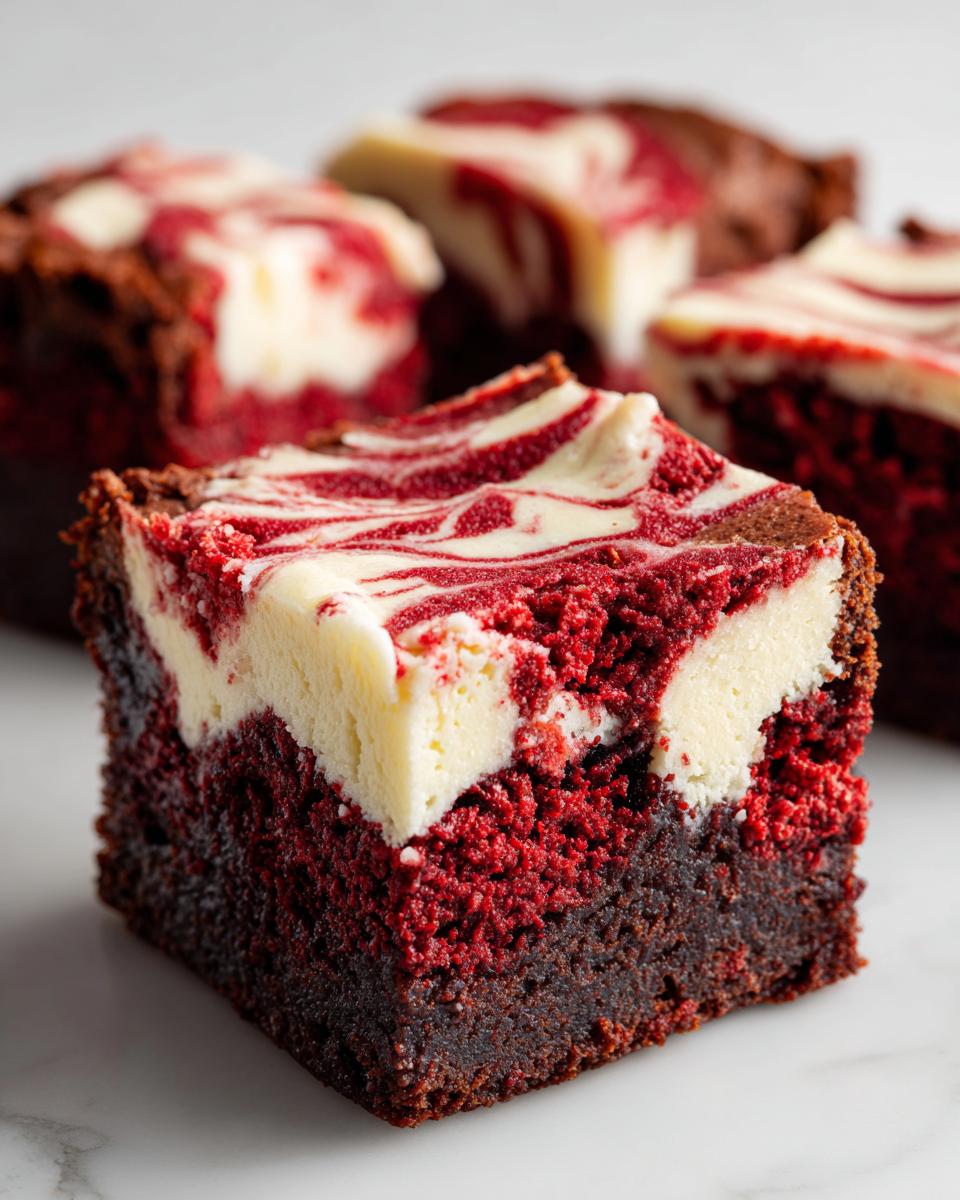
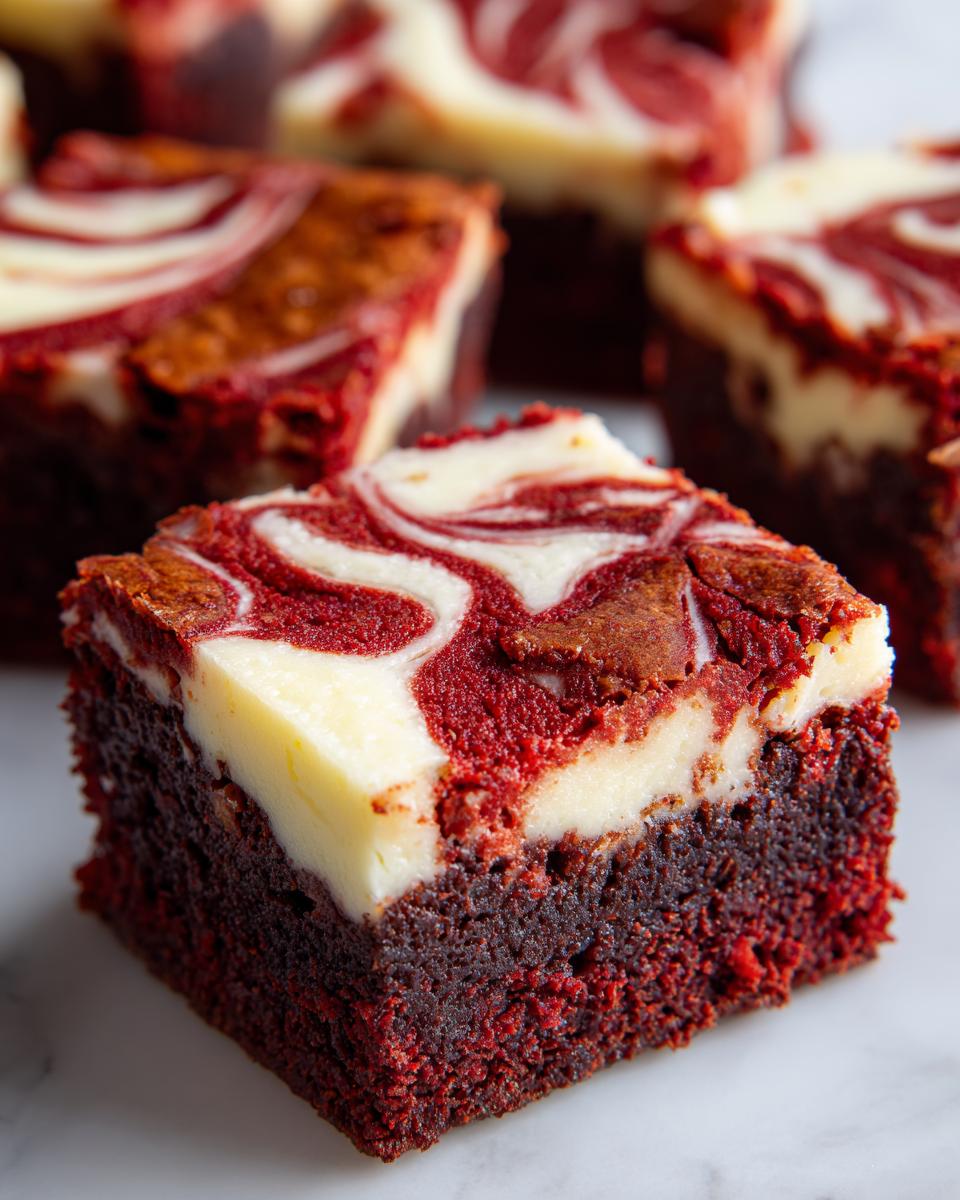
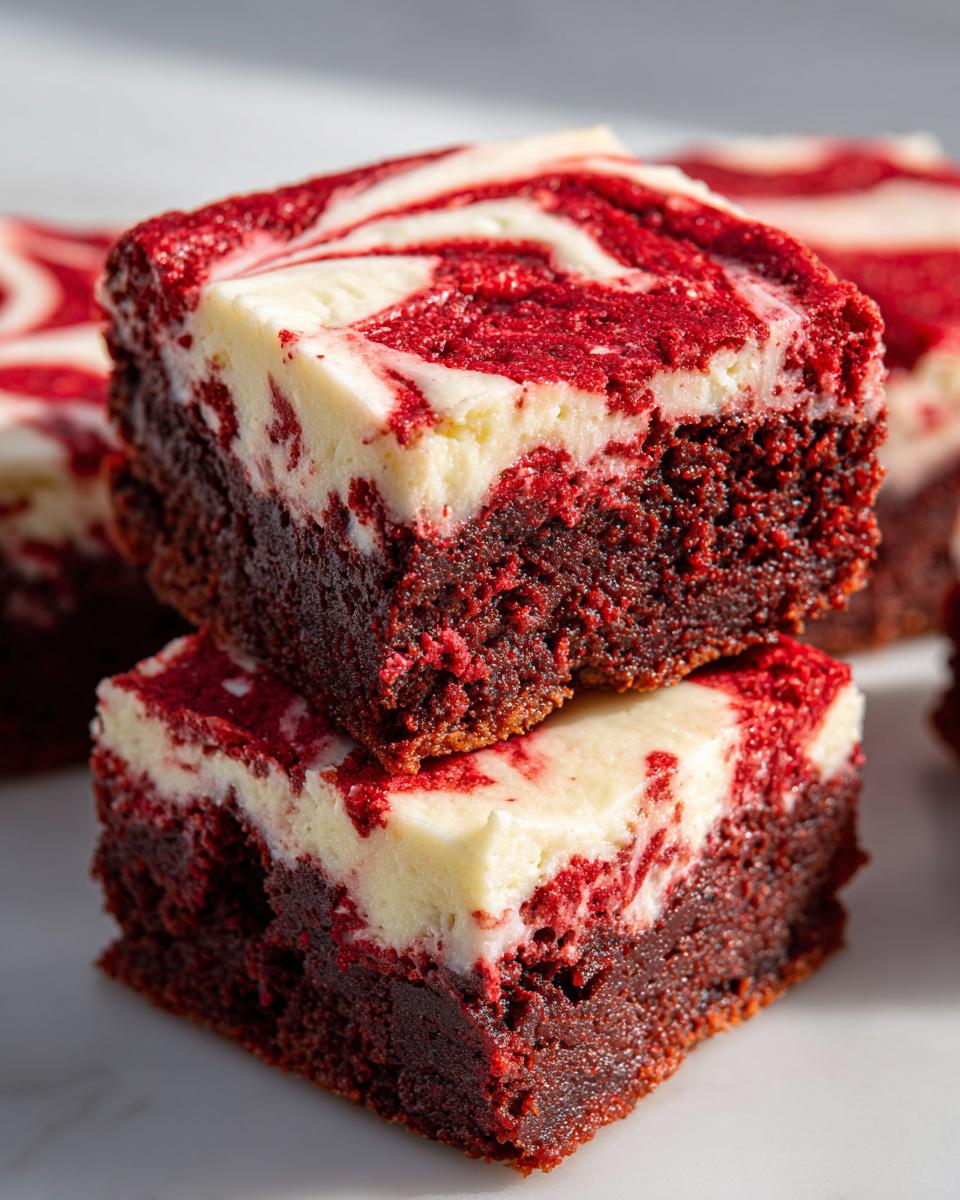
Creating and Swirling the Cream Cheese Topping on Red Velvet Brownies
Time for that tangy counterpoint! In another bowl, beat your softened cream cheese and softened butter together until they are perfectly smooth—no lumps allowed! Then, slowly beat in the powdered sugar until it’s all creamy. Stir in the vanilla. Now, take spoonfuls of this cream cheese topping and drop them randomly all over the surface of your bright red batter. Take a knife or a thin skewer and gently draw patterns through the batter. You don’t need to mix it completely; we are looking for that beautiful marbled, swirled effect when it bakes up. For more ideas on decadent batches, see how others make theirs here.
Baking and Cooling Your Decadent Brownies
Pop the pan into that 350-degree oven and let them bake for about 30 to 35 minutes. You are checking for doneness, not dryness! The edges should look set, but when you insert a toothpick toward the center, it should come out with moist crumbs attached—if it’s wet batter, give it a few more minutes. The minute you pull them out, resist the urge to cut them! You MUST let the brownies cool completely on a wire rack inside the pan before you even think about lifting them out using those parchment overhangs. Cutting them warm is a guaranteed way to lose that perfect fudgy structure.
Tips for Achieving the Best Fudgy Red Velvet Brownies
We want these red velvet brownies to be fudgy and beautiful, not like a sad, dry cake! The notes in the recipe are really my hard-won wisdom, so pay attention to them. For that intense, perfect red color, you absolutely must reach for a gel food coloring versus the liquid drops you might keep around for Easter eggs. The liquid kind waters down the batter too much.
Also, please, please, please—do not overbake! I know it’s tempting to keep them in until the toothpick is perfectly clean, but for fudgy brownies, we want those moist little crumbs clinging to the toothpick when it comes out. If you’re struggling with that, here’s a tip from my own kitchen: make sure your eggs are sitting out on the counter for at least 30 minutes before you start. Room temperature ingredients combine much more smoothly, which helps lock in moisture! For more incredibly rich, fudgy treats, you should look at my guide on flourless chocolate cake, but you won’t want to make anything else once you taste these. If you need external ideas on getting that perfect texture, check out this guide on fudgy red velvet brownies.
Ingredient Notes and Substitutions for Red Velvet Brownies
When we’re making something as specific as red velvet brownies, sometimes the little details make all the difference between a snack and a showstopper. I want you to feel confident walking into the kitchen, knowing exactly *why* I listed certain ingredients the way I did.
Let’s talk about that color first. If you grab your standard bottle of liquid red food coloring, you’ll notice the color comes out a bit muted, almost brownish-red. That’s because the liquid coloring has a high water content, which disrupts the rich cocoa and fat balance we need for that perfect fudgy texture! That’s why I insist on using a good quality gel food coloring. The gel is concentrated, so a little goes a long way, giving you that truly vibrant red color without thinning out the batter one bit. It’s a small step, but it keeps the chocolate flavor tasting rich, not diluted.
Now, for a little substitution tip. The recipe calls for white vinegar and mixing it into the wet ingredients. This is traditional red velvet flavor, but if you happen to not have vinegar on hand and you have buttermilk in the fridge, you can swap those two tablespoons of vinegar for two tablespoons of buttermilk. Buttermilk has that necessary acidity, and it’s actually a bit thicker, which can help maintain that great texture we are aiming for in these homemade brownies. Just make sure you use whatever you substitute consistently throughout the recipe!
Serving Suggestions for Rich Chocolate Desserts
Now that you have these stunning, decadent brownies cooled and cut, the next major decision is deciding how to serve them! These aren’t just any treats; they are beautiful enough to be the star of any gathering—whether it’s Valentine’s Day, Christmas, or just a Saturday night when you crave something truly chocolatey.
Because these rich chocolate desserts already have that wonderful tanginess from the cream cheese, they don’t really need much extra fussing, but I have a few favorite ways to dress them up or pair them for the perfect experience. If I’m making a big batch for a party, I like to have some simple plating options ready.
Here are my easy ideas for making your red velvet brownies shine:
- A Simple Dusting: Sometimes, less is more. If your cream cheese swirl is already pretty, a very light dusting of powdered sugar right before serving—just enough to catch the light—is elegant.
- Fresh Fruit Contrast: The tartness of a fresh raspberry or a few slices of strawberry cuts through the richness perfectly. Place one berry right beside each square on the plate. It adds a lovely color pop, too!
- The Perfect Drink Pairing: Since these are so rich, a strong, slightly bitter beverage really cleanses the palate between bites. My favorite pairing is a steaming mug of my best homemade rich, creamy hot chocolate (yes, even more chocolate!) brewed very dark, or simply a strong cup of black coffee. For the kids, even plain cold milk is perfect to handle the intensity.
- A Touch of Crunch: If you want to elevate the texture, try sprinkling a few finely chopped pecans over the cream cheese swirl right before baking. They add a nutty depth that goes surprisingly well with the red velvet profile.
No matter how you serve them, I guarantee these treats will disappear quickly. For more inspiration on making show-stopping desserts, I always love browsing what other folks are baking, like this fantastic recipe for ultimate fudgy red velvet brownies!
Storage and Reheating Instructions for Homemade Brownies
One of the best things about this easy brownie recipe is that they hold up so wonderfully over a few days—if they last that long, that is! Because we used that luscious cream cheese topping, we do need to be a little thoughtful about storage to keep everything tasting fresh and prevents the frosting from getting too messy.
In my house, I rarely store red velvet brownies at room temperature for more than a day, especially if it’s humid. The cream cheese layer really benefits from being kept cool, and frankly, I think a slightly chilled brownie becomes incredibly dense and fudgy, which I absolutely adore.
Here is my routine for keeping your homemade brownies perfect:
- Refrigeration is your friend: Once the brownies are completely cooled—and I mean stone cold, usually after setting them out for a few hours—transfer them to an airtight container. I layer them with sheets of wax paper between the layers so they don’t stick together. They will stay wonderful in the fridge for up to five days this way.
- Bringing them back to life: If you prefer a slightly softer, room-temperature chew, just pull the portion you plan to eat out of the fridge about 30 minutes before serving. This lets the butter and fats soften up just enough to give you that melt-in-your-mouth texture without making them greasy.
- For a quicker warm-up: If you’re just having one square and want it warm right now (maybe paired with a scoop of vanilla ice cream!), wrap that single square loosely in a paper towel and microwave it for about 10 to 15 seconds. Watch it closely! You want it barely warm, not molten, especially because of that cream cheese swirl.
These truly are the **best brownie recipe** for making ahead, which is why they are excellent Christmas or Valentine’s Day desserts! Just make sure they are firmly covered wherever you store them.
Frequently Asked Questions About Red Velvet Brownies
When you are baking something as special as these red velvet brownies, I know questions pop up! That’s totally normal. I always gathered questions from my students before letting them present their projects, and I treat you all the same way—I want you to feel confident every step of the way. Here are the most common things I hear from folks making this recipe!
How do I make sure my red velvet brownies are fudgy, not cakey?
Oh, this is the million-dollar question for any brownie lover! The key to achieving that dense, gooey, fudgy brownie texture is two-fold. First, we use a lot of fat (butter!) relative to the flour. Second, and most important: Do not overmix once the flour comes in. I keep hammering this point because it’s vital! When you mix flour too much, you build up the gluten structure, and that leads to a fluffy, cake-like result. We are aiming for just combined—a few little flour streaks are your friends here!
Can I make these Cream Cheese Frosting Brownies ahead of time?
Yes, you absolutely can, and I often suggest it, especially if you are baking for a party or holiday gathering! If you make and bake them, let them cool completely, and then cover them. These cream cheese frosting brownies do really well in the refrigerator for up to five days. As I mentioned earlier, letting them chill actually firms up that fudgy texture in a delicious way. If you plan to frost them ahead of time, leave them refrigerated, but pull them out about 30 minutes before serving so they aren’t rock hard when you cut them.
What is the best way to get a truly vibrant red color?
We discussed this a bit, but I want to stress it again because color contrast is what makes these showstoppers! Skip the standard liquid drops. You need gel food coloring for that deep, vibrant red desserts look we want. Gel coloring is super concentrated and won’t throw off the moisture balance of the batter. I also do a little trick: since sometimes the cocoa powder can mute the red slightly, make sure your cocoa powder is a good quality but don’t skimp on the amount, and then be slightly generous with the gel. The red needs to fight through that dark chocolate base, and gel coloring wins that fight every time!
For more straightforward baking tips that build confidence, check out my guide on the easy brownie recipe collection on my site!
Estimated Nutritional Information for Red Velvet Brownies
Now, listen, I made my living teaching third grade for thirty years, not crunching numbers in a lab! So, take this information with a grain of salt—or maybe a grain of sugar, given what we baked here! This is just an estimate based on the ingredients I listed and cutting the pan into 16 squares. It’s a good benchmark, but remember, these rich chocolate desserts taste best when you aren’t worrying too much about the counting!
These decadent brownies are certainly a treat, and knowing the basics helps when planning a menu for gatherings.
Here is the breakdown for one hearty square:
- Calories: Approximately 350
- Fat: About 20g (Keep in mind the butter and cream cheese add up here!)
- Carbohydrates: Around 42g
- Sugar: Roughly 35g (We use both brown and granulated, after all!)
- Protein: About 4g
Remember, this estimate is based on a standard serving size of one square from the 9×13 pan. If you cut them smaller, the numbers go down, but honestly, who wants a tiny piece of the best brownie recipe? Enjoy these wonderful homemade brownies responsibly!
Share Your Decadent Brownies Experience
Well, that’s it! You’ve made the absolute best, most fudgy chocolate dessert I know how to teach—these are truly wonderful red velvet brownies. But here at Cooking by Carla, we are all about building memories together, and that means I truly love hearing from you!
When you take that first bite, or when you see the look on someone’s face when they try one of these holiday brownies, please come back here and let me know how it went. Did you make them for Valentine’s Day? Or were they the star of your Christmas dessert table?
Leave a star rating right below this post so others know what a dependable recipe this is. I read every single comment; it truly warms my heart to know I’ve helped you create something delicious in your own kitchen.
If you’re ever curious about me and how this whole site started, you can read a bit more about my journey over at my About page. Now go enjoy those beautiful treats!
PrintFudgy Red Velvet Brownies with Cream Cheese Frosting
Make rich, fudgy red velvet brownies with a vibrant color and top them with a tangy cream cheese frosting. This easy recipe delivers a decadent dessert perfect for holidays or parties.
- Prep Time: 20 min
- Cook Time: 35 min
- Total Time: 55 min
- Yield: 16 servings 1x
- Category: Dessert
- Method: Baking
- Cuisine: American
- Diet: Vegetarian
Ingredients
- 1 cup (2 sticks) unsalted butter, melted
- 1 3/4 cups granulated sugar
- 1 cup packed light brown sugar
- 4 large eggs
- 1 tablespoon vanilla extract
- 1 teaspoon white vinegar
- 2 tablespoons red food coloring (gel preferred)
- 1 1/2 cups all-purpose flour
- 3/4 cup unsweetened cocoa powder
- 1 teaspoon salt
- 8 ounces cream cheese, softened
- 1/4 cup (1/2 stick) unsalted butter, softened
- 1 1/2 cups powdered sugar
- 1/2 teaspoon vanilla extract
Instructions
- Preheat your oven to 350 degrees F. Line a 9×13 inch baking pan with parchment paper, leaving an overhang on the sides for easy removal. Lightly grease the paper.
- In a large bowl, whisk together the melted butter, granulated sugar, and brown sugar until combined.
- Whisk in the eggs one at a time until fully incorporated. Stir in the vanilla extract and white vinegar.
- Add the red food coloring and mix until you achieve a deep, vibrant red color throughout the batter.
- In a separate medium bowl, whisk together the flour, cocoa powder, and salt.
- Gradually add the dry ingredients to the wet ingredients, mixing just until combined. Do not overmix; a few streaks of flour are acceptable for fudgy brownies.
- Spread the brownie batter evenly into the prepared baking pan.
- To make the cream cheese topping, beat the softened cream cheese and softened butter together in a bowl until smooth.
- Gradually beat in the powdered sugar until fully combined and creamy. Stir in the vanilla extract.
- Drop spoonfuls of the cream cheese mixture evenly over the top of the brownie batter. Use a knife or skewer to gently swirl the cream cheese into the batter for a marbled effect.
- Bake for 30 to 35 minutes. The edges should look set, and a toothpick inserted near the center should come out with moist crumbs attached, not wet batter.
- Let the brownies cool completely in the pan on a wire rack before lifting them out using the parchment overhang.
- Once cool, cut into squares.
Notes
- For the most intense red color, use a high-quality gel food coloring instead of liquid drops.
- Do not overbake these brownies; slightly underbaking them ensures a fudgy texture.
- If you prefer a thicker layer of frosting, you can chill the brownies completely before spreading the cooled cream cheese frosting on top.
Nutrition
- Serving Size: 1 square
- Calories: 350
- Sugar: 35
- Sodium: 180
- Fat: 20
- Saturated Fat: 12
- Unsaturated Fat: 8
- Trans Fat: 0.5
- Carbohydrates: 42
- Fiber: 1
- Protein: 4
- Cholesterol: 75