
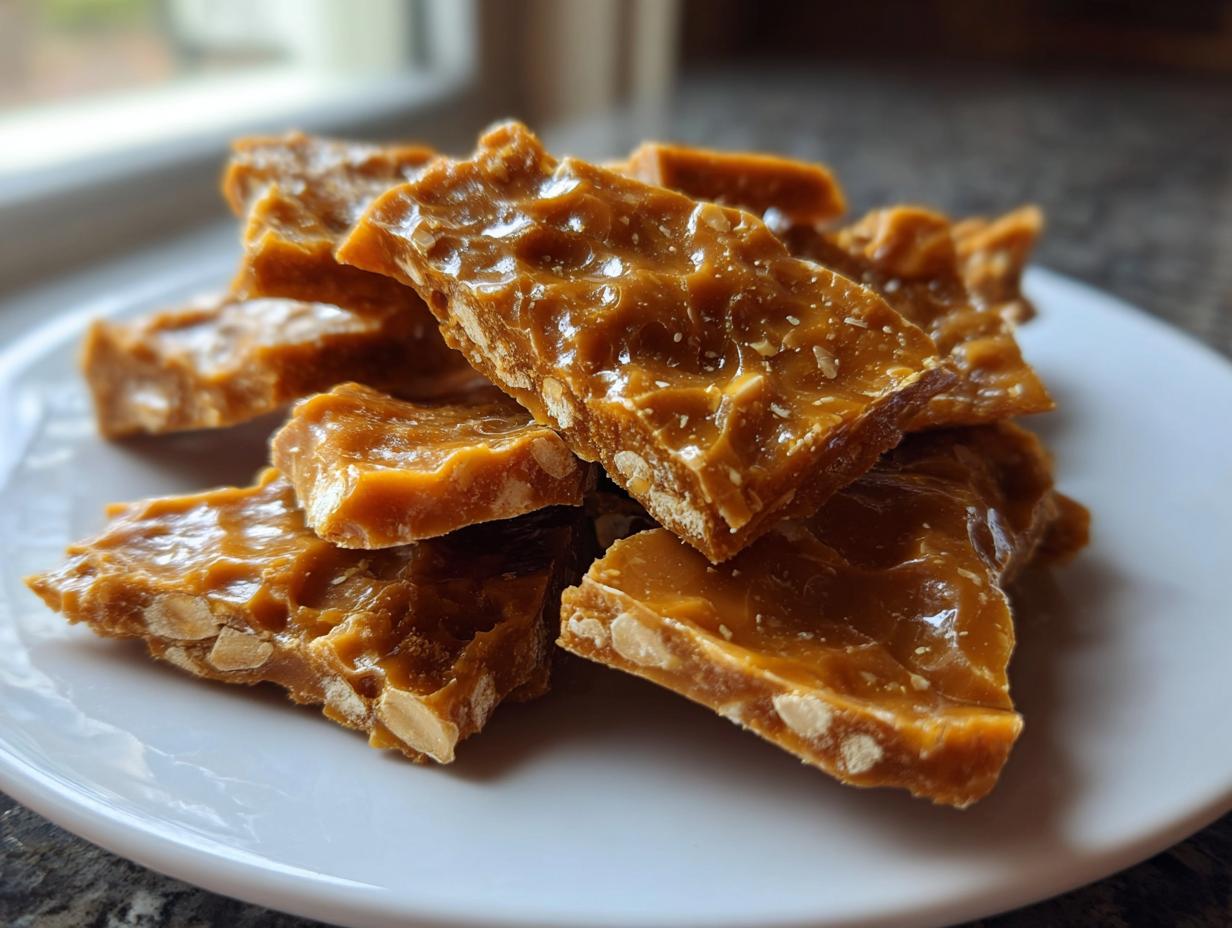
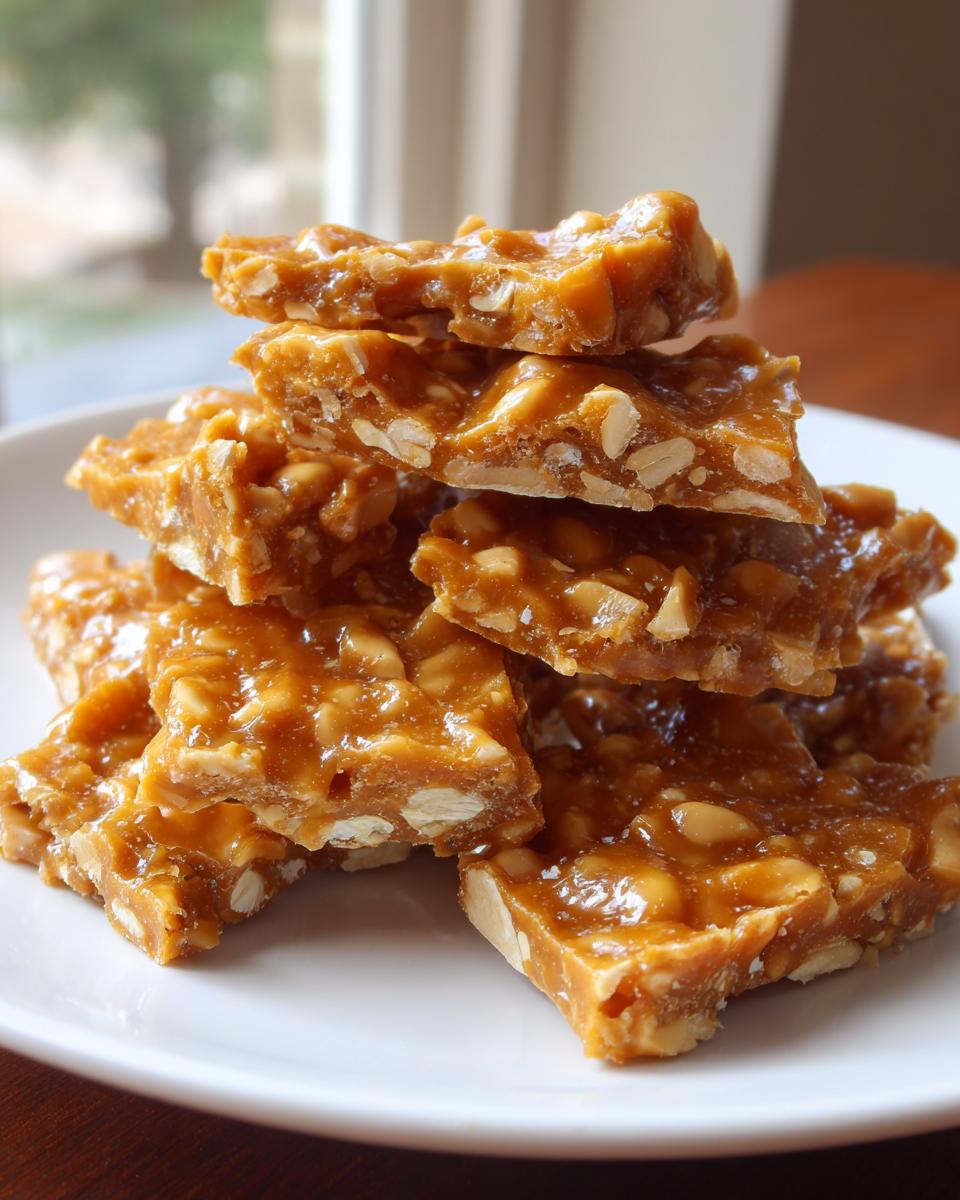
Oh, that sound! There is just nothing better than the sharp, unmistakable *snap* you get when you break a piece of perfectly made peanut brittle. If you’ve fought with brittle before, ending up with something closer to taffy than glass, I completely understand. That’s why I’m sharing my Easy Old-Fashioned peanut brittle recipe. After thirty years of standing at the front of a classroom, I learned that patience and clear instructions solve almost any problem, and that goes double for candy making! This recipe is designed to guide you right through hitting that crucial temperature so you can finally enjoy that classic, buttery crunch you’ve been missing.
- Why This Old Fashioned peanut brittle recipe Delivers the Perfect Snap
- Gathering Ingredients for Your peanut brittle recipe
- Essential Equipment for Your Homemade peanut brittle recipe
- Step-by-Step Instructions for the perfect peanut brittle recipe
- Troubleshooting Common Issues with Your peanut brittle recipe
- Storage & Serving Suggestions for Your Classic Confection Recipe
- Making this peanut brittle recipe a Holiday Brittle Recipe Tradition
- Estimated Nutritional Data for this peanut brittle recipe
- Share Your Homemade peanut brittle Recipe Success
Why This Old Fashioned peanut brittle recipe Delivers the Perfect Snap
I promise you, the struggle ends here! So many recipes promise brittle but deliver sad, sticky squares. Not ours! This is truly a no fail brittle if you follow the temperature marker. When I make this crunchy candy recipe, I know exactly what I’m going to get—shatteringly crisp every single time. If you’re nervous about candy making, don’t be. Making this brittle gives you the same satisfaction as having perfected any other tricky bake, like my soft peanut butter blossoms, which you can find right here.
Key Attributes of Our Crunchy Candy Recipe
- We zero in on the perfect hard crack stage, ensuring that satisfying, clean break.
- It uses pantry staples—nothing fancy required for this classic confection.
- This brittle is absolutely beautiful, making it an ideal choice for homemade food gifts during the holidays.
Gathering Ingredients for Your peanut brittle recipe
The beauty of this peanut brittle recipe is that it relies on simple, trustworthy ingredients. You probably have most of this sitting on your shelf already! When you look at the list, make sure you grab roasted, unsalted peanuts. I know, I know, you might be tempted to use raw ones, but please stick with roasted. That process deepens the flavor so much, making this a truly wonderful classic confection recipe.
For those wanting to check out my favorite soft cookie dough while the brittle sets, you can grab that easy peanut butter cookie recipe over here. We need just a few things for this candy:
- 2 cups granulated sugar
- 1 cup light corn syrup
- 1 cup water
- 2 cups roasted, unsalted peanuts
- 2 tablespoons unsalted butter
- 1 tablespoon baking soda
- 1 teaspoon vanilla extract
Essential Equipment for Your Homemade peanut brittle recipe
Now, before you even think of turning on the burner, we need to talk about your tools. Candy making, unlike baking a cake, is less forgiving when it comes to time and temperature. If you want this homemade peanut brittle to snap like glass, you need the right support system. Don’t worry if you don’t have fancy gadgets; what matters is the precision we need here.
The absolute, non-negotiable hero of this process is your candy thermometer. If you try to guess, you will probably end up with soft, sticky candy, and that just breaks my heart! My teaching background comes in handy here—I always tell my readers, follow the guide, and the results will follow.
The Importance of a Candy Thermometer Guide
This brittle relies entirely on hitting that ‘hard crack’ stage, which is 300 degrees Fahrenheit. If you stop at 290°F, it’ll be soft. If you go to 310°F, it’ll likely taste burnt. It’s a tiny window! So, getting a reliable Candy Thermometer Guide is essential for creating this easy peanut candy. Clamp that bad boy right into your heavy saucepan so the tip doesn’t touch the bottom, and watch it like a hawk as the temperature climbs toward 300°F. Trust the thermometer, not your eyes, for this cooking milestone!
Step-by-Step Instructions for the perfect peanut brittle recipe
Alright, deep breath! This is where the magic happens, but we have to move quickly toward the end here. Remember, we’re cooking sugar, and sugar can go from perfect to pavement in the blink of an eye. We start gentle: sugar, corn syrup, and water go into a heavy pot over medium heat. Stir it just until that sugar dissolves—that’s key for preventing crystals later on. Then, insert your thermometer and just let it bubble away until it hits 250°F. That’s the soft ball stage, and it takes a good 15 to 20 minutes of patience.
Once you hit 250°F, toss in those 2 cups of peanuts and keep watching that dial. If you need a refresher on how to manage that, I have a quick guide on homemade applesauce that helps you focus on process over speed, which might help settle your nerves!
Reaching the Hard Crack Stage: The Secret to How to Make Brittle That Snaps
Step five is the make-or-break moment for knowing how to make brittle that snaps. You absolutely must hit 300°F—that’s the hard crack stage. If your thermometer is being stubborn or you’re nervous, you used to be able to drop a bit of the syrup into ice water; if it formed hard, brittle threads you could snap, you were golden. But honestly, dear reader, trust your thermometer! It prevents guesswork and guarantees that shiny, glassy texture we are aiming for.
The Quick Finish: Adding Baking Soda to the peanut brittle recipe
The second you see 300°F, yank that pan right off the heat! Immediately stir in the butter, vanilla, and that essential baking soda. Wow, will it foam up! That baking soda is what creates all those wonderful little air bubbles that keep the final product from being too dense. Stir maybe three or four times just to combine it all. Don’t dawdle, but don’t overmix either, because the setting process starts instantly. Pour it right onto your prepared sheet and let it be! No touching, no spreading, just let it cool naturally.
Troubleshooting Common Issues with Your peanut brittle recipe
Even with the best recipe in the world, sometimes those sugar temperatures can play tricks on us! That’s why I think being able to troubleshoot is just as important as following the initial steps. I’ve spent years teaching cooks how to recover or adjust, and handling a temperamental sugar batch is a great skill to learn for all your future endeavors creating caramelized nut candy.
If you’ve followed the steps but still ended up with something sticky, don’t throw it out just yet! We can usually figure out what went wrong. Sometimes the solution is just waiting a little longer, and sometimes, yes, we have to admit defeat on that batch and try again. If you want to see how others troubleshoot their candy making, I always enjoy reading through posts like Lulu’s over here—it helps remind me that even the pros have off days!
Why is my peanut brittle chewy instead of crisp?
This is the number one question I get about homemade peanut brittle, and almost every time, the answer is temperature. If your brittle is chewy, it means the sugar syrup didn’t quite reach the hard crack stage—that magic 300°F mark. Sugar molecules need to be cooked to that specific point to align into a hard, glassy structure when they cool. If you pulled it off the burner at, say, 295°F, it will definitely set up soft. The other common culprit is humidity. If you live somewhere really damp, you must let the brittle cool completely undisturbed and in a very dry area. Moisture is taffy’s best friend, and we want the opposite!
My sugar mixture turned dark brown—what happened to this Old Fashioned Brittle?
If you look down at your pot and the color is approaching deep mahogany instead of a lovely amber gold, oh honey, you burned it. Truly, that’s what happened. Sugar burns very quickly once it passes that 305°F mark, but even if you didn’t pass the temperature, leaving it on the heat too long while it climbs toward 300°F can scorch it. A burnt sugar mixture results in a very bitter flavor that no amount of butter can hide. To prevent this in the future, make sure you keep your pan over a medium heat that allows steady rising, not a raging inferno that scalds the bottom while the top waits its turn!
Storage & Serving Suggestions for Your Classic Confection Recipe
Once your peanut brittle recipe has cooled completely—and I mean hard as a rock, usually about 30 minutes on the counter—the next big question is, how do I keep this gorgeous, crunchy candy around for more than five minutes? Good news: this is one of the easier candies to store, provided you follow my one cardinal rule: keep it away from the freezer or refrigerator!
Temperature fluctuations and moisture are the sworn enemies of snappy candy. If you chill brittle, the condensation that forms when you pull it out will instantly turn that beautiful crunch into a sticky mess. Store your broken pieces in a cookie tin or a sturdy, airtight container at cool room temperature. If you layer it, put wax paper or parchment pieces between the layers so they don’t bond together.
When it comes time to serve this classic confection recipe, don’t keep it hidden away! It makes an incredible crunchy topping crumbled over vanilla ice cream, or honestly, just serve it alongside a fresh cup of coffee. It’s the perfect sweet and salty snack to anchor a dessert board. If you’re making a big batch for gifting, remember to wrap those pieces individually in cellophane bags. They look so professional, like something you bought right off the shelf at a fancy candy shop! If you need a homemade drizzle to go with it (maybe drizzle the brittle with chocolate?), I’ve got a simple chocolate syrup recipe you can thin out just a bit for drizzling!
Making this peanut brittle recipe a Holiday Brittle Recipe Tradition
When I look at this peanut brittle recipe, I don’t just see sugar and nuts; I see our big dining room table piled high for Christmas. This is my favorite seasonal bake! There’s something so nostalgic about making true old fashioned brittle that just screams tradition. My mother always made a triple batch of this to include in our neighbor tins. It was always the first thing gone!
It’s such a lovely idea for a Holiday Brittle Recipe because it holds up so well for gifting. If you’re putting together a basket of edible gifts, this is a must-have component. It goes so well right next to a slice of my easy mincemeat pie, which you can find the recipe for when you’re ready for more holiday cheer. I truly hope this brittle becomes a centerpiece of your own yearly Christmas candy recipes, just like it is in our kitchen. If you love checking out other inspiring holiday bakes, I always peek at what those clever folks are doing over at Little Cooks Reading Books!
Estimated Nutritional Data for this peanut brittle recipe
I always get asked about the numbers, dear reader, and while I spent most of my career focusing on making sure third graders ate their vegetables, I can certainly share what the general estimates are for our peanut brittle recipe. Please remember, these are just guidelines! Since we are making this from scratch brittle, and depending on the exact size of your peanuts or how much butter really sticks to the pan, your exact numbers will shift a little.
But for a standard serving—about one ounce of this glorious sweet and salty snack—here’s what the breakdown looks like:
- Serving Size: 1 ounce
- Calories: 160
- Sugar: 18g
- Sodium: 45mg
- Fat: 8g
- Saturated Fat: 2g
- Carbohydrates: 21g
- Protein: 4g
See? It’s candy, so yes, there is sugar, but because we are using real butter and those hearty peanuts, you get a satisfying energy boost that lasts a bit longer than just plain, sugary hard candy. If you’re looking for another great pairing that blends salty and sweet, you might want to check out my recipe for no-bake chocolate peanut butter protein balls when you’re done breaking up your brittle!
It is important to note that these values are estimates based on the recipe ingredients provided. If you find your brittle is stickier than expected (which means it’s softer and you might eat a larger piece!), the calorie count will change slightly.
Share Your Homemade peanut brittle Recipe Success
Now it’s your turn, dear one! I have shared everything I know about hitting that perfect 300°F so you can make that glorious, crackling, peanut brittle recipe that tastes just like the old days. Candy making can feel intimidating, but I truly believe that with a little patience and my clear steps, you’ve made a batch you are proud of. I’m eager as a student waiting for test results to know how it went!
When you finish breaking up your brittle—did it snap perfectly? Tell me how that crack sounded! Please take a moment to leave a star rating right here on the recipe card for me. Those ratings really help other home cooks, just like you, feel confident taking on this amazing sweet and salty snack. If you had any little hiccups, pop those questions into the comments below, too. I always check in and love hearing from you. If you have any general questions about my kitchen or need to reach out for other reasons, the contact page is always open right here. Happy crunching!
PrintEasy Old-Fashioned Peanut Brittle Recipe for Perfect Snap
Make classic, crunchy homemade peanut brittle that snaps perfectly every time. This straightforward recipe guides you through reaching the hard crack stage for a satisfying, buttery, sweet, and salty confection ideal for gifting.
- Prep Time: 10 min
- Cook Time: 25 min
- Total Time: 65 min
- Yield: About 1 pound 1x
- Category: Dessert
- Method: Stovetop Cooking
- Cuisine: American
- Diet: Vegetarian
Ingredients
- 2 cups granulated sugar
- 1 cup light corn syrup
- 1 cup water
- 2 cups roasted, unsalted peanuts
- 2 tablespoons unsalted butter
- 1 tablespoon baking soda
- 1 teaspoon vanilla extract
Instructions
- Prepare your baking sheet by lightly greasing it or lining it with parchment paper or a silicone mat. Set aside.
- Combine the sugar, corn syrup, and water in a heavy, deep saucepan over medium heat. Stir gently until the sugar dissolves.
- Insert a candy thermometer into the mixture, avoiding the bottom of the pan.
- Cook the mixture without stirring until it reaches 250 degrees Fahrenheit (Soft Ball Stage). This takes about 15 to 20 minutes.
- Add the roasted peanuts to the syrup mixture. Continue to cook, stirring occasionally to prevent scorching, until the mixture reaches exactly 300 degrees Fahrenheit (Hard Crack Stage). This is crucial for a crisp snap.
- Immediately remove the pan from the heat. Quickly stir in the butter, baking soda, and vanilla extract. The mixture will foam up rapidly. Stir just until combined. Do not overmix once the baking soda is added.
- Immediately pour the hot mixture onto the prepared baking sheet. Do not spread or scrape the mixture; let it flow naturally.
- Allow the brittle to cool completely and harden at room temperature for at least 30 minutes. Do not place it in the refrigerator, as this can cause stickiness.
- Once fully hardened, break the peanut brittle into irregular pieces. Store in an airtight container at room temperature.
Notes
- Use a candy thermometer; guessing the temperature results in chewy brittle.
- For the best crunch, ensure your peanuts are roasted before adding them to the syrup.
- If the mixture starts to look brown before it hits 300°F, reduce the heat slightly; burning the sugar causes a bitter taste.
- Work quickly once the baking soda is added, as the setting process begins immediately.
Nutrition
- Serving Size: 1 ounce
- Calories: 160
- Sugar: 18g
- Sodium: 45mg
- Fat: 8g
- Saturated Fat: 2g
- Unsaturated Fat: 6g
- Trans Fat: 0g
- Carbohydrates: 21g
- Fiber: 1g
- Protein: 4g
- Cholesterol: 5mg