
The holidays are upon us, and that means dusting off the cookie cutters! If you’re looking for something that brings a big smile without needing hours of complicated piping work, I have saved the perfect recipe for you. These melted snowman cookies are ridiculously fun and so easy to assemble. While these are simple, if you ever want to try a wholly scratch base, my classic butter cookie recipe is fantastic inspiration for the foundational layer. Since I spent thirty years teaching youngsters, I know how important it is for a holiday bake to be simple and clear for every skill level. Trust me, using simple refrigerated dough is the secret to keeping stress low and fun high. These little melting guys are guaranteed to be the cutest addition to your cookie platter this year!
- Why You Will Love These Melted Snowman Cookies
- Essential Ingredients for Your Melted Snowman Cookies
- Step-by-Step Guide to Making Melted Snowman Cookies
- Tips for Perfect Melted Snowman Cookies
- Ingredient Notes and Substitutions for Melted Snowman Cookies
- Storage and Reheating Instructions for Festive Sugar Cookies
- Frequently Asked Questions About Kid Friendly Cookie Crafts
- Serving Suggestions for Your Novelty Christmas Desserts
- Estimated Nutritional Data for Melted Snowman Cookies
Why You Will Love These Melted Snowman Cookies
I’ve seen a lot of exciting cookie trends come and go, but these little melting fellows always stick around because they are just pure, simple joy. They hit that sweet spot between being cute and being incredibly practical for a busy home cook. You just can’t go wrong when you need something fast and festive!
- Total Time Saver: Because we lean on ready-made sugar cookie dough, these are lightning fast to get in the oven. They are truly Easy Christmas Cookies for when you’re short on time!
- Perfect for Little Hands: This is one of the best Kid Friendly Cookie Crafts you can find. The decoration is fun, messy, and forgiving—no stress about perfection here, which is wonderful for little bakers.
- Big Visual Impact, Zero Effort: They are unique and memorable! Serving these novelties instantly elevates your spread from just ‘cookies’ to a centerpiece of Adorable Holiday Baking.
- Simple Icing Required: We use a basic powdered sugar glaze that sets quickly. You don’t need complex royal icing skills to create that lovely, intentional drip.
- Great for Exchanges: These look professional enough to win prizes at any Holiday Cookie Exchange Recipes gathering, but took you almost no time overall.
- Instant Holiday Cheer: Truly one of the best Fun Holiday Baking Ideas because the end result is always charming, making them perfect Cute Winter Treats.
If you are looking for more crowd-pleasers for your next gathering, take a peek at all my favorite best dessert recipes. But honestly, these snowmen are hard to beat for holiday fun!
Essential Ingredients for Your Melted Snowman Cookies
See, this is where we save our time! Since the showstopper here is the *melting* effect, we let store-bought dough do the heavy lifting. That means these melted snowman cookies come together so fast you’ll think you cheated. Don’t worry about perfect icing techniques; we keep that simple too. If you ever want to learn advanced decoration, I have a great resource on foolproof meringue powder icing, but not today!
- 1 package (16.5 ounces) refrigerated sugar cookie dough (The shortcut!)
- 1 cup confectioners’ sugar
- 2 tablespoons milk
- 1/2 teaspoon vanilla extract
- 1 bag mini marshmallows (These are the cute little heads!)
- 1 bag candy-coated chocolate pieces (Think M&M’s for the scarves)
- Chocolate chips (For those tiny arms and eyes)
That’s it! Simple pantry staples and candy make for the cutest Novelty Christmas Desserts.

Step-by-Step Guide to Making Melted Snowman Cookies
Making these cookies is all about setting up the base just right so the fun part—the decorating—goes smoothly. When I taught my grandkids, patience during the cooling phase was the biggest hurdle, but it’s non-negotiable for successful decorating!
Preparing the Cookie Base for Your Melted Snowman Cookies
First things first, get that oven up to the temperature listed on your refrigerated sugar cookie dough package. Line your baking sheets with parchment paper; cleanup is my reward for staying organized! Bake those rounds until the edges are just barely golden. The most important thing here is letting them cool completely on a rack. If they are even a little warm, that nice icing we are about to make will just slide right off.
Creating the Simple Drip Icing
Now for the white icing that creates our melting puddle. In a small bowl, whisk together that confectioners’ sugar, the milk, and vanilla. You want this icing thin enough to drizzle beautifully but thick enough to hold its shape a bit. If it looks too heavy, add milk just a few drops at a time until it flows well off your whisk. We need that lovely drip effect!
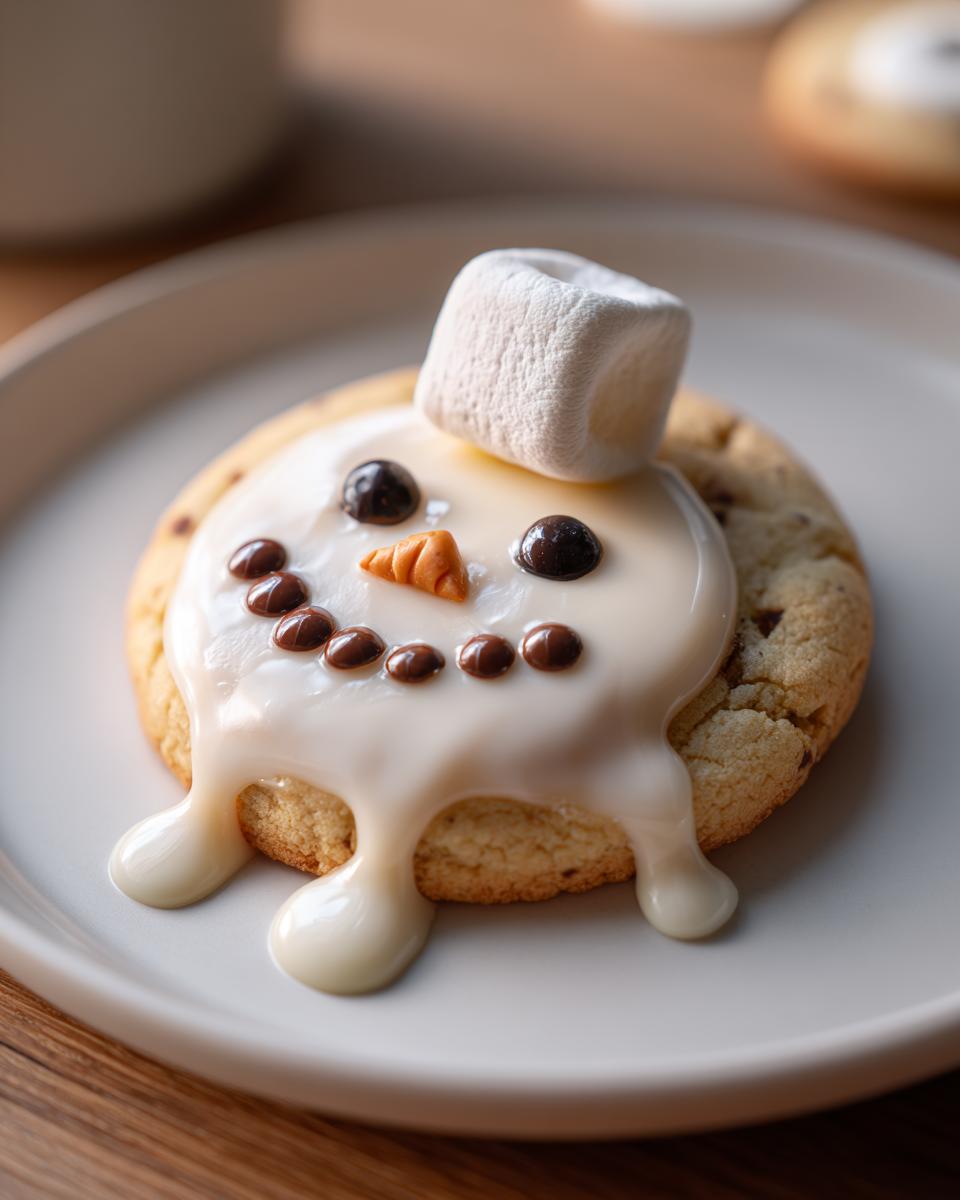
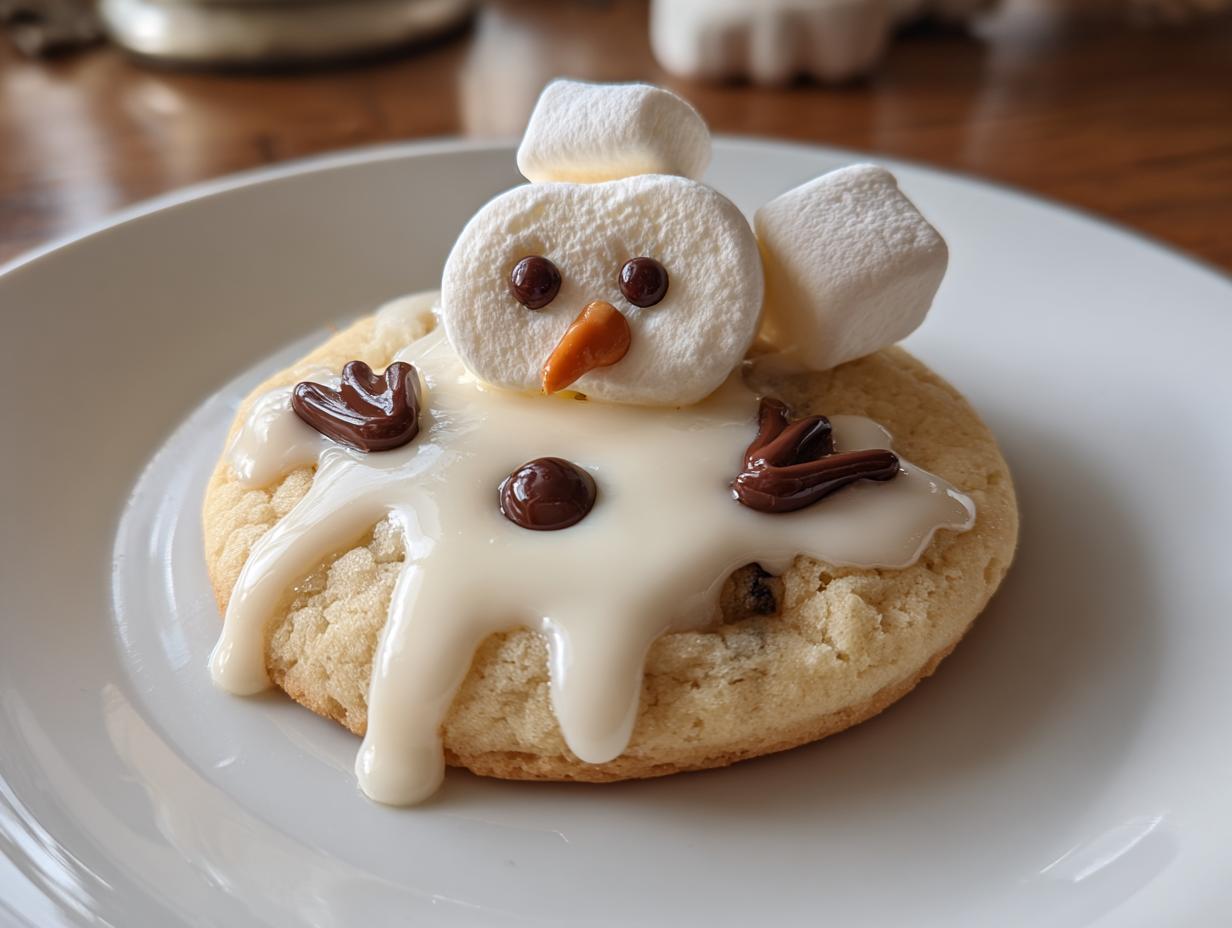
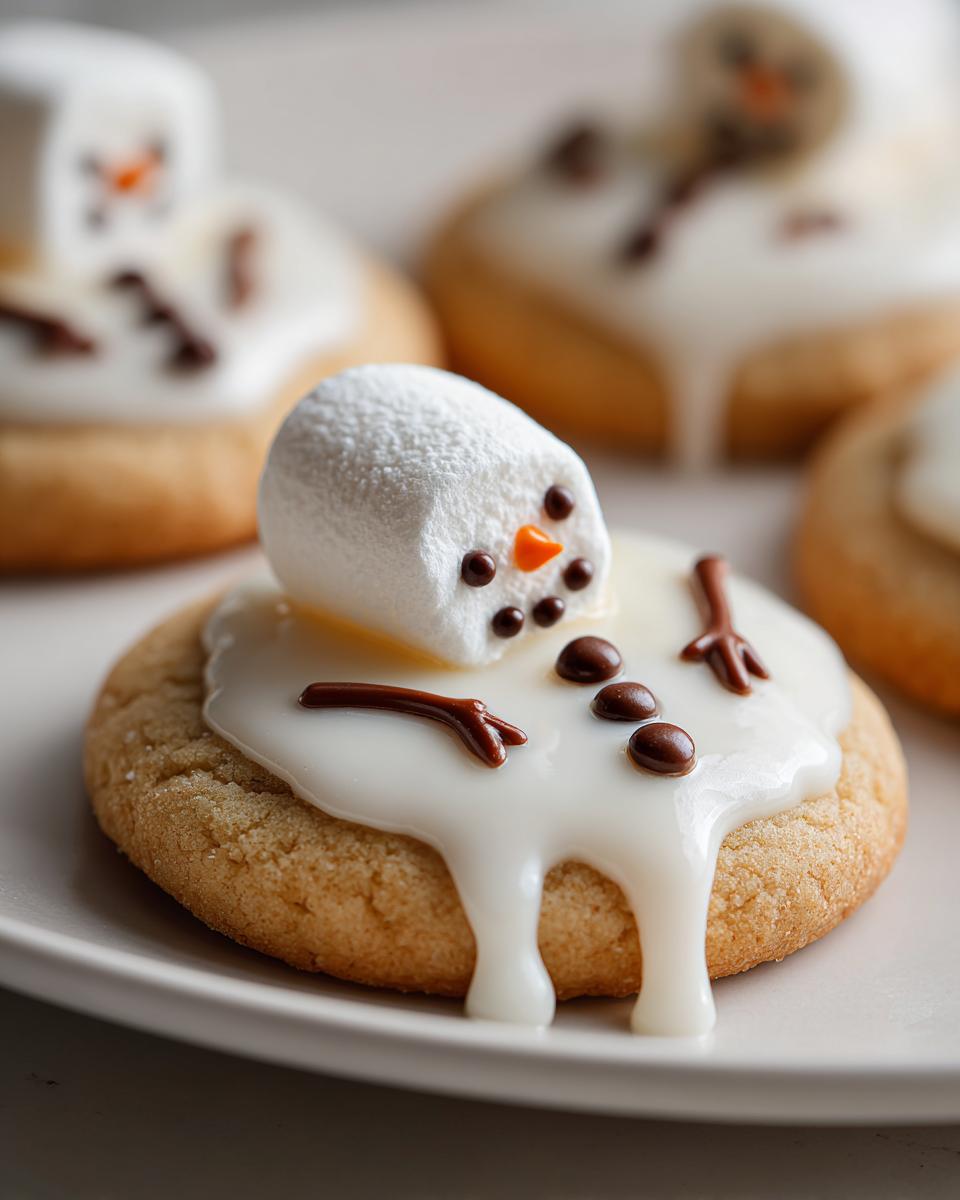
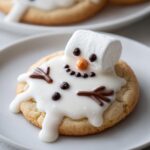
Assembling and Decorating Your Cute Winter Treats
Once your cookies are cool and your icing is ready, dip the top of the cookie, letting that white icing spill over a bit to create the melted puddle. Before that drip hardens—give it about five minutes—it’s time for the snowmen parts! Place one mini marshmallow near the middle of the puddle for the head. Press two candy pieces gently onto the marshmallow for the scarf (those bright colors look so cheerful!). Use tiny bits of chocolate chips for the eyes, and then use a toothpick to just nudge two other small chocolate chips into the sides of the cookie base to look like little melting arms. If you want to avoid making something like homemade chocolate toppings right now, this is the perfect shortcut!

Tips for Perfect Melted Snowman Cookies
Even with a straightforward recipe like this, a few little tricks from my decades in the kitchen can make all the difference, especially when decorating. Remember, these are meant to be fun, but a little patience goes a long way in making them look fantastic for your Holiday Cookie Exchange Recipes!
First, let’s talk consistency again. If that white icing is too stiff, it won’t drip nicely; it will just sit there like a blob. If it’s too thin, it runs right off the cookie before you can place your marshmallow head. Aim for what I call a slow ribbon flow off your spoon. You should be able to draw a line with it that smooths itself out in about 10 seconds.
When setting the marshmallow head—the one little guy who’s had a hard day—don’t push him too far down into the wet icing. You want him nestled in, but if you push him too deep, he’ll sink right through while setting, and we won’t see that lovely melted edge we created!
Finally, decorating the face bits (eyes and scarf) must happen quickly after the icing layer goes down. You need the icing to be *tacky*, not wet and not dry. This tacky state locks your candies in place instantly, meaning you won’t be tempted to nudge them later. Give them a solid thirty minutes to fully set before you even think about moving them to a serving platter!
Ingredient Notes and Substitutions for Melted Snowman Cookies
Now, I know some of you prefer to do things entirely from scratch, and if that’s you, I totally respect it! However, if you’re sticking to the store dough for speed, that’s perfectly fine for these melted snowman cookies. That’s the beauty of a Simple Cookie Decoration project—it works with a lot of bases!
If you are nervous about the icing sticking, remember that the recipe calls for a very basic powdered sugar glaze. You can use store-bought royal icing, just thin it out slightly with water until it drips nicely down the sides. You aren’t aiming for a smooth, uniform coating; you want that fun, messy look!
One question I always get is about switching up the base cookie since people love peanut butter. You can absolutely do that! If you swapped the sugar cookie base for a nice, soft peanut butter cookie—maybe one like the base for my easy peanut butter fudge—you can also swap the topping. Instead of the mini marshmallow head, try using a mini peanut butter cup! It gives a richer flavor profile to these Cute Winter Treats.
For the decoration pieces, we used candy-coated chips for the scarf and chocolate chips for the eyes and arms. But if you have a specific sweet tooth or allergy to worry about, feel free to switch them up. Small slivers of colorful hard candy make excellent scarves, and a dab of black decorating gel works just as well as a chocolate chip for the eyes. The goal here is just fun, not strict adherence to candy brands!
Storage and Reheating Instructions for Festive Sugar Cookies
Once you’ve completed your masterpiece and those adorable melted snowman cookies are fully set, you’ll want to know the best way to keep them looking fresh until they are devoured. Since the decorations rely on that slightly soft icing where the marshmallow sits, storage needs a little bit of care. They aren’t like a plain shortbread that can handle anything; we need to protect those little melting bodies!
The absolute best way to store these Festive Sugar Cookies is in a single layer, if at all possible. I know, sometimes space is tough during the holidays, but layering causes smushing, and we don’t want a squished snowman! If you absolutely must stack them, place a small piece of wax paper or parchment between each cookie. This prevents the icing on one from sticking to the candy face of the one above it.
You must store them in an airtight container. This is key! If air gets to them, the exposed icing will get hard and crusty, and the marshmallow head might start to dry out. A sturdy cookie tin or a plastic container with a good snap-on lid works perfectly. Keep them at room temperature; refrigeration actually makes the sugar cookie base tougher and sometimes encourages condensation, which ruins the look of the ‘melt.’
They keep beautifully for about five days, maybe even a full week if your icing set up perfectly. Since they are mostly sugar cookie dough, they handle time well, but those little marshmallow heads look best within the first few days. Honestly, these Cute Winter Treats rarely last that long once they hit the counter, but it’s good to know you can make them a day or two ahead of time for your big holiday baking spree!
Frequently Asked Questions About Kid Friendly Cookie Crafts
It’s only natural to have a few questions when you’re trying out a new, visual cookie idea! As a long-time teacher, I always encouraged questions because that’s how we learn to make things perfect. Here are the most common things folks ask when setting out to make these kid friendly cookie crafts.
Can I use a different kind of base cookie instead of sugar cookies?
That’s a great question! You absolutely can use other cookie bases. While the plain sugar cookie lets the white ‘melt’ icing really pop visually, shortbread cookies work wonderfully too—they give a lovely buttery base to these melted snowman cookies. My advice is just to make sure whatever cookie you choose, it’s firm enough to hold up the weight of the marshmallow and candies. If you are looking for other easy Christmas cookies that are simple to make from scratch, you might want to look over my collection of easy breakfast recipes, because some of those bases are fantastic for cookies too!
How far ahead of time can I decorate these winter themed goodies?
Since these cookies rely on the marshmallow head and the icing setting correctly, you want to decorate them close to when you plan to serve them. I wouldn’t suggest decorating more than 24 hours ahead of time. If you decorate much sooner, the marshmallow might start to get a little sticky or stale, and that’s no good for our little melting guy! If you need to bake early, just bake the cookies and keep them in an airtight container. You can then decorate them the morning of your party or exchange for the freshest look.
How long does the simple icing need to sit before I can add the marshmallow?
This is crucial for that lovely drip effect! You do not want the icing to be soaking wet when you place the marshmallow on top, or the snowman will just slide right off the cookie and into the puddle. If you check the instructions, I suggest letting the icing set for just about five minutes. You are looking for the surface to be tacky, where it’s almost dry to the touch but still slightly soft. This tackiness is what grabs onto the bottom of that mini marshmallow and holds it right where you put it. If you wait too long, say twenty minutes, the icing gets too hard, and the marshmallow won’t adhere at all!
My candy scarf kept slipping off. What’s the secret for those decorations?
Oh, I’ve had that happen too! The key to keeping those colorful candies (your scarf) and the chocolate chips (arms and eyes) in place is timing. Once the marshmallow head is gently placed on the tacky icing, you need to quickly press the scarf pieces right beside it, slightly embedded into that soft white icing layer. The icing acts like glue! If you are having persistent slipping problems, you can always go back later, once the main drip has set, and put a tiny, tiny dot of extra, thick icing right behind the scarf to hold it up, but honestly, a speedy placement right after the initial dip usually solves it. These are great Fun Holiday Baking Ideas precisely because minor mishaps just add to the charm!
Where can I find more inspiration for novelty Christmas desserts?
If you are gearing up for a big holiday baking day, you might want to check out some of the recipes that are popular right now. I know some folks who found wonderful ideas, including a peanut butter version of this cookie, over at this collection of Melted Snowman Cookies recipes. They have some clever ways to decorate these novelty Christmas desserts that might give you inspiration for next year!
Serving Suggestions for Your Novelty Christmas Desserts
These little melted snowman cookies are such a fun centerpiece! They are generally fantastic all by themselves, of course, but when you’re serving them up at a holiday party or just enjoying a quiet evening by the fire, pairing them with the right drink just completes the scene. Since they are so sweet and festive, you want something warm and comforting to go alongside them.
For small family treats, honestly, nothing beats a big mug of hot chocolate. The simple, rich flavors of a good cocoa are the perfect counterbalance to the sugary cookie and the sweetness of the marshmallow head. I have a recipe for the best homemade rich and creamy hot chocolate that uses just a few simple steps to get that deep, warming flavor that makes a winter night perfect. It’s a classic pairing for a reason!
When you’re taking these novelty Christmas desserts to a cookie exchange or a bigger gathering, presentation matters almost as much as taste! Since these look so whimsical, I like to place them on a simple white platter or a tiered tray surrounded by other contrasting colors—maybe some dark chocolate bark or bright red sugar cookies. This makes the white icing of the snowmen stand out even more.
For an adult gathering, these festive sugar cookies go surprisingly well with a strong, dark coffee, cutting through the sweetness perfectly. If you wanted to get elaborate, a little small cup of spiced eggnog is a wonderful, traditional accompaniment too. Just remember, the key to enjoying these cute winter treats is surrounding them with the atmosphere of the season—twinkling lights and good company!
Estimated Nutritional Data for Melted Snowman Cookies
Now, I always share the nutritional information for my recipes because I believe in being open about what we are serving our families. However, I want to be clear right from the start: since these melted snowman cookies rely heavily on store-bought dough and candy decorations, these numbers are just my best estimate based on standard ingredient calculations. They are meant to give you a general idea, not a precise laboratory reading, so please use them as a helpful guideline for your festive sugar cookies.
Here is the approximate data for one average-sized cookie, keeping in mind that one cookie is usually one serving:
- Serving Size: 1 cookie
- Calories: 180
- Sugar: 18g
- Sodium: 110mg
- Fat: 9g
- Saturated Fat: 3g
- Unsaturated Fat: 6g
- Trans Fat: 0g
- Carbohydrates: 24g
- Fiber: 0g
- Protein: 2g
- Cholesterol: 5mg
As you can see, being based on sugar cookie dough and candy, these are certainly a delightful treat best enjoyed in moderation during the busy holiday season! These values reflect the simple ingredients we used, including the marshmallow head and candy accessories. We bake these sweet little guys for the joy and the fun of making kid friendly cookie crafts, not for their health benefits, bless their hearts!
PrintEasy Melted Snowman Sugar Cookies
Make these adorable, fun holiday cookies that look like snowmen are melting. This recipe is simple, kid-friendly, and perfect for your Christmas cookie exchange.
- Prep Time: 15 min
- Cook Time: 10 min
- Total Time: 25 min
- Yield: 18 servings 1x
- Category: Dessert
- Method: Baking
- Cuisine: American
- Diet: Vegetarian
Ingredients
- 1 package (16.5 ounces) refrigerated sugar cookie dough
- 1 cup confectioners’ sugar
- 2 tablespoons milk
- 1/2 teaspoon vanilla extract
- 1 bag mini marshmallows
- 1 bag candy-coated chocolate pieces (like M&M’s) for scarves
- 1 bag chocolate chips for arms and eyes
Instructions
- Preheat your oven to the temperature specified on the sugar cookie dough package. Line baking sheets with parchment paper.
- Prepare the cookie base: Roll or cut the refrigerated sugar cookie dough into rounds according to package directions. Place them on the prepared baking sheets. Bake until lightly golden brown around the edges. Let the cookies cool completely on a wire rack.
- Make the simple icing: In a small bowl, whisk together the confectioners’ sugar, milk, and vanilla extract until smooth. If the icing is too thick to drizzle, add milk a few drops at a time until you reach a good consistency.
- Decorate the cookies: Dip the top of each cooled cookie into the white icing, allowing some of the icing to drip over the edges to create a ‘melted’ look. Let the icing set slightly, about 5 minutes.
- Create the snowman body: Place one mini marshmallow near the center of the cookie. This will be the head.
- Add the features: While the icing is still slightly soft, press two candy-coated chocolate pieces into the sides of the marshmallow for the ‘scarf’. Use melted dark chocolate or small pieces of chocolate chips to create two small eyes on the marshmallow head.
- Form the arms: Use a toothpick or the tip of a small knife to gently press two small chocolate chips into the sides of the cookie base, just below where the marshmallow sits, to look like melting arms.
- Allow the icing to set completely before serving or storing your cute winter treats.
Notes
- You can use store-bought royal icing if you prefer to skip mixing the glaze. Thin it slightly with water if needed.
- For a peanut butter variation, use a peanut butter cookie base and top the melted section with a mini peanut butter cup instead of a marshmallow.
- This recipe works well for holiday baking with kids because the decoration is forgiving and fun.
Nutrition
- Serving Size: 1 cookie
- Calories: 180
- Sugar: 18g
- Sodium: 110mg
- Fat: 9g
- Saturated Fat: 3g
- Unsaturated Fat: 6g
- Trans Fat: 0g
- Carbohydrates: 24g
- Fiber: 0g
- Protein: 2g
- Cholesterol: 5mg