

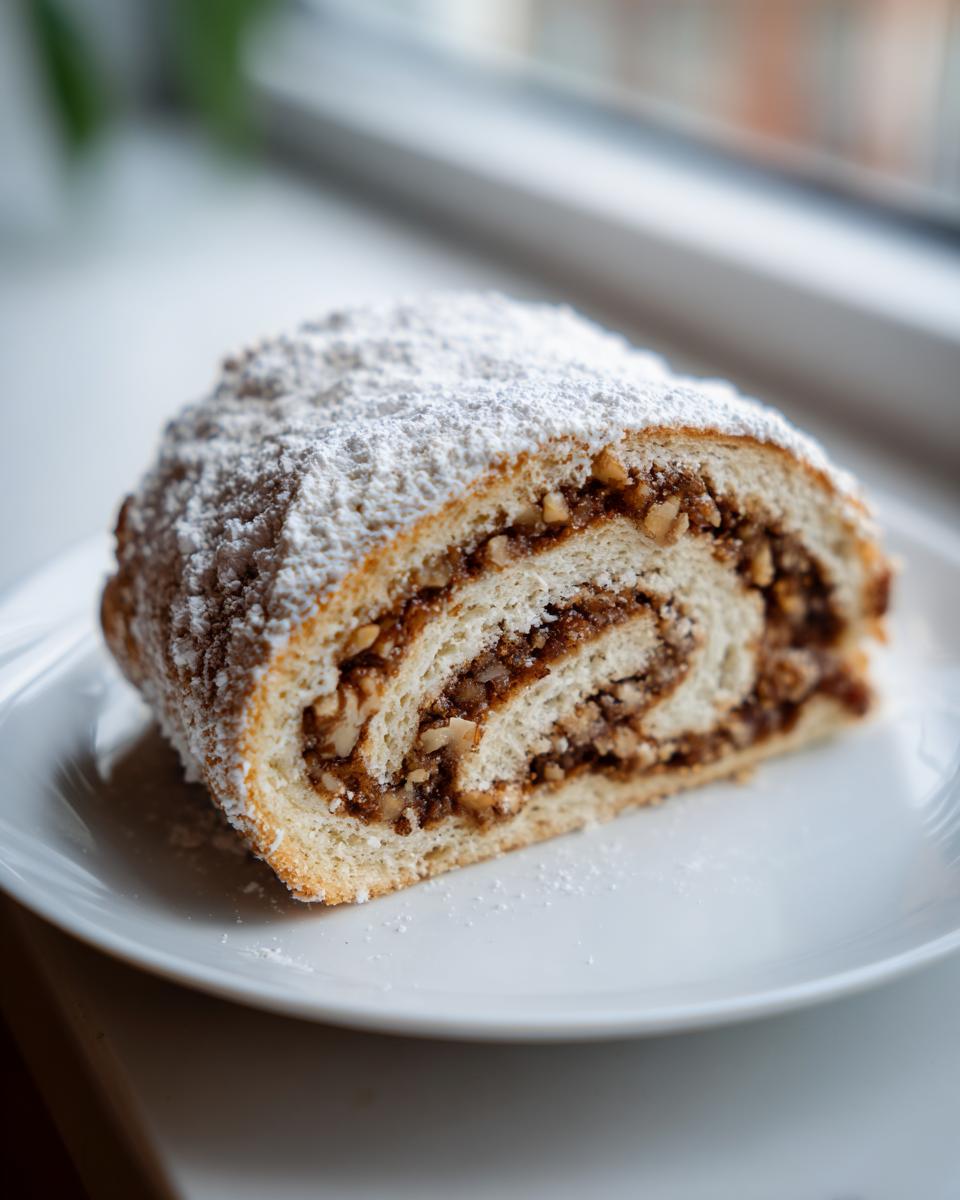
When the holidays start rolling around, my kitchen just *needs* that familiar, comforting scent of spices and butter. There is nothing quite like taking a bite of a truly traditional cookie that tastes exactly how you remember enjoying it as a child. That’s what we have here today with these wonderful italian nut roll cookies. I’ve spent years making sure this dough is just right—it has to be perfectly tender and buttery, holding up beautifully around that rich, sweet filling. These rolls always transport me right back to my mother’s side, helping her line up the finished cookies for the big family dinner. These aren’t just cookies; they’re a wonderful piece of home history you can easily make for your own family gatherings. I’m so glad you’re here to bake with me today! You can find more of those sweet favorites over at my page for best dessert recipes.
- Why This Recipe for Italian Nut Roll Cookies is a Keeper (E-E-A-T)
- Gathering Ingredients for Your Italian Nut Roll Cookies
- Step-by-Step Instructions for Perfect Italian Nut Roll Cookies
- Tips for Success with Your Buttery Rolled Cookies
- Serving Suggestions: Pairing Italian Nut Roll Cookies with Coffee
- Storage and Make-Ahead Tips for Italian Nut Roll Cookies
- Frequently Asked Questions About Italian Nut Roll Cookies
- Nutritional Snapshot of These Classic Italian Treats
- Share Your Homemade Italian Nut Roll Cookies Experience
Why This Recipe for Italian Nut Roll Cookies is a Keeper (E-E-A-T)
I promise you, these italian nut roll cookies are foolproof. They are exactly the kind of reliable recipe I developed after years of teaching—you can trust them completely. They always come out flaky, buttery, and just right. I think you’ll see why they earned a permanent spot on my baking rotation.
- They offer that ideal contrast between buttery dough and rich filling.
- The chilling process ensures they stay perfectly formed—no spreading here!
- They are fantastic for making ahead of time for big events.
The Tender Cookie Dough Difference
What makes this dough so special? It’s the sour cream, honestly. That little bit of acid reacts beautifully with the butter and flour, giving you the softest, most tender cookie dough without being sticky while you roll. It’s magic, and it’s why these aren’t dry like some other rolled pastries.
Perfect for Homemade Italian Holidays
If you are planning your Holiday cookie platter ideas, you need these on there! These little jewels really elevate the spread. They feel special, yet they are so sturdy, making them perfect for gifting or just having around all season long for when friends drop by. You can find some other simple, dependable treats over at my 3-ingredient butter cookies post.
Gathering Ingredients for Your Italian Nut Roll Cookies
Before we get our hands messy—and trust me, there will be some flour dust, as is tradition—let’s talk about what you need. Baking is always best when you use what you have, but for these italian nut roll cookies, a few key measurements are non-negotiable for getting that flaky texture right. This recipe makes a very generous batch, perfect for those big holiday baking days when you need a huge tray of Classic Italian Christmas cookies to share.
Gather everything up and set it out before you start mixing. It makes the whole process so much calmer, which is important when working with delicate dough!
For the Buttery Rolled Cookies Dough
The dough relies on good quality butter. Make sure it’s room temperature soft, but definitely not oily or melty. We need that structure!
- 2 ½ cups all-purpose flour
- 1 cup (2 sticks) unsalted butter, softened
- 1 cup sour cream
- 1 egg yolk
- ½ teaspoon salt
- 1 tablespoon sugar
Crafting the Sweet Nut Filling Recipe
This is where the real flavor of our Sweet nut filling recipe comes from. We are using walnuts today, but feel free to peek ahead at my tips section about swapping them out!
- 1 ½ cups finely ground walnuts
- ½ cup granulated sugar (measure this exactly, please!)
- 1 teaspoon ground cinnamon
- 1 tablespoon melted butter (just to bind it, that’s all!)
Don’t forget the other bits we need for the assembly! You’ll need one beaten egg for the wash and plenty of powdered sugar waiting for the very end for that snowy finish. If you’re looking for bar recipes instead of rolled shapes, check out my post on Christmas sugar cookie bars!
Step-by-Step Instructions for Perfect Italian Nut Roll Cookies
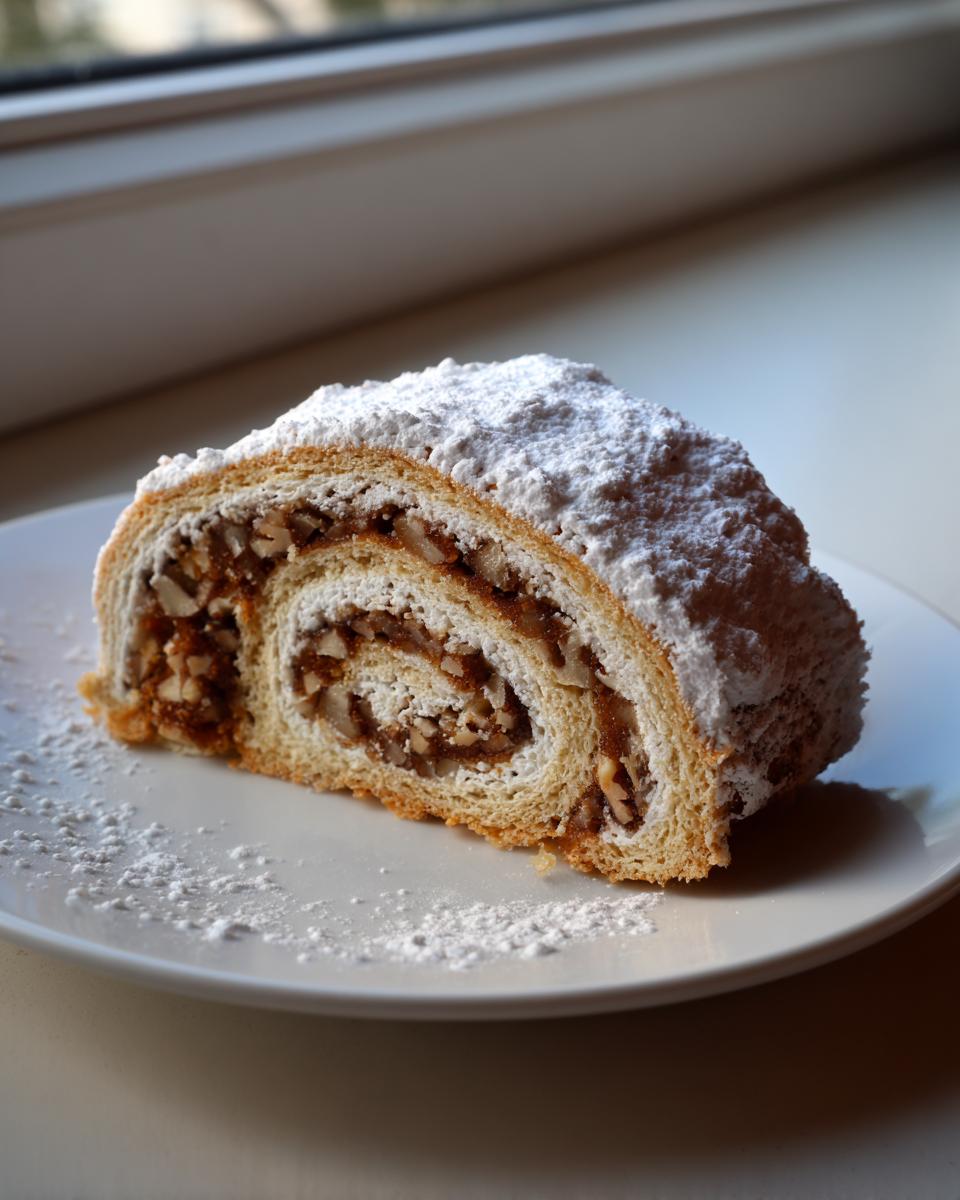
Now we get to the fun part—putting it all together! Mastering this Walnut roll recipe takes just a little bit of patience, especially with the dough handling, but trust me, the buttery, flaky result is absolutely worth every second. We are aiming for a perfect cross-section when we slice these later, so focus on keeping that roll tight. Remember, these cookies love to be cold, so don’t rush the chilling!
Making and Chilling the Tender Cookie Dough
First things first, let’s combine our dough ingredients in a big bowl. I like to use my stand mixer on low speed for this part, but you can certainly use a sturdy wooden spoon like my grandmother did. Combine the flour, softened butter, sour cream, egg yolk, salt, and that tablespoon of sugar. You are looking for a soft dough to form. And here’s my big teacher tip for you: Do not overmix! If you beat it too long, we lose that tender quality we worked so hard to achieve with the sour cream.
Once it just comes together, stop the mixer immediately. Divide the dough in half, wrap each piece tightly in plastic wrap, and make sure they head straight into the refrigerator. They need to chill for at least 2 hours. Don’t try to rush this part; cold dough is what prevents the filling from oozing out and keeps our cookies from spreading too much.
Assembling and Rolling Your Italian Nut Roll Cookies
Okay, the dough is rested and firm—perfect! Go ahead and set your oven to preheat to 350°F (175°C) now, and line a couple of cookie sheets with parchment paper. This makes cleanup so much easier, and nothing sticks!
Take one piece of dough out at a time—keep the second piece cold while you work. Lightly flour your counter space and roll that dough out into a nice, thin rectangle. I aim for about 1/8 inch thick. Think thin enough to see your hand shadows through it, but not so thin it rips when you try to lift it.
Now, take half of that lovely sweet nut filling we made earlier and spread it carefully over the dough. Make sure you leave a small border—maybe half an inch—along all the edges. This is crucial for sealing! Starting from one of the long sides, begin to roll the dough up tightly, just like you would a jelly roll or a rugelach. When you get to the end, really pinch that seam shut. If the seam pops open in the oven, your filling will leak out into a sad little puddle!
Baking and Finishing the Italian Nut Roll Cookies
Once your log is sealed tight, use a sharp knife to slice it into rounds, about 1-inch thick. Place these cut-side up onto your prepared sheets. Give them a little brushing all over with that beaten egg wash; it gives them a lovely shine.
Bake them for about 15 to 18 minutes. You aren’t looking for dark brown, just until the edges look lightly golden brown and set. Once they come out of the oven, let them sit right on the hot pan for just five minutes—this lets them firm up a bit. Then, carefully move them over to a wire rack to cool completely. Powdered sugar goes on when they are totally cool; otherwise, it just melts right into the butter and disappears! You can find some ideas for warm coffee pairings to go with these on my post about tiramisu cookies here.
Tips for Success with Your Buttery Rolled Cookies
I always tell folks that once you have the dough and the filling right, these italian nut roll cookies practically bake themselves! But every baker runs into a little snag now and then, so I want to share the little extra notes I jotted down on the back of my original recipe card. These small tweaks really help ensure you get that ‘melt-in-your-mouth’ texture every time. You can check out how important butter is in another simple recipe I love over at my post for melt-in-your-mouth butter cookies.
Do you prefer a little variety on your holiday platter? You absolutely can change up the nuts! While walnuts are the traditional choice that gives you that classic texture, feel free to substitute pecans for some or even all of the walnuts in that sweet filling. Pecans are a bit richer and toast up beautifully when baked inside this buttery rolled cookies dough. Just make sure you grind them as finely as you can so they incorporate well.

Now, about the topping! I adore the simple, snowy look of a heavy dusting of powdered sugar. It keeps the focus right on the gorgeous swirl of the cookie. But, if you are in the mood to dress them up a bit for a really fancy festive Italian dessert, you can certainly use a glaze instead. It’s super easy—just whisk about one cup of powdered sugar with maybe two or three tablespoons of milk or, if you want a little zing, fresh lemon juice until it’s smooth enough to drizzle.
Remember, since these cookies are quite large, this recipe makes a big batch. Don’t stress about eating them right away; they store beautifully! Keeping them in an airtight container on the counter means they stay terrific for quite a while, making them ideal bakers for making ahead for your big holiday baking schedule.
Serving Suggestions: Pairing Italian Nut Roll Cookies with Coffee
You know, I always bake enough of these italian nut roll cookies to last us through several afternoons. They truly are the perfect accompaniment to a hot beverage. If you ask me, these are definitely in the top tier of coffee pairing cookies! The rich, spiced walnuts and the slightly tangy, buttery dough really stand up nicely to a strong cup of something dark.
When I serve these, I almost always have a fresh pot of dark roast going. The slight bitterness cuts through the sweetness of the filling and the powdered sugar perfectly. My husband prefers just a simple black coffee, but if you like cream and sugar, try adding just a touch less than usual—you don’t want to overpower the cookie’s flavor.
If coffee isn’t your thing, don’t worry! These cookies are also sublime with a strong black tea, like an Earl Grey or a classic English Breakfast blend. The bergamot notes in the Earl Grey, for example, really brighten up the cinnamon in the filling, making the whole experience feel a little elegant. Since we made such a big batch, it’s nice to mix up what we serve them with over the week!
If you’re having a party and need another pairing suggestion that’s a little different, I’ve got a wonderful recipe for a light, fruity holiday sangria that guests always rave about as well. But for a quiet afternoon, it’s just coffee and these cookies for me!
Storage and Make-Ahead Tips for Italian Nut Roll Cookies
One of the absolute best parts of baking these italian nut roll cookies is that they are fantastic make-ahead treats! Honestly, I think they taste even better the day after you bake them, once the filling flavor has really settled into that buttery dough. Because we are making such a big batch—perfect for those busy weeks leading up to Christmas—knowing how to store them properly is half the battle.
For simple counter storage, just line them up in a single layer in a large, rigid container, and make sure the lid seals tight. If you stack them, definitely put a piece of wax paper or parchment paper between the layers to prevent that sweet powdered sugar from sticking everywhere. They keep wonderfully like this for nearly a week. If you are prepping for a big event and need to make them further ahead, you have a couple of great options!
You can freeze the baked cookies without any trouble at all. Just make sure they are completely cooled down first (that’s vital). Wrap them well in plastic wrap, then tuck them into a freezer-safe bag or container. When you want to serve them, just pull out what you need and let them thaw on the counter for an hour or so. They hold their shape and texture beautifully, which is why they are one of my favorite freezer-friendly recipes. I also have a great recipe for an easy Christmas poke cake if you need another make-ahead dessert!
But what about the dough? Since the preparation takes a bit of time rolling and sealing, I often make the dough, wrap it up, and stick it in the fridge for those two hours, just like the recipe says. However, you can actually take that cold dough and freeze it, too! Wrap it extra well in a couple of layers of plastic wrap before putting it in the freezer. If you freeze the dough, just remember to pull it out the day before you plan to bake and unroll it gently in the refrigerator overnight. It thaws perfectly, ready for the rolling process the next day!
Frequently Asked Questions About Italian Nut Roll Cookies
I know sometimes when you look at a recipe like this—so beautiful and traditional—you just have a few little questions left floating around. That’s perfectly normal! When I taught third grade, I always told my students that the best questions are the ones you weren’t afraid to ask out loud. These are some of the things I hear most often when people are starting out with these italian nut roll cookies for the first time.
Can I use nuts other than walnuts in this Italian Nut Roll Cookies recipe?
Oh yes, you absolutely can! While the traditional flavor profile leans heavily on walnuts, that doesn’t mean you can’t experiment. Pecans are my next favorite choice for a rich, buttery cookie like this. Almonds work well too, though they tend to be a bit milder than walnuts. The main thing to remember is that the texture changes just a tiny bit depending on the nut you choose, so don’t be surprised if your easy nut roll cookies act a little differently!
How do I stop the filling from leaking out while baking these flaky rolled cookies?
This is the biggest worry people have, and honestly, it all comes down to temperature and sealing! First, make sure your dough has chilled for the full two hours. If it’s even a little warm, it will soften too much when you roll and seal it. Second, when you finish rolling that log, you need to really pinch that seam shut with your fingers. Make sure you don’t have any filling showing near that final edge before slicing. A firm, cold seal keeps everything tucked in tight, guaranteeing you get beautiful, flaky rolled cookies!
What makes the dough for these Italian pastry cookies so tender?
That softness comes from two main things working together. Number one, as I mentioned before, is the sour cream. It adds moisture and a slight acidity that keeps the dough from becoming tough. Number two, and this is non-negotiable: Do not overwork the dough! Once those flour particles meet the liquid and fat, gluten starts to develop, and that makes things chewier, not tender. Mix it just until it barely comes together, wrap it, and chill it. That’s how we get those lovely, delicate Italian pastry cookies!
If you’d like some ideas for simple snacks and appetizers for your next gathering, you can always check out what I’ve prepared over at my easy appetizers and snacks page!
Nutritional Snapshot of These Classic Italian Treats
Now, I always tell folks that while we bake these italian nut roll cookies with love and not too much worry about the numbers, it’s good to have a general idea of what’s in them, especially when sharing them around during the holidays. Remember, these are homemade treats, and the values I’m sharing here are just estimates based on the ingredients listed for one cookie serving size. My professional experience is in teaching, not nutrition science, so please take these as a helpful guideline rather than a guarantee!
Since these are rich, buttery, and filled with ground nuts, they surely fall into the ‘indulgent’ category, which is perfectly fine for a festive Italian dessert or a special coffee companion. Here is a quick look at the breakdown:
- Serving Size: 1 cookie
- Calories: About 180
- Fat: 11g (with about 5g of that being saturated fat from the butter)
- Carbohydrates: 18g
- Sugar: A sweet 10g
- Protein: Around 3g
See? Not too bad for a wonderful, traditional Italian baking treat! They definitely pack some energy to keep you going while you’re working on that big holiday cookie platter ideas assembly. Enjoy them mindfully, and know that you’ve made something truly special from scratch.
Share Your Homemade Italian Nut Roll Cookies Experience
Now that you’ve baked up a batch of these beautiful, flaky italian nut roll cookies, I genuinely want to hear all about them! This community thrives when we share our successes and even the little hiccups along the way. When you take that first bite of the perfectly buttery dough wrapped around that sweet spice, I hope you feel that same warmth I do when I make them.
Did you stick to the ground walnuts, or did you try swapping in pecans like I mentioned in the tips section? Did you go for the simple dusting of powdered sugar, or did you drizzle on that lemon glaze? I love seeing how everyone customizes their traditional recipes!
Please take a moment to leave a rating for the recipe right below this section—it really helps other home bakers know this is a dependable recipe they can turn to. If you have a photo of your gorgeous, sliced Italian nut roll cookies, tag me on social media! I always love seeing little bits of home baking showing up in my feed. And if you have any questions popping up now that you’ve tasted them, don’t hesitate to drop a comment down below. If you ever need to get in touch with me directly, you can find my contact form over here. Happy baking, friends!
PrintClassic Italian Nut Roll Cookies with Tender, Buttery Dough

Make these classic Italian Nut Roll Cookies featuring a tender, buttery dough wrapped around a sweet, spiced walnut filling. These flaky, delicious cookies are perfect for special occasions and pair well with coffee or tea.
- Prep Time: 45 min
- Cook Time: 18 min
- Total Time: 163 min
- Yield: About 3 dozen cookies 1x
- Category: Dessert
- Method: Baking
- Cuisine: Italian
- Diet: Vegetarian
Ingredients
- 2 ½ cups all-purpose flour
- 1 cup (2 sticks) unsalted butter, softened
- 1 cup sour cream
- 1 egg yolk
- ½ teaspoon salt
- 1 tablespoon sugar
- 1 ½ cups finely ground walnuts
- ½ cup granulated sugar (for filling)
- 1 teaspoon ground cinnamon
- 1 tablespoon melted butter (for filling)
- 1 beaten egg (for egg wash)
- Powdered sugar (for dusting)
Instructions
- Prepare the dough: In a large bowl, combine the flour, softened butter, sour cream, egg yolk, salt, and 1 tablespoon of sugar. Mix until a soft dough forms. Do not overmix.
- Wrap the dough in plastic wrap and chill in the refrigerator for at least 2 hours.
- Prepare the sweet nut filling: In a separate bowl, mix the ground walnuts, ½ cup granulated sugar, cinnamon, and 1 tablespoon of melted butter until well combined.
- Preheat your oven to 350°F (175°C). Line baking sheets with parchment paper.
- Divide the chilled dough into two equal portions. On a lightly floured surface, roll one portion of dough into a thin rectangle, about 1/8 inch thick.
- Spread half of the nut filling evenly over the dough rectangle, leaving a small border on the edges.
- Starting from one long side, tightly roll the dough into a log. Pinch the seam closed to seal the filling inside.
- Slice the log into 1-inch thick rounds. Place the slices cut-side up on the prepared baking sheets. Repeat with the second dough portion and filling.
- Brush the tops of the cookies lightly with the beaten egg wash.
- Bake for 15 to 18 minutes, or until the edges are lightly golden.
- Let the cookies cool on the baking sheets for a few minutes before transferring them to a wire rack to cool completely.
- Once cool, dust generously with powdered sugar.
Notes
- For a richer flavor, you can substitute pecans for some or all of the walnuts in the filling.
- If you prefer a glaze instead of powdered sugar, mix 1 cup of powdered sugar with 2-3 tablespoons of milk or lemon juice until smooth, then drizzle over cooled cookies.
- This recipe makes a large batch, perfect for holiday cookie platters.
Nutrition
- Serving Size: 1 cookie
- Calories: 180
- Sugar: 10
- Sodium: 65
- Fat: 11
- Saturated Fat: 5
- Unsaturated Fat: 6
- Trans Fat: 0
- Carbohydrates: 18
- Fiber: 1
- Protein: 3
- Cholesterol: 30