
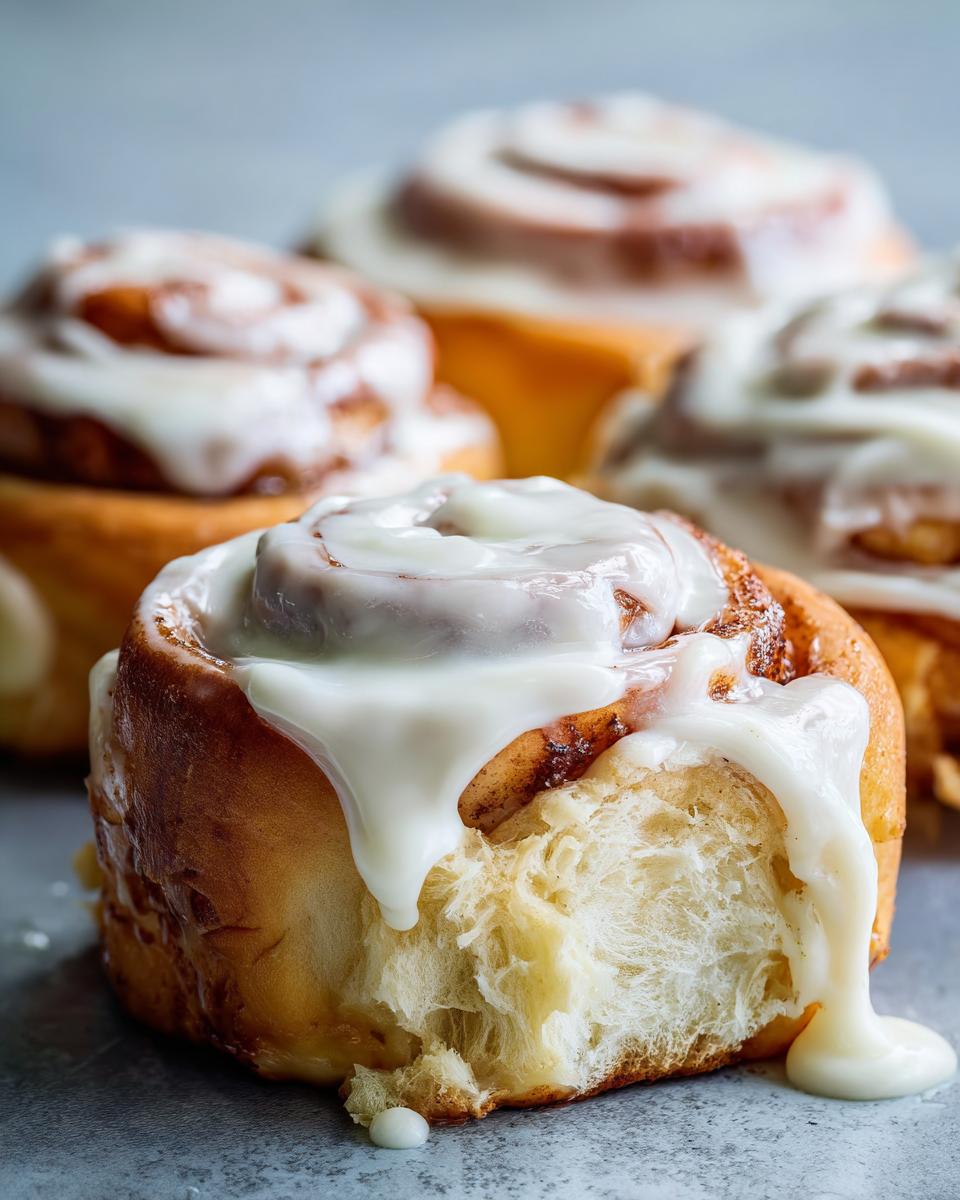
When a day just calls for something extra special—maybe it’s recognizing an ‘Eat What You Want Day,’ or maybe it’s just Tuesday and you deserve it!—there’s nothing quite like tackling a truly rewarding baking project. I get it; yeast bread recipes can feel a little daunting, but believe me, this is the one that pays off big time. We are going straight for the ultimate comfort food: truly fantastic, bakery-style homemade cinnamon rolls. My goal, the one I teach everyone here at Cooking by Carla, is simple: you need a dough so wonderfully pillow-soft it practically melts, topped with a rich, utterly gooey cream cheese frosting.
Forget dry spirals! If you give this dough the time it needs to proof right—just like we do for those wonderfully soft fluffy dinner rolls—you’ll end up with the best cinnamon buns you’ve ever had outside of a little shop downtown. That’s my philosophy—easy, comforting flavors made perfectly, every time. We’re going to make magic happen together.
- Why You Will Make These Homemade Cinnamon Rolls Again and Again
- Ingredients for Pillow-Soft Homemade Cinnamon Rolls
- Equipment Needed for Your Homemade Cinnamon Rolls
- Step-by-Step Instructions for Perfect Homemade Cinnamon Rolls
- Tips for Success with Homemade Cinnamon Rolls
- Ingredient Notes and Substitutions for Homemade Cinnamon Rolls
- Make-Ahead and Storage Tips for Homemade Cinnamon Rolls
- Frequently Asked Questions About Homemade Cinnamon Rolls
- Serving Suggestions for Your Indulgent Breakfast
- Nutritional Estimates for Homemade Cinnamon Rolls
- Share Your Pillow-Soft Homemade Cinnamon Rolls Success
Why You Will Make These Homemade Cinnamon Rolls Again and Again
If you’ve been searching for the perfect recipe, you can stop now! These rolls hit every sweet spot:
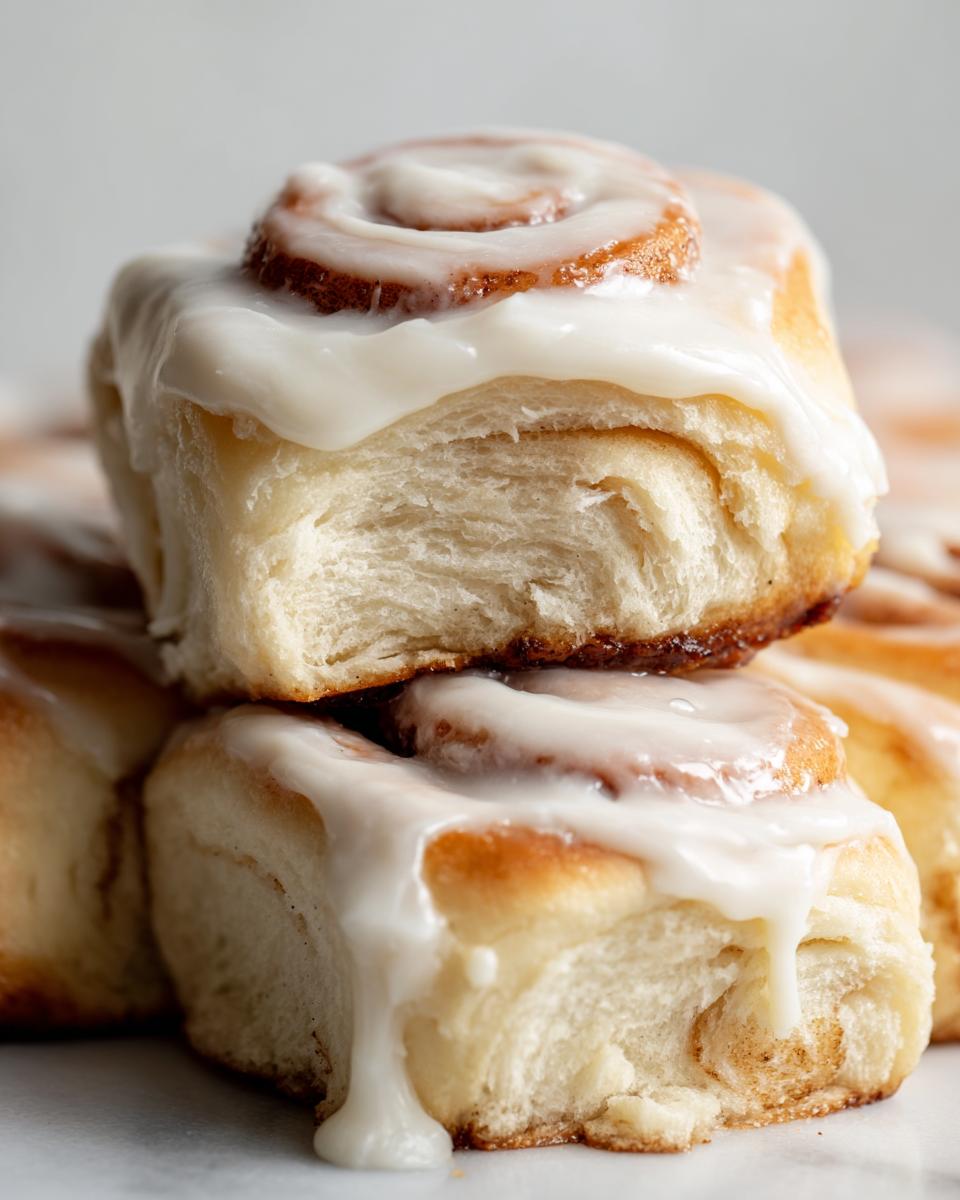
- That unbelievably pillow-soft dough that makes them melt in your mouth.
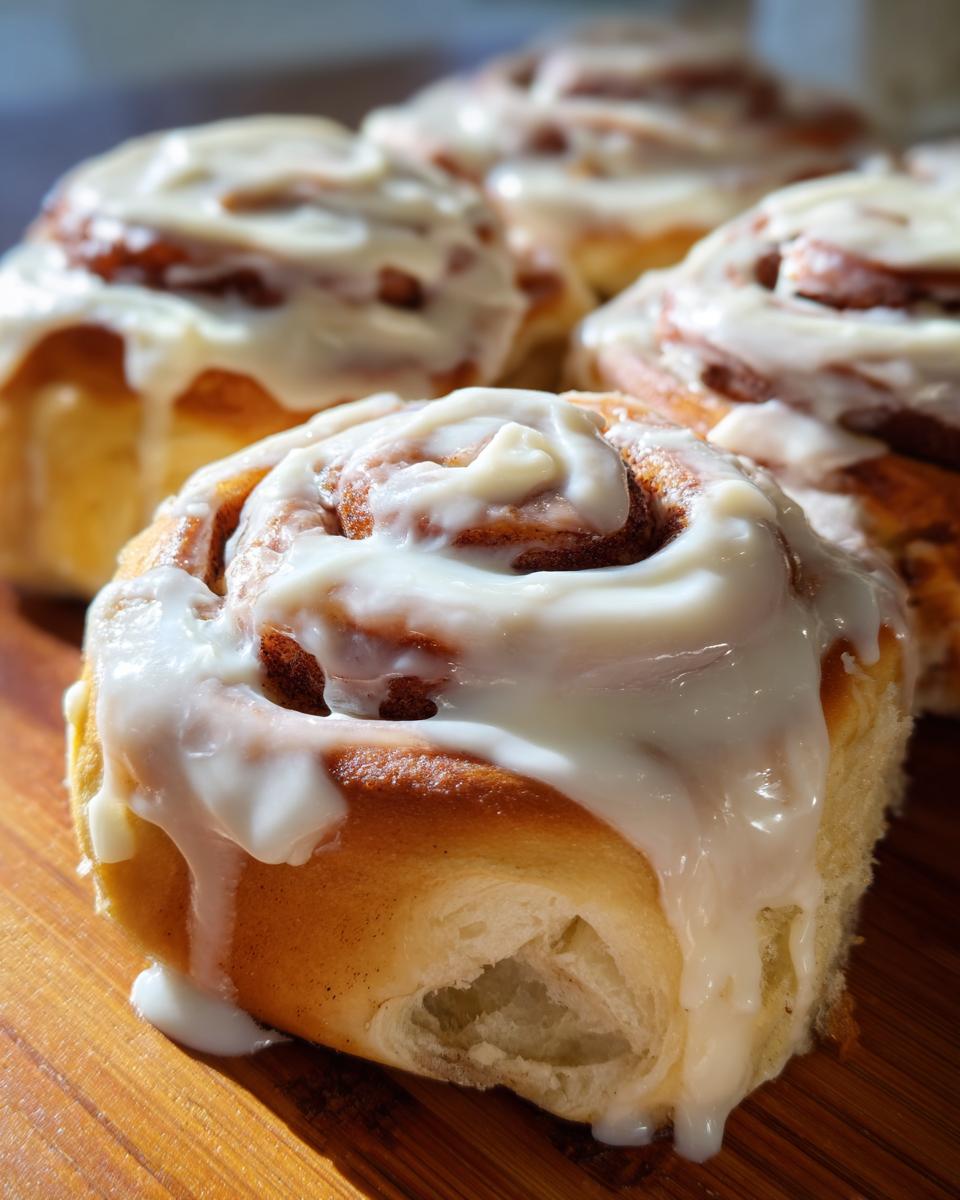
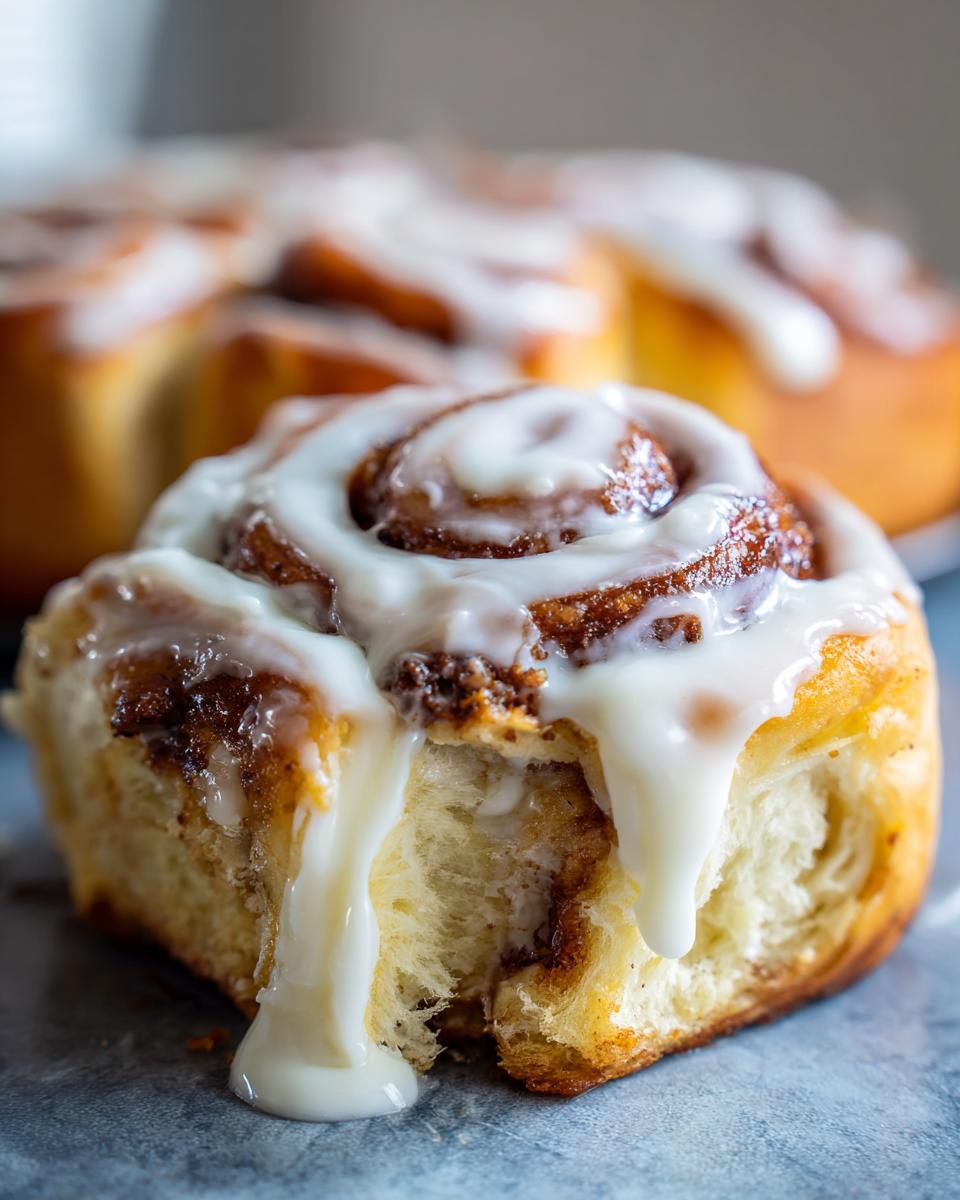
- The rich, thick blanket of gooey cream cheese frosting poured right on top while they’re warm.
- They transform a regular morning into an absolutely indulgent breakfast fit for a celebration.
Trust me, once you master this texture, you’ll be ready to bake these best cinnamon buns every chance you get!
Ingredients for Pillow-Soft Homemade Cinnamon Rolls
When baking yeast bread recipes, precision really helps, especially when you want that light, airy texture. For these rolls, we divide the ingredients into three simple groups: the dough, the filling, and that amazing icing. Gather everything first; it makes the mixing process so much smoother! Don’t forget to make sure your butter is softened—not melted—for the dough and the filling. I always use room-temperature eggs, too; they mix in much better.
- For the Dough: 1 cup whole milk, warmed to 110°F; 2 1/4 teaspoons active dry yeast; 1/2 cup granulated sugar, divided; 1/2 cup unsalted butter, softened, plus more for greasing; 2 large eggs, room temperature; 4 cups all-purpose flour, plus more for dusting; 1 teaspoon salt.
- For the Filling: 1/2 cup (1 stick) unsalted butter, softened; 1 cup packed light brown sugar; 2 tablespoons ground cinnamon.
- For the Cream Cheese Icing: 8 ounces cream cheese, softened; 1/2 cup (1 stick) unsalted butter, softened; 3 cups powdered sugar, sifted; 1 teaspoon vanilla extract; 1 tablespoon milk, or as needed.
Having everything measured out just like this means you won’t panic halfway through kneading. If you want a slightly different adventure in baking, check out my foolproof cinnamon roll guide for tips on technique!
Equipment Needed for Your Homemade Cinnamon Rolls
You don’t need a professional setup for these, but having the right tools really makes the process move along nicely. Since we are dealing with yeast bread recipes, having something to mix the dough properly is key. I usually rely on my big stand mixer because kneading for 7 minutes by hand can make my arm tired!
Here is what you’ll definitely want on your counter before you start warming that milk:
- A large mixing bowl, or the bowl of your stand mixer with a dough hook attachment.
- A 9×13 inch baking pan. Make sure you have butter or cooking spray ready to grease it up well!
- A rolling pin—you need a surface that’s 12 by 18 inches for perfect spirals.
- Plastic wrap or a clean kitchen towel for covering the dough during rising times.
- A sharp knife or, even better, unflavored dental floss for cutting the rolls cleanly. Seriously, floss is amazing for a perfect cut!
- A medium bowl for activating that yeast, and a separate smaller bowl for whipping up the cream cheese icing.
Get your gear ready, and suddenly those homemade cinnamon rolls seem much less intimidating!
Step-by-Step Instructions for Perfect Homemade Cinnamon Rolls
Now we get to the really fun part! This is where we take simple ingredients and transform them into those legendary swirls. Since this is a yeast dough, remember that time is your friend here. Don’t rush the rising times; that’s the secret ingredient for truly easy cinnamon rolls that aren’t tough. We’ll walk through activating the yeast, kneading that beautiful dough until it’s smooth, and getting the filling just right. If you follow this sequence, you’re guaranteed those bakery-style results! Don’t forget that once they come out of the oven, we hit them immediately with that glorious frosting! If you are looking for a quicker treat sometime, you might also love my recipe for easy cinnamon roll bites.
Making the Soft Dough and First Rise for Homemade Cinnamon Rolls
First things first: we have to wake up our yeast! Combine your warm milk—and I mean 110°F, not scorching hot, or you’ll kill the little guys—the yeast, and 1 teaspoon of the granulated sugar. Let that soup sit for about five to ten minutes until it looks foamy on top. That foam tells us the yeast is hungry and ready to work its magic in our dough!
Next, beat your softened butter and the remaining granulated sugar until it gets pale and fluffy; this really helps incorporate air. Then add your eggs one at a time, followed by that foamy yeast mixture. Now, slowly add your dry ingredients—the flour and salt—mixing until a soft dough starts to come together. Pop it into a lightly greased bowl, turning to coat, cover it up, and let it rest in a warm room for a full hour to an hour and a half. Patience here pays off hugely for that soft texture!
Filling, Rolling, and Cutting Your Homemade Cinnamon Rolls
While that dough is ballooning up, whip together your softened butter for the filling, the packed light brown sugar, and the cinnamon until it’s one uniform, gorgeous paste in a separate bowl. This is the core flavor, so make sure it’s evenly mixed!
Once the dough has doubled, gently punch it down—it’s so satisfying! Turn it out onto a lightly floured surface and roll it into a large rectangle, about 12 by 18 inches. Spread that brown sugar filling all over the surface, but be sure to leave a 1-inch border on one long edge. That barren strip is our seal. Roll it up tightly, starting from the long edge opposite the border, making sure the roll is firm all the way through. Pinch that seam closed. Now, take a sharp knife and cut that beautiful, long log into 12 equal pieces. Try to keep the slices uniform so they bake evenly!
The Second Rise and Baking Your Homemade Cinnamon Rolls
Take those 12 rolls and arrange them, cut-side up, in your greased 9×13 inch baking pan. They should be touching slightly, which helps them stay super soft while baking. Cover the pan loosely and let them have their second nap in a warm spot for another 30 to 45 minutes, until they look puffy.
When they look puffy, preheat your oven to 375°F (190°C). Slide those babies in and bake them for about 20 to 25 minutes. You’re looking for a lovely golden brown color on top. Pull them out when they look perfect; we need them warm for the next step!
Preparing the Gooey Cream Cheese Icing for Homemade Cinnamon Rolls
We’re making the classic topping that takes these over the edge into true indulgence! While those rolls are baking, whip your softened cream cheese and softened butter together until they look perfectly smooth—no lumps allowed! This foundational step is key to a perfectly creamy cream cheese icing.
Now, gradually beat in the sifted powdered sugar, vanilla extract, and 1 tablespoon of milk. Keep mixing until you have that thick but spreadable consistency. If it feels too stiff to drizzle, add just a little bit more milk until it oozes perfectly over the warm tops. We want it generous!
Tips for Success with Homemade Cinnamon Rolls
Look, even though the recipe looks straightforward, making these truly homemade cinnamon rolls perfect comes down to a few little tricks I learned over the years teaching my home-ec students. It’s all about the conditions when you start mixing!
Temperature is Everything for Softness
If you want that wonderful pillow-soft texture, you cannot cheat temperature control. First, your milk for the yeast absolutely must be lukewarm, around 110°F. If it’s too hot—say, piping hot—you’ll instantly kill your yeast, and you’ll end up with flat bricks instead of fluffy rolls. Trust me, I’ve done it before; it’s heartbreaking!
Second, make sure that butter for the dough is actually softened to room temperature. It should give easily when you press it, but it shouldn’t look shiny or melted. This creaming process creates tiny air pockets that are essential for a light crumb, which is what makes these easy cinnamon rolls so delicate.
The Secret to Gooey Icing
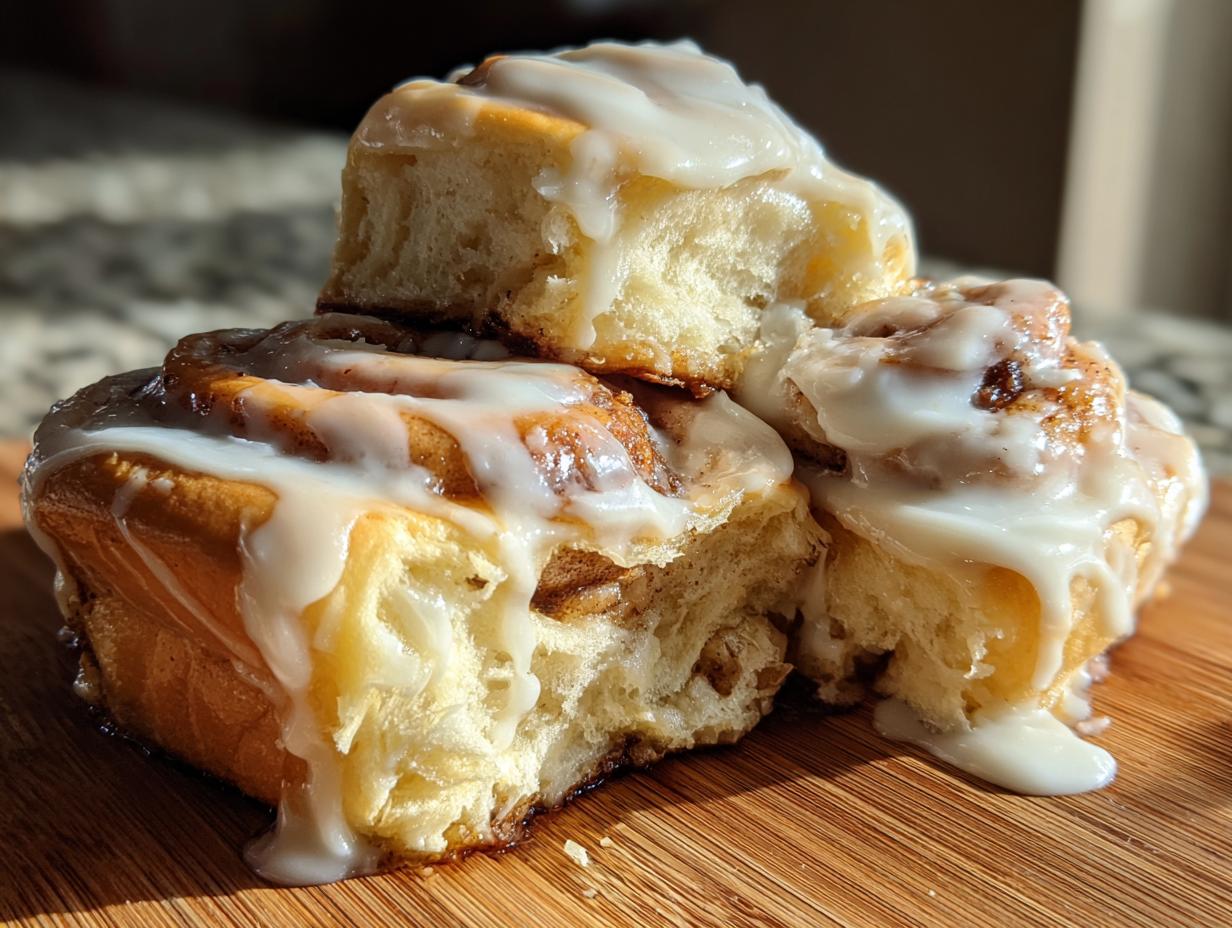
This is my favorite part, and it’s crucial for that ultimate indulgent breakfast experience! Do not wait for the rolls to cool completely before icing them. Five minutes out of the oven is perfect. You want the rolls hot enough to slightly melt the rich cream cheese icing so it sinks down into every swirl and crevice.
If you wait too long, the icing just sits on top in a stiff layer. When you spread it over that warm surface, it melts just enough to become delightfully runny and decadent. That’s the gooey factor you’re looking for! It makes all that rising time completely worth it. If you ever want to try a baked version instead of frosting, you might want to check out my cinnamon roll casserole for an easy brunch bake!
Ingredient Notes and Substitutions for Homemade Cinnamon Rolls
Since these are yeast bread recipes, sometimes people get stuck worrying about the specific ingredients they have on hand, especially when aiming for that perfect pillow-soft dough. I want to ease your mind—this recipe is dependable, but knowing *why* we use certain things helps build total confidence!
Why We Insist on Active Dry Yeast
I specified active dry yeast because it’s the most common one homeowners have, and it needs that initial waking-up step in the warm milk. If you happen to grab instant yeast instead? No big worry! Instant yeast doesn’t need that foaming step, so you can skip step one and just mix it directly into the flour mixture with the salt. Either way, you still get those beautiful air bubbles that make for the best cinnamon buns.
The Importance of Room Temperature Eggs and Butter
I always remind readers that eggs left on the counter for about 30 minutes before I start mixing are essential. When butter and eggs are too cold, they don’t emulsify—that’s the scientific word for mixing smoothly—with the sugar. If they don’t blend well, you end up with dough that’s a little heavy right from the start. Cold ingredients slow down the creaming process we need for that light, airy start. If you’re ever in a rush, you can put your eggs in a bowl of warm tap water for five minutes to quickly bring them up in temperature!
Flour and the Soft Dough Debate
We use all-purpose flour, which works wonderfully for these rolls. If you want to try bread flour, you absolutely can! Bread flour has higher protein, which means your rolls might come out a bit chewier, which some people love. If you prefer the softest, most tender roll possible, stick with all-purpose flour like I do in my recipe for fluffy buttery dinner rolls. Just make sure you don’t add too much extra flour when kneading, or the rolls will get tough!
Make-Ahead and Storage Tips for Homemade Cinnamon Rolls
I know that getting up early to make homemade baked goods isn’t always realistic, especially during the week! The good news is that these homemade cinnamon rolls are fantastic for making ahead, and yes, that dough is absolutely perfect for an overnight chill. If you managed to get through the first rise (step 4 in the instructions), punch the dough down gently, coat it lightly in oil in an airtight container, and tuck it into the fridge for up to 18 hours.
This overnight rest actually makes the dough easier to handle the next morning! Just pull it out about an hour or two before you plan to roll and cut it so it can warm up slightly and become relaxed again. That’s how you sneak in an indulgent breakfast without setting your alarm at 4 AM!
Storing Baked Rolls
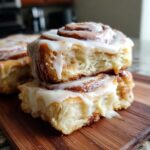
Once your rolls are baked and iced, you need to store them correctly to keep that heavenly texture. I cover the whole pan tightly with foil or transfer them to an airtight container. They stay wonderfully soft at room temperature for about two full days. If you frosted them heavily, I sometimes keep them in the fridge to keep that gorgeous cream cheese icing firm, but let them sit on the counter for about 30 minutes before serving so they soften up again.
Reheating for That Fresh-From-the-Oven Taste
If they’ve been sitting for a day or two, don’t eat them cold! The best trick to bringing back that soft, gooey texture is reheating them. You can microwave a single roll for about 15 to 20 seconds—just enough to melt the frosting slightly and make the bread warm and tender again. If you have a crowd, cover the whole pan loosely with foil and warm them in a 300°F oven for about 10 minutes. This second heating step restores the beautiful softness that makes these best cinnamon buns so famous!
Frequently Asked Questions About Homemade Cinnamon Rolls
How do I get the softest dough for my homemade cinnamon rolls?
The softness is all about temperature and patience! First, make sure your milk is exactly the right temperature (110°F) for your yeast, as I stressed in the beginning. Second, you must let the dough complete both rising stages fully—don’t rush that rest time! If you want a truly quick version, you can check out my easy breakfast recipes round-up, but for bakery-quality softness, those proofs are essential.
Can I use this recipe for easy cinnamon rolls if I’m unsure about yeast bread recipes in general?
Absolutely, you can! I promise this is one of the most forgiving yeast bread recipes out there. The trick that makes these feel like easy cinnamon rolls is using the stand mixer for kneading, which takes the effort out of it. If the dough seems too sticky after kneading, add flour one tablespoon at a time until it’s smooth but still a little tacky to the touch. Don’t over-flour it, or they won’t be soft!
How important is it to use light brown sugar instead of white sugar in the filling?
Using light brown sugar in the filling is super important for flavor and texture! Brown sugar has molasses in it, which keeps that delicious filling soft and almost liquidy when it bakes. If you only use white granulated sugar, the filling tends to dry out and crystallize while baking, which prevents that wonderfully gooey result we are aiming for!
Can I skip the second rise?
I generally wouldn’t recommend skipping it! The first rise builds the flavor and structure, but the second rise is what gives you those beautiful, puffy centers. If you skip it, you end up with dense, tight spirals rather than the plump, cloud-like rolls that define the best cinnamon buns. If you are truly pressed for time, make the dough the night before and let it rise in the fridge, as I mentioned in the make-ahead section—that saves morning time!
What is the secret to making the cream cheese icing perfectly smooth?
The secret is to make sure both your 8 ounces of cream cheese AND your half-cup of butter are fully softened, but not warm or melty! Beat them together alone first until they look like whipped frosting on their own. Then, add your sifted powdered sugar slowly. Sifting the sugar prevents those little hard lumps that ruin a smooth cream cheese icing.
Serving Suggestions for Your Indulgent Breakfast
You’ve done the hard work, you’ve waited for the rise, and now you have this mountain of warm, gooey perfection! These homemade cinnamon rolls really shine as the main event, but every great indulgent breakfast needs a few thoughtful pairings to round things out. I love keeping it simple because these rolls are rich enough on their own.
For the perfect morning pairing, you absolutely need a good, hot beverage! A strong cup of black coffee cuts through the sweetness of that cream cheese icing perfectly. Or, if you’re serving the kids, a glass of cold milk is always a winner.
If you feel like you need a little balance—and believe me, sometimes you do after eating two of these—a side of simple, fresh fruit really brightens the plate. Think about slicing up some bright mandarins or some tart berries like raspberries. It offers a nice, cool contrast to the warm spice. Honestly, though, serving them with nothing but sheer eagerness is sometimes the best approach!
Nutritional Estimates for Homemade Cinnamon Rolls
Now, let’s talk reality! Because these are truly homemade cinnamon rolls made with plenty of butter (for that soft dough!) and a thick layer of rich cream cheese icing, they are definitely an indulgence. My philosophy says we should enjoy these wonderful treats without guilt, but it’s good to know what you’re eating when you decide to have an indulgent breakfast!
These numbers are estimates based on using the standard ingredients listed above. If you use lots of extra icing or different types of flour, these numbers will change, of course. But for one large, glorious roll, here is the general breakdown:
- Serving Size: 1 roll
- Calories: 480
- Fat: 26g (mostly Saturated Fat at 16g—that’s the butter and cream cheese talking!)
- Carbohydrates: 58g
- Sugar: 45g (Yes, that’s high, but that’s the joy of it!)
- Protein: 7g
- Sodium: 320mg
Keep in mind that these estimates are based on careful measurement. If you’re being generous with that sweet spice mix, or if your roll is bigger than average once cut, you might see those numbers creep up just a bit. That’s okay! We bake for joy, not for spreadsheets, right?
Share Your Pillow-Soft Homemade Cinnamon Rolls Success
Well, if you’ve made it this far, you’ve successfully managed the yeast, rolled out a beautiful log, and smelled your kitchen transform into the best bakery in town! I sure hope you ended up with those incredibly pillow-soft homemade cinnamon rolls I promised you.
Now, I would absolutely love to hear all about it! Did the dough feel just right during the kneading? Did you go heavy on that gooey cream cheese icing? Please take a second and head down to the comment section below and leave a star rating for the recipe. Your feedback helps other bakers feel brave enough to tackle their own indulgent breakfast projects next time!
If you ran into trouble or if you changed something that worked beautifully, dish the details! We are all learning here. And if you need to get in touch directly for a complicated question, my contact page is right here. Happy baking, and enjoy every last swirl of those magnificent rolls!
PrintPillow-Soft Homemade Cinnamon Rolls with Gooey Cream Cheese Frosting
Make indulgent, bakery-style cinnamon rolls at home. This recipe uses a simple yeast dough for a soft texture and is topped with a rich cream cheese icing for a comforting breakfast treat.
- Prep Time: 45 min
- Cook Time: 25 min
- Total Time: 155 min
- Yield: 12 servings 1x
- Category: Breakfast
- Method: Baking
- Cuisine: American
- Diet: Vegetarian
Ingredients
- 1 cup whole milk, warmed to 110°F
- 2 1/4 teaspoons active dry yeast
- 1/2 cup granulated sugar, divided
- 1/2 cup unsalted butter, softened, plus more for greasing
- 2 large eggs, room temperature
- 4 cups all-purpose flour, plus more for dusting
- 1 teaspoon salt
- For the Filling:
- 1/2 cup (1 stick) unsalted butter, softened
- 1 cup packed light brown sugar
- 2 tablespoons ground cinnamon
- For the Cream Cheese Icing:
- 8 ounces cream cheese, softened
- 1/2 cup (1 stick) unsalted butter, softened
- 3 cups powdered sugar, sifted
- 1 teaspoon vanilla extract
- 1 tablespoon milk, or as needed
Instructions
- Activate the yeast: In a small bowl, combine the warm milk, yeast, and 1 teaspoon of the granulated sugar. Let stand for 5 to 10 minutes until foamy.
- Mix the dough: In a large bowl or the bowl of a stand mixer, beat the softened butter and remaining granulated sugar until light and fluffy. Beat in the eggs one at a time. Add the yeast mixture.
- Combine dry ingredients: In a separate bowl, whisk together the flour and salt. Gradually add the flour mixture to the wet ingredients, mixing until a soft dough forms. Knead by hand or with a dough hook for 5 to 7 minutes until the dough is smooth and elastic.
- First rise: Place the dough in a lightly greased bowl, turning to coat. Cover the bowl with plastic wrap and let it rise in a warm place for 1 to 1.5 hours, or until doubled in size.
- Prepare the filling: While the dough rises, mix the softened butter, brown sugar, and cinnamon together in a small bowl until well combined.
- Shape the rolls: Punch down the risen dough. Turn it out onto a lightly floured surface. Roll the dough into a large rectangle, about 12 by 18 inches. Spread the cinnamon-sugar filling evenly over the dough, leaving a 1-inch border on one long edge.
- Roll and cut: Starting from the long edge opposite the border, tightly roll the dough into a log. Pinch the seam closed. Cut the log into 12 equal pieces.
- Second rise: Arrange the rolls, cut-side up, in a greased 9×13 inch baking pan. Cover loosely and let rise again in a warm place for 30 to 45 minutes, until puffy.
- Bake: Preheat your oven to 375°F (190°C). Bake for 20 to 25 minutes, or until golden brown.
- Make the icing: While the rolls bake, beat the softened cream cheese and butter together until smooth. Gradually add the sifted powdered sugar, vanilla extract, and milk until you reach a thick, spreadable consistency. Add more milk if you prefer a thinner icing.
- Frost and serve: Remove the rolls from the oven and let them cool for 5 minutes before spreading the cream cheese icing generously over the warm rolls. Serve immediately for the best texture.
Notes
- For extra soft rolls, ensure your milk is the correct temperature for the yeast; too hot will kill the yeast.
- You can prepare the dough the night before, let it rise once, punch it down, wrap it tightly, and refrigerate. Bring it to room temperature before the second rise.
- If you want a very gooey result, pour the icing over the rolls while they are still warm from the oven.
Nutrition
- Serving Size: 1 roll
- Calories: 480
- Sugar: 45g
- Sodium: 320mg
- Fat: 26g
- Saturated Fat: 16g
- Unsaturated Fat: 10g
- Trans Fat: 0.5g
- Carbohydrates: 58g
- Fiber: 2g
- Protein: 7g
- Cholesterol: 85mg