
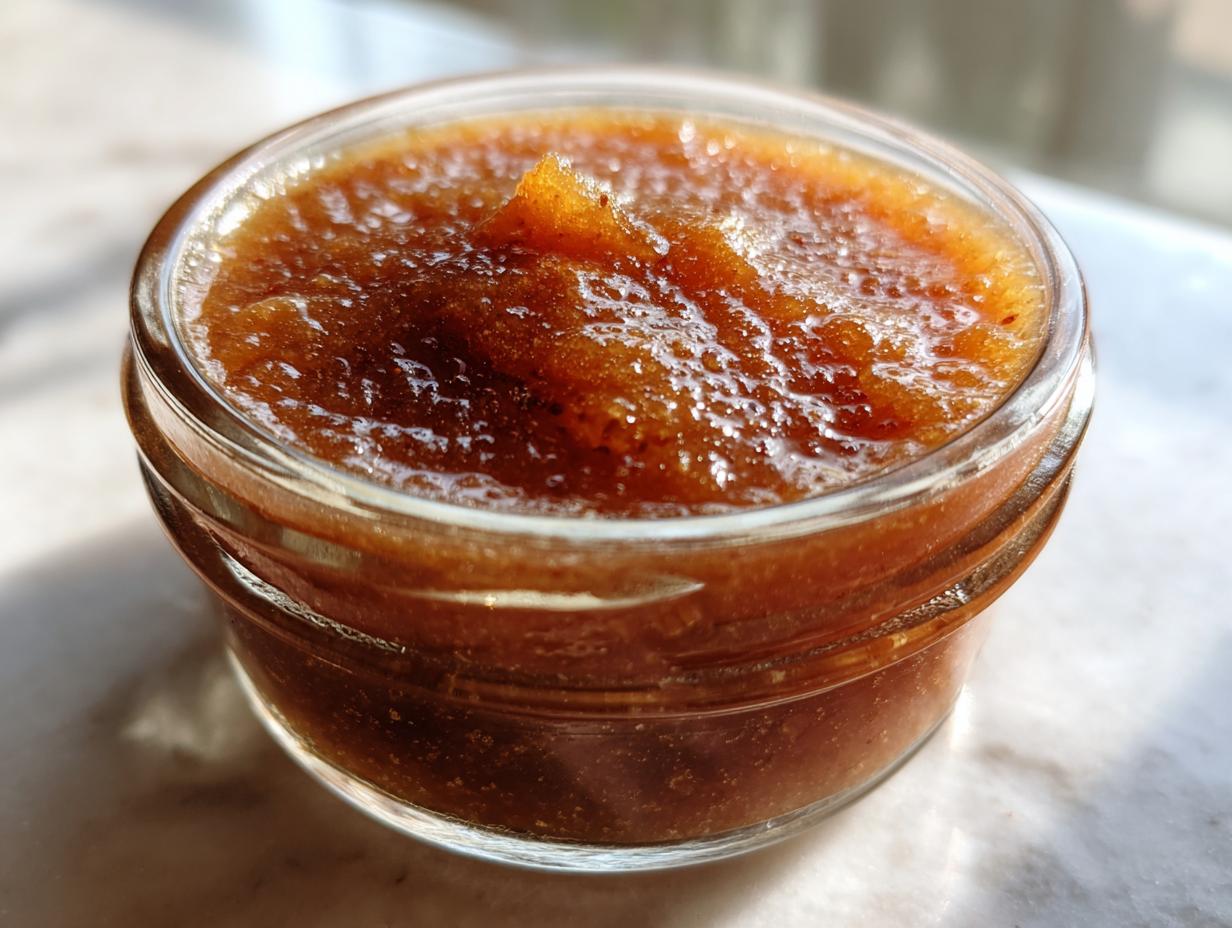
Oh, there is just nothing that smells more like coming home for me than the scent of slow-cooked fall fruit filling the kitchen. When those autumn spreads start simmering, I immediately think of my mother, who taught me all her secrets for preserving the harvest. Today, I want to share my absolute favorite way to capture that beautiful, comforting flavor: the easiest Slow Cooker **pear butter** recipe you will ever find! This recipe not only gives you rich, homemade fruit butter bursting with spice, but I’m also walking you through the whole canning process so you can enjoy these flavors all winter long. Trust me, hands-off cooking is the best cooking!
- Why This Easy Pear Butter Recipe Works So Well
- Gathering Ingredients for Homemade Pear Butter
- Step-by-Step Instructions for Slow Cooker Pear Butter
- How to Can Pear Butter Safely for Long-Term Storage
- Flavor Variations: Maple, Bourbon, and Vanilla Pear Butter
- Serving Suggestions for Your Homemade Pear Butter
- Storage Tips for Uncanned Pear Butter
- Frequently Asked Questions About Making Pear Butter
- Sharing Your Autumn Spreads Creations
- Estimated Nutritional Data for Pear Butter
Why This Easy Pear Butter Recipe Works So Well
I’ve tried every method for fruit butter over the years, including the stovetop, which requires constant stirring. But this recipe stands out because it’s truly an easy pear butter recipe. It captures all that deep, concentrated flavor without chaining you to the stove. And the yield is wonderful!
- Hands-Off Cooking with the Slow Cooker Pear Butter Method: Once the pears and sugar are in the pot, you walk away! This is my favorite crock pot pear butter trick. It cooks gently for hours, drawing out moisture naturally, which is perfect for those days when you’re busy canning vegetables or running errands.
- Rich, Spiced Flavor Profile of Our Pear Butter: We use classic autumn spices like cinnamon and cloves, which bloom slowly during the long cooking time. This results in the most comforting and complex spiced pear butter you can imagine—it tastes like everything good about fall in one jar.
Gathering Ingredients for Homemade Pear Butter
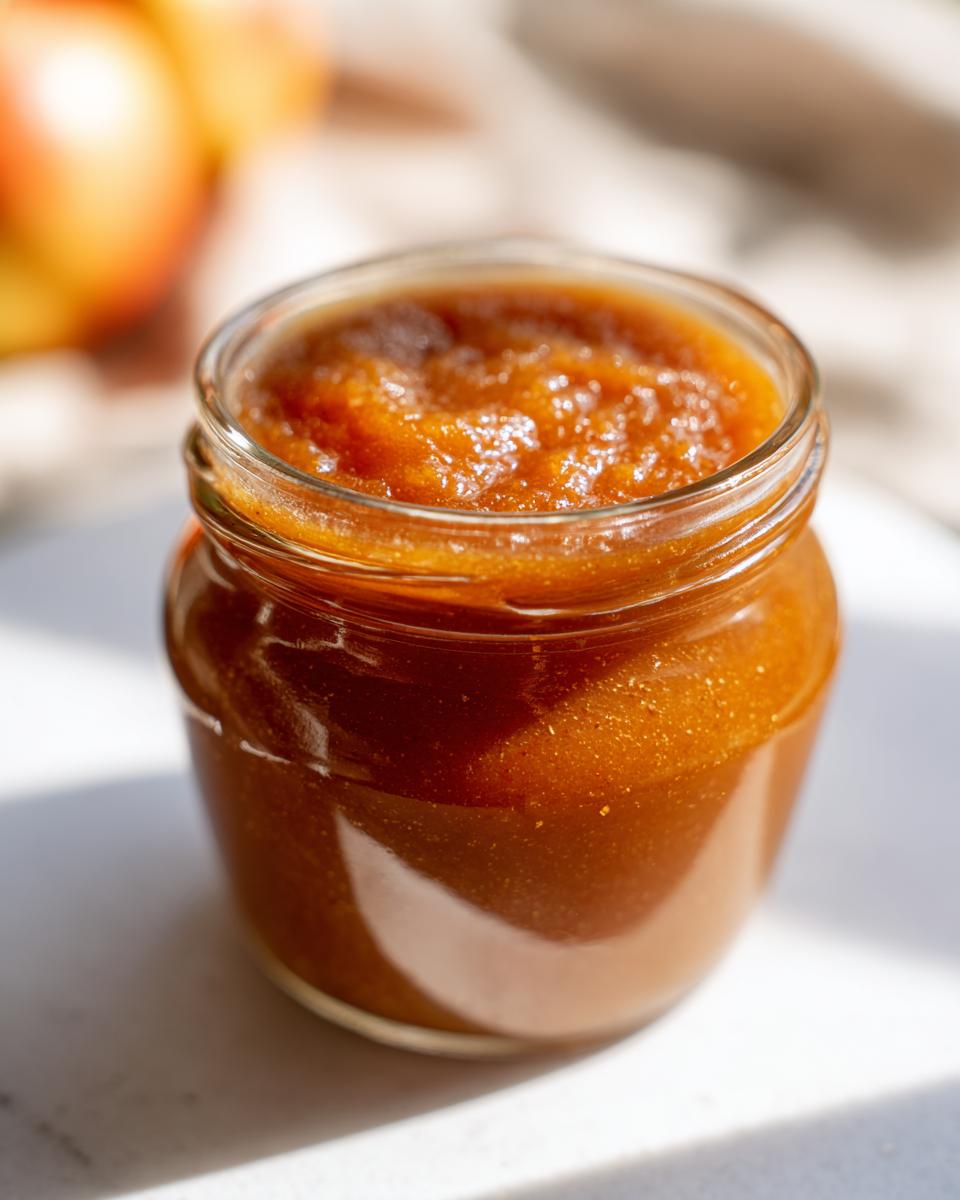
When we make something wonderful like homemade pear butter, we have to start with wonderful ingredients. I’ve listed everything out exactly as I use it, down to the type of spice! It’s important to be precise here, especially when you plan on canning later, which builds trust that the final product will be perfect. We need ripe pears, brown sugar for that deep molasses note, and just the right mix of warm flavors.
Ingredient Notes and Substitutions for Pear Butter
You’ll see I called for the pears to be peeled and cored, but here’s my little trick: if you know ahead of time that you’ll be using an immersion blender to smooth everything out later, you can skip the peeling! It saves a lot of time, though the final texture will be a tiny bit less perfectly velvety. Also, if you want to try a sweet maple pear butter variation, you can swap out 1/4 cup of that brown sugar for pure maple syrup.
A quick word on the fruit itself: please make sure those pears are ripe! You want them just soft enough that they start giving a little when you squeeze them. Overripe pears get mushy too quickly, but underripe ones won’t give you the intense, delicious flavor we need for spectacular pear butter.
Step-by-Step Instructions for Slow Cooker Pear Butter
Now for the actual fun part! Since this is a slow cooker recipe, the Prep Time is only about 25 minutes, but remember that Total Time commitment is quite long—around 8 hours—because that slow simmer is what makes it so incredibly luscious. Don’t confuse this with my quick applesauce recipe; you can find that simple version right here if you need a faster fruit fix. We want this to cook down until it’s deeply flavored. First, just toss those prepared pears right into the ceramic insert with the brown sugar and the water. Then, let it go on low for 6 to 8 hours, or use high for 3 to 4 hours, until the pears are very soft and yielding. It needs to be tender enough to fall apart easily when you stir it.
Once the pears are soft as butter, it’s time to blend it smooth. This is where you need to be careful, especially if you’re going the stovetop route later. I always use my immersion blender directly in the slow cooker insert if possible, but if you have to switch pots, make sure to work in batches if you use a regular blender. It gets incredibly hot!
Blending and Thickening the Pear Butter
Blending is key to achieving that velvety mouthfeel true pear butter needs. Smooth that cooked fruit mixture until there are absolutely no lingering chunks—unless you left the peels on, in which case it will have a slight texture, which is fine! After it’s blended, stir in all those beautiful spices we talked about, plus the vanilla and lemon juice. Now comes the thickening part. If you’re sticking with the slow cooker, take the lid off and cook it on high for another hour or two, stirring frequently. If you transfer it to a heavy pot on the stove, you’ll simmer it over medium-low for about 45 minutes to an hour. Keep stirring during this phase; we are boiling off water now to concentrate the flavor until the mixture coats the back of your spoon heavily. This step turns sauce into butter!
How to Can Pear Butter Safely for Long-Term Storage
If you are lucky enough to have made a big batch, you absolutely must learn how to can pear butter. Preserving is such an important skill my mother passed down—it means we get to enjoy the taste of autumn harvest well into spring! Canning takes this fantastic fruit butter and turns it into a pantry staple, ready for gifting or easy weekday breakfasts. The key here is safety and precision; we follow tested processing times strictly to make sure every jar is sealed perfectly.
Make sure all your jars and lids are hot and sterilized before you start filling them. Once the pear butter is piping hot and thick, you carefully ladle it into those jars. Remember the headspace rule—that space between the top of the food and the canning lid? It needs to be exactly 1/4 inch. Don’t overfill it, and wipe those rims clean before you put the lids on!
Next, we process the jars. We place them into a boiling water bath canner, make sure the water covers the jars by at least an inch, and process for 10 minutes. Now, if you live somewhere high up, you must adjust that time for altitude. If you want a really deep dive into the specifics for processing times, I highly recommend checking out trusted guides, like this wonderful resource on canning pear butter.
Checking the Seals on Your Canned Pear Butter
Once that 10 minutes is up (or adjusted time), carefully remove the jars using a jar lifter and set them on a towel that’s lined up on your counter—no tilting them or touching them for a long while! We need to let them cool completely without being disturbed. You’ll hear those happy little “pings” as the lids seal themselves shut. Check those seals the next day, within 12 to 24 hours. If the center of the lid is concave (curved inward) and doesn’t pop when you press it, it’s sealed beautifully and safe to store away in a cool, dark place!
Flavor Variations: Maple, Bourbon, and Vanilla Pear Butter
Now that you have my foolproof method for incredible pear butter, let’s talk about getting creative! Because we’ve built such a stable, wonderful base with the brown sugar and spices, this fruit butter takes on other flavors like a dream. This way, you can customize your pantry spreads for different holidays or just to suit your mood!
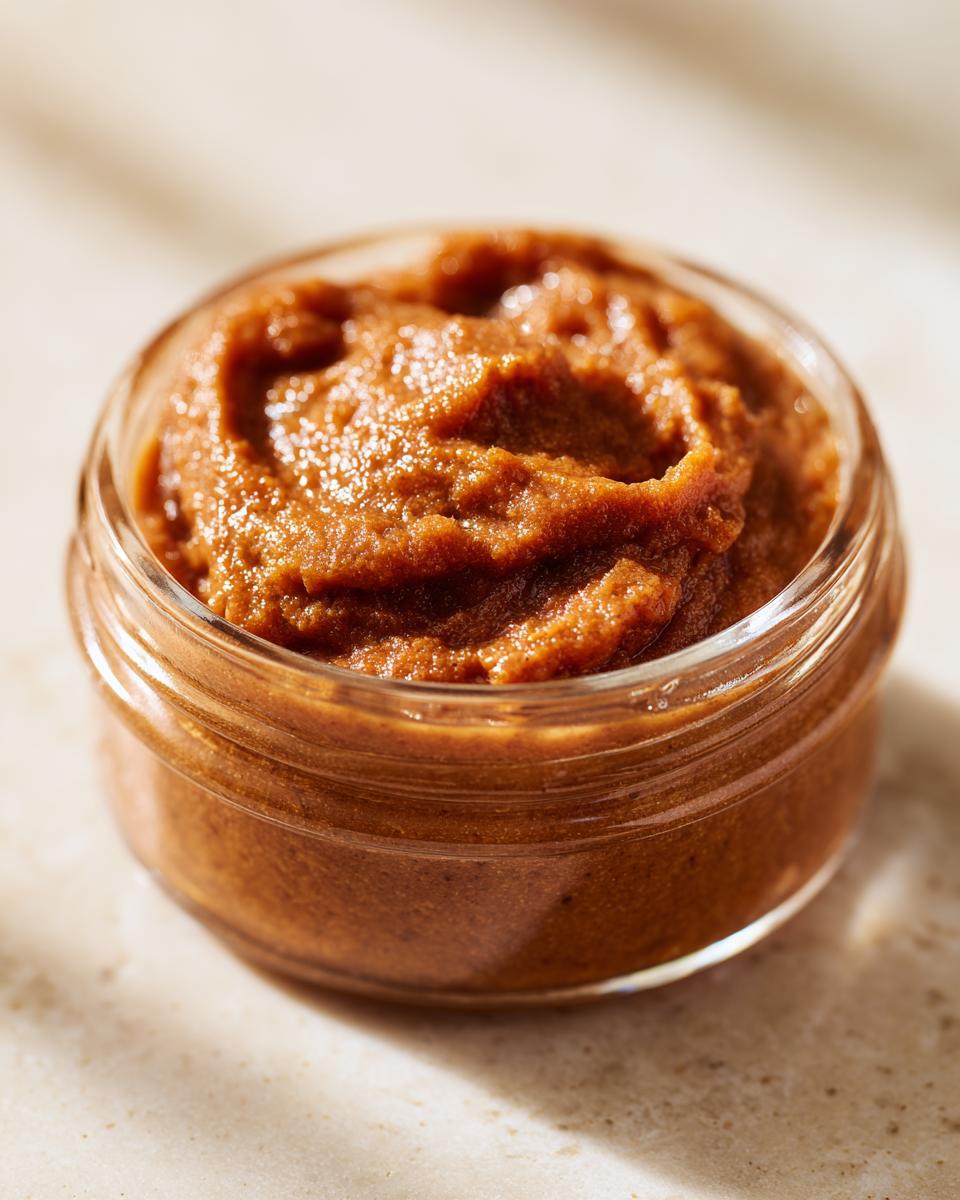
If you love a touch of warm caramel flavor, you have to try the maple pear butter variation. Simply swap out 1/4 cup of the brown sugar for pure, real maple syrup when you first put everything into the slow cooker. The slow cooking process just deepens that woodsy flavor beautifully. It’s stunning on a holiday breakfast table.

For something a little more grown-up and cozy, I highly recommend exploring a bourbon pear butter recipe. A splash of good bourbon added right near the end of the simmering process adds notes of vanilla and oak that complement the pears perfectly. If you’re interested in pairing bourbon with pears elsewhere, I have a lovely recipe for easy poached pears you might enjoy.
And speaking of vanilla, don’t skip the teaspoon I put in the main recipe! That pure vanilla extract is essential for a deeper flavor profile—it rounds out the tartness of the fruit and warms up the spices. Many people search specifically for vanilla pear butter, and I’ve found that using a full teaspoon really makes a difference between plain fruit butter and something truly special. If you want to see another great take on that flavor pairing, I saw a lovely maple bourbon pear butter link that looked fantastic for experimenting!
Serving Suggestions for Your Homemade Pear Butter
Now the really satisfying part begins: eating it! You’ve put in the time, you’ve canned the jars, and now you get to enjoy this wonderfully rich homemade fruit butter. One thing I love about this slow-cooked spread is just how versatile it is. It’s far more interesting than plain jam, and it works beautifully in so many different ways for your morning routine.
If you are looking for something new for breakfast spreads, start simple! This pear butter is incredible on a warm piece of homemade bread or a toasted English muffin—it’s one of my favorite autumn spreads for quick toast toppings. The sweet-tart flavor just melts right in, especially if you add a little melted butter on top. Don’t stop there, though!
This fruit butter is divine drizzled over a stack of my fluffy old-fashioned pancakes. It adds a richer depth than syrup sometimes manages. If you are looking for something a little lighter, stir a spoonful into plain yogurt. It sweetens the yogurt naturally and adds such a lovely texture and spiced flavor. It’s such an easy way to elevate your everyday yogurt into a special treat. Seriously, try it—it’s what I serve the grandkids!
Storage Tips for Uncanned Pear Butter
Alright, so maybe you whipped up a batch, but realized you don’t have the right jars for canning right away, or perhaps you just know this pear butter is going to disappear before you even look at the canner! That’s perfectly fine! You don’t have to seal every drop away for it to be delicious.
If you skip the water bath processing step, you just need to treat your finished homemade fruit butter like you would any other fresh preserves or chutney. Once the butter has cooled down completely—and I mean totally cool to a room temperature—transfer it into clean, airtight containers. Mason jars work wonderfully for this, even without the sealing lids, or any sturdy container you have stashed away.
Here’s the important part you need to remember: If you don’t can it, you must keep it in the refrigerator. My note on this recipe mentions that cooled leftovers will keep well in the fridge for up to three weeks. That seems like a long time, but because of the sugar content, it holds up nicely! However, I recommend that you keep an eye on it, especially if you omitted some of the sugar for a sugar free pear butter version, as those might not last quite as long. We want everything fresh, especially when we are using it daily as a delicious topping for our breakfast spreads!
Frequently Asked Questions About Making Pear Butter
Can I make this pear butter recipe without peeling the pears?
Oh, absolutely! If you’re in a hurry or just don’t want to face that pesky peeling task, go right ahead and leave the skins on. Remember I mentioned that when you use ripe pears, they break down so beautifully in the slow cooker? You can use an immersion blender right in the pot and blend it until it’s silky smooth. However, just to be honest with you, the final texture of your pear butter might be just a tiny bit less smooth than if you took the time to peel them first. It still tastes wonderful, though!
Is this a vegan pear butter recipe?
Yes, it certainly is! When I look over the ingredient list—pears, brown sugar, water, spices, vanilla, lemon juice—I don’t see any animal products listed at all. So, if you are looking for delicious vegan pear butter to enjoy on your morning toast or waffles, this recipe fits the bill perfectly. It’s all fruit and spice magic!
What is the difference between pear butter and pear sauce?
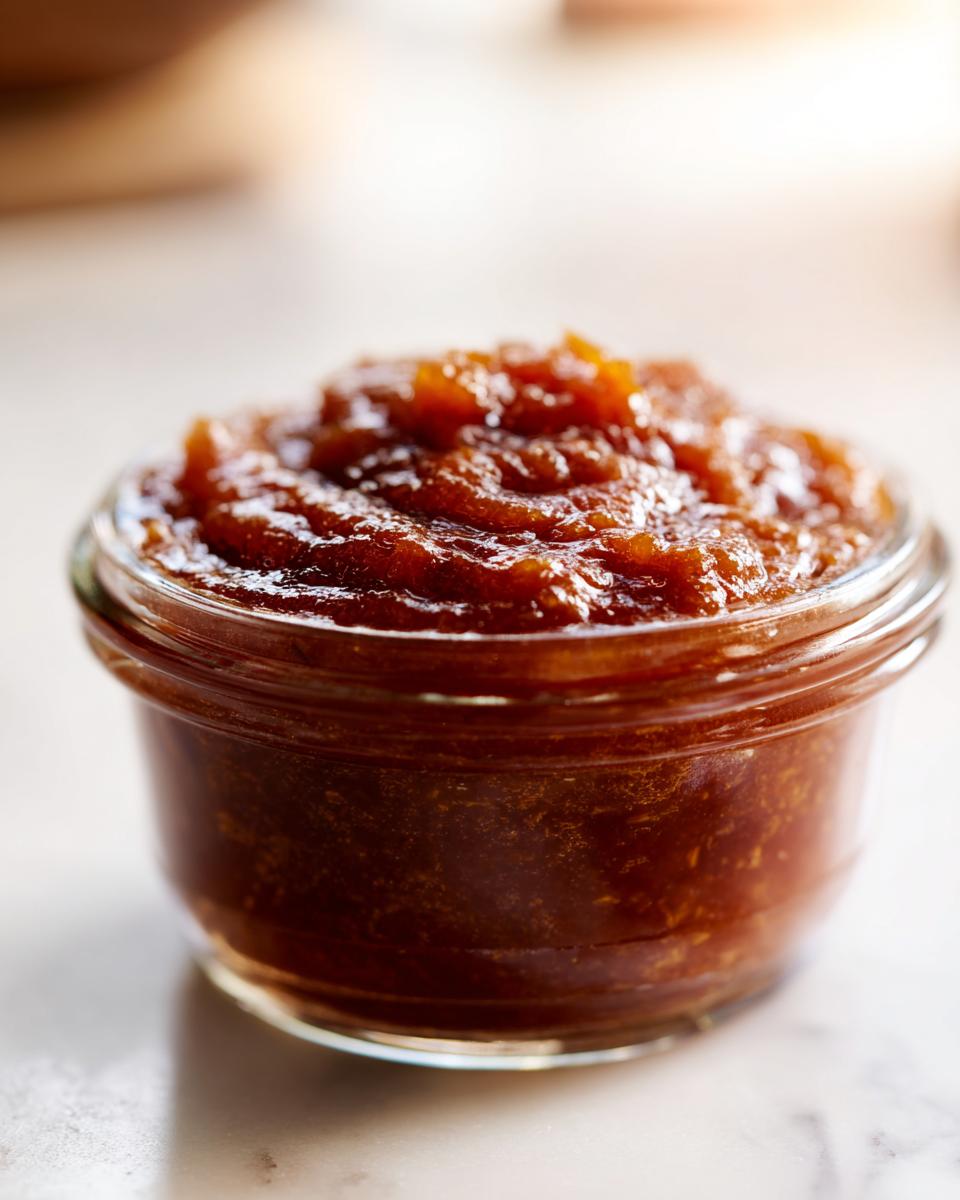
That is a great question about canning recipes for fall because people mix them up all the time! Think of pear sauce as the younger, lighter sibling. It’s looser and often sweeter, designed to be eaten soon after making. Pear butter, on the other hand, requires a much longer cooking time—usually simmering uncovered after the initial slow cook—to really evaporate a lot of the liquid. This long process concentrates the flavor dramatically, makes the sugars caramelize a bit more, and thickens it up so much that it truly holds its shape on a spoon. That’s what makes it a perfect, spreadable fruit butter!
Can I use the Instant Pot for this pear butter?
You definitely can! While my favorite way to explain this process is using the slow cooker because it truly is hands-off, I know so many of you love the speed and efficiency of your pressure cookers. The great news is that many folks have adapted this recipe for the Instant Pot with fantastic results. You’ll cook the pears under high pressure until tender, then switch to ‘Sauté’ mode to thicken it up at the end, just like we do on the stovetop. It’s a wonderful way to make homemade pear butter when you want it a little faster!
Sharing Your Autumn Spreads Creations
I truly hope you enjoyed making this simple, yet deeply flavorful $\text{Slow Cooker Spiced Pear Butter}$. Cooking by hand, just like my mother taught me, is the soul of my kitchen, and when you bring these wonderful fall fruit preserves into your own home, I just love hearing about it!
Did you serve it warm over waffles? Did you manage to get all those jars sealed up for gifting? Please, don’t keep the delicious results a secret! Head right down to the comment section below and leave me a star rating. It helps our community find reliable recipes.
And if you took pictures—and I bet you did!—please tag me on social media. I love seeing my recipes in your homes. It brings me such joy to know that a little bit of that Midwest autumn coziness has made its way to your table. If you’re looking for another easy comfort recipe for the season, maybe try my easy Christmas poke cake later on!
Estimated Nutritional Data for Pear Butter
Now, I do want to give you a general idea of what’s in this wonderful spread, but please keep in mind that this is just an estimate! The actual amounts of calories and sugar in your homemade pear butter can change depending on the pears you choose and exactly how much sugar you stir in. But generally speaking, this holds up well for a healthy serving!
This information is based on the serving size established in my recipe notes:
- Serving Size: 1/4 cup
- Calories: 145
- Sugar: 35g (Yes, it’s sweet, but it’s fruit-based sweetness!)
- Sodium: 2mg
- Fat: 0.2g
- Saturated Fat: 0.0g
- Carbohydrates: 37g
- Fiber: 3g
Remember, since we are using whole fruit, you get that 3 grams of fiber in that little scoop right off the top! That’s why sharing these homemade fruit butters is a wonderful way to enjoy fall flavors while still getting good nutrition. Enjoy every spoonful!
PrintEasy Slow Cooker Spiced Pear Butter with Canning Instructions
Make rich, thick homemade pear butter using your slow cooker. This simple recipe uses fall spices and provides clear steps for canning your preserves for later enjoyment.
- Prep Time: 25 min
- Cook Time: 8 hr
- Total Time: 8 hr 25 min
- Yield: About 4 half-pint jars 1x
- Category: Preserves
- Method: Slow Cooker
- Cuisine: American
- Diet: Vegetarian
Ingredients
- 3 lbs ripe pears (Bosc or Bartlett), peeled, cored, and quartered
- 1 cup packed brown sugar
- 1/2 cup water
- 1 teaspoon ground cinnamon
- 1/4 teaspoon ground cloves
- 1/4 teaspoon ground allspice
- 1 teaspoon vanilla extract
- 1 tablespoon lemon juice
Instructions
- Place the peeled, cored, and quartered pears, brown sugar, and water into your slow cooker.
- Cook on low for 6 to 8 hours, or on high for 3 to 4 hours, until the pears are very soft. Stir occasionally.
- Carefully transfer the cooked pear mixture to a blender or use an immersion blender to process until completely smooth. Work in batches if necessary.
- Return the smooth pear puree to the slow cooker or transfer it to a large, heavy-bottomed pot for stovetop cooking.
- Stir in the cinnamon, cloves, allspice, vanilla extract, and lemon juice.
- If using the slow cooker, remove the lid and cook on high for 1 to 2 hours, stirring frequently, until the butter has thickened significantly. If using the stovetop, simmer over medium-low heat, stirring often, for 45 to 60 minutes until thick. The butter should coat the back of a spoon.
- Prepare your canning jars and lids according to standard safety procedures.
- Ladle the hot pear butter into hot, sterilized canning jars, leaving 1/4 inch headspace. Wipe rims clean.
- Process the filled jars in a boiling water bath canner for 10 minutes, adjusting for altitude if needed.
- Remove jars and let them cool undisturbed on a towel-lined counter. Check seals after 12 to 24 hours.
Notes
- You can skip peeling the pears if you use an immersion blender, but the final texture will be slightly less smooth.
- For a maple pear butter variation, substitute 1/4 cup of the brown sugar with pure maple syrup.
- This pear butter is excellent served on toast, pancakes, or stirred into plain yogurt for a breakfast spread.
- If you do not want to can the butter, store cooled leftovers in an airtight container in the refrigerator for up to three weeks.
Nutrition
- Serving Size: 1/4 cup
- Calories: 145
- Sugar: 35
- Sodium: 2
- Fat: 0.2
- Saturated Fat: 0.0
- Unsaturated Fat: 0.1
- Trans Fat: 0.0
- Carbohydrates: 37
- Fiber: 3
- Protein: 0.4
- Cholesterol: 0