
Oh, you just wait until you pull this loaf out of the oven! Seriously, the aroma of freshly baked bread flooding your kitchen? Nothing beats it. I’m Carla, and for years I taught kids, so I learned about patience—and that patience is exactly what we need for baking wonderful, crusty Homemade Italian Bread. You don’t need to be a professional baker to achieve that perfect bakery-quality, crisp exterior and that soft, fluffy inside that’s just begging for olive oil. If you’ve been intimidated by yeast recipes before, don’t worry one bit. As a grandmother now, I promise to walk you through every single step so we get this perfect Italian bread together, right here in your home kitchen.
- Why This Is the Best Italian Bread Recipe You Will Make
- Gathering Ingredients for Your Homemade Italian Bread
- Step-by-Step Instructions for Crusty Italian Bread
- Tips for Success When Making Homemade Italian Bread
- Serving Suggestions for Your Freshly Baked Bread Aroma
- Storage and Reheating Instructions for Italian Bread
- Frequently Asked Questions About This Easy Yeast Bread Recipe
- Understanding the Nutrition of Your Italian Bread
- Share Your Homemade Italian Bread Creations
Why This Is the Best Italian Bread Recipe You Will Make
I know what you’re thinking: “Another bread recipe?” But trust me when I say this loaf is special. This isn’t just bread; it’s that sturdy, delicious Italian bread you look for at the bakery, only you made it yourself! It’s honestly the friendliest recipe I’ve ever developed for newcomers.
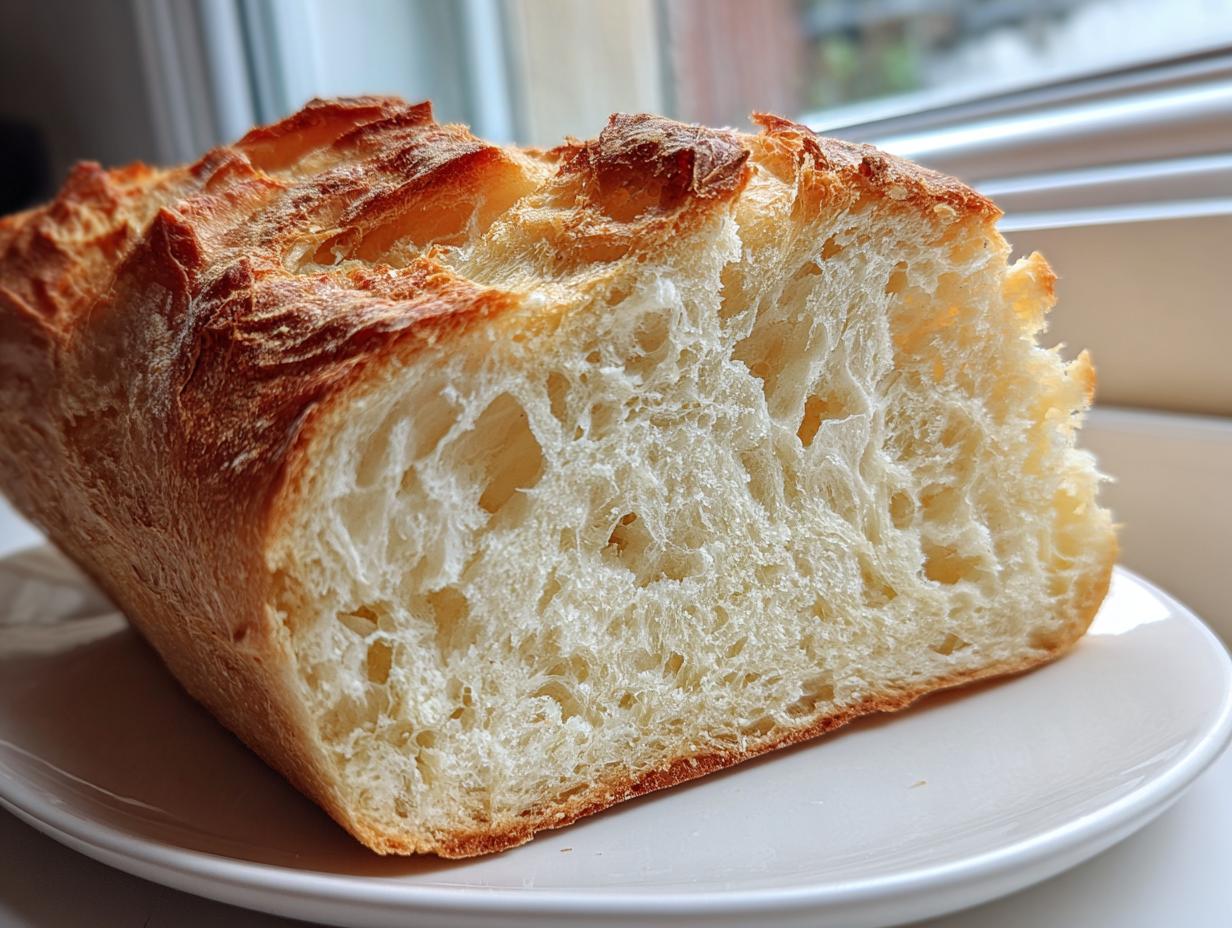
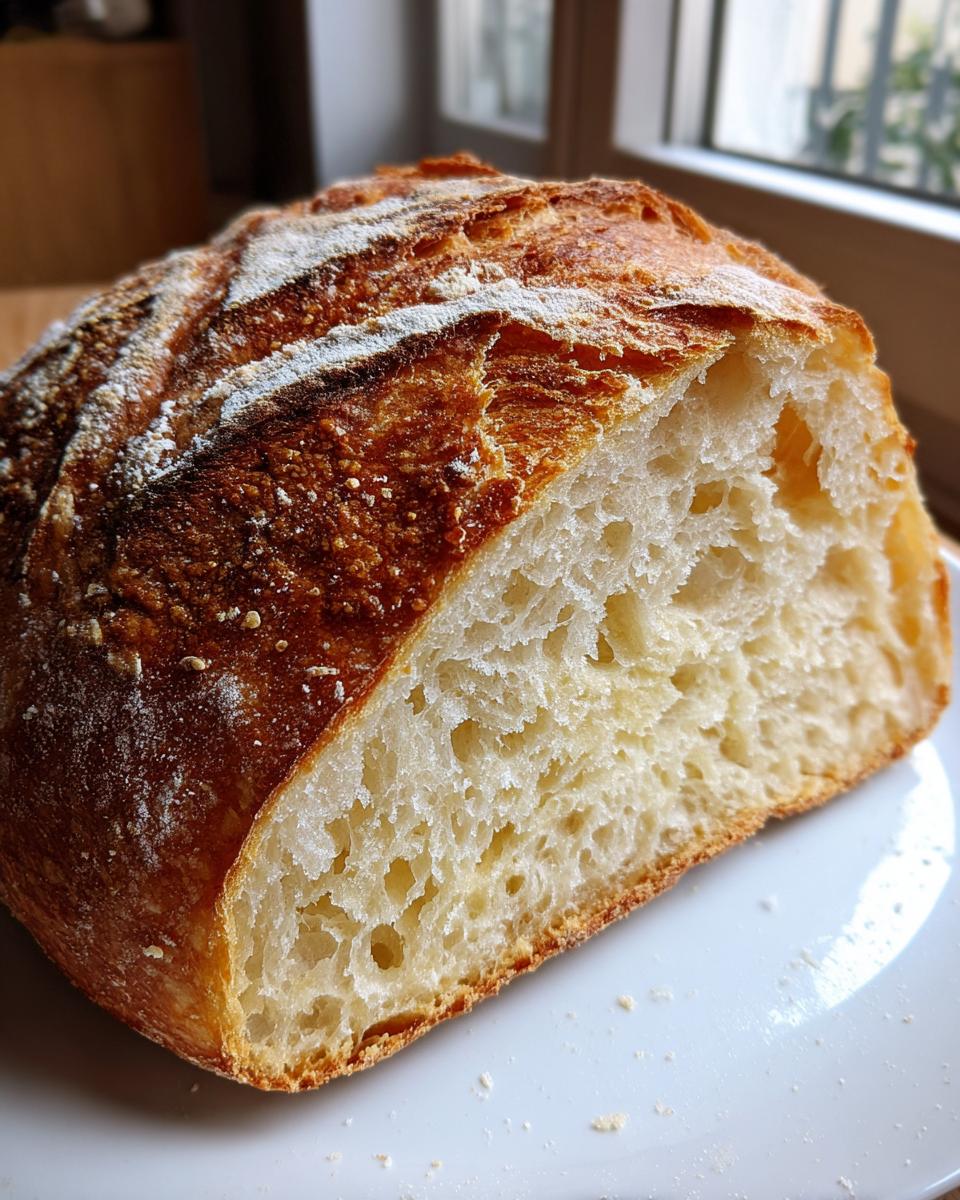
- We hit that perfect balance: a deep, golden, crusty artisan bread exterior.
- Inside, it’s light, airy, and perfect for soaking up sauce.
- The process is straightforward enough for any beginner baker—I promise!
If you love the sound of savory garlic bread instead, you’ll want to check out my recipe for easy artisan garlic parmesan bread next time!
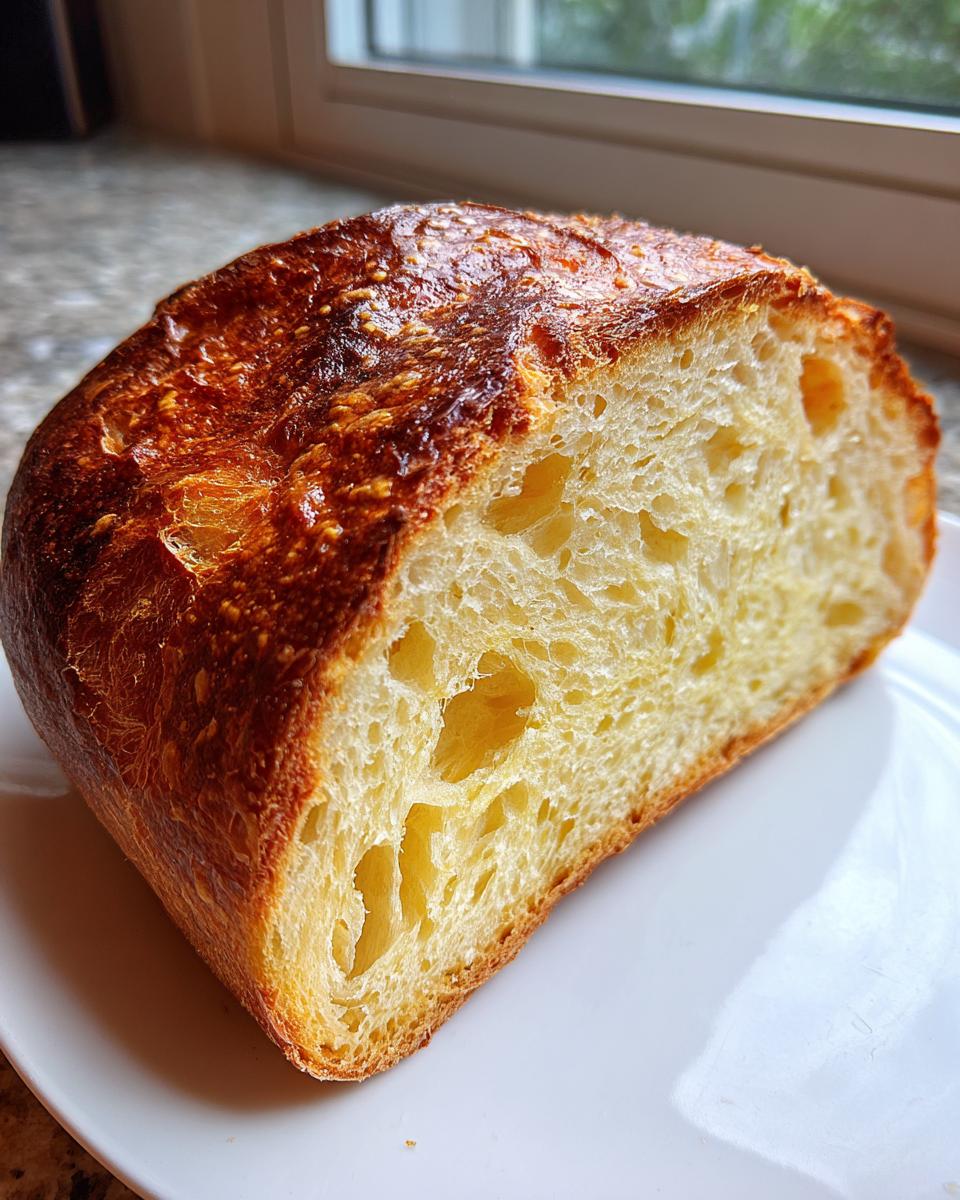
Achieving the Perfect Crusty Artisan Bread Texture
The secret to that amazing, crackle-worthy crust? Steam! It sounds complicated, but it’s so simple. When the bread goes into the oven, we add a pan of hot water underneath it. That burst of steam keeps the outside soft just long enough to expand beautifully before setting up hard and crisp. It’s the oldest trick in the baking book, and it works like magic every single time for that rustic finish.
Gathering Ingredients for Your Homemade Italian Bread
Before we jump into the kneading, let’s make sure you have everything cozy in the kitchen. Baking this Italian bread is fantastic because it uses staples you probably already have tucked away! There’s no need for fancy additives, just good, honest ingredients that make magic happen.
Here’s exactly what you’ll need to pull together for one beautiful loaf:
- 3 cups All-purpose flour
- 1 1/2 cups Warm water (about 105-115°F)
- 2 1/4 teaspoons Active dry yeast (that’s one standard packet, folks!)
- 1 teaspoon Granulated sugar
- 2 teaspoons Salt
- 1 tablespoon Olive oil, plus more for coating the bowl
Ingredient Notes and Substitutions for Simple Bread Baking
Since this is what I call a simple bread baking recipe, there aren’t many tricky parts, but yeast is the star, so treat it nicely! Make sure your water feels warm, not hot, when you start. If it’s too hot, you kill the yeast, and then you’re just left with salty flour water. Nobody wants that!
For flour, standard all-purpose works perfectly, giving you the classic structure people expect from a nice dinner loaf. If you happen to have bread flour, you can absolutely swap it in. Bread flour has more protein, which means if you substitute it, you’ll get a slightly chewier—though still wonderfully light—crumb. For more general tips on flour types, check out some of my general baking advice over here!
Step-by-Step Instructions for Crusty Italian Bread
Okay, deep breath! Baking bread seems like a marathon, but this Italian bread comes together so fast. I’ve broken it down into clear chunks so you don’t feel rushed. Remember, I was a teacher, so clarity is key here. We move from mixing to kneading, then let the yeast do the heavy lifting for us!
Activating the Yeast and Mixing the Italian Bread Dough
This first step is non-negotiable for a successful rise. Take your warm water—and I mean *warm*, like a cozy bath, around 110°F—and mix in the sugar and your yeast. Now, you let it hang out for about 5 to 10 minutes. If you see foam, like the top of a cappuccino, that means your yeast is alive and hungry! If nothing happens, dump it and start over with fresh yeast, because that foamy top is proof that your dough will become a gorgeous, fluffy Italian loaf.
Once it’s bubbly, whisk your flour and salt together in a separate big bowl. Then, pour in that foamy yeast mixture and your olive oil. Stir it up with a wooden spoon until it just gets shaggy and sticks together. No need to mix it fully yet!
Kneading and the First Rise for a Fluffy Italian Loaf
Time to get your hands dirty! Turn that shaggy dough out onto a lightly floured counter. You’ll knead this for a good 8 to 10 minutes. Keep working it until it goes from sticky and bumpy to smooth, soft, and wonderfully elastic. Give it the windowpane test—if you can stretch a small piece thin enough to see light through it without tearing, you’ve done it right.
Lightly coat a clean bowl with oil, tuck your dough ball inside, and flip it so the top gets a little slick too. Cover it up snugly. We need this dough to relax and grow in a warm spot—at least 1 to 1.5 hours until it’s truly doubled. I usually put mine in the oven briefly just to warm it up for them!
Shaping, Proofing, and Creating Steam for Your Rustic Italian Loaf
Gently punch the air out when it’s ready—don’t crush those gorgeous air bubbles completely! Shape it gently into a long, rustic Italian loaf on your parchment-lined baking sheet. Cover it again and let it rest for another happy 30 minutes while you preheat the oven to 425°F (220°C). Crucially, put a shallow pan underneath the rack where the bread will sit.
Right before you slide the bread in, use a very sharp knife to make a few neat, shallow slices across the top—these are the scores! Now, the magic trick for that incredible crust: quickly pour about a cup of boiling water into that hot bottom pan and shut the door fast. That steam is what gives you that beautiful, crisp finish. If you want to see a similar technique applied to faster styles, check out my recipe for easy French bread!
Tips for Success When Making Homemade Italian Bread
Baking truly happy bread comes down to a few little secrets I picked up over the years. Since that crust is what everyone raves about when they try my Italian bread, I want to make sure you nail it!
My first pro tip is borrowing from the artisan bakers: use a Dutch oven, if you have one! Instead of using that pan of hot water for steam, try this: preheat your Dutch oven *inside* the oven. After you score your loaf, gently lower it into the hot pot, put the lid on, and bake it for the first 20 minutes. That trapped heat and condensation gives you the absolute thickest, crunchiest crust imaginable. Take the lid off for the last 15 minutes to let it brown up perfectly.

Now, if you prefer that slightly softer, more yielding crust—maybe you’re making this into a big sandwich loaf—just skip the steam method entirely. As soon as the bread comes out of the oven, brush the entire top surface lightly with melted butter. This blocks moisture from escaping too quickly and keeps that exterior tender. It’s a different flavor entirely, but so cozy!
Finally, please, please let it cool! I know the smell of freshly baked bread aroma is intoxicating, and you’ll want to slice into it right away. But if you cut into it while it’s hot, the steam rushes out, and your lovely, airy interior turns gummy. Give it a full hour on a wire rack. Patience means success with this easy yeast bread recipe!
Serving Suggestions for Your Freshly Baked Bread Aroma
What a joy it is to have this beautiful, rustic Italian bread cooling on the rack! Now comes the fun part: eating it! Honestly, this loaf is versatile enough for any Italian feast you’re planning. The number one thing I always do is take a warm slice, still slightly steamy, and just dip it. It’s the simplest pleasure!
For dipping, you can’t go wrong with good quality olive oil seasoned with a crack of black pepper and maybe a tiny pinch of dried oregano. But if you want to make dipping an *event*, you absolutely have to try my recipe for Cowboy Butter dipping sauce. It has herbs, garlic, and butter—it makes everything taste better, trust me!

This bread for dipping is also the best sidekick for saucy meals. Think about serving it alongside a big bowl of bolognese or lasagna. That sturdy crust holds up perfectly under heavy sauce without turning to mush right away. It’s sturdy enough for making hearty sandwiches too, though if you’re looking for that super-soft loaf for subs, you might want to go for a softer crust version!
Enjoy this incredible smell filling your house! You’ve earned it!
Storage and Reheating Instructions for Italian Bread
I know, I know. When you make a loaf of beautiful, crusty artisan bread like this, you want to eat it all right now! But leftovers are a wonderful problem to have, aren’t they? We just have to make sure we store this Italian bread right so the crust doesn’t turn soft and sad overnight.
The key to keeping that crusty exterior? Don’t seal it completely! If you wrap this loaf tight in plastic wrap while it’s still even slightly warm, all that steam gets trapped, and boom—you have a tough, chewy crust instead of a crisp one. After it’s completely cool, wrap it loosely in parchment paper, and then place that in a plastic bag or a bread box. The parchment keeps it from getting dried out, but the loose seal lets some moisture escape, preserving that crunch.
If you’ve let it sit a day or two and the crust has softened up a bit, don’t worry about tossing it! We can bring it right back to life. My trick for reviving leftovers is simple: drizzle just a tiny bit of water—maybe a teaspoon—over the outside of the loaf, and pop it back into a 350°F oven for about 5 to 7 minutes. Watch it closely!
That little spritz of water creates instant steam when it hits the hot oven coils, effectively giving the crust a mini-rebirth. It’ll come out smelling like it just came out of the oven, ready for dipping. If you’re not eating it right away, freezing works great too! Slice it first, then wrap the slices tightly in plastic wrap and toss them in a freezer bag. When you need some, just toast a slice directly from frozen!
Frequently Asked Questions About This Easy Yeast Bread Recipe
I totally get it; baking is fun, but sometimes you need a quick answer or a little tweak before sticking that beautiful dough in the oven. This recipe is wonderfully reliable, but every kitchen is a little different! Here are some things folks ask me most often when they are making this easy yeast bread recipe.
Can I make this a No Knead Italian Bread recipe?
That’s a popular question, especially if you’re looking for convenience! Yes, you absolutely can adapt this to be a No Knead Italian Bread, but you need to understand the trade-off. Kneading develops gluten structure, which is what gives you that beautiful, slightly chewy, airy crumb we talked about. If you skip kneading, you’ll mix everything just until it’s combined (Steps 1 through 3), then go straight to the first rise.
The rise needs to be much longer—think 3 to 4 hours instead of 1.5—because the yeast has to do all the work the kneading would normally help with. You can gently fold the dough over itself once halfway through the rise instead of traditional kneading. The result will still be delicious, homemade Italian bread, but it usually ends up slightly denser and might not have that same perfectly open, rustic texture.
How do I get a softer crust on my Italian bread?
If that crispy, crunchy crust is just a little too aggressive for your family, or maybe you’re slicing it for sandwiches later, getting a soft crust bread is easy! Remember when I mentioned brushing the loaf with melted butter immediately after it comes out of the high-heat oven? That’s the trick for a softer finish.
When fat (like butter) hits the hot surface, it traps steam inside the crust area and kind of seals it off from getting rock hard. It also adds a lovely subtle richness to the outside flavor. If you want a middle-of-the-road texture, you can skip the steam pan entirely when baking, which will naturally result in a softer loaf than if you use that hot water trick!
I cover more forgiving techniques for folks easing into baking over on my simple bread baking guide if you want more foundational knowledge!
Understanding the Nutrition of Your Italian Bread
Now, I always tell folks that when you’re baking at home, you know exactly what’s going into your food, and that’s just wonderful for peace of mind. This is such a simple recipe, using just flour, water, yeast, salt, and a tiny bit of oil. When we talk about the nutrition in this lovely, crusty artisan bread, remember these are just estimates based on dividing the loaf into 12 slices.
When you’re using whole ingredients like this, you’re avoiding all those weird preservatives you find in store-bought loaves. Here is a breakdown of what you can generally expect per slice when enjoying this wonderful homemade Italian bread:
- Serving Size: 1 slice
- Calories: 180
- Sugar: 1 gram
- Sodium: 250 mg
- Fat: 2 grams
- Protein: 5 grams
See? Nothing scary in there at all! It’s mostly carbohydrates fueling you up for your day or giving you the perfect base for soaking up that amazing pasta sauce we talked about earlier. When you bake this Italian bread yourself, you’re in total control of the salt shaker, too, which is a pretty neat benefit of baking bread at home!
Share Your Homemade Italian Bread Creations
My favorite part of sharing these recipes is seeing what you all create in your own kitchens! When I taught school, I loved seeing the pride in a child’s eyes when they finished a project, and I get that same feeling when you share a picture of this beautiful, crusty Italian bread you baked.
I truly hope this recipe brings that wonderful, comforting feeling of a freshly baked bread aroma into your home. Did it turn out perfectly crusty? Did your family devour the entire loaf before dinner even started? Don’t keep those triumphs to yourself!
Please, hop down to the comments section below and let me know how it went. Leaving a star rating helps other new bakers feel confident trying this easy yeast bread recipe for the first time. I read every single note you leave!
And if you’re sharing photos on social media—and you absolutely should, because this loaf is photogenic!—please tag me. Seeing my simple steps turn into your magnificent rustic Italian loaf truly makes my day. I love connecting with this community of home cooks. If you want to read a little more about my philosophy on making cooking accessible for everyone, you can always learn more about me and the start of Cooking by Carla right here!
Happy baking, my friends. You’ve created something wonderful today!
PrintCrusty Homemade Italian Bread: Easy Yeast Bread for Dinner
Bake a golden, rustic Italian loaf with a crisp crust and soft interior. This easy yeast bread recipe uses simple ingredients and is perfect for dipping or serving alongside your favorite Italian meals.
- Prep Time: 20 min
- Cook Time: 35 min
- Total Time: 2 hours 25 min
- Yield: 1 loaf 1x
- Category: Side Dish
- Method: Baking
- Cuisine: Italian
- Diet: Vegetarian
Ingredients
- 3 cups All-purpose flour
- 1 1/2 cups Warm water (about 105-115°F)
- 2 1/4 teaspoons Active dry yeast (one standard packet)
- 1 teaspoon Granulated sugar
- 2 teaspoons Salt
- 1 tablespoon Olive oil, plus more for coating
Instructions
- In a small bowl, mix the warm water, sugar, and yeast. Let this mixture sit for 5 to 10 minutes until it becomes foamy. This shows the yeast is active.
- In a large mixing bowl, whisk together the flour and salt.
- Pour the yeast mixture and the olive oil into the flour mixture. Stir with a wooden spoon until a shaggy, cohesive dough forms.
- Turn the dough out onto a lightly floured surface. Knead the dough for about 8 to 10 minutes until it becomes smooth and elastic.
- Lightly grease a clean bowl with olive oil. Place the dough in the bowl and turn it over to coat the top lightly with oil.
- Cover the bowl with plastic wrap or a clean kitchen towel. Let the dough rise in a warm place for 1 to 1.5 hours, or until it has doubled in size.
- Gently punch down the risen dough. Shape it into a long, rustic loaf shape on a baking sheet lined with parchment paper or a pizza peel dusted with cornmeal.
- Cover the loaf loosely and let it rest for a second rise for about 30 minutes. While it rests, preheat your oven to 425°F (220°C). Place a shallow pan on the bottom rack to create steam later.
- Before baking, use a sharp knife to score the top of the loaf two or three times with shallow diagonal cuts.
- Carefully pour about 1 cup of hot water into the preheated shallow pan on the bottom rack to create steam. Quickly close the oven door.
- Bake for 25 to 35 minutes, or until the crust is deep golden brown and the internal temperature reaches 200°F (93°C).
- Remove the bread from the oven and transfer it to a wire rack to cool completely before slicing. Enjoy this homemade Italian bread warm.
Notes
- For an extra crusty exterior, you can bake the bread in a preheated Dutch oven with the lid on for the first 20 minutes, then remove the lid for the remaining bake time.
- If you want a softer crust, brush the loaf lightly with melted butter immediately after removing it from the oven.
- This bread is excellent for dipping in olive oil or serving with pasta sauce.
Nutrition
- Serving Size: 1 slice
- Calories: 180
- Sugar: 1
- Sodium: 250
- Fat: 2
- Saturated Fat: 0.5
- Unsaturated Fat: 1.5
- Trans Fat: 0
- Carbohydrates: 35
- Fiber: 1
- Protein: 5
- Cholesterol: 0