
When the air turns crisp and the smell of cinnamon starts drifting through the house, you know it’s time for some serious fall baking inspiration. Many folks think an impressive dessert has to be complicated, but that’s just not true! I’ve spent thirty years making sure delicious food doesn’t need a culinary degree to turn out perfectly. That’s why I’m sharing my absolute favorite recipe when I want something elegant yet simple: my Easy Homemade French Apple Tart, or Tarte aux Pommes. Trust me, this classic apple dessert proves you can achieve gorgeous results with a reliable, straightforward apple tart recipe every single time.
- Why This Easy Homemade Apple Tart Recipe Works (Simple Apple Dessert)
- Gathering Ingredients for Your Classic Apple Tart
- Step-by-Step Instructions for the Best Apple Tart
- Tips for a Flawless Rustic Apple Tart Experience
- Serving Suggestions for Your Elegant Apple Tart
- Storing Your Homemade Apple Tart
- Frequently Asked Questions About Making an Apple Tart
- Nutritional Estimate for This Simple Apple Dessert
- Share Your Apple Tart Creations
Why This Easy Homemade Apple Tart Recipe Works (Simple Apple Dessert)
The reason this particular apple tart recipe has earned a permanent spot in my binder is simple: it delivers maximum impact with minimum fuss. It’s the perfect answer when you need a beautiful seasonal apple recipe without spending the whole afternoon wrestling with dough.
- It gives you that incredible, flaky, buttery crust that rivals anything you’d find in a fancy patisserie.
- The assembly is so straightforward—just slice the apples and arrange them beautifully. It’s truly an easy apple dessert.
- The final look is stunning! It earns compliments every time, making it wonderful fall baking inspiration.
Achieving the Perfect Buttery Crust for Your Apple Tart
When I taught my kids how to bake, the crust was always where we had to slow down. For this French pastry, the crust simply must be flaky. The trick, which I learned from my own mother, is keeping everything related to the fat ice cold. You can’t rush chilling the butter or the dough! When those cold pieces of butter meet the heat of the oven, that’s what creates those lovely pockets, making your homemade apple tart crust shatter perfectly when you cut into it.
Quick Assembly for a Gorgeous Apple Tart
Don’t let the French name scare you; this isn’t fussy at all. Once that crust is chilled, the rest moves fast. Tossing the apples with just a hint of sugar and spice takes maybe five minutes. Arranging them nicely in the pan takes a little patience, yes, but it’s relaxing! This is how you create an elegant apple tart that looks like it took hours of labor, even though we both know it’s actually a wonderful quick apple tart.
Gathering Ingredients for Your Classic Apple Tart
Now that you’re excited about this simple but beautiful bake, we need to gather our players! Remember, in baking, specificity matters, especially when you want that dreamy, flaky texture. You absolutely must start with unsalted butter cut cold into small pieces—no excuses here! For the apples, I always recommend a mix of tart and sweet, so grab some Granny Smith and maybe a Honeycrisp or two.
Keep your water icy cold for the dough, too. If you’re running short on time and want a quick apple tart, you can always swap out that homemade dough for a sheet of good quality, all-butter puff pastry. But if you can manage the dough, check out my tips for the flakiest pie crust; the technique is similar!
Step-by-Step Instructions for the Best Apple Tart
Alright, let’s get down to the fun part—making this beautiful French apple tart! Remember what I said about patience? That applies to the dough most of all. We’re going to walk right through this together, just like I did with my students in the classroom. Don’t worry if your dough looks a little messy at first; that’s what gives us that authentic, flaky texture.
Making the Buttery Pastry for Your Apple Tart
First, we mix the flour and salt. Then, toss in your cold butter pieces. Now, this is key: you need to work that butter until it looks like coarse crumbs, but you must still see some pieces about the size of little peas. Those pea-sized bits are magic! Once that’s done, add your ice water, just a tablespoon at a time. Stop mixing the *instant* the dough comes together into a shaggy ball. Overmixing means tough pastry for your apple tart, and we certainly don’t want that!
Wrap that dough up tight and put it in the fridge for at least 30 minutes. It needs that chill time to relax before we roll it out.
Preparing and Arranging the Apples on the Tarte aux Pommes
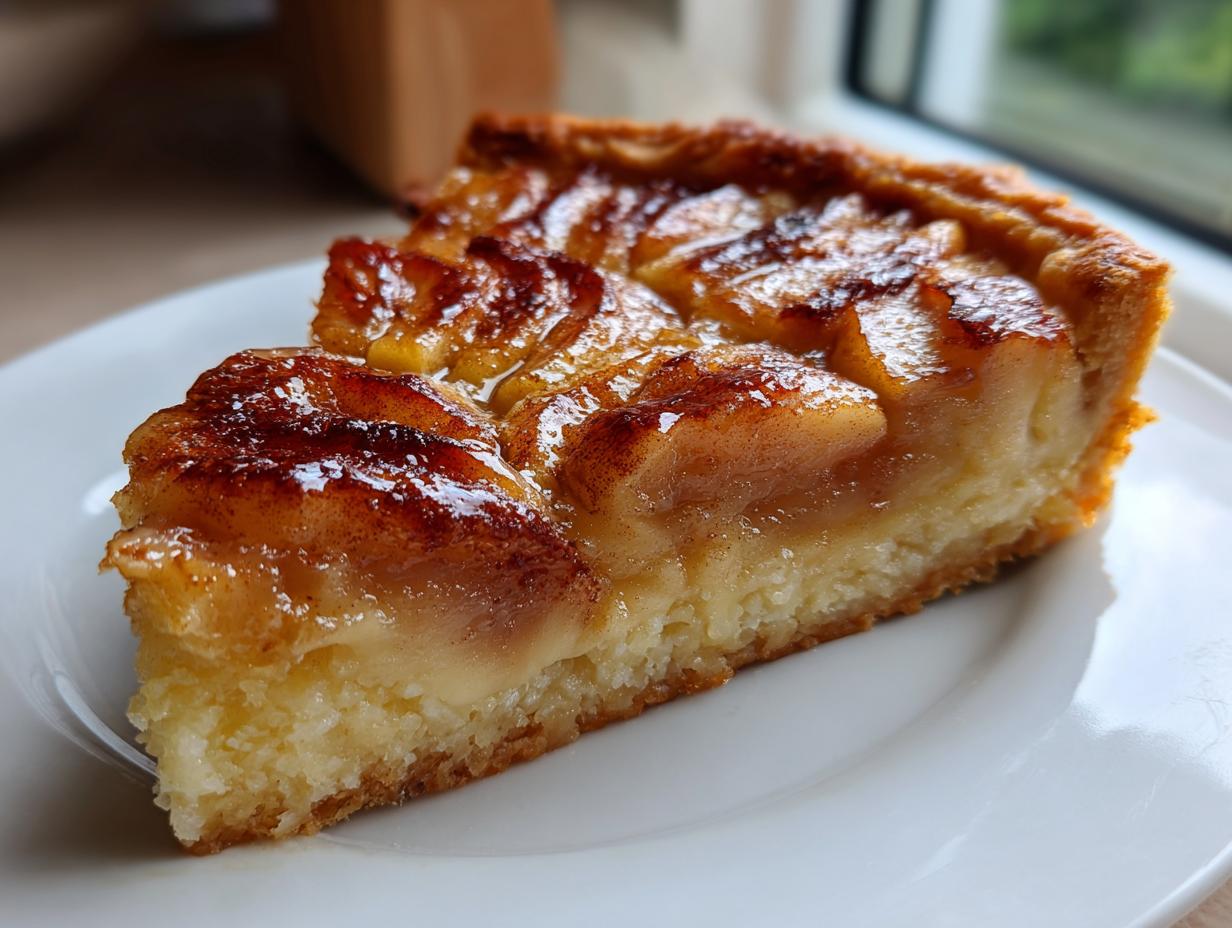
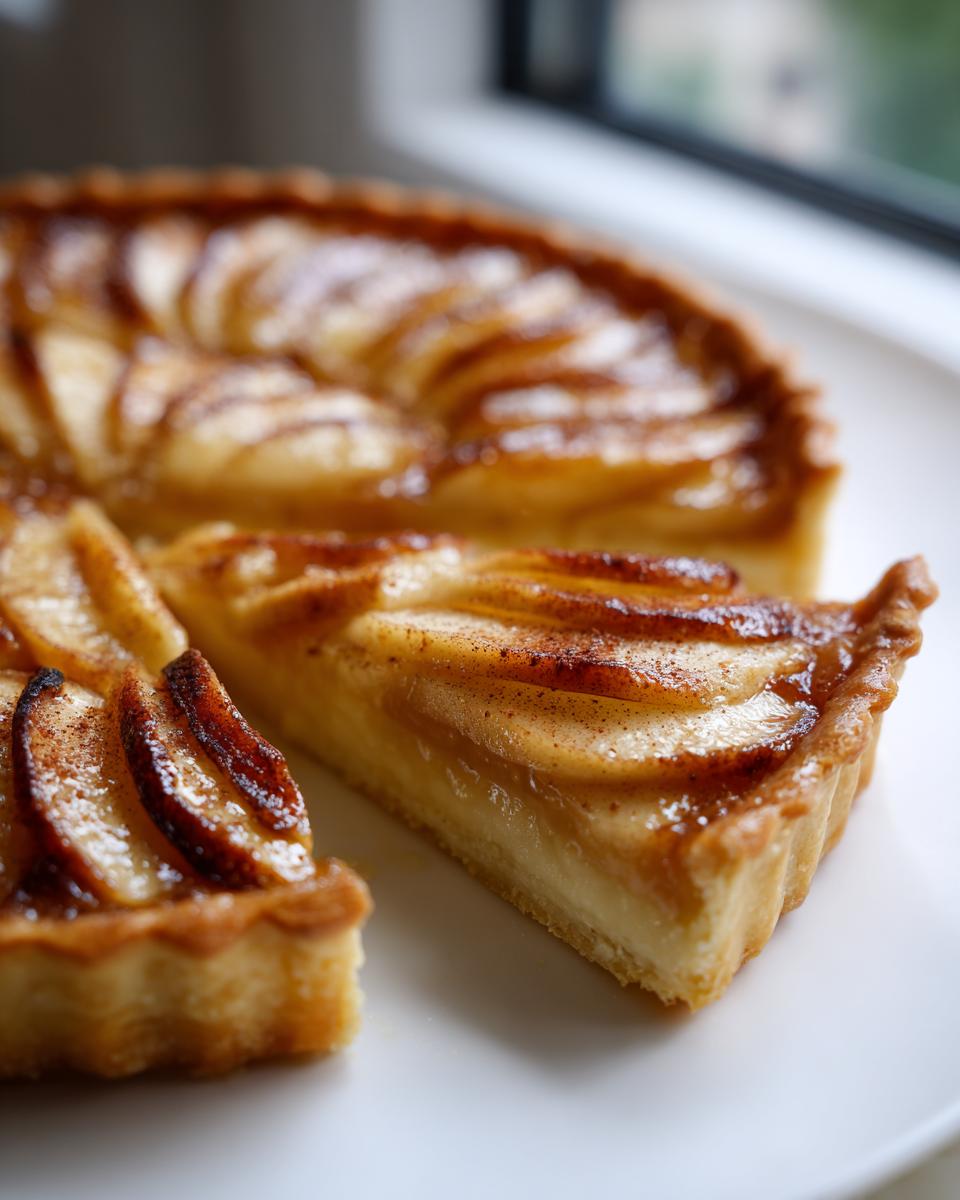
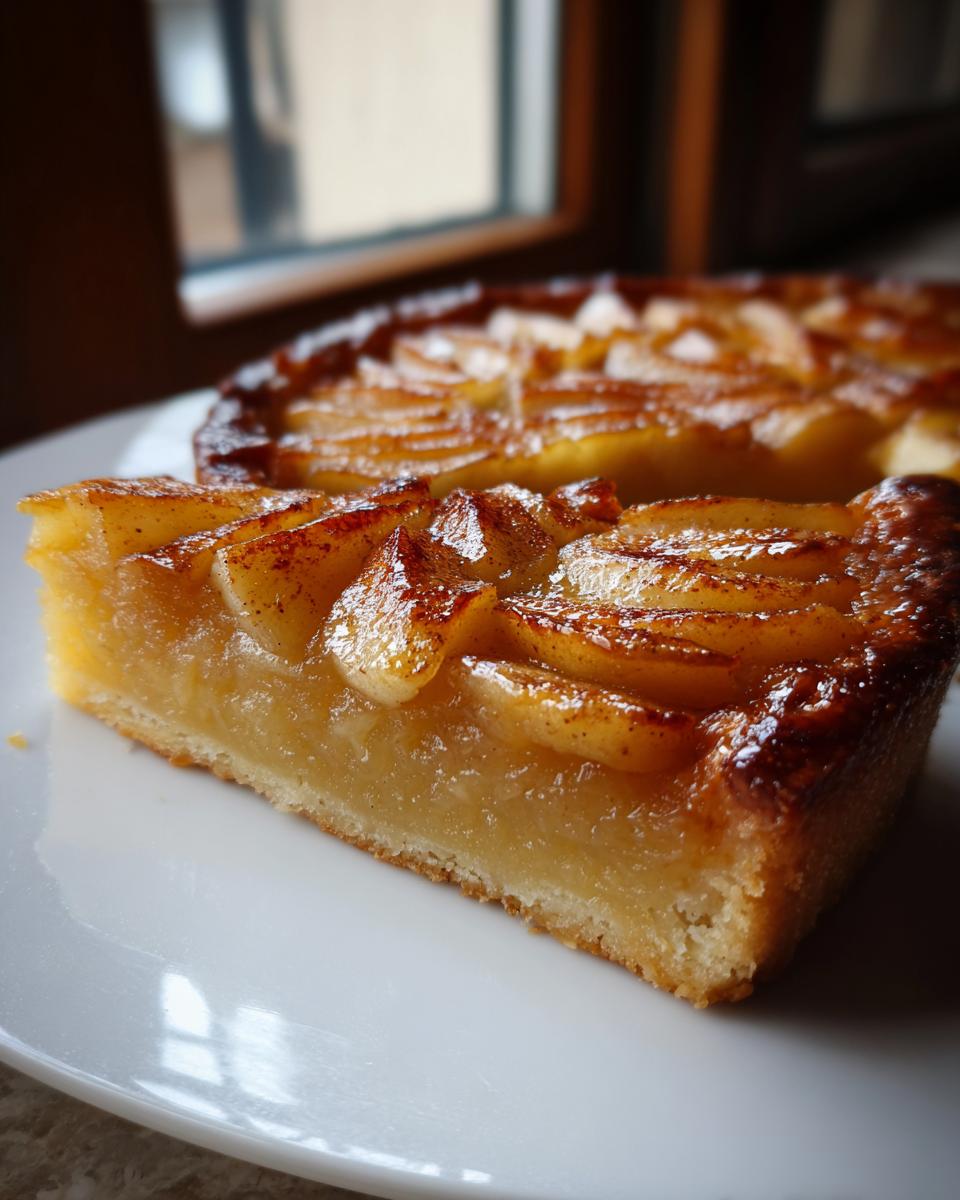
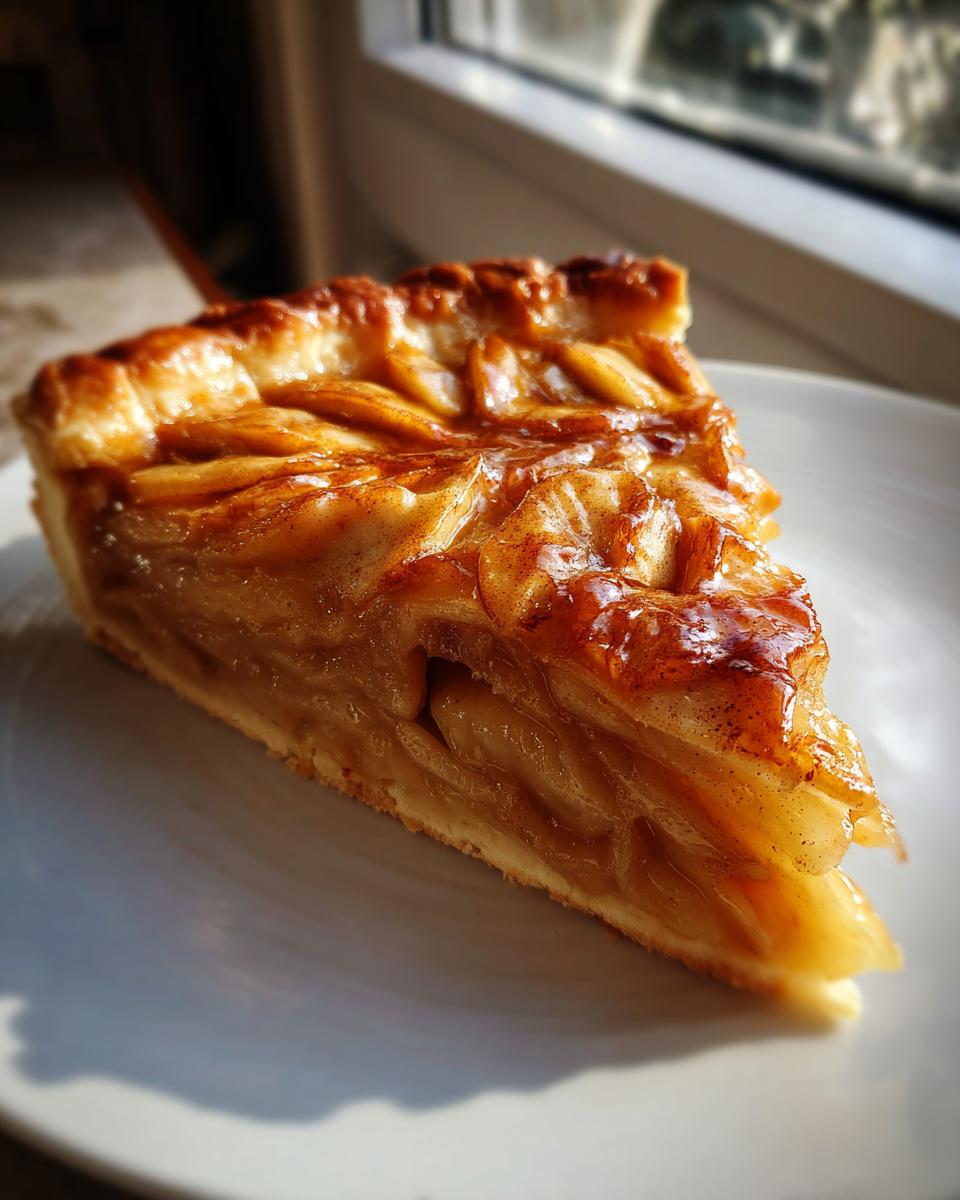
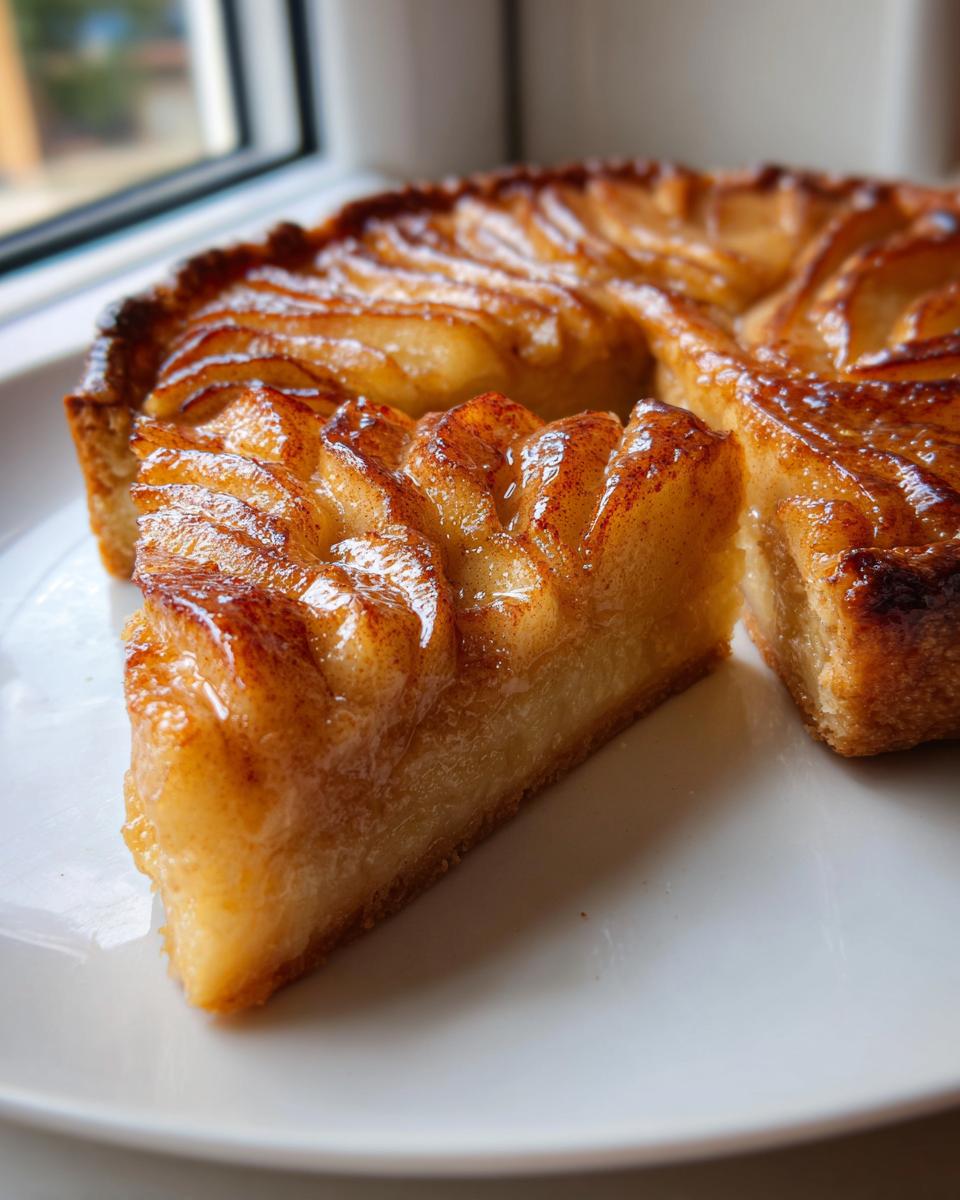
While the dough chills, we deal with the fruit. Peel, core, and slice those apples very thinly—aim for about 1/8th of an inch thick if you can. Toss those beautiful slices gently with the sugar, cinnamon, and lemon juice. Now for the presentation: If you want that truly gorgeous apple tart everyone talks about, take your time arranging the slices over the bottom of your pan. Overlap them slightly in concentric circles, going around and around like a beautiful floral design.
Baking and Glazing the Finished Apple Tart
Get your oven hot—preheat it to 375 degrees Fahrenheit (190 Celsius). You’ll bake the tart until that homemade apple tart crust is golden brown and the apples look tender, which usually takes about 40 to 50 minutes. As soon as it comes out, while it’s still warm, you need to do the glaze. Heat up two tablespoons of apricot jam or apple jelly until it liquefies. Brush that shiny glaze all over the warm apples. This seals the deal and gives your Tarte aux Pommes that professional sheen. You can find wonderful inspiration for this specific preparation over at Silver Recipes, too.
Don’t forget, if you need a quick fix, recipes like my Apple Dumpling Crescent Roll can satisfy that apple craving fast!
Tips for a Flawless Rustic Apple Tart Experience
Even though this French apple tart recipe is designed to be forgiving, there are always those little secrets that elevate a good bake into a fantastic one. If you want that beautiful rustic apple tart texture where the apples aren’t turning into mush, pay close attention to the fruit preparation. I’ve found that moisture control is the name of the game when we are dealing with fresh fruit in pastry.
Apple Selection and Slicing for the Ideal Apple Tart
You want apples that can stand up to the heat! Don’t reach for soft, mealy varieties; they’ll break down completely while baking. I always lean on Granny Smith because their tartness balances the sugar, and they keep their shape beautifully. When slicing, try to keep them uniform—thin, but not paper-thin. If they are all the same size, they’ll cook evenly, avoiding those frustrating spots that are either hard or completely collapsed in your finished apple tart.
Quick Apple Tart Hack: Using Puff Pastry
Sometimes life is just too busy for making a full crust from scratch, and that’s okay! If you need a quick apple tart fix, go grab one box of good quality, all-butter puff pastry. Thaw it out according to the package directions. You roll it slightly larger than your pan and press it in, just like the dough we made. It bakes up puffier and lighter than the shortcrust, but it’s honestly delicious and a wonderful shortcut for a weeknight treat. You can find a lovely example of a rustic approach over at It’s a Keeper.
When you’re practicing your pastry skills sometime when you have more time, I highly recommend my recipe for moist coffee cake; it really helps you practice that delicate ingredient mixing!
Serving Suggestions for Your Elegant Apple Tart
Just when you think this beautiful apple tart is complete, we get to the very best part: deciding how to serve it! While it’s wonderful perfectly fine on its own, a little something extra really finishes the plate. My husband, bless his heart, always thinks a dessert isn’t finished without a topping.
I think this French apple tart is absolutely divine served warm—not hot, but just warm enough that the pastry is fragrant. That’s the perfect temperature for pairing it with a generous scoop of high-quality vanilla ice cream. The contrast between the warm spice and the cold cream is just heavenly! If you prefer something warmer, a dollop of fresh whipped cream is always lovely, too. These little touches turn a great apple tart into a showstopper dessert. Speaking of warmth, if you happen to have leftover honey butter from making my skillet corn, a tiny drizzle actually works wonders on the side!
Storing Your Homemade Apple Tart
I hope you have some leftovers, because this apple tart tastes just as good the next day—maybe even better once the spices have really settled into those apples! But how you store this dessert matters, especially since we worked so hard on that delicate, flaky pastry.
For a rustic apple tart like this that doesn’t have a creamy custard base, room temperature storage is usually fine for the first day or so, provided your kitchen isn’t too hot. Cover the tart loosely with plastic wrap or place it in an airtight container. Don’t wrap it too tightly immediately after baking, though; you have to let the steam escape first, or you’ll end up with a soft, soggy bottom, which is the enemy of a buttery crust dessert!
If you need to keep it longer than 24 hours, move it into the refrigerator. If you want to store it for the holidays or a long time, you can even freeze leftover slices! Wrap individual slices tightly in plastic wrap and then pop them into a freezer bag. They hold up beautifully frozen for about a month.
Reviving that Flaky Crust When Reheating
The main concern with refrigerating pastry is that the butter hardens, and the crust loses its charm. Don’t just leave it sitting out! To bring back that wonderful texture, you need to reheat the slice.
I always put my slices on a baking sheet in a 300-degree oven for about 8 to 10 minutes. This mild heat warms the apples nicely while gently crisping up that crust again. If you skip this step and just microwave it, well, let’s just say you’ll get a chewy crust, and that’s a crying shame when you’ve made such a wonderful homemade apple tart crust!
If you are serving it straight from the fridge, try it with a warm topping, like a nice scoop of ice cream, to balance the chill. It’s all about enjoying every last bite of your beautiful work!
Frequently Asked Questions About Making an Apple Tart
I always love when folks reach out with questions once they start baking! It means they’re truly engaged with making the recipe their own, just like I encourage everyone to do here at Cooking by Carla. Baking should be fun, not frustrating! Here are a few things I hear often about getting that best apple tart just right.
What is the difference between a Tarte aux Pommes and a regular apple pie?
That’s a wonderful question that gets to the heart of why we love this French apple tart! The main difference is structure, dear friend. A traditional American apple pie has a thicker filling, usually made with a little cornstarch or flour to set up like a pudding, and it’s almost always covered with a top crust. Our Tarte aux Pommes is wide open—no top crust! The apples are often sliced very thinly and arranged beautifully on top of a shallow base, sometimes with a thin layer of custard or nothing at all, just the bottom crust. It’s much lighter and lets those beautiful apples really shine as a classic apple dessert.
Can I make this apple tart ahead of time?
You certainly can! This recipe is a brilliant go-to for entertaining because you can do a lot of the heavy lifting ahead of time. I strongly recommend making the crust a day ahead and keeping it wrapped tightly in the fridge; in fact, sometimes I think the dough is even better after that overnight rest! You can also peel and slice your apples well in advance, toss them with the lemon juice and sugar, and keep them covered in the fridge—that lemon juice keeps them from turning brown. Bake the whole thing the morning you plan to serve it for the best result, especially if you want that beautiful, flaky pastry dessert texture.
What apples make the best apple tart?
If you want a respectable apple tart that doesn’t turn to soup while baking, you need apples with backbone! I always preach about using firm, crisp apples that hold their shape. Granny Smith apples are my first choice because they offer that lovely tartness that cuts through the butter and sugar. However, Gala or Honeycrisp are fantastic too because they are wonderfully aromatic and sweeten up nicely without dissolving. If you mix one firm tart apple with one slightly sweeter, firmer apple—that’s the jackpot combination for flavor and structure in your fall baking!
If you’re looking for some non-dessert recipes to fill your day while the tart bakes, you should pop over and check out my collection of easy breakfast recipes!
Nutritional Estimate for This Simple Apple Dessert
Now, I always tell folks that when you’re baking with real butter and fresh fruit, you aren’t watching calories too closely—you’re making memories! But I know some of you like to keep track, so I took the ingredients from this easy apple tart and ran the numbers. Please remember that these are just estimates, dear ones. What kind of apples you use or if you glaze it heavily will change the final count!
These figures are based on the recipe yielding 8 generous slices. If you manage to save any leftovers, of course, you’ll need to adjust! You can find other straightforward meals over at my quick and healthy lunch ideas section if you need something less decadent later in the week.
- Serving Size: 1 slice
- Calories: 320
- Fat: 16g
- Carbohydrates: 42g
- Sugar: 22g
- Protein: 4g
Share Your Apple Tart Creations
Well, we made it! I truly hope you feel encouraged and excited to try this classic apple dessert. Making an apple tart isn’t just about following steps; it’s about putting a little piece of your heart into the oven. If you followed along, you should have a beautiful, golden pastry right now, smelling just heavenly!
I would simply love to hear how yours turned out! Did you go for the classic arrangement, or did you try something wonderfully rustic? Please don’t be shy! Head over to the comment section below and tell me your results. If you manage to snap a picture of your creation, I’d be tickled pink if you shared it with me—you can always find a way to reach out through my contact page.
If this easy apple tart recipe worked its magic for you on a busy weekday or perhaps graced your holiday table, please give it a solid five stars right at the top of the page. Seeing those ratings tells me that these simple, reliable recipes are still what home cooks truly need. Thank you for trusting me with your baking time. Now go pour yourself a cup of coffee and enjoy every single bite of that beautiful buttery crust dessert!
PrintEasy Homemade French Apple Tart (Tarte aux Pommes)

Make this classic French apple tart, Tarte aux Pommes, using a simple, buttery crust. This recipe delivers a gorgeous, flaky dessert perfect for any occasion.
- Prep Time: 25 min
- Cook Time: 50 min
- Total Time: 1 hr 45 min
- Yield: 8 servings 1x
- Category: Dessert
- Method: Baking
- Cuisine: French
- Diet: Vegetarian
Ingredients
- 1 1/2 cups all-purpose flour
- 1/2 teaspoon salt
- 1/2 cup (1 stick) cold unsalted butter, cut into small pieces
- 3 to 4 tablespoons ice water
- 5 medium baking apples (like Honeycrisp or Granny Smith)
- 1/4 cup granulated sugar
- 1 tablespoon lemon juice
- 1 teaspoon ground cinnamon
- 2 tablespoons apricot jam or apple jelly (for glaze)
Instructions
- Prepare the crust: In a large bowl, whisk together the flour and salt. Cut in the cold butter using a pastry blender or your fingers until the mixture resembles coarse crumbs with some pea-sized pieces of butter remaining.
- Add the ice water one tablespoon at a time, mixing until the dough just comes together. Do not overmix. Form the dough into a disk, wrap it in plastic wrap, and chill it in the refrigerator for at least 30 minutes.
- Prepare the apples: Peel, core, and thinly slice the apples. In a medium bowl, gently toss the apple slices with the granulated sugar, lemon juice, and cinnamon.
- Preheat your oven to 375 degrees Fahrenheit (190 degrees Celsius). Lightly grease a 9-inch tart pan with a removable bottom.
- Roll out the chilled dough on a lightly floured surface into a 12-inch circle. Carefully transfer the dough to the tart pan, gently pressing it into the bottom and up the sides. Trim any excess dough.
- Arrange the apple slices over the bottom of the crust. You can layer them flat or arrange them in an overlapping circular pattern for a more elegant apple tart appearance.
- Bake for 40 to 50 minutes, or until the crust is golden brown and the apples are tender.
- While the tart is still warm, gently heat the apricot jam or jelly in a small saucepan or microwave until liquid. Brush this glaze evenly over the top of the warm apples for shine.
- Let the apple tart cool slightly before removing the outer ring of the tart pan. Serve warm or at room temperature.
Notes
- If you want a quicker dessert, substitute the homemade crust with one sheet of thawed, store-bought puff pastry.
- For a richer flavor, use half Granny Smith and half Honeycrisp apples.
- Serve this classic apple dessert with a scoop of vanilla ice cream for a perfect pairing.
Nutrition
- Serving Size: 1 slice
- Calories: 320
- Sugar: 22
- Sodium: 150
- Fat: 16
- Saturated Fat: 10
- Unsaturated Fat: 6
- Trans Fat: 0
- Carbohydrates: 42
- Fiber: 3
- Protein: 4
- Cholesterol: 50