
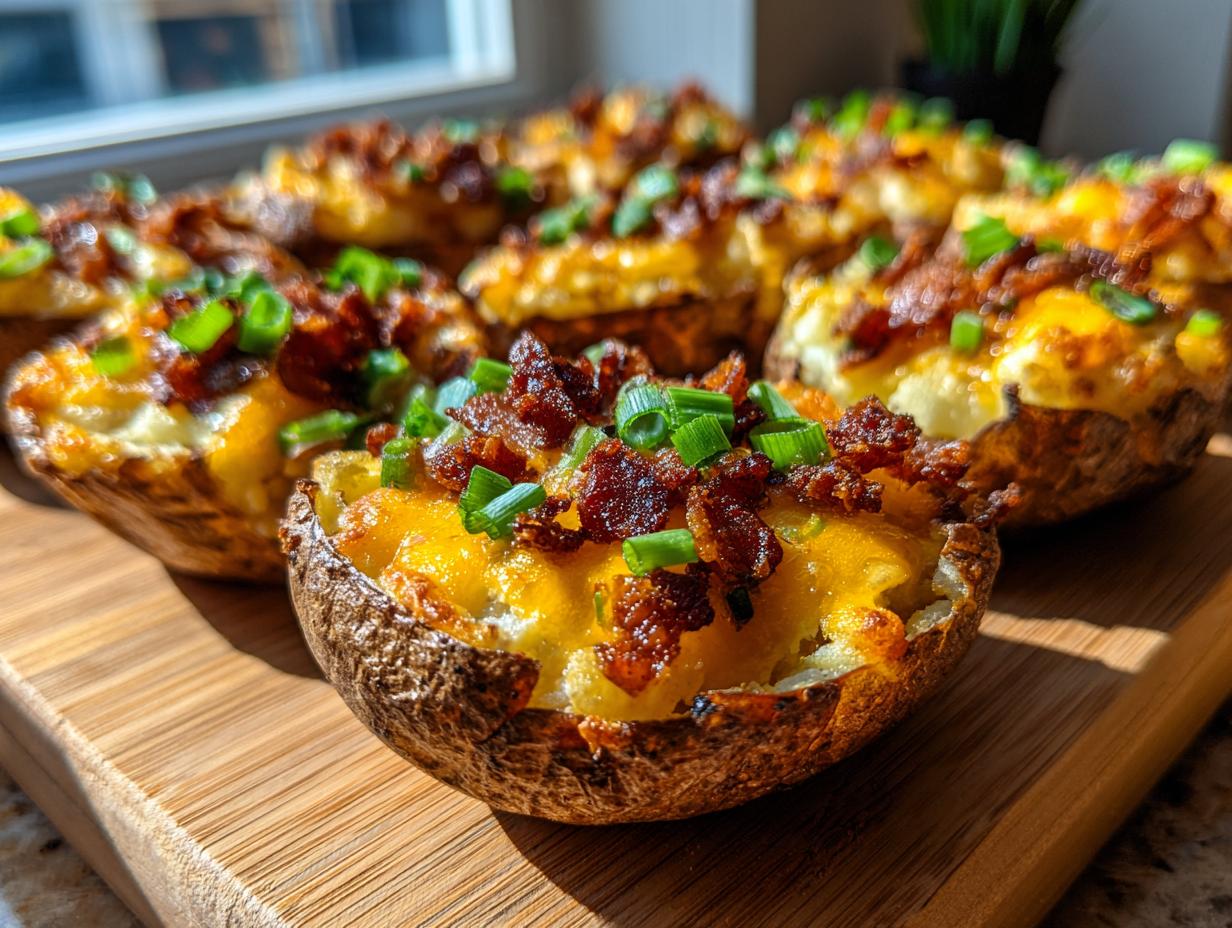
When the big game comes on or when you need a party appetizer that disappears faster than popcorn, you need a reliable star. For years, I’ve been perfecting my recipe for these easy appetizers and snacks, and I finally landed on perfection. I call them The Ultimate Crispy Loaded Potato Skins, and trust me, they are the best, most dependable potato skins you will ever make. After thirty years of teaching in the classroom, I learned patience and clarity, and I apply that same step-by-step approach here so you can master the art of the crispy skin without any stress. Get ready for melted cheese and savory bacon!
- Why These Are The Best Potato Skins Recipe You Will Ever Make
- Gathering Ingredients for Loaded Potato Skins
- How to Prepare Crispy Potato Skins Step-by-Step
- Tips for Perfect Game Day Potato Skins
- Variations on Classic Potato Skins
- Serving Suggestions for These Baked Potato Skins Appetizer
- Storage and Reheating Instructions for Leftover Potato Skins
- Frequently Asked Questions About Potato Skins
- Share Your Ultimate Potato Skins Experience
Why These Are The Best Potato Skins Recipe You Will Ever Make
It might sound bold to say these are the *best* potato skins, but I stand by it! My goal was simple: get rid of the dreaded soggy bottom that ruins so many appetizer attempts. When you follow my baking notes, you get that satisfying crunch every single time, paired with a filling that never spills out halfway through serving. Folks always ask me how I keep them sturdy!
- They use Russets—the perfect sturdy potato for shells.
- We do a crucial second bake to dry out the structure.
- The filling is perfectly balanced so it melts beautifully without over-saturating the insides.
Achieving Maximum Crispiness in Your Potato Skins
Crispiness is non-negotiable, isn’t it? It all starts before the filling even comes close to the potato. First, make sure you pierce those potatoes thoroughly. Think of it like letting them breathe while they bake! Then, after you scoop out the insides, we bake the empty shells alone at 375 degrees for ten minutes. Don’t skip that step! It dries out the shell walls so they can crisp up perfectly when the cheese hits them. Trust me, this double-baking technique is the secret weapon.
Gathering Ingredients for Loaded Potato Skins
Now that we’ve talked about the technique, let’s get our foundation ready! Getting the right components is just as important as the baking steps. You don’t need a pantry full of fancy things for these potato skins, just good quality basics. I’ve listed everything below exactly as I use it in my kitchen. If you’re looking for other savory delights, check out my recipe for best cheese straws for another guaranteed party hit!
Ingredient Notes and Substitutions for Perfect Potato Skins
Listen closely, because the type of potato really matters here! You absolutely must use Russet potatoes; they have that thicker skin and fluffier interior that holds up best to scooping and crisping. For the cheese, make sure you grab *sharp* cheddar—we need that flavor punch to cut through the creamy potato.
If you’re short on time, you can totally cook your bacon ahead of time! Store it in the fridge until you’re ready to crumble it over the hot shells. If someone isn’t a fan of green onions, fresh chives work beautifully, or you can even swap the sour cream for plain Greek yogurt for a tangier option. Keep it simple, keep it good!
How to Prepare Crispy Potato Skins Step-by-Step
This process is where the magic happens, and I promise, if you just take it one step at a time, you will have the most incredible batch of potato skins everyone talks about. Remember, baking is just following a few clear rules. We aren’t rushing this foundational step one bit. If you love potato dishes, you might also want to check out my recipe for crispy parmesan potato stacks!
Baking the Potatoes for the Base of Your Potato Skins
First things first: get that oven preheated to 400 degrees Fahrenheit! You need to scrub those potatoes until they’re spotless—we’re eating the skin, remember? Be sure to dry them really well after scrubbing. Pierce each one several times with a fork, then rub them down with your olive oil, salt, and pepper. Lay them right on the oven rack and let them bake for a full 50 to 60 minutes. They need to be truly tender all the way through; squeeze one gently when you think they’re done—if it gives easily, they’re ready for the next phase.
Scooping and Creating the Crispy Potato Skins Shells
Once they’re cool enough to touch—I usually wait about fifteen minutes so I don’t burn my fingers!—slice them right down the middle lengthwise. Now, this is critical: scoop out almost all that fluffy potato, but leave yourself about a quarter-inch border all around. That’s your sturdy shell! After scooping, turn those empty shells skin-side up on your baking sheet and pop them back into the oven, which you’ve lowered to 375 degrees, for about 10 minutes. This dries them out, ensuring they become the crispy vessels we need.
Loading and Finishing These Loaded Potato Skins
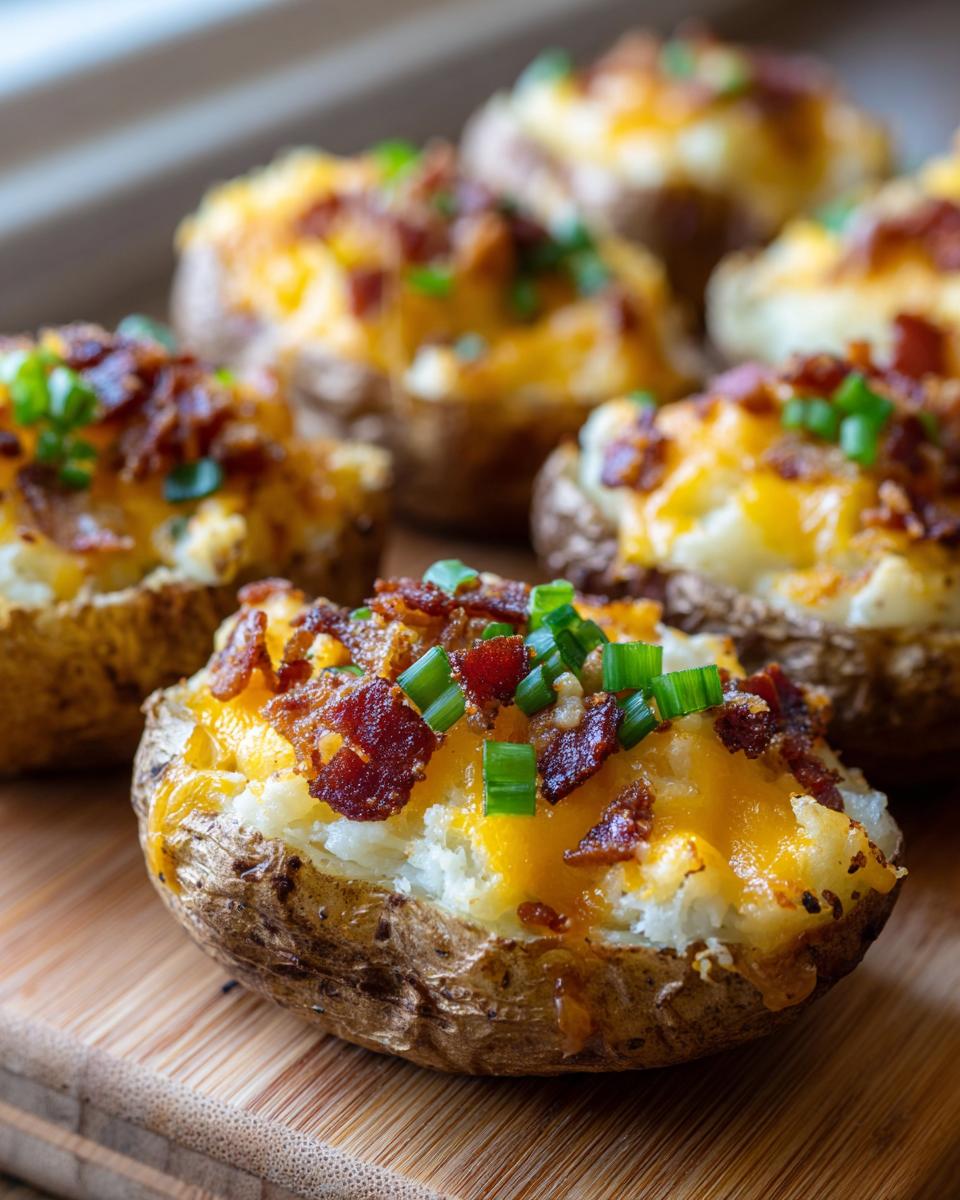
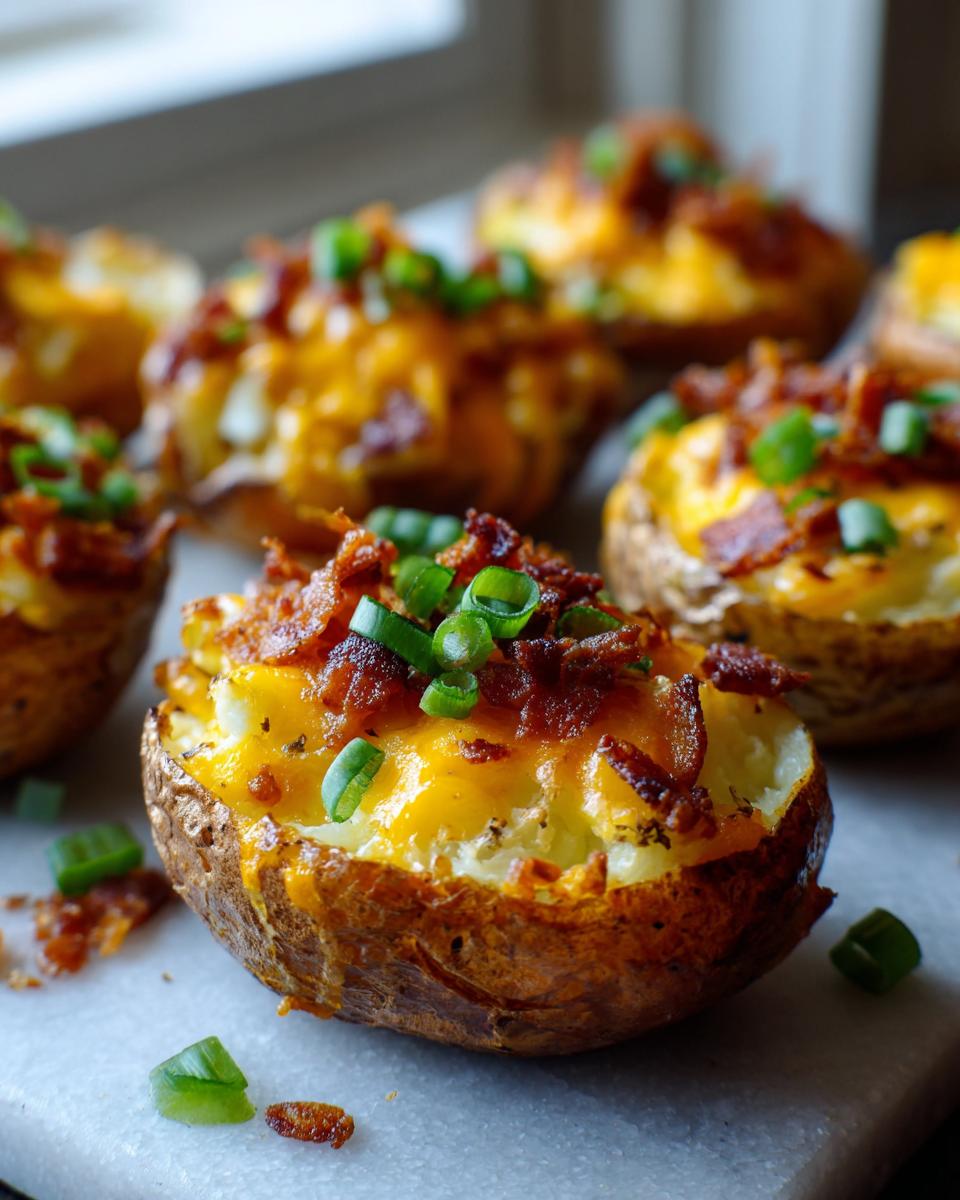
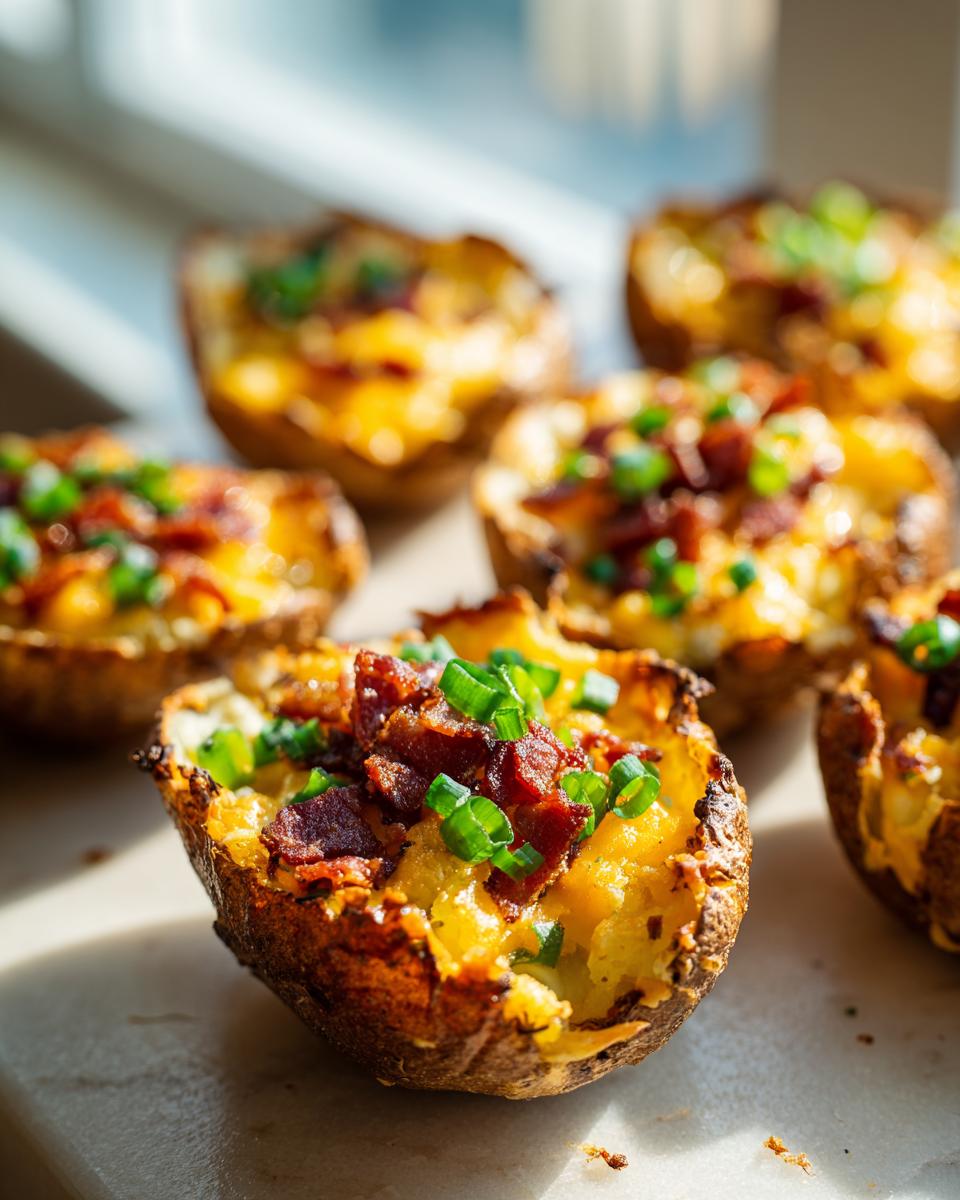
Pull those shells out after their drying bake. Now it’s time for the fun part! Fill each one generously with your sharp cheddar cheese and salty, crumbled bacon. Back into the oven they go for another 8 to 10 minutes. You’re looking for that glorious moment when the cheese is fully melted and just starting to bubble up around the edges. Finally, pull them out, sprinkle them with fresh green onions, and serve immediately! They are best enjoyed right away while that skin snaps when you bite into it.
Tips for Perfect Game Day Potato Skins
When you’re hosting a crowd, efficiency is key, and that’s where a good game plan comes in handy. These potato skins are fantastic because you can absolutely prep them ahead of time, which means less frantic juggling right before kickoff! Here are my tried-and-true strategies for making sure your appetizer spread is legendary.
- Prep the Components Early: Bake your potatoes a day ahead of time. Once cooled, scoop out the filling and store the empty shells and the potato filling separately in the fridge. The bacon can be cooked and crumbled too! You just assemble and bake right before guests arrive.
- Keep Them Warm Without Sogging: If you aren’t ready to bake them right away, keep the *empty* shells wrapped loosely in foil in a 200-degree oven for up to an hour. They stay warm but don’t steam, which helps them crisp later.
- Don’t Skimp on the Oil: Even if you think they look okay, brush those shells one last time with a little olive oil or melted butter before you fill them. That extra fat is what guarantees that deep, satisfying crunch we’re after.
- Serve Alongside Other Favorites: These loaded bites are rich and savory, so they pair perfectly with something lighter. If you need another quick addition to your snack table, you have to try my Cowboy Caviar—it balances out the richness beautifully!
Variations on Classic Potato Skins
While the classic combination of cheese and bacon is truly marvelous for Loaded Potato Skins, I love encouraging folks to play around a bit! Kitchen creativity is what makes home cooking so much fun. These simple swaps can turn a great snack into something totally new, perfect for pleasing every palate at your next gathering. If you want another fun potato dish that plays with savory spices, take a peek at my recipe for cheesy taco potatoes—it uses similar hearty flavors!
Making Vegetarian or Spicy Potato Skins
If you have folks skipping meat, making vegetarian potato skins is incredibly easy. Just skip the bacon entirely! To keep that savory, salty element, I suggest you replace the bacon flavor with a tablespoon of smoked paprika mixed into the scooped-out filling before it goes back in the oven. That smoky note works wonders!
For those who like a little fire in their food—and I know my youngest grandson certainly does!—spice is the answer. You can toss finely diced, seeded jalapeños in with your cheese. Or, if you want heat across the whole batch, skip the jalapeños and stir a teaspoon of chili powder directly into the cheese and bacon mixture before you load up those shells. Always taste your mixtures before you load them to make sure you’ve hit the right level of heat for your crowd. These little variations make for wonderful Savory Snack Ideas!

Serving Suggestions for These Baked Potato Skins Appetizer
These gorgeous, loaded potato skins are hearty enough to be a main course, but they shine as the centerpiece of an appetizer spread. Because they are so rich and savory, I like pairing them with something bright or creamy to balance things out. They go perfectly alongside my simple easy chicken gravy if you’re serving them as a side to a main meal, or alongside a classic cool ranch dip when serving them just as a Game Day Snack. Every guest will want to grab two!
Storage and Reheating Instructions for Leftover Potato Skins
Oh, leftovers! Sometimes we make too many, but if that happens, we need to make sure we store them correctly so they taste almost as good the next day. The single biggest mistake people make is throwing fully loaded skins into a single container. That traps steam, and steam is the enemy of crispy potato skins—it makes them soft and sad!
If you have leftovers that are already assembled (filled with cheese and bacon), the best way to store them is in an airtight container, making sure you put a piece of paper towel or parchment paper *between* the layers. This helps absorb any residual moisture. They are good in the fridge for up to three days.
If you planned ahead and have components separate—the empty shells, the cooked bacon, the pre-shredded cheese—store these airtight packages separately in the fridge. This is the superior method for keeping everything fresh!
The Best Way to Reheat Crispy Potato Skins
Please, for the love of perfectly seasoned potatoes, do not use the microwave if you want any semblance of crispiness left! Microwaving turns them rubbery immediately. We need the oven or, even better, the air fryer to bring back that crunch we worked so hard for.
If reheating assembled skins: Lay them out in a single layer on a baking sheet—uncovered is the key here. Pop them into a 350-degree oven for about 10 to 12 minutes. By the time the cheese is soft again, the shell should have firmed right back up. If you only have the empty shells left, heat them alone at 375 degrees for about 5 minutes until they feel dry and crisp before adding your cold fillings for a fresh batch experience.
Frequently Asked Questions About Potato Skins
It’s natural for folks to have questions when tackling a classic recipe, especially when the goal is that perfect crispy texture! I’ve put together some of the things my family and friends ask most often about making these Loaded Potato Skins. We want sure-fire success, every single time, whether you’re making a few for yourself or a whole sheet for a big crowd.
Can I make these potato skins in an air fryer?
Oh, the air fryer! It’s a wonderful tool, and yes, you absolutely can make Air Fryer Potato Skins using this filling. They come out wonderfully crispy too! However, my main recipe focuses on the oven because it allows you to cook a whole sheet pan of them at once, which is ideal for big Game Day Snacks or parties. If you use an air fryer, you’ll likely need to cook them in smaller batches. If you try it, I’d suggest pre-baking the empty shells at about 380 degrees Fahrenheit for about 6-8 minutes until they firm up, then loading them and cooking them again until the cheese melts.
How do I prevent my potato skins from getting soggy?
Preventing sogginess is the #1 trick to mastering these Crispy Potato Skins Recipe, and it all comes down to removing water! Remember those two crucial steps we talked about? First, when you pierce the potatoes before the initial bake, you let the steam escape. Second, and most importantly, after you scoop out the fluffy interior but *before* you add any cheese, you bake those empty shells again at 375 degrees for 10 minutes. This second bake is non-negotiable if you want that sturdy, crunchy shell that holds up to all those delicious toppings. Don’t skip drying them out first!
If you’re ever looking for another cozy, comforting potato dish that delivers great flavor without the fuss, I highly recommend looking over my recipe for creamy potato leek soup. It’s pure warmth in a bowl!
Share Your Ultimate Potato Skins Experience
Now that you have the foolproof keys to making the most delicious, crispy potato skins imaginable, I really want to hear about it! That’s the best part of sharing recipes—knowing they are showing up on your tables for football games, birthdays, or just a cozy weeknight dinner.
Once you’ve pulled that perfectly cheesy, bacon-loaded sheet out of the oven, please take a moment to leave me a rating right here on the recipe card. Did you manage to keep them extra crispy? Did your kids leave any behind (I doubt it!)? Tell me what you thought!
If you snapped a picture of your finished appetizer spread, I’d love to see it! Tag me on social media or send it over. Building this community together, one dependable recipe at a time, is why I started Cooking by Carla. If you want to learn more about my philosophy and why I share these simple, honest recipes, feel free to read about me on my About page. Happy cooking, friend!
PrintThe Ultimate Crispy Loaded Potato Skins

Make crispy baked potato skins loaded with sharp cheddar cheese, smoky bacon, and fresh green onions. This easy appetizer recipe is perfect for game days or parties.
- Prep Time: 20 min
- Cook Time: 70 min
- Total Time: 90 min
- Yield: 8 servings 1x
- Category: Appetizer
- Method: Baking
- Cuisine: American
- Diet: Vegetarian
Ingredients
- 4 large Russet potatoes
- 2 tablespoons olive oil
- 1/2 teaspoon salt
- 1/4 teaspoon black pepper
- 1 cup shredded sharp cheddar cheese
- 6 slices bacon, cooked and crumbled
- 1/4 cup chopped fresh green onions or chives
- 1/2 cup sour cream (for serving)
Instructions
- Preheat your oven to 400 degrees Fahrenheit. Scrub the potatoes clean and dry them completely. Pierce each potato several times with a fork.
- Rub the potatoes with olive oil, salt, and pepper. Place them directly on the oven rack. Bake for 50 to 60 minutes, or until the potatoes are tender when squeezed.
- Remove the potatoes from the oven and let them cool until you can handle them safely. Reduce the oven temperature to 375 degrees Fahrenheit.
- Slice each potato in half lengthwise. Carefully scoop out most of the inside potato flesh, leaving about a 1/4-inch thick shell. Place the shells skin-side up on a baking sheet.
- Brush the inside and outside of the potato shells lightly with any remaining olive oil or melted butter if desired for extra crispiness.
- Bake the empty potato shells for 10 minutes to dry them out and make them crispier.
- Remove the shells from the oven. Fill each skin generously with shredded cheddar cheese and crumbled bacon.
- Return the loaded potato skins to the oven and bake for another 8 to 10 minutes, or until the cheese is melted and bubbly.
- Remove from the oven. Top each skin with chopped green onions or chives. Serve immediately with a dollop of sour cream on the side.
Notes
- For the crispiest potato skins, ensure the potato shells are completely dry before the second bake.
- You can prepare the bacon and cheese filling ahead of time and store it in the refrigerator for up to 24 hours before assembling and baking.
- These make a great gluten free appetizer if you skip any breading or flour-based toppings.
Nutrition
- Serving Size: 2 skins
- Calories: 320
- Sugar: 2
- Sodium: 350
- Fat: 20
- Saturated Fat: 10
- Unsaturated Fat: 10
- Trans Fat: 0
- Carbohydrates: 25
- Fiber: 3
- Protein: 12
- Cholesterol: 45