
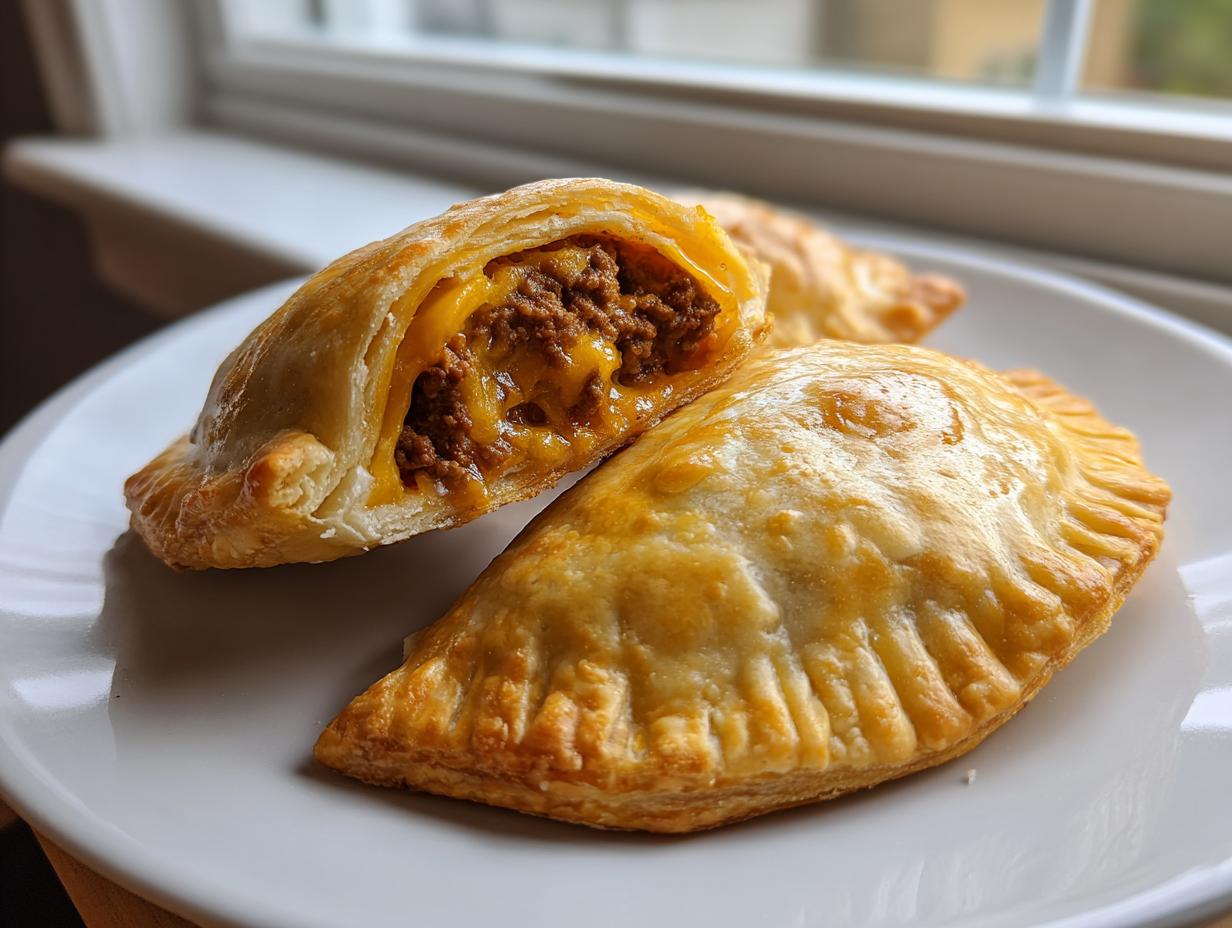
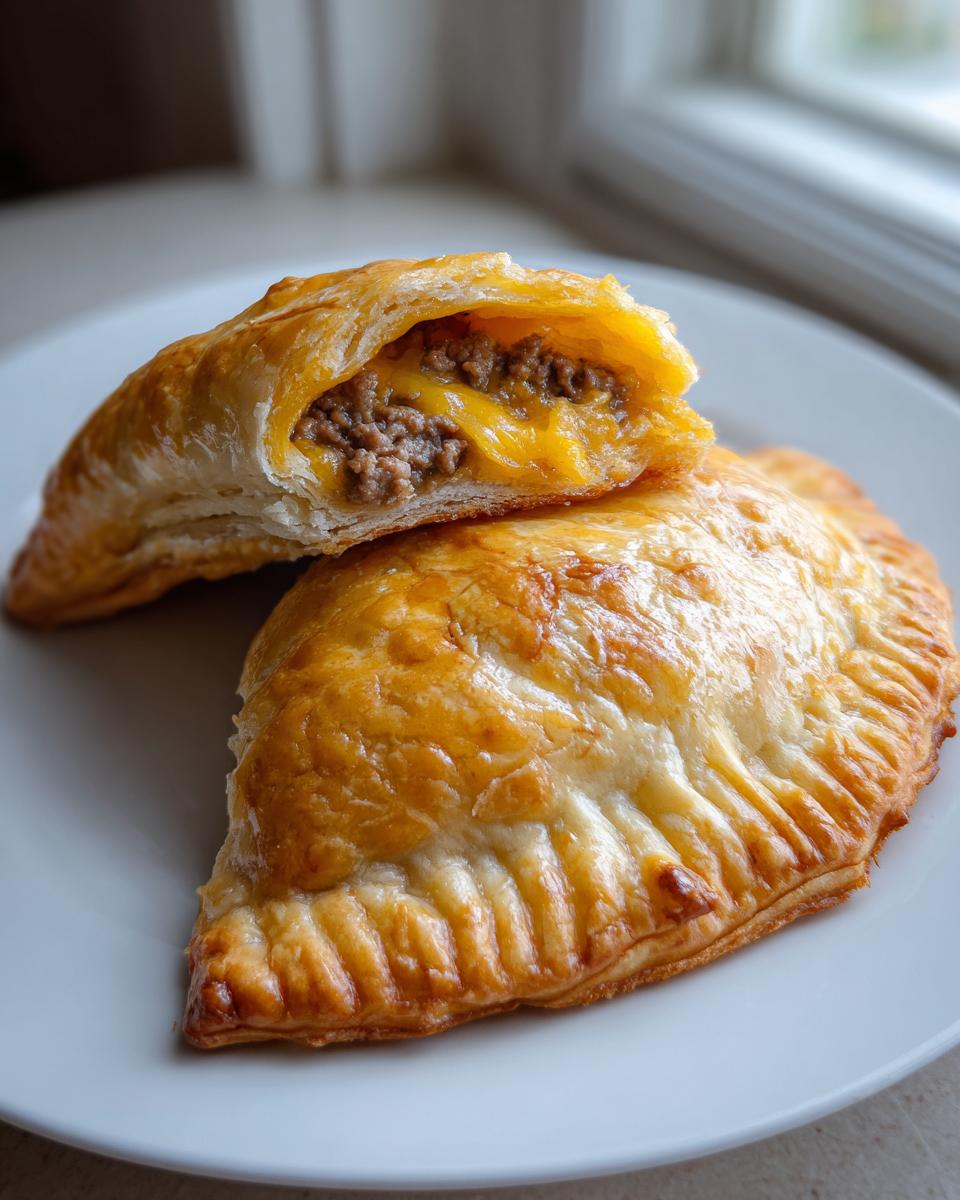
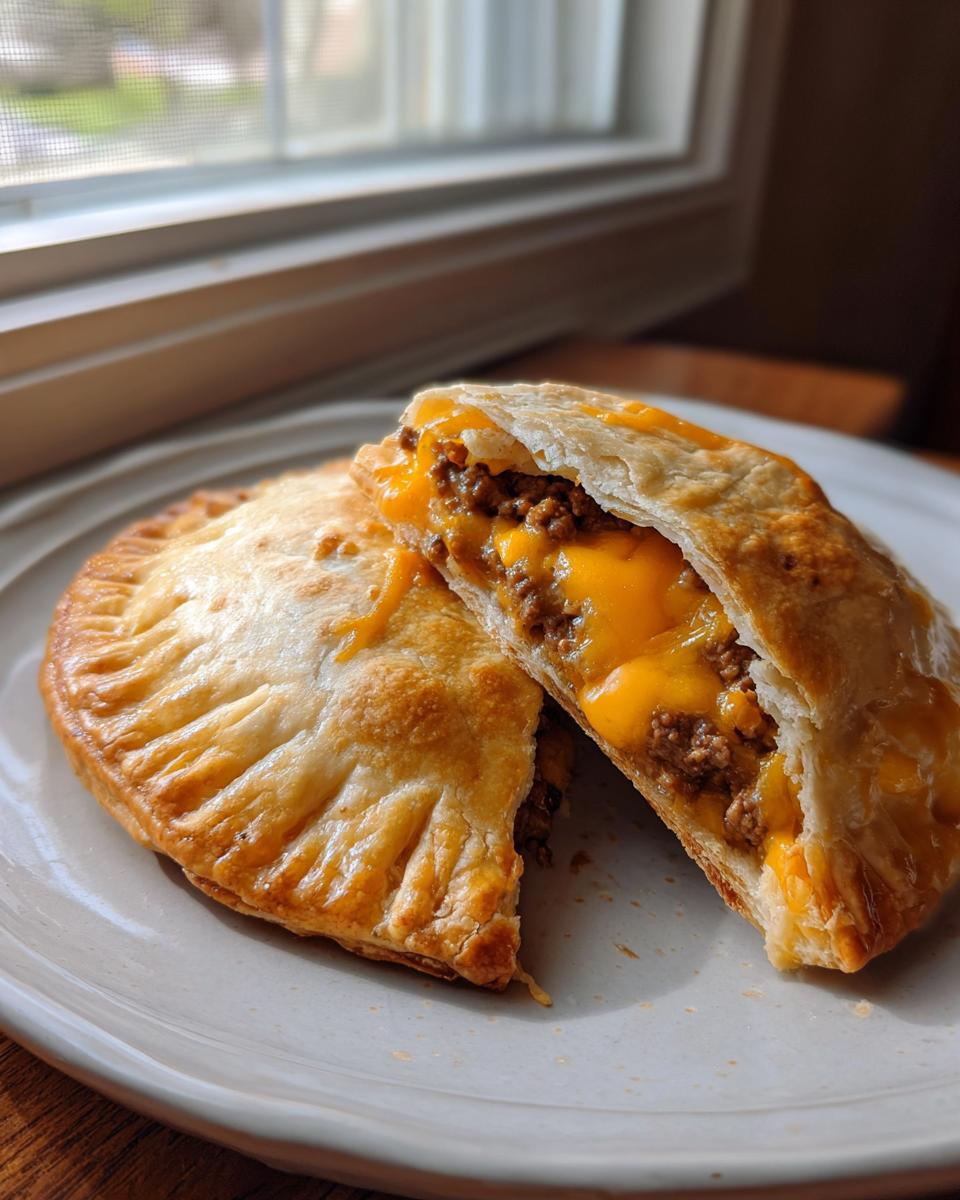
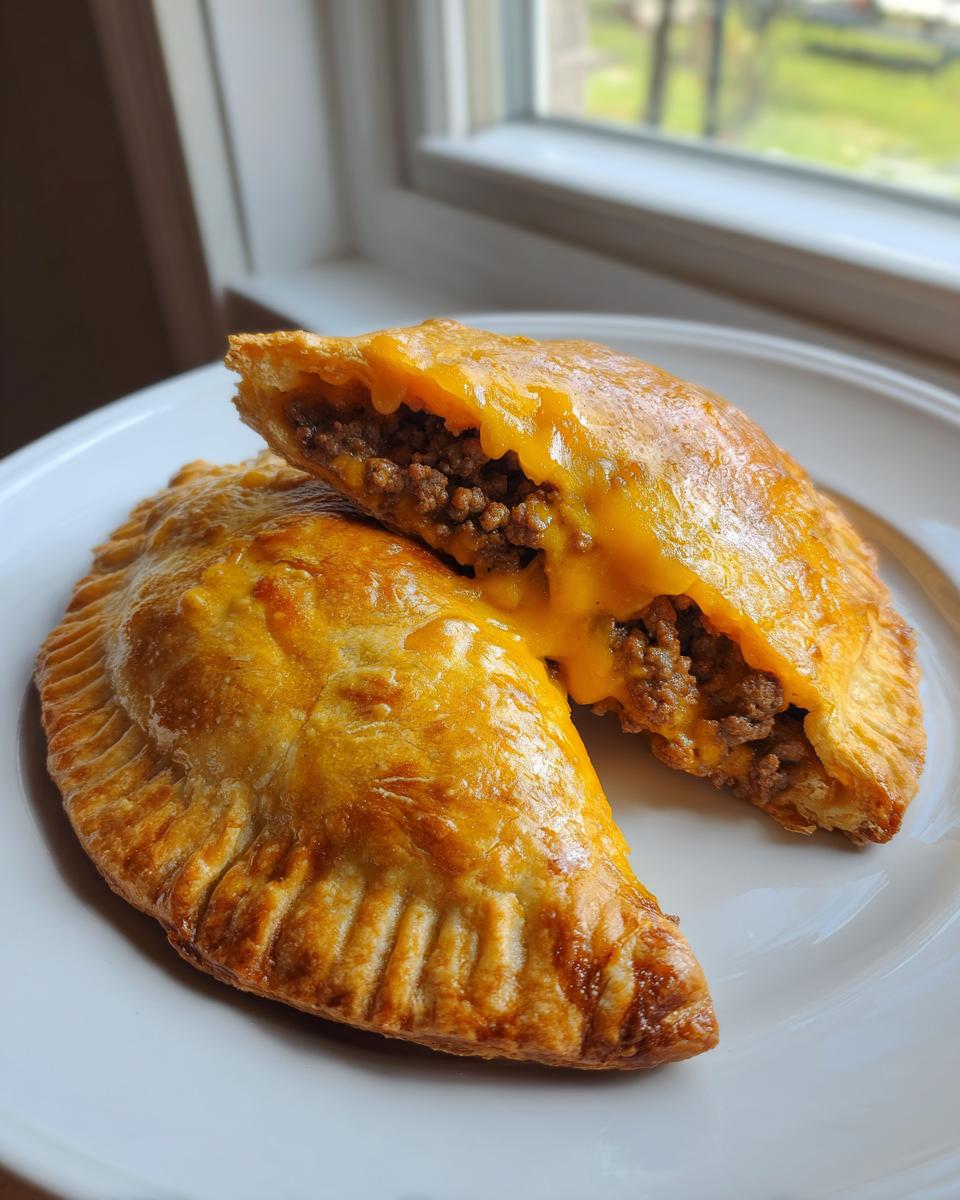
Oh, I have something incredibly special today that solves the eternal worknight dilemma. Are you craving that juicy, savory goodness of a classic cheeseburger but don’t have the patience for grilling or assembly? I get it; sometimes you just need comfort tucked neatly into a portable package. Well, look no further! These aren’t just appetizers; these are full-flavor cheesy cheeseburger pockets designed to bring that familiar burger experience right to your dinner table with minimal fuss.
If you love easy comfort food that tastes like a throwback, you might also adore my recipe for easy cheeseburger soup—but today, we are sealing all that flavor inside dough!
This recipe is exactly what I aim for here at Cooking by Carla: totally dependable, wonderfully simple, and absolutely delicious for everyone, from my littlest grandkids to Dad. It truly is the perfect marriage of convenience and classic American flavor, and I promise, once you try these ground beef crescent roll pockets, they’ll become a staple. Why not whip up a batch tonight?
- Why This Easy Cheeseburger Pockets Recipe Works for Dinner
- Ingredients Needed for Perfect Cheesy Cheeseburger Pockets
- How to Prepare Your Cheesy Cheeseburger Pockets Step-by-Step
- Tips for Achieving Golden Brown Cheesy Cheeseburger Squares
- Serving Suggestions for Your Comfort Food Ground Beef Pockets
- Making Ahead and Storing Cheesy Cheeseburger Pockets
- Frequently Asked Questions About These Simple Stuffed Dough Recipe
- Nutritional Estimates for One Cheesy Cheeseburger Pocket
- Share Your Homemade Cheesy Cheeseburger Pockets Experience
Why This Easy Cheeseburger Pockets Recipe Works for Dinner
When I look at a recipe, I ask myself three things: Is it fast? Is it easy? And does it taste like something truly satisfying? These pockets check all those boxes, hands down. They skip the mess of flipping patties and assembling towering burgers, but you still get that beloved flavor profile packed inside a flaky crust.
- Total time is under 35 minutes—that’s faster than most takeout!
- Uses common pantry staples you probably already have on hand.
- Perfect for picky eaters because everything is sealed up tight.
Quick Dinner Ideas with Ground Beef
The total time listed is just 33 minutes, start to finish. Honestly, that’s how long it takes me to get the kids’ homework checked and the table set! This method transforms ground beef into quick dinner ideas with ground beef that feel special without requiring any actual grilling skills. It’s simple, dependable weeknight magic, just how I like my cooking.
Ingredients Needed for Perfect Cheesy Cheeseburger Pockets
When you’re making something that’s supposed to taste like a classic burger, you can’t skimp on the core components. Don’t worry, though, none of these ingredients are fancy. Every measurement here is designed to give you 8 perfectly stuffed turnovers that hit that savory sweet spot we’re aiming for. Keep reading, because I have a couple of notes that make all the difference!
- 1 pound ground beef
- 1/2 cup chopped onion
- 1 teaspoon salt
- 1/2 teaspoon black pepper
- 1 tablespoon Worcestershire sauce
- 1 teaspoon dried mustard powder
- 1 cup shredded cheddar cheese
- 1 (8 ounce) package refrigerated crescent rolls
- 1 egg, beaten (for egg wash)
If you need a great appetizer idea that uses shredded cheese similar to this, check out my Hanky Panky recipe—it’s another crowd-pleaser!
Ingredient Notes and Substitutions for Cheesy Beef Hand Pies
Now, that list looks straightforward, but let me give you a couple of pro tips for these cheesy beef hand pies. First, for the cheese, use sharp cheddar. It has better flavor when melted than mild, which is important since we aren’t using a ton of actual cheese. Second, if you can’t find those ready-made crescent rolls tubes, you can absolutely use puff pastry sheets instead, just cut them into squares instead of triangles. You’ll get a flakier result, which I kind of adore for a variation!
How to Prepare Your Cheesy Cheeseburger Pockets Step-by-Step
Okay, now for the fun part—bringing those delicious flavors together inside that dough! We’re going to work in two stages: making the amazing inside filling first, and then wrapping it up so beautifully that nobody can believe how simple this recipe for crescent meat pockets really is. Remember, patience in the first step prevents soggy bottoms later!
If you’ve ever made my mini meatloaf muffins, the idea behind keeping the mixture dry is similar. We don’t want any liquid leaking out into our pastry!
Preparing the Burger Filling for Baked Cheeseburger Turnovers
Start by grabbing your biggest skillet. Brown that pound of ground beef over medium heat until it’s all cooked through. Now, this next step is critical, so listen up: drain off every bit of excess grease. Seriously, wipe that pan out if you need to! Next, toss in your onions, salt, pepper, Worcestershire sauce, and that little bit of mustard powder. Let it cook for about five minutes until those onions start looking soft and happy. Once they are, kill the heat and let the whole mixture relax and cool down a bit before you touch the dough. Warm filling melts cheese too fast and makes the crescent dough gummy!
Assembling and Sealing the Cheesy Cheeseburger Pockets
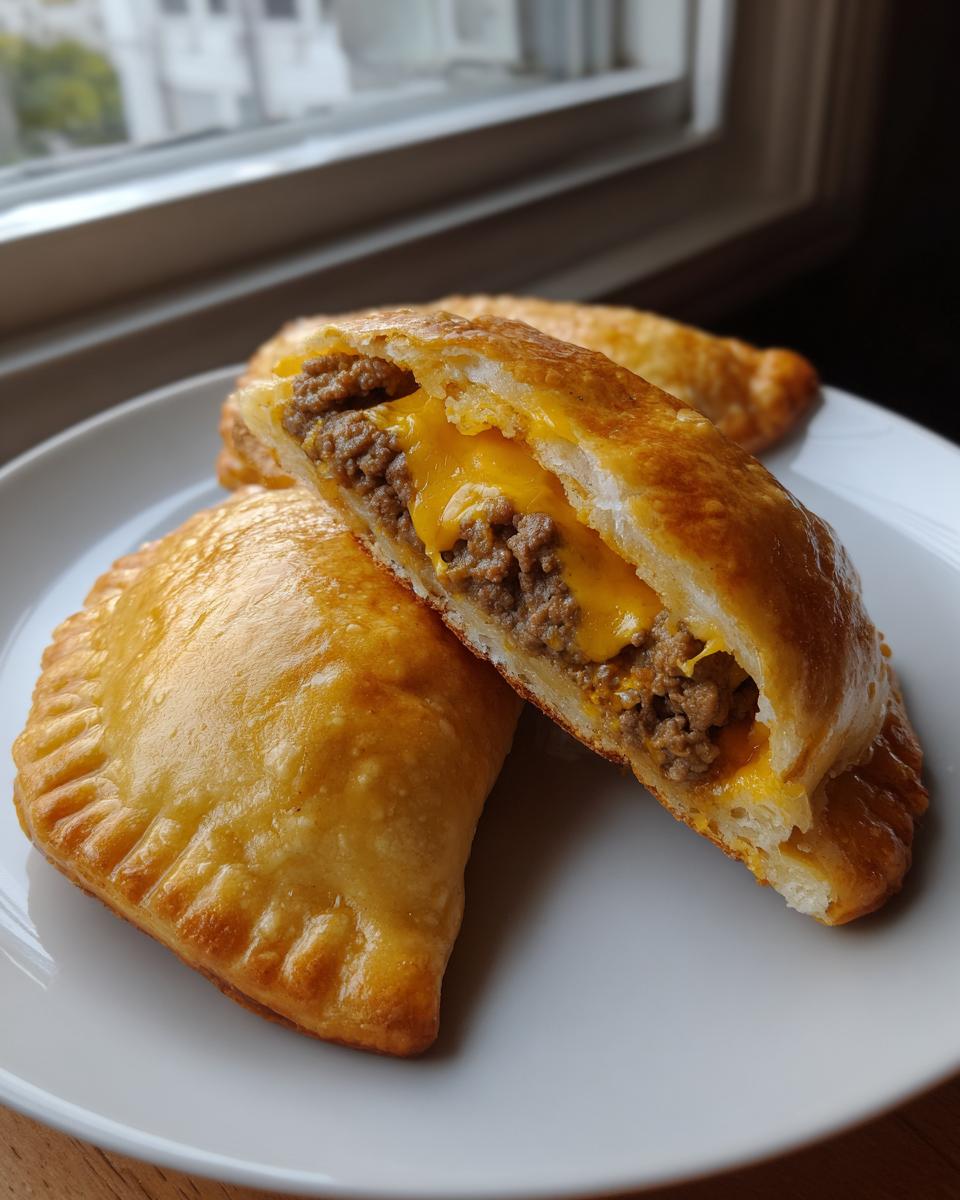
Get your crescent roll triangles ready. Spoon a good scoop of that slightly cooled beef mixture—maybe two tablespoons—onto the wide end of each one. Then, sprinkle just a little cheddar right over the meat. Now, roll it up tight, just like you would a real crescent roll. When you get to the tip, pinch those edges together firmly. I mean it—pinch them hard so they glue shut. The most important thing for these perfect ground beef crescent roll pockets is placing the finished product seam-side down on your baking sheet. This prevents them from unrolling while they bake!
Tips for Achieving Golden Brown Cheesy Cheeseburger Squares
We are almost there! Getting that perfect golden shell on your cheesy beef hand pies is the final, shiny step. The secret here lies in giving the dough a little bit of encouragement before it goes into the heat. You must brush them with that beaten egg wash, which I mentioned in the ingredient list. Don’t skip it! It’s what gives you that beautiful, rich color instead of a pale, soft crust.
Make sure your oven is fully preheated to 375 degrees Fahrenheit before they go in. If it’s not hot enough, the dough tends to steam instead of bake, and you miss out on the crispness.
Now, for those of you who use your air fryer—and I happen to love mine for snacks—you can absolutely make air fryer cheeseburger pockets! Just set your air fryer to 350 degrees Fahrenheit and keep an eye on them. They usually take about 10 to 12 minutes. You can read more about my general thoughts on quick appliance cooking here. Either way, you’ll have perfectly cooked, golden brown results!
Serving Suggestions for Your Comfort Food Ground Beef Pockets
Part of the fun with these little parcels is dressing them up just like you would a big backyard burger! Even though these comfort food ground beef pockets are handheld, they still deserve all the classic fixings we love. I always put out little bowls of ketchup, mustard, and some sliced dill pickles for dipping and topping—it just completes the flavor profile.
For a fuller dinner, keep it simple on the side. My kids always ask for oven-baked fries, which are easy enough to throw in while the pockets are cooling. If you want something green, a simple crunchy slaw or leafy salad dressed simply works wonders. If you are looking for another great side dish to round out the meal, you might want to try my recipe for easy creamy corn dip—it’s surprisingly perfect alongside these beefy bites!
Making Ahead and Storing Cheesy Cheeseburger Pockets
One of the best things about making a batch of these is that they are fantastic for meal prepping, or just having leftovers for lunch the next day. They taste just as good (maybe even better!) once they’ve cooled down and the flavors have settled together.
If you have any leftover baked cheeseburger turnovers, you have a couple of great options for storage. Let them cool completely first. Once they are room temperature, you can place them in an airtight container or a zip-top freezer bag.
For the refrigerator, they will stay perfectly good for about three days. Just make sure they are sealed up tight so they don’t pick up any funny smells from the fridge. I often make a double batch just so I have these ready to go!
Freezing Your Ground Beef Crescent Roll Pockets
These freeze beautifully, which is a lifesaver on busy days. If freezing, I recommend freezing them *before* you brush them with the egg wash. Lay the assembled, unbaked pockets on a parchment-lined baking sheet and flash freeze them until solid. Once frozen solid, transfer them to a heavy-duty freezer bag. When you’re ready to bake, just let them thaw for about 30 minutes on the counter, apply the egg wash, and bake them at the regular 375 degrees Fahrenheit, maybe adding a minute or two to the cooking time.
Reheating for Best Results
If you are reheating already baked pockets—say, for lunch the next day—please skip the microwave if you can! The microwave really ruins that lovely crispness we worked so hard to achieve with the egg wash. The best methods are the oven or the air fryer. Set your regular oven to about 325 degrees Fahrenheit and warm them for 5 to 7 minutes. If you use the air fryer, 300 degrees Fahrenheit for about 4 minutes is usually perfect to crisp everything back up without drying out the beef inside.
Frequently Asked Questions About These Simple Stuffed Dough Recipe
It’s natural to have questions when you’re trying a new method for an old favorite, like turning a burger into something pocket-sized! I’ve gathered some of the most common things folks ask me about preparing these simple stuffed dough recipe wonders. You want these cheeseburger bites to be perfect, and I’m here to help you get there!
Can I use puff pastry instead of crescent rolls for my cheesy cheeseburger pockets?
Oh yes, you absolutely can! As I mentioned earlier, puff pastry works wonderfully for that flakier texture, which transforms these into something closer to a savory hand pie. Crescent dough gives you that familiar, cloud-like crust, but puff pastry is much richer and crispier when baked. If you use puff pastry, just remember to cut it into squares instead of triangles, and generally, they bake up very similarly in terms of time. Don’t forget to brush the tops with that egg wash for great color!
What is the best way to reheat leftover ground beef crescent roll pockets?
This is an important one, because we want leftovers to taste almost as fresh as when they came out of the oven! My biggest plea is to avoid the microwave—it heats the meat but turns that lovely crescent dough completely soggy—and we certainly don’t want soggy ground beef crescent roll pockets. For the absolute best results, pop them back into your oven or toaster oven at about 325 degrees Fahrenheit for 5 to 7 minutes. If you’re in a real rush and own one, the air fryer at 300 degrees Fahrenheit for about 4 minutes works like a charm to bring back that exterior crispness! I’ve got more quick appetizer ideas, including some other make-ahead snacks, if you click right here.
Another great question I often get is about adding vegetables. Feel free to add finely diced mushrooms or even some finely shredded cabbage to the beef mixture, but make sure you cook them down really well first so they don’t release extra moisture into the dough when baking!
Nutritional Estimates for One Cheesy Cheeseburger Pocket
Now, I’m asked all the time about the numbers, and trust me, when you’re feeding a family, knowing what’s in your food is important. Keep in mind that everything I give you here is an estimate based on the ingredients I listed—using standard ground beef, regular crescent rolls, and sharp cheddar. If you swap out for lower-fat beef or use a different type of dough, those numbers will shift a bit!
These nutritional estimates are for one single serving, which is one of our perfect, golden-brown cheesy cheeseburger pockets:
- Calories: Approximately 320
- Fat: Around 18 grams
- Protein: About 18 grams
- Carbohydrates: Roughly 22 grams
I always tell folks not to worry too much about the details unless you have strict dietary needs. What matters most here is that this is real, comforting food made with love, which, in my book, is nourishing on its own! These little bites offer a great balance of protein and carbs to keep everyone satisfied until the next mealtime.
Share Your Homemade Cheesy Cheeseburger Pockets Experience
Now that you’ve pulled those gorgeous, golden-brown things from the oven, I truly want to hear all about them! Cooking by Carla isn’t just my place; it’s ours. It’s where we share what worked and what we loved around our own tables. Did they pass the picky-eater test? Did you serve them with pickles or use them as an appetizer?
Please, take a moment and leave a rating! Five stars is always wonderful, but honest feedback helps everyone who tries this recipe after you. Just head down to the ratings section and let me know how your dinner turned out.
I absolutely love seeing your creations! If you snap a picture of your beautiful cheesy cheeseburger pockets—maybe they are cooling on a rack or already being devoured—tag me on social media. It truly makes my day to see the traditions and simple meals we are building together.
If you have any questions about technique or want to share a substitution you tried, please leave a comment below or reach out directly through my contact page. Happy cooking, friends!
PrintEasy Cheesy Cheeseburger Pockets

Make these simple, handheld pockets filled with ground beef, cheese, and classic burger flavor using crescent roll dough. They are perfect for a quick dinner or an appetizer.
- Prep Time: 15 min
- Cook Time: 18 min
- Total Time: 33 min
- Yield: 8 servings 1x
- Category: Dinner
- Method: Baking
- Cuisine: American
- Diet: Low Fat
Ingredients
- 1 pound ground beef
- 1/2 cup chopped onion
- 1 teaspoon salt
- 1/2 teaspoon black pepper
- 1 tablespoon Worcestershire sauce
- 1 teaspoon dried mustard powder
- 1 cup shredded cheddar cheese
- 1 (8 ounce) package refrigerated crescent rolls
- 1 egg, beaten (for egg wash)
Instructions
- Preheat your oven to 375 degrees Fahrenheit. Line a baking sheet with parchment paper.
- Brown the ground beef in a large skillet over medium heat. Drain off any excess grease.
- Add the chopped onion, salt, pepper, Worcestershire sauce, and mustard powder to the skillet with the beef. Cook until the onion softens, about 5 minutes. Remove from heat and let the mixture cool slightly.
- Unroll the crescent roll dough and separate it into 8 triangles. Do not separate the perforations.
- Spoon about 2 tablespoons of the cooled beef mixture onto the wide end of each dough triangle. Sprinkle a small amount of shredded cheddar cheese over the beef filling.
- Roll each triangle up tightly, starting from the wide end and rolling toward the tip. Pinch the edges together to seal the pocket completely.
- Place the sealed pockets seam-side down on the prepared baking sheet.
- Brush the tops of the pockets lightly with the beaten egg wash. This helps them brown nicely.
- Bake for 15 to 18 minutes, or until the crescent dough is golden brown and cooked through.
- Let the cheesy beef hand pies cool for a few minutes before serving.
Notes
- Serve these with your favorite burger toppings on the side, like ketchup, mustard, or pickles.
- You can substitute the crescent rolls with puff pastry if you prefer a flakier texture.
- For an air fryer cheeseburger pockets version, cook at 350 degrees Fahrenheit for 10 to 12 minutes, checking halfway through.
Nutrition
- Serving Size: 1 pocket
- Calories: 320
- Sugar: 2
- Sodium: 450
- Fat: 18
- Saturated Fat: 7
- Unsaturated Fat: 11
- Trans Fat: 0
- Carbohydrates: 22
- Fiber: 1
- Protein: 18
- Cholesterol: 65