
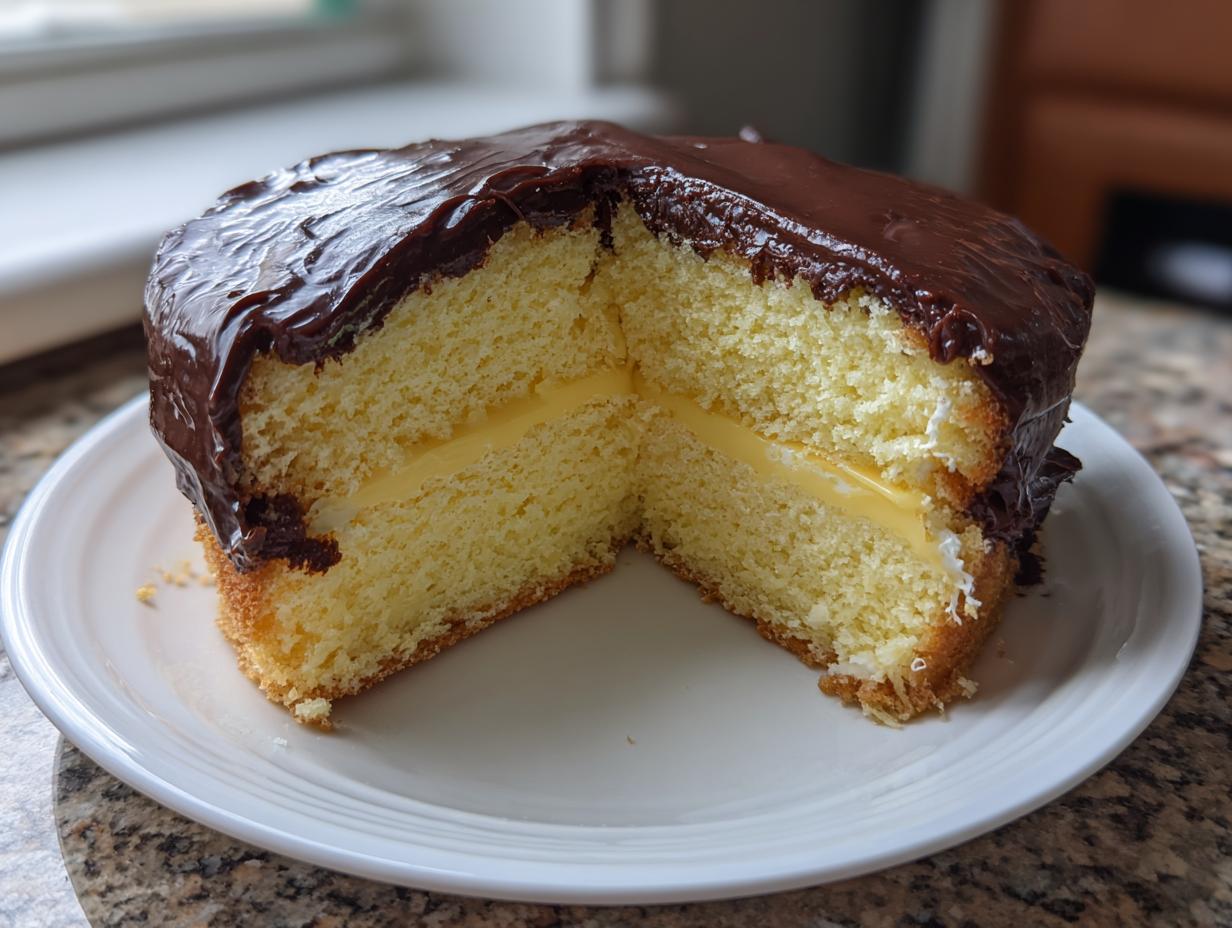
When we talk about classic American desserts, sometimes you just need something that really stands up—something rich, layered, and that makes everyone stop and stare. That, my friends, is where the Boston Cream Pie comes in. Now, don’t let the name fool you; it’s truly a cake, but it’s the kind of showstopper dessert that belongs on every holiday table in the Midwest. I’ve spent years teaching my grandchildren how to get this recipe just right, layering moist vanilla sponge with the silkiest filling imaginable. Making this from scratch feels like an accomplishment, and trust me, the joy of seeing it set on the table is worth every minute in the kitchen.
- Why This Homemade Boston Cream Pie Recipe is a Showstopper Dessert
- Gathering Ingredients for Your Classic Boston Cream Pie
- Step-by-Step Instructions for the Perfect Boston Cream Pie
- Tips for Success Making a Classic Boston Cream Pie
- Storage and Keeping Your Boston Cream Pie Fresh
- Frequently Asked Questions About This American Classic Dessert
- Estimating the Nutritional Value of this Dessert
- Share Your Experience Making This Recipe
Why This Homemade Boston Cream Pie Recipe is a Showstopper Dessert
I know you see a lot of recipes out there, but this isn’t just any layered cake. This is the official, tried-and-true version that travels well and sets up beautifully every single time. That’s where my years of teaching come in handy—I break down the complexity so you don’t need culinary school training to nail it.
Here is why this homemade Boston Cream Pie recipe is the best investment of your time:
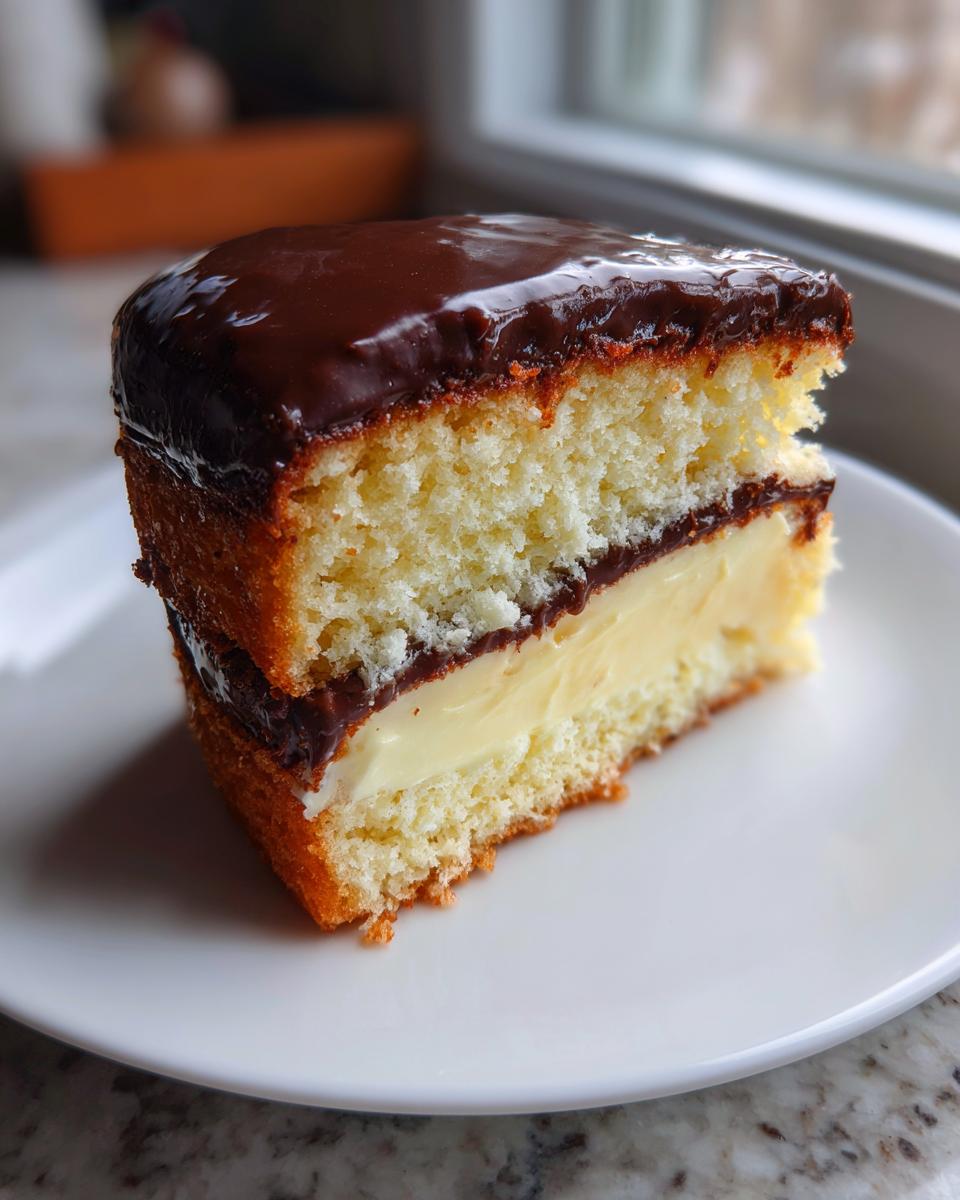
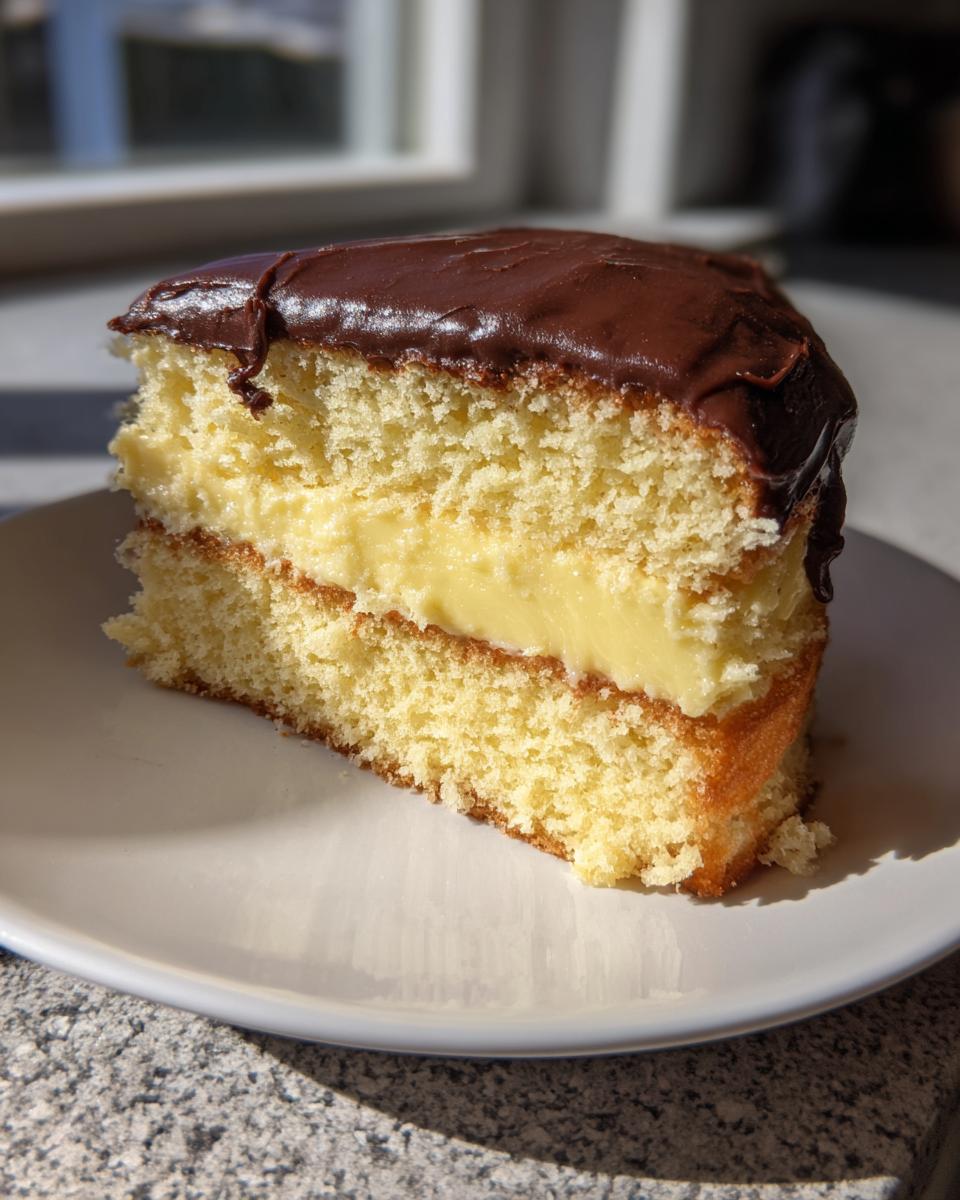
- Fluffy Sponge Cake Layers: We develop a cake that is tender enough to soak up some creamy goodness but strong enough to hold up to its filling without shrinking or collapsing.
- Rich Vanilla Custard Flavor: Forget the thin, runny stuff! Our filling is a proper, stovetop-cooked pastry cream. It sets up firmly, giving you that decadent, melt-in-your-mouth texture you expect.
- That Glossy Topping: The chocolate ganache isn’t just poured on; it’s made specifically to set with a beautiful, mirror-like shine. It looks like it came right from a bakery case!
- Reliability for Special Occasions: This recipe is dependable. When you’re making something for a birthday or holiday, you need components that cooperate, and this classic Boston Cream Pie always delivers a perfect result.
Gathering Ingredients for Your Classic Boston Cream Pie
Alright, before we can dive into the fun part—the assembly—we need to make sure our pantry is set for success. Making this from scratch means we need three distinct groups of supplies: one for the cake layers, one for that luxurious custard, and one for the final drizzle of chocolate heaven. I’ve learned over the years that being specific about texture here is everything; don’t just grab any butter, make sure it’s softened!
For the Fluffy Sponge Cake Layers
For our two lovely cake layers, you’ll need:
- 1 and 3/4 cups of all-purpose flour
- 1 and 1/2 cups of granulated sugar
- 1 full tablespoon of baking powder
- 1/2 teaspoon of salt
- 1/2 cup of unsalted butter, softened just right
- 2 large eggs
- 1 teaspoon of vanilla extract
- And 3/4 cup of whole milk
For the Rich Vanilla Custard Filling (Pastry Cream Recipe)
This is where the magic happens for the filling! To make this authentic **Pastry Cream Recipe**, gather these items:
- 1/2 cup of granulated sugar
- 1/4 cup of cornstarch
- 1/4 teaspoon of salt
- 2 large egg yolks—save the whites for something else!
- 1 and 1/2 cups of whole milk
- 1/4 cup of unsalted butter, cut up into small pieces
- 1 teaspoon of vanilla extract
For the Glossy Chocolate Ganache Topping
Just a few things needed for that beautifully shiny finish:
- 4 ounces of semi-sweet chocolate, which you must chop finely
- 1/2 cup of heavy cream
- And, if you want that extra bakery style gloss, 1 tablespoon of light corn syrup (optional, but I highly recommend it!)
Step-by-Step Instructions for the Perfect Boston Cream Pie
Now we get to the real fun! Making this Boston Cream Pie is a three-part process, so take your time and enjoy each stage. Don’t try to rush the chilling time—that’s where most people tend to slip up when they are eager to see the final product!
Baking the Fluffy Sponge Cake Layers
First things first, get your oven warmed up to 350°F (175°C). Grease and flour two 8-inch round cake pans well; we don’t want any sticking! In a nice big bowl, whisk together your flour, sugar, baking powder, and salt. Then, add in the softened butter, your eggs, and vanilla extract. You’ll beat this on medium speed until it just comes together. Here is my crucial tip for this beautiful boston cream pie cake: Do not overmix once you add the milk! Mix only until the batter is smooth. Overmixing develops gluten, and we want fluffy, not tough, layers.
Spread the batter evenly between those two pans. Bake them for about 25 to 30 minutes. Test with a wooden pick—if it comes out clean, you’re golden. Let them cool in the pan for about 10 minutes before carefully turning them out onto a wire rack to cool completely. Patience pays off here!
Creating the Homemade Vanilla Custard Filling
This is for the rich **Vanilla Custard Filling**, so pay attention! Grab a medium saucepan. Whisk your sugar, cornstarch, and salt together first until they look uniform. Then, whisk in the egg yolks until smooth, followed by the milk. You need to cook this over medium heat, and I mean *constantly whisking*—if you stop, it will scorch on the bottom, and nobody wants that! Keep whisking until it gets nice and thick and comes to a full boil. Let it boil for just one minute while still whisking.
Take it off the heat and stir in the butter pieces and your vanilla until everything is melted and smooth. Pour this thick custard into a shallow bowl. This step is vital: press plastic wrap directly onto the surface of the cream. This stops it from forming that rubbery skin on top, which we absolutely don’t want in our **Vanilla Custard Filling**. Chill it for a minimum of 2 hours until it’s completely cold and firm.
Preparing and Applying the Chocolate Ganache Topping
For the topping, put your finely chopped semi-sweet chocolate into a bowl that can handle heat. Heat up the heavy cream and that optional tablespoon of light corn syrup until it just starts to bubble around the edges—don’t let it go crazy! Pour that hot cream right over the chocolate. Do *not* stir it yet! Let it sit undisturbed for a full five minutes to melt the chocolate into submission.
After five minutes, gently whisk until it’s glossy and smooth all over. We need the ganache to cool down just a bit—you want it thick enough to coat the cake beautifully without immediately running right off the sides and onto the plate. Just wait until it’s spreadable, not runny.
Assembling Your Showstopper Dessert
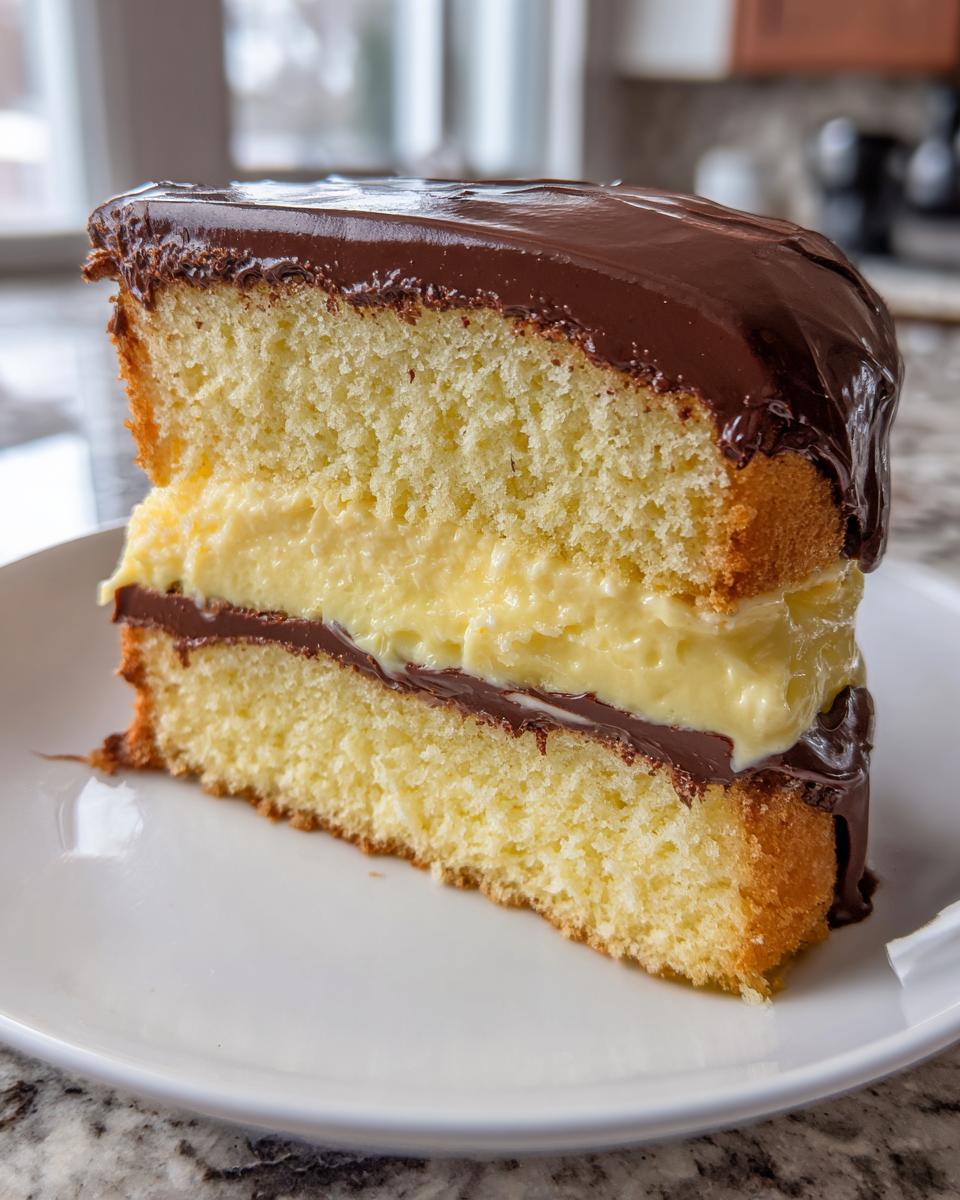
Time to put this masterpiece together! Place one of your completely cooled cake layers onto your serving dish. Don’t worry if the edges aren’t perfect; the filling will hide minor flaws. Carefully spoon all that chilled custard filling over the bottom layer. Make sure you spread it evenly right to the edges. Then, gently place the second cake layer right on top.
Pour that beautiful, slightly cooled chocolate ganache right over the center of the top cake layer. Use an offset spatula if you need to guide it, but really, let gravity help you swirl it so it drips naturally down the sides for that classic look. Once it’s all glazed over, you must let the whole thing chill again for at least one full hour. This sets the filling and lets the ganache firm up just enough so you can slice cleanly through your incredible **boston cream pie** assembly.
Tips for Success Making a Classic Boston Cream Pie
You’ve put in the work, so let’s make sure this Classic Boston Cream Pie sets up perfectly! My main notes over the years always came down to temperature control.
First, please ensure those cake layers are totally cool before you even think about adding filling. If they are even a little warm, that beautiful custard filling will start melting right into the sponge, and we want distinct layers, not soup!
Second note: If your **Vanilla Custard Filling** seems rock hard after chilling—don’t panic! This stiffens up nicely in the fridge. Just take it out and whisk it vigorously for about a minute. It comes right back to that perfect, spreadable consistency like magic. This little trick saves any batch!
Finally, don’t be afraid to use a springform pan for this homemade Boston Cream Pie recipe, even if Grandma always used two regular pans. A springform makes peeling off those sides so much easier, which is great when you’re handling a showstopper dessert like this. And if you’re looking for another great vanilla base, check out my notes on vanilla cake layers!
Storage and Keeping Your Boston Cream Pie Fresh
Now that you’ve created this truly gorgeous, bakery-style dessert, you need to treat it right so it stays perfect until everyone has had a slice! Because we used that rich **Vanilla Custard Filling**, this isn’t a cake you can just leave sitting out on the counter, unfortunately.
The whole assembled pie needs to stay under refrigeration. You want to keep it in the fridge, covered tightly. I usually use an overturned large cake carrier or just wrap the whole serving platter loosely with plastic wrap, making sure the wrap doesn’t touch that beautiful chocolate topping if it’s still a little soft.
When properly stored, this beauty will hold up beautifully for about three days. The key here is honestly the custard; it needs that cold environment to stay firm and safe. If you let it sit out too long once it’s assembled, the filling can start to weep or get a little unstable. I really haven’t found a way to reheat this, as warming it up would just melt that lovely ganache and turn the custard soupy—it really is best served cool or at room temperature after it’s rested.
If you find the cake layers are slightly firming up after a day in the fridge (which can happen when the moisture from that custard really sinks in), don’t worry! Just let a slice sit on the counter for about 20 minutes before serving. That little bit of warmth softens the cake right back up, and you get that perfect melt-in-your-mouth texture that makes this Classic Boston Cream Pie so beloved.
Frequently Asked Questions About This American Classic Dessert
I always get so many wonderful questions about this iconic rich dessert! It’s natural when you’re trying to master something that looks so impressive. People want to know if they can simplify it or if the name is just plain wrong. Here are some of the common things I hear from folks tackling their first From Scratch Dessert like this one.
Is Boston Cream Pie technically a pie or a cake?
That’s the question everyone asks! Historically, it’s purely a cake, though it’s named a pie. If you look at the original recipe from the Parker House Hotel in Boston back in the 1850s, they called it a “Chocolate Cream Pie” because pies were just the standard format for single-layer baked goods back then. But look closely at what we made—it’s baked in two round layers with filling in between, which definitely fits the bill for a cake. So, you can call it whatever you like, but functionally, it’s one of the best layered cakes out there!
Can I make the custard filling ahead of time for my Homemade Boston Cream Pie Recipe?
Oh, absolutely, and I highly recommend it! That rich **Vanilla Custard Filling** benefits from a long chill. You can certainly make the entire custard component one day before you plan to assemble the whole thing. Remember what I stressed in the instructions? You need to press that plastic wrap directly onto the surface of the warm cream before chilling so it doesn’t get crusty. If you store it airtight in the fridge overnight, it will set up quite firm, but just give it a good, hard whisk right before you plan to spread it onto your cooled cake layers. It whips right back to being perfectly smooth for your **Homemade Boston Cream Pie Recipe**!
If you’ve made this Classic Boston Cream Pie and have a few leftover tips or tricks to share, please pop down to the comments! I love hearing how this dessert turned out for your family gatherings.
Estimating the Nutritional Value of this Dessert
Now, I know most of us aren’t counting every morsel when we are serving up something this magnificent—because truly, this Boston Cream Pie is meant to be enjoyed! But for those of you who do like to keep track, I’ve put together a rough estimate of what one slice of this homemade treat contains.
Remember, because we are making everything completely from scratch—from the vanilla sponge to the rich pastry cream—the exact count will shift a bit depending on the brands of butter or chocolate you choose. These figures are an estimate per serving based on standard pantry staples, so take them as a helpful guide rather than gospel!
Here’s a look at the numbers for a generous slice of this classic dessert:
- Serving Size: 1 slice
- Calories: 450
- Sugar: 45 grams
- Total Fat: 25 grams (with 14 grams of that being saturated Fat)
- Carbohydrates: 55 grams
- Protein: 6 grams
- Cholesterol: 120 mg
- Sodium: 250 mg
It’s a rich, satisfying dessert, just like a true American classic should be! Don’t let the numbers worry you too much; it pairs perfectly with a cup of black coffee after dinner.
Share Your Experience Making This Recipe
Well, we’ve done it! We’ve taken simple kitchen staples and turned them into the ultimate, luxurious Boston Cream Pie that tastes just like it came from an old-fashioned bakery. I hope you had as much fun putting these layers together as I did writing it all down for you.
Now that you’ve served up this amazing boston cream pie, I truly want to hear about it! Did the ganache set just right? Was that homemade vanilla custard filling as silky smooth as you hoped it would be? Your feedback helps me, and it helps all the lovely home cooks who follow along here.
Please, take just a moment to rate this recipe right here on the page—five stars if it earned that spot in your personal recipe file! And if you have a minute, drop a comment below. Tell me the moment that stood out most. Was it the smell while the cake baked, or maybe the look on your family’s faces when they saw that glossy chocolate top? I read every single one, and they truly make my day.
If you run into any sneaks or snags in the future, or if you just want to share a picture of your beautiful creation, don’t hesitate to reach out to me directly through my contact page. Happy baking, my friends. I can’t wait to see your results!
PrintClassic Homemade Boston Cream Pie Recipe

Make the iconic Boston Cream Pie from scratch. This recipe features moist vanilla sponge cake layers, rich homemade vanilla custard filling, and a glossy chocolate ganache topping. It is a showstopper dessert perfect for special occasions.
- Prep Time: 40 min
- Cook Time: 30 min
- Total Time: 3 hours 10 min
- Yield: 8 servings 1x
- Category: Dessert
- Method: Baking
- Cuisine: American
- Diet: Vegetarian
Ingredients
- For the Vanilla Cake:
- 1 3/4 cups all-purpose flour
- 1 1/2 cups granulated sugar
- 1 tablespoon baking powder
- 1/2 teaspoon salt
- 1/2 cup unsalted butter, softened
- 2 large eggs
- 1 teaspoon vanilla extract
- 3/4 cup whole milk
- For the Vanilla Custard Filling (Pastry Cream):
- 1/2 cup granulated sugar
- 1/4 cup cornstarch
- 1/4 teaspoon salt
- 2 large egg yolks
- 1 1/2 cups whole milk
- 1/4 cup unsalted butter, cut into pieces
- 1 teaspoon vanilla extract
- For the Chocolate Ganache Topping:
- 4 ounces semi-sweet chocolate, finely chopped
- 1/2 cup heavy cream
- 1 tablespoon light corn syrup (optional, for gloss)
Instructions
- Prepare the Cake Layers: Preheat your oven to 350°F (175°C). Grease and flour two 8-inch round cake pans. In a large bowl, whisk together the flour, sugar, baking powder, and salt.
- Add the softened butter, eggs, and vanilla extract to the dry ingredients. Beat with an electric mixer on medium speed until just combined. Gradually add the milk and mix until the batter is smooth. Do not overmix.
- Divide the batter evenly between the prepared pans. Bake for 25 to 30 minutes, or until a wooden pick inserted into the center comes out clean. Let the cakes cool in the pans for 10 minutes before inverting them onto a wire rack to cool completely.
- Make the Vanilla Custard Filling: In a medium saucepan, whisk together the sugar, cornstarch, and salt. Whisk in the egg yolks until smooth. Gradually whisk in the milk.
- Cook the custard over medium heat, whisking constantly, until it thickens significantly and comes to a boil. Boil for 1 minute while continuing to whisk. Remove from heat.
- Whisk in the butter and vanilla extract until the butter is fully melted and incorporated. Pour the custard into a shallow bowl, press plastic wrap directly onto the surface to prevent a skin from forming, and chill in the refrigerator for at least 2 hours, or until completely cold and firm.
- Prepare the Chocolate Ganache Topping: Place the chopped chocolate in a heatproof bowl. Heat the heavy cream and corn syrup (if using) in a small saucepan until it just begins to simmer. Pour the hot cream over the chocolate. Let it sit undisturbed for 5 minutes.
- Whisk the mixture gently until smooth and glossy. Let the ganache cool slightly at room temperature until it thickens enough to coat the cake without running off completely.
- Assemble the Boston Cream Pie: Place one cooled cake layer on your serving plate. Spread the chilled vanilla custard filling evenly over the first layer.
- Top with the second cake layer. Pour the slightly cooled chocolate ganache over the top center of the cake, allowing it to naturally drip down the sides.
- Chill the assembled cake for at least 1 hour before slicing and serving. This allows the filling and topping to set properly.
Notes
- For the best texture, ensure your cake layers are completely cool before adding the chilled custard filling.
- If your custard seems too stiff after chilling, whisk it vigorously for a minute to restore a smooth, spreadable consistency.
- You can use a springform pan for easier removal, but ensure the sides are well-greased.
Nutrition
- Serving Size: 1 slice
- Calories: 450
- Sugar: 45
- Sodium: 250
- Fat: 25
- Saturated Fat: 14
- Unsaturated Fat: 11
- Trans Fat: 0.5
- Carbohydrates: 55
- Fiber: 2
- Protein: 6
- Cholesterol: 120