
Oh, my friends, when do you crave true comfort? For me, it’s when the weather turns crisp, or when the whole house is full of people and noise. There is nothing—and I mean nothing—that settles the soul quite like a big helping of creamy, bubbly, cheesy macaroni and cheese. Finding the right baked mac and cheese recipe that manages to be decadent enough for a holiday yet easy enough for a Tuesday night has been a lifelong quest in my kitchen.
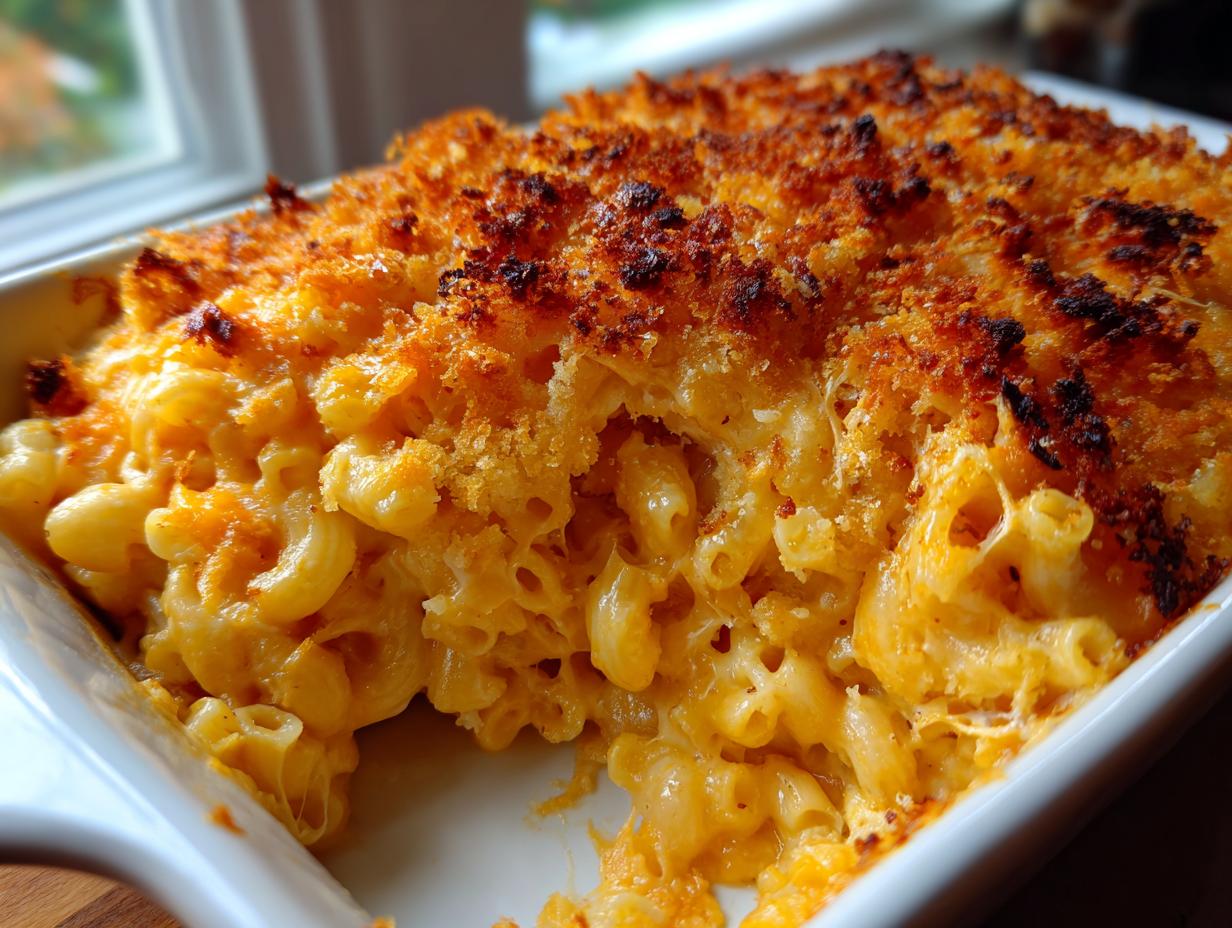
What I’m sharing with you today isn’t just another pasta bake. This is my ultimate version, the one I serve at every single family gathering because it checks every single box: it’s intensely creamy on the inside, it’s loaded with sharp cheese flavor, and, critically, it sports that signature golden, crispy breadcrumb topping that makes you close your eyes on the first bite. This dish tastes like a warm hug, and honestly, being able to consistently produce this dish reminds me of my mother teaching me how to make a proper roux years ago. It’s simple, yes, but when you get the technique right, it transforms the ordinary into the extraordinary.
- Why This Is The Ultimate baked mac and cheese recipe
- Ingredients for the creamy baked macaroni and cheese
- How To Make the best baked mac and cheese
- Tips for the perfect creamy baked macaroni and cheese
- Variations on this baked mac and cheese recipe
- Make Ahead & Freezer Tips for your baked mac and cheese recipe
- Serving Suggestions for this ultimate comfort food pasta
- Frequently Asked Questions about this baked mac and cheese recipe
- Nutritional Estimate for this cheesy baked pasta dish
- Share Your Family Favorite Mac and Cheese Experience
Why This Is The Ultimate baked mac and cheese recipe
You know, I’ve tried every shortcut out there for macaroni and cheese, but when it comes to the baked version, you just can’t cut corners if you want that showstopper result. This recipe rises above the rest because it nails the texture contrast everyone craves. It’s the perfect harmony between a rich, smooth sauce and that crunchy crown on top.
This recipe is my definitive version because it is built for sharing. If you’re heading to a potluck or planning a big holiday meal, this is the one that disappears first. I promise you.
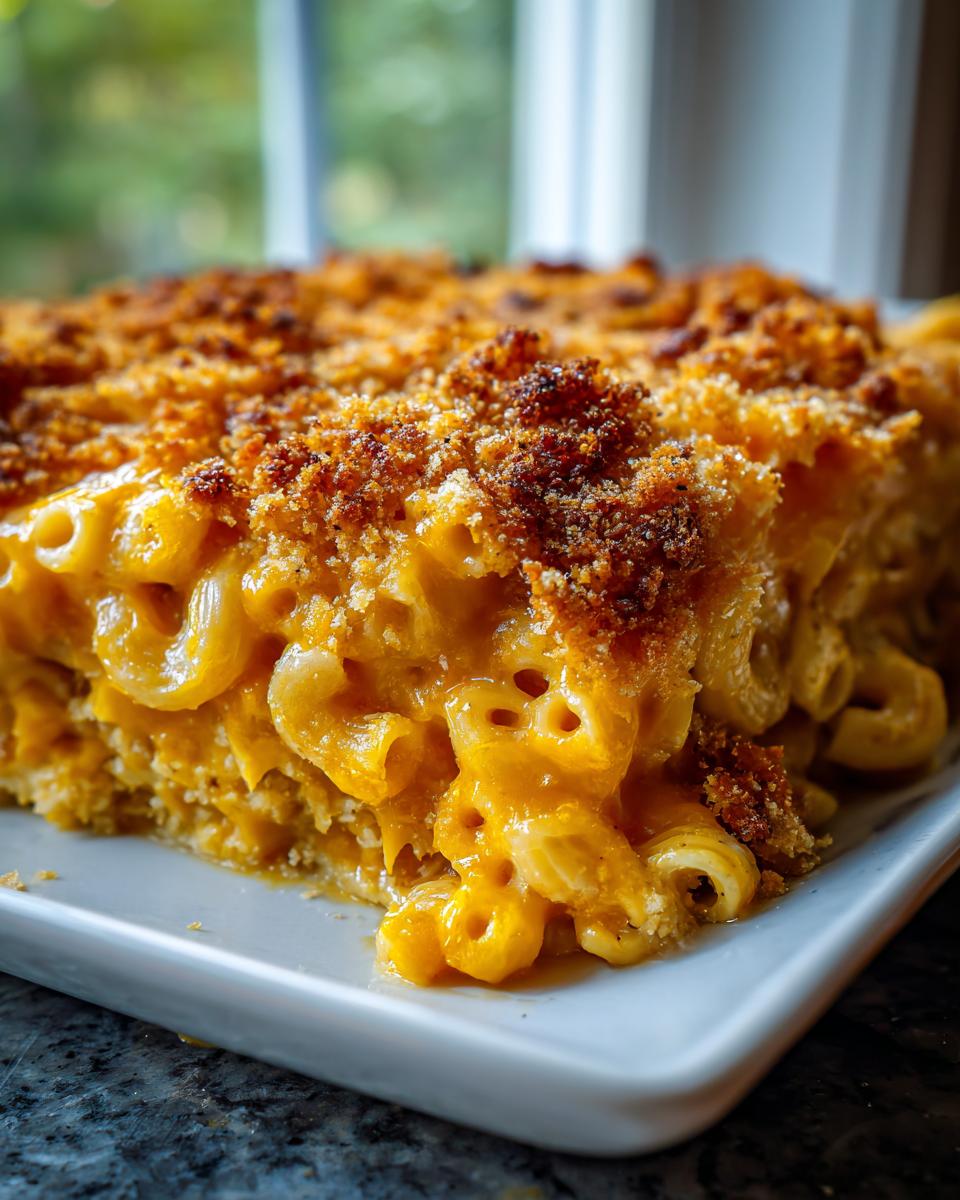
- It achieves extreme creaminess thanks to the blend of three different cheeses—sharp flavor meets ultimate meltiness.
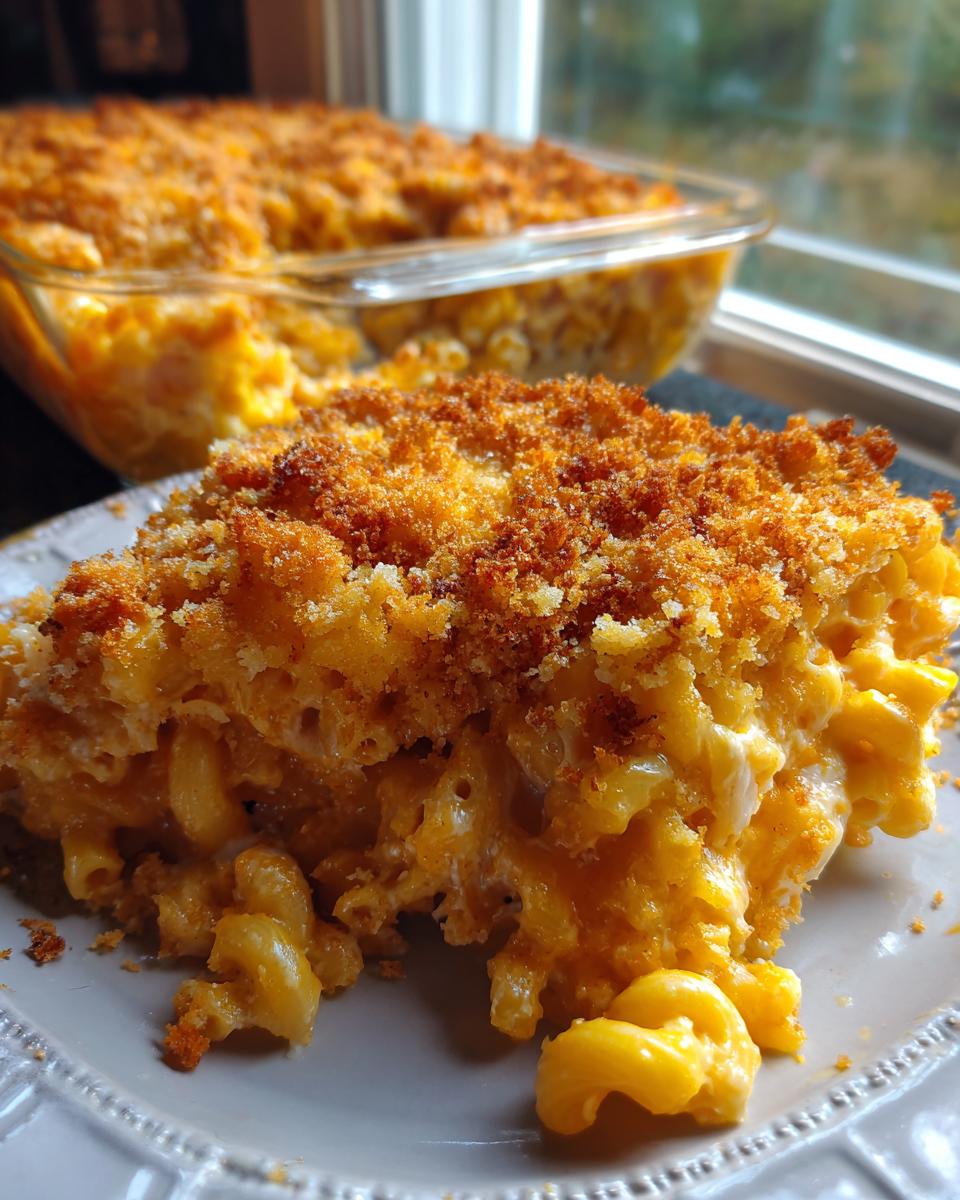
- You get that perfect golden crust that snaps just a little when you cut into it.
- It’s incredibly easy to scale up for a big family or gathering. You can even prepare the whole thing the day before!
Now for my teaching moment, as your old schoolteacher friend! To get that incredible melt, you absolutely must shred your own cheese. Pre-shredded bags are coated with things like cellulose just to keep them from clumping in the bag, but those additives stop your sauce from becoming silky smooth. Take the extra five minutes to shred the block; your taste buds will thank me! For a fantastic pairing that travels well alongside this, check out my classic 7-layer salad.
Ingredients for the creamy baked macaroni and cheese
Transparency matters in the kitchen, especially when dealing with something as beloved as mac and cheese. Getting this just right depends on having the right building blocks ready to go before you even start heating the stove. Don’t substitute the sharp cheddar; that real bite is what balances the richness!
Here is exactly what you’ll need to gather for this batch:
- One pound of elbow macaroni (that’s your standard box amount).
- Six tablespoons of unsalted butter, divided—you’ll need some for the sauce base and some for later.
- One-half cup of all-purpose flour for thickening the sauce base.
- Four cups of whole milk, and please warm it up a bit first! Cold milk in a hot roux equals lumps, and we are avoiding lumps today.
- One teaspoon of dry mustard powder—this isn’t for flavor as much as it helps bring out the cheese flavor, trust me!
- One-half teaspoon of salt.
- One-quarter teaspoon of freshly ground black pepper.
- A tiny pinch of cayenne pepper—just enough to give it a little warmth on the finish, nothing too spicy.
- Four cups (about one full pound) of sharp cheddar cheese, shredded fresh off the block.
- One cup of Gruyère cheese, shredded. This melts beautifully and adds nuttiness.
- One cup of American cheese, shredded—don’t turn up your nose! This is our secret weapon for that unbelievable creamy texture that holds up when baked.
- One cup of panko breadcrumbs for that essential crunch.
- Two tablespoons of melted butter reserved specifically for tossing with the panko topping.
Having everything measured and ready before you start means you can focus entirely on the technique when the heat is on. It keeps everything smooth, calm, and truly delicious!
How To Make the best baked mac and cheese
Alright, let’s get down to business! Making the absolute best baked mac and cheese recipe is all about technique, especially when building that sauce. We aren’t just throwing things in a pot; we are constructing an experience. Follow these steps closely, and you’ll have that creamy, cheesy middle and that perfect crust without fail. If you love learning solid baking techniques, you might also want to check out my recipe for fluffy buttermilk biscuits!
Preparing the Pasta and Preheating
First things first, let’s get that oven ready. We need it sitting at 375°F (that’s 190°C). Take your 9×13 inch baking dish and just give it a light grease so nothing sticks later on. Now, the pasta! This is important: boil your elbow macaroni according to the package directions, but pull them out a full minute early. I mean it—just shy of al dente. They’re going to bake for another 20 minutes, and if they’re already perfectly tender, you’ll end up with mush later. Drain them well once they hit that just-right point and give them a slight shake to remove extra water. Set those aside.
Building the Rich Roux and Cheese Sauce for your baked mac and cheese recipe
This is where we earn our creaminess! Grab your biggest saucepan and melt those main six tablespoons of butter over medium heat. Once it’s shimmering, whisk in the flour right away. Keep whisking constantly for about one full minute. That’s your roux, and we need to cook out that raw flour taste. It should look like wet sand. Now, take your warmed milk and add it in slowly, whisking like your life depends on it! Seriously, add only a little bit at a time until it’s smooth. Keep stirring until that sauce is thick enough to coat the back of a spoon—it should take about five to seven minutes. Don’t let it boil hard, just a gentle simmer is fine. Once it’s coated and thick, pull the whole thing right off the burner. This next part is key for smoothness: once the heat is off, whisk in all your seasonings—the dry mustard, salt, pepper, and cayenne. THEN, start adding your mountains of shredded cheese, a handful at a time. Wait until the cheddar, Gruyère, and that creamy American cheese are fully melted and incorporated before adding the next batch. That gradual process keeps the sauce from getting grainy, giving you that dreamy mouthfeel you see in the best baked mac and cheese pictures out there, like this gorgeous one at Forkful Heaven.
Assembling the cheesy baked pasta dish
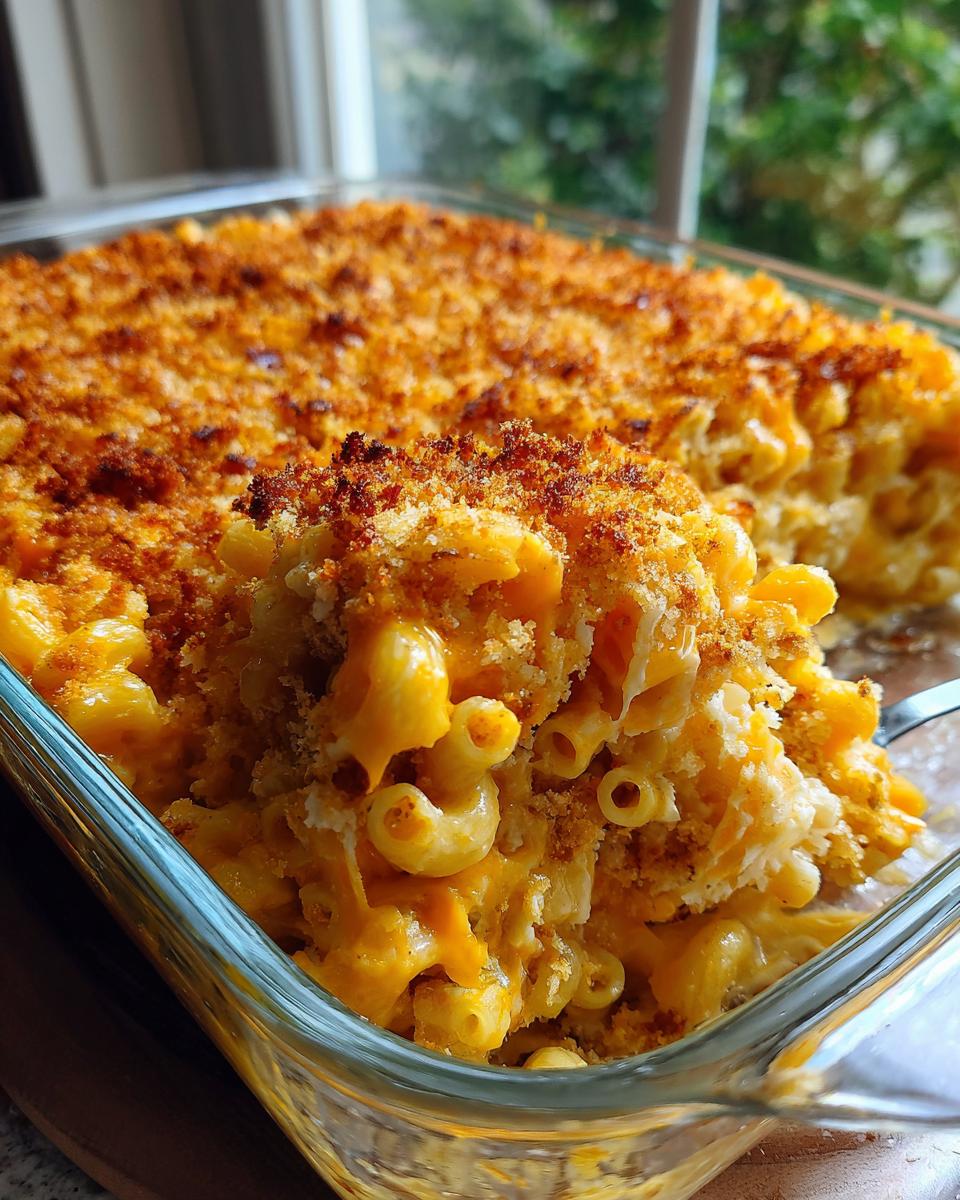
Now that you have this beautiful, luxurious sauce, gently fold in your slightly undercooked pasta. You want every single piece of macaroni to be coated in that liquid gold! Once everything is mixed evenly, pour the whole thing into your prepared baking dish. Don’t smooth the top too much; leave it a little rustic.

For the topping—the crunchy part that everyone fights over—toss your panko breadcrumbs with the remaining two tablespoons of melted butter. Sprinkle this mixture evenly over the top of the macaroni. You don’t need to press it down firmly; let it sit nice and loosely so it can crisp up nicely in the oven.
Baking to Golden Perfection
Slide that casserole into your 375°F oven. It only needs to bake for about 20 to 25 minutes. You’re watching for two signs: the cheese sauce should be bubbly all the way around the edges, and that panko topping needs to be deeply golden brown. When you pull it out, resist the urge to dive in immediately! This is crucial for it to set up properly. Let this ultimate comfort food pasta rest on the counter for a good five to ten minutes. This resting time allows that hot, bubbly sauce to settle slightly so it doesn’t run everywhere when you serve it up. Keep that timer handy; you’ll be glad you waited those few extra minutes!
Tips for the perfect creamy baked macaroni and cheese
I mentioned it before, but I’ll say it again because it’s non-negotiable for the best baked mac and cheese: please, please shred your own cheese! Pre-shredded cheese just won’t melt right into that smooth sauce we worked so hard to create. If you want to mimic that incredible richness you sometimes find in true Southern baked mac and cheese, try swapping out one cup of the whole milk for heavy cream. Wow, that makes a difference, especially if you’re making this for a holiday!
Also, remember that bit of spice? That dash of cayenne I put in the sauce? It really makes the sharp cheddar pop without making it spicy. If you’re nervous about creaminess, check out the simple steps in my recipe for homemade nacho cheese sauce—the principles are similar for smoothness. For a great guide on texture contrast, check out these tips on getting the crispy topping just right.
Variations on this baked mac and cheese recipe
While I swear by the classic sharp cheddar and Gruyère combo we just used, I know you home cooks love to make things your own! Baking is about love, and love means customization, right? Don’t be afraid to tweak this baked mac and cheese recipe to suit your crew.
If you are leaning toward that soul-satisfying, rich flavor profile reminiscent of Southern baked mac and cheese, my number one trick is to amp up the smoky spice blend in the sauce. I often add a small dash of smoked paprika right in with the dry mustard. Sometimes, if I’m feeling bold, a tiny splash of Tabasco works wonders—it doesn’t make it hot, it just wakes up all the cheese flavors!
Another fun option is swapping out cheeses entirely if you want a different flavor story. If you want deep, strong flavor, skip the Gruyère and use an equal amount of double-aged or extra sharp cheddar. It makes for a more intense bite! Just be warned: the older the cheddar, the sometimes trickier it is to melt perfectly, so make sure your sauce is off the heat and give it a good stir when adding it in.
For something completely different but still hearty, you can toss in some cooked, crumbled bacon or a little pinch of something earthy. If you are looking for side dish inspiration that pairs well with a bolder mac, my moist Mexican cornbread is a wonderful counterpoint!
Make Ahead & Freezer Tips for your baked mac and cheese recipe
I get it—sometimes you just don’t have time to deal with a big, bubbly casserole right before dinner, especially during the holidays. That’s why I love that this make ahead baked mac and cheese works so well! It’s easily assembled the day before, which is a life-saver when you’re juggling roasted turkeys or big family meals.
If you’re preparing it ahead, just mix everything together—pasta, sauce, topping—and pop the whole dish covered into the refrigerator for up to 24 hours. When it’s time to bake, you’ll need to add about 10 to 15 minutes to the standard baking time because you are starting cold. You still want that hot bubbly edge, so don’t rush this part!
Storing a Make-Ahead Meal
If you’re looking to serve this for a big crowd, like for a potluck, whipping up a double batch and freezing half is smart thinking. Once you’ve assembled the mac and cheese in the dish (or even in a foil container if you plan to transport it later), let it cool completely, cover it tightly with plastic wrap, and then foil. It keeps beautifully in the freezer for up to three months.
Reheating Your Cheesy Baked Pasta Dish
When you are ready to bake those frozen leftovers, the trick is to thaw them out first if you possibly can. Toss it in the fridge overnight to defrost slowly. Then, take off the plastic wrap, cover it with foil (to protect the panko topping from burning too fast), and bake it until it’s hot all the way through, usually starting at 350°F for about 30 minutes. If you want that golden crunch back, take the foil off for the last 10 minutes. It reheats wonderfully—this is truly the one family favorite mac and cheese that tastes just as good the second time around!
If you need a quick, hearty main dish to serve alongside those leftovers, I highly recommend my recipe for easy slow cooker shredded chicken. It’s always a hit!
For more great tips on serving a crowd without the stress, check out how my friend Molly handles her crowd-pleaser mac and cheese.
Serving Suggestions for this ultimate comfort food pasta
Honestly, once you pull this rich, bubbly, cheesy baked mac and cheese recipe out of the oven, you know you’ve made something special. But what do you serve *with* it? Since this dish is so decadent—it’s heavy on the cream, the butter, and the cheese—the best pairings are things that give your plate some balance. It’s the ultimate comfort food pasta, so we want to keep the mains somewhat simple!
If you’re serving this as the star of a potluck or holiday table, it pairs beautifully with something lean that lets the cheese shine. My go-to main course when I have this baking is a perfectly simple roast. You can find my detailed method for a juicy roasted chicken with crispy skin recipe right here on the blog. The simple salt and herbs let the mac and cheese do all the heavy lifting flavor-wise.
For something lighter than a full roast, think about something bright that cuts through the richness. A simple side salad with a sharp vinaigrette is fantastic. Or, if you’re using this as a holiday side dish mac and cheese for Thanksgiving or Christmas, skip the heavy casseroles and opt for green beans tossed with toasted almonds, or even some glazed carrots. The slight sweetness of the carrots is a beautiful contrast to the sharp cheddar lurking in the pasta.
And for those using this as a weeknight dinner casserole? Keep it easy! A slice of tomato and cucumber drizzled with olive oil and salt is all you need. Trust me, when the main dish is this good, you want the sides to be happy helpers, not main competitors!
Frequently Asked Questions about this baked mac and cheese recipe
I know you might have some questions swirling around, especially if you’re working on perfecting a classic recipe like this for the first time. Believe me, when I was first learning how to make the ultimate comfort food pasta, I had plenty of questions too! Here are a few things folks ask me all the time about getting this creamy baked macaroni and cheese just right.
Why did my cheese sauce turn out grainy instead of smooth?
This is the number one problem folks run into, and it almost always comes down to the heat! If you add your shredded cheese while the sauce is still boiling rapidly, the proteins seize up and the fat separates, creating that sad, grainy texture. Remember what I taught you: always remove that base sauce from the heat entirely before you start adding those handfuls of cheese. Stir until it’s velvety smooth before putting it back on low heat, if necessary, to keep warm.
Can I skip making a roux for this easy baked mac and cheese recipe?
Well, you certainly *could*, but I really, really advise against it if you’re aiming for the best baked mac and cheese. The roux—that simple mix of flour and butter—is what stabilizes your milk and holds all that fat from the cheese in suspension. If you skip it, you end up with watery pasta sitting in pools of oily cheese when you try to make a baked casserole. Trust me, taking those extra five minutes to build that foundation makes all the difference between a good dish and a truly magnificent one!
What is the absolute best cheese for baked mac and cheese?
For my version of this cheesy baked pasta dish, I rely on a trio for complexity and melt factor. Sharp cheddar is a must because that’s where all your flavor comes from—you need that bite! Gruyère is fantastic because it melts like a dream and adds a lovely nutty note. But the secret weapon for guaranteed creaminess? That’s the American cheese. It’s engineered to melt perfectly and keeps everything silky, even after baking. If you only want one, go for a good quality extra sharp cheddar, but having a blend is truly the trick to perfection.
Can I bake this mac and cheese the day before?
Absolutely! This is such a great family favorite mac and cheese because it’s so well-behaved ahead of time. Follow the assembly instructions, cover the whole thing tightly, and put it in the fridge overnight. Just remember when you bake it later, you have to leave extra time—plan on 10 to 15 minutes longer than the recipe calls for since the dish starts cold. Don’t forget to let it sit for that 5 minutes rest afterward, even when reheating!
If you’re looking for a lighter side dish to balance out the richness, I have a wonderful recipe for an easy Asian cabbage salad.
Nutritional Estimate for this cheesy baked pasta dish
Now, I need to have a little chat with you about nutrition, folks. While this cheesy baked pasta dish is pure, unadulterated comfort and absolutely necessary for holidays or difficult days, it’s certainly not diet food! We are dealing with whole milk, butter, and rich cheeses here, so we should go into it with our eyes wide open!
The figures below are my best estimate based on the ingredients listed above, assuming an even division among the eight servings. Remember, these are just guidelines—your yogurt might be higher in fat, or your cheese block might have been a little heftier than mine! Think of this as a guide for an indulgent, classic American dinner staple.
- Serving Size: 1 serving
- Calories: Approximately 650
- Fat: About 38 grams total (with 22 of those being saturated fat—ooh la la!)
- Carbohydrates: Around 55 grams
- Protein: A solid 28 grams per serving
- Sodium: Roughly 650 milligrams
- Sugar: About 7 grams
This recipe is wonderful because it packs a lot of flavor and satisfying energy into one bowl—it’s satisfying, which means you’re less likely to reach for seconds later! It’s best enjoyed as part of a balanced meal, maybe next to that light salad we talked about earlier.
Share Your Family Favorite Mac and Cheese Experience
Well, we made it to the end! I truly hope you’ve found everything you needed to create what I promise you will soon call your own definitive baked mac and cheese recipe. Seeing this dish come together—from the silky roux to that perfectly crunchy topping—is one of the great joys of home cooking for me.
Now that you know my secrets for that ultimate creamy baked macaroni and cheese, I just can’t wait to hear about *yours*!
This is where you come in. I want to know what you thought! Did you try my tip about shredding your own cheese? Did you add something unexpected? Did you manage to keep the kids out of the kitchen while it was resting those crucial five minutes?
Please take a moment to leave a rating for the recipe below, and tell me all about your experience in the comments. Hearing how this ultimate comfort food pasta turned out for your own family—whether it was for a quiet weeknight or a huge holiday table—is the real reward for spending time in the kitchen. It helps me know what helpful tips to share next time!
If you loved this creamy classic, maybe next time you can try your hand at my soft and chewy peanut butter blossoms! And if you’re looking for more delicious inspiration for oven-baked comfort, go check out what my friends over at Tasty RCP are doing with their take on a delightful baked mac and cheese. Happy cooking, dear friends!
PrintUltimate Creamy Baked Mac and Cheese with Crispy Topping

This recipe delivers the ultimate comfort food: creamy, cheesy macaroni baked until golden brown with a satisfyingly crisp topping. It is a family favorite perfect for weeknight dinners or holiday gatherings.
- Prep Time: 15 min
- Cook Time: 30 min
- Total Time: 55 min
- Yield: 8 servings 1x
- Category: Casserole
- Method: Baking
- Cuisine: American
- Diet: Vegetarian
Ingredients
- 1 pound elbow macaroni
- 6 tablespoons unsalted butter, divided
- 1/2 cup all-purpose flour
- 4 cups whole milk, warmed
- 1 teaspoon dry mustard powder
- 1/2 teaspoon salt
- 1/4 teaspoon black pepper
- Pinch of cayenne pepper
- 4 cups (about 1 pound) sharp cheddar cheese, shredded
- 1 cup Gruyère cheese, shredded
- 1 cup American cheese, shredded (for extra creaminess)
- 1 cup panko breadcrumbs
- 2 tablespoons melted butter (for topping)
Instructions
- Preheat your oven to 375°F (190°C). Lightly grease a 9×13 inch baking dish.
- Cook the elbow macaroni according to package directions until it is just shy of al dente (about 1 minute less than recommended). Drain well and set aside.
- Prepare the cheese sauce: In a large saucepan over medium heat, melt 6 tablespoons of butter. Whisk in the flour and cook for 1 minute, stirring constantly, to create a roux.
- Gradually whisk in the warm milk until the mixture is smooth. Continue cooking, stirring often, until the sauce thickens enough to coat the back of a spoon (about 5-7 minutes). Do not let it boil rapidly.
- Remove the sauce from the heat. Whisk in the dry mustard, salt, pepper, and cayenne pepper.
- Add the shredded sharp cheddar, Gruyère, and American cheese to the sauce in handfuls, stirring until completely melted and smooth before adding the next batch. This creates your rich, cheesy sauce.
- Gently fold the cooked, drained macaroni into the cheese sauce until every piece is coated.
- Pour the macaroni mixture into the prepared baking dish.
- In a small bowl, mix the panko breadcrumbs with 2 tablespoons of melted butter. Sprinkle the breadcrumb mixture evenly over the top of the macaroni.
- Bake for 20 to 25 minutes, or until the sauce is bubbly and the topping is golden brown and crisp.
- Let the baked mac and cheese rest for 5 to 10 minutes before serving.
Notes
- Shred your own cheese; pre-shredded cheese contains additives that prevent smooth melting.
- For a Southern style, you can add a splash of heavy cream to the milk mixture for extra richness.
- You can prepare the sauce and pasta ahead of time, assemble the dish, cover it, and refrigerate for up to 24 hours. Add 10-15 minutes to the baking time if baking directly from the refrigerator.
Nutrition
- Serving Size: 1 serving
- Calories: 650
- Sugar: 7
- Sodium: 650
- Fat: 38
- Saturated Fat: 22
- Unsaturated Fat: 16
- Trans Fat: 1
- Carbohydrates: 55
- Fiber: 3
- Protein: 28
- Cholesterol: 110