
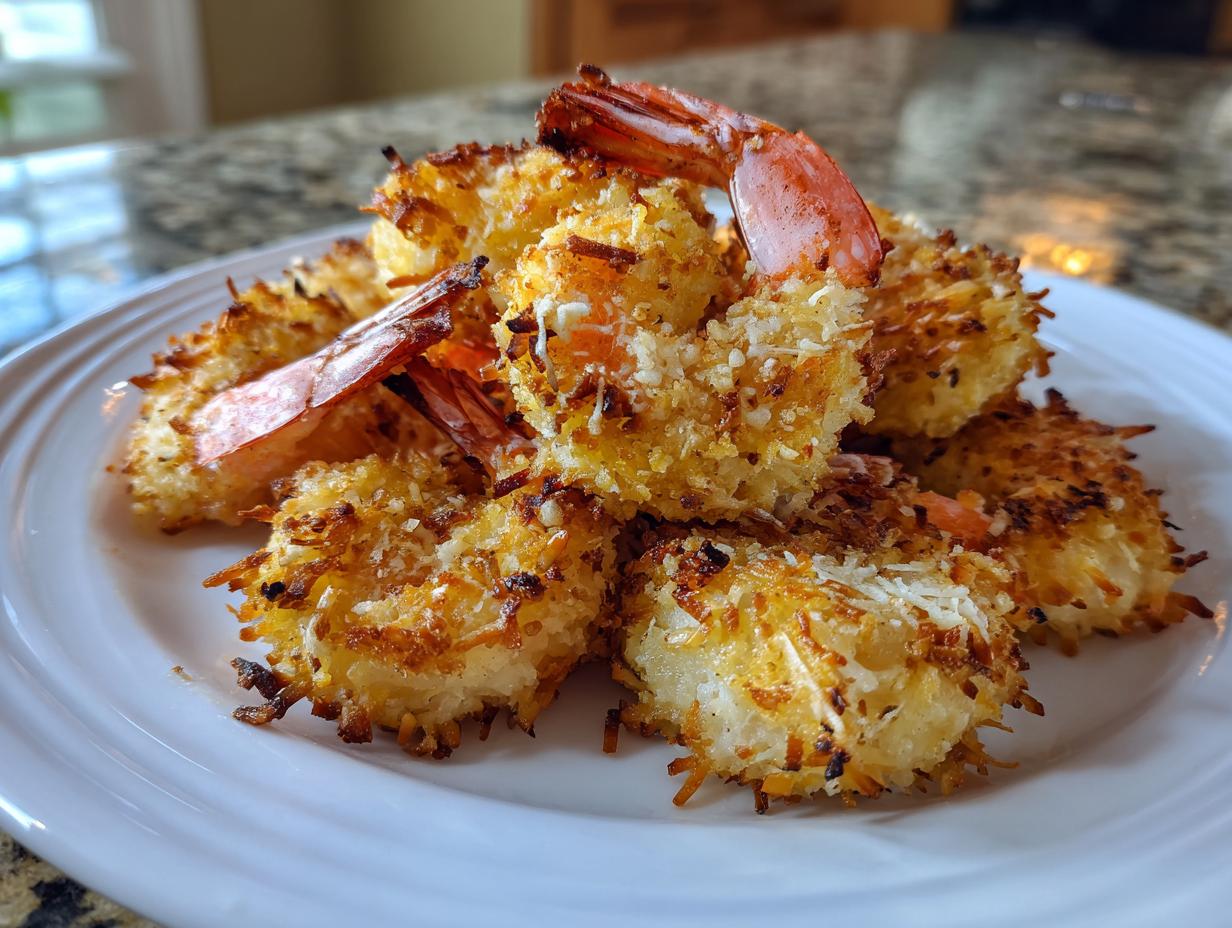
It feels like such a shame to miss out on a classic appetizer just because we’re trying to skip the deep fryer, doesn’t it? Well, I’m here to tell you that those days are over! We can absolutely get that fantastic, satisfying crunch we all crave. This recipe for Baked coconut shrimp is my go-to for pool parties and holidays because it delivers the goods—light, tropical, and incredibly crispy—without any of the grease. Like I always tell my grandchildren, good food just needs straightforward steps and quality ingredients. Having taught school for thirty years, I’ve perfected the art of explaining things simply, and baking shrimp is one of the easiest kitchen victories you can have. Trust me, this coating sticks, it browns beautifully, and it delivers that perfect snap-back bite every single time.
- Why This Baked Coconut Shrimp Recipe Tastes Like Home
- Ingredients for the Perfect Baked Coconut Shrimp
- Setting Up Your Crispy Baked Shrimp Breading Station
- Step-by-Step Instructions for Baked Coconut Shrimp
- Tips for the Best Crunchy Coconut Shrimp Results
- Variations: Making Your Baked Coconut Shrimp Unique
- Serving Suggestions for Coconut Shrimp with Sweet Chili Sauce
- Storing and Reheating Baked Coconut Shrimp
- Frequently Asked Questions About Baked Coconut Shrimp
Why This Baked Coconut Shrimp Recipe Tastes Like Home
When I first started testing ways to make this dish lighter, I was convinced I’d have to sacrifice texture. But home cooking is all about reliability, and these shrimp deliver the crunch without the fuss of frying. That’s why I love them so much for family get-togethers.
- These are genuinely some of the best healthy party appetizers you can make.
- The combination of panko and coconut creates a texture that holds up beautifully after baking.
- We get that deeply satisfying, all-around crunch without any heavy oil weighing it down.
Ingredients for the Perfect Baked Coconut Shrimp
Keeping things simple is my motto, and this ingredient list reflects that! You don’t need anything fancy, just the right components mixed together correctly. We’re using one pound of large shrimp, which I always insist on peeling and deveining ahead of time so we can focus on the coatings.
See that list below? Those three dishes are what matter most.
- 1 pound large shrimp, peeled and deveined
- 1 cup all-purpose flour
- 2 large eggs, lightly beaten
- 1 teaspoon salt
- 1/2 teaspoon black pepper
- 1 1/2 cups sweetened flaked coconut
- 1/2 cup panko breadcrumbs
- Cooking spray
Now, about the crunch! Please trust Carla on this: you absolutely must use the panko breadcrumbs mixed with the coconut. Regular breadcrumbs simply won’t give you that spectacular, airy crispiness we are aiming for when we make baked coconut shrimp. The panko is non-negotiable for that perfect texture!
Setting Up Your Crispy Baked Shrimp Breading Station
This is where the magic really begins! When I was teaching, I always emphasized setting up your workspace correctly before starting any project, and cooking is no different. To get that wonderful, uniformly crispy baked shrimp, we need a simple three-dish breading station. It’s easy, organized, and stops things from getting messy too fast.
Dish one holds our dry ingredients—the base flavor. Dish two is the glue: the egg wash. And dish three? That’s everything that makes our coating golden and crunchy. Make sure all your dishes are shallow so coating the shrimp is easy. Before you start dipping, go ahead and mix that coconut and panko blend thoroughly. You want those two things perfectly married so every shrimp gets the same great coating! For more tips on getting that perfect coating, check out my deep dive on ultimate crispy panko recipes.

Seasoning the Flour for Flavorful Baked Coconut Shrimp
The first layer is foundational for our baked coconut shrimp. In that first dish, we are combining the all-purpose flour with just a teaspoon of salt and a half teaspoon of pepper. Don’t skip adding the salt here! This seasoned flour is what the egg wash clings to, and it gives the shrimp flavor right down to the core, not just on the outside coating.
Achieving Maximum Crunch with Coconut and Panko
This combo is what separates good coconut shrimp from great coconut shrimp. We mix the sweetened flaked coconut right in with the panko breadcrumbs for our third dish. The sweetened coconut gives us that tropical sweetness, but the panko is what guarantees that satisfying crunch we want when we bite in. It truly makes these the best crunchy coconut shrimp you’ll make at home!
Step-by-Step Instructions for Baked Coconut Shrimp
Now that our station is set up, let’s get these beauties coated and baked! Remember, the key to a great texture—which is essential for any air fryer shrimp recipes variation too—is maintaining a neat little assembly line. First things first: make sure your oven is cranked up to 400°F (200°C) and your baking sheet is lined with parchment and given a good, light spray of cooking spray. This coating can stick if it’s not prepared properly! If you want to see how I convert this to an air fryer method later, I’ve got instructions ready over at my post on air fryer shrimp recipes.
Take your first raw shrimp and dredge it completely in that seasoned flour, shaking off any loose bits. Next, dunk it right into the egg wash—let any heavy drips fall off. Then, it heads straight to the coconut-panko mix. We’re going to bake about 10 to 12 minutes total, so timing is key!
The Coating Technique for Crispy Baked Shrimp
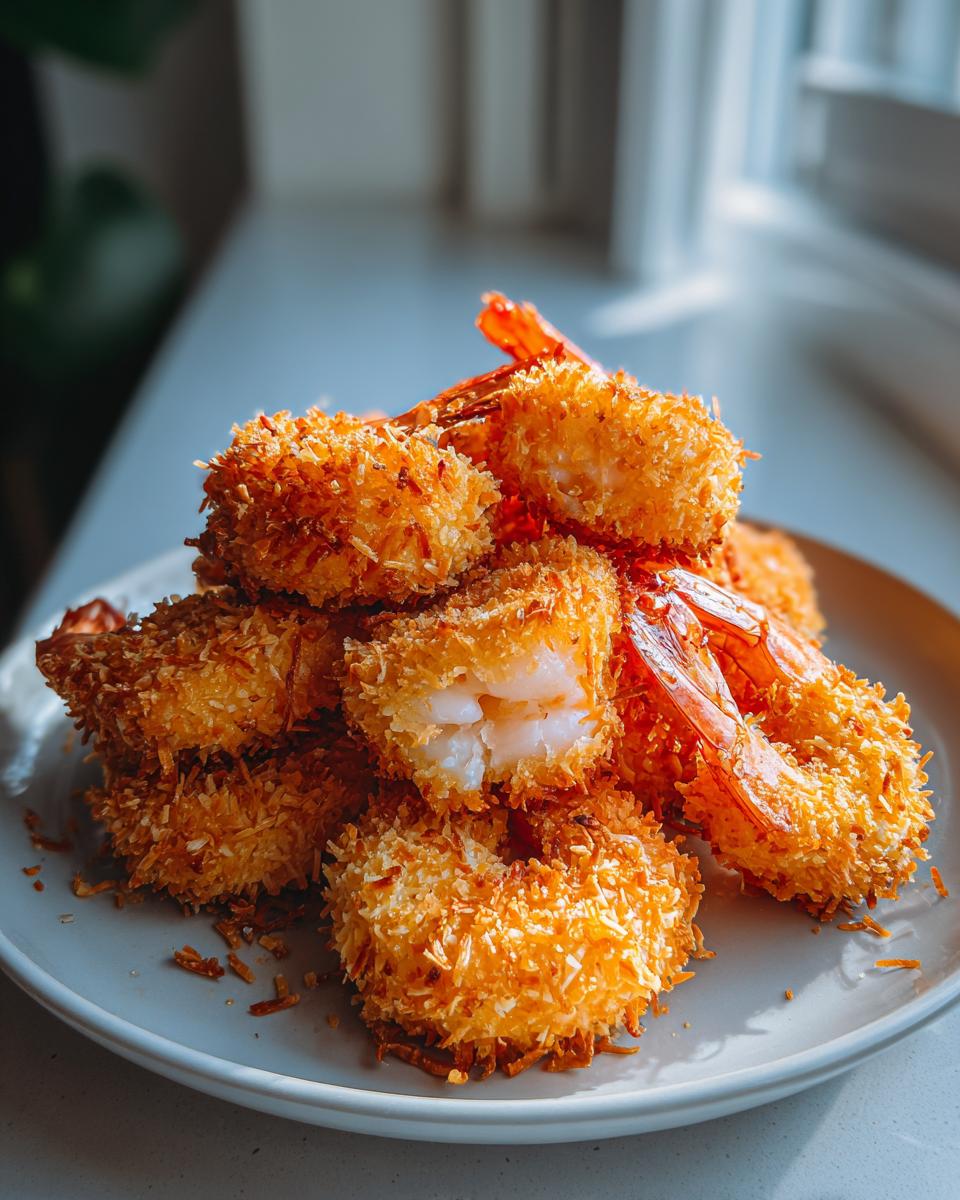
When you move the shrimp into that coconut-panko mixture, you can’t be timid! You need to press that coating on firmly. I mean it—really pat it down so that coconut sticks tight all the way around. If you leave big pools of egg wash on the shrimp before you hit the coconut, you’ll get soggy spots later, and we certainly don’t want that on our crispy baked shrimp. Make sure you press it on all sides so they are completely covered.
Baking Tips for Golden Baked Coconut Shrimp
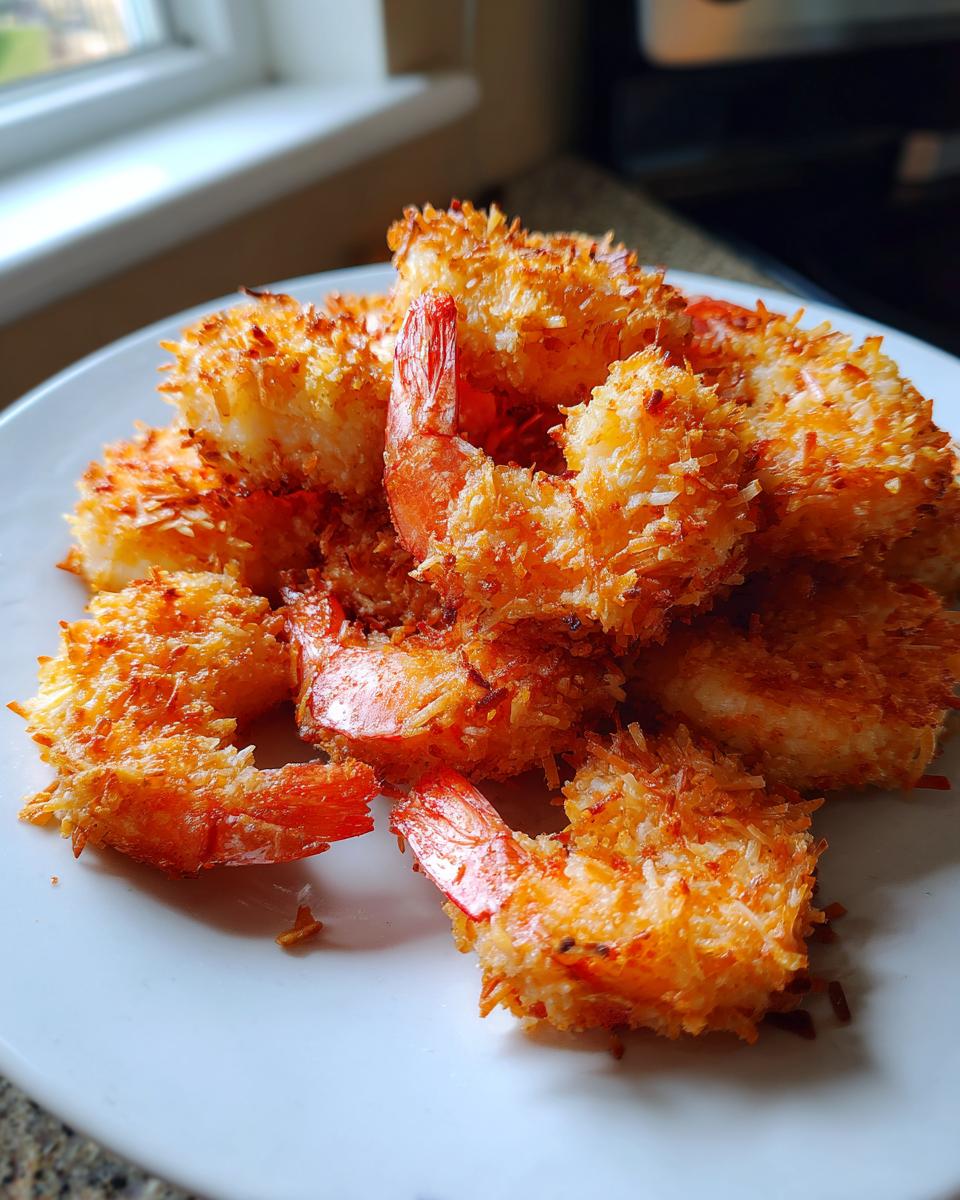
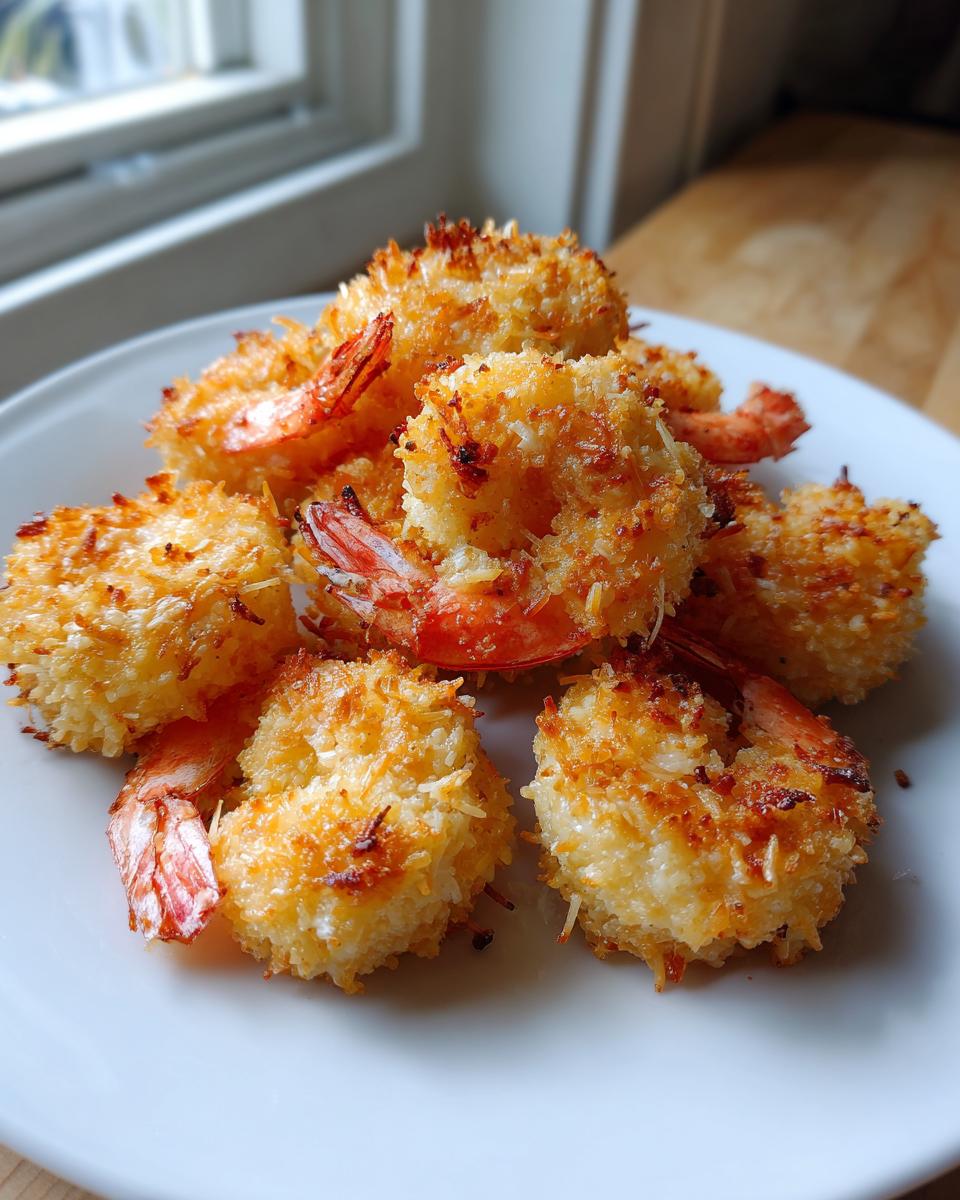
Once they are all coated and lined up on the pan—and please, make sure they aren’t touching each other!—this is my special trick: give the tops of all the shrimp another light misting with cooking spray. That tiny bit of fat helps them brown up perfectly. We bake them for 10 to 12 minutes, but you *must* flip them over halfway through. When they come out, the shrimp should be pink and firm, and that coating should be gorgeous and golden brown!
Tips for the Best Crunchy Coconut Shrimp Results
If you’ve ever pulled your baked items out of the oven only to find they look a little pale or unevenly cooked, I understand your frustration! Getting that uniform, golden crisp around the whole shrimp takes one little secret I learned years ago. When you arrange the shrimp on your baking sheet, make absolutely certain that none of them are touching. They need their own space, like people on a crowded bus!
When they touch, they steam each other instead of baking properly, and that ruins our chance at truly crispy baked shrimp. As they bake, the moisture gets trapped between pieces, and suddenly, all our hard work on the coating is wasted. Give them space to breathe, and they reward you with that fantastic, crunchy coating every single time you make this recipe!
Variations: Making Your Baked Coconut Shrimp Unique
Now, I know a recipe is a guideline, not a strict law, and I love seeing how you all put your own spin on things! If you find the sweetness a bit much, you can easily swap out the sweetened coconut for unsweetened, but remember to add about a tablespoon of sugar right into that coconut-panko mix. That balances it out perfectly! For folks who like a little warmth, I’ve had success stirring a tiny pinch of cayenne pepper into that initial flour mixture. That little kick makes these feel exactly like the healthy party appetizers you want for a crowd.
Air Fryer Shrimp Recipes Adaptation for Extra Crisp
If you happen to be one of the lucky ones with an air fryer, this recipe converts beautifully! It’s a fantastic way to get those edges super-crisp, too. Just treat these just like you would in the oven: set your air fryer temperature to 375°F (190°C) and cook them for about 8 to 10 minutes total. Don’t forget to open the basket and give them a little shake halfway through so they brown evenly—it’s a key step for great air fryer shrimp recipes!
Serving Suggestions for Coconut Shrimp with Sweet Chili Sauce
These little bites are sweet, tropical, and wonderfully crunchy, so they really sing when paired with something zesty or spicy! Of course, the classic companion is always a good bowl of coconut shrimp with sweet chili sauce. That sweet-and-spicy dance is just unbeatable, especially when it’s piled high on a platter at a family get-together.
But don’t stop there! If you want something a little creamier to cool things down, I highly recommend a squeeze of fresh lime juice mixed into a dollop of mayonnaise—or, if you’re looking for something brighter, you can make my quick lime aioli, which you can find the easy steps for right here. A little slaw on the side helps cut through that sweetness, too!
Storing and Reheating Baked Coconut Shrimp
The only thing better than eating these fresh is hoping there are leftovers the next day! If you have any of this crunchy coconut shrimp left, just pop them right into an airtight container. Keep them in the refrigerator for up to three days. Now, trust me on the reheating part: absolutely no microwaves if you value that crunch! Microwaves turn beautiful coatings soft and sad.
Instead, use your oven or even better, a toaster oven. Set it to 350°F (175°C) and bake them for about 5 to 7 minutes. That dry, quick heat brings back nearly all of the crispiness we worked so hard to achieve in the first place. It’s simple, but it keeps them tasting fresh!
Frequently Asked Questions About Baked Coconut Shrimp
I always tell folks that if you have a question, it’s probably a question someone else has too! I’ve gathered a few things people ask me most often about making sure their baked coconut shrimp comes out perfectly golden. Don’t hesitate to reach out if you have more; you can always find my contact page here!
Can I use raw shrimp for this baked coconut shrimp recipe?
Oh yes, you absolutely must use raw shrimp here! I wrote this recipe specifically for raw, large, peeled, and deveined shrimp. If you use pre-cooked shrimp, they cook too fast, and your beautiful coating will burn before the shrimp inside is warmed through. We want that 10 to 12 minutes in the oven to cook the raw shrimp gently while the coating gets fully toasted until it’s perfectly golden brown.
How do I keep my baked coconut shrimp from getting soggy?
Soggy is the enemy of crunchy coconut shrimp, isn’t it? The biggest thing is airflow! Make sure you are using panko, not regular crumbs, because panko absorbs less moisture. Second, give them space on that pan—no touching, remember? Finally, that little spritz of cooking spray right before they go in is crucial. That spray helps crisp up the coconut flakes externally, locking in that crunch we are looking for.
What is the best dip besides sweet chili sauce for this crispy baked shrimp?
Sweet chili sauce is wonderful, and it hits that secondary flavor note so nicely, but sometimes you want something creamy and cool to contrast that spice. For a really delightful pairing with this crispy baked shrimp, try a simple yogurt-lime sauce. Just mix plain Greek yogurt with a squeeze of fresh lime juice, a little bit of garlic powder, and salt. It’s cooling, zesty, and complements the tropical coconut flavor beautifully!
PrintCrispy Baked Coconut Shrimp
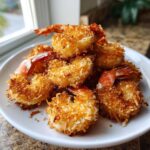
Make satisfyingly crunchy coconut shrimp without deep-frying. This recipe delivers a tropical appetizer with a crisp texture perfect for parties or a snack.
- Prep Time: 15 min
- Cook Time: 12 min
- Total Time: 27 min
- Yield: 4 servings 1x
- Category: Appetizer
- Method: Baking
- Cuisine: American
- Diet: Low Fat
Ingredients
- 1 pound large shrimp, peeled and deveined
- 1 cup all-purpose flour
- 2 large eggs, lightly beaten
- 1 teaspoon salt
- 1/2 teaspoon black pepper
- 1 1/2 cups sweetened flaked coconut
- 1/2 cup panko breadcrumbs
- Cooking spray
Instructions
- Preheat your oven to 400°F (200°C). Line a baking sheet with parchment paper and lightly coat it with cooking spray.
- Set up a standard breading station with three shallow dishes.
- In the first dish, place the flour, salt, and pepper. Mix them together.
- In the second dish, place the beaten eggs.
- In the third dish, combine the flaked coconut and panko breadcrumbs. Mix well.
- Take one shrimp at a time and dredge it completely in the flour mixture, shaking off any excess.
- Dip the floured shrimp into the egg wash, allowing excess to drip off.
- Press the shrimp firmly into the coconut-panko mixture to coat all sides.
- Place the coated shrimp on the prepared baking sheet in a single layer.
- Lightly spray the tops of the shrimp with cooking spray for extra crispiness.
- Bake for 10 to 12 minutes, flipping halfway through, until the shrimp is pink and the coating is golden brown and crisp.
- Serve immediately, perhaps with sweet chili sauce.
Notes
- For an air fryer shrimp recipes variation, cook at 375°F (190°C) for 8 to 10 minutes, shaking the basket halfway through.
- To make this a healthier party appetizer, use extra-large shrimp for a more substantial bite.
- If you prefer unsweetened coconut, add 1 tablespoon of sugar to the coconut and panko mixture.
Nutrition
- Serving Size: 4 shrimp
- Calories: 280
- Sugar: 18
- Sodium: 350
- Fat: 10
- Saturated Fat: 6
- Unsaturated Fat: 4
- Trans Fat: 0
- Carbohydrates: 28
- Fiber: 2
- Protein: 20
- Cholesterol: 150