
Oh, there is truly nothing better on a chilly evening than that warm, deeply spiced aroma filling your kitchen. That smell signals that a real Comfort Food Dessert is on its way, and for me, that always means apple cobbler. If you’re looking for the ultimate cozy dish that tastes leagues better than anything you can buy pre-made, you’ve landed in the right spot! This apple cobbler recipe is my go-to; it’s simple, straightforward, and uses the most divine, buttery biscuit topping you could imagine. After thirty years of teaching elementary school, I learned how important clarity is, and trust me, I’ve refined this recipe over many years of feeding my own grandchildren so it works every single time. Get ready for tender cinnamon-spiced apples underneath a beautiful, golden crust! You can read a little more about my teaching background here.
- Why This Is the Best Apple Cobbler Recipe You Will Make
- Gathering Ingredients for Your Apple Cobbler Recipe
- Step-by-Step Instructions for This Apple Cobbler Recipe
- Tips for the Perfect Golden Crust Dessert
- Serving Suggestions for Your Warm Apple Dessert
- Storage and Reheating: Keeping Your Apple Cobbler Recipe Fresh
- Frequently Asked Questions About This Apple Cobbler Recipe
- Nutritional Estimates for This Classic Apple Cobbler Recipe
- Share Your Homemade Apple Cobbler Experience
Why This Is the Best Apple Cobbler Recipe You Will Make
I hear folks say they prefer pie, but honestly, this Homemade Apple Cobbler beats pie every time when I need comfort fast. This recipe stands out because it’s incredibly dependable; that’s what I strive for in all my recipes. You get that flaky, rich texture on top—so much better than a standard crumble—without spending hours rolling out pastry. It really is the Best Apple Cobbler Recipe in my book for a home cook.
- It tastes worlds better than any store-bought offering.
- It relies on simple pantry staples you likely have right now.
- The topping is genuinely buttery and soft, not hard or dry.
- It’s perfect when you need a delicious dessert without a huge time commitment.
If you enjoy baked goods that bring that farmhouse feeling, you should check out more of my favorite dessert recipes!
Quick Apple Dessert Recipe Ready in Under an Hour
That’s right! When that craving hits for a Warm Apple Dessert, you don’t want to wait three hours, do you? This entire recipe—from peeling apples to pulling out that bubbly, golden delight—comes together in about 60 minutes total time. The filling is mixed up in minutes, and while the cobbler bakes, you can clean up your workspace. It’s truly an ideal Quick Apple Dessert Recipe for a busy weeknight or a last-minute get-together.
Gathering Ingredients for Your Apple Cobbler Recipe
Now, nothing ruins a good baking session faster than realizing you’re missing something crucial halfway through! This recipe is very particular about the apples, and trust me, how you handle that butter for the topping is key to getting that amazing texture. Don’t worry, I’ve listed everything out clearly below so you can grab what you need easily. This combination creates that perfect balance of sweet spice and structure that makes this the Best Apple Cobbler Recipe.
Ingredients for the Tender Apple Filling
For the filling, you want apples that hold their shape but still get wonderfully soft while baking. I always suggest a mix of tart and sweet, so Granny Smith mixed with Honeycrisp is wonderful. You’ll need:
- 6 medium apples (Granny Smith or Honeycrisp are my favorites), peeled, cored, and sliced
- 1/2 cup granulated sugar
- 1/4 cup packed light brown sugar
- 1 tablespoon all-purpose flour (this keeps the juices from getting too watery)
- 1 teaspoon ground cinnamon
- 1/4 teaspoon ground nutmeg
- 1 tablespoon lemon juice
- 1/4 cup water
Ingredients for the Buttery Cobbler Topping
This is where the magic happens for that golden crust! For the biscuit-style topping, the temperature of your fat is the most important detail. Make sure everything here for the Buttery Cobbler Topping stays cold.
- 1 cup all-purpose flour
- 2 tablespoons granulated sugar
- 1 teaspoon baking powder
- 1/4 teaspoon salt
- 1/2 cup (that’s one full stick!) cold unsalted butter, cut into tiny little pieces
- 1/3 cup buttermilk
- 1 tablespoon coarse sugar (for sprinkling on top for crunch!)
Step-by-Step Instructions for This Apple Cobbler Recipe
Alright, let’s get baking! Since I spent years helping little ones follow directions in the classroom, I promise these steps are laid out so clearly that you won’t have a single question. It’s really a breeze to make this apple cobbler recipe by splitting the work between the fruit down below and the biscuit topping up top. Just stick right with me, and you’ll have a spectacular dessert ready in no time. You can even check out some of my quick breakfast recipes to see how I approach straightforward cooking!
Preparing the Apples and Oven
First things first, we need to get things hot! Go ahead and preheat your oven to 375°F (190°C). While that’s warming up, lightly grease the dish you’re using—a 9-inch square dish works perfectly. Now for the apples! In a big bowl, toss those lovely slices with both sugars, flour, cinnamon, nutmeg, and lemon juice. Make absolutely sure every single slice is coated well so you get that beautiful, deep Cinnamon Apple Cobbler flavor throughout the whole filling.
Once they look good and coated, spread that apple goodness evenly into your prepared pan. Then, just sprinkle that 1/4 cup of water right over the top. That little splash helps steam things up just enough to get the apples tender.
Making the Buttermilk Cobbler Topping
While your apples are chilling out in the dish, we whip up the topping. In a separate bowl, whisk together the 1 cup of flour, 2 tablespoons of sugar, baking powder, and salt. This is my favorite part for achieving that tender texture: take your very cold, cut-up butter and work it into the flour mixture. You want it to look like coarse crumbs, with some small, pea-sized pieces of butter still visible. Don’t melt it with your hands! Those chunks are what create flaky pockets in your Buttermilk Cobbler Topping.
Next, pour in the buttermilk and stir *just* until everything comes together into a shaggy mound. Please, please, please promise me you won’t overmix this dough! We want it rustic, not smooth.
Assembly and Baking the Apple Cobbler Recipe
Now it’s time to assemble our apple cobbler recipe! Take spoonfuls of that biscuit dough and drop them evenly right over the apple filling. Don’t feel like you need to cover every inch; gaps are good! Those openings let the fruit bubble up nicely. Finally, sprinkle the coarse sugar right over the top of the dough. Pop it into that 375°F oven and bake it for about 35 to 45 minutes. You are looking for two signs of perfection: the topping is golden brown, and you see that filling bubbling happily around the edges!
Tips for the Perfect Golden Crust Dessert
Getting that beautiful, crackly color on top of your cobbler isn’t just luck; it comes from respecting the ingredients, just like in any good Old Fashioned Apple Dessert. The single most important thing for that flaky, gorgeous crown is keeping your butter ice cold when you make your topping. Seriously, if the butter melts before it hits the oven, you end up with a dense, flatter crust instead of those lovely peaks.
When you cut the butter into the flour mixture, think quick hands! Overworking it warms everything up too fast. We want those defined little butter pieces remaining so they steam in the heat, creating those airy, flaky layers that characterize a truly special Golden Crust Dessert. Once you have those small chunks in there, handle the dough as little as possible when adding the buttermilk. It should look slightly messy and unformed when you drop those scoops onto the apples.
If you want to learn more about my philosophy on simple, reliable home cooking, you can always check out my About page!
Serving Suggestions for Your Warm Apple Dessert
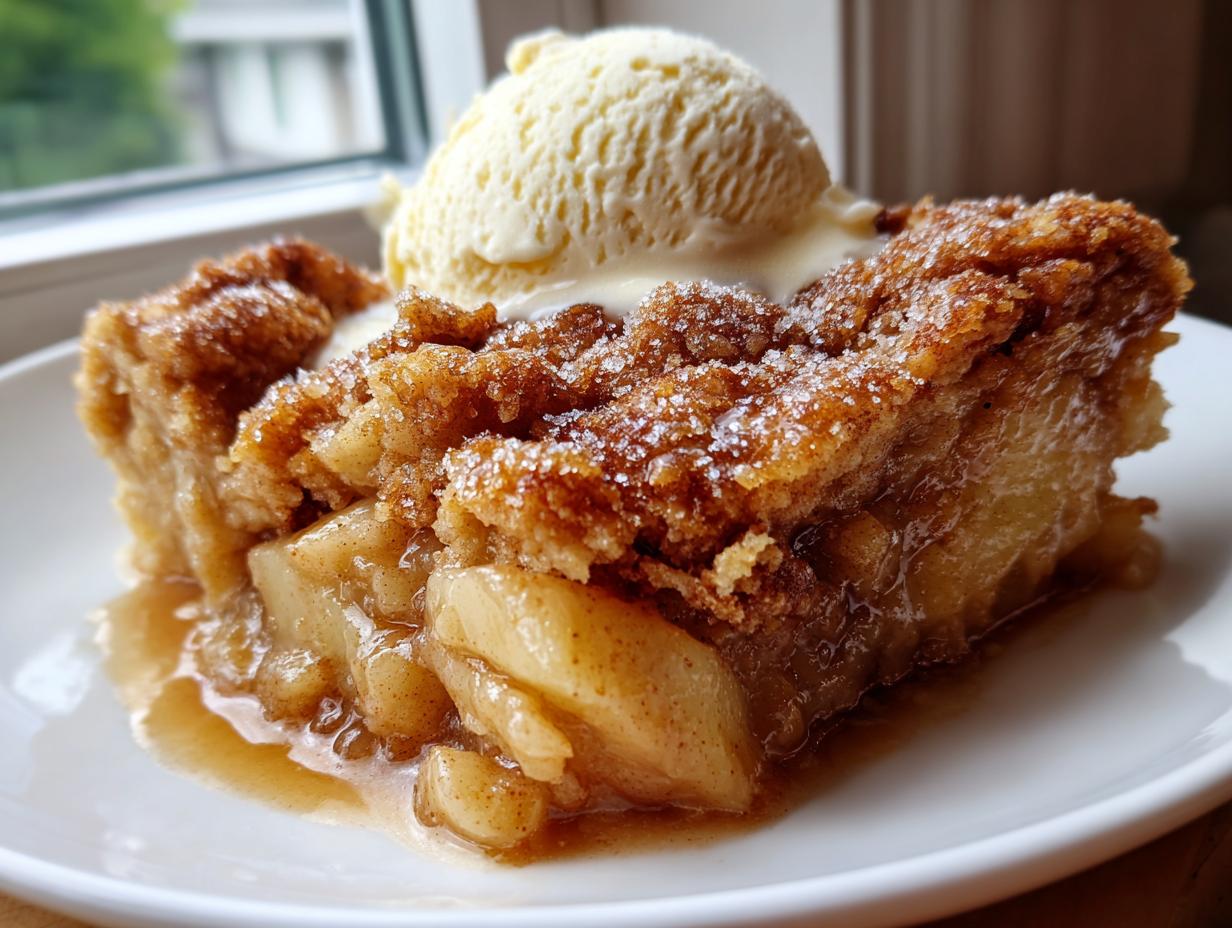
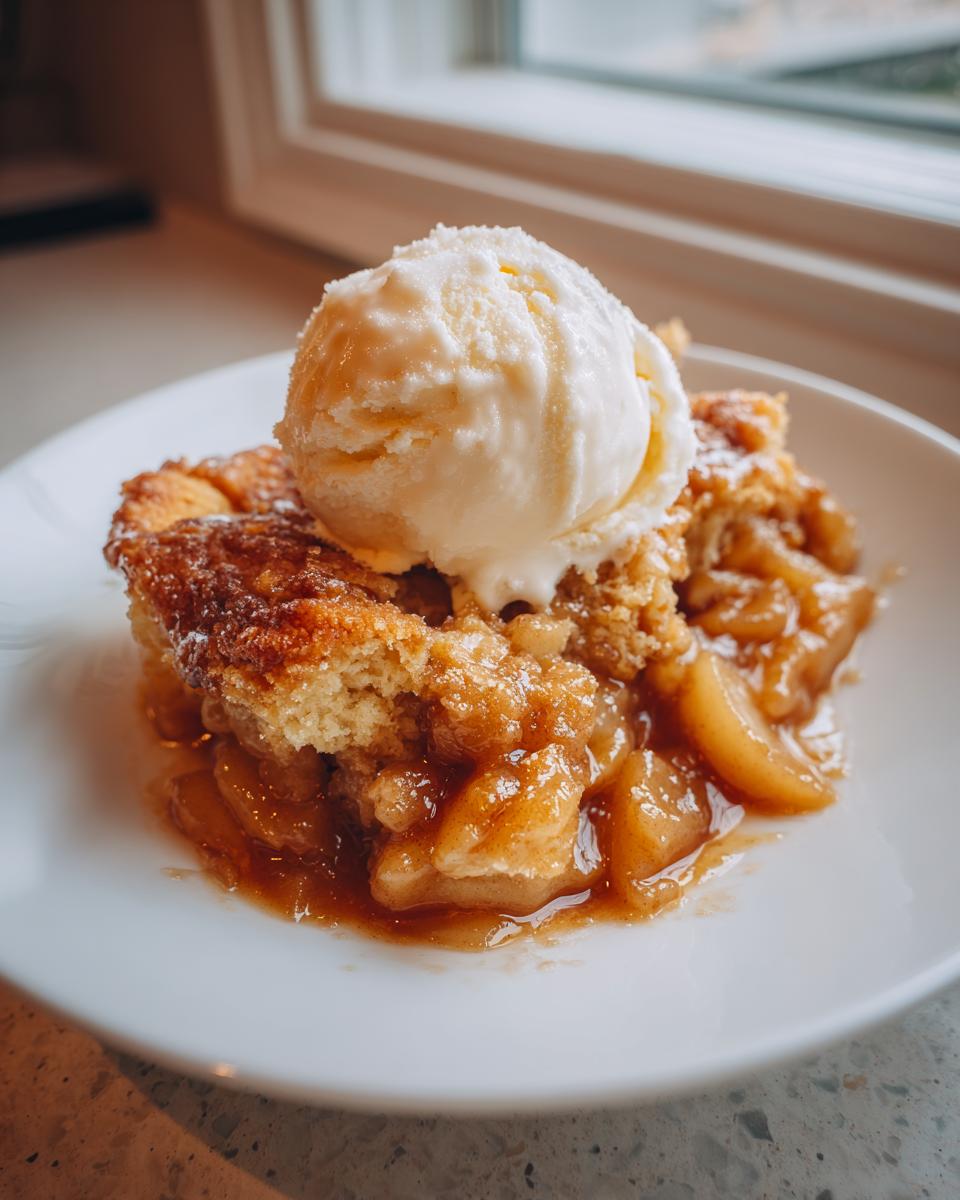
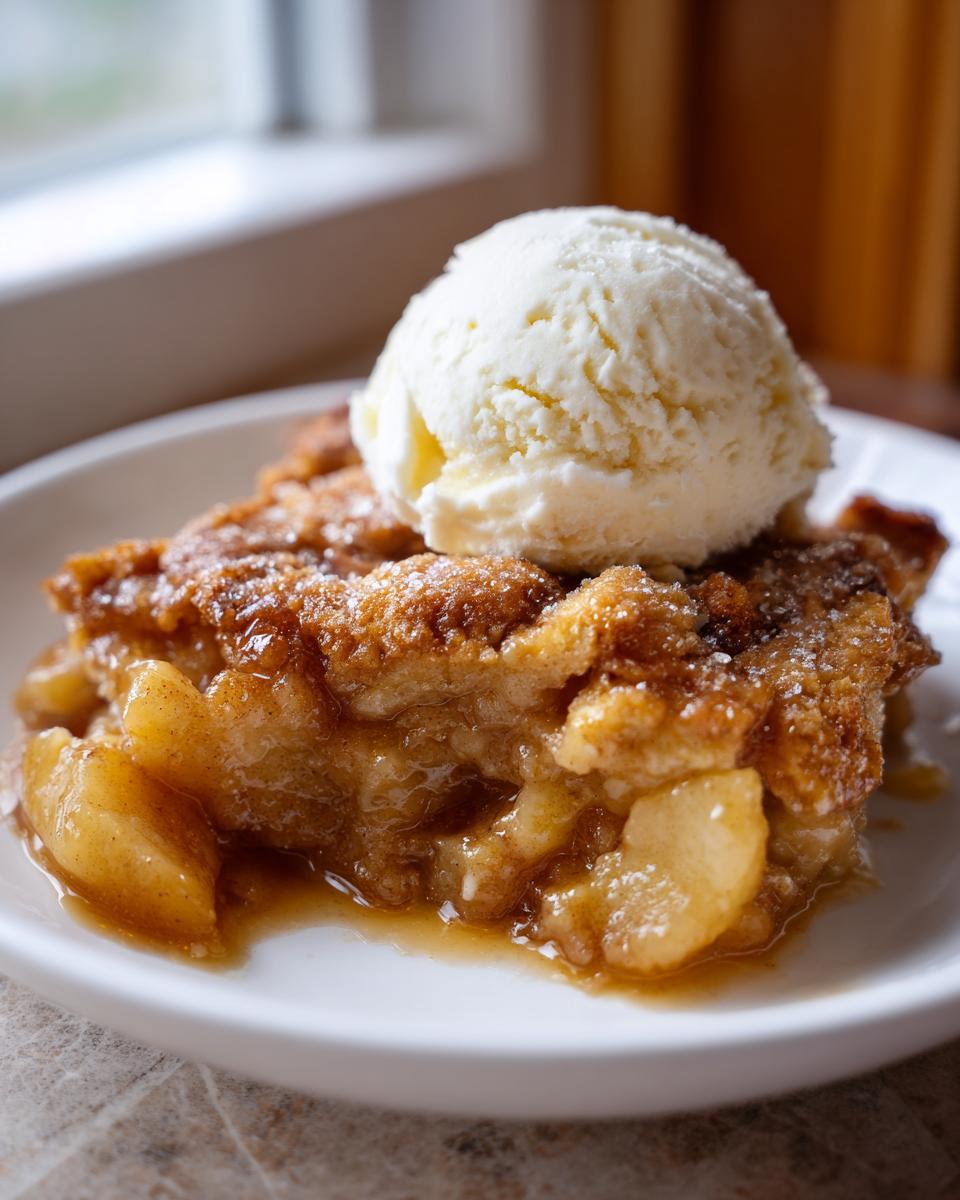
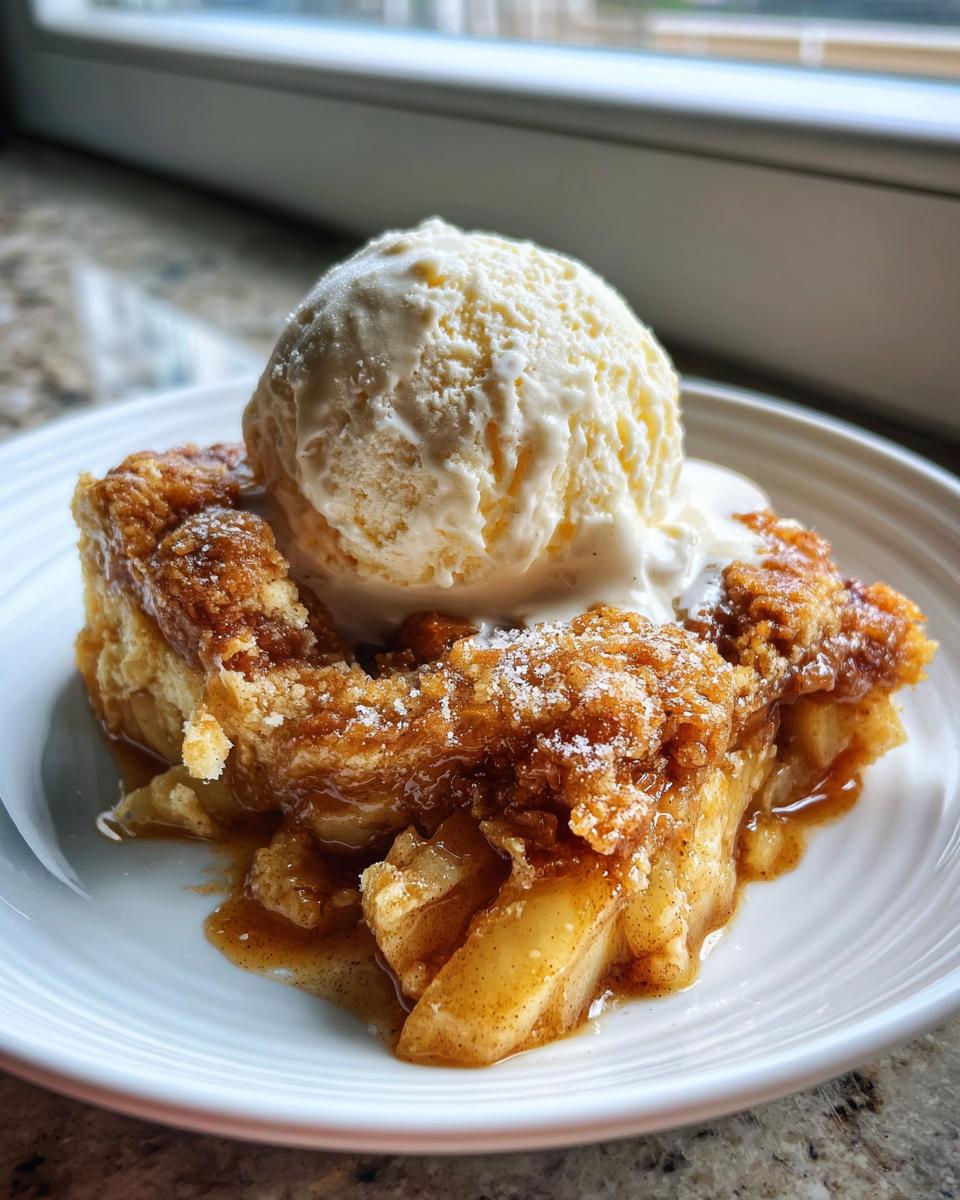
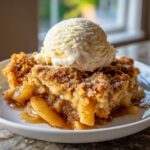
The best part about pulling this beautiful, bubbling cobbler out of the oven? Figuring out what to serve it with! This is designed to be the ultimate cozy hug in a bowl, an absolute must-have among Comfort Food Desserts. While it’s perfectly wonderful all by itself, you usually need a creamy contrast to the hot, spiced fruit.
My personal favorite—and the way my grandkids always request it—is warm with a very generous scoop of vanilla ice cream right on top. The way that cold, creamy ice cream melts instantly into the hot juice is just heavenly! It turns this simple recipe into a real showstopper. If you want something a bit different for a change, you could always try topping it with whipped cream or even a drizzle of caramel sauce. For more ideas on simple treats, take a peek at my pudding recipe!
Storage and Reheating: Keeping Your Apple Cobbler Recipe Fresh
Oh, we almost never have leftovers because this apple cobbler recipe disappears so fast! But when we do, properly storing it is important so that topping stays nice. You can keep any remaining cobbler covered tightly on the counter for about a day, but for longer storage, use the fridge. It stays good in there for up to four days.
When you want to reheat it—and you absolutely should, because this is best served warm!—skip the microwave if you care about that lovely texture. The microwave heats it up, sure, but it makes the biscuit topping soggy fast. Instead, pop it into a 350°F oven for about 10 to 15 minutes. This brings back that warm, comforting feeling and keeps the crust from losing its beautiful structure. That way, you still get that lovely Golden Crust Dessert experience the next day!
Frequently Asked Questions About This Apple Cobbler Recipe
I know sometimes when you follow a new recipe, little questions pop up right before you start mixing. That’s completely normal! I’ve collected a few of the things folks ask me most often about making this irresistible dessert. If you still have questions after reading through, feel free to reach out to me on my contact page!
Can I use pre-made pie crust instead of the biscuit topping in this apple cobbler recipe?
You absolutely *can*, but you’ll completely change the dessert! This recipe is special because of that soft, cakey biscuit topping that gets wonderfully golden on top. If you use a pre-made pie crust, you’re essentially making an apple pie with a bottom crust and a top crust—it’s delicious, but the texture is entirely different from an authentic, biscuit-style cobbler. For the intended result of this apple cobbler recipe, I really encourage you to try the simple biscuit method!
What are the best apples for an Easy Apple Cobbler?
The best apples are the ones that give you a bit of tang to cut through all that lovely sugar and spice. Granny Smith apples are my dependable workhorse here because they stay firm when baked. However, if you like something a tiny bit sweeter, using Honeycrisp or Braeburn works beautifully too. For the absolute best flavor in an Easy Apple Cobbler, I mix half tart apples and half firm, sweet apples. That way, the filling doesn’t turn mushy, and you get a complex flavor profile.
How do I prevent the bottom apples from being too watery in my apple cobbler recipe?
This is a common worry, especially with juicy apples! The primary defense mechanism we use in this apple cobbler recipe is adding that tablespoon of all-purpose flour right into the apple mixture when you toss them with the sugar. That flour soaks up extra liquid released by the fruit during baking, thickening those juices into a nice, luxurious sauce instead of pool of water at the bottom of your dish. Also, make sure you aren’t adding any extra water beyond the 1/4 cup listed!
Nutritional Estimates for This Classic Apple Cobbler Recipe
Now, whenever I bake one of my favorite Homemade Apple Cobbler recipes, I know folks want to have an idea of what they are eating, even when we are enjoying true comfort food! Keep in mind that these numbers are just estimates, based on the standard recipes and measurements provided. Since we are using real butter and sugar here, it’s a treat, not a daily requirement, bless its heart!
But for those times you want to know exactly what’s in that scrumptious slice, here is what we come up with per serving size:
- Calories: 380
- Fat: 18g (Be indulgent, that’s the butter working its magic!)
- Carbohydrates: 55g
- Protein: 5g
- Sugar: 35g
This is based on dividing the recipe into the standard 6 servings, as listed in the recipe details. If you serve it with a huge scoop of vanilla ice cream, that number will certainly climb, but that’s part of the fun of a great Warm Apple Dessert, isn’t it? Enjoy every bite!
Share Your Homemade Apple Cobbler Experience
Well friends, that’s all there is to it! I truly hope you enjoyed making this wonderfully easy and delicious apple cobbler recipe. If this Sweet and Simple Cobbler brought some cozy light into your kitchen, please let me know! I absolutely love hearing from you—did you stick to the biscuit topping, or did you sneak in something extra? Go ahead and leave me a rating below (I always appreciate those five stars!) and tell me all about your experience in the comments. Maybe you even used a recipe from my appetizer collection to start your evening!
PrintThe Ultimate Easy, Buttery Apple Cobbler Recipe with Cinnamon Biscuit Topping
Make this easy apple cobbler recipe for a warm, comforting dessert. It features tender, cinnamon-spiced apples under a rich, buttery biscuit topping. This homemade apple cobbler tastes better than store-bought and is perfect for cozy nights.
- Prep Time: 20 min
- Cook Time: 40 min
- Total Time: 60 min
- Yield: 6 servings 1x
- Category: Dessert
- Method: Baking
- Cuisine: American
- Diet: Vegetarian
Ingredients
- 6 medium apples (like Granny Smith or Honeycrisp), peeled, cored, and sliced
- 1/2 cup granulated sugar
- 1/4 cup packed light brown sugar
- 1 tablespoon all-purpose flour
- 1 teaspoon ground cinnamon
- 1/4 teaspoon ground nutmeg
- 1 tablespoon lemon juice
- 1/4 cup water
- 1 cup all-purpose flour (for topping)
- 2 tablespoons granulated sugar (for topping)
- 1 teaspoon baking powder
- 1/4 teaspoon salt
- 1/2 cup (1 stick) cold unsalted butter, cut into small pieces
- 1/3 cup buttermilk
- 1 tablespoon coarse sugar (for sprinkling)
Instructions
- Preheat your oven to 375°F (190°C). Lightly grease a 9-inch square baking dish or a similar-sized casserole dish.
- In a large bowl, combine the sliced apples, granulated sugar, brown sugar, 1 tablespoon flour, cinnamon, nutmeg, and lemon juice. Toss gently until the apples are evenly coated.
- Pour the apple mixture into the prepared baking dish. Sprinkle the water evenly over the apples.
- Prepare the topping: In a separate medium bowl, whisk together the 1 cup flour, 2 tablespoons sugar, baking powder, and salt.
- Cut in the cold butter using a pastry blender or your fingertips until the mixture resembles coarse crumbs with some pea-sized pieces of butter remaining.
- Pour the buttermilk over the flour mixture and stir just until a shaggy dough forms. Do not overmix.
- Drop spoonfuls of the biscuit dough evenly over the apple filling. The topping does not need to cover the apples completely; gaps are fine.
- Sprinkle the coarse sugar over the topping.
- Bake for 35 to 45 minutes, or until the topping is golden brown and the apple filling is bubbly and tender when pierced with a fork.
- Let the apple cobbler cool on a wire rack for at least 15 minutes before serving. Serve warm with vanilla ice cream.
Notes
- For the best results with the topping, make sure your butter is very cold when you cut it into the dry ingredients.
- If you prefer a slightly tangier filling, use Granny Smith apples exclusively.
- Serve this warm apple dessert with a scoop of vanilla ice cream for the ultimate comfort treat.
Nutrition
- Serving Size: 1 serving
- Calories: 380
- Sugar: 35
- Sodium: 250
- Fat: 18
- Saturated Fat: 11
- Unsaturated Fat: 7
- Trans Fat: 0
- Carbohydrates: 55
- Fiber: 3
- Protein: 5
- Cholesterol: 45