
There’s just something about the aroma of cinnamon and sweet dough wafting from the oven that says, “Welcome home,” isn’t there? While I teach a few wonderful recipes that use commercial yeast—and I love them dearly—nothing beats the deep, complex satisfaction of using our natural yeast for a truly special treat. This recipe for sourdough cinnamon swirl bread is my absolute favorite way to use an active starter because it creates this wonderful, soft crumb that perfectly cradles that spiced, buttery ribbon inside. It strikes that perfect chord: a little bit of that delightful sourdough tang balancing out all that sweet goodness. If you’ve been looking for a way to use up that bubbling starter, be sure to check out my recipe for sourdough discard cinnamon rolls, but honestly, when this loaf comes out of the oven, my grandchildren know exactly what kind of special occasion is starting, even if it’s just a regular Tuesday!
- Why This Sourdough Cinnamon Swirl Bread is a Kitchen Favorite
- Gathering Ingredients for Your Sourdough Cinnamon Swirl Bread
- Step by Step Sourdough Cinnamon Swirl Bread Instructions
- Tips for the Best Homemade Cinnamon Swirl Sourdough
- Troubleshooting Common Sourdough Cinnamon Swirl Bread Issues
- Serving Suggestions for Your Tangy Sweet Sourdough Loaf
- Storage and Reheating Your Sourdough Cinnamon Swirl Bread
- Frequently Asked Questions About This Artisan Sourdough Sweet Bread
- Sharing Your Sourdough Cinnamon Swirl Bread Creations
Why This Sourdough Cinnamon Swirl Bread is a Kitchen Favorite
When I share a recipe, it’s because I know it works, and this sourdough cinnamon swirl bread is no exception! It’s reliable, beautiful, and tastes like it took days to make, even though the timeline is quite manageable in a loaf pan. It truly stands out on the breakfast table.
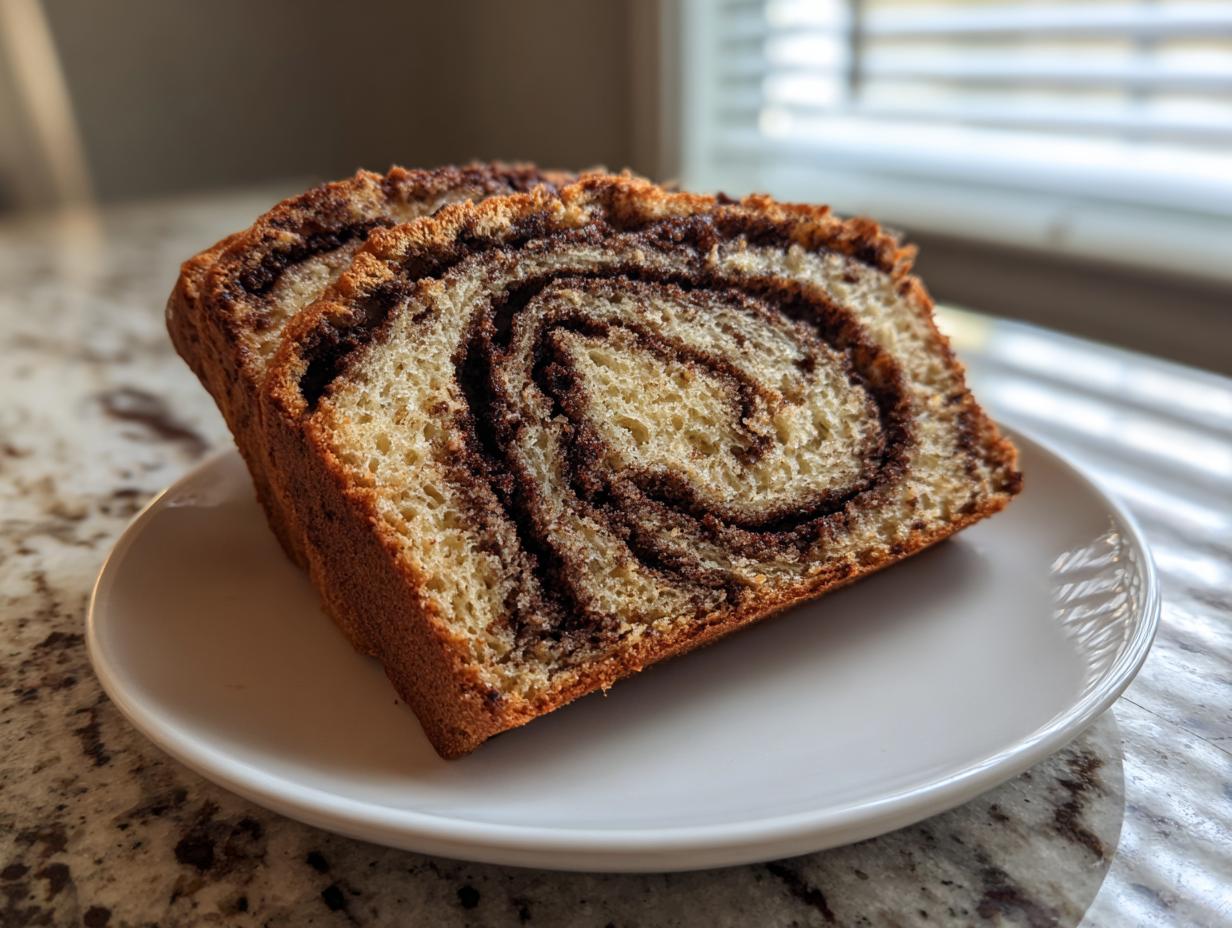
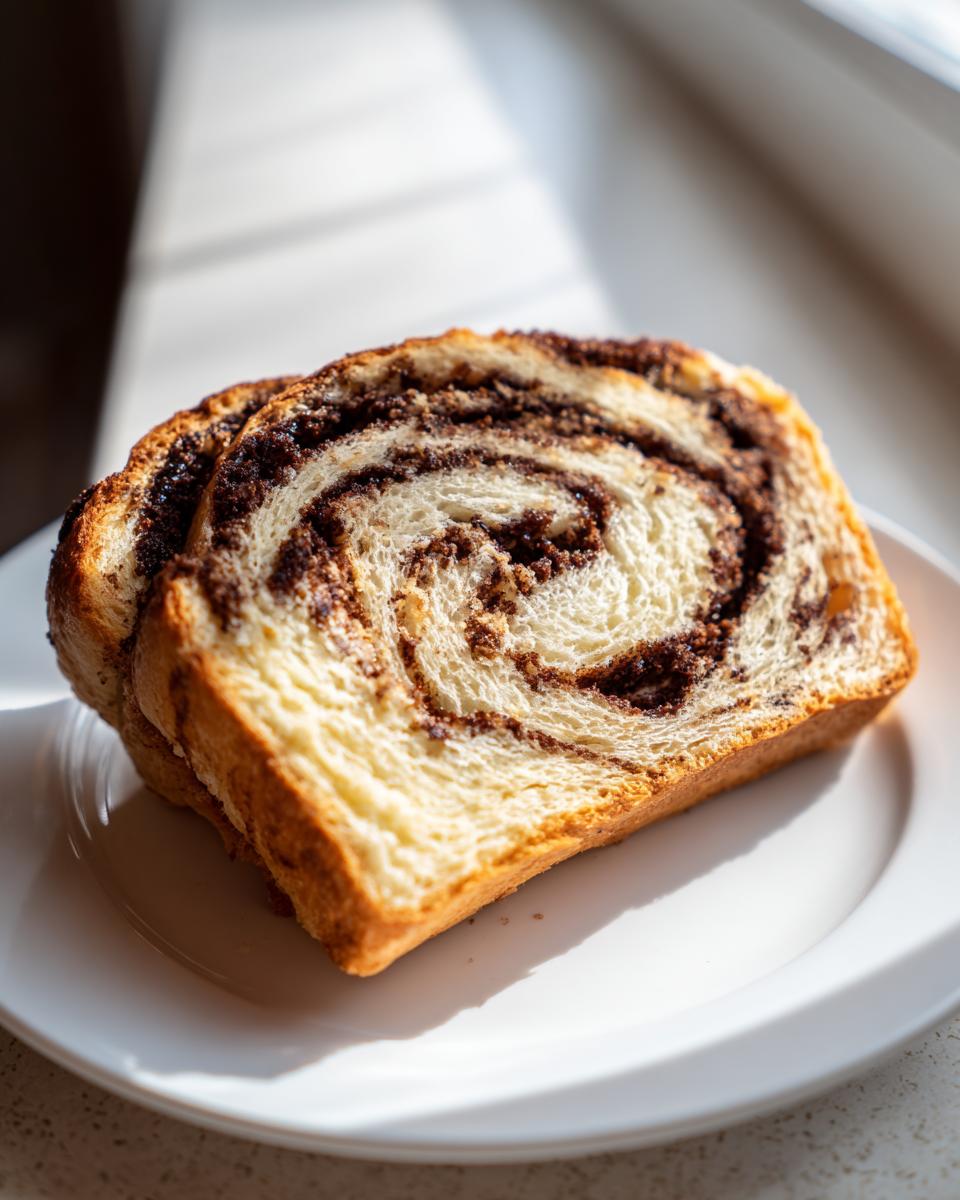
- The beautiful ribbon of filling makes every slice look artisanal.
- Using natural yeast lends a lovely, complex depth of flavor to the sweet dough.
- It has a soft texture that holds up beautifully for sandwiches or toasting.
If you love a sweet brunch treat, you should also check out my recipe for a cinnamon roll casserole!
Balancing Tang and Sweetness in Your Sourdough Cinnamon Swirl Bread
One thing folks worry about with our natural yeast breads is getting too much sourness, especially when we add sugar! That’s why I specify using a starter that’s been fed about six hours before mixing. It’s active, giving us the lift we need, but it hasn’t taken on that super sharp, acidic edge yet. The 50 grams of granulated sugar in the dough, combined with that rich brown sugar in the filling, perfectly counteracts any residual tang. You get flavor, not face-puckering sourness!
Gathering Ingredients for Your Sourdough Cinnamon Swirl Bread
When you gather your supplies for this beautiful bake, precision really helps us set up for success. I always lay everything out on the counter—what we call mise en place—before I even think about mixing, especially when working with sourdough! Having all these components ready means we can focus purely on technique when it’s time to mix and fold. Don’t forget to check out my recipe for easy cinnamon butter if you want an extra treat for the finished bread!
For the Tangy Sweet Sourdough Loaf Base
Remember, the heartbeat of this bread is your starter. It absolutely must be active and bubbly when you measure it out! This lets us know it has the strength to lift that rich, sweet dough evenly.
- 100g active sourdough starter (fed 4-6 hours prior)
- 350g warm water (about 90°F)
- 500g bread flour
- 10g fine sea salt
- 50g granulated sugar
- 50g unsalted butter, softened
- 1 large egg
Crafting the Perfect Cinnamon Sugar Filling for Sourdough Cinnamon Swirl Bread
This filling is what makes the loaf so irresistible! The key here is making sure you use soft butter; cold, hard butter rips the dough when you try to spread it across the rectangle. We want smooth layers for the best sourdough cinnamon swirl bread.
- 150g packed light brown sugar
- 2 tablespoons ground cinnamon
- 100g unsalted butter, softened
Step by Step Sourdough Cinnamon Swirl Bread Instructions
Now for the fun part! Making this dough structure strong enough to hold all that wonderful filling takes just a little bit of focused attention in the first few hours. Don’t rush anything once the dough is mixed, and trust the process—even if it feels a little sticky to start with. If you need a refresher on keeping your natural yeast happy, take a look at my sourdough starter guide for beginners. Honestly, getting the structure right in this bread is just as important as getting the filling right—it’s what keeps those nooks and crannies from collapsing! For tips on structure, you might also want to look at my guide for the best homemade English muffin texture; the folding principles overlap!
Mixing and Developing the Sourdough Cinnamon Swirl Bread Dough
First things first, make sure that starter of yours has peaked and is ready to go! In your big bowl, gently mix the active starter, warm water, flour, salt, sugar, softened butter, and egg. We aren’t kneading yet; we just want everything incorporated. Cover that up and let it rest for 30 minutes—that’s our autolyse rest. After that short break, we’ll develop strength with four separate sets of stretch and folds, spaced 30 minutes apart. After that last fold set, let the dough hang out for an hour or two until you see it grow by about 30%. That means it has enough strength for the swirl!
Applying the Cinnamon Sugar Filling and Shaping the Sourdough Loaf Pan
This is where we create those gorgeous ribbons! On a lightly floured surface, gently pat or roll your dough into a rectangle about 10 inches by 14 inches. Take those 100g of softened butter and spread it evenly, but try to leave a small, clean half-inch border along one of the long sides—this helps seal things up tight. Then, shower the buttered area evenly with your cinnamon-sugar mix. Starting from the side opposite the clean border, roll the dough up very tightly into a long log. Pinch that seam closed firmly! Then, gently tug the log a bit so it fits snugly into your greased 9×5 inch loaf pan, seam-side down. You want that seam to anchor itself on the bottom.
Proofing and Baking Your Sourdough Cinnamon Swirl Bread
Cover the pan loosely and let your loaf proof for 1 to 3 hours until it’s nearly doubled. You must pass the poke test: when you gently poke the side, the dent should slowly, slowly spring back halfway. If it springs back fast, it needs more time! Preheat your oven to 375°F (190°C). Bake it for 35 to 45 minutes. If the top starts looking too dark before the time is up—and it often does with the sugar content—just throw a piece of aluminum foil loosely over the top. When the internal temperature hits 200-205°F, you’re done! Get it out of that hot pan immediately so the bottom crust doesn’t get gummy; cooling on a wire rack is non-negotiable, trust me!
Tips for the Best Homemade Cinnamon Swirl Sourdough
Even though this recipe is very dependable, those little expert touches can take your sourdough cinnamon swirl bread from ‘great’ to ‘unforgettable.’ I always rely on the original notes my mother taught me, but over the years of teaching classes, I’ve picked up a few tricks of the trade that really help make those swirls pop!
For instance, if you really struggle to get those clean separation lines between the dough and the swirl when you slice it, try this: after the dough has finished its first bulk fermentation (that’s after the four stretch and folds and the initial rise), pop the whole bowl covered into the refrigerator for just 30 minutes. That chilling firms up the dough just enough so when you roll it out for the filling application, it doesn’t stretch too thin and blend the layers together. It gives you a much more distinct, marbled sourdough bread recipe look!
Also, don’t forget to treat your baked loaf gently right at the end. If you leave it sitting in that hot pan, the residual heat steams the crust and makes the bottom gummy. You need that immediate transfer to the cooling rack!
Do you love swirled breads? When I make a chocolate version, I use a technique similar to what I saw in my chocolate babka recipe instructions!
Sourdough Loaf Pan Baking Guide Secrets
Baking in a loaf pan, especially with richer sourdough dough, needs a few tricks specific to that environment. First, don’t be shy with the grease! Make sure that 9×5 inch pan is thoroughly greased—I use softened butter or my homemade cake goop—to ensure everything releases cleanly later on. You’re trying to bake this artisan sourdough sweet bread like a cake, where sticking is the enemy.
When it’s proofing, use a loose cover—a damp kitchen towel works wonderfully—because you need airflow but you don’t want the top to dry out and form a skin, which would stop the rise! Once it comes out of the oven at that perfect 200-205°F internal temperature, the most important part of the entire sourdough loaf pan baking guide is this: tip that baked loaf out onto a wire rack right away. Don’t let it touch the bottom of the pan for a second longer! That wire rack allows air to circulate underneath, setting the crust and preventing that disappointing, dense layer you get on the bottom of some beautiful loaves.
Troubleshooting Common Sourdough Cinnamon Swirl Bread Issues
Oh, my dear bakers! Even the best recipes have moments where the dough seems to have a mind of its own. Don’t you worry one bit if your sourdough cinnamon swirl bread doesn’t look exactly like the picture the first time. Sourdough is living, breathing alchemy, and sometimes it needs a little adjusting!
The most common heartbreak is a flat loaf, which usually comes back to two things: you either didn’t have a truly active starter, or you didn’t develop enough strength during the mixing phase. If your starter only looks mildly bubbly even after feeding, it won’t have the power to lift all that rich dough and heavy filling. Next time, wait a bit longer for that double-in-size lift pre-mix! For this recipe, we need that power early on to support the swirl.
If your bread seemed baked through but the crumb is dense and gummy—especially near the bottom—that usually means it sat in that hot loaf pan too long after coming out of the oven. Remember what I said about that wire rack? Get it out right away! The dough might also feel overly developed or like it’s tearing during the shaping stage, which signals you might have overdeveloped the gluten during those stretch and folds. If that happens, just try to be gentler with your rolling next time, or try chilling the dough as I mentioned before.
If you ever need more general advice on strengthening your dough, I have a lovely guide on sweet Alabama pecan bread that walks through developing structure for sweet loaves, using similar principles.
Serving Suggestions for Your Tangy Sweet Sourdough Loaf
Once this beautiful loaf has cooled completely—and I know that is the hardest part—it begs to be served right away! This is one of those breads that shines all on its own, no fancy toppings required, but I do have a few favorite ways to enjoy it at our house.
Since this is one of my favorite sourdough breakfast bread recipes, it pairs perfectly with a piping hot mug of drip coffee in the morning. The slight tang cuts right through the richness of the coffee beans. If you’re slicing it thin and toasting it up, the nooks and crannies get so wonderfully crisp!
For a real treat, you have to try spreading it with a good quality softened butter. Even better? Use my recipe for easy cinnamon butter whipped up with a little extra vanilla. That doubles down on the spice and moisture in the best way possible.
If you find yourself with leftover slices that didn’t quite make it to breakfast, they are fantastic lightly warmed up and served alongside my recipe for fluffy, old-fashioned pancakes! It makes for a truly indulgent brunch spread. Honestly, though, a simple smear of cream cheese on a warm slice is pure heaven; the coolness of the cheese contrasts beautifully with that warm, gooey cinnamon swirl inside.
Storage and Reheating Your Sourdough Cinnamon Swirl Bread
The patience required to bake a perfect loaf shouldn’t stop once it leaves the oven! Getting the storage right ensures your beautiful sourdough cinnamon swirl bread tastes just as wonderful on day three as it did on day one. The absolute biggest rule, one I repeat to my grandkids every time they try to cut into a warm loaf, is this: you must let this bread cool completely before slicing it!
When you slice warm bread with gooey fillings, the steam gets trapped between the crumb and the filling, creating that gummy texture we desperately want to avoid. Let it cool on the wire rack for at least two hours, or until it’s barely warm to the touch. Once it’s fully cooled, wrap the entire loaf tightly. I usually use plastic wrap first, then slip the whole thing into a zip-top bag or an airtight container. Stored this way on the counter, it stays wonderfully soft for about three days.
If you know you won’t get through it that fast, my advice is always to slice it first, *then* wrap it well, and pop those individual slices into the freezer. When you want a slice, just pull one out! Reheating is simple: pop a frozen slice into the toaster on a medium setting, or wrap it loosely in foil and heat it in a 300°F oven for about five minutes. That gentle heat warms the butter and sugar just enough to bring back that fresh-out-of-the-oven, soft, tangy sweet experience. It’s the best way to enjoy this no-commercial-yeast beauty!
Frequently Asked Questions About This Artisan Sourdough Sweet Bread
When you bake something new, especially one that uses that lovely natural yeast like this artisan sourdough sweet bread, you always have questions! That’s perfectly normal. I’ve gathered some of the common ones I get about keeping this recipe straightforward and delicious.
Can I use a less active starter for this sourdough cinnamon roll bread recipe?
You certainly can, but it changes the result slightly! A less active, or older, starter means lower initial lift, so your final proofing time will be much longer, maybe even requiring a cold retard overnight. The upside? You’ll get a much milder tang. If you want that beautiful, noticeable tang, stick to the starter fed 4–6 hours prior. This recipe is designed to shine as a tangy sweet sourdough loaf, not an overtly sour one.
What is the best sourdough bread swirl technique to prevent the filling from leaking out?
This is all about sealing the deal before it hits the oven! The best technique is exactly what we did in the instructions: roll the dough very tightly from the long edge and make sure you properly pinch that final seam closed—really press it down with your thumb and forefinger until it feels secure. Then, crucially, place the loaf seam-side down in the pan. If you skip the final pinch or place it seam-side up, the filling just melts out the side during the final proof or bake.
How do I make this a marbled sourdough bread recipe instead of distinct layers?
If you prefer that gentle, soft marbling over clear ribbons, you have to change how you incorporate the filling! Instead of rolling the dough tightly into a log, you would gently fold it over itself, perhaps just twice more after spreading the butter and sugar. You are aiming to incorporate the filling into the dough mass rather than wrapping it around something solid. This gentle folding technique, which is a bit closer to what’s used in my no commercial yeast cinnamon bread recipe if you were folding that dough, gives you a softer, more integrated texture throughout the crumb.
Sharing Your Sourdough Cinnamon Swirl Bread Creations
Now that you have a beautiful, warm, and aromatic loaf sitting on your counter, I truly hope you enjoy every single bite! Baking is a journey, and seeing how your results turned out makes my day. The appearance of that swirl, the softness of the crumb—it all tells a story of your time spent kneading and waiting!
I would absolutely love to hear what you think of this sourdough cinnamon swirl bread! Please take a moment down in the comments below to let me know how the recipe worked for you. Did you manage to get those fantastic, distinct layers in your swirl, or did it come out a little more integrated? Did you serve it with coffee or that homemade cinnamon butter I mentioned?
If you snapped a picture of your gorgeous loaf before anyone dug in, please share it! We have a wonderful community here, and I love seeing the bread you create at home. You can always tag me on social media if you prefer, or if you have any burning questions pop up later, feel free to reach out directly through my contact page. Happy baking, friends!
PrintSourdough Cinnamon Swirl Bread
A comforting, homemade sourdough loaf featuring a rich, sweet cinnamon swirl, perfect for breakfast or a snack.
- Prep Time: 30 min
- Cook Time: 45 min
- Total Time: 5 hr 45 min
- Yield: 1 loaf 1x
- Category: Baking
- Method: Baking
- Cuisine: American
- Diet: Vegetarian
Ingredients
- 100g active sourdough starter (fed 4–6 hours prior)
- 350g warm water (about 90°F)
- 500g bread flour
- 10g fine sea salt
- 50g granulated sugar
- 50g unsalted butter, softened
- 1 large egg
- For the Filling:
- 150g packed light brown sugar
- 2 tablespoons ground cinnamon
- 100g unsalted butter, softened
Instructions
- Feed your sourdough starter until it is bubbly and has at least doubled in size.
- In a large bowl, mix the active starter, warm water, bread flour, salt, granulated sugar, softened butter, and egg until just combined. This is the autolyse stage. Cover and let rest for 30 minutes.
- Perform four sets of stretch and folds, spaced 30 minutes apart, to develop the dough structure.
- After the final fold, let the dough rest, covered, at room temperature for 1 to 2 hours, or until it has increased in volume by about 30%.
- Prepare the filling: In a small bowl, mix the brown sugar and cinnamon thoroughly.
- Gently turn the dough out onto a lightly floured surface. Roll or pat the dough into a rough 10×14 inch rectangle.
- Spread the 100g of softened butter evenly over the dough surface, leaving a small half-inch border on one long edge.
- Sprinkle the cinnamon-sugar mixture evenly over the buttered surface.
- Starting from the long edge opposite the clean border, tightly roll the dough into a log. Pinch the seam closed.
- Gently stretch the log slightly to fit a greased 9×5 inch loaf pan. Place the log seam-side down in the pan.
- Cover the pan loosely with plastic wrap or a damp towel. Allow the dough to proof at room temperature for 1 to 3 hours, or until it has nearly doubled and passes the poke test (a gentle poke leaves an indentation that slowly springs back).
- Preheat your oven to 375°F (190°C).
- Bake the loaf for 35 to 45 minutes. If the top browns too quickly, loosely tent it with aluminum foil for the remainder of the baking time. The internal temperature should reach 200-205°F (93-96°C).
- Remove the bread from the pan immediately after baking and cool completely on a wire rack before slicing to set the crumb.
Notes
- For a less sour flavor, use a starter that was fed 6-8 hours before mixing, rather than one at its peak activity.
- If you prefer a very distinct swirl, chill the dough for 30 minutes after the first bulk fermentation before rolling out for the filling application.
- To achieve a soft crust, brush the top of the loaf with melted butter immediately after removing it from the oven.
Nutrition
- Serving Size: 1 slice
- Calories: 300
- Sugar: 25
- Sodium: 350
- Fat: 15
- Saturated Fat: 9
- Unsaturated Fat: 6
- Trans Fat: 0
- Carbohydrates: 38
- Fiber: 2
- Protein: 7
- Cholesterol: 45