
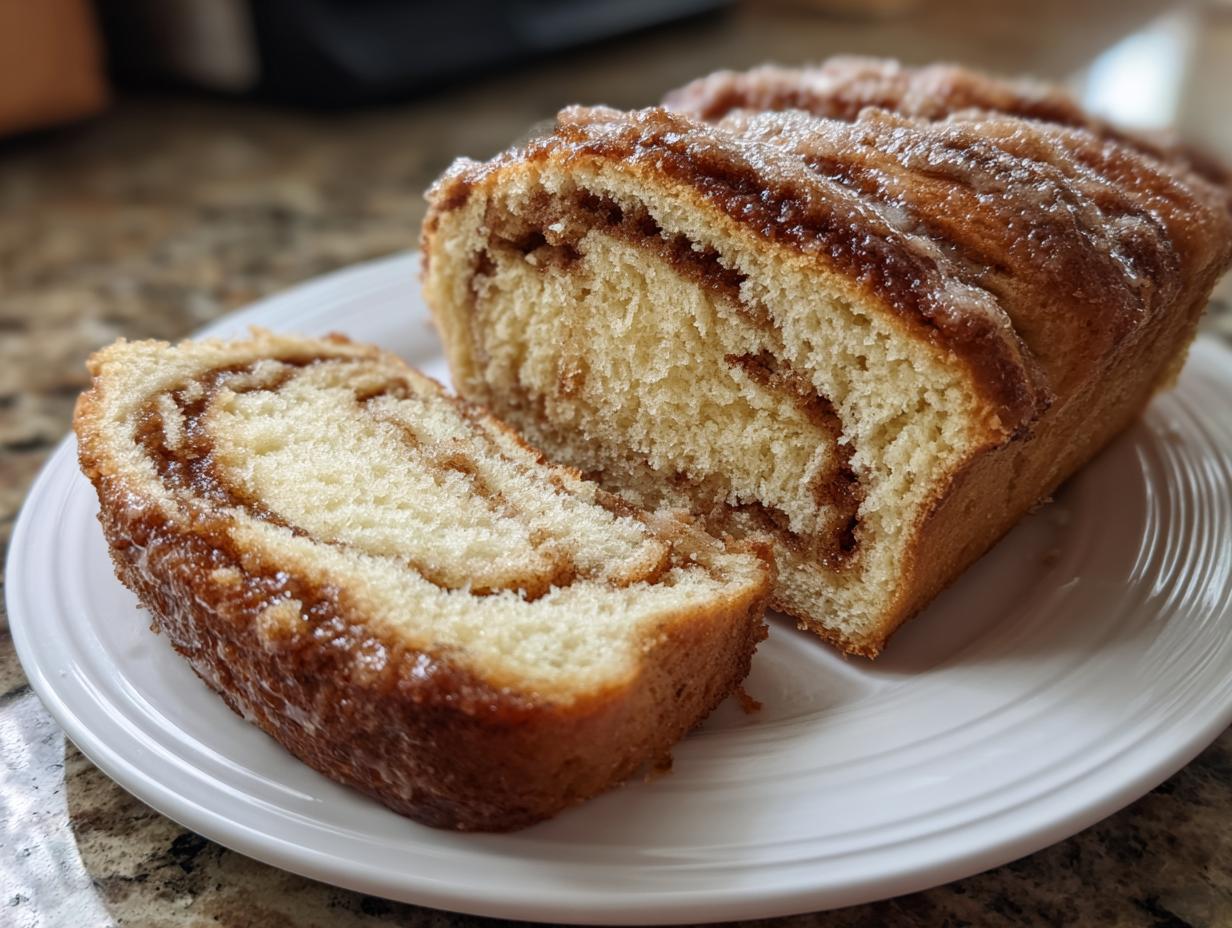
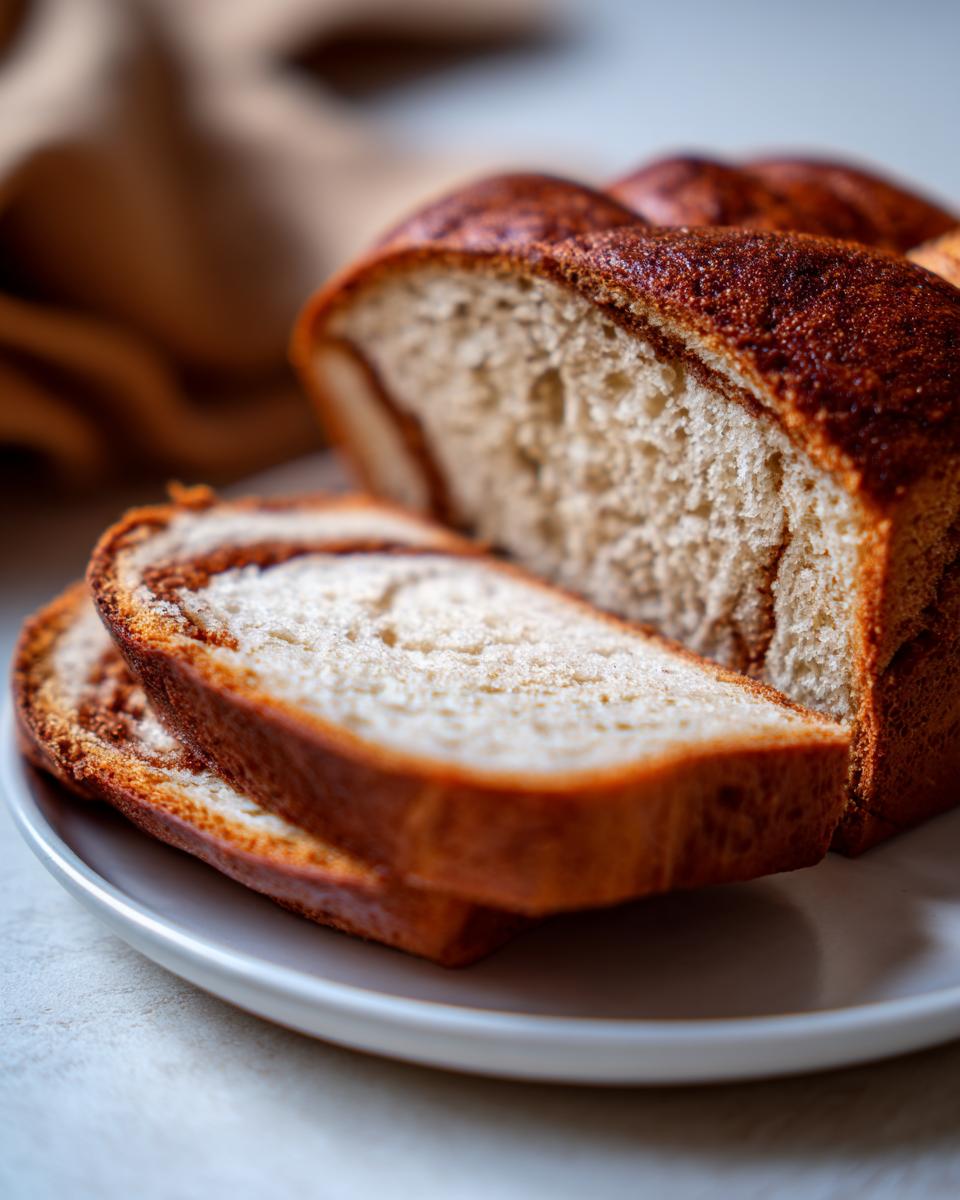
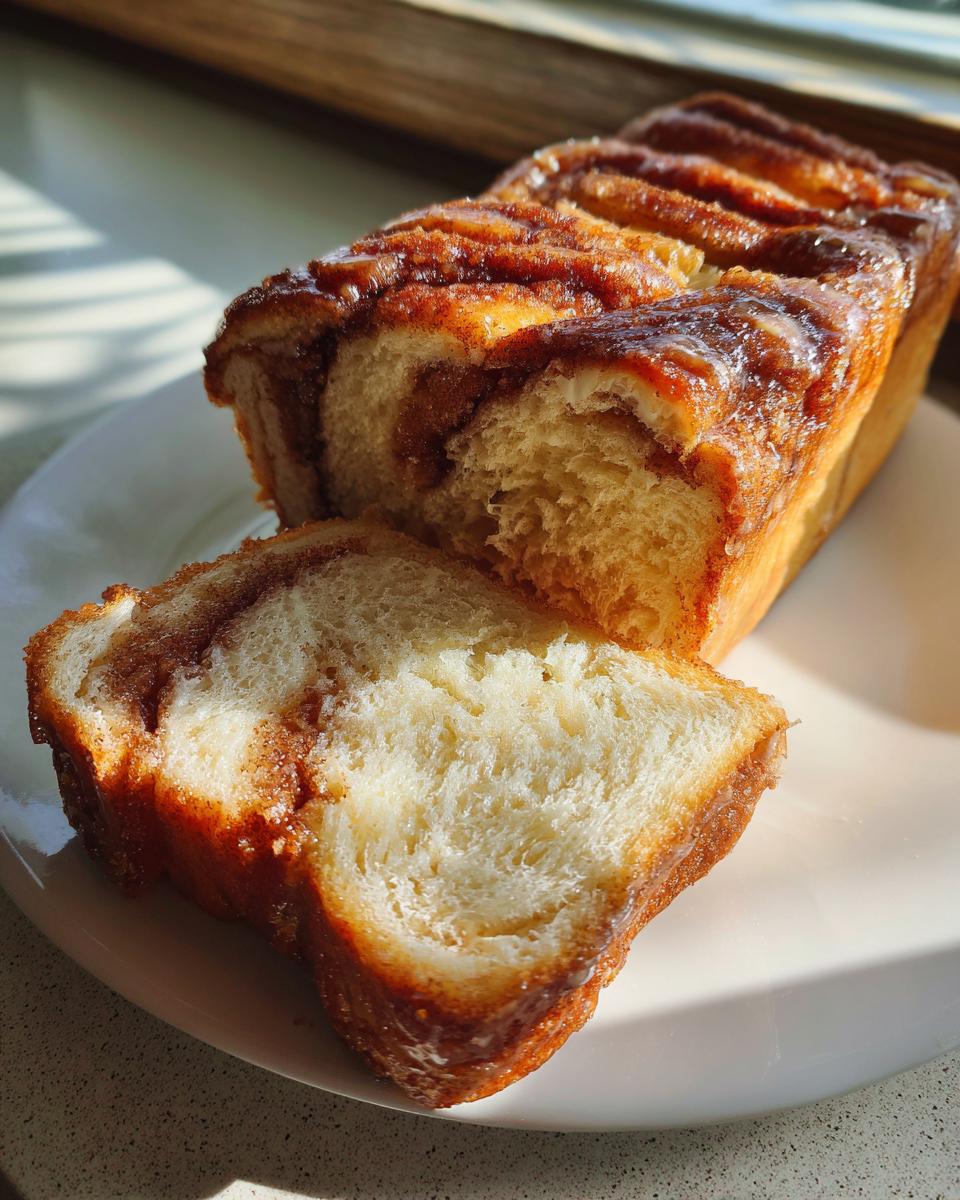
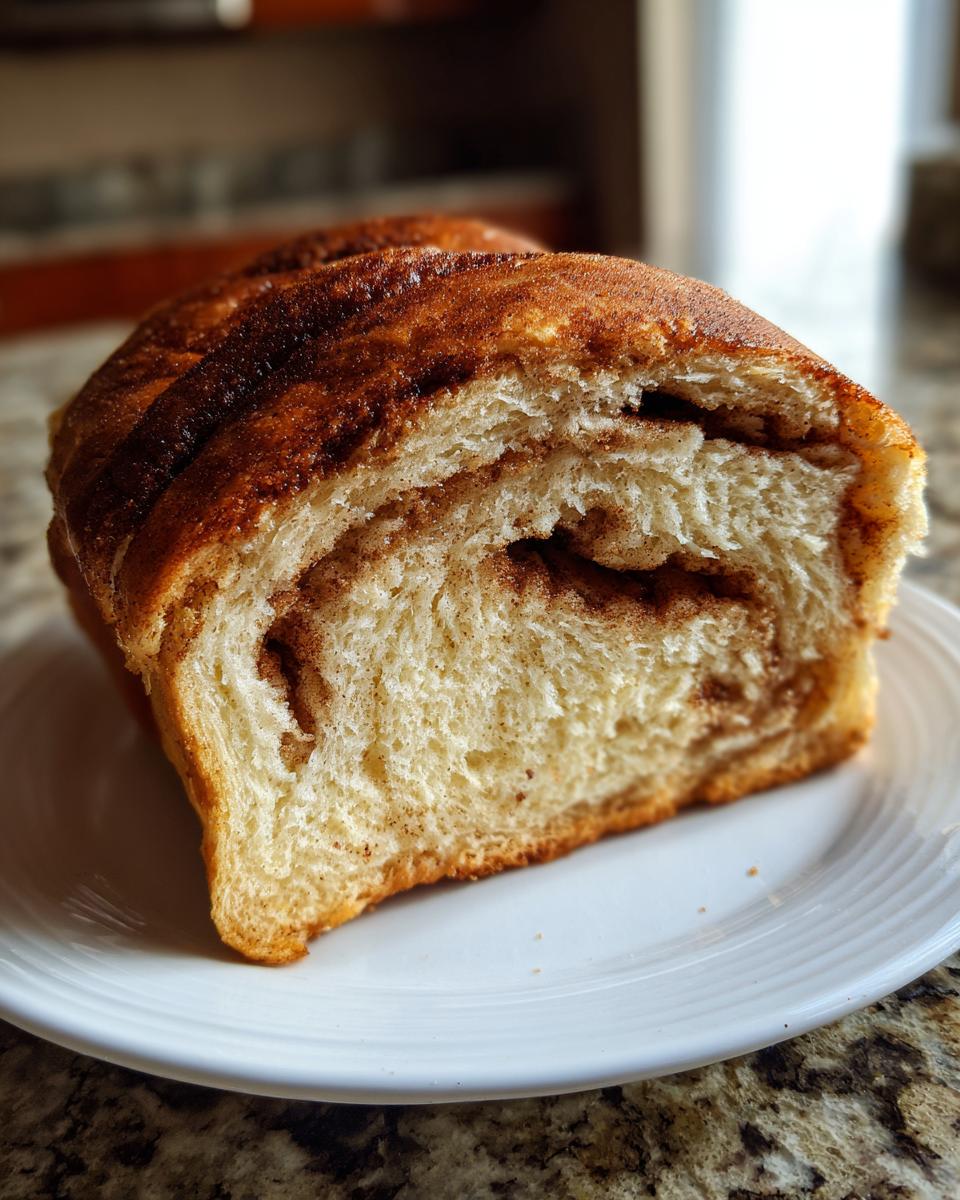
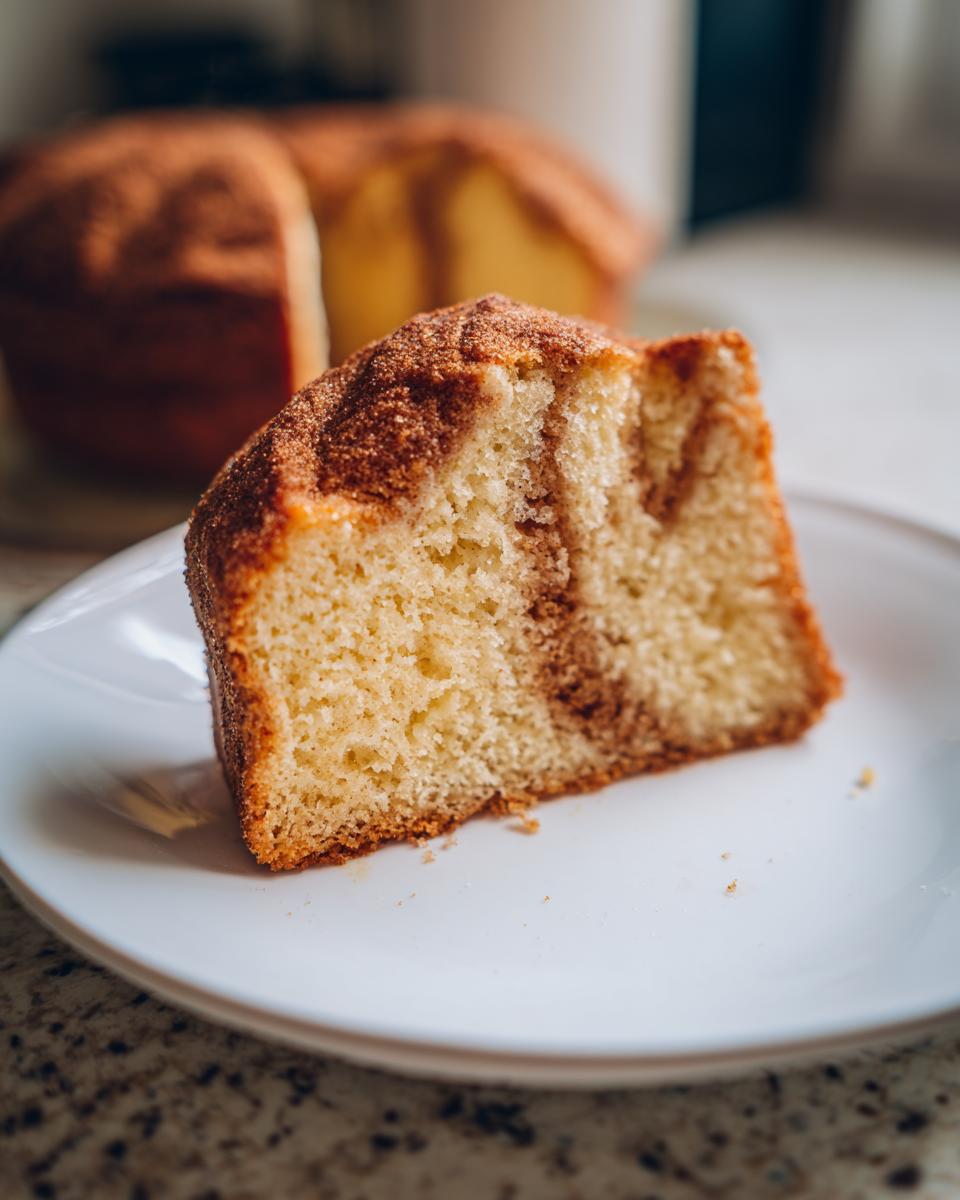
Oh, the aroma that sweeps through the house when you pull this out of the oven! Nothing beats it. If you’ve ever dreamed of biting into that perfect, fluffy slice of bakery goodness, then you’ve come to the right place. This is my trusted, classic, yeast-based cinnamon swirl bread recipe. It absolutely guarantees a soft loaf and that thick, buttery swirl you see in the photos. After thirty years of teaching baking concepts, I promise you, patience pays off when working with yeast, and this recipe shows you exactly how clear steps bring comforting flavors to life.
- Why This Homemade Cinnamon Swirl Bread Recipe Works (The Secrets to a Soft Loaf)
- Gathering Ingredients for Your Cinnamon Swirl Bread
- How to Prepare the Soft Cinnamon Swirl Loaf
- Tips for Success Making Easy Cinnamon Bread Baking
- Storage and Keeping Your Cinnamon Swirl Loaf Fresh
- Frequently Asked Questions About This Comfort Food Baking
- Nutritional Estimates for Your Sweet Cinnamon Ribbon Bread
- Share Your Weekend Baking Projects
Why This Homemade Cinnamon Swirl Bread Recipe Works (The Secrets to a Soft Loaf)
When you bake, you want reliability, and that’s what yeast brings to the table! Many people grab a quick bread recipe because they need breakfast fast, but they often end up with something dense. My method uses yeast because that gentle rising creates the air pockets needed for a truly soft and fluffy texture. It’s the difference between a good breakfast and a truly memorable one.
This recipe is designed to give you that beautiful, sliceable loaf that holds up to toasting and buttering. We are aiming for bakery quality right here in your own kitchen!
Achieving the Best Swirl Bread Recipe: Yeast vs. Quick Methods
If you look around, you’ll see lots of recipes skipping the yeast for the sake of speed—those are usually quick breads. While they are fine in a* pinch, they won’t quite achieve the fluffy structure we are looking for in this loaf. Yeast develops gluten gently over time, which gives this bread its unmistakable tenderness. It’s worth the wait, I promise! You can always make my faster cinnamon buns if you are pressed for time.
Tips for a Buttery Cinnamon Filling Bread
The swirl itself is pure magic, but it needs the right consistency! The trick here is making sure your butter for the filling is soft, but it must not be melted. If it’s too liquid, it will soak right into the dough instead of sitting on top to create those lovely, thick ribbons when you roll it up. We want a paste, not a puddle, for the most beautiful contrast in the final slice.
Gathering Ingredients for Your Cinnamon Swirl Bread
Baking starts with good ingredients, and being precise about what goes into the dough and the filling makes a huge difference in the final texture. Getting the butter consistency right is where so many folks stumble, so pay close attention to those descriptions! You want everything measured out and ready to go before you even wake up that yeast. If you need a wonderful base recipe for flavored butter, check out my recipe for whipped cinnamon butter.
Dough Components
- 1 cup whole milk, warmed to 110 degrees F (This temperature is crucial!)
- 2 1/4 teaspoons active dry yeast
- 1/4 cup granulated sugar, plus 1 teaspoon for the yeast
- 1/2 cup (1 stick) unsalted butter, softened
- 1 large egg, at room temperature
- 1 teaspoon salt
- 3 1/2 to 4 cups all-purpose flour, plus more for dusting (I always advise starting with 3 1/2 cups and adding slowly to keep your dough soft!)
For the Sweet Cinnamon Ribbon Filling
This is what makes those gorgeous inside layers! Remember, the butter here needs to be soft, almost like room temperature whipped cream.
- 1/2 cup (1 stick) unsalted butter, softened
- 3/4 cup packed light brown sugar (The molasses flavor makes the swirl so rich!)
- 2 tablespoons ground cinnamon
Optional Glaze Ingredients
If you’re serving this for a special brunch, a little drizzle on top takes it over the edge. But honestly, the bread is perfect plain, too!
- 1 cup powdered sugar
- 2 tablespoons milk
- 1/2 teaspoon vanilla extract
How to Prepare the Soft Cinnamon Swirl Loaf
This is where the real magic happens! It takes a little time working with yeast, but honestly, taking it slow ensures you don’t end up fighting a sticky mess later. If you’ve never worked with yeast dough before, think of it like caring for a tiny pet that needs warmth and gentle handling. For more on coaxing yeasty doughs along, you can check out my thoughts on caring for starters.
Activating Yeast and Mixing the Dough
First things first, we need to wake up that yeast! In your big bowl, pour in the warmed milk—it should feel just warm to the touch, not hot, or you’ll kill the yeast dead. Add that tiny bit of sugar and sprinkle the yeast right on top. Go grab a cup of coffee for about five to ten minutes while it foams up; that foam tells us it’s ready to work! Once happy, switch to adding the rest of your sugar, the softened butter, your room-temperature egg, and the salt. I always insist on room-temperature eggs because cold ingredients stop the mixing process, and we want everything happy and incorporated right from the start. Then, slowly bring in the flour, cup by cup, until you get a shaggy dough in the bowl.
Kneading and First Rise for the Cinnamon Swirl Bread
Now, turn that shaggy dough out onto a lightly floured counter. This is the rhythm part! You need to knead this dough for a good six to eight minutes. It’s satisfying work, pushing down and folding until the dough stops sticking and feels smooth under your hands—that means the gluten is developing structure! Then, place it in an oiled bowl, cover it, and let it rest in a warm spot for an hour to an hour and a half until it looks completely doubled. Don’t rush this initial rise!
Shaping and Rolling the Buttery Cinnamon Filling Bread
When it’s doubled, gently punch the air out—don’t deflate it completely, just calm it down! Roll that beautiful piece of dough out into a nice, long rectangle, aiming for about 12 by 18 inches. My secret trick here is to make sure that cinnamon-butter filling is spread right to the edges, but leave just a tiny strip—maybe half an inch—bare along one long side. This “bare” edge is what seals the loaf shut! Then, starting on the opposite side, roll it up as tightly as you can, like rolling a sleeping bag! Pinch that seam closed really well, and tuck the ends underneath so it doesn’t try to spring open while it bakes. You can check some great shaping methods over at Chasety for visual help if you need it.
Second Rise and Baking Instructions
Place your tightly rolled log, seam-side down, into your greased 9×5 loaf pan. Cover it loosely so it can breathe, and let it have its second nap for about 30 to 45 minutes. You want it to crown nicely above the rim of the pan. Preheat your oven to 375 degrees F while it’s taking that last rest. Bake this for 30 to 35 minutes. If you notice the top is getting very dark too fast, just slip a piece of foil loosely over the top. The bread tells you it’s done when the internal temperature hits 200 degrees F, but if you don’t have a thermometer, a thin knife inserted in the center should come out clean or with just a few moist crumbs attached.
Tips for Success Making Easy Cinnamon Bread Baking
Now that you know the steps, I want to make sure your first loaf is a showstopper! Even with a detailed recipe, little things can trip you up, especially when working with yeast dough.
Here are a few things I’ve learned over the years that make this process feel easier and guarantee better results. You’ll find that when you get the basics of the dough right, the rest of this Easy Cinnamon Bread Baking project just flows!
- Handle the Dough Gently After the First Rise: When you go to roll out the dough, try not to over-knead it or punch it down too aggressively. You want to keep some of those beautiful air pockets we spent time building during that first rise. A gentle push is all it needs.
- Dealing with Warm Weather: If your kitchen is warm, your second rise will happen much faster—maybe only 25 minutes! Because the filling uses soft butter, too much heat can cause the filling to seep out the bottom of the pan while baking. If it feels warm, pop the loaf (before the second rise) into the fridge for 15 minutes to firm up the filling again.
- Don’t Skip the Cooling Rack: Don’t let the loaf sit in that hot pan! Turn it out onto a wire rack immediately after baking. Sitting in the metal tin transfers residual heat and can make the bottom of your beautiful crust soggy, which ruins the texture.
If you want to see another excellent example of a great base loaf recipe, check out my tips for making a moist lemon cake; the principles of gentle mixing carry over!
For other simple bread ideas that are fantastic for beginners, take a quick peek at what they are doing over at Home Recipe Simple.
Storage and Keeping Your Cinnamon Swirl Loaf Fresh
This bread is honestly best eaten the day it comes out of the oven, the scent alone is enough to stop traffic! But because we want to enjoy it all week, storage is important. Once the loaf is completely cool on the rack, wrap it tightly in plastic wrap and then aluminum foil. This keeps the air out and preserves that beautiful soft crumb we worked so hard for.
It stays perfectly good at room temperature for two or three days. If you know you won’t finish it by then, I highly recommend slicing it first, then wrapping it well for the freezer, just like I mentioned in the recipe notes. It reheats beautifully—just a quick zap in the microwave or a few minutes in a warm oven brings that buttery flavor right back!
When you need a treat later, nothing beats a slice of this bread when it’s perfectly revived, much like reheating a slice of my applesauce cake.
Frequently Asked Questions About This Comfort Food Baking
I get so many wonderful questions as you all start baking this loaf, and I love being able to share what I’ve learned over the years. Teaching clarity is my favorite part of sharing these recipes! Don’t worry if you run into a little snag; that’s just part of the learning process here in the kitchen.
Can I use Milk Instead of Water in the Dough?
You absolutely should be using the milk as listed! Water works for basic bread, but milk is key to achieving those truly Moist Bread Recipes. Milk has fat and protein, which tenderizes the crumb structure. If you try swapping it out for water, you’ll notice a drier outcome, and frankly, you’ll miss out on that tender melt-in-your-mouth feel this loaf is known for. Stick with the whole milk, warmed just right, for the best results!
What if My Dough Isn’t Rising?
This usually comes down to one of two things, and it’s almost always the yeast itself. First, check the temperature of your milk—if it was too hot, it killed the yeast right away, and you won’t see the beautiful foam come up in the beginning. Second, if your kitchen is chilly, the yeast gets sluggish. Yeast likes warmth, around 75-80 degrees. Try placing the bowl in the oven with just the light turned on (make triple sure the oven isn’t actually on!). That little bit of ambient heat helps things move along nicely.
Is this a Quick Bread Alternative?
That’s a great question! This comforting classic uses yeast, giving it that classic, soft bread structure. If you’re looking for something you can whip up in thirty minutes without letting it sit around, then you might be searching for a No Yeast Cinnamon Swirl Quick Bread alternative. While this yeast version is superior for texture, I might share a quicker recipe someday for those busy mornings! For now, trust the process here; the rising time is what gives you that phenomenal fluffy loaf. For other great brunch ideas, feel free to browse my collection of favorite desserts.
If you want to compare shaping techniques for yeast loaves versus quick breads, check out this great resource from Tasty Home Cooks.
Nutritional Estimates for Your Sweet Cinnamon Ribbon Bread
As a teacher, I always want you to know exactly what you are sharing with your family, so here are the estimates for one slice of this delicious loaf. Please remember these numbers are just guides, since the exact amount of flour you use or how thickly you spread that filling changes things! These estimates are based on the recipe as written, using the lower end of the flour measurement for that wonderfully soft crumb.
- Serving Size: 1 slice
- Calories: 280
- Sugar: 18g
- Sodium: 250mg
- Fat: 12g
- Protein: 6g
It’s comforting baking, but it does have sugar, so enjoy a slice with your morning coffee!
Share Your Weekend Baking Projects
Honestly, the best part of sharing these recipes isn’t just seeing my kitchen smell wonderful—it’s hearing from you! When you tackle a yeast dough like this classic cinnamon swirl bread, I want to know all about it. Did you nail that tight roll? Was your swirl thick and buttery just like you hoped? That’s why community matters in cooking, and I truly want to see your triumphs!
Please take a picture of your gorgeous loaf, rate the recipe, and drop a comment down below telling me how it went. Did you serve it warm? Did you toast it and drown it in butter? Don’t keep that deliciousness to yourself!
Your feedback helps me keep these recipes reliable for everyone else who comes to the site looking for their next great Weekend Baking Projects. If you have any specific questions that weren’t covered above, or if you want to share how you adapted this recipe for a holiday morning, please reach out to me directly through the Contact Page. Happy baking, friends, and I look forward to seeing those beautiful cinnamon ribbons!
PrintClassic Homemade Yeast Cinnamon Swirl Bread

Bake a soft, moist loaf of yeast-based cinnamon swirl bread featuring a thick, buttery cinnamon-sugar ribbon inside. This recipe delivers bakery style cinnamon bread at home.
- Prep Time: 30 min
- Cook Time: 35 min
- Total Time: 165 min
- Yield: 1 loaf 1x
- Category: Breakfast
- Method: Baking
- Cuisine: American
- Diet: Vegetarian
Ingredients
- 1 cup whole milk, warmed to 110 degrees F
- 2 1/4 teaspoons active dry yeast
- 1/4 cup granulated sugar, plus 1 teaspoon for yeast
- 1/2 cup (1 stick) unsalted butter, softened
- 1 large egg, room temperature
- 1 teaspoon salt
- 3 1/2 to 4 cups all-purpose flour, plus more for dusting
- For the Swirl Filling:
- 1/2 cup (1 stick) unsalted butter, softened
- 3/4 cup packed light brown sugar
- 2 tablespoons ground cinnamon
- For the Glaze (Optional):
- 1 cup powdered sugar
- 2 tablespoons milk
- 1/2 teaspoon vanilla extract
Instructions
- Activate the yeast: In a large bowl, combine the warm milk and 1 teaspoon of sugar. Sprinkle the yeast over the top. Let it sit for 5 to 10 minutes until foamy.
- Make the dough: Add the remaining 1/4 cup sugar, softened butter, egg, and salt to the yeast mixture. Mix until combined. Gradually add the flour, one cup at a time, mixing until a soft dough forms.
- Knead the dough: Turn the dough out onto a lightly floured surface. Knead for 6 to 8 minutes until the dough is smooth and elastic.
- First rise: Place the dough in a lightly oiled bowl, turning to coat. Cover the bowl with plastic wrap or a clean towel. Let the dough rise in a warm place for 1 to 1.5 hours, or until doubled in size.
- Prepare the filling: While the dough rises, mix the softened butter, brown sugar, and cinnamon together in a small bowl until it forms a thick, spreadable paste.
- Shape the loaf: Gently punch down the risen dough. Turn it out onto a lightly floured surface and roll it into a rectangle, about 12 by 18 inches.
- Spread the filling: Spread the cinnamon-butter mixture evenly over the entire surface of the dough, leaving a small half-inch border along one long edge bare.
- Roll and seal: Starting from the long edge opposite the bare border, tightly roll the dough into a log. Pinch the seam closed firmly. Gently tuck the ends under.
- Second rise: Place the dough log, seam-side down, into a greased 9×5 inch loaf pan. Cover loosely and let it rise again in a warm spot for 30 to 45 minutes, or until the dough has crowned about 1 inch above the rim of the pan.
- Bake: Preheat your oven to 375 degrees F. Bake for 30 to 35 minutes, or until the top is golden brown and the internal temperature reaches 200 degrees F. If the top browns too quickly, loosely tent it with foil.
- Cool: Remove the bread from the oven and immediately turn it out onto a wire rack to cool completely.
- Glaze (Optional): Whisk together the powdered sugar, milk, and vanilla extract until smooth. Drizzle over the cooled bread.
Notes
- For the best swirl, make sure your filling butter is soft but not melted. This helps it spread without tearing the dough.
- If you want a very soft crumb, use the lower end of the flour measurement (3 1/2 cups).
- This bread freezes well once cooled. Slice it first, then wrap tightly in plastic wrap and foil before placing it in a freezer bag.
Nutrition
- Serving Size: 1 slice
- Calories: 280
- Sugar: 18
- Sodium: 250
- Fat: 12
- Saturated Fat: 7
- Unsaturated Fat: 5
- Trans Fat: 0
- Carbohydrates: 40
- Fiber: 1
- Protein: 6
- Cholesterol: 45