
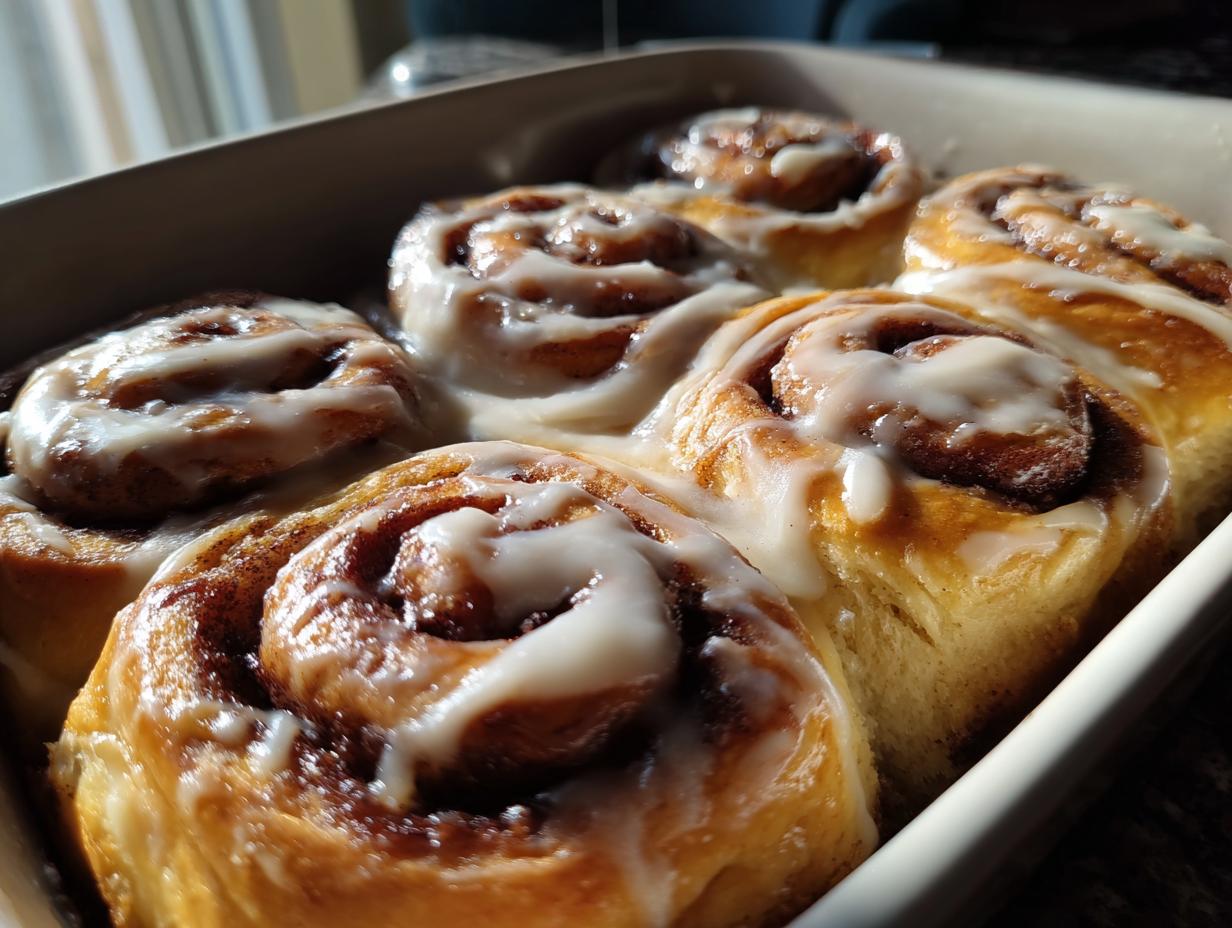
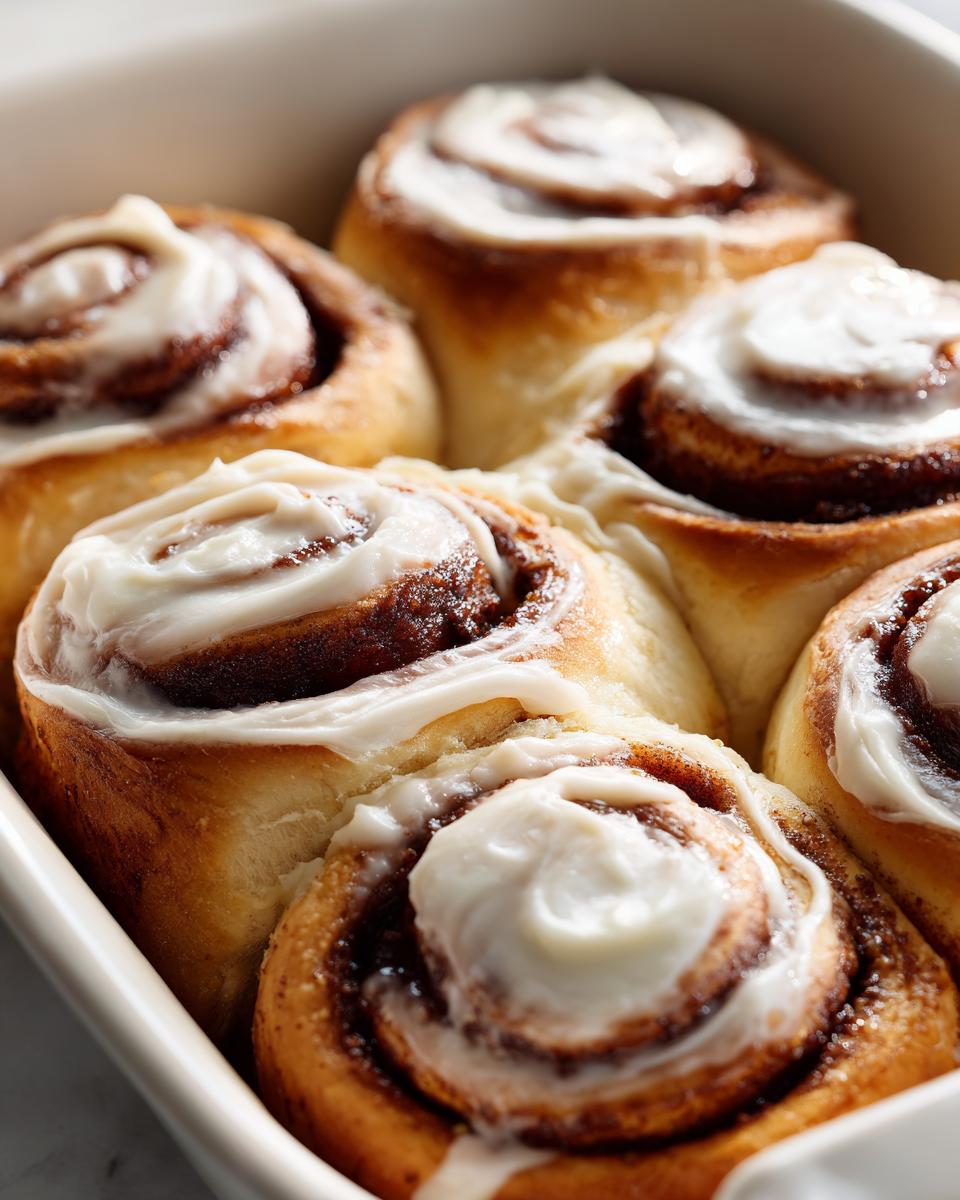
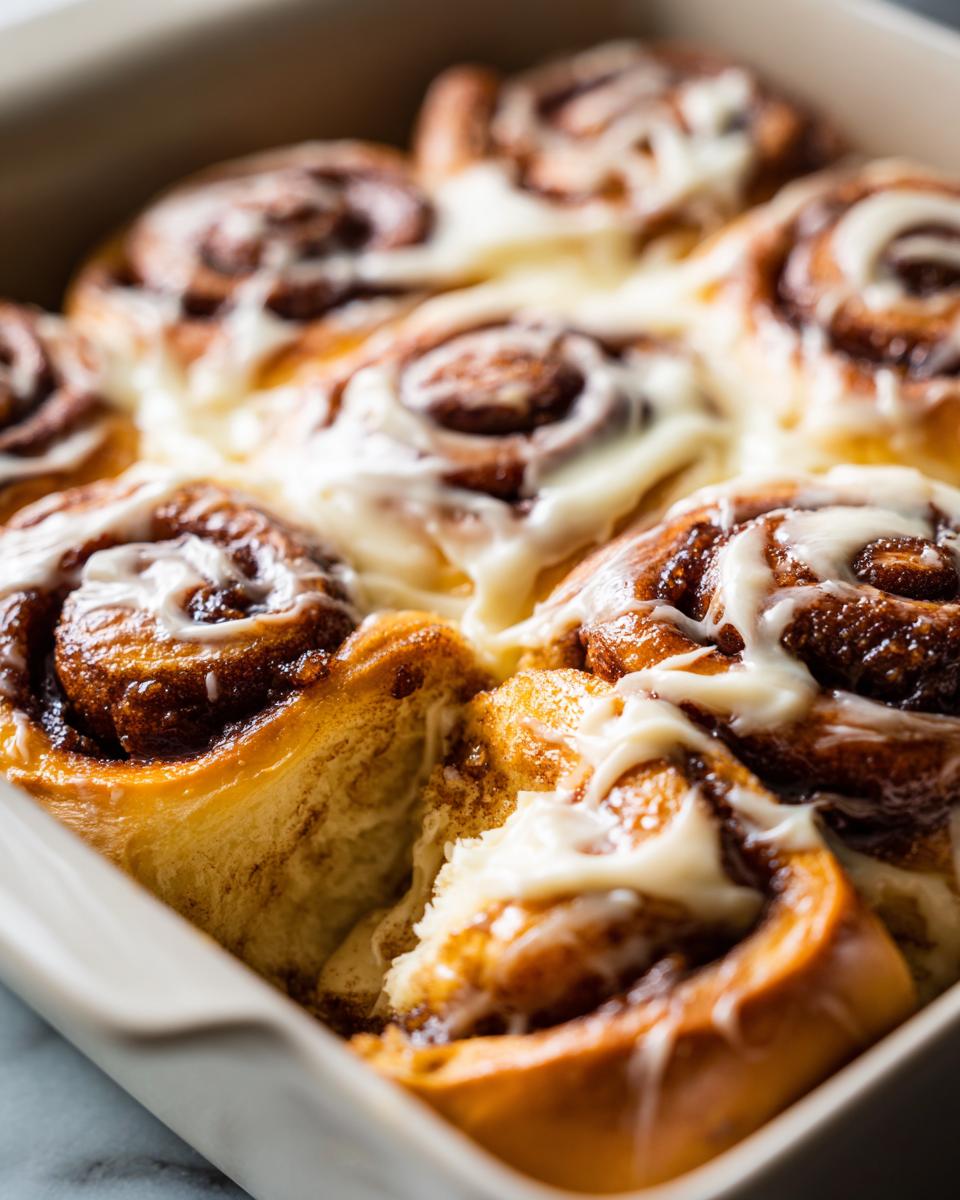
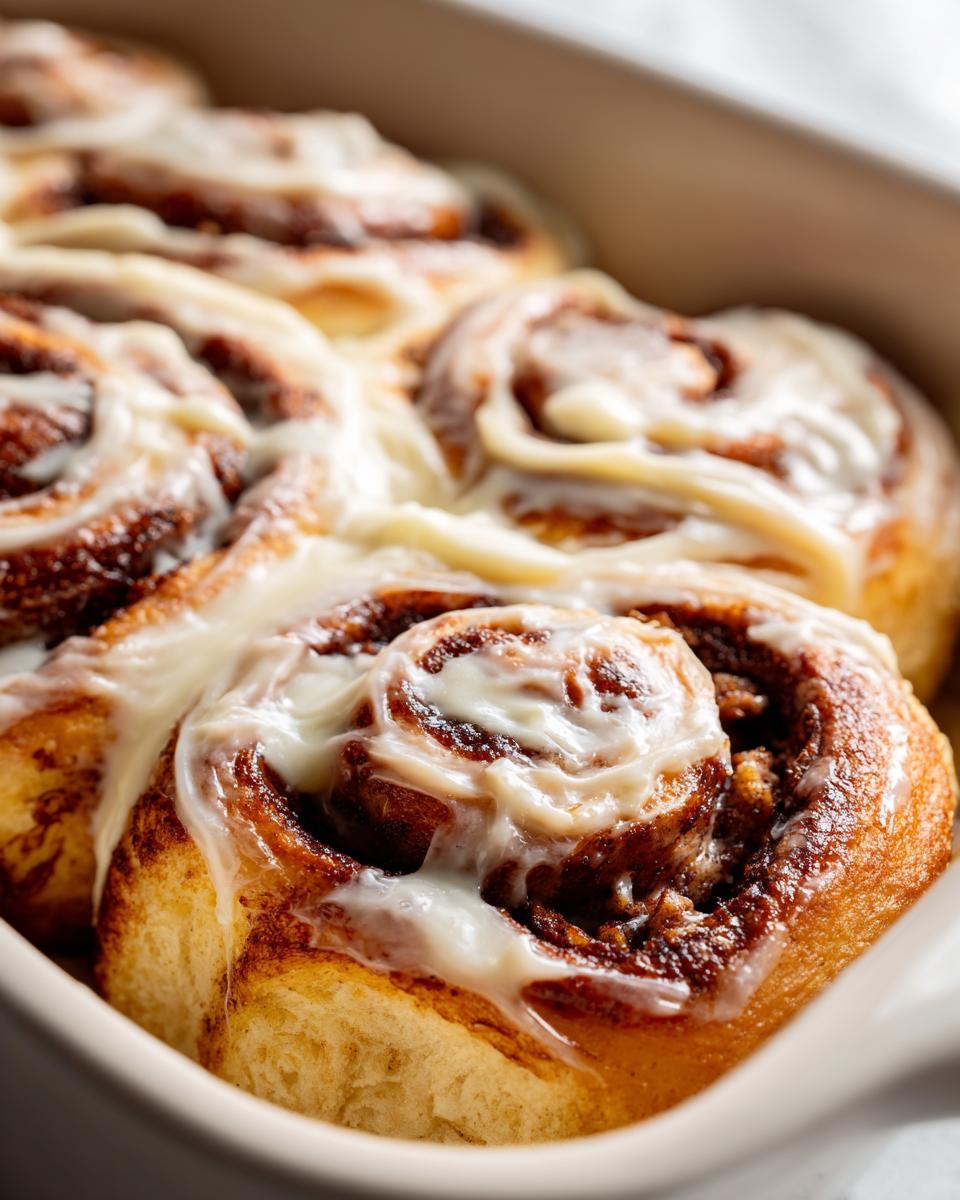
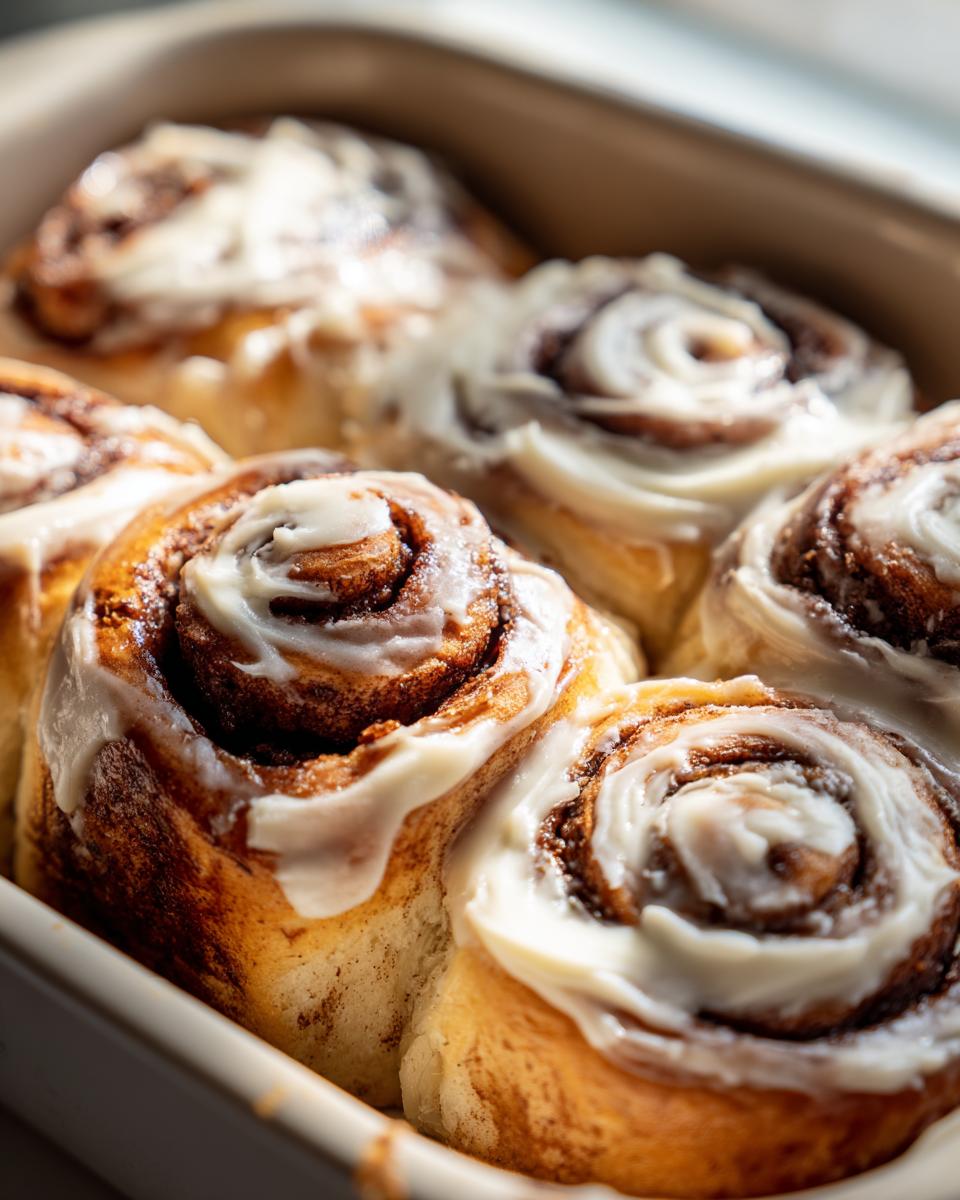
There is simply no better sound (or smell!) than pulling a fresh batch of these glorious cinnamon buns from the oven. Honestly, the aroma alone will get your whole house wide awake faster than coffee ever could. Now, I’ve spent years teaching kids about patience—raising yeast dough requires that same calm, steady hand—and trust me, these aren’t just good; they are the ultimate soft & gooey homemade cinnamon buns you’ll ever need. They are soft, they are swimming in filling, and that cream cheese frosting just pulls it all together. Once you master this yeast dough, you’ll be making these incredible sweet breakfast swirls every weekend. You can find more of my favorite easy breakfast recipes right here on the blog!
- Why You Will Make These Ultimate Soft Cinnamon Buns Again and Again
- Gathering Ingredients for Perfect Homemade Cinnamon Buns
- Essential Equipment for Baking Bakery Style Cinnamon Buns From Scratch
- Step-by-Step Guide to Making Fluffy Cinnamon Buns
- Mastering the Best Cream Cheese Frosting Recipe for Cinnamon Buns
- Tips for Success: Achieving Perfect Soft Cinnamon Buns Every Time
- Make-Ahead and Storage Tips for Your Cinnamon Buns
- Frequently Asked Questions About Homemade Cinnamon Rolls Recipe
- Serving Suggestions for Your Decadent Breakfast Pastries
Why You Will Make These Ultimate Soft Cinnamon Buns Again and Again
I promise these rolls will become your go-to comfort bake. When I developed this version, I focused on the three things that matter most in a great sweet roll. They never come out dry, I promise you that!
- They are unbelievably soft, staying tender for days thanks to the enriched dough.
- The filling is truly gooey—we use plenty of butter to make sure that cinnamon-sugar melts perfectly into every swirl.
- You get that signature bakery-style finish with a rich, tangy cream cheese frosting that melts right into the warm bun.
Gathering Ingredients for Perfect Homemade Cinnamon Buns
Getting ready for baking is half the fun! If you look at the ingredient list for these homemade cinnamon rolls recipe components, you’ll see we need a few things for the dough, the glorious filling, and that decadent topping. Don’t skip the prep notes—they’re my mother’s way of making sure everything works right before we turn on the mixer. Mastering that best homemade dough recipe starts here, so gather everything up first!
Here is what you’ll need to pull together these incredible rolls. Remember, room temperature ingredients blend so much better!
For the Dough:
- 1 cup whole milk (warm it up just slightly)
- 1/2 cup unsalted butter (need this melted down)
- 1/4 cup granulated sugar
- 2 1/4 teaspoons active dry yeast (This is what gives us that fluffy rise!)
- 1/4 cup warm water (Make sure it hits that 105-115°F sweet spot for the yeast.)
- 1 large egg
- 4 cups all-purpose flour
- 1 teaspoon salt
For the Filling:
- 1 cup packed light brown sugar (Packing it in adds amazing depth of flavor)
- 2 tablespoons ground cinnamon
- 1/2 cup unsalted butter (This MUST be softened for easy spreading)
For the Cream Cheese Frosting:
- 8 ounces cream cheese (Soften this completely, please!)
- 1/2 cup unsalted butter (Also softened)
- 3 cups powdered sugar
- 1 teaspoon vanilla extract
- 1-3 tablespoons milk (We’ll use this to adjust for the perfect drizzle consistency)
Once you have all these beautiful components laid out, you are ready to move on to the mixing. It’s going to be worth every second, I promise!
Essential Equipment for Baking Bakery Style Cinnamon Buns From Scratch
You don’t need a professional bakery setup to make these rolls, but having the right pans and tools definitely makes the process smoother. When I taught my fourth graders to bake, we learned quickly that the right tools help beginner hands succeed! If you have a stand mixer, use it—it makes kneading this rich dough so much easier, but honestly, a sturdy wooden spoon and some elbow grease will get you there too.
Here are the five main things I always pull out when I’m making these bakery style cinnamon buns from scratch:
- A large mixing bowl, or better yet, the bowl for your stand mixer.
- A small saucepan for gently warming the milk and butter for the dough.
- A good solid rolling pin. You need to get that dough thin and even!
- A 9×13 inch baking dish. This is crucial for getting those rolls to bake up tightly next to each other so they steam and stay soft.
- A wire rack for cooling (though you probably won’t use it long before drowning them in frosting!).
Step-by-Step Guide to Making Fluffy Cinnamon Buns
Alright, deep breath! This is where we pull it all together. Making yeast dough can seem intimidating, but I promise that if you take your time and follow these simple steps, you’ll end up with the most beautiful cinnamon buns. I learned in my teaching days that breaking things down into small, manageable chunks makes all the difference. We are going to focus hard on that dough so it develops the beautiful structure it needs to hold all that gooey filling. If you are interested in seeing some other favorite yeast dough baking projects, you can check out that link!
Preparing the Yeast Dough for Your Cinnamon Buns
First things first, we have to wake up that yeast! Warm up your milk and butter gently—you just want that butter melted and the mixture lukewarm, not hot enough to burn you. Then, dissolve your yeast in a tiny bit of warm water and let it bubble up for about five minutes. That foam tells you it’s alive and ready to work! Once you mix that yeast water, the warm liquid mixture, and the egg, begin adding your flour and salt slowly. Once the dough comes together, you need to knead it until it’s smooth and elastic, kind of like a soft earlobe. This usually takes about seven minutes on a mixer, but don’t skimp on that kneading time!
Creating the Rich Cinnamon Filling for Gooey Cinnamon Rolls
While your dough is enjoying its first rise—let it double in size, don’t rush it!—mix up your filling. It’s just the brown sugar and cinnamon whisked together. Once the dough has puffed up, gently punch it down and roll it out nice and thin on a floured surface, aiming for that big 12×18 inch rectangle. Now for the magic: take that half-cup of softened butter and spread it edge-to-edge. You want total coverage! Then, take your cinnamon-sugar mix and sprinkle it generously all over the butter. Don’t leave any bare spots, or you’ll just get plain bread in that swirl!
Rolling, Cutting, and Second Rise for Optimal Cinnamon Buns
This next part determines how those lovely spirals look! Starting from one long edge, roll that dough up as tightly as you possibly can without squishing the air out entirely. Pinch that final seam closed really well—we don’t want it popping open during baking. Now, take a sharp knife or, even better, unflavored dental floss to cut the log into 12 equal pieces. They should be about an inch and a half thick. Place them snuggly into your greased 9×13 dish. Cover them loosely and let them sit in a warm spot for their second rise for at least 30 to 45 minutes until they look beautifully puffy. Finally, set that oven to 375°F and let the baking work begin!
Mastering the Best Cream Cheese Frosting Recipe for Cinnamon Buns
Oh, the frosting! The cinnamon buns are honestly great just coming out of the oven, but the frosting? That’s what makes them truly worthy of being called decadent breakfast pastries. If you don’t get the consistency right here, the whole sweet experience can fall flat. That’s why I want to walk you through my method for the absolute best cream cheese frosting recipe; it’s tangy, rich, and spreads like a dream over those warm swirls.
The secret, just like with the dough, is temperature. Make absolutely certain your cream cheese and butter have been sitting out long enough to get truly soft. If they are even slightly cold, you will end up with lumps, and nobody wants a lumpy, bumpy frosting on their beautiful, fluffy rolls!
Start by beating the softened cream cheese and butter together until they are completely smooth and creamy—use your mixer on medium speed for a good minute or two. Don’t rush this foundational stage! Once you have that perfect, light base, start adding your powdered sugar one cup at a time. Keep the mixer on low speed initially so you don’t end up with a sugar cloud erupting from your bowl—trust Carla on that one!
Once the sugar is incorporated, it will look thick, almost like a paste. This is where the milk comes in to turn it into liquid gold. I always start by drizzling in just one tablespoon of milk, mixing it well, and seeing how it flows. You might need two, maybe three tablespoons total to thin it out until it’s perfectly spreadable. Remember, you want it thick enough to coat the bun but thin enough to drip down into those gorgeous crevices. If you accidentally add too much milk? Don’t panic! Scoop in another little bit of powdered sugar until it smooths right out again. That’s the beauty of making things from scratch—you’re always in control!
Once you have that luscious coating ready, slather it over the rolls right when they come out of the oven. The residual heat melts the frosting just enough, making the entire pan of rolls absolutely irresistible. If you are interested in other rich topping ideas, I have a wonderful recipe for fluffy buttercream that you might want to try on a different morning!
Tips for Success: Achieving Perfect Soft Cinnamon Buns Every Time
Now that you’ve mixed, kneaded, and baked these beautiful rolls, I want to share a few little secrets—things I learned from trial and error over the years—to guarantee your cinnamon buns turn out heavenly soft every single time. My teaching background really shines through here because I love giving you little checkpoints to make sure you don’t get stuck!
The number one enemy of a soft cinnamon roll is being overbaked, so keep a close eye on the oven during those last few minutes. You are looking for light golden brown tops, not dark mahogany! If the centers seem done but the edges are browning too fast, just gently tent the pan with a piece of foil.
If you want your rolls to be truly next-level, almost dripping with sweet butter and cinnamon goodness, you have to try this little addition. This is one of my favorite ways to ensure ultra-gooey results. Just before you slide the pan into the oven, pour 1/4 cup of heavy whipping cream right over the top of the unbaked rolls. It sounds crazy, I know, but that cream melts down, steams the top layer, and creates this incredible pool of buttery moisture that soaks right into the dough. It really delivers on the cinnamon roll foolproof recipe promise!
Also, remember the temperature checks we discussed earlier? They matter! Make sure your milk and water mixtures for the yeast are in that perfect 105°F to 115°F range. If it’s too cool, the yeast sleeps lazy. If it’s too hot, you kill it right off the bat! We need an active, happy yeast to give us that lift we are looking for in these fluffy cinnamon buns.
Finally, **frost them warm!** That 10-minute cooling window after they come out of the oven is so important. It lets the rolls set up just enough so they don’t completely fall apart when you lift them, but they are still hot enough that the cream cheese frosting melts beautifully into a luscious glaze that coats every single swirl. That combination of the warm roll and the tangy frosting is just pure comfort on a plate.
Make-Ahead and Storage Tips for Your Cinnamon Buns
One of the best parts about working with a good yeast dough is that you can often make the hard work ahead of time, which is a lifesaver when you’re planning a big weekend brunch or baking for the holidays! If you want to wake up to the heavenly aroma without having to mix dough before coffee, you absolutely have to try the overnight method. This is perfect for times when you need those easy overnight planning techniques to shine.
To prepare these for the fridge, you’ll follow the recipe right through cutting those 12 gorgeous rolls and arranging them snugly in the 9×13 dish. Since you want them to rest slowly overnight, skip the second room-temperature rise (Step 11 in the instructions). Just cover that pan tightly—I mean *very* tightly, maybe use plastic wrap and then foil over that—and pop the whole thing into the refrigerator. They can rest happily in there for up to 18 hours. When morning comes, pull them out, let them sit on the counter for about 30 minutes just to take the deep chill off, and then pop them straight into that 375°F oven. They’ll bake up just as beautifully!
Now, what if you have leftovers? Because honestly, sometimes 12 rolls is just too many for one morning, even if you try your best! Leftover cinnamon buns are wonderful, but they do lose a little of that fresh-baked magic once they cool completely. Don’t rely on the microwave for reheating; it tends to make the bread rubbery after a while. My best trick is to use the oven, like you’re baking them fresh again.
Wrap the leftover rolls (or just one individual roll) loosely in foil. Pop that foil-wrapped roll into a 350°F oven for about 10 to 15 minutes. The foil traps the steam and moisture. When you unwrap them, they feel wonderfully soft again, and you can apply a little extra dollop of frosting while they are warm. This reheating method keeps them tasting just like they were fresh out of the oven, ready for a cozy afternoon snack!
Frequently Asked Questions About Homemade Cinnamon Rolls Recipe
It’s natural to have questions when dealing with yeast dough, especially when you are aiming for those perfect easy brunch recipes that look professional. I always encourage my readers to ask—that’s how we learn and get better in the kitchen! Here are a few things people ask me most often about these homemade cinnamon rolls recipe delights.
Can I use instant yeast instead of active dry yeast?
Yes, you absolutely can! Instant yeast is wonderful because it doesn’t need that little warm water bath to wake up. If you are using instant yeast, you can skip the step where you dissolve it in warm water. Just mix it directly in with your flour, salt, and sugar, and then proceed with adding your liquid mixtures. It should still give you that beautiful rise we look for in these soft rolls.
How do I prevent my cinnamon buns from drying out?
This is the question I get most often! The keys are twofold. First, don’t over-bake them—pull them out when they are just lightly golden. Second, you must make sure that filling is generous. That half-cup of softened butter mixed with brown sugar essentially bastes the dough from the inside as it bakes. If you want guaranteed moistness, try pouring that 1/4 cup of heavy cream over them right before they go into the oven; it’s my secret weapon for the most gooey cinnamon rolls!
Can I use maple extract instead of vanilla in the frosting?
Oh, I love how creative people get! Maple is a fantastic flavor pairing with that hearty cinnamon swirl. Absolutely substitute the vanilla extract (one teaspoon) with maple extract. If you want an even richer flavor, you could even swap just a tablespoon of milk for maple syrup, though you might need a touch more powdered sugar to keep that spreadable consistency for your best cream cheese frosting recipe.
What is the best way to get really defined swirls?
To get those clear, beautiful spirals, the trick is in the rolling and the cutting. You need to roll the dough *very* tightly on the long side—think of it like rolling up a yoga mat snugly. Then, use unflavored dental floss or a very sharp, thin knife to cut through the log without squishing it down. If you compress the roll too much while cutting, the layers blend together, and you lose that distinct swirl pattern.
Serving Suggestions for Your Decadent Breakfast Pastries
Now that you have these incredible, gooey cinnamon buns cooling slightly and waiting for that thick layer of frosting, the next thought is: what do we serve them with? These rolls are rich; they are sweet; they are absolutely the star of the show, so the pairings should complement them beautifully without competing. Honestly, if I’m making a batch of these, I know it’s going to be a special morning, usually a weekend or maybe even a holiday when we can all sit down together.
First and foremost, you need a good, strong cup of coffee. That slight bitterness cuts through the richness of the butter and the sweetness of the frosting perfectly. I like mine black, but any coffee works to balance this out.
If you are serving these for a big brunch, you can’t just serve sugar, bless your heart! You need something savory to anchor the whole meal. That’s why I always suggest pairing these rolls with a simple yet satisfying egg dish. Sometimes I look to my recipe for a simple baked egg dish because it bakes up easily while the cinnamon buns are proofing, and it won’t tie up my oven space when it’s time for the rolls!
For a lighter contrast, a simple fruit salad is wonderful, especially in the summer. The acidity from fresh berries, oranges, or even sliced kiwi really brightens up the palate after a bite of dense, sweet dough. You could even lightly whip some heavy cream and fold in a little bit of lime zest to serve on the side—it echoes that tanginess from the cream cheese frosting but keeps things fresh.
Remember, these are hearty, wonderful decadent breakfast pastries, so a little bit goes a long way. Load up on the coffee, add one savory side, and let these amazing swirls be the beautiful, sweet centerpiece your family deserves. Enjoy every single bite!
PrintThe Ultimate Soft & Gooey Homemade Cinnamon Buns with Classic Cream Cheese Frosting
Make bakery-style cinnamon buns from scratch that are soft, fluffy, and irresistibly gooey. This recipe delivers the ultimate comfort food experience, topped with a rich cream cheese glaze.
- Prep Time: 45 min
- Cook Time: 25 min
- Total Time: 150 min
- Yield: 12 servings
- Category: Breakfast
- Method: Baking
- Cuisine: American
- Diet: Vegetarian
Ingredients
- For the Dough: 1 cup whole milk, 1/2 cup unsalted butter, 1/4 cup granulated sugar, 2 1/4 teaspoons active dry yeast, 1/4 cup warm water (105-115°F), 1 large egg, 4 cups all-purpose flour, 1 teaspoon salt
- For the Filling: 1 cup packed light brown sugar, 2 tablespoons ground cinnamon, 1/2 cup unsalted butter (softened)
- For the Cream Cheese Frosting: 8 ounces cream cheese (softened), 1/2 cup unsalted butter (softened), 3 cups powdered sugar, 1 teaspoon vanilla extract, 1-3 tablespoons milk
Instructions
- Warm the milk and butter in a small saucepan until the butter melts. Remove from heat and stir in the granulated sugar. Let the mixture cool to about 105°F.
- In a small bowl, dissolve the yeast in the warm water and let it sit for 5 minutes until foamy.
- In a large bowl or stand mixer bowl, combine the cooled milk mixture, the yeast mixture, and the egg. Mix well.
- Gradually add the flour and salt. Mix until a soft dough forms. Knead the dough for 5-7 minutes until smooth and elastic.
- Place the dough in a lightly oiled bowl, cover it, and let it rise in a warm place for 1 to 1.5 hours, or until doubled in size.
- While the dough rises, prepare the filling by mixing the brown sugar and cinnamon together.
- Punch down the risen dough and roll it out onto a lightly floured surface into a large rectangle, about 12×18 inches.
- Spread the softened butter evenly over the dough surface. Sprinkle the cinnamon-sugar mixture over the butter.
- Tightly roll the dough up lengthwise, starting from the long edge. Pinch the seam closed.
- Cut the log into 12 equal rolls, about 1.5 inches thick.
- Arrange the rolls in a greased 9×13 inch baking dish. Cover the dish and let the rolls rise again for 30-45 minutes until puffy.
- Preheat your oven to 375°F. Bake the cinnamon buns for 20-25 minutes until golden brown.
- While the buns bake, make the frosting: Beat the softened cream cheese and butter together until smooth. Gradually beat in the powdered sugar and vanilla extract. Add milk one tablespoon at a time until you reach a spreadable consistency.
- Remove the buns from the oven and let them cool slightly for about 10 minutes before spreading the cream cheese frosting generously over the warm rolls. Serve immediately for the best gooey texture.
Notes
- For overnight cinnamon rolls, complete steps 1 through 6, then place the cut rolls in the prepared pan, cover tightly, and refrigerate for up to 18 hours. In the morning, let them sit at room temperature for 30 minutes before baking as directed.
- If you want extra gooey rolls, pour 1/4 cup of heavy whipping cream over the rolls just before baking.
- You can substitute maple extract for vanilla extract in the frosting for a maple-glazed flavor variation.
Nutrition
- Serving Size: 1 roll
- Calories: 450
- Sugar: 45g
- Sodium: 350mg
- Fat: 22g
- Saturated Fat: 13g
- Unsaturated Fat: 9g
- Trans Fat: 0.5g
- Carbohydrates: 58g
- Fiber: 2g
- Protein: 6g
- Cholesterol: 65mg