
When the holidays roll around, or even just game day, my family always demands the same thing: a spectacular, yet simple, appetizer that disappears fast. For me, that means it’s time for the classic **cheese ball**. Forget those dry, flavorless versions from the grocery store; I promise you, making your own **cheese ball** is so easy, and it tastes worlds better. This recipe is the one I’ve relied on for decades for every single family gathering. It’s creamy, savory, perfectly coated, and truly the most reliable **crowd pleasing appetizer** you can keep in your back pocket. If you are looking for the absolute best, most foolproof recipe, this is the one you need to save right now!
You can find loads of other easy appetizer ideas over on my quick snacks page, but this spreadable savory cheese shape is certainly my number one go-to.
- Why This Classic Cheese Ball Recipe Stands Above the Rest
- Gathering Ingredients for Your Irresistible Party Snack Cheese Ball
- Step-by-Step Instructions for the Best Cheese Ball Recipe
- Tips for a Successful Cheese Ball and Serving Suggestions
- Flavor Variations: Try a Cheddar Ranch Cheese Ball Recipe
- Frequently Asked Questions About Making a Cheese Ball
- Estimated Nutritional Data for This Simple Party Food
- Share Your Homemade Cheese Ball Masterpiece
Why This Classic Cheese Ball Recipe Stands Above the Rest
Honestly, once you try this homemade **cheese ball**, you won’t ever go back to the pre-made tubs, and I mean that with all my heart. The difference in flavor is just night and day! Store-bought versions always seem a bit waxy or too salty, but this one captures that rich, sharp cheddar taste beautifully. It’s my absolute favorite **easy cheese ball recipe** because it comes together faster than you can grab your keys to run to the store.
That’s the beauty of it—it’s a fantastic **make ahead cheese ball**! You mix it, shape it, chill it, and then you have an incredible **holiday cheese ball appetizer** ready to go whenever company walks in the door. It saves so much stress when you are trying to keep track of all the moving parts during entertaining season. If you’re looking for other dips, I have a fantastic sausage and cream cheese dip that is also a huge hit!
The Secret to a Perfectly Creamy Cheese Ball
The absolute number one rule for getting that gorgeous, smooth texture, what I call a perfect **creamy cheese dip ball**, is temperature management. You cannot rush softening your cream cheese or butter! They must be brought to room temperature. If they are too cold, you end up with little lumps that never blend properly.
My tip from years of teaching patience? Use a wooden spoon and mix those two soft ingredients until they are totally homogenous and fluffy *before* adding in any of the seasonings. When it’s just butter and cheese looking beautiful, then you know the base is set right.
Gathering Ingredients for Your Irresistible Party Snack Cheese Ball
Now that you know this is the most dependable **cheese ball** recipe you’ll ever need, let’s talk about what goes into it! The beauty of this appetizer is how few hard-to-find ingredients there are. You likely have most of this already in your fridge or pantry. I always tell folks that the quality of your main players really shines through here, especially that cheddar. Don’t skimp on the sharp stuff; it’s what gives our **cheese ball** its wonderful tang and keeps it from tasting flat.
If you’ve ever made my creamy cheddar soup, you know I’m serious about good cheddar! Keep everything measured precisely, and you are guaranteed a perfect savory cheese spread shape every single time you make it.
Ingredient List for the Classic Cheese Ball
When you gather these items, make sure you follow my notes on preparation—it truly affects the texture of this **crowd pleasing appetizer**. We aren’t using any cooked items here, so the assembly is super fast as long as your cheese and butter are soft enough.
You will need:
- 8 ounces cream cheese, softened
- 8 ounces sharp cheddar cheese, shredded
- 1/4 cup butter, softened
- 1 teaspoon Worcestershire sauce
- 1/2 teaspoon garlic powder
- 1/4 teaspoon onion powder
- 1/4 teaspoon salt
- 1/4 teaspoon black pepper
- 1 cup chopped pecans or walnuts (for coating)
Step-by-Step Instructions for the Best Cheese Ball Recipe
Putting this together is where the magic really happens! Even though you’re making a **holiday cheese ball appetizer**, the actual hands-on time is practically nothing, which is why I rely on this recipe so heavily when I’m hosting. Just follow my flow below and you’ll have a beautiful, ready-to-chill **cheese ball** in minutes. It’s so much easier than anything complicated, trust me!
Mixing and Chilling the Cheese Base
First things first, dump those softened cheeses and butter into your biggest bowl. Now, dig in with your mixer or that trusty spoon and beat everything until it’s completely smooth. You want no streaks of white cheese peeking through—it should look like one gorgeous, pale orange dream. Once it’s mixed, cover the bowl tight! This mixture needs to chill for at least an hour. That chill time is crucial because it firms up the spread just enough so you can actually handle it without making a huge sticky mess.
How to Shape a Cheese Ball Perfection
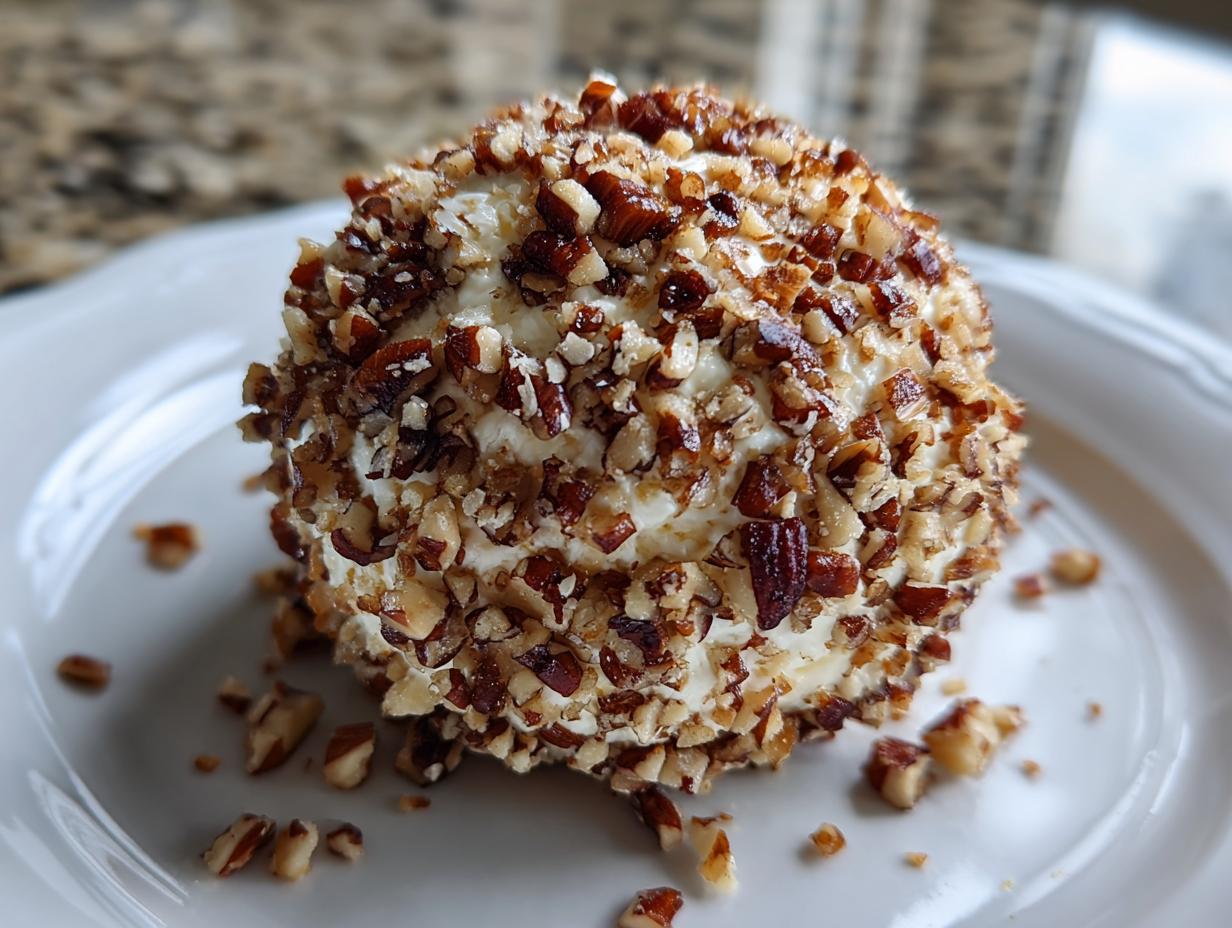
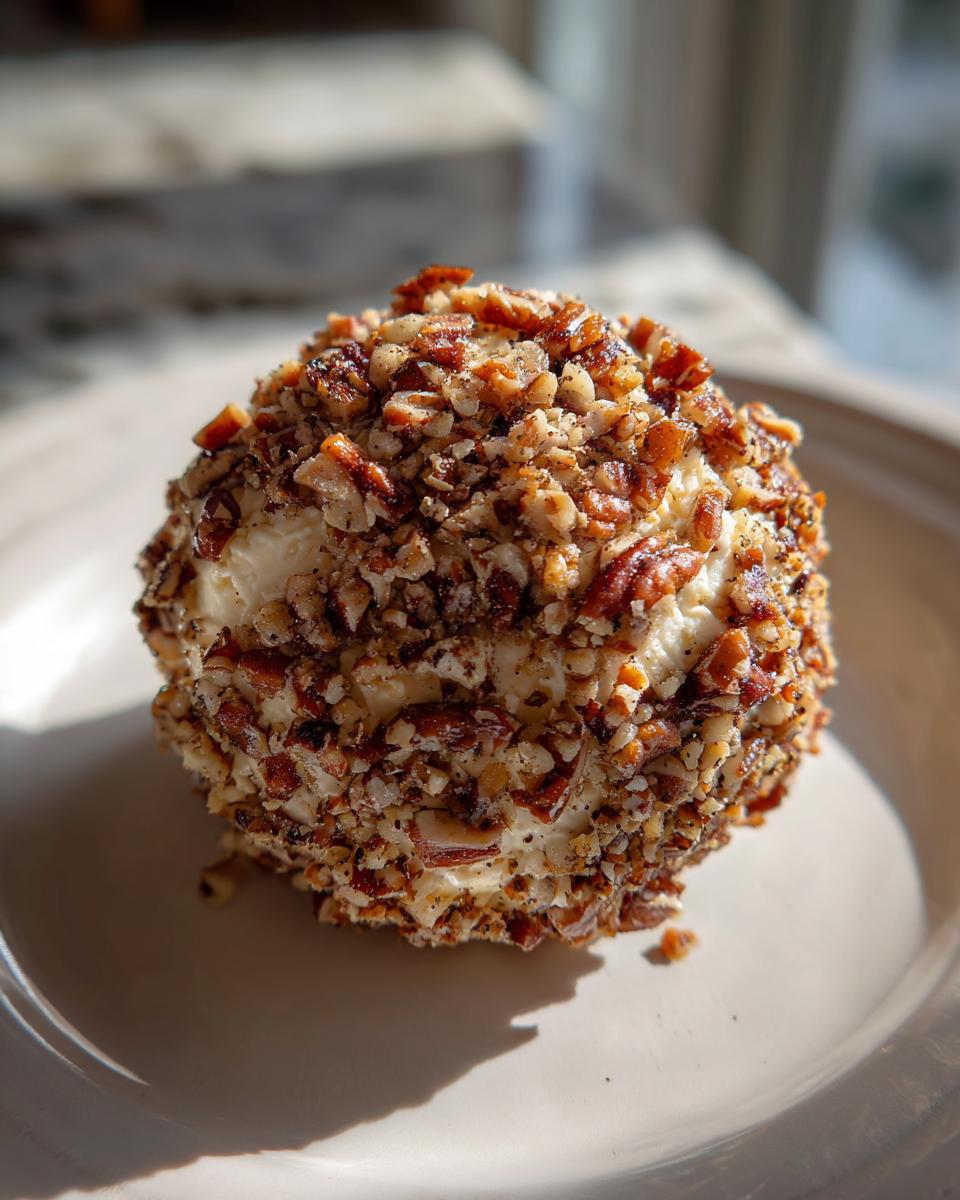
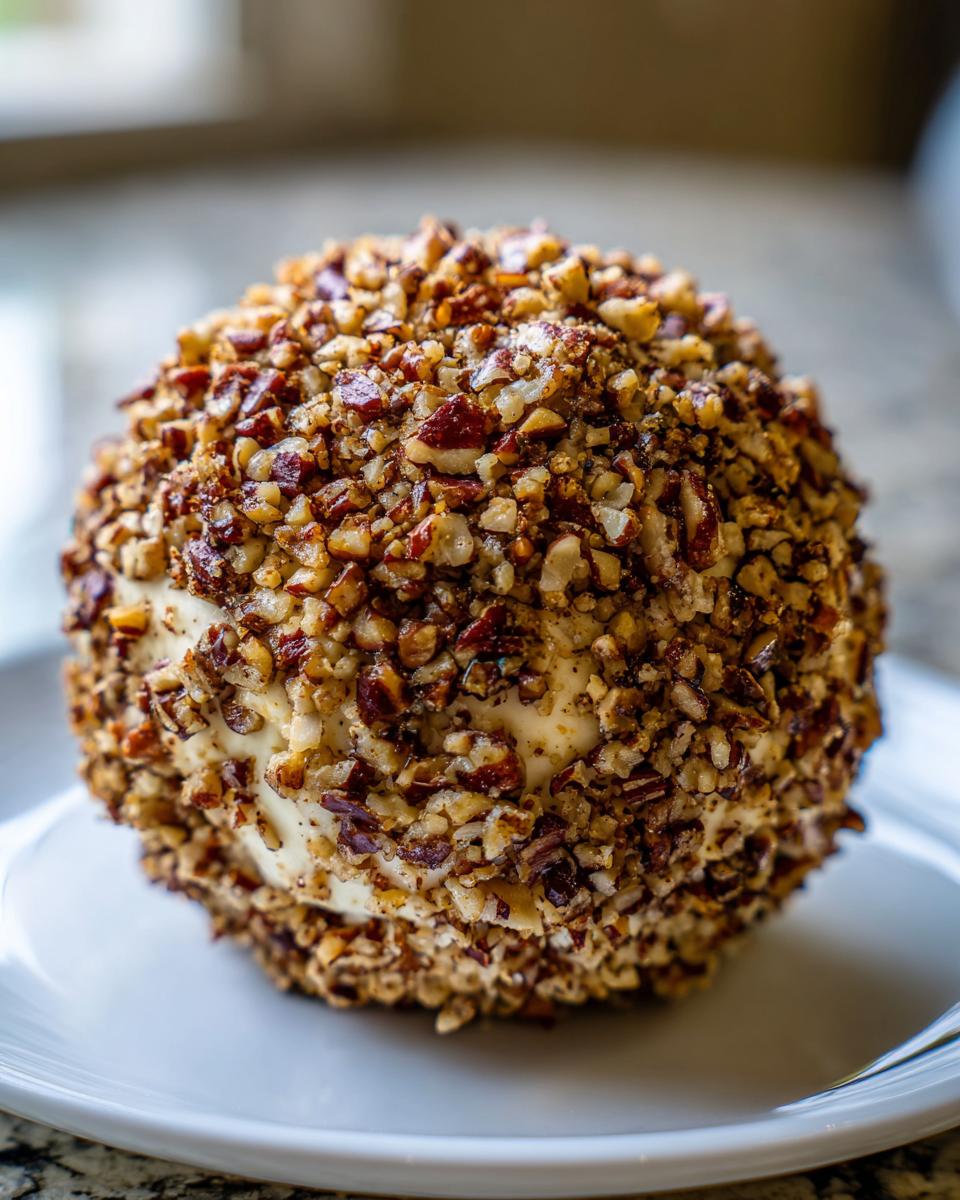
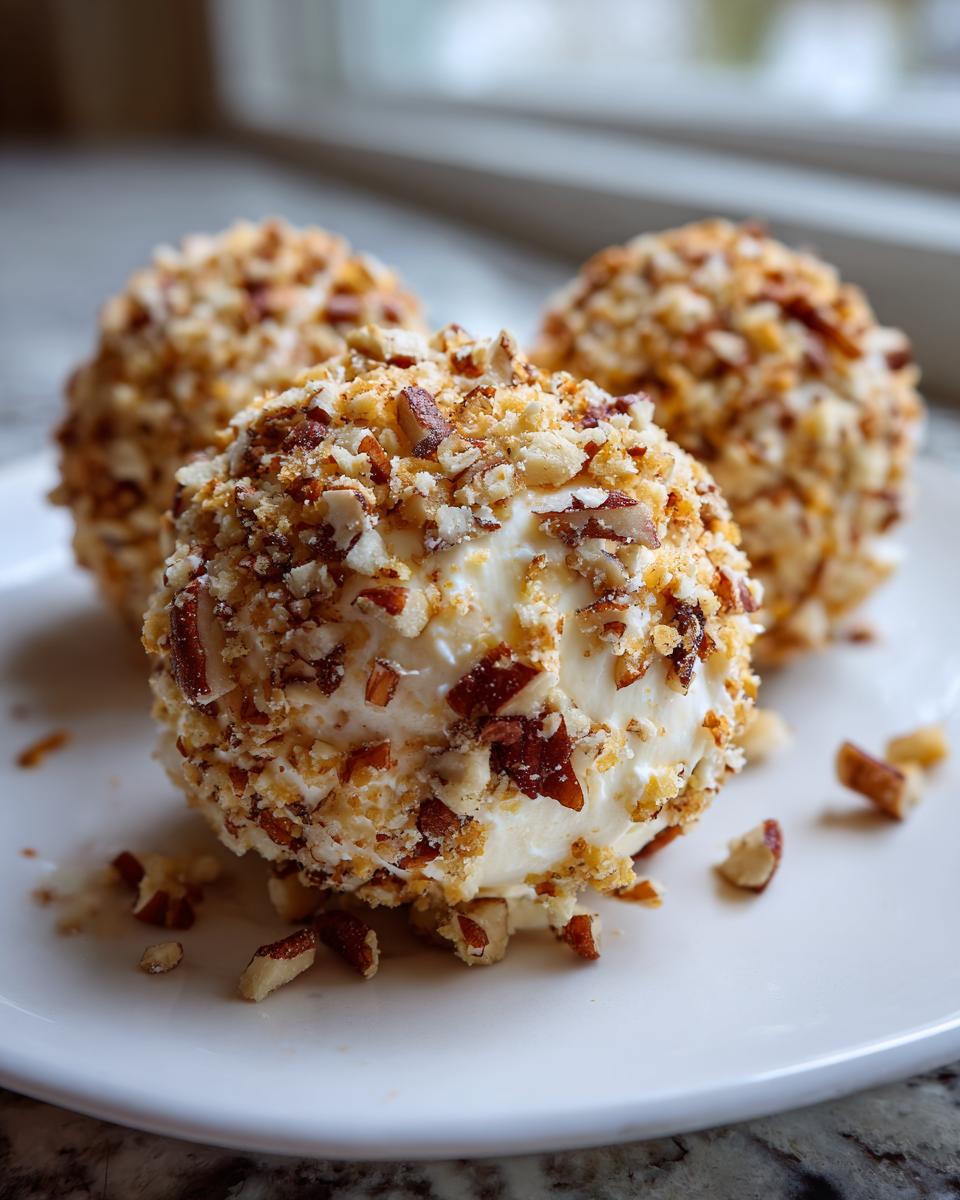
After that rest period, it’s time for the fun part: shaping! Take the chilled mixture out. If you struggle with getting a nice round shape, here’s my trick for **how to shape a cheese ball perfection**: grab two large pieces of plastic wrap, place the cheese mixture between them, and then gently mold it into a tight ball. This keeps your hands cleaner! Once it looks like a nice globe, roll it immediately in those chopped pecans or walnuts until it’s totally coated. Back into the fridge it goes until serving time!
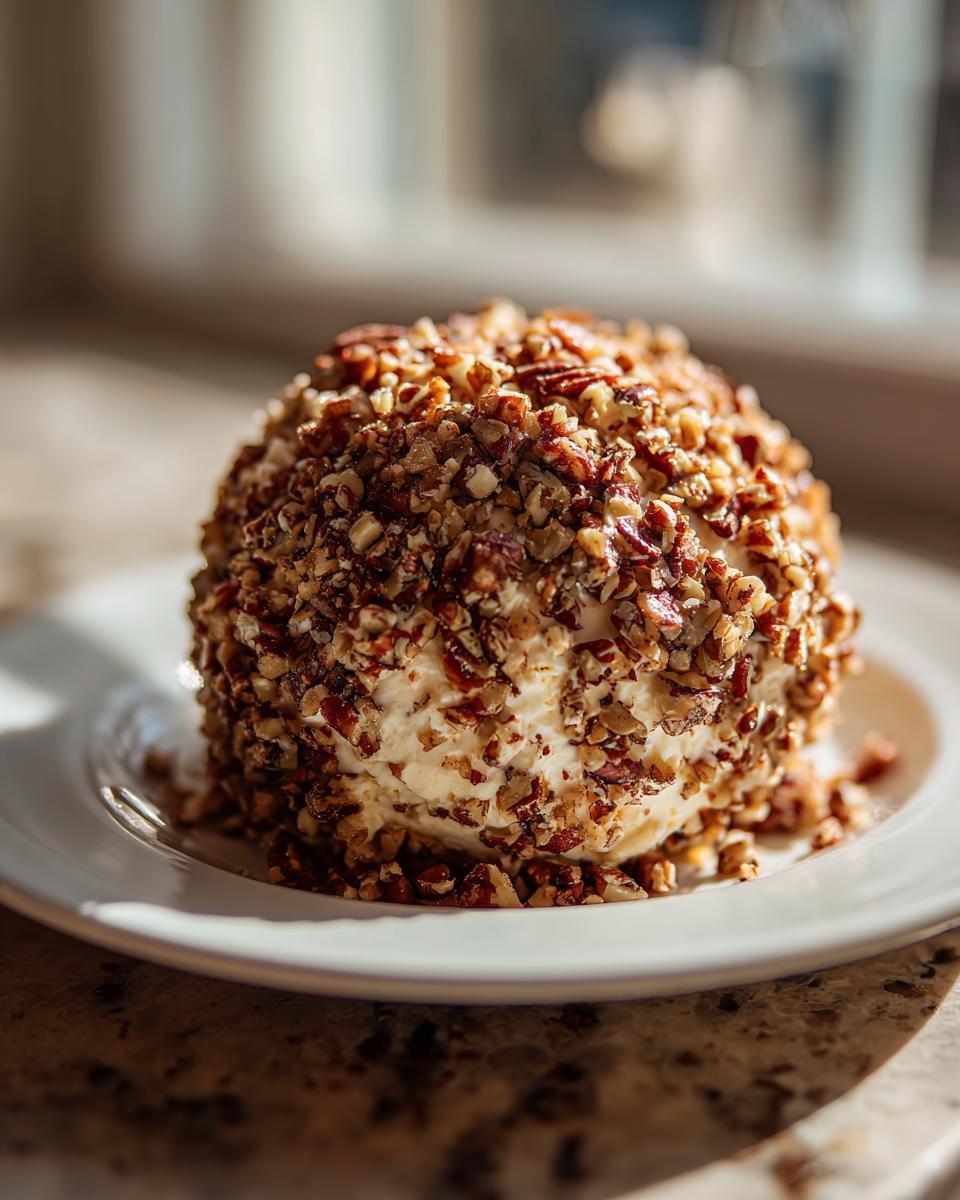
If you’re planning ahead for a big party, you can even wrap that finished ball tightly with plastic wrap and leave it chilled for up to three days. I always pull mine out about fifteen minutes before guests arrive so it spreads a little easier on the crackers. You can find my favorite easy Christmas poke cake recipe if you need another holiday make-ahead dessert!
Tips for a Successful Cheese Ball and Serving Suggestions
Making sure this appetizer is a guaranteed hit—a true **crowd pleasing appetizer**—comes down to a few simple finishing touches after the shaping is done. We covered refrigeration, but remember that essential make-ahead tip: you can prepare the entire **cheese ball**, cover it tightly, and keep it tucked away in the fridge for up to three days. Honestly though, it tastes best if you can manage to make it the day before!
If you’ve made it ahead, just set it out on the counter about fifteen minutes before you plan to serve it. This small bit of warming time makes spreading so much simpler for your guests. I know you’ll want an easy cleanup, too; if you’re looking for other one-pan ideas, check out my mini meatloaf muffins!
Serving Your Cheese Ball with Crackers and Veggies
When it’s finally time to serve this beautiful creation, you need the right vehicles to scoop up all that flavor. My classic recipe pairs perfectly with almost anything sturdy! I always put out hearty water crackers, some good thick pretzels, and a colorful spread of fresh vegetables. Think carrot sticks, celery, and bell pepper strips, which make for great **cheeseball with crackers and veggies**. The freshness is a wonderful contrast to the rich, savory **cheese ball** spread.
Flavor Variations: Try a Cheddar Ranch Cheese Ball Recipe
I know that the classic recipe with the Worcestershire sauce is my family’s favorite, but if you want to switch things up for game day or a different holiday gathering, you have to try a **Cheddar Ranch Cheese Ball** recipe. It’s almost the exact same base, but swapping out just a couple of things makes a totally different flavor experience!
To adapt this for that tangy ranch flavor everyone loves, you just need to make a small substitution. Ditch the Worcestershire sauce entirely. Instead, mix in 1 to 2 tablespoons of good quality dry ranch seasoning mix right along with your garlic and onion powders. That’s it! It immediately transforms your **cheese ball** into that irresistible, cool, savory flavor profile.
If you want to go full-on popular appetizer mode, try adding about half a cup of crushed bacon bits to the mix before you chill it—it makes it seriously addictive! For a full, separate recipe on that flavor combo, you can see a great one over on this site. And if you love that bacon and ranch combination, try my chicken bacon ranch wrap sometime; it uses the same great flavor notes!
Frequently Asked Questions About Making a Cheese Ball
I always get so many questions after people try this recipe, and that’s wonderful! It means you’re excited to make this cheese ball a regular feature at your parties. It’s so straightforward, but sometimes those little details trips folks up. I’ve gathered a few of the most common questions I get when folks are trying to whip up their own **holiday cheese ball appetizer** or snack for game day. Don’t worry if you have other questions; just send me a note!
Can I make this cheese ball without nuts?
Oh, absolutely you can! If you have allergies or just aren’t a fan of the crunch from pecans or walnuts, there are so many other great ways to coat your spread. You can roll your shaped **cheese ball** in things like dried, finely minced parsley or chives for a soft green coating, or you can crush up some crispy bacon bits instead! Crushed pretzels also add a nice salty crunch without being a nut at all.
What is the best cheese to use for a cheese ball?
For the very best depth of flavor in your **cheese ball**, I always insist on using good quality sharp cheddar cheese. Don’t use pre-shredded if you can help it; grating it yourself melts so much better! However, the most important cheese, which dictates the texture, is the cream cheese. Make sure that cream cheese is really soft and high quality because it creates that beautiful, smooth base for the entire appetizer.
When you’re ready for a sweet treat after all that savory goodness, you should definitely check out my recipe for white chocolate raspberry cookies!
Estimated Nutritional Data for This Simple Party Food
As a home cook, I try not to obsess over numbers, especially when it comes to delicious party food like this! But for those of you who track things, here are the estimated nutrition facts based on the standard ingredients listed. Keep in mind these figures are just a guideline; if you use extra butter or different coating nuts, the numbers will shift a bit.
I always say, a good appetizer shouldn’t leave you feeling heavy, which is why this **simple party food** is so great—it’s rich in flavor but light on the plate! If you need something healthy yet deeply satisfying, I highly recommend trying my chicken and rice soup sometime, too.
- Serving Size: 1/12 of ball
- Calories: 150
- Sugar: 1g
- Sodium: 180mg
- Fat: 14g (7g Saturated Fat)
- Protein: 5g
Share Your Homemade Cheese Ball Masterpiece
Now that you have everything you need for the absolute **best cheese ball recipe**, I would just love to hear from you! Did you try the classic version? Or did you end up diving into that tempting **Cheddar Ranch Cheese Ball** variation? Please come back and leave me a quick rating below so other home cooks know this **Classic cheese ball tutorial** is worth their time. If you made something wonderful, share what you served it with—I’m always looking for new snack ideas for my next gathering!
And while you’re planning your next event, don’t forget to check out my recipe for the best holiday sangria; it pairs perfectly with this **cheese ball**!
PrintThe Best Classic Cheese Ball Recipe

Make this simple, creamy cheese ball recipe for an irresistible party snack that tastes better than store-bought alternatives. It is a perfect make-ahead appetizer for holidays and game days.
- Prep Time: 15 min
- Cook Time: 0 min
- Total Time: 15 min
- Yield: 12 servings 1x
- Category: Appetizer
- Method: No Bake
- Cuisine: American
- Diet: Vegetarian
Ingredients
- 8 ounces cream cheese, softened
- 8 ounces sharp cheddar cheese, shredded
- 1/4 cup butter, softened
- 1 teaspoon Worcestershire sauce
- 1/2 teaspoon garlic powder
- 1/4 teaspoon onion powder
- 1/4 teaspoon salt
- 1/4 teaspoon black pepper
- 1 cup chopped pecans or walnuts (for coating)
Instructions
- In a large bowl, combine the softened cream cheese, shredded cheddar cheese, softened butter, Worcestershire sauce, garlic powder, onion powder, salt, and pepper.
- Mix the ingredients thoroughly with an electric mixer or a sturdy spoon until the mixture is completely smooth and well combined.
- Cover the bowl and chill the cheese mixture in the refrigerator for at least 1 hour to firm up slightly. This makes shaping easier.
- Spread the chopped nuts onto a shallow plate or piece of parchment paper.
- Remove the chilled cheese mixture from the refrigerator. Shape the mixture into a ball using your hands. Work quickly so the cheese does not become too soft.
- Roll the cheese ball gently in the chopped nuts until it is completely coated on all sides.
- Return the finished cheese ball to the refrigerator until ready to serve.
- Serve your crowd pleasing appetizer with crackers, pretzels, or fresh vegetables.
Notes
- For a make ahead cheese ball, prepare the ball completely, cover tightly with plastic wrap, and refrigerate for up to 3 days. Allow it to sit at room temperature for 15 minutes before serving for easier spreading.
- If you want a savory cheese spread shape with more flavor, add 2 tablespoons of dried minced onion or 1 tablespoon of dried parsley to the cheese mixture.
- To achieve perfection when shaping, use two pieces of plastic wrap to help mold the mixture into a tight ball shape before coating.
Nutrition
- Serving Size: 1/12 of ball
- Calories: 150
- Sugar: 1
- Sodium: 180
- Fat: 14
- Saturated Fat: 7
- Unsaturated Fat: 7
- Trans Fat: 0
- Carbohydrates: 2
- Fiber: 0
- Protein: 5
- Cholesterol: 35