
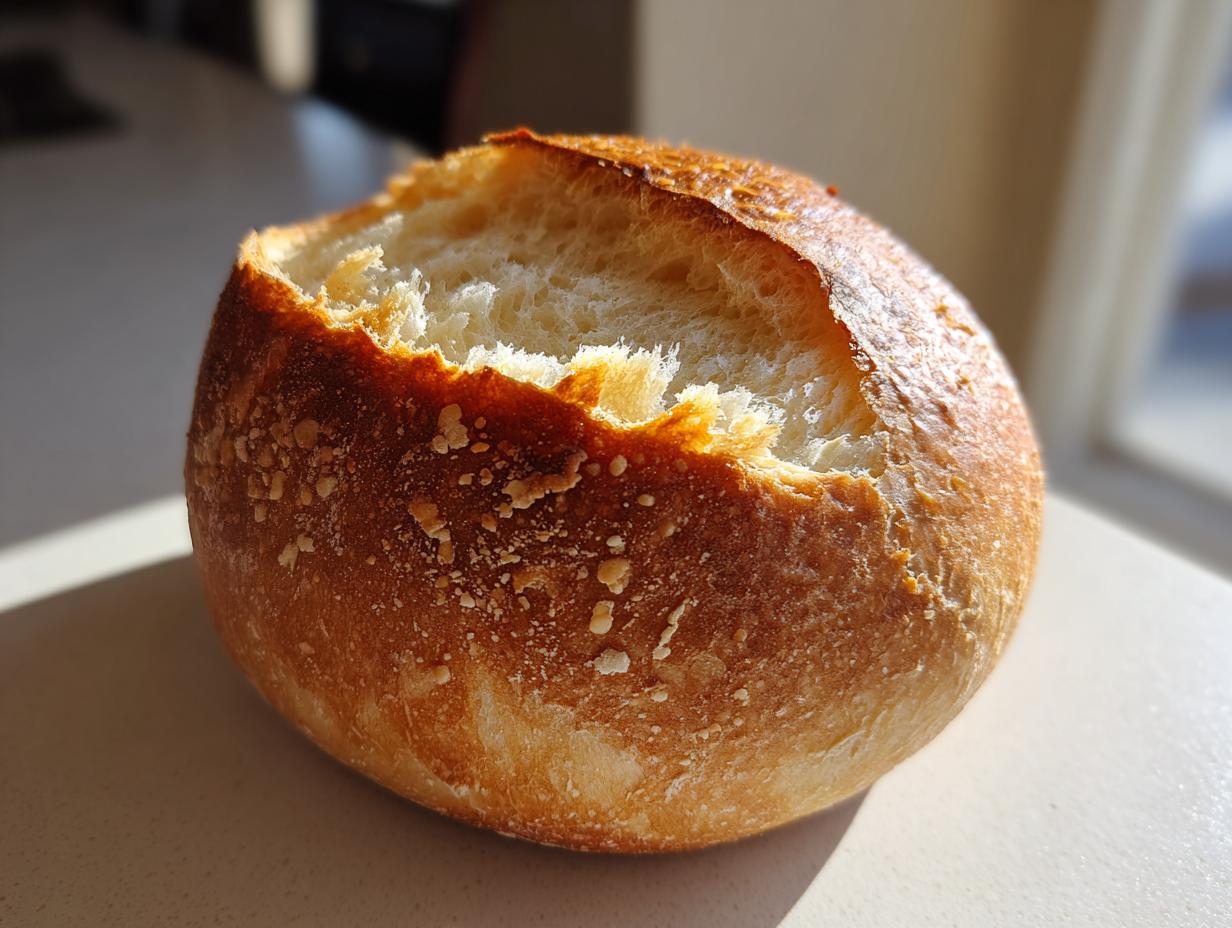
There is just nothing that says ‘cozy’ quite like pulling a fresh, warm loaf of bread out of the oven. For me, that feeling is multiplied ten times over when I’m making my homemade bread bowls. Forget those slightly stale, factory-made cups you buy at the store; we are aiming for bakery-style perfection here! I promise you, achieving that magical combination—a perfectly crisp, golden exterior giving way to a soft, pillowy interior—is easier than you think, even if you’re just starting out with yeast baking. If you love this kind of rustic baking, you might also enjoy my recipe for easy artisan garlic parmesan bread.
I always make a big batch of these every time the leaves start turning. Serving chili or my creamy potato soup in these edible bowls means less dishwashing later, which is always a win in my book! Everyone gathers around the table, and having these sturdy, warm vessels makes a casual supper feel like a real celebration.
- Why Homemade bread bowls Are Better Than Store-Bought
- Ingredients for the Best Easy bread bowl recipe
- How to Prepare Your Homemade bread bowls from Scratch
- Tips for Achieving Panera style bread bowls at Home
- Serving Suggestions: What to Fill Your bread bowls With
- Storage and Reheating Instructions for leftover bread bowls
- Frequently Asked Questions about baking bread bowls
- Nutritional Estimate for Homemade bread bowls
- Share Your Comfort Food Creations
Why Homemade bread bowls Are Better Than Store-Bought
Why bother with store-bought when you can have these spectacular homemade bread bowls? Honestly, the difference is night and day. When you bake them yourself, you control everything that goes into that delicious vessel. You get to decide how thick the walls should be, and you know exactly when they come out of the oven—warm and ready for dipping! If you enjoyed this, you might also love my tutorial for copycat Olive Garden breadsticks.

- You control the salt and richness. No weird preservatives here!
- You get that perfect soft, chewy center that melts into your soup.
- They are sturdy enough to hold thick chili without collapsing halfway through dinner.
Achieving the Perfect Crusty bread bowls Texture
The true secret to that desirable crusty bread bowl comes down to steam and temperature control. When commercial bakeries make these, they often rush the process. We take our time! By preheating the oven hot and ensuring our dough has enough moisture, we create a burst of steam in those first few minutes. That brief steam bath allows the exterior to set up beautifully, locking in that wonderful, crackly crust we all crave.
Ingredients for the Best Easy bread bowl recipe
Gathering your supplies for these easy bread bowl recipe loaves is simple. We’re using pantry staples, which is just another reason I find baking bread so comforting! The most important step before you even start mixing is making sure your water is just right. Yeast is alive, you know! If it’s too hot, you’ll shock it and kill it; too cool, and it just won’t wake up. I always aim for that sweet spot between 105°F and 115°F for the warm water.
Here is everything you’ll need for four lovely, sturdy bread bowls:
- 1 ½ cups warm water (105°F to 115°F)
- 2 ¼ teaspoons active dry yeast
- 1 teaspoon granulated sugar
- 3 ½ to 4 cups all-purpose flour, plus more for dusting
- 2 teaspoons salt
- 1 large egg, beaten (for egg wash)
- 1 tablespoon water (for egg wash)
If you’re looking for other foundational baking recipes, my sourdough cornbread is another family favorite!
Ingredient Notes and Substitutions for Your bread bowls
For the flour, I stick with standard all-purpose because it handles the moisture well, giving us those beautiful, chewy interiors—no need for fancy bread flour here! The egg wash you see in the instructions is crucial; it’s what creates that beautiful, deep golden shine on the finished crusty bread bowls. Don’t toss those centers once you hollow them out! That soft bread is perfect for making croutons or just tearing off pieces instantly for dipping right into your hot soup.
How to Prepare Your Homemade bread bowls from Scratch
Alright, let’s get our hands messy! This is where the magic really starts to happen. While some folks look for a quick bread bowl recipe, I always find that giving the yeast a little time makes all the difference in flavor and texture. We have to follow the steps with care so that when we fill these beauties with soup later, they hold up perfectly. Preheat, mix, knead, rest—that’s the rhythm of happy bread baking!
Remember that recipe you just looked at? We’re following that exact order. First step, always, is waking up that yeast. If you see foam on the top after ten minutes, you’re golden! If you don’t see foam, well, don’t panic, just check your water temperature and try again another time.
Kneading and First Rise for Fluffy bread bowls
Once you mix in the salt and just enough flour to make a shaggy mess, it’s time to knead. Don’t be afraid to dust your counter lightly, but resist adding too much flour! You want the dough to feel smooth and elastic when you’re done—it shouldn’t be sticky anymore. Pop it into an oiled bowl, cover it tightly, and find a nice, quiet, draft-free spot for it to rest. I usually put mine in the oven with just the light on. Wait until it’s completely doubled; you can’t rush that important first rise for your homemade bread bowls.
Shaping and Baking Perfect Crusty bread bowls
When it’s doubled, gently press that air out—we call that ‘punching down’—and divide it into four equal portions. Pinch those pieces into really tight, round balls. That tightness is key for a good shape! Let them rest again for just 30 minutes while you crank the oven up to 400°F. Before they go in, brush them all over with that egg wash; it acts like a built-in browning agent. Bake them for 25 to 30 minutes until they are deep brown and sound hollow when you tap the bottom. If you are making soup later, you might want to bookmark my recipe for easy one-pot wedding soup!
Tips for Achieving Panera style bread bowls at Home
Oh, I know why you’re here—you want those recognizable, slightly shiny, perfectly savory bowls that everyone loves from that big soup chain! Getting those Panera style bread bowls right at home is totally achievable, and honestly, it’s the best part of this recipe. The secret, which I learned after a few slightly pale attempts, isn’t just the dough, but what you do right when they come out of the oven.
Once the bowls are baked golden brown and cooling on the rack, I immediately brush the tops with melted butter mixed with just a whisper of salt. It gives them that slight sheen and savory flavor that makes them taste like they came straight from the bakery case. I remember the first time I nailed that brushing technique; my husband asked if I’d snuck one out of the restaurant! If you like buttery bread, you absolutely must try my suggestion for easy artisan garlic parmesan bread too. For another great savory bread idea, check out the pretzel version from my friends over at Dishes by Daisy.
Serving Suggestions: What to Fill Your bread bowls With
Now that you have these glorious, sturdy homemade bread bowls cooling on the rack, the real fun begins! What are you going to put inside? Since these loaves are baked to be substantial—we made sure those walls are thick—they can handle just about anything you throw at them. They transform the simplest meal into something truly special. These aren’t just bread; they are beautiful, edible soup bowls!
Don’t just stick to plain chicken noodle, though! Think thick, cheesy, and rich. I’ve found that using these for denser foods means less mess and more flavor soaking into the bread below the filling. It’s the ultimate comfort food setup, perfect for a chilly evening when you need something heartwarming. If you are planning on serving baked potato soup, you absolutely have to check out the creamy version from Molly’s Home Guide!
- Classic Broccoli Cheddar or Creamy Potato Soup (you simply must try my creamy potato leek soup!)
- Hearty Beef Stew or French Onion Soup
- Thick, decadent White Chicken Chili—my Instant Pot white chicken chili is amazing served this way!
- Warm Spinach and Artichoke Dip (Yes, for an appetizer!) or one of my easy dips like my 3-ingredient chili cheese dip.
Ideas for Hearty soup in a bread bowl
When I want a real showstopper, I go straight for the thick stuff. Hearty beef stew is fantastic because it barely touches the sides, letting the bottom soak up all that rich gravy slowly. If you want that indulgent restaurant experience, skip the thinner soups and load these up with a proper, chunky chili. If you use my chili recipe, be sure to top it with a little extra cheese inside the bowl before you pour it in!
Storage and Reheating Instructions for leftover bread bowls
These warm bread bowl recipes are best eaten the day you make them, but if you have leftovers, don’t worry! I always store the hollowed-out bread shells separately from any soup or chili you filled them with. That soup goo will make the walls soggy overnight, and nobody wants a soggy bread bowl, right?
Wrap the bread shells tightly in plastic wrap once they’ve cooled completely. If the inside feels a little soft the next day, just pop the shell into a 350°F oven for about five to seven minutes to crisp that crust right back up. It works wonders! You can even reheat leftover chicken gravy if you’re looking for a quick weeknight filler using my standby recipe, which pairs wonderfully with these crusty shells—check out easy chicken gravy recipe without drippings for timing!
Frequently Asked Questions about baking bread bowls
I get so many wonderful questions from folks trying this recipe for the very first time, which is fantastic! Bread making can feel a little intimidating, but I’m happy to clear up any confusion about getting those perfect homemade bread bowls just right. If you’ve ever wondered about using sourdough starter instead of commercial yeast, or if you’re looking for ways to get a softer pretzel bread bowl, these answers should help guide you!
If you’re new to using yeast, you might want to check out my recipe for my fluffy sourdough pancakes, as that recipe also deals heavily with wild yeast cultures—it’s very instructive! See my sourdough pancake recipe here.
Can I use this easy bread bowl recipe for a quick bake?
That’s the million-dollar question! While this is an easy bread bowl recipe, yeast naturally needs time to work its magic, so waiting for the dough to double is essential for structure. If you are in a huge rush, try placing your dough in a slightly warmer (but not hot!) location, like right next to a sunny window, to encourage that first rise to speed up by about 15 minutes. This is a great trick for getting your bread bowls ready for soup night a little faster.
For anyone attempting to cut corners, I suggest looking at resources like the one from Adventures of a DIY Mom if you absolutely need a *super* quick fix, but my method still produces the best texture overall!
What if my dough didn’t rise?
Don’t worry! Nine times out of ten, it’s the water temperature—it was probably too cold for the yeast. If it looks like sludge and hasn’t foamed, you’ll need to start over with fresh yeast and warmer water next time. If it rose and then flattened out quickly, it might indicate over-kneading, but usually, that just means you needed a little more flour, and it will still bake up fine!
Can I substitute the flour?
For these sturdy edible soup bowls, stick to all-purpose flour. While bread flour would give a slightly chewier texture, all-purpose is best suited for the necessary rise and softness we’re aiming for here in this basic recipe.
Nutritional Estimate for Homemade bread bowls
Now, I’m not a nutritionist by any stretch, but I know many of you like to keep track of what you’re making for your families. Based on the recipe for these four homemade bread bowls (and assuming one loaf is one serving), here is a little guide. Remember, these figures are just estimates, as the final count really depends on the exact flour brand or how thick you slice the inside bread!
- Serving Size: 1 bread bowl
- Calories: 320
- Sugar: 2g
- Sodium: 450mg
- Fat: 2g
- Carbohydrates: 68g
- Protein: 10g
Share Your Comfort Food Creations
Well, that’s it for the baking part! I truly hope you give these homemade bread bowls a try next time you’re making soup or chili. They are just wonderful!
Once you’ve served them up, I would absolutely love to see what you filled them with! Head back here, leave me a star rating—it helps other home cooks find reliable recipes—and share a picture on social media tagging me. If you want to know more about my teaching background and philosophy, you can always read more over on my About Page. Happy baking, friends!
PrintEasy Homemade Bread Bowls: Soft Inside, Crusty Outside
Learn how to make bakery-style homemade bread bowls from scratch. This easy recipe yields soft, chewy interiors and perfectly crusty exteriors, making them ideal for serving your favorite soups, chili, or dips.
- Prep Time: 20 min
- Cook Time: 30 min
- Total Time: 2 hours 20 min
- Yield: 4 servings 1x
- Category: Baking
- Method: Baking
- Cuisine: American
- Diet: Vegetarian
Ingredients
- 1 ½ cups warm water (105°F to 115°F)
- 2 ¼ teaspoons active dry yeast
- 1 teaspoon granulated sugar
- 3 ½ to 4 cups all-purpose flour, plus more for dusting
- 2 teaspoons salt
- 1 large egg, beaten (for egg wash)
- 1 tablespoon water (for egg wash)
Instructions
- Activate the yeast: In a large bowl, combine the warm water, yeast, and sugar. Let this stand for 5 to 10 minutes until foamy.
- Mix the dough: Add 3 ½ cups of flour and the salt to the yeast mixture. Mix with a wooden spoon until a shaggy dough forms.
- Knead the dough: Turn the dough out onto a lightly floured surface. Knead for 6 to 8 minutes, adding small amounts of the remaining flour only if the dough is too sticky. The dough should be smooth and elastic.
- First rise: Place the dough in a lightly oiled bowl, turning to coat. Cover the bowl with plastic wrap or a clean kitchen towel. Let the dough rise in a warm place for 1 to 1 ½ hours, or until doubled in size.
- Shape the bowls: Gently punch down the risen dough. Divide it into 4 equal pieces. Shape each piece into a tight, round ball. Place the dough balls on a baking sheet lined with parchment paper, leaving space between them.
- Second rise: Cover the shaped dough balls loosely and let them rest for 30 minutes.
- Preheat and prepare: Preheat your oven to 400°F (200°C). Mix the beaten egg with 1 tablespoon of water to create an egg wash.
- Bake the bread bowls: Brush the tops of the dough balls evenly with the egg wash. This helps create a golden, crusty bread bowl exterior. Bake for 25 to 30 minutes, or until the tops are deep golden brown and the bottoms sound hollow when tapped.
- Cool and hollow: Let the bread bowls cool on a wire rack for at least 15 minutes before serving. To serve, use a sharp knife to cut a circle in the top of each loaf. Gently pull out the soft interior bread, leaving a sturdy wall about ¾ inch thick to hold your soup or chili.
Notes
- For a Panera style bread bowl, brush the tops with melted butter mixed with a pinch of salt immediately after they come out of the oven.
- Use the removed soft bread for dipping into the soup or making croutons.
- These edible soup bowls are perfect for serving hearty beef stew or creamy clam chowder.
Nutrition
- Serving Size: 1 bread bowl
- Calories: 320
- Sugar: 2
- Sodium: 450
- Fat: 2
- Saturated Fat: 0.5
- Unsaturated Fat: 1.5
- Trans Fat: 0
- Carbohydrates: 68
- Fiber: 3
- Protein: 10
- Cholesterol: 0