

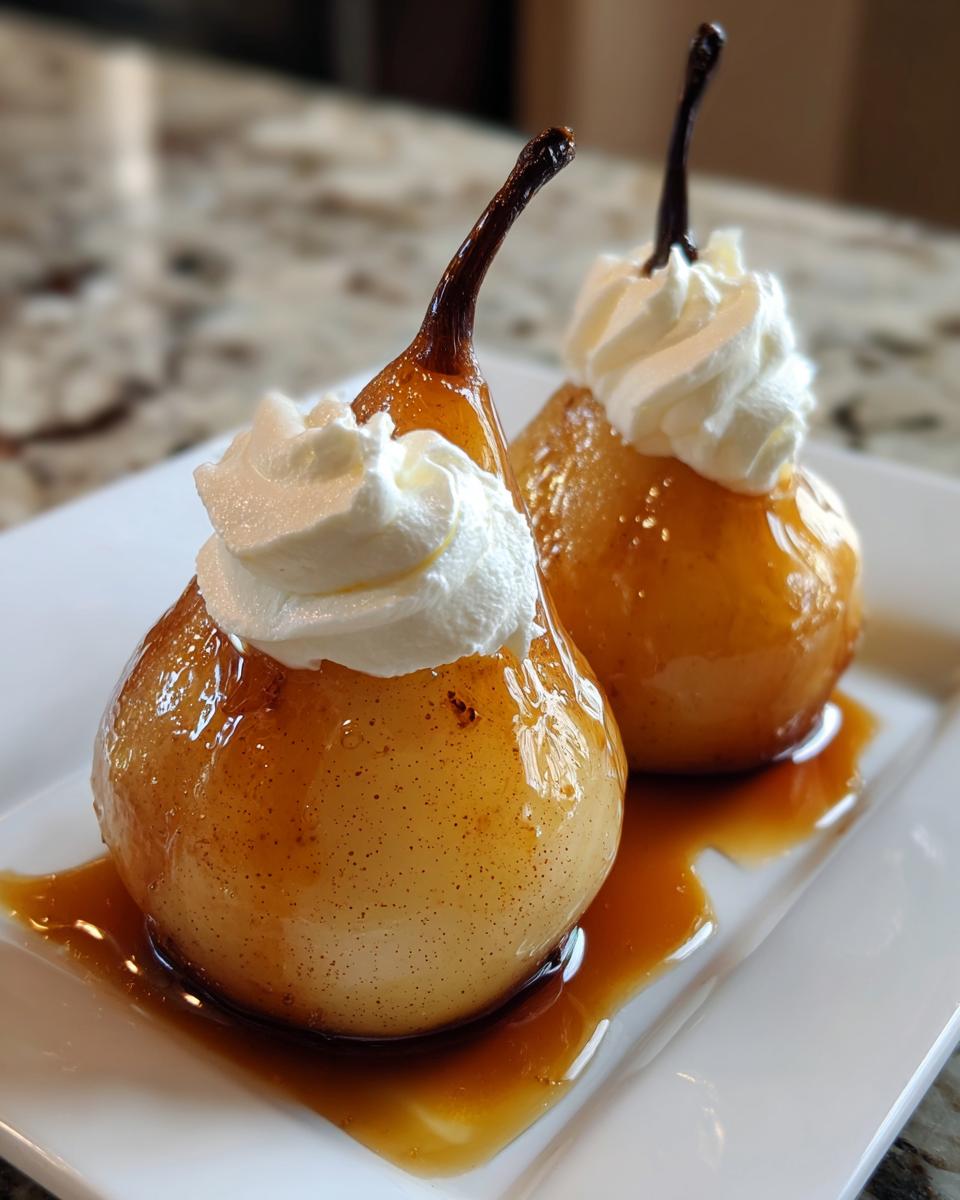
Sometimes, when company is coming over, you just want a dessert that looks like it took hours of fancy work but was actually quite simple to pull off. I hear you! That’s why I rely on classic fruit preparations, and nothing screams elegant dessert recipes quite like perfectly simmered fruit. Today, we are making my absolute favorite for holiday desserts: Vanilla Bourbon Poached Pears. Believe me when I say these are the easiest yet most impressive treats you can put on the table.
As a former teacher, I pride myself on breaking down techniques so everyone can succeed, and poaching fruit is no different! Getting those poached pears tender and flavorful is all about the liquid and the time you give them. This recipe is designed to give you that melt-in-your-mouth texture with the warm spice of bourbon and vanilla. It’s a gourmet fruit dessert that requires minimal fuss but gives a huge payoff!
- Why You Will Love These Vanilla Bourbon Poached Pears
- Gathering What You Need for Perfect Poached Pears
- How to Prepare Tender Poached Pears Step-by-Step
- Essential Tips for Perfect Poached Pears Every Time
- Variations for Wine Poached Pears and Spiced Poached Pears
- Serving Suggestions for Elegant Dinner Party Desserts
- Make Ahead Dessert and Storage for Poached Pears
- Frequently Asked Questions About Poached Pears
- Estimated Nutritional Information for Poached Pears
Why You Will Love These Vanilla Bourbon Poached Pears
I just know you are going to adore this simple approach to a gourmet fruit dessert. When you look at these glistening pears, you’d never guess they required so little effort from me. They are perfect for pulling out after a big meal, and definitely qualify as elegant dessert recipes!
- Simply Tender Perfection: We aim for that “melt-in-your-mouth” texture, and by following the gentle simmer, you skip the rubbery fruit problem entirely. It’s truly a tender pear recipe staple.
- Make-Ahead Magic: These are fantastic easy poached pears because they actually taste better the next day. You can handle the main cooking days before your event.
- Sophisticated Flavor Profile: The combination of real vanilla bean and that smoky hint of bourbon adds such depth. It tastes far fancier than the effort required.
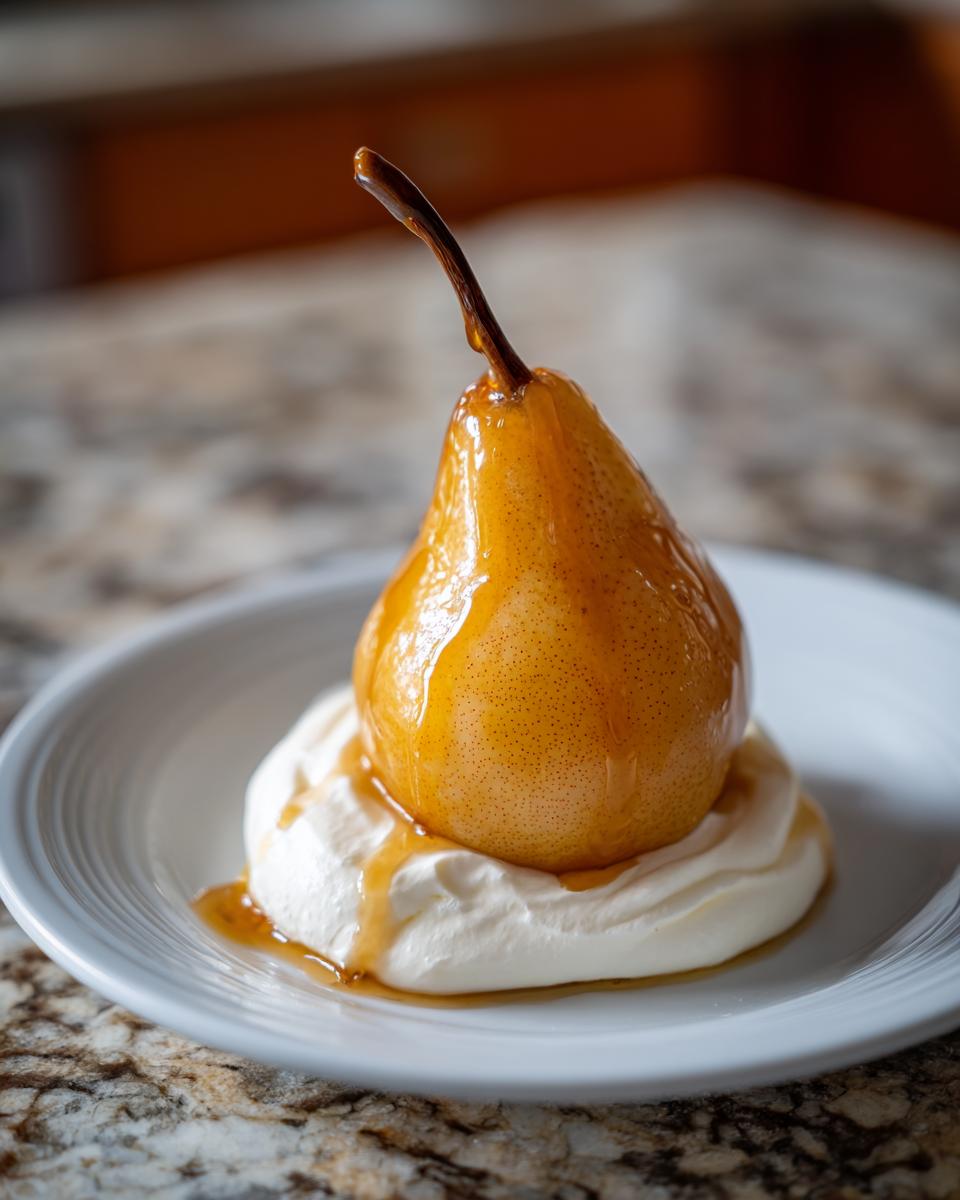
- Stunning Presentation: Leaving the stems on makes these look like something you’d find in a high-end French pastry shop without any of the guesswork. A true elegant dinner party dessert centerpiece!
Gathering What You Need for Perfect Poached Pears
Gathering your supplies is super straightforward, which is why I love this recipe for busy hosts! When it comes to choosing your fruit, make sure you start with firm pears. I always reach for Bosc or Anjou—they hold their shape beautifully during the simmering process. If you use fruit that’s already too soft, it will just turn to mush, and we certainly don’t want that! We need them sturdy enough to soak up all that amazing bourbon vanilla flavor.
I was looking at some beautiful inspiration online just the other day for similar recipes, and they all agreed: quality ingredients make all the difference in a simple poaching liquid. Don’t be tempted to skip the vanilla bean for the paste; that little piece of bean is where all the magic happens!
Ingredients for the Vanilla Bourbon Poached Pears
This list looks long, but it’s mostly liquids and spices that you probably have on hand already. Trust me, the aroma while these simmer is worth every single item.
- 4 firm pears (Bosc or Anjou), peeled, stems left on
- 4 cups water
- 1 cup granulated sugar
- 1 vanilla bean, split and scraped
- 1/2 cup bourbon
- 1 orange, sliced
- 1 cinnamon stick
For the Mascarpone Topping
This creamy topping is the perfect cool contrast to the warm, spiced fruit. Remember, you need that mascarpone softened up so it whisks smooth without any lumps!
- 1 cup mascarpone cheese, softened
- 2 tablespoons powdered sugar
- 1 teaspoon vanilla extract
You can see how straightforward this is! If you want to see another great example of how vanilla and bourbon play together in elegant desserts, check out this lovely recipe I found online. Vanilla Bourbon Poached Pears show similar flavor profiles!
How to Prepare Tender Poached Pears Step-by-Step
Now for the fun part—turning those firm pears into that beautiful, fork-tender fruit we all dream about! Believe me, getting that perfect delicate texture is easier than you think. As a former teacher, I pride myself on breaking down techniques so everyone can succeed, and cooking fruit is no different! When we follow these steps closely, we guarantee those gorgeous, juicy poached pears.
Preparing the Pears for Poaching
First things first, we have to get the pears ready to welcome all that flavor. Use your vegetable peeler and take off all the skin. Don’t worry if you nick a little bit of the flesh; we can trim that later! The absolute must-do step here is leaving the stems attached! That stem stub is your handle later on, and it makes for such a fancy finish when you serve them up later. Next, we need to scoop out the core from the bottom using a melon baller or a small spoon. Keep it neat, though; we want the pear shape to stay as whole as possible.
Creating the Flavorful Poaching Liquid
Find a pot, folks—and it needs to be wide and deep enough to hold those four pears snugly. In that pan, whisk together your water, sugar, that gorgeous scraped vanilla bean (don’t forget the pod—it flavors the liquid!), the bourbon, your orange slices, and that cinnamon stick. Put it over medium heat and just stir it until every single grain of sugar disappears. We need a smooth, sweet base before anything else goes in. The quality of this liquid sets the stage for the whole elegant dessert! If you’re looking for other beautiful ways to cook pears, check out this recipe I saw: Melt-In-Your-Mouth Poached Pears Recipe.
Achieving the Tender Pear Recipe Finish
Gently nestle those prepared pears into the simmering liquid. If they aren’t mostly submerged, just add a bit more water until they are covered. Now, listen close: lower that heat right down low! We want a lazy, gentle simmer—not a rolling, angry boil. A hard boil will make your fruit break down too fast. Partially cover the pot and let them bathe for about 20 to 35 minutes. To check if you’ve nailed this tender pear recipe, just slip a little paring knife near the center. If the knife slides in with almost no pushing at all, they are done! If you’re interested in other techniques for perfecting fruit desserts, you might like my recipe for easy homemade French apple tart.
That tender quality is what separates a good batch of poached pears from a truly great one. Once they are soft, don’t rush the next step—the cooling is just as vital!
Essential Tips for Perfect Poached Pears Every Time
I mentioned patience being key when we were simmering them, but the real secret for success—and achieving that truly gourmet fruit dessert flavor—comes after you turn the heat off. My mother always said that baking and cooking rely on a little bit of waiting time, and nowhere is that truer than with poaching fruit. These little pointers are the difference between nice poached pears and absolutely show-stopping poached pears!
The Importance of Cooling in the Liquid
When your paring knife slides through the pear like butter (Step 4), your first instinct might be to pull them out right away onto a cooling rack. Don’t do it! Please resist that urge! Once you remove the pan from the burner (Step 5), you need to let those pears cool down right there in the liquid. This is crucial, friends.
Why? Because that warm, spiced bourbon vanilla syrup continues to seep deep into the fruit as it cools. If you pull them out too soon, you end up with a nicely cooked exterior but a slightly bland center. Letting them steep while they hit room temperature ensures every single bite of your tender pear recipe is saturated with flavor.
This is also your big secret for handling elegant dinner party desserts! You can let them cool completely like this, even let them sit overnight in the fridge submerged in the strained liquid. If you’re planning ahead, this step makes the whole process stress-free. For more on getting great soaking flavors, check out how I make a wonderful easy chicken gravy recipe without drippings—it’s the same principle of low and slow flavor absorption!
Making the Glossy Syrup Reduction
Once those pears have soaked up all the flavor they can handle and you’ve transferred them to storage or your serving plate, you are left with this gorgeous, fragrant bourbon liquid. Don’t you dare pour that down the sink! That is pure gold and the best part of the syrup component for your elegant dessert.
To turn it into the perfect drizzle for your mascarpone cream, simply pour that leftover liquid back into a saucepan. Bring it up to a rapid, rolling boil over medium-high heat (Step 7). You need to let it boil vigorously until it reduces down and thickens up. It should look glossy and coat the back of a spoon nicely—this usually means it’s reduced by about half. This reduced syrup is what you use to drizzle artfully over your finished poached pears. If you want a real flavor boost, you can find some great ideas for finishing touches over at Puresavory on making poached pears!
Variations for Wine Poached Pears and Spiced Poached Pears
One of the things I love most about poaching fruit, and why it’s such a dependable technique for elegant dessert recipes, is how easily you can switch up the flavor profile! While these vanilla bourbon pears are truly special, if you’re looking to lean into a more traditional holiday vibe or just want to explore different liquids, I’ve got you covered. It’s all about keeping that gentle simmer going to ensure you still get those wonderfully tender poached pears.
Classic Red Wine Poached Pears Substitution
If you want that deep, jewel-toned color and rich, tart flavor—especially popular around Thanksgiving—you should absolutely swap out the liquid base to make classic wine poached pears. The simplest switch is replacing the 4 cups of water with 4 cups of a dry red wine, like a Cabernet Sauvignon or Merlot. You skip the bourbon in this case, but you really amp up the spices! I’d add an extra cinnamon stick, maybe a star anise pod or two, and perhaps a clove. You still use the sugar, but the wine brings so much natural acidity that balances it out beautifully. This results in amazing spiced poached pears!
Honey Poached Fruit Alternative
For a lighter, softer sweetness that tastes wonderfully of the orchard, you can try a honey poached fruit variation. This is great if you feel the bourbon is too strong for certain company, or if you just prefer a less refined sugar base. Instead of using the full cup of granulated sugar, try using 3/4 cup of good quality liquid honey—like clover or wildflower—and reduce the water slightly. The honey creates a subtle floral note that pairs beautifully with vanilla. It keeps the process simple but offers a wonderfully different take on spiced poached pears, perfect for a light fruit dessert!
Serving Suggestions for Elegant Dinner Party Desserts
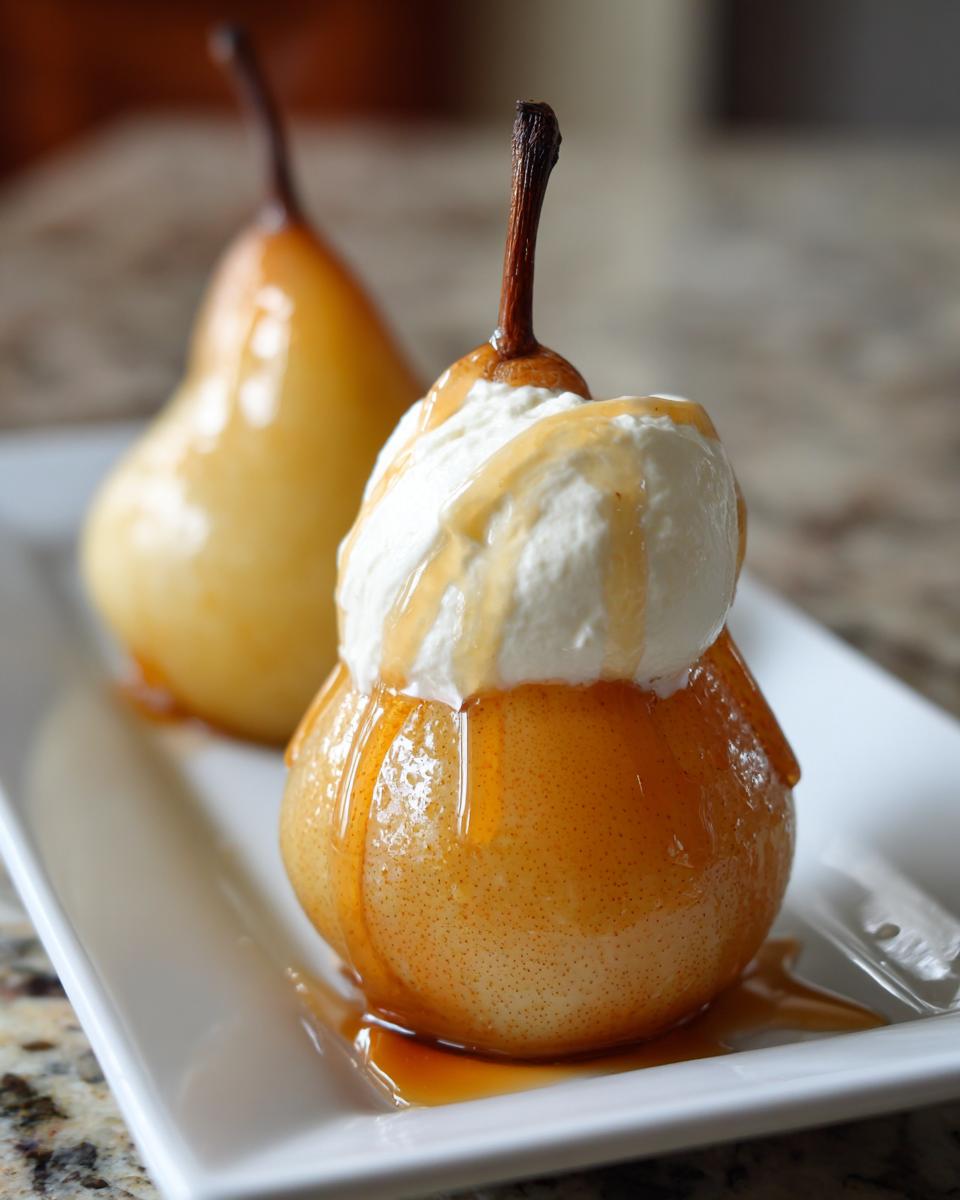
We’ve done the work—the slow simmering, the flavorful infusion—now we get to the fun part: making these look like they belong on a magazine cover! Since our goal is creating those stunning, easy poached pears that serve as gourmet fruit desserts, presentation really matters here. Even though these are simple, the way we plate them elevates them instantly for any elegant dinner party dessert setting.
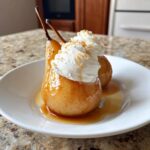
The first and most important element is that homemade Mascarpone Cream we made. That creamy, slightly tangy dollop cuts through the sweet spiced fruit perfectly. Don’t just plop it on the side; use a nice tablespoon and set it right next to or slightly underneath the pear so it catches some of that gorgeous syrup.
Remember that reduced poaching syrup we talked about? Drizzle that over the pear *after* it’s on the plate. I like to use a spoon to make a few sweeping lines across the plate first, setting the pear down gently in the middle of the design. It makes the whole dish look intentional and adds that necessary glossy shine.
Beyond the mascarpone, you have options to keep it light or add a little crunch! For an extra layer of texture—especially if you are serving these as holiday desserts—I sometimes toast a few slivered almonds or pecans and dust them lightly over the cream. It gives the eater something nice to bite into alongside that tender pear texture. If you like chocolate with your fruit, though, you can always skip the nuts and serve these alongside a small scoop of homemade chocolate pudding for a richer experience. You can find my recipe for homemade chocolate pudding recipe if you want to compare!
Presentation really is everything here. Keep the plate simple, let the color of the pear shine, and use the glaze to make it look expensive!
Make Ahead Dessert and Storage for Poached Pears
Now, this is the part that separates a stressful holiday dinner from one where I can actually sit down and enjoy my guests! These vanilla bourbon poached pears are a dream because they fall squarely into that wonderful *make ahead dessert* category. You absolutely do not need to make these the day you plan to serve them!
This technique actually improves the flavor profile because the longer the pears sit soaking in that lovely spiced liquid, the more deeply those vanilla and bourbon notes penetrate. It’s kind of like marinating, but for fruit! Trust me, having this elegant dessert ready to go saves so much panic later on.
If you made these the day before—which I highly recommend—I have a couple of strict rules about how they need to be stored so they stay perfect for serving.
Storing Your Poached Pears
Once your pears have cooled down completely in the poaching liquid (remember that essential step we talked about?), you need to transfer them into an airtight container. You can use a large zip-top bag or a sturdy glass container, ensuring the pears are fully submerged in the strained poaching liquid. Don’t just store the fruit; the liquid is essential for keeping them plump and preventing any drying or discoloration.
The recipe notes confirmed that you can safely keep these stored in the refrigerator for up to three days. That means you can make them on Tuesday for your Friday dinner party! If you plan on serving them cold, just pull them out an hour before company arrives so they aren’t icy cold. If you prefer them warm, gently reheat them in a small saucepan with a bit of that original poaching liquid, just until they are warmed through—but don’t boil them!
If you are looking for other make-ahead recipes that take the pressure off serving days, you might want to look at my recipe for a moist and zesty lemon cake—that one also holds up beautifully!
Serving Previously Poached Fruit
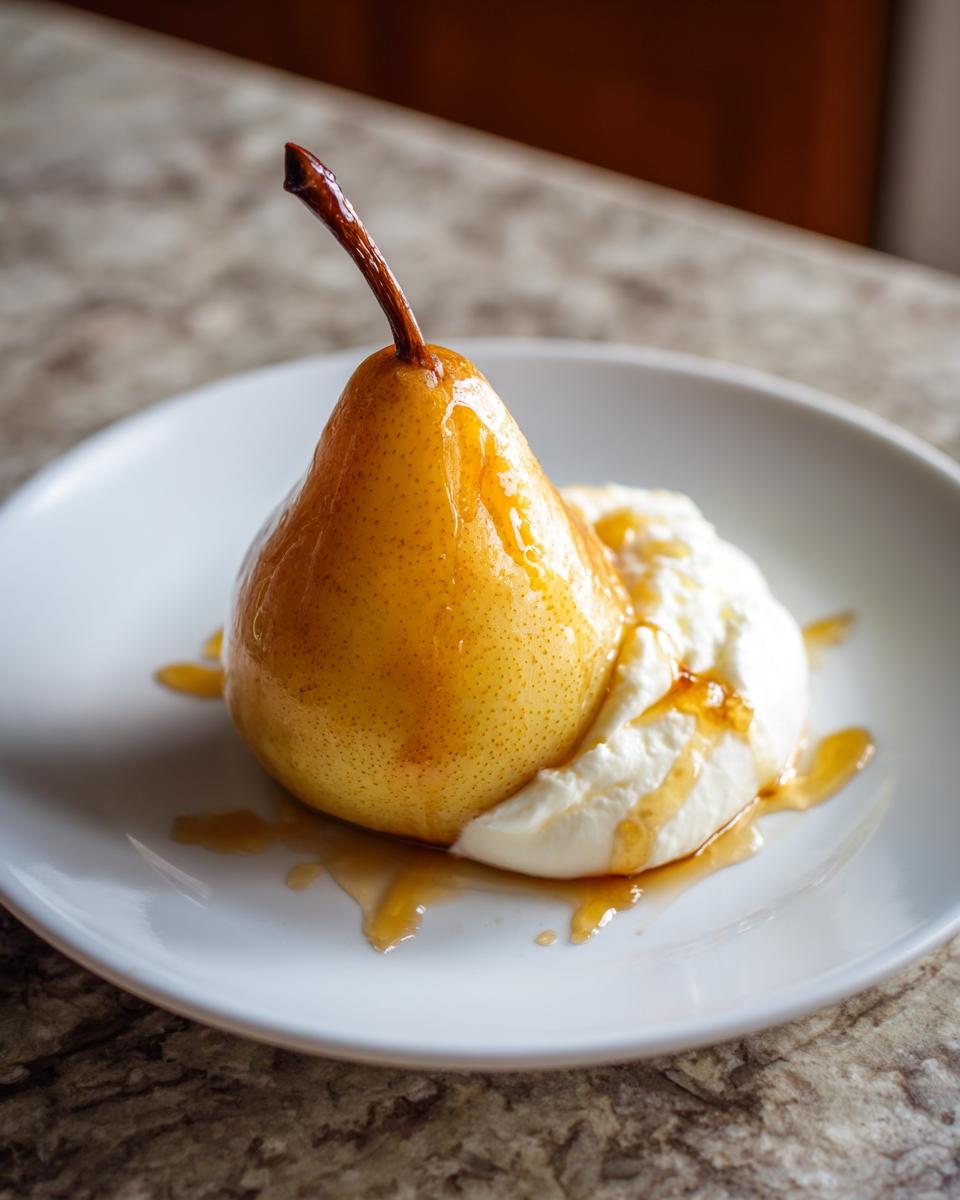
When it comes time to serve, pull your perfect poached pears out of the fridge. If the fruit seems a little soft after refrigeration, that’s okay—it just means they soaked up all that flavor! Be sure to plate them immediately after pulling them from the liquid. You will still want to drizzle them with that reduced, glossy syrup we made for that final elegant touch. If you want to see how another lovely baker prepares these amazing bourbon vanilla pears, check out Laila’s recipe for inspiration on presentation!
Because we allowed them the time to fully infuse, you’ll find that even day-three pears are incredibly juicy and tender. They are truly one of the best light fruit dessert options because the flavor deepens but the texture remains soft and yielding.
Frequently Asked Questions About Poached Pears
It’s natural to have questions when trying out a new technique, especially when you want the absolute best results for your guests. I’ve gathered the ones I hear most often from my readers who are just getting started with poaching fruit. Don’t worry if you’re nervous about the exact timing—that’s why I’m here!
What is the best way to ensure my poached pears are juicy and tender?
This is the number one question! The secret to how to poach pears perfectly boils down to two things working together. First, you must start with firm pears, like Bosc or Anjou. If they are too ripe, they will disintegrate before they absorb the flavor. Second, and this is critical, you must maintain a very gentle simmer. If your liquid is bubbling hard, it shocks the outside of the fruit, making it tough before the inside softens. Keep the heat low enough that you only see tiny bubbles breaking the surface occasionally. That low, slow bath is what guarantees that beautifully tender pear recipe texture!
Can I use apples instead of pears in this recipe?
Oh, you certainly can! Apples work beautifully as a substitute, though you should think of it as a slightly different dessert experience. Apples have a denser flesh than pears, so they often require a little less poaching time—maybe 15 to 25 minutes depending on how firm they are. Because of that density, they won’t quite achieve that silky, melt-in-your-mouth quality that truly ripe poached pears get, but they will still be delicious and wonderfully flavored by the bourbon vanilla syrup!
Are these considered light fruit dessert options?
That’s a thoughtful question, especially if you’re watching sugar intake or just want something that isn’t heavy after a big meal. In the grand scheme of desserts, yes, these absolutely fall into the category of light fruit dessert options. While we do use sugar to create the syrup vehicle for flavor, you are primarily eating fruit, which provides fiber. It’s certainly much lighter than turning to traditional cakes or creamy puddings. The key is moderation with that final syrup drizzle, but the base of our sweet potato muffins recipe which focuses on vegetables also shows you how fruit can make a lighter base!
Estimated Nutritional Information for Poached Pears
Now, I always like to include a little note about nutrition for you, because while this is definitely a treat, it’s a much lighter option than something heavy and baked. When we talk about these vanilla bourbon poached pears, remember that we are eating primarily fruit, which is wonderful for digestion and gives us some nice fiber! The sugar content comes mostly from the syrup we use to poach them.
As a former teacher, I always believed in transparency—showing all my work! So please remember that these figures are just an estimate based on the ingredients in the recipe JSON. They are calculated for one serving (one pear, plus syrup and topping). If you go heavy on the mascarpone cream or use a lot more syrup, the calories and sugar will naturally go up. But generally speaking, this is a beautifully balanced, light fruit dessert!
Here is what we estimate for one serving of these gorgeous poached pears:
- Serving Size: 1 pear with syrup and topping
- Calories: 350
- Sugar: 55g
- Sodium: 15mg
- Fat: 14g
- Saturated Fat: 8g
- Trans Fat: 0g
- Carbohydrates: 58g
- Fiber: 8g
- Protein: 5g
- Cholesterol: 45mg
See? Lots of fiber from that fruit! We want you eating well, not just eating dessert. If you are looking for ways to add hidden vegetables into your family’s diet—which I specialized in during my teaching years—you should check out my recipe for sweet potato muffins, moist and fluffy recipe. It’s a great way to sneak in some good stuff alongside your treats!
PrintVanilla Bourbon Poached Pears with Mascarpone Cream
Make melt-in-your-mouth poached pears infused with vanilla and bourbon. This elegant dessert is simple to prepare and perfect for holiday dinners or special occasions.
- Prep Time: 15 min
- Cook Time: 35 min
- Total Time: 50 min
- Yield: 4 servings 1x
- Category: Dessert
- Method: Stovetop Simmering
- Cuisine: American
- Diet: Vegetarian
Ingredients
- 4 firm pears (Bosc or Anjou), peeled, stems left on
- 4 cups water
- 1 cup granulated sugar
- 1 vanilla bean, split and scraped
- 1/2 cup bourbon
- 1 orange, sliced
- 1 cinnamon stick
- 1 cup mascarpone cheese, softened
- 2 tablespoons powdered sugar
- 1 teaspoon vanilla extract
Instructions
- Prepare the pears: Peel the pears entirely, leaving the stems intact for presentation. Use a melon baller or small spoon to carefully core the pears from the bottom, keeping the shape whole.
- Make the poaching liquid: In a deep, wide saucepan that fits the pears snugly, combine the water, granulated sugar, vanilla bean seeds and pod, bourbon, orange slices, and cinnamon stick. Bring this mixture to a simmer over medium heat, stirring until the sugar dissolves completely.
- Poach the pears: Gently place the prepared pears into the simmering liquid. The liquid should mostly cover the pears; if needed, add a little more water. Reduce the heat to low so the liquid maintains a gentle simmer, not a rolling boil.
- Cook until tender: Cover the pan partially and let the pears simmer for 20 to 35 minutes. Check for doneness by inserting a small paring knife near the core; it should meet little resistance for a tender, juicy texture.
- Cool and infuse: Remove the pan from the heat. Let the pears cool completely in the poaching liquid. This step allows the pears to fully absorb the vanilla and bourbon flavors. You can do this step ahead of time and refrigerate them in the liquid.
- Make the topping: While the pears cool, prepare the mascarpone cream. In a small bowl, whisk together the softened mascarpone cheese, powdered sugar, and vanilla extract until smooth and creamy.
- Serve: Remove the pears from the liquid. If you want a thicker syrup, boil the remaining poaching liquid rapidly until it reduces by half and becomes glossy. Serve each pear warm or chilled, drizzled generously with the reduced syrup, alongside a dollop of the vanilla mascarpone cream.
Notes
- For an even more elegant presentation, use red wine instead of water and bourbon for a classic Red Wine Poached Pears flavor profile.
- If you do not have a vanilla bean, use 2 teaspoons of good quality vanilla bean paste in the liquid.
- These make an excellent make ahead dessert; store the cooled pears submerged in their strained poaching liquid in the refrigerator for up to three days.
Nutrition
- Serving Size: 1 pear with syrup and topping
- Calories: 350
- Sugar: 55
- Sodium: 15
- Fat: 14
- Saturated Fat: 8
- Unsaturated Fat: 6
- Trans Fat: 0
- Carbohydrates: 58
- Fiber: 8
- Protein: 5
- Cholesterol: 45