
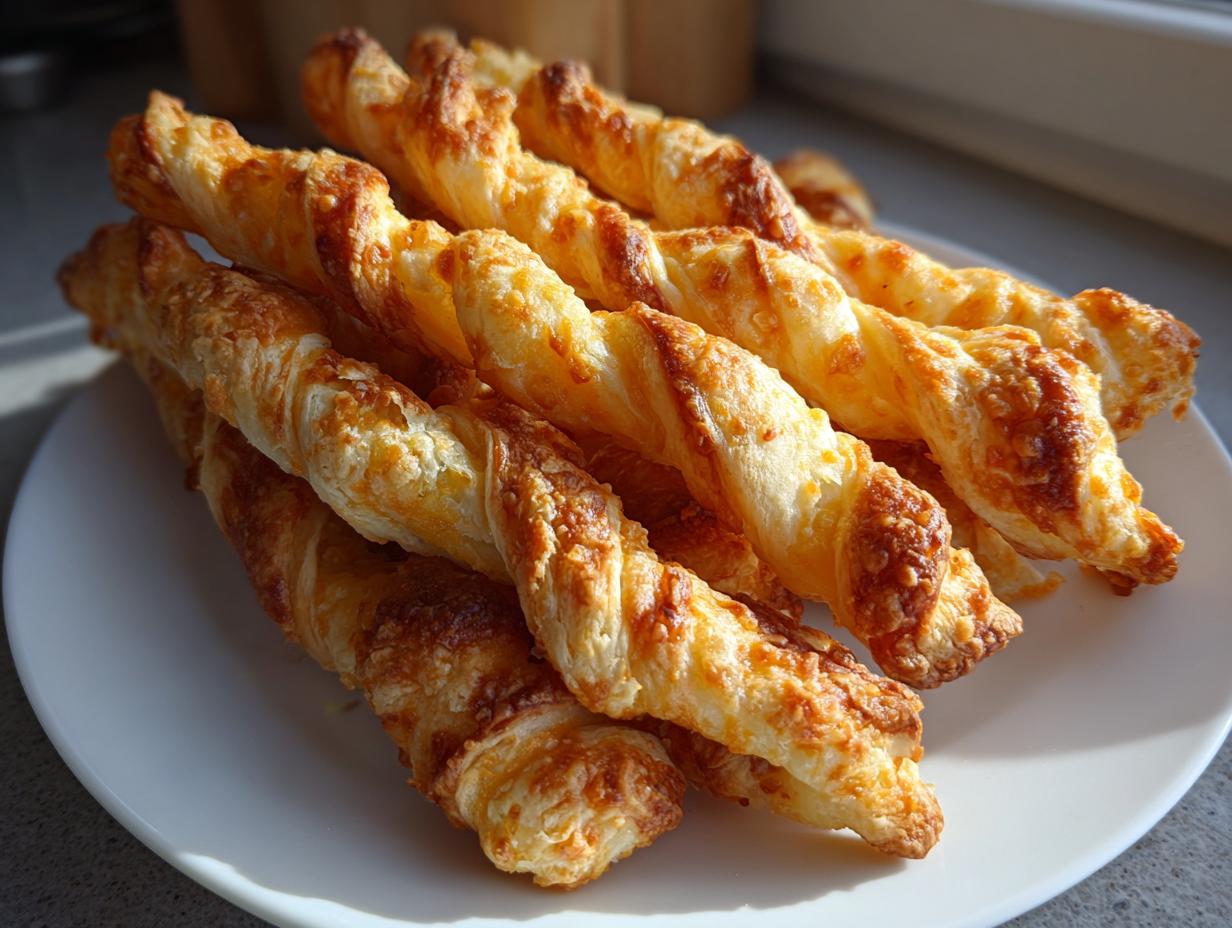
There are sweet snacks, and then there are the snacks that truly satisfy that deep, savory craving, the ones that make you reach for the platter again and again. To me, nothing beats a perfectly executed appetizer, and these spicy Southern cheese straws are the ultimate party finger food. When I started this blog, I knew I had to share my tried-and-true version, rooted deeply in the comfort of classic American home cooking my mother taught me. Forget those pale, floppy versions you sometimes see; my focus here is crystal clear: achieving the most addictive, buttery crunch you can imagine in every single twist. Trust me, once folks taste these, you’ll want to bookmark all my easy appetizer recipes!
- Why These Are the Best Cheese Straws You Will Ever Make
- Gathering Ingredients for Classic Cheese Straws
- Step-by-Step Instructions for Perfect Cheese Straws
- Tips for Success When Making Homemade Cheese Straws
- Storage and Make Ahead Appetizers: Keeping Cheese Straws Fresh
- Variations on Classic Cheese Straws for Entertaining Food Ideas
- Serving Suggestions and Wine Pairing Snacks for Cheese Straws
- Frequently Asked Questions About Making Cheese Straws
- Share Your Homemade Cheese Straws Experience
- Share Your Homemade Cheese Straws Experience
Why These Are the Best Cheese Straws You Will Ever Make
I truly believe these buttery baked snacks are the ones you’ll circle back to every single time you have people over. They just disappear! My background in straightforward American home cooking means I focus only on what makes a snack truly memorable, and these deliver every time.
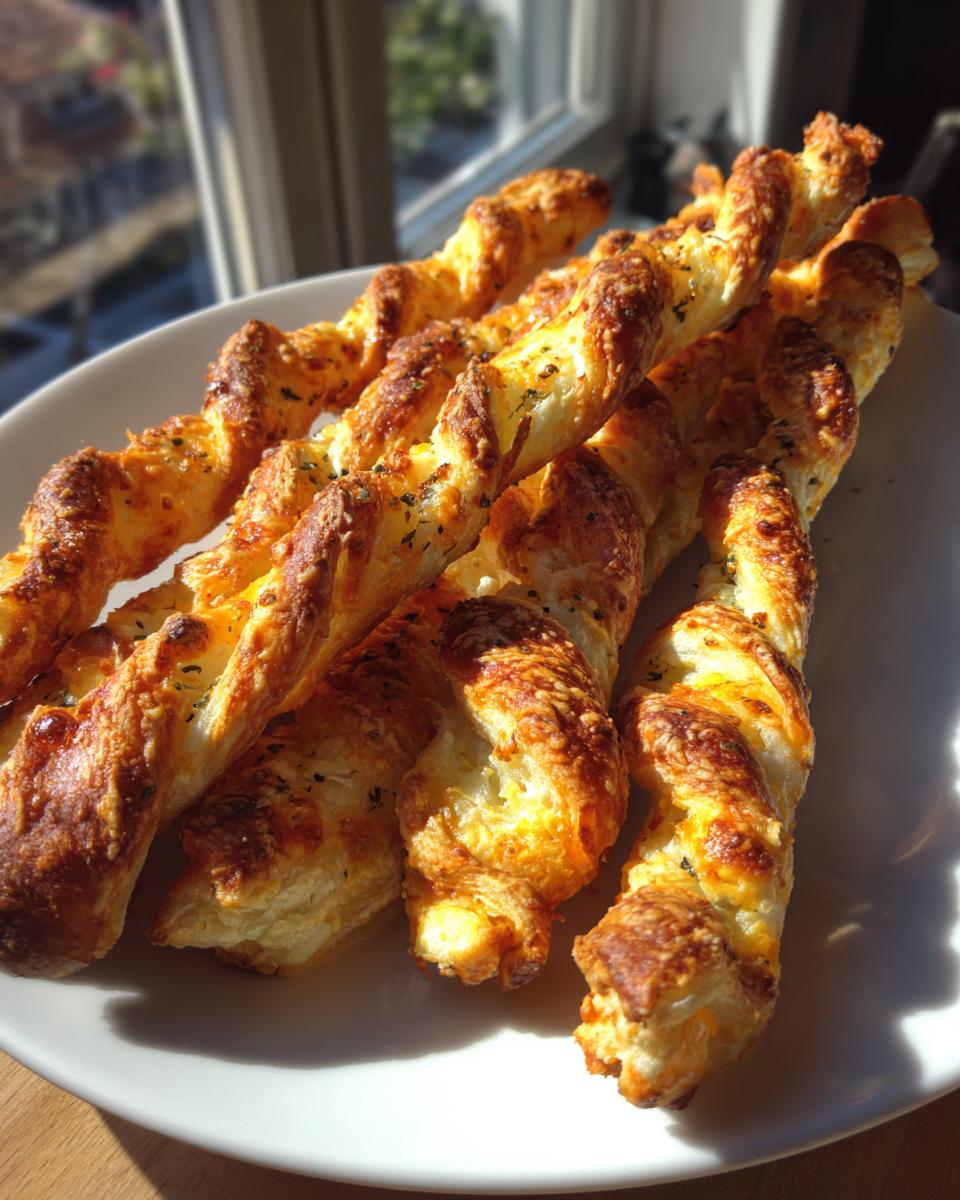
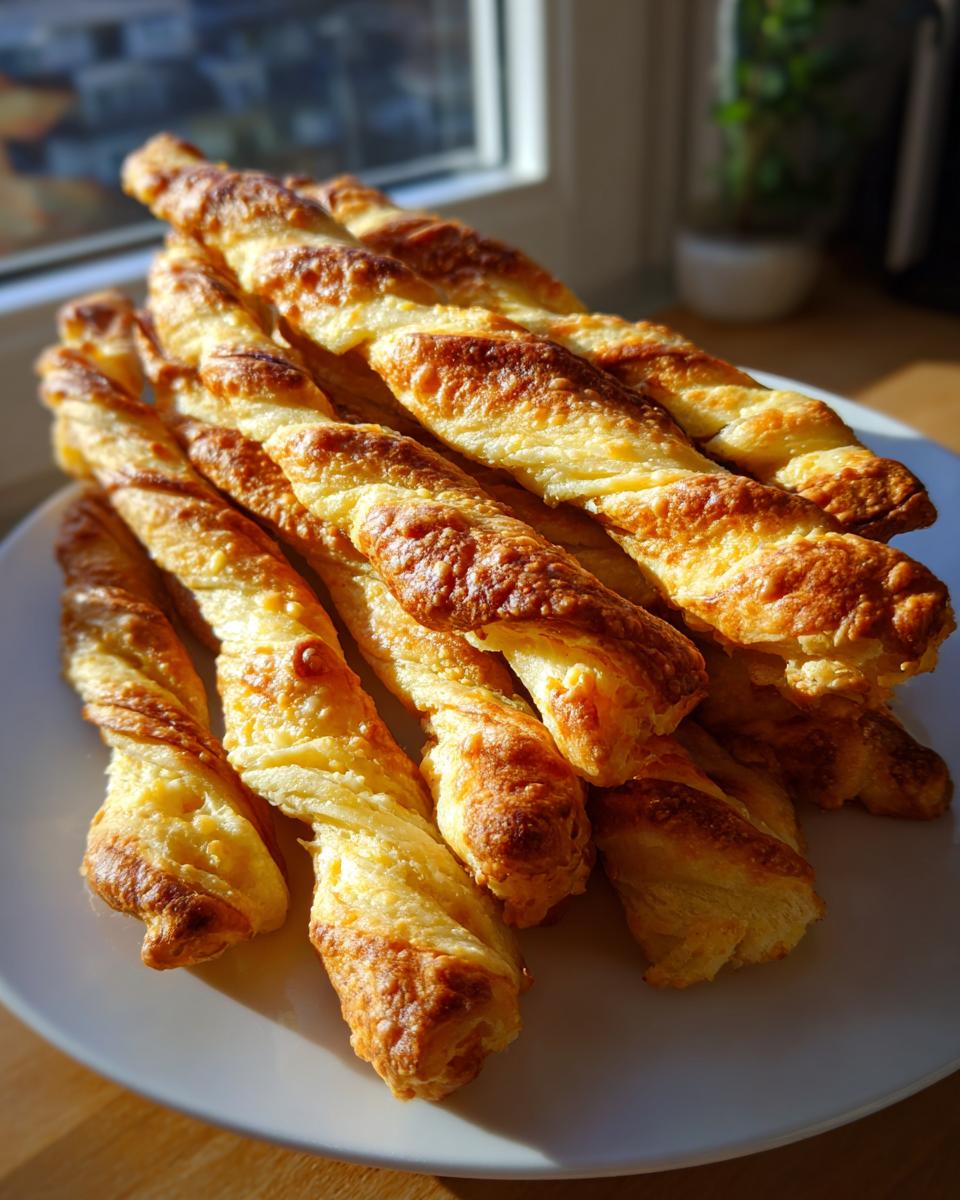
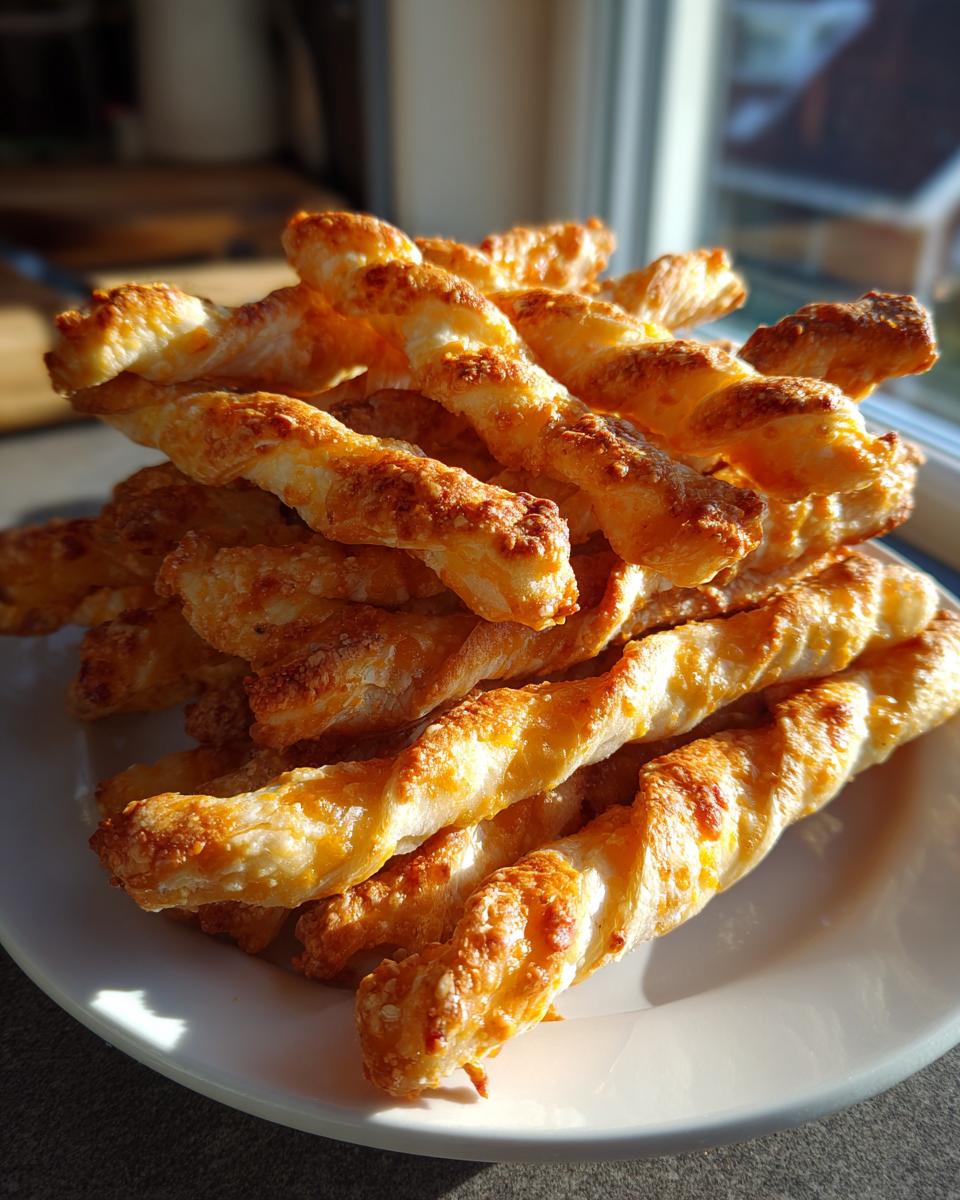
- They have a superior, noticeable crispiness—they snap, they don’t bend!
- The flavor is deep and savory because we insist on using real, aged sharp cheddar cheese.
- They are practically famous for being the star of holiday entertaining spreads and are equally welcome during casual game day snacks.
Achieving Peak Crispiness in Your Cheese Straws
Crispy is the name of the game here, and it all comes down to two tiny steps. First, you absolutely must roll that dough out thin—I mean about 1/8 of an inch thick. Don’t skimp! If it’s too thick, you end up with a softer bite, not the crisp snap we want. Second, use that egg white wash! Brushing them lightly before they go into the oven creates a beautiful seal that locks in the buttery goodness while ensuring a deep, golden crunch.
Gathering Ingredients for Classic Cheese Straws
Getting the right components ready before you even think about turning on the mixer is how we make sure everything runs smoothly. When I teach my grandchildren this recipe, I always tell them that the quality of your ingredients directly translates to the quality of your final snack. Since this recipe is so wonderfully simple, there aren’t many places to hide inferior quality, especially when it comes to the cheese!
- 1 cup unsalted butter, softened—and I mean really soft, almost spreadable, but not melted!
- 2 cups all-purpose flour
- 1 teaspoon salt
- 1/2 teaspoon cayenne pepper (We like the kick!)
- 1/4 teaspoon black pepper
- 1/4 teaspoon paprika
- 2 cups sharp cheddar cheese, finely grated—and I mean finely grated, like snow!
- 1 large egg white, lightly beaten (This is for the coating later)
Ingredient Notes and Sharp Cheddar Selection for Cheese Straws
The cornerstone of these savory appetizers is absolutely the cheese. You simply must use aged, high-quality sharp cheddar. Mild cheddar just won’t bring that punch of flavor we need, and it doesn’t have the right fat content to give us that perfect flaky texture. Sharp cheddar is non-negotiable; it’s what separates a decent snack from the kind people beg you for the recipe.
Also, notice that little bit of cayenne pepper listed? That’s the ticket to achieving that authentic Spicy Southern profile. You don’t want them overwhelmingly hot, just enough warmth on the back end to keep you reaching for the next bite and maybe having a sip of water with your appetizer.
Step-by-Step Instructions for Perfect Cheese Straws
Alright, let’s get baking! First things first, get your oven up to 400 degrees Fahrenheit and line two big baking sheets with parchment paper. This makes cleanup a breeze, which is always a win in my book. Once the oven is ready, we move straight into mixing up these addicting cheese straws.
We start by creaming that nice, soft butter until it’s light and smooth. Don’t rush this part; it builds the foundation for everything good that comes next. While that’s happening, I like to whisk together my flour, salt, and spices in a separate bowl. Remember, we want those homemade crackers to have flavor uniformity!
Mixing the Dough for Buttery Baked Snacks
Next, slowly add the dry mixture to the butter, mixing only until it just starts to come together. Then, toss in all two cups of that grated sharp cheddar. Here is the golden rule for fantastic texture: once the cheese is in, you mix it gently, just until you don’t see streaks of flour. If you keep beating it once the cheese is added, you develop the gluten way too much, and those beautiful butter layers get tough. We want flaky and crisp, not chewy!
Cutting and Twisting Your Cheese Straws
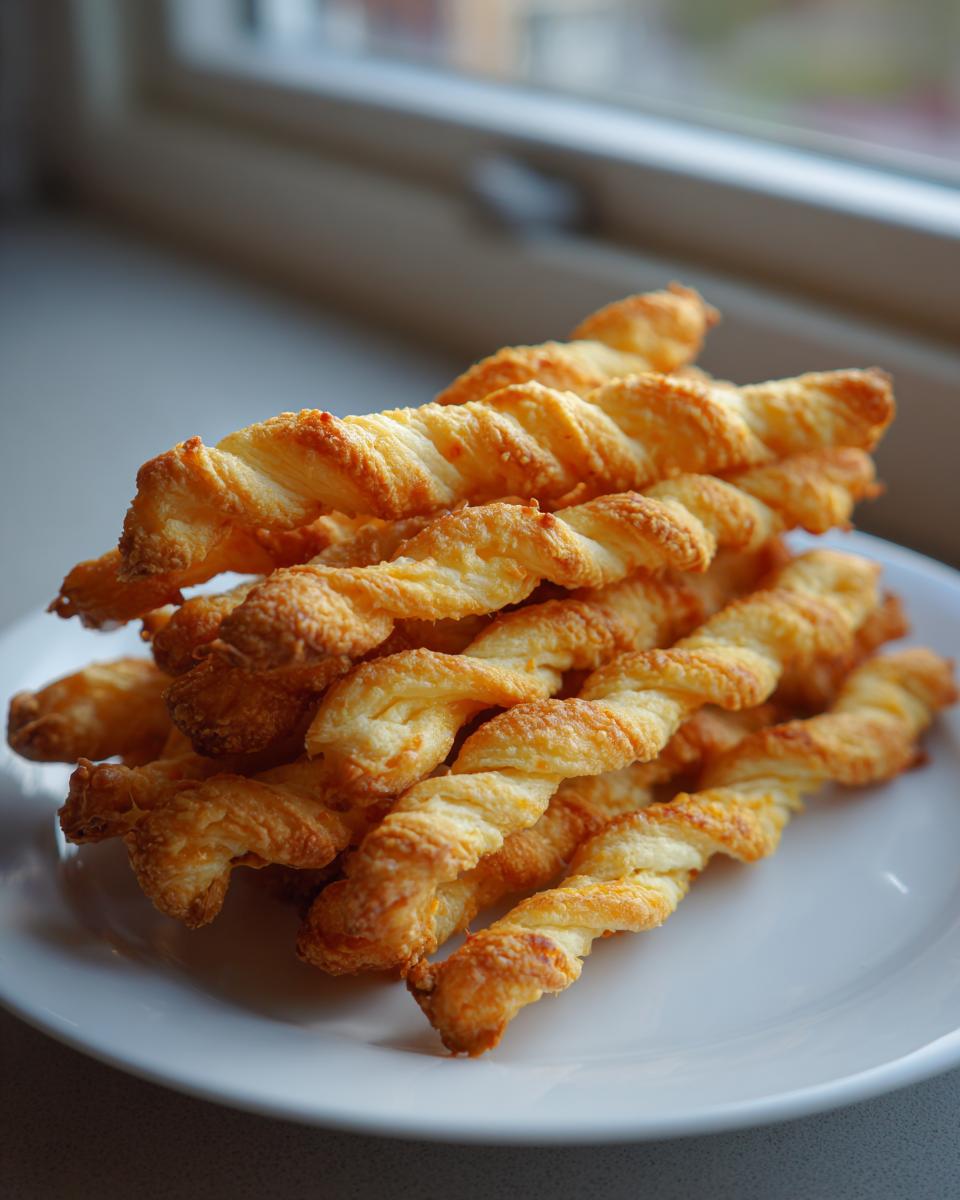
Once everything is combined, divide your dough in half. Flour your surface lightly—and I mean lightly! Roll each half out until it’s only about 1/8-inch thick. This thinness is essential for that perfect snap. Now, use a pizza cutter or a sharp knife to slice them into uniform strips, about half an inch wide and four or five inches long. Take each strip and gently twist it once or twice to create those lovely little crispy savory twists. Lay them out on your prepared sheets, keeping them spaced slightly apart for even baking.
Tips for Success When Making Homemade Cheese Straws
You’ve mixed the dough, you’ve twisted the shapes, and now they are heading into the oven. This is where a little experience from my years of baking from scratch really pays off. People sometimes ask me, Carla, what’s the last secret to making sure these don’t come out soft the next day? It’s all about heat and patience!
First, make sure your oven thermostat is honest! I always double-check mine because if the air isn’t hot enough, you won’t get the structure you need for true crispiness. We are baking these at 400 degrees, and we need that hotter temperature to evaporate the moisture quickly and maintain that flaky texture.
Pay close attention to the color. They need to get beautifully golden brown—I mean a deep, rich color, especially on the edges. Don’t pull them out just because they look ‘done’ on top. A light, pale color means there’s still moisture trapped inside, and they won’t deliver that satisfying snap we are aiming for. Trust me, if you want the very best cheese straws, let them reach that deep golden hue! You can even peek at my friend Martie’s method over at her take on the spicy Southern classic for comparison.
Finally, and this is crucial for crispiness: cooling! As soon as they come out smelling absolutely divine, slide that parchment right off the hot metal sheet and onto a wire rack. If you leave them on the pan, the residual heat keeps cooking them unevenly and they can steam themselves soft. The air circulation around the rack is what finishes the drying process, ensuring every one of your amazing cheese straws cools down perfectly crunchy.
Storage and Make Ahead Appetizers: Keeping Cheese Straws Fresh
One of the greatest joys of making a big batch of these simple, savory treats is knowing you have something delicious ready for unexpected guests all week long! I always plan to make extra because they are truly wonderful make ahead appetizers. The dough itself holds up beautifully. If you happen to be in the middle of something and need to pause, just wrap that dough up really tight in plastic wrap and pop it in the fridge. It’ll keep perfectly for two full days, just waiting patiently for you to roll it out later.
When baking from the fridge, however, I always add about five extra minutes to the bake time. Cold fat takes longer to melt and spread, so you need that little extra nudge in the heat to ensure they are baked all the way through to the center. Patience here again means crunch later!
Now, for storing the finished product. This is vital if you want to keep that delightful snap. Unlike cakes that need airtight containers to stay moist, we want the opposite for our cheese straws. Once they are completely cool—and I mean stone cold—transfer them to a storage tin or container that is airtight, yes, but avoid layering them too tightly if you can. If you have room, lay them flat in a single layer in a large cookie tin.
If you must stack them, place a piece of parchment paper between the layers. Kept sealed up at a cool room temperature, these last for a solid week without losing their texture one bit. Don’t bother with the refrigerator unless your kitchen is exceptionally hot and humid; chilling them can sometimes introduce unwanted moisture. My goal is always to have a fresh batch of crispy cheese straws ready to go for entertaining whenever the mood strikes!
Variations on Classic Cheese Straws for Entertaining Food Ideas
While my recipe sticks close to that lovely, straightforward Southern tradition, I know home cooks love to put their own signature spin on things, especially when planning big spreads of entertaining food ideas. That’s the fun of it! You start with a solid, dependable base, and then you get creative with the seasonings to match whatever you’re serving.
If sharp cheddar is your starting point, you can easily swap out about half a cup of it for a different cheese to change the whole personality of your cheese straws. Gruyère melts beautifully and brings a wonderfully nutty flavor that pairs fantastically with wine, if you’re looking for something a little more sophisticated. Or, try mixing in some Parmesan! Parmesan is saltier and harder, so it really helps boost that savory crust we’re aiming for.
Herbs are another fantastic way to switch things up! Instead of just relying on the spice, try crushing up a teaspoon of dried rosemary right into your dry mixture before adding it to the butter. Rosemary and cheese are just soulmates, aren’t they? You could also use a teaspoon of Italian seasoning blend if you want a slightly more herbaceous, less focused savory flavor. Honestly, the combinations are endless, and it makes serving these party finger foods fun year after year. You can check out how my friends over at House of Nash Eats approaches their basic recipe, just to see how far you can take the concept!
Making Spicy Snack Recipes with Different Heat Sources
Since we established that a little heat really makes these cheesy bites sing, you might want to experiment beyond cayenne pepper if you want to tailor your spicy snack recipes just right. Cayenne is great because it gives you that noticeable warmth without adding a lot of competing flavor, but maybe you want color, or maybe you need a different kind of burn.
If you’re looking for smokier notes, swap out half of the cayenne for smoked paprika. It gives them a gorgeous, deep orange hue and a lovely background warmth that tastes luxurious. Another trick I’ve used, especially if I’m making a very large batch and want to stretch the heat a little, is mixing a tiny dash of your favorite bottled hot sauce right into the dough when you add the egg white.
Be careful with the hot sauce volume, naturally! We aren’t aiming for fiery, just flavorful depth. Just a teaspoon or two should be enough to infuse the entire batch with a subtle kick. This way, you end up with something unique that still satisfies that craving for a little fire alongside your delicious, buttery party dip.
Serving Suggestions and Wine Pairing Snacks for Cheese Straws
When you have a platter of these deeply savory, buttery snacks out, you want everything around them to shine, too! These wonderful little twists aren’t just for eating alone; they are excellent supporting actors for a great appetizer spread. Since they are rich with sharp cheddar and a nice little kick from the cayenne, we need companions that can cut through that richness without fighting the cheese flavor.
For events where you’re serving drinks, I always recommend keeping the wine pairings crisp and clean. A Sauvignon Blanc, for instance, with its bright acidity, is just heavenly against the richness of the cheddar. If you prefer a bubbly, skip the overly sweet Champagne and go for a dry Prosecco or Cava—the bubbles help cleanse the palate perfectly between bites of these cheesy bites.
They are also fantastic alongside other, milder appetizers. If you are serving one of my favorite creamy concoctions, like my Dirty Martini Dip, the salty, acidic notes in the dip contrast beautifully with the baked richness of the straws. You can also serve them alongside a simple bowl of marinated olives or some lightly seasoned nuts. Anything too sweet or too heavy will just dull down the wonderful, savory flavor we worked so hard to achieve in these gorgeous little snacks!
Frequently Asked Questions About Making Cheese Straws
I love hearing from you all when you tackle these recipes, and usually my inbox fills up with folks asking about the texture—which is no surprise, since achieving that perfect crunch is the goal when making cheese straws! When I developed this recipe, I aimed for something that stood up to the best of what my own mama made, those classic Southern snacks that always vanish first at a gathering. Here are a few things I hear most often!
Can I substitute the flour in this cheese straws recipe?
That’s a great question, and it gets right to the heart of why these turn out so flaky compared to, say, a standard cheese wafer. For this specific texture—the one that’s buttery and melts just right—I really, really advise sticking to all-purpose flour. The weight and gluten structure of AP flour are necessary for balancing the high volume of butter and cheese to create that beautiful, slightly flaky dough structure. If you start swapping in things like almond or coconut flour, you’re moving into a completely different baking territory, and you won’t get the results you see here with these homemade crackers.
What is the best way to get crispy cheese straws if mine come out soft?
Oh, don’t you worry if you pull a batch out and they feel a little limp! It usually means one of two things, and both are fixable. First, check your oven. Are you sure it’s truly hitting 400 degrees? If it runs cool, the moisture in the butter and cheese doesn’t evaporate fast enough. Next, look at the color again. Did you let them bake until they were genuinely golden brown all over, not just slightly tan? If they look pale, they need more time—even another three or four minutes can make all the difference in texture!
The most important step, as I mentioned earlier, is the cooling process. Make sure you transfer those hot straws straight onto a wire cooling rack so air can circulate underneath them completely. If they sit on the hot sheet pan, they steam themselves soft. If you follow those three steps—oven temperature, deep color, and full rack cooling—you’ll get those snappy, perfect cheese straws every single time! I always encourage folks to check out what others have learned about the classic recipe, like this great review from Southern Living.
I’ve been documenting all my tips and tricks over on my About Page if you want to learn more about my baking philosophy!
Share Your Homemade Cheese Straws Experience
Honestly, seeing your pictures and reading your notes is one of my favorite parts of running this blog. When you make these classic, spicy cheese straws, they become your own, and I’d love to hear what wonderful memories you make while baking them! Did you adjust the cayenne pepper to make them extra spicy for your game day snacks? Maybe you tried one of the nutty cheese swaps I mentioned earlier for your holiday entertaining spread?
Please leave your rating and review right here on the recipe card below. Knowing what works for your kitchen helps everyone else, too! If you have any lingering questions that I didn’t cover in the FAQs, don’t hesitate to send me a message through my contact page. Happy baking, and thank you for letting my family’s recipes be part of your home!
PrintClassic Spicy Southern Cheese Straws

Make these classic, crispy Southern cheese straws using sharp cheddar for a savory, addictive party appetizer. This recipe yields buttery, flaky snacks perfect for any gathering.
- Prep Time: 20 min
- Cook Time: 15 min
- Total Time: 35 min
- Yield: About 4 dozen 1x
- Category: Appetizer
- Method: Baking
- Cuisine: American Southern
- Diet: Vegetarian
Ingredients
- 1 cup unsalted butter, softened
- 2 cups all-purpose flour
- 1 teaspoon salt
- 1/2 teaspoon cayenne pepper (adjust for spice level)
- 1/4 teaspoon black pepper
- 1/4 teaspoon paprika
- 2 cups sharp cheddar cheese, finely grated
- 1 large egg white, lightly beaten (for brushing)
Instructions
- Preheat your oven to 400 degrees Fahrenheit. Line two large baking sheets with parchment paper.
- In a large bowl, cream together the softened butter until smooth.
- In a separate bowl, whisk together the flour, salt, cayenne pepper, black pepper, and paprika.
- Gradually add the dry ingredients to the butter mixture, mixing on low speed until the dough just comes together.
- Add the grated sharp cheddar cheese and mix until evenly incorporated. Do not overmix.
- Divide the dough in half. On a lightly floured surface, roll each half out to about 1/8-inch thickness.
- Use a knife or pizza cutter to cut the dough into strips, about 1/2 inch wide and 4 to 5 inches long.
- Gently twist each strip once or twice to form a straw shape. Place the twisted straws onto the prepared baking sheets, leaving a small space between them.
- Brush the tops of the cheese straws lightly with the beaten egg white. This helps them brown nicely.
- Bake for 12 to 15 minutes, or until the straws are golden brown and crisp.
- Transfer the baked cheese straws to a wire rack to cool completely. They will crisp up further as they cool.
Notes
- For the best flavor and texture, use high-quality, aged sharp cheddar cheese.
- You can prepare the dough up to 2 days ahead, wrap it tightly, and keep it refrigerated. Add a few extra minutes to the baking time if baking directly from the fridge.
- These are excellent make-ahead appetizers; store cooled straws in an airtight container at room temperature for up to one week.
Nutrition
- Serving Size: 3 straws
- Calories: 110
- Sugar: 0.1
- Sodium: 150
- Fat: 9
- Saturated Fat: 5
- Unsaturated Fat: 4
- Trans Fat: 0.1
- Carbohydrates: 3
- Fiber: 0.1
- Protein: 3
- Cholesterol: 25