
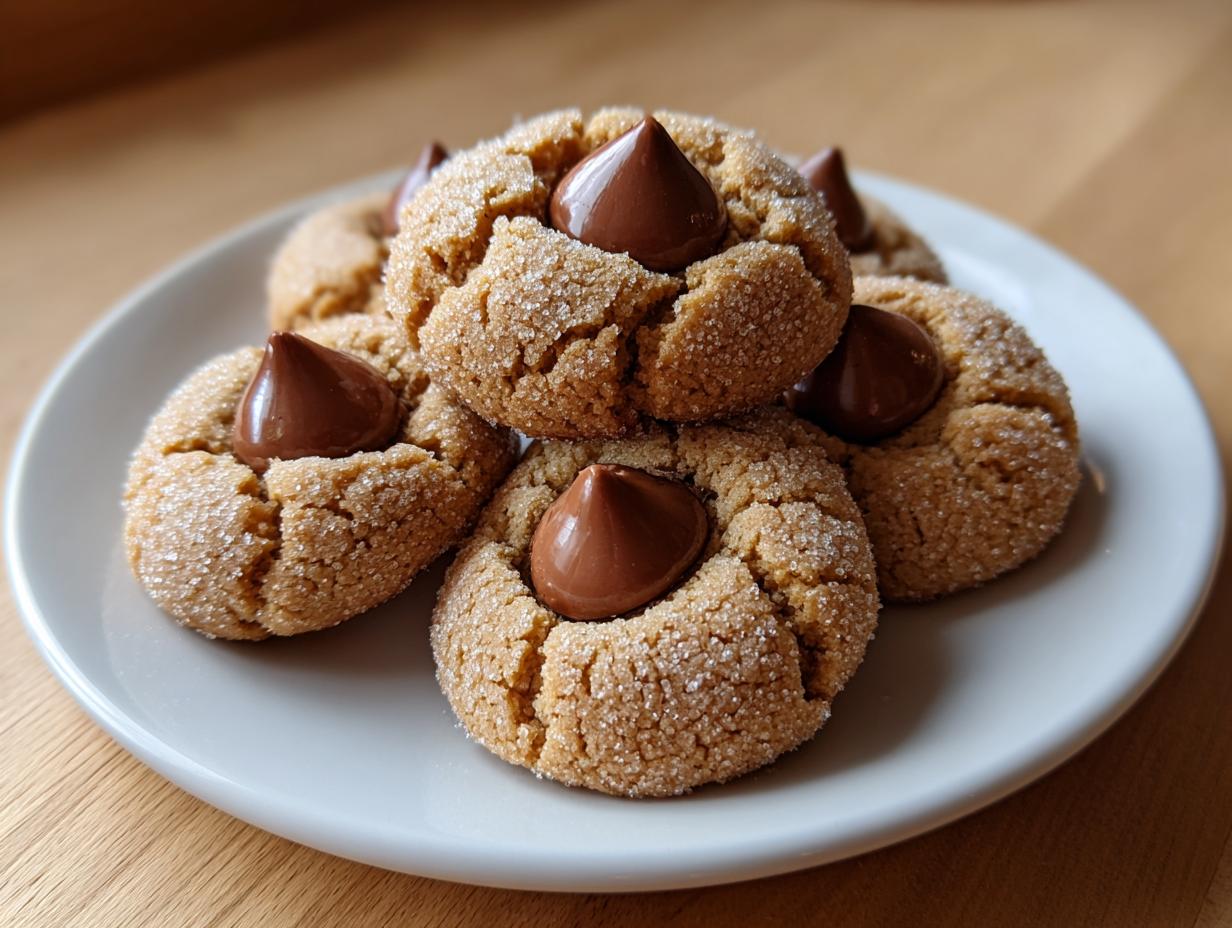
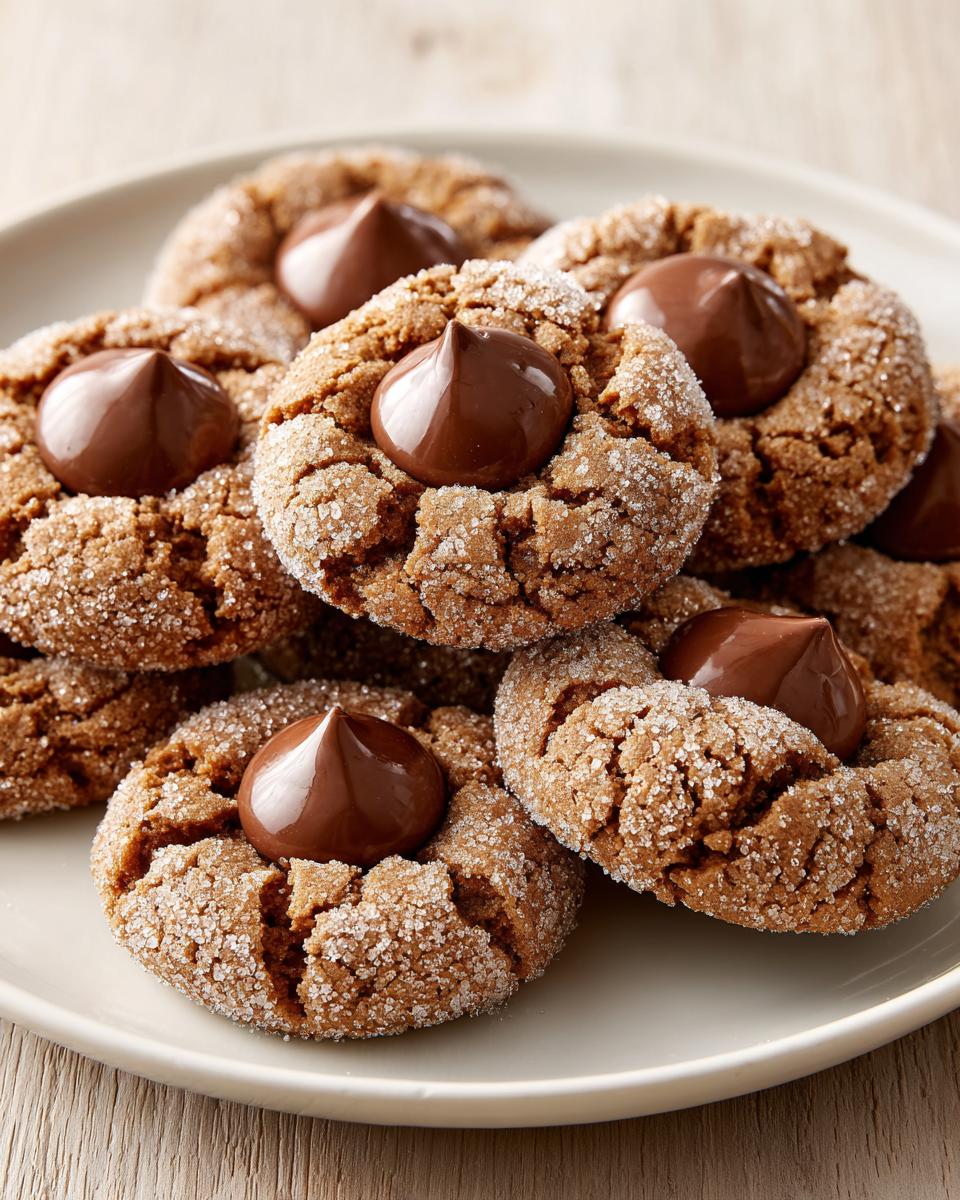
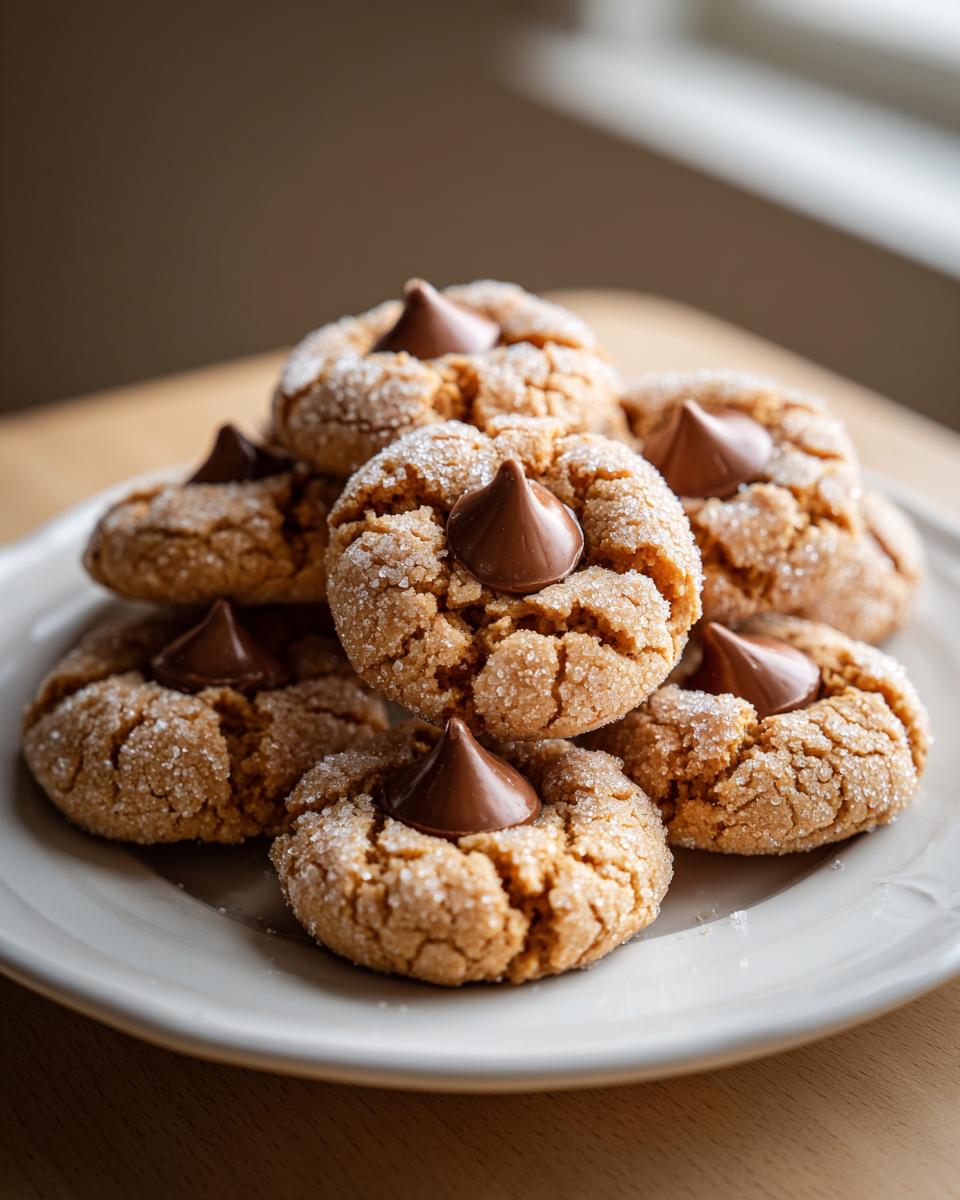
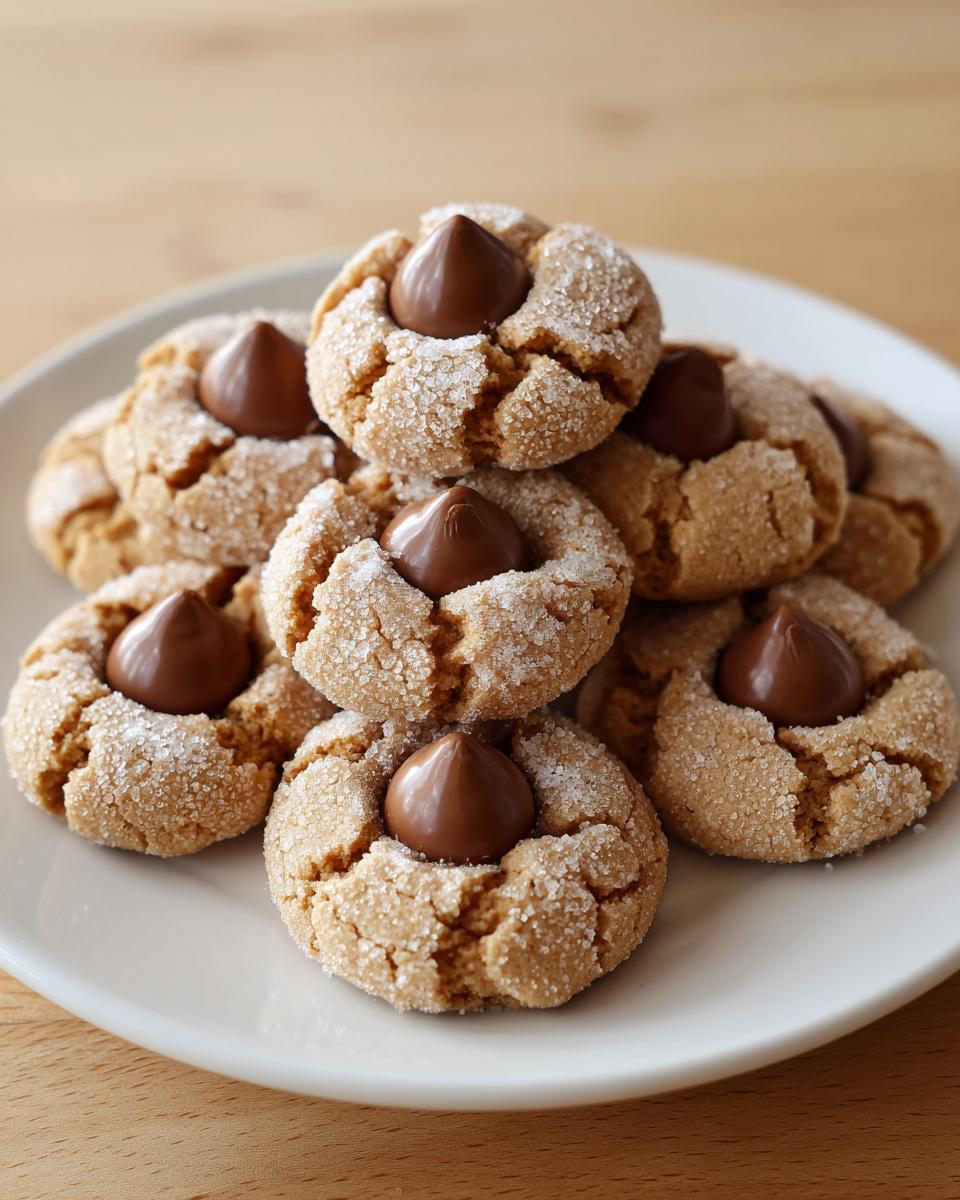
Oh, the smell of December in a Midwestern kitchen—that’s pure nostalgia right there, isn’t it? For me, nothing says holidays quite like seeing that perfect platter of peanut butter blossoms ready for sharing. These aren’t just cookies; they’re tradition! I’ve spent years tinkering to make sure that peanut butter base is incredibly soft and delightfully chewy, not crumbly or hard. Trust me when I say that after teaching third grade for thirty years, I know how to make a recipe easy enough for any beginner baker to master. This classic recipe is dependable, yields that gorgeous crackled top, and always gets rave reviews. Let’s get baking the very best version of this beloved cookie.
- Why This Classic Peanut Butter Blossoms Recipe is a Keeper
- Gathering Ingredients for Perfect peanut butter blossoms
- Step-by-Step Instructions for Classic Peanut Butter Blossoms Recipe
- Tips for the Best Chewy Peanut Butter Kisses
- Making peanut butter blossoms suitable for holiday baking ideas
- Storage and Keeping your peanut butter blossoms fresh
- Frequently Asked Questions about peanut butter blossoms
- Estimated Nutrition for our peanut butter blossoms
- Share Your Favorite Simple Dessert Recipes
Why This Classic Peanut Butter Blossoms Recipe is a Keeper
If you ask me, these are truly the best cookies for a holiday tray. They look fancy, but honestly, they are so straightforward. I developed this recipe to be super reliable, which is why I consider it a top-tier Christmas Cookie Favorite.
Here is what makes this particular batch of peanut butter blossoms perfect every single time I pull out the bowl:
- The Texture is spot on: We aim for soft and wonderfully chewy centers. No dry, crumbly messes here!
- Beginner-Friendly: You don’t need fancy equipment or hours of time. If you can cream butter, you can make these delicious cookies.
- That Sugar Coat: Rolling them in extra sugar gives you that signature, beautiful crackle look while locking in moisture.
These attributes combine to make a cookie that lasts longer and tastes better, even a few days after baking.
Gathering Ingredients for Perfect peanut butter blossoms
When we talk about the Best Peanut Butter Blossom Recipe, the quality of our ingredients really matters. Don’t rush this part! The texture of these fall right out of the ratio of fat to sugar to flour, so measure carefully. I always pull my butter out early because it *has* to be truly softened—no cold sticks allowed if you want that light, fluffy creamed base. We are making melt in your mouth cookies, and softness starts right here.
Here is exactly what you’ll need for about three dozen cookies. Remember, you need unwrapped kisses ready to go!
- 1 cup unsalted butter, softened
- 1 cup creamy peanut butter
- ¾ cup granulated sugar, plus extra for rolling
- ¾ cup packed light brown sugar
- 2 large eggs
- 1 teaspoon vanilla extract
- 2 ¼ cups all-purpose flour
- 1 teaspoon baking soda
- ½ teaspoon baking powder
- ½ teaspoon salt
- About 72 milk chocolate kisses, unwrapped
Ingredient Notes and Substitutions for peanut butter blossoms
I always recommend creamy over crunchy for these because we want the dough smooth before rolling, which helps guarantee that soft peanut butter cookie texture. If you have gluten sensitivities, I’ve had great luck substituting the flour with a good quality 1-to-1 gluten free baking blend—no need for chilling the dough either! If you absolutely must use crunchy peanut butter, just know the surface of your cookie won’t look quite as uniform.
Step-by-Step Instructions for Classic Peanut Butter Blossoms Recipe
Now for the fun part! You’ll see just how quick these Simple Dessert Recipes come together. We’re aiming for a very quick total time, which means no chilling the dough is required—a big bonus during busy holiday baking!
First things first: get that oven ready at 375 degrees F. I always line my baking sheets with parchment paper. Not only does it make clean-up a breeze, but honestly, it helps these sweet cookies release perfectly without any sticking. Remember, hot trays mean hot cookies, so have those unwrapped kisses right beside your workstation!
Mixing the Dough for Soft Peanut Butter Cookies
This is where we build that delicious, soft texture. In a nice big bowl, start creaming along your softened butter, peanut butter, the white sugar, and that dark brown sugar. You want this mixture to look light and fluffy—almost pale yellow—before moving on. It tells me those air pockets are forming! Then, beat in your eggs one at a time, followed by the vanilla. Next, whisk your dry stuff—flour, baking soda, powder, and salt—in a separate bowl so everything is balanced. Add the dry ingredients to the wet mixture slowly, mixing only until you barely see the streaks of flour disappear. Seriously, stop mixing! Overmixing the dough is the fastest way to end up with a tough cookie instead of the soft peanut butter cookies we crave.
Baking and Adding the Kiss to your peanut butter blossoms
Next, get about a tablespoon of dough and roll it into a nice, tight ball. This is important for even baking. Roll that ball completely in the extra granulated sugar you put in a shallow dish. You want a good sugar coating! Place them about two inches apart on your prepared sheet.
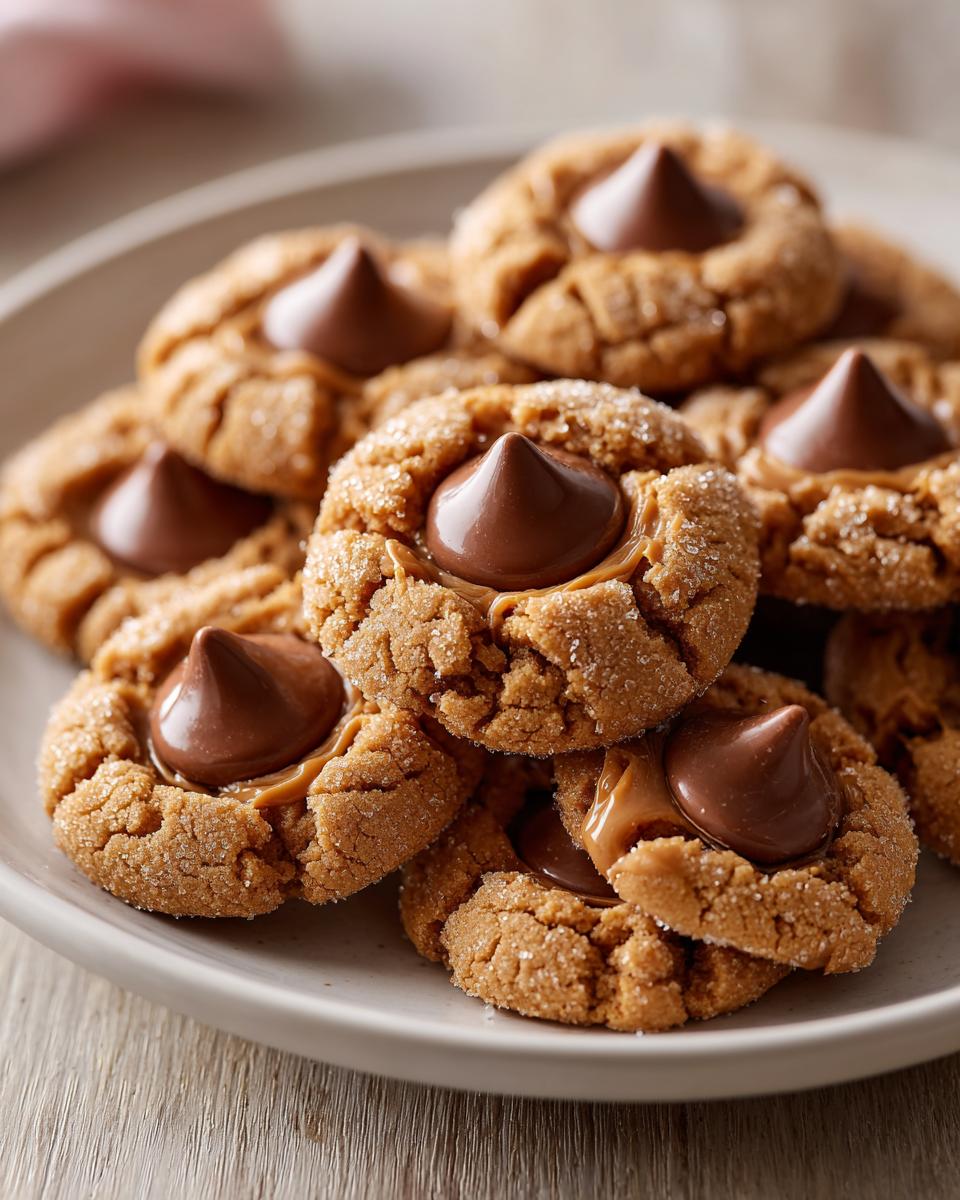
Bake these little beauties for only 8 to 10 minutes. Watch them closely! The edges should look set, but the center needs to look slightly soft when you pull them out. This is the secret to that melt in your mouth center. The absolute key to the perfect “blossom” shape is timing: Immediately upon taking the tray out of the oven, gently press one chocolate kiss right into the center of each warm cookie. They need that residual heat to melt just enough to stick perfectly into the cookie without melting completely away. Let them sit on the hot tray for five minutes before you dare try to move them to a cooling rack!
Tips for the Best Chewy Peanut Butter Kisses
Achieving that perfect balance between the crisp, sugared exterior and the wonderfully chewy peanut butter cookie body takes just a couple of extra bits of attention. Honestly, baking is just about knowing the dough’s personality!
My biggest tip, which I mentioned before, is marrying the chocolate and the cookie right away. If you wait even two minutes after you pull the tray out, the cookie will set too much, and your Hershey’s Kiss won’t sink down to create that beautiful little crater. You want that chocolate to soften just slightly against the warm cookie—that’s what locks in the moisture for the next day, too!
Also, try to keep your dough balls consistent when you are rolling them. I use a measuring spoon to scoop them out, aiming for roughly one tablespoon each. When all the cookie dough balls are the same size, they bake evenly, and you don’t end up with some burnt cookies right next to ones that look a bit underdone. Consistent size equals consistent texture, and that is what makes these Chewy Peanut Butter Kisses irresistible.
Don’t forget to check out my recipe for chewy ginger molasses cookies if you want another easy drop cookie that stays soft for days!
Making peanut butter blossoms suitable for holiday baking ideas
These truly shine when they are piled high on a platter during the holidays. They are probably my kids’ favorite cookie when we make up our Christmas baking trays. The beautiful contrast between the sugary, crackled peanut butter cookie and the dark chocolate kiss just screams festive!
Since they are a classic drop cookie, making a big batch for cookie exchanges is incredibly easy. Because this recipe doesn’t require chilling the dough, you can turn out three dozen of these Easy Holiday Cookies faster than almost anything else on my list. If you’re looking for ways to dress them up even more for gifting, you can find some wonderful ideas over at Clara’s site, who has a lovely take on the classic peanut butter blossoms.
They travel well in an airtight container, and everyone always asks for the recipe!
Storage and Keeping your peanut butter blossoms fresh
Now, this is important because we want these soft peanut butter cookies to last! The good news is that you don’t have to worry about finding special refrigerator space for them.
I find the very best way to store these is simply in an airtight container right there on the counter at room temperature. They don’t need refrigeration at all, which is handy when the kitchen is already full of holiday goodies, right?
If kept sealed up tight, these wonderful cookies stay perfectly fresh—soft and chewy—for up to a full week. That means you can bake a big batch early in the week, and the last ones you grab on Christmas morning will taste just as delicious as the first ones!
Frequently Asked Questions about peanut butter blossoms
When folks write to me, they often have little hiccups they want to iron out before they start baking. That’s wonderful! I’m happy to share what I’ve learned over the years making these cookies for school events and family gatherings. Getting the details right ensures you get that perfect soft and chewy texture every time.
If you are looking for more easy-to-make treats after these, you should check out my recipe for easy homemade chocolate pudding—it’s a different kind of sweet comfort!
Do I need to chill the dough for these peanut butter blossom cookies?
Oh, that’s one of my favorite parts of this recipe! No, you absolutely do not need to chill the dough for these peanut butter blossom cookies. That’s one reason why they are such a fantastic, fast option when you need a last-minute treat. Because we use both brown sugar and good butter, the dough comes together beautifully without chilling, letting you go straight from mixing to baking. This makes them one of the best drop cookies around!
Can I use crunchy peanut butter in this Classic Peanut Butter Blossoms Recipe?
You certainly can, but I always lean toward creamy. If you use crunchy peanut butter in this Classic Peanut Butter Blossoms Recipe, you’ll find that your dough balls aren’t as smooth when you roll them in the sugar. They will still taste marvelous, don’t get me wrong—but you lose some of that melt-in-your-mouth smoothness that comes from the completely smooth base.
What chocolate can I use besides Hershey’s Kisses for my Chocolate Kiss Cookies?
While the Hershey’s Kiss is iconic for that classic look, you can absolutely use other chocolates for your Chocolate Kiss Cookies! I’ve used good quality chocolate squares, like Ghirardelli baking squares broken into small pieces. You can even use large chocolate melting wafers. The trick is that whatever you use, you must press it firmly into the cookie center *right* when it comes out of the oven. If the cookie cools down even a little, the chocolate won’t sink in properly, and you won’t get that signature blossom appearance we are looking for.
Estimated Nutrition for our peanut butter blossoms
I always like sharing the nutrition estimate for these cookies, just so everyone knows what they are getting into—though honestly, who is counting calories when they are covered in powdered sugar and chocolate?
Based on the standard ingredients listed here, here is a general idea for one cookie:
- Calories: 160
- Total Fat: 9g
- Carbohydrates: 18g
- Protein: 3g
- Sugar: 12g
Please remember, these figures are just my estimates based on typical ingredients. If you swap out the peanut butter or use dark chocolate instead of milk chocolate kisses, the actual values will change a bit. But the love we bake into them? That stays the same!
Share Your Favorite Simple Dessert Recipes
Well, that’s it then! We’ve made the most wonderfully soft and chewy batch of peanut butter blossoms you could ask for. I truly hope these become a staple on your holiday plate, just like they are on mine every year. Making something simple and classic and having it turn out perfectly is such a rewarding feeling, isn’t it?
I put so much heart into standardizing this Classic Peanut Butter Blossoms Recipe so that everyone feels confident tackling it, whether this is your very first time baking cookies or you’re an old pro. If you gave this recipe a try, I would just be tickled pink if you hopped down below and left me a comment telling me how they turned out! Did you get that perfect crackle? Were they as soft as promised?
We are building this community together, so sharing your finished product makes all the difference. If you happen to snap a picture of your beautiful platter of Chocolate Kiss Cookies, please tag me over on social media! I always love seeing how everyone’s kitchen looks while they are baking. And if you’re curious about my teaching background, you can read more about my story here.
If you’re looking for some other ideas for your holiday exchange or just want to see what else has been popular in the kitchen, you might also enjoy the tips and photos shared over at The Crispy Chef regarding their easy peanut butter blossoms. Keep making memories around the table, friends!
PrintClassic Soft and Chewy Peanut Butter Blossoms

Make the classic Christmas cookie: soft, chewy peanut butter cookies rolled in sugar and topped with a milk chocolate kiss. This simple recipe delivers melt-in-your-mouth flavor perfect for holiday baking.
- Prep Time: 15 min
- Cook Time: 10 min
- Total Time: 25 min
- Yield: 3 dozen cookies 1x
- Category: Dessert
- Method: Baking
- Cuisine: American
- Diet: Vegetarian
Ingredients
- 1 cup unsalted butter, softened
- 1 cup creamy peanut butter
- ¾ cup granulated sugar, plus extra for rolling
- ¾ cup packed light brown sugar
- 2 large eggs
- 1 teaspoon vanilla extract
- 2 ¼ cups all-purpose flour
- 1 teaspoon baking soda
- ½ teaspoon baking powder
- ½ teaspoon salt
- About 72 milk chocolate kisses, unwrapped
Instructions
- Preheat your oven to 375 degrees F. Line baking sheets with parchment paper.
- In a large bowl, cream together the softened butter, peanut butter, granulated sugar, and brown sugar until the mixture is light and fluffy.
- Beat in the eggs one at a time, then mix in the vanilla extract.
- In a separate medium bowl, whisk together the flour, baking soda, baking powder, and salt.
- Gradually add the dry ingredients to the wet ingredients, mixing on low speed until just combined. Do not overmix the dough.
- Place about 1 tablespoon of extra granulated sugar in a shallow dish. Roll the dough into 1-inch balls. Roll each ball in the sugar to coat completely.
- Place the sugared dough balls about 2 inches apart on the prepared baking sheets.
- Bake for 8 to 10 minutes. The edges should look set, but the centers will still look slightly soft.
- Immediately upon removing the cookies from the oven, press one chocolate kiss gently into the center of each warm cookie. The chocolate will soften slightly.
- Let the cookies cool on the baking sheet for 5 minutes before transferring them to a wire rack to cool completely.
Notes
- For the best crackle effect, press the chocolate kiss into the cookie immediately after removing it from the oven.
- If you want to make these gluten free, substitute the all-purpose flour with a 1-to-1 gluten free baking blend.
- Store the cookies in an airtight container at room temperature for up to one week.
Nutrition
- Serving Size: 1 cookie
- Calories: 160
- Sugar: 12
- Sodium: 85
- Fat: 9
- Saturated Fat: 4
- Unsaturated Fat: 5
- Trans Fat: 0
- Carbohydrates: 18
- Fiber: 1
- Protein: 3
- Cholesterol: 20