

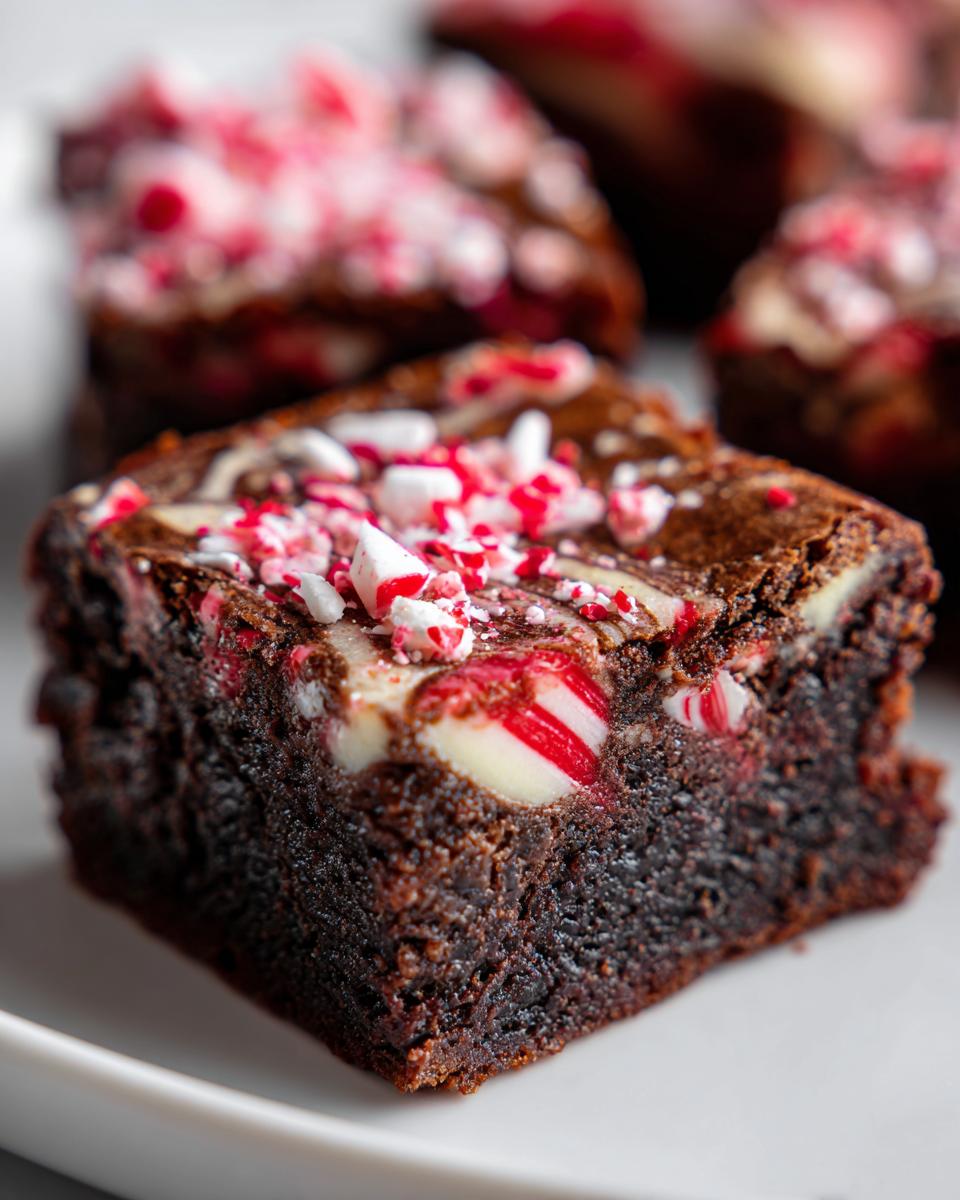
Oh, my dears, when the scent of peppermint starts drifting through the air, you just know Christmas is right around the corner! That lovely smell instantly whisks me back to my classroom days, remembering all the wonderful treats the children would bring in. Now, in my own modern kitchen, it means it’s time to make something truly decadent. I’m talking about the absolute best candy cane brownies you will ever set eyes on. These aren’t those cakey, thin bar things you sometimes see; no, we are making rich, fudgy chocolate peppermint swirls here! This recipe is pure holiday memory-making in a 9×13 pan. Prepare yourselves for the ultimate Christmas brownies recipe that will be the star of every gathering.
- Why You Will Love These Fudgy Candy Cane Brownies Recipe
- Gathering Ingredients for Your Rich Chocolate Candy Cane Brownies
- Expert Tips for the Best Candy Cane Brownies Texture
- Step-by-Step Instructions for Making Candy Cane Brownies
- Make Ahead Christmas Treats: Storing Your Candy Cane Brownies
- Variations for Your Festive Brownie Bars
- Serving Suggestions for Your Chocolate Peppermint Dessert
- Frequently Asked Questions About Candy Cane Brownies
- Estimated Nutrition for Your Festive Brownie Bars
- Estimated Nutrition for Your Festive Brownie Bars
Why You Will Love These Fudgy Candy Cane Brownies Recipe
I developed this recipe because I needed something foolproof that tasted like a holiday hug. Honestly, you are going to adore these for so many reasons. They hit every single note we want in a spectacular festive bake!
- Perfectly Fudgy Texture: We are going for dense and chewy, not cakey! These stay delightfully rich every single time.
- Amazing Chocolate Peppermint Flavor: The combination of dark, rich cocoa and that cool, refreshing peppermint swirl is just divine this time of year.
- So Easy for Parties: You mix it all in one pan, which means less cleanup for you! These are fantastic make ahead Christmas treats.
- Visually Stunning: That marbled swirl and the sparkly topping of crushed candy canes make these look like gourmet holiday baking without the fuss.
Gathering Ingredients for Your Rich Chocolate Candy Cane Brownies
Now we get down to the good part—the ingredients! Remember what I always say: good ingredients make good food. For these rich chocolate candy cane squares, we need quality chocolate and good measuring skills. Don’t substitute the butter; it’s essential for that fudgy base we are aiming for. Everything you need is listed right here plainly, but pay attention to those sugars—the blend of granulated and brown sugar is key to the texture and deep flavor.
Here’s the list you’ll need to gather:
- 1 cup (2 sticks) unsalted butter (make sure it’s real butter, please!)
- 1 1/4 cups granulated sugar
- 1 cup packed light brown sugar
- 4 large eggs
- 1 tablespoon vanilla extract
- 1 cup all-purpose flour
- 3/4 cup unsweetened cocoa powder
- 1/2 teaspoon salt
- 1/4 teaspoon baking powder
- 1 cup white chocolate chips (for the swirl!)
- 1/2 cup crushed peppermint candy canes, plus extra for topping
- 1 teaspoon peppermint extract (this is optional, but I love the extra mint punch)
Expert Tips for the Best Candy Cane Brownies Texture
When we bake brownies, we always chase that perfect, dense, fudgy texture. It’s a balancing act, dear ones, and it comes down to how you treat that batter! I’ve learned over the years that handling the dry stuff gently is half the battle. Resist the urge to whip everything together until it’s perfectly smooth, or you’ll end up with a brownie that’s more like a cake. Trust me, less mixing equals more comfort food!
Achieving Fudgy Peppermint Brownies: The No-Overmixing Rule
This is the secret weapon for fudgy results. As soon as you add that flour mixture, stop stirring almost immediately after everything is just incorporated. If you keep beating it, you start developing the gluten in the flour. And gluten in a brownie means it gets tough and dry, which is simply tragic when we are going for rich chocolate peppermint squares!
Perfecting the Peppermint Chocolate Swirls
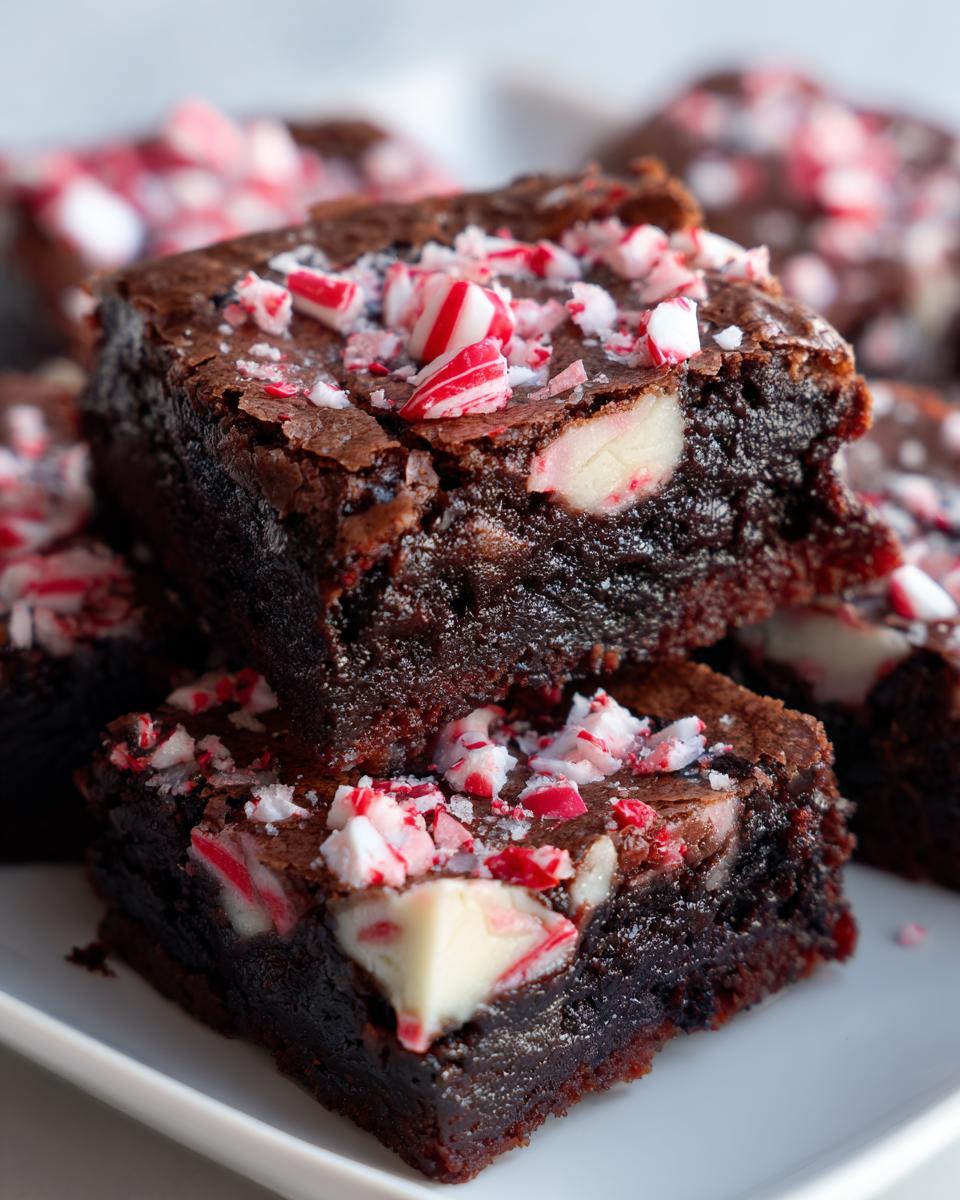
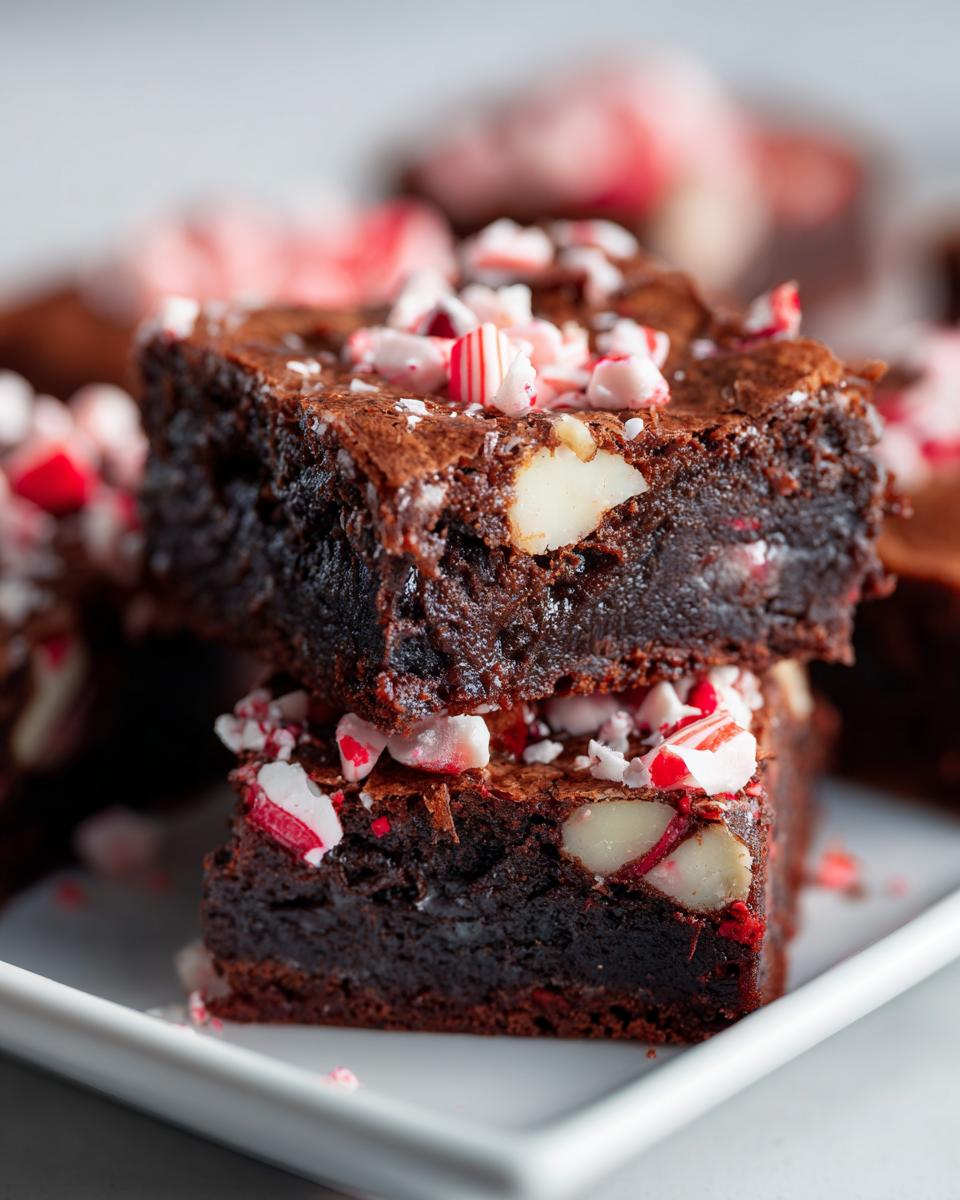
That gorgeous marbled effect makes these peppermint chocolate swirls look so impressive on the dessert table. Once you dollop that melted white chocolate mixture over the base layer, don’t swirl it around too much! Just take a knife or a wooden skewer and gently drag it through the batters maybe three or four times total. You want distinct ribbons of white chocolate running through the dark batter, not a fully blended light brown mess.
Step-by-Step Instructions for Making Candy Cane Brownies
Alright, it’s time to roll up our sleeves! Don’t let the beautiful swirl scare you; these are incredibly straightforward if you follow the steps in order. Remember to get that oven heating up to 350°F (175°C) right away. I always line my 9×13 pan with parchment paper first—making sure there’s an overhang on the sides—and give it a light grease. This little trick makes lifting these wonderful candy cane brownies out later an absolute breeze, which you’ll thank me for later!
First, we melt that butter carefully over low heat in a saucepan, then quickly whisk in both the sugars before pulling it off the burner. Add your eggs one by one, mixing well after each addition, followed by the vanilla. That’s your foundation done! In a separate bowl, just give your flour, cocoa, salt, and baking powder a quick whisk to break up any lumps.
Now, gently fold the dry mixture into the wet, remembering our rule: mix *just* until combined—we are aiming for fudgy, remember? Spread half of that lovely batter evenly into your prepared pan. While that’s sitting, whip up your swirl topping. Melt those white chocolate chips slowly, then stir in the ½ cup of crushed candy canes and that optional peppermint extract.
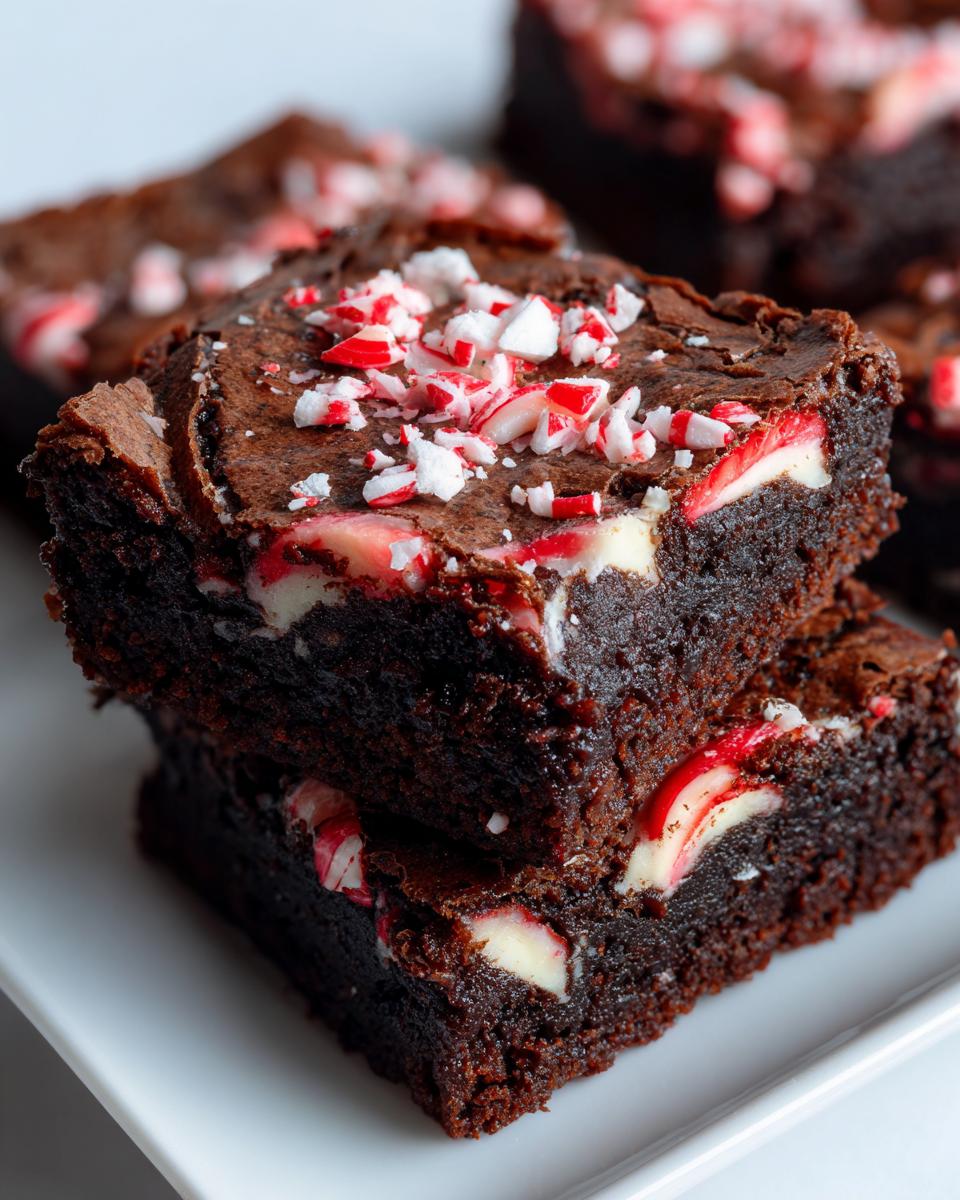
Dollop spoonfuls of that white chocolate peppermint mixture over the first layer of batter. Pour the remaining brownie batter right on top of that. Now, take a thin knife or a skewer and gently swirl through the batter a few times to marble it—don’t over-swirl! Bake this beauty for about 25 to 30 minutes. I check usually around 25 minutes. If a toothpick comes out with moist crumbs attached, your wonderful festive brownie bars are done. Let them cool totally before sprinkling on the rest of your extra crushed candy canes and cutting them into squares. If you need the official rundown on how to prep a pan perfectly, check out the tips here!
Make Ahead Christmas Treats: Storing Your Candy Cane Brownies
The holidays are busy, aren’t they? Between wrapping gifts and finding the perfect spot for the tree, the last thing you want is to be stressed about baking right before your big party. That’s why I love that these easy holiday brownies are fantastic candidates for making ahead! Giving yourself a head start is just smart hospitality, if you ask me.
You can absolutely make these brownies a day early. In fact, I think they taste even better the next day after the fudgy texture has really set up and the peppermint flavor has settled into the chocolate. Seriously, don’t panic about baking them the day of!
When it comes to storage, you just want to keep them covered tightly. Room temperature is just perfect for these. Keep them in the pan, covered with plastic wrap, or cut them into their squares and store them in an airtight container on the counter. They are perfectly good like this for a good couple of days. If you need them to last longer—say, you’re preparing for a big event next week—you can freeze them!
If you pop them in the freezer, wrap the cooled, cut squares very tightly first in plastic wrap, then foil. They will keep beautifully for up to three months. When you want to serve them, just let them thaw out on the counter for an hour or so. That beautiful peppermint chocolate swirl will look just as festive as the day you baked them. This is an excellent hack for anyone looking for easy Christmas party desserts!
Variations for Your Festive Brownie Bars
While I absolutely adore the marbled effect the white chocolate swirl gives these candy cane brownies, I know that sometimes you want a different kind of festive flair! Baking is all about making things your own, and the base recipe we used for these brownies is so sturdy and rich that it handles layering beautifully. Don’t be afraid to switch things up a little bit to suit your family’s tastes.
One little trick I always tell people about when they are working with deep chocolate flavors is to drop a tiny pinch—maybe just an eighth of a teaspoon—of instant espresso powder into the dry mix. You won’t taste coffee, I promise! It just wakes up the cocoa powder and makes the final chocolate taste so much deeper. It’s one of my favorite little adjustments when I’m feeling like making gourmet holiday baking right in my own kitchen.
Also, feel free to swap out those white chocolate chips for dark chocolate chips if you prefer a more intense, bittersweet swirl running through your rich chocolate candy cane squares. The more chocolate, the better, in my book!
Swirl vs. Peppermint Frosting Brownies
If swirling feels like too much fuss after a long day, ditching the swirl entirely and opting for a creamy peppermint frosting is a wonderful route to take. This gives you a soft, cool top layer that pairs perfectly with the fudgy base. This option is fantastic if you want to cut them into perfect little squares for a cookie exchange!
To make this simple frosting layer, you simply need to mix together about 1 cup of powdered sugar, 1/4 cup of softened butter (make sure it’s soft!), and 1 teaspoon of peppermint extract. You might need to add a tiny splash of milk—maybe a tablespoon or two—until it gets smooth and spreadable. Once the brownies are totally cool, use an offset spatula to spread this creamy goodness evenly over the entire top. Then, you just sprinkle those extra crushed candy canes right on top before they set! It’s a different kind of visual feast, but just as delicious!
Serving Suggestions for Your Chocolate Peppermint Dessert
Now that you have these spectacular rich, fudgy brownies cooling, we need to talk about the presentation! Half the joy of holiday baking is serving it up beautifully and having everything ready for when guests inevitably gather in the kitchen. These chocolate peppermint dessert squares are so hearty and flavorful, they barely need anything extra, but I always like to have a few simple accompaniments ready for those who like a little something extra with their rich chocolate candy cane squares.
For a real crowd-pleaser at your holiday gatherings, serving these slightly warm is lovely. Just warm a square for about 10 seconds in the microwave—not long enough to melt the candy cane topping, mind you! Then, a small scoop of good quality vanilla bean ice cream makes everything feel extra special. The sharp, cold vanilla cuts through the richness of the chocolate perfectly. Or, if you’re keeping things simple as the perfect easy Christmas party dessert, a dollop of fresh, lightly sweetened whipped cream works just as beautifully.
And for the beverages? You absolutely must have something warm on hand. Peppermint and chocolate sing beautifully with a proper cup of coffee, of course. But honestly, if you’re serving these to the whole family, you need good hot chocolate! I have my favorite recipe for the ultimate creamy hot chocolate, which is perfect for dipping the corner of a brownie into. It doubles down on the winter comfort, and everyone loves the festive theme. Keep those mugs warm, put out those spectacular festive brownie bars, and enjoy the season!
Frequently Asked Questions About Candy Cane Brownies
It’s natural to have a few questions when you’re trying a new recipe, especially when you want to make sure your holiday baking inspiration turns out perfectly festive! I’ve gathered the most common things folks ask me about these fudgy peppermint brownies. Don’t hesitate to reach out if yours comes out differently; we can solve it together!
Can I use candy cane dust instead of crushed pieces?
That’s a fair question! You absolutely can use candy cane dust or finely ground pieces for the swirl, and it will actually blend in much more smoothly than the larger chunks. If you use dust in the white chocolate swirl, you won’t notice the crunch inside, which some people prefer. However, for that wonderful, festive texture on top—those sparkly, crunchy bits—I highly recommend using slightly larger, roughly crushed pieces for the final topping. That crunch really signals ‘holiday’ to me!
What kind of cocoa powder works best for these rich chocolate candy cane squares?
I specify unsweetened cocoa powder in the recipe, and usually, a standard natural unsweetened cocoa powder works perfectly well. But if you want to really deepen that chocolate flavor in your chocolate peppermint dessert, try using Dutch-processed cocoa powder. Dutch-processed cocoa has a smoother, less acidic flavor, which really complements the cool peppermint. It will give those rich chocolate candy cane squares a darker color and a more intense, almost Oreo-like chocolate flavor. It’s worth trying next time!
Can I freeze these rich chocolate candy cane squares?
Yes, you certainly can! These are fantastic make ahead Christmas treats for that very reason. Make sure the brownies are completely cooled before cutting them. I suggest cutting them first, then stacking them with small wax paper squares between each layer before wrapping the whole stack tightly in plastic wrap, and then foil. They freeze beautifully for up to three months. When you thaw them, they taste almost freshly baked, making them one of the best easy Christmas party desserts you can plan for!
My swirls look too light; how do I get a deeper contrast?
If your white chocolate swirl isn’t standing out much against the dark batter, it usually means your melted white chocolate mixture wasn’t quite as thick as the brownie batter when you dolloped it in. Next time, try melting the white chocolate chips but avoid stirring in the crushed candy canes until *after* you have dolloped the white chocolate onto the base batter. That way, the white chocolate is slightly cooler and denser when you start swirling, giving you those dramatic, beautiful ribbons.
Estimated Nutrition for Your Festive Brownie Bars
Of course, when we bake treats this delicious, we know we aren’t exactly pulling out the salad greens! But knowing the approximate nutrition helps me plan the rest of my holiday menu, and I thought you might like a little peek, too. These figures are just estimates based on the ingredients I listed above, so it really depends on the exact brands you use. These are designed to be indulgent festive brownie bars, meant to be enjoyed!
Here is the general breakdown per serving (we usually cut the 9×13 pan into 16 good-sized squares):
- Serving Size: 1 square
- Calories: 280
- Sugar: 30g
- Sodium: 110mg
- Fat: 16g
- Saturated Fat: 10g
- Carbohydrates: 33g
- Protein: 3g
Fudgy Candy Cane Brownies with Peppermint Swirl

Make these rich, fudgy chocolate brownies topped with a white chocolate peppermint swirl and crushed candy canes. This easy recipe creates the best candy cane dessert for your holiday gatherings.
- Prep Time: 20 min
- Cook Time: 30 min
- Total Time: 50 min
- Yield: 16 servings 1x
- Category: Dessert
- Method: Baking
- Cuisine: American
- Diet: Vegetarian
Ingredients
- 1 cup (2 sticks) unsalted butter
- 1 1/4 cups granulated sugar
- 1 cup packed light brown sugar
- 4 large eggs
- 1 tablespoon vanilla extract
- 1 cup all-purpose flour
- 3/4 cup unsweetened cocoa powder
- 1/2 teaspoon salt
- 1/4 teaspoon baking powder
- 1 cup white chocolate chips
- 1/2 cup crushed peppermint candy canes, plus extra for topping
- 1 teaspoon peppermint extract (optional, for swirl)
Instructions
- Preheat your oven to 350°F (175°C). Line a 9×13 inch baking pan with parchment paper, leaving an overhang for easy removal. Lightly grease the paper.
- In a large saucepan over low heat, melt the butter. Remove from heat. Whisk in the granulated sugar and brown sugar until combined.
- Whisk in the eggs one at a time, mixing well after each addition. Stir in the vanilla extract.
- In a separate bowl, whisk together the flour, cocoa powder, salt, and baking powder.
- Gradually add the dry ingredients to the wet ingredients, mixing just until combined. Do not overmix.
- Pour half of the batter into the prepared pan and spread evenly.
- In a small microwave-safe bowl, melt the white chocolate chips in 30-second intervals, stirring until smooth. Stir in the 1/2 cup crushed candy canes and the optional peppermint extract into the melted white chocolate.
- Dollop spoonfuls of the white chocolate mixture over the batter in the pan. Pour the remaining brownie batter over the top.
- Use a knife or skewer to gently swirl the white chocolate mixture into the brownie batter to create a marbled effect.
- Bake for 25 to 30 minutes. The edges should look set, and a toothpick inserted near the center should come out with moist crumbs attached for fudgy results.
- Let the brownies cool completely in the pan on a wire rack.
- Once cool, sprinkle the top evenly with the extra crushed candy canes. Lift the brownies out using the parchment paper overhang and cut into squares.
Notes
- For the fudgiest texture, avoid overbaking. Check them early.
- You can make these brownies a day ahead and store them covered at room temperature.
- If you prefer a peppermint frosting layer instead of a swirl, use 1 cup powdered sugar, 1/4 cup softened butter, 1 teaspoon peppermint extract, and 1-2 tablespoons milk to make a simple frosting after the brownies cool.
Nutrition
- Serving Size: 1 square
- Calories: 280
- Sugar: 30
- Sodium: 110
- Fat: 16
- Saturated Fat: 10
- Unsaturated Fat: 6
- Trans Fat: 0
- Carbohydrates: 33
- Fiber: 1
- Protein: 3
- Cholesterol: 65