
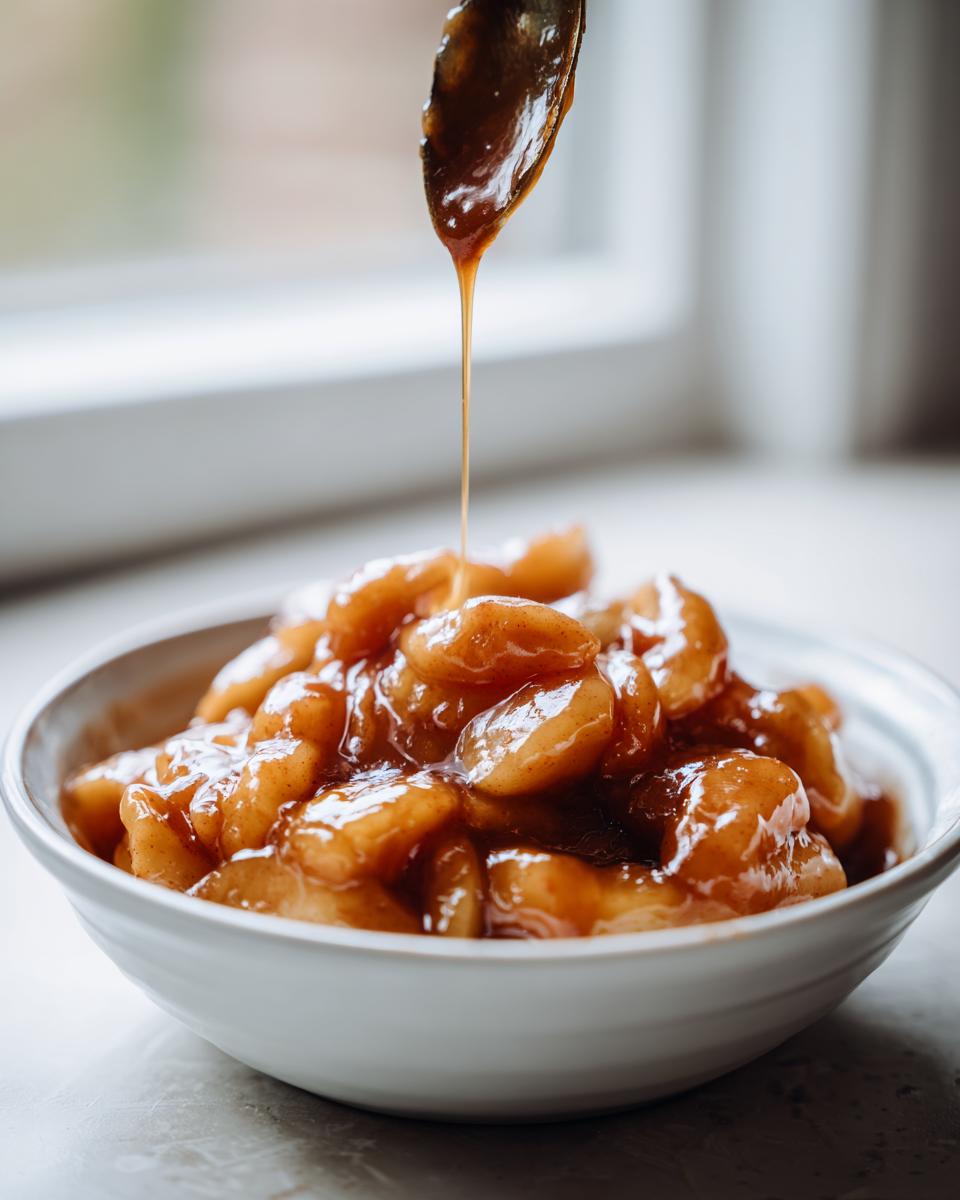
Oh, honey, let’s talk fillings! I’m telling you right now, if you’re still reaching for that can of gloppy, strangely translucent goo from the store, you are missing out on the true magic of baking. Nothing—and I mean *nothing*—beats making your own apple pie filling from scratch. When I was growing up, my mother, Carla, always insisted that the secret to a perfect fall dessert wasn’t the crust; it was that rich, deeply flavored center. This recipe is my go-to: The Best Homemade Stovetop Apple Pie Filling with Brown Sugar. We cook it right on the stove so we can nail that perfect, thick glaze while keeping those apple slices tender but never, ever mushy. It’s baking with integrity, just like my mother taught me!
- Why This Apple Pie Filling Recipe is a Baker's Essential
- Gathering Ingredients for Your Apple Pie Filling with Brown Sugar
- How to Make Easy Stovetop Apple Pie Filling Recipe
- Tips for Success with Your Homemade Apple Pie Filling
- Making Ahead and Storing Your Versatile Apple Filling Recipe
- Serving Suggestions for This Apple Filling
- Frequently Asked Questions About Apple Pie Filling
- Estimated Nutritional Data for Apple Pie Filling
- Share Your Homemade Dessert Fillings Experience
Why This Apple Pie Filling Recipe is a Baker’s Essential
Honestly, making this simple stovetop apple pie filling from scratch changes everything. Why deal with preservatives when you can have something so much better, cooked in under 30 minutes? It’s reliable, foolproof, and lets you skip those pricey store-bought cans completely. Trust me, once you taste the depth the brown sugar brings, you won’t look back.
- It produces a beautifully thick and spiced apple pie filling—no runny soup here!
- The cooking time on the stove is so quick, making it perfect for impromptu baking projects.
- It’s incredibly versatile; it works just as well over ice cream as it does in a pie crust. Check out my recipe for Apple Pie Dump Cake if you want another fun way to use up your filling!
Perfect Texture: Avoiding Mushy Apple Pie Filling
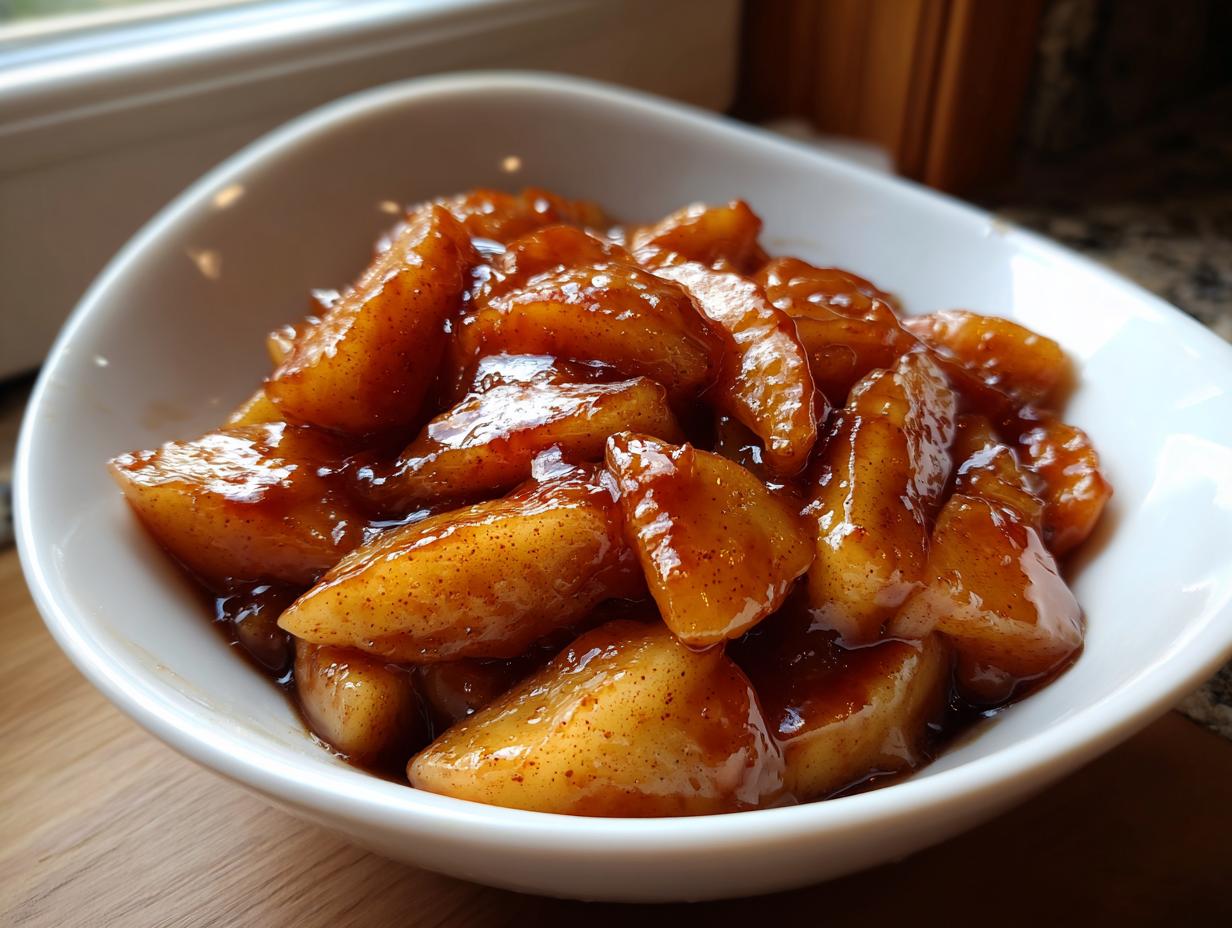
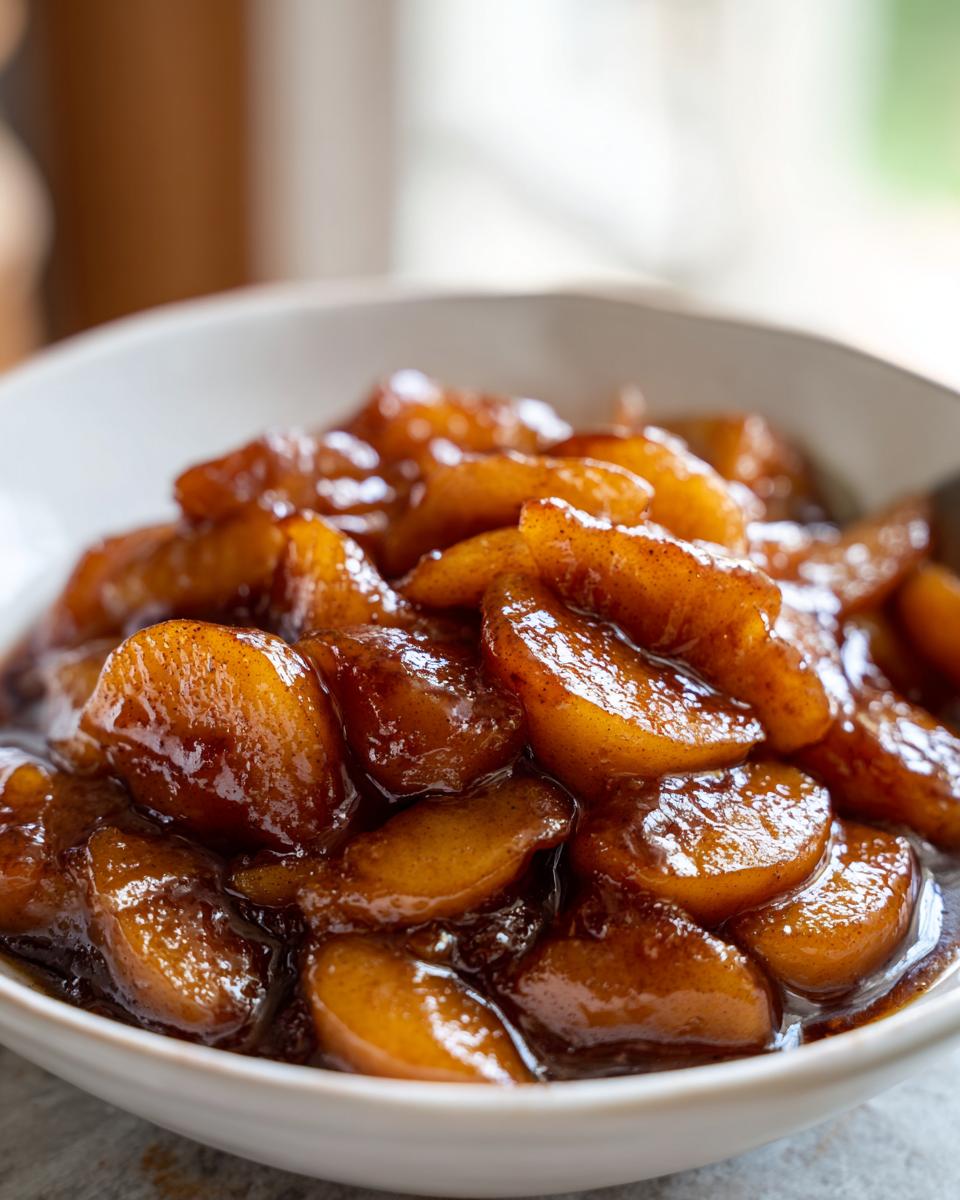
This is the biggest fear for every baker, right? You want tender apples, not baby food! The key to achieving that no mushy apple pie filling texture is twofold. First, we slice the apples to a specific thickness, about 1/4 inch. Second, we use just the right amount of cornstarch mixed with the sugar *before* it hits the heat. This creates a glossy, thick glaze that hugs the apple slices instead of dissolving them. We cook just until they are tender—you need to taste them to test for that perfect bite!
Gathering Ingredients for Your Apple Pie Filling with Brown Sugar
Before we get to the stove, we need to talk about what goes into this magnificent apple pie filling. Getting the right ingredients is half the battle, and it’s why my flavors come out so much richer than the stuff you buy ready-made. I always preach balance here—you need the tartness of one apple variety balanced by the sweetness of another. Don’t skimp on that dark brown sugar, either; it really gives our glaze that homey, molasses depth that standard white sugar just can’t replicate. Take a peek at what you’ll need for about five cups of amazing filling!
Here’s your shopping list:
- 6 medium apples (Granny Smith, Honeycrisp, or a mix)
- 3/4 cup packed light brown sugar
- 1/4 cup granulated sugar
- 1/4 cup water
- 2 tablespoons cornstarch
- 1 teaspoon ground cinnamon
- 1/4 teaspoon ground nutmeg
- 1/8 teaspoon ground allspice
- 1 tablespoon lemon juice
- 2 tablespoons unsalted butter
If you want to see a great example of how these specific ingredients shine together, you should definitely check out this recipe for apple pie filling with brown sugar—it’s a similar approach!
Best Apples for Pie Filling Selection
I swear by using a mix when I make my best apples for pie filling. Granny Smiths are my foundation because they hold their shape beautifully and offer that necessary tartness to cut through the sweetness. But they can be a little sharp on their own. That’s where Honeycrisp or even Braeburn come in! They give you a sweeter bite and a slightly softer texture without dissolving into nothingness during cooking. You want about six medium apples total, aiming for that sturdy-but-flavorful combination.
Ingredient Notes and Substitutions
The cornstarch is non-negotiable; it’s what gives us that perfect, glossy, thick sauce instead of thin apple juice. If you happen to be out of brown sugar, you can substitute maple syrup for the brown sugar amount, but you might lose a little of that classic, deep caramel note we are looking for. Also, if you don’t have nutmeg or allspice, don’t stress! Just use a little more cinnamon, maybe boost it to 1.5 teaspoons total, and you’ll still have a wonderfully spiced filling.
How to Make Easy Stovetop Apple Pie Filling Recipe
Okay, this is where the magic happens, and I promise you, it’s the quickest part of the whole process! We’re making this apple pie filling right in one pan on the stove. That’s why it’s such an easy stovetop apple pie filling recipe—no pre-baking shells or wrestling with convection settings! You can have this rich, spiced goodness ready in about 10 minutes of active cooking time. We’ll go step-by-step so you don’t accidentally burn that beautiful brown sugar at the bottom! Don’t forget to check out the easy homemade apple pie filling technique over at Blackberry Babe for another quick method!
Preparing the Apples and Spice Mix
First things first: grab your apples. You’ll want all six peeled, cored, and sliced evenly into about 1/4-inch pieces. Uniformity matters here if you want everything soft at the same time! Toss those slices right into your large saucepan. Now, please, don’t just dump the sugar on top! In a separate, smaller bowl, whisk together your brown sugar, white sugar, cornstarch, cinnamon, nutmeg, and allspice until it looks like one beautiful, speckled powder. Then, stir in your water and lemon juice with the warm apples. Only *then* do you sprinkle that thoroughly whisked spice mixture over everything and gently stir until that mixture coats every single apple slice.
Thickening the Apple Pie Filling on the Stove
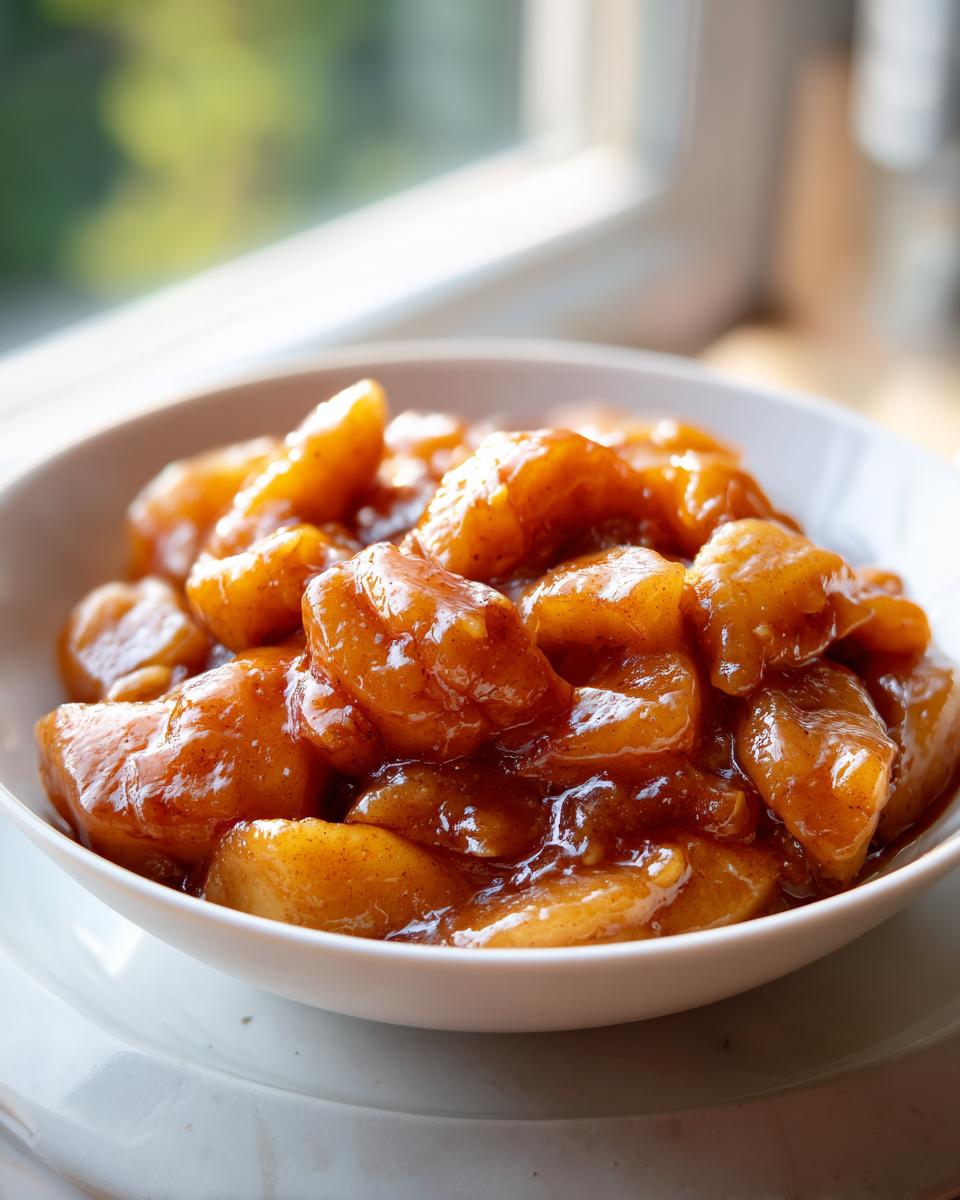
Time for the heat! Place that saucepan over medium heat. You have to keep an eye on it and stir frequently during those 8 to 10 minutes of cooking. What we’re waiting for is a bubble—a steady, gentle boil that signals the cornstarch is doing its job. When it’s truly ready, that sauce should thicken enough to coat the back of a spoon heavily. That’s how you get that wonderful, thick and spiced apple pie filling texture!
My mom, Carla, always warned me, “Don’t walk away when it bubbles, or you’ll scorch the bottom!” Once it’s thick, pull it off the heat immediately and stir in those two tablespoons of cold butter right at the end. Wow, does that make it glossy! Let it cool down before you fill up your pie crust or spoon it over your breakfast. For more quick cooking tips, check out my guide on making chocolate pudding—it’s all about watching that heat!
Tips for Success with Your Homemade Apple Pie Filling
Listen, even the best homemade apple pie filling can need a little nudge sometimes! My goal when developing this recipe was to make sure you get that incredible balance—juicy apple slices hugged by a gorgeous, thick glaze. Don’t let the texture intimidate you; it’s all about active cooking management. If you follow the timing I gave you, you’ll nail that perfect consistency for your pie right away. We want that sauce to look shiny and substantial when it cools down, which means we avoided that thin, boring liquid at the bottom. This is what separates a good pie from a truly memorable one!
If you’re looking for more ways to bring warm, comforting flavors into your kitchen, you absolutely need to try my recipe for moist cinnamon streusel—it uses similar spice notes! Also, if you want to see how other great cooks handle their toppings, take a look at this apple pie filling topping guide for inspiration on using this filling outside a full pie.
Remember, tasting as you go is key to that juicy apple pie filling tutorial success. Give a slice of the very softest apple a taste right before that last minute of boiling. It should taste perfectly seasoned, not too sweet, because remember, it still has to bake inside a crust!
Making Ahead and Storing Your Versatile Apple Filling Recipe
One of the best things about this apple pie filling recipe? You can totally bake ahead! I love making a big double batch early in the week, which means when a spontaneous dessert craving hits on Wednesday, I’m halfway done already. If you plan to use it within a week, just make sure it cools completely on the counter first, then transfer it all into a sturdy, airtight container. It keeps wonderfully in the refrigerator for about seven days.
If you’re thinking way ahead—maybe preparing for a holiday rush—this recipe freezes like a dream! Once fully cooled, portion your apple pie filling into freezer-safe bags or containers. I usually measure out about 3-cup portions, which is perfect for a standard 9-inch pie. It lasts beautifully frozen for about three months. When you’re ready to use it, just thaw it overnight in the fridge.
And remember how I mentioned how versatile this is? Don’t just reserve it for pie! This makes an instant, phenomenal apple pie topping recipe. Spoon it warm over a scoop of vanilla ice cream—heaven! Or, my kids love it piled high on top of buttermilk pancakes. If you haven’t tried it on my honey butter skillet corn, you’re missing out on the sweet/savory thing, trust me on this one!
Serving Suggestions for This Apple Filling
Now that you’ve got this incredible, thick, and versatile apple filling recipe, don’t feel like you have to hide it all in a crust! As I mentioned, this stove-top version is practically begging to be used as an immediate topping. My grandkids always beg for this filling spooned hot over my extra-fluffy buttermilk pancakes for a special weekend breakfast. It’s also amazing dolloped onto waffles or stirred right into a bowl of warm oatmeal for a quick, comforting lunch. Honestly, just heating up a scoop and eating it with a spoon counts as dessert in my book!
Frequently Asked Questions About Apple Pie Filling
It’s totally normal to have questions when you start venturing into homemade fillings! We want this to be as easy as possible, so let’s iron out any last wrinkles before you bake something spectacular using this apple pie filling recipe. Don’t stress if things don’t look exactly like the photo right away; baking is about learning!
Can I use pre-sliced apples for this apple pie filling?
Oh, please avoid them if you can! While they seem like a shortcut, pre-sliced apples are often drier and have often started to oxidize a bit. We really need fresh apples because they release their *own* lovely, clean moisture when they cook. Using pre-cut often results in a slightly firmer, less juicy texture, which isn’t what we want for that perfect pie!
How do I adjust the spice level for my apple pie filling?
This is totally up to your family’s taste! The recipe has a solid base, but if you love that deep fall aroma, you can bump up the cinnamon a bit. If you want to get fancy, pull out that secret arsenal and make your own perfect apple pie spice mix using equal parts cinnamon, nutmeg, and allspice, then just use about 1.5 teaspoons of your custom blend total. Taste it before you pull it off the heat!
What if my homemade apple pie filling is too thin?
Don’t panic if the sauce looks a little runny right out of the pot! A lot of the thickening happens as it cools down completely. If, after it has rested for an hour, it’s still too thin for your liking, here’s my reliable fix: In a tiny bowl, mix one teaspoon of cornstarch with one tablespoon of cold water until it’s perfectly smooth. Whisk that slurry into the cooled filling and heat it up gently on the stove for just a minute until it bubbles slightly. That should firm things right up! For other quick breakfast ideas, I have a great French toast recipe, too!
Estimated Nutritional Data for Apple Pie Filling
Now, I’m not a nutritionist, so please take these numbers with a grain of salt—or maybe a sprinkle of cinnamon! This information is just an estimate based on the ingredients we used in our apple pie filling recipe, broken down into half-cup servings. Since we use real butter and plenty of lovely brown sugar, it’s definitely a treat, but oh, is it worth it! Baking should be about joy, but it’s nice to know what you’re enjoying, right?
Here is a general overview based on using about 1/2 cup of the finished, unsweetened filling:
- Serving Size: 1/2 cup
- Calories: 210
- Sugar: 35 grams (That’s where all that delicious brown sugar sweetness comes from!)
- Total Fat: 2 grams
- Carbohydrates: 54 grams
- Protein: 0 grams
Remember, if you use this filling in a large, thick-crusted pie, the final nutritional count for your slice will change significantly based on the crust recipe you choose. Compared to those sad, store-bought versions, I feel much better feeding my family treats made with real fruit and real butter!
Share Your Homemade Dessert Fillings Experience
Well, we made it! You now have the blueprint for the absolute best, thickest, most flavorful apple pie filling you’ll ever need. I truly believe that stepping away from the can and making this simple stovetop version is a game-changer for all your fall baking and topping needs. I want to hear all about it when you try this!
My kitchen thrives on seeing your results, so please, if you make a batch, come right back here and leave a star rating. And don’t be shy in the comments below—tell me what you put it on! Did you stick to a classic double-crust pie? Or did you use it as a topping for my other favorite dessert recipes? I love reading about your successful spoonfuls!
Every time you choose to make something from scratch, you are honoring that love for good, honest home cooking. Thank you for letting me share my mother Carla’s wisdom with you. Happy baking, dear friend!
PrintThe Best Homemade Stovetop Apple Pie Filling with Brown Sugar
Make thick, spiced, and tender apple pie filling on the stovetop. This recipe uses brown sugar for deep flavor and works well for pies, crisps, or as a topping.
- Prep Time: 15 min
- Cook Time: 10 min
- Total Time: 25 min
- Yield: About 5 cups filling 1x
- Category: Dessert Filling
- Method: Stovetop Cooking
- Cuisine: American
- Diet: Vegetarian
Ingredients
- 6 medium apples (Granny Smith, Honeycrisp, or a mix)
- 3/4 cup packed light brown sugar
- 1/4 cup granulated sugar
- 1/4 cup water
- 2 tablespoons cornstarch
- 1 teaspoon ground cinnamon
- 1/4 teaspoon ground nutmeg
- 1/8 teaspoon ground allspice
- 1 tablespoon lemon juice
- 2 tablespoons unsalted butter
Instructions
- Peel, core, and slice the apples into 1/4-inch thick pieces. Place the slices in a large saucepan.
- In a small bowl, whisk together the brown sugar, granulated sugar, cornstarch, cinnamon, nutmeg, and allspice.
- Add the water and lemon juice to the saucepan with the apples. Stir gently to coat.
- Sprinkle the dry sugar and spice mixture over the apples. Stir again until everything is evenly combined.
- Place the saucepan over medium heat. Cook, stirring frequently, until the mixture begins to bubble and thicken, about 8 to 10 minutes. The apples should be tender but still hold their shape.
- Once the filling has thickened to your liking, remove the pan from the heat. Stir in the butter until it melts completely.
- Let the apple pie filling cool slightly before using it in your pie crust or as a topping.
Notes
- For a thicker glaze, cook for a few extra minutes until the sauce coats the back of a spoon heavily.
- Use a mix of tart and sweet apples, like Granny Smith and Honeycrisp, for the best texture and flavor balance.
- This filling can be made ahead and stored in an airtight container in the refrigerator for up to one week.
- Use this versatile apple filling recipe over pancakes, waffles, or ice cream.
Nutrition
- Serving Size: 1/2 cup
- Calories: 210
- Sugar: 35
- Sodium: 2
- Fat: 2
- Saturated Fat: 1
- Unsaturated Fat: 1
- Trans Fat: 0
- Carbohydrates: 54
- Fiber: 3
- Protein: 0
- Cholesterol: 5