
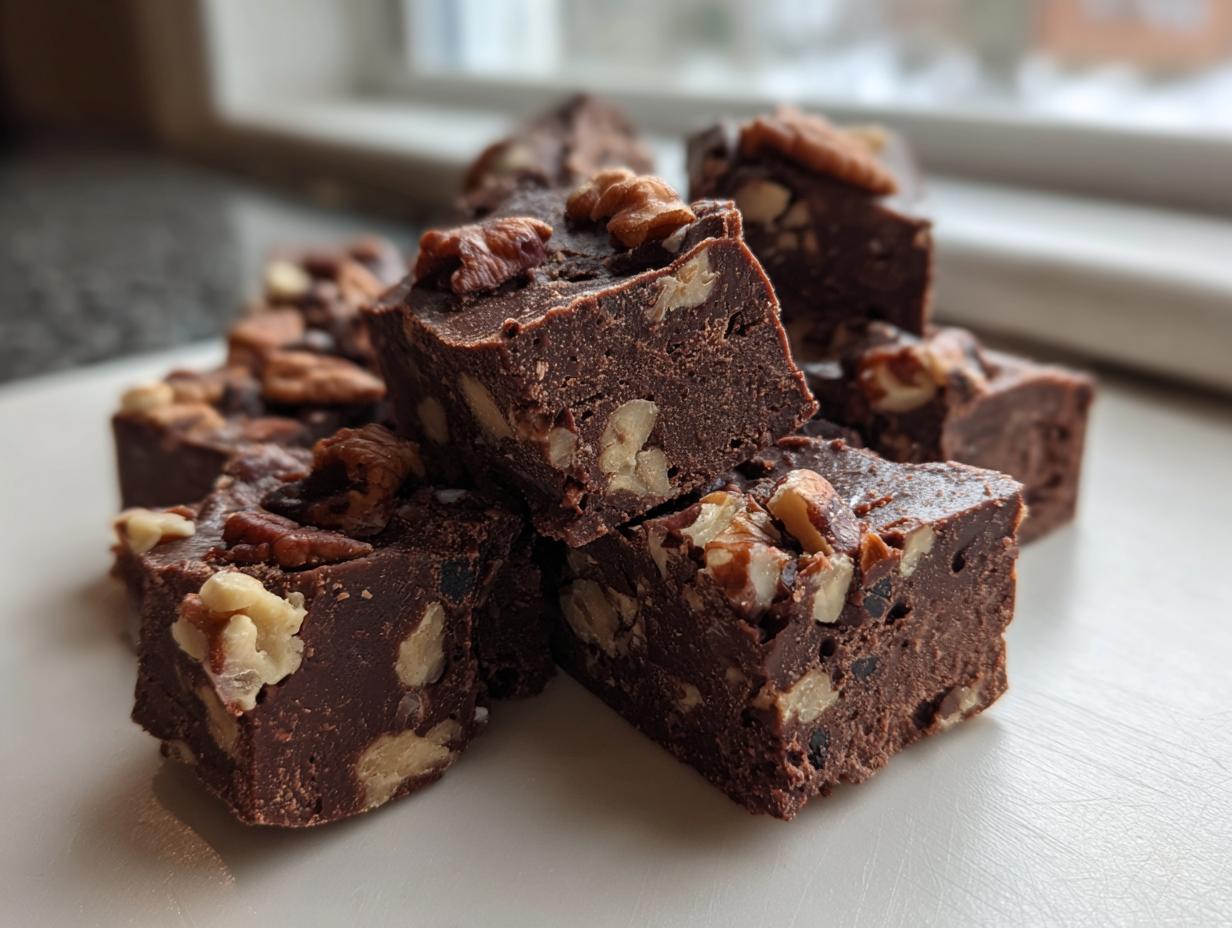
There’s just something about a truly comforting sweet that wraps you up like a warm quilt on a chilly evening. We all need those reliable, tried-and-true recipes that taste exactly like home, and for me, that’s always been my classic maple pecan fudge. This isn’t some fussy, complicated candy; it’s honest, rich, and simple, just the way my mom taught me to make things. I put my elementary teacher’s patience into perfecting this batch, which means it’s wonderfully easy, even if you’ve never made fudge before. You get that earthy sweetness from the best pure syrup, paired with that satisfying crunch from perfectly toasted pecans. Trust me, this homemade maple fudge is destined to become *your* new reliable tradition.
- Why This Maple Pecan Fudge Tastes Like Home
- Gathering Ingredients for Perfect Maple Pecan Fudge
- Step-by-Step Instructions for Homemade Maple Fudge
- Tips for Perfect Butter Pecan Fudge Texture
- Storage and Keeping Your Maple Pecan Fudge Fresh
- Serving Suggestions for This Easy Maple Dessert
- Frequently Asked Questions About Maple Pecan Recipe
- Estimated Nutritional Snapshot for Maple Pecan Fudge
- Share Your Sweet Tradition
Why This Maple Pecan Fudge Tastes Like Home
This candy isn’t flashy, and honestly, that’s why I love it so much. It tastes like gathering around the kitchen table after a long afternoon, and it’s the kind of treat my family expects whenever I’m around. It perfectly balances that deep, earthy sweetness you only get from real maple syrup with the wonderful, buttery bite of good pecans. It just settles right in your soul, you know?
When I was teaching, I needed easy maple desserts that I could whip up quickly on a Sunday night for Monday’s treats. This recipe always delivered that deep comfort without keeping me up too late. It’s reliable, straightforward, and delivers flavor every single time. Here’s what makes this a keeper:
- It captures that perfect harmony of maple and nut meant to feel like a comforting hug.
- You are done with the active cooking in less time than it takes to watch one sitcom episode!
- It sets up beautifully, giving you those crisp edges and soft center we all dream about in homemade fudge.
- It reminds you of the simpler sweets we treasured growing up.
Quick Preparation for Your Maple Pecan Recipe
Seriously, hold onto your hats! The best part of this whole maple pecan recipe is how fast it comes together on the stove. Once you melt everything down, it’s just a quick ten minutes of stirring until it hits just the right temperature. You’ll be surprised how little active time this takes!
The Comfort of Southern Candy Fudge Tradition
Growing up, our desserts weren’t fussy; they were hearty and dependable. This fudge fits right into that tradition. It’s what I think of when people mention southern candy fudge—rich ingredients handled simply to make something memorable. My mother always said a good sweet shared with neighbors was better than any fancy pastry. That’s the spirit I put into every batch I teach people to make.
If you’re looking for another simple, tried-and-true candy idea, I have a fantastic guide on making fudge without needing a thermometer that you might want to peek at later: my favorite no-thermometer fudge method.
Gathering Ingredients for Perfect Maple Pecan Fudge
Okay, my teaching experience taught me that if the ingredients aren’t right, the final product is going to need a lot more convincing later on! For this classic maple pecan fudge, we aren’t working with a huge list, thankfully. It keeps the cleanup easy, which is always a win in my book. Everything goes into one pot, which is half the fun!
You’ll need the following essentials ready to go before you even turn on the stove. Having everything measured out—because this cooks fast—is key to success:
- 1 (14 ounce) can sweetened condensed milk
- 1 (12 ounce) package semi-sweet chocolate chips
- 1 cup granulated sugar
- 1/2 cup (1 stick) unsalted butter
- 1/2 cup pure maple syrup
- 1 teaspoon vanilla extract
- 1 cup chopped pecans
- Pinch of salt
I know you can find lots of syrups out there, but for this recipe, please use the real stuff. That bottle labeled ‘Pancake Syrup’? Put it back! The quality of the pure maple syrup is what carries the entire flavor in this candy.
Ingredient Notes and Substitution Guidance
If you happen to have some maple brown sugar cookies on hand, you already know the depth of flavor that good maple brings! That flavor is really what we are highlighting here. Because the maple is so prominent in this maple pecan fudge, that’s where you shouldn’t skimp.
Now, let’s talk pecans. They are the backbone of that wonderful crunch. If you have time, lightly toasting them in a dry skillet for just a few minutes until you can really smell that lovely, earthy aroma really wakes them up before they go into the fudge. It deepens the flavor profile wonderfully. If you toast them, make sure they cool down completely before mixing them in, or they can mess with the setting process!
When I was teaching full-time, I once tried walnuts instead of pecans just because that’s what I had on hand. It was fine, but it just wasn’t the same satisfying chew. I think the best way to stick to the comforting flavors we love is to stick to the pecans here, or you are drifting into a different type of candy altogether.
If you’re looking for other ways to get that maple warmth into your baking routine, you might enjoy looking over my recipe for maple brown sugar cookies later on!
Step-by-Step Instructions for Homemade Maple Fudge
Now for the real magic! Getting the method right is where your candy goes from a grainy mess to that smooth, melt-in-your-mouth texture we’re aiming for. Since I was a teacher for so long, I learned that breaking down a process helps everyone stay calm, especially when you’re dealing with sugar that needs to be just right. Don’t let the saucepan intimidate you; just keep that spoon moving!
First things first, get your 8×8 pan lined with parchment paper, making sure you leave those helpful overhangs on two sides. Give that paper a little light grease, too—it saves so much heartbreak later when you try to lift it out!
- In your saucepan, combine the sweetened condensed milk, chocolate chips, sugar, butter, and that pure maple syrup.
- Place it over medium heat. Your goal here is to stir constantly until everything melts down smoothly and the chocolate is totally dissolved. Keep an eye on it so it doesn’t start boiling hard; we want gentle heat, not a runaway volcano!
- Keep stirring until your candy thermometer reads exactly 234 degrees Fahrenheit.
- Once it hits that magic number, pull that pot right off the burner! Immediately stir in your vanilla, all those wonderful chopped pecans, and that little pinch of salt.
- This next part is crucial for texture: Beat the entire fudge mixture vigorously by hand for about a minute. You’ll notice it immediately starts to thicken up and lose that liquid gloss.
- Pour it all quickly into that prepared pan and spread it out evenly with a spatula.
Then? We wait. You just let it sit on the counter, untouched, for at least four whole hours until it’s totally firm. You can cheat and put it in the fridge, but I like letting it set naturally for the best texture.
Achieving the Soft-Ball Stage in Your Maple Pecan Fudge
That 234-degree mark is non-negotiable, friends. This is what professionals call the soft-ball stage, and it’s the secret to making sure your maple pecan fudge doesn’t turn grainy or stay gooey. If you stir constantly but let the mixture boil too rapidly, you risk getting inconsistent pockets of sugar crystals forming, and nobody wants that!
Keep stirring gently but firmly right up the center of the pot. When the thermometer reads 234°F, you stop immediately. Trust the thermometer; it’s the most dependable tool in this whole process! If you’re curious about how to gauge candies without a meter, I have a whole guide dedicated to that technique, but for this maple version, being precise really pays off.
The Final Beat and Setting the Homemade Maple Fudge
The most exciting part, in my opinion, is when you take it off the heat. Once the vanilla and pecans are in, you need to switch gears and incorporate a little air by beating it pretty hard for about sixty seconds. This vigorous action smooths out the mixture and helps set the crystalline structure just right, giving you that beautiful, semi-soft texture.
Once it’s poured, you must let it be! That four-hour setting time seems long when you’re craving chocolate and maple, but that time allows the fats and sugars to stabilize completely. Once it’s firm, use those parchment paper handles you left hanging over the edge to lift the whole slab out. Then, just slice it into small squares—this recipe makes a surprising amount!

Tips for Perfect Butter Pecan Fudge Texture
Whenever I teach a class—or just chat with my grandkids about baking—I stress this: Fudge is temperamental, but only if you let it be! Getting that creamy, non-grainy texture that makes people swear they are eating the best batch of butter pecan fudge they’ve ever had comes down to two little things I noticed over my years in the kitchen. Don’t let a little crystal structure scare you off!
The number one enemy of smooth fudge is stirring *too much* once it’s off the heat, but also, not enough stirring right when you take it off. It’s a delicate balance, kind of like explaining fractions to second graders!
If your fudge isn’t setting up properly, nine times out of ten, it’s because you didn’t hold it at that 234°F soft-ball stage long enough, or you poured it into the pan while it was still too hot. If you see your finished squares crumbling instead of holding that clean edge, try beating it for closer to 90 seconds by hand next time. That extra agitation right at the end really helps lock in the smoothness.
On the flip side, if you’re worried about graininess—which is just tiny sugar crystals forming—make sure you never scrape the sides of the pan while you’re boiling! All the dissolving sugar is sticking there, and if you scrape it in, those crystals act as seeds for the rest of the mixture, making the whole batch gritty overnight. Just wipe down the sides once at the very beginning with a wet pastry brush if you see any sugar clinging, and then leave it alone!
For more inspiration on rich, decadent textures without refined sugar, I have a fantastic guide on my keto chocolate peanut butter fudge if you ever want to try a different path but keep that satisfying density.
Storage and Keeping Your Maple Pecan Fudge Fresh
I know how it is—you make a truly fantastic batch of homemade candy, and suddenly you look around and realize you made enough to feed the whole neighborhood! My biggest goal after baking is making sure anything left over tastes just as amazing tomorrow as it does today. Luckily, this maple pecan fudge is very well behaved when it comes to storage.
Because this recipe relies on sweetened condensed milk rather than just cream, it’s wonderfully shelf-stable. You don’t have to worry about keeping this maple pecan recipe tucked away in the cold! I actually prefer storing it at room temperature. Cold air can sometimes slightly change the texture of fudge, making it a bit too firm for my liking, especially if you prefer that softer, more yielding bite.
Here is my standard operating procedure:
- Once the fudge is completely cool and you’ve cut your squares, line an airtight container.
- You can place small squares of parchment paper between the layers of fudge to stop them from sticking together as they settle.
- Seal that container up tight, and keep it somewhere cool and dry—your pantry works perfectly.
Following these steps means this delightful southern candy fudge will keep beautifully for up to a full week. It’s perfect for prepping ahead for holiday baking too! If you happen to have a very warm kitchen, you can pop it in the fridge, but pull it out about an hour before serving so it softens up just a bit. If you like more ideas for fudgy treats, I have a great classic peanut butter fudge recipe that stores just as easily!
Serving Suggestions for This Easy Maple Dessert
Once you’ve managed to cut your beautiful squares of **maple pecan fudge**—and I know it’s hard to stop smelling them while cutting—you have to think about how you’re going to enjoy them! This rich candy is definitely a star on its own, but sometimes you want to dress it up a little for company or just make a simple afternoon coffee break feel special.
Because the fudge is so intensely sweet and nutty, I find that simple, slightly tart pairings work best. This is one of my go-to easy maple desserts for casual gatherings because it plays so well with other flavors without needing a complicated presentation.
Here are a few ways I like to serve it up:
- With Coffee or Tea: A small square next to a piping hot mug of black coffee cuts right through the richness and lets the maple really shine.
- Alongside Vanilla Ice Cream: This is decadent, I know, but a small piece of this fudge sprinkled over plain vanilla ice cream—especially if you let the fudge soften for five minutes on the counter first—is heaven.
- As a Picnic Treat: Since this homemade maple fudge travels so well and doesn’t require refrigeration, it’s perfect for packing up. It’s much less messy than trying to manage slices of pie on the go!
If you are looking for other simple but heartwarming treats that come together fast, you really shouldn’t miss my classic chocolate chip cookies recipe. That combination of warm cookies and cool fudge on the side? Perfection!
Frequently Asked Questions About Maple Pecan Recipe
I know that whenever I’m trying a brand new candy recipe, my brain starts spinning with what-ifs. Fudge can feel a little intimidating because of that temperature, but honestly, once you master this basic method, you’ll feel like a star! Here are a few things folks often ask me about making this maple pecan recipe.
Can I make this maple pecan fudge without a candy thermometer?
Oh, honey, if you’re aiming for my classic, smooth, perfect batch of maple pecan fudge, I really, truly recommend using a thermometer. The soft-ball stage (234°F) is so specific for preventing grainy fudge or candy that just won’t set up right. You *can* try the cold water test—where you drop a tiny bit of the mixture into ice water to see if it forms a soft ball—but it takes a good eye and a lot of practice to get it perfect every time. For the most dependable results with minimal risk, grab a cheap thermometer! You’ll thank me when you cut into that beautiful slab.
What is the best way to store leftover homemade maple fudge?
This is one of the best facts about this **homemade maple fudge**: it stores like a dream! Since we use sweetened condensed milk, it’s much sturdier than cream-based fudges. You don’t need the fridge unless your kitchen is scorching hot. Just use an airtight container, layering the squares with small pieces of parchment paper between them so they don’t get sticky. Stored like that at room temperature, your **maple pecan recipe** will stay delicious for a full week. It freezes well too, wrapped tightly in plastic wrap and foil, for up to three months!
If you’re looking for more quick sweets that grace my kitchen often, I have a whole collection of easy maple desserts you might just fall in love with, too!
Estimated Nutritional Snapshot for Maple Pecan Fudge
Now, I always tell folks that when you’re making traditional candy like this rich maple pecan fudge, we aren’t exactly aiming for a health food, are we? But I also know that as mothers and home cooks, we like to have a general idea of what we are sharing. Since this recipe uses real ingredients like butter, sugar, and pecans, it is certainly a comforting indulgence!
Here is a snapshot based on the ingredients we used. Keep in mind that since we all measure and pour a little differently, these figures are estimates, especially since the exact brand of chocolate chips or the amount of syrup absorbed can change things slightly.
For one small square (and remember, this makes 36 squares from one pan, so we keep them modest!):
- Calories: About 185 per square
- Fat: 10g (About half of that is saturated fat from the butter and chocolate)
- Carbohydrates: 22g
- Sugar: 21g (That’s where all that maple syrup sweetness comes from!)
- Protein: 3g (Thank you, pecans and condensed milk!)
See? A perfect little square of comfort. It’s best eaten slowly with a cup of coffee, savoring every bit of the earthy sweetness and the pecan crunch in this rich homemade maple fudge.
Share Your Sweet Tradition
Doesn’t that just feel wonderful? Holding a piece of this rich, creamy maple pecan fudge in your hand is like holding a little piece of comfort that you made yourself. I truly poured my heart, and all thirty years of teaching patience, into making sure this maple pecan recipe works perfectly every time for you.
This tradition—the smell of simmering maple, the crunch of toasted pecans—is meant to be shared, and I want to hear all about your experience! Did you serve it with coffee? Did someone try to sneak a square before it fully set? Don’t be shy!
Please be sure to leave me a rating right at the top of the page—it helps other home cooks find reliable recipes like this one. And if you have a story about a simple, traditional sweet that tastes like your home, please share it in the comments below. I love learning new kitchen memories. If you have any questions you didn’t see answered, feel free to send them over via my contact page!
Happy baking, and enjoy every single delicious square!
PrintCarla’s Classic Maple Pecan Fudge
This easy maple fudge recipe delivers rich, earthy sweetness and the satisfying crunch of pecans, bringing a taste of comforting home tradition to your kitchen.
- Prep Time: 15 min
- Cook Time: 10 min
- Total Time: 4 hours 25 min
- Yield: 36 small squares 1x
- Category: Dessert
- Method: Stovetop Cooking
- Cuisine: American
- Diet: Vegetarian
Ingredients
- 1 (14 ounce) can sweetened condensed milk
- 1 (12 ounce) package semi-sweet chocolate chips
- 1 cup granulated sugar
- 1/2 cup (1 stick) unsalted butter
- 1/2 cup pure maple syrup
- 1 teaspoon vanilla extract
- 1 cup chopped pecans
- Pinch of salt
Instructions
- Line an 8×8 inch baking pan with parchment paper, leaving an overhang on the sides for easy removal. Lightly grease the paper.
- In a medium saucepan over medium heat, combine the sweetened condensed milk, chocolate chips, sugar, butter, and pure maple syrup.
- Stir the mixture constantly until the butter melts and the chocolate is fully dissolved. Do not let the mixture boil rapidly.
- Continue stirring until the mixture reaches 234 degrees Fahrenheit on a candy thermometer (soft-ball stage). This usually takes about 8 to 10 minutes of steady cooking after the initial melt.
- Remove the saucepan from the heat immediately. Stir in the vanilla extract and the chopped pecans. Add the pinch of salt.
- Beat the fudge mixture vigorously by hand for about 1 minute until it thickens slightly and loses some of its gloss.
- Quickly pour the fudge mixture into the prepared baking pan. Spread it evenly with a spatula.
- Let the fudge cool completely at room temperature for at least 4 hours, or until firm.
- Use the parchment paper overhang to lift the fudge from the pan. Cut into small squares.
Notes
- For the best flavor, use high-quality pure maple syrup in this homemade maple fudge recipe.
- If you prefer a smoother texture, you can toast the pecans lightly before adding them to the mixture.
- This southern candy fudge keeps well in an airtight container at room temperature for up to one week.
Nutrition
- Serving Size: 1 square
- Calories: 185
- Sugar: 21g
- Sodium: 35mg
- Fat: 10g
- Saturated Fat: 5g
- Unsaturated Fat: 5g
- Trans Fat: 0g
- Carbohydrates: 22g
- Fiber: 1g
- Protein: 3g
- Cholesterol: 15mg