
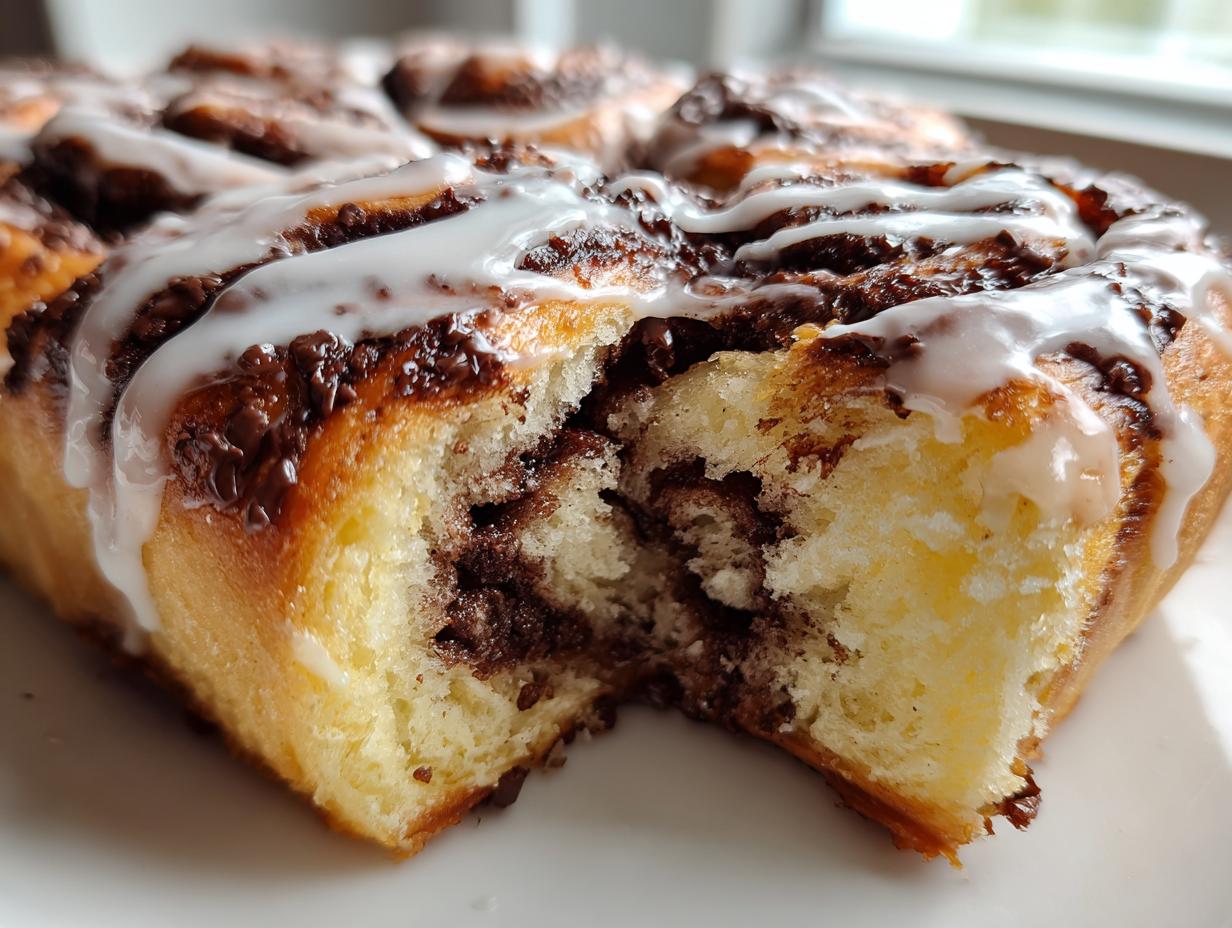
Oh, the smell of yeasty dough rising on the counter! There is truly nothing in this world that screams ‘comfort’ quite like a tray of warm, puffy sweet rolls fresh from the oven. If you ask me, Carla, the absolute best way to elevate that classic experience is by swapping out cinnamon for a rich, gooey chocolate hazelnut filling. Trust me when I say these homemade Nutella rolls are the dreamiest breakfast treat, but they aren’t tricky. This yeast dough recipe is time-tested right here in my own kitchen; it’s reliable, straightforward, and guarantees that soft, pull-apart texture that just tastes like a loving hug. Forget the store-bought tubes; let’s bake something wonderful together!
- Why You Will Love These Fluffy Homemade Nutella Rolls
- Gathering Ingredients for Your Nutella Rolls
- Making the Perfect Yeast Dough for Sweet Rolls with Chocolate Hazelnut Filling
- Assembling and Rolling Your Nutella Rolls
- Baking the Best Nutella Swirl Bread
- Finishing Touches: The Perfect Nutella Roll Glaze
- Tips for Success Making Nutella Rolls
- Storage and Reheating Instructions for Your Nutella Rolls
- Frequently Asked Questions About Baking Nutella Rolls
Why You Will Love These Fluffy Homemade Nutella Rolls
I developed this recipe because I wanted something deeply decadent but completely foolproof. If you’re looking for the easy homemade nutella rolls recipe that actually works every single time, you’ve found your winner. Here’s what makes them so special:
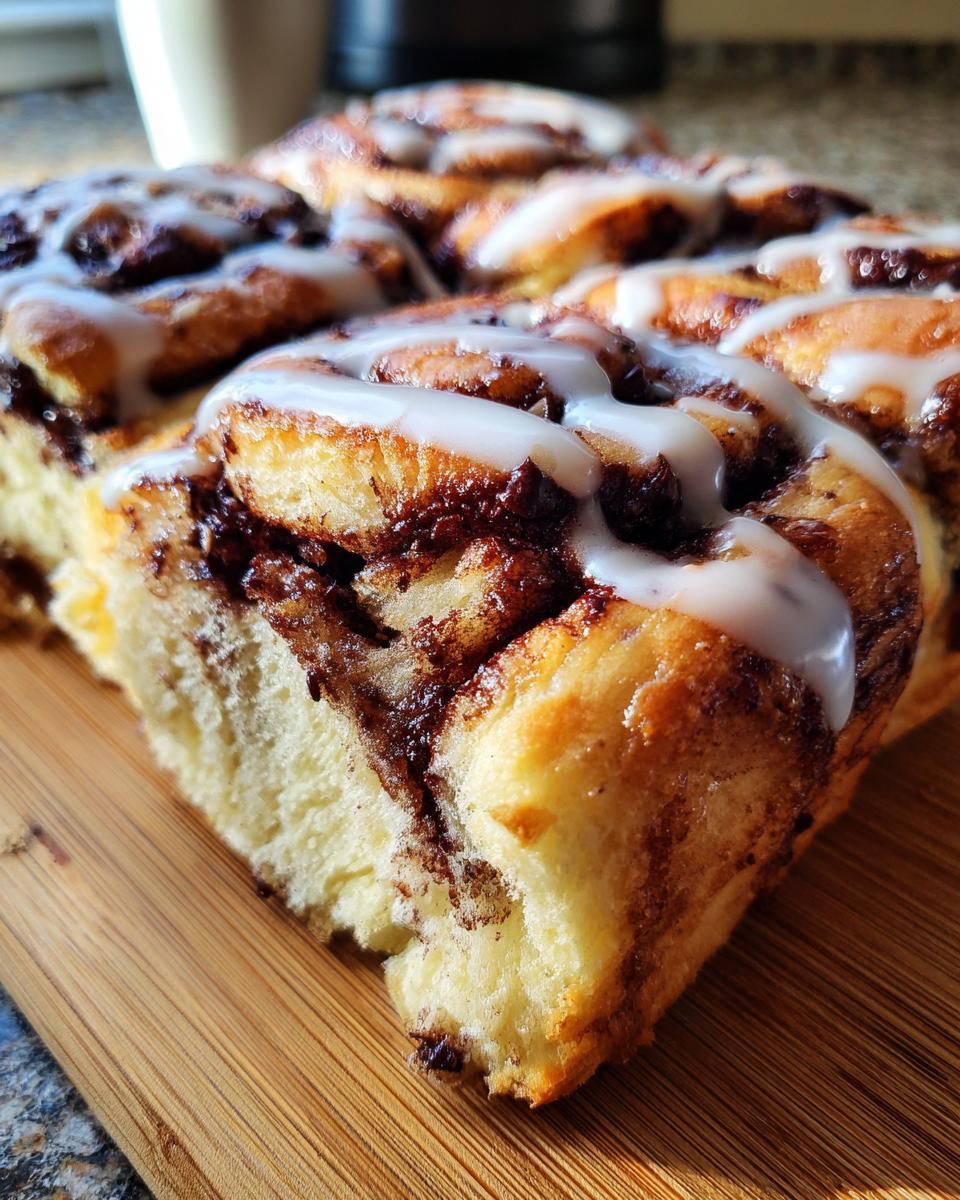
- They bake up incredibly fluffy and light—no dense bread here!
- The yeast dough yields that classic, satisfying swirl texture.
- The melted chocolate hazelnut filling is rich but never oily or messy (if you roll it right!).
- They freeze beautifully, which is perfect for freezing baked treats like my famous cinnamon buns.
Gathering Ingredients for Your Nutella Rolls
Baking is all about precision, especially when you’re working with yeast dough, so make sure you have everything measured out before you even turn the oven on. When I teach my grandchildren how to bake, this is the first lesson—prep work prevents pastry panic! We need quality ingredients to achieve those soft sweet rolls with chocolate hazelnut filling.
For the dough itself, you’ll need:
- 1 cup whole milk, warmed to 105-115°F (Lukewarm is key; too hot kills the yeast!)
- 2 1/4 teaspoons active dry yeast
- 1/4 cup granulated sugar plus an extra 1 teaspoon just for waking up that yeast
- 2 large eggs, brought to room temperature—this helps them mix in smoothly
- 1/4 cup unsalted butter, melted down gently
- 3 1/2 to 4 cups all-purpose flour (Keep that extra half cup handy for kneading!)
- 1 teaspoon fine salt
Having everything ready now means you can focus on the kneading later. If you’re looking for other ways to use this foundational dough, you might enjoy my recipe for Cinnamon Roll Cake while you wait for the yeast to foam!
For the Rich Chocolate Hazelnut Filling and Glaze
This is where the magic happens! The filling is simple, but the light drizzle on top makes these Nutella rolls look professional. Make sure your Nutella isn’t rock-hard from the fridge; let it sit on the counter for about 30 minutes so it spreads like a dream.
You will need:
- 1 cup Nutella (That’s the star of the show!)
- 1/2 cup powdered sugar (sifted if you have lumps)
- 2 tablespoons milk or heavy cream
- 1/2 teaspoon pure vanilla extract
Making the Perfect Yeast Dough for Sweet Rolls with Chocolate Hazelnut Filling
Now we get down to the real work—creating that tender, springy foundation that turns these into the best nutella swirl bread. We are following the standard procedure for a rich sweet dough, but pay close attention to the kneading, because that’s where you build the structure needed to hold all that chocolate goodness!
First things first: wake up your yeast! In a big bowl (I usually use the bowl of my stand mixer, but a sturdy mixing bowl works just fine), combine that warmed milk, one teaspoon of sugar, and your yeast. Give it a gentle stir, cover it with a clean towel, and let it sit for about ten minutes. If it gets foamy and bubbly on top, rejoice! That means you have happy, active yeast ready to make your whole batch of nutella rolls rise beautifully. If it doesn’t foam? Toss it and start over; your milk was probably too hot.
Next up, we mix the wet ingredients and bring in the flour. Whisk in your remaining sugar, the room-temperature eggs, and the melted butter right into that bubbly yeast mixture. In a separate bowl, whisk your measured flour and salt together. Start adding that dry mixture to your wet ingredients gradually. Mix until it’s just shaggy—like a giant, messy ball beginning to form. After that, turn it out onto your counter, dust your hands lightly, and start kneading for those full 8 to 10 minutes. I always tell my class that dough is ready when you press a finger gently into it, and it slowly springs back. That beautiful elasticity is what makes these fluffy baked nutella treats so wonderful. For more tips on dough handling, take a peek at my instructions for super soft dinner rolls!
Activating Yeast and First Rise for Your Nutella Rolls
That first step, activating the yeast in warm milk, is non-negotiable for success! Remember, the milk should feel like a warm bath, not hot water, or you’ll scald your yeast before they even get a chance to work their magic. We are aiming for that 105 to 115-degree sweet spot. If your milk is too cool, the yeast will just nap, and you’ll end up with pancake-flat rolls instead of beautiful, puffy pastries.
Once the base is foamy, mix in the eggs, butter, and the rest of the sugar. Then, gradually incorporate the flour and salt mixture. You’ll add most of the flour, knead until you’re feeling that springiness I mentioned, and then it’s time for the big rest. Place that smooth dough ball into a lightly oiled bowl, give it a turn so it’s coated all over, cover it up tight, and put it somewhere cozy for an hour, or until it has seriously doubled in size. This slow rise develops the flavor and sets you up perfectly for achieving those fluffy baked nutella treats!
Assembling and Rolling Your Nutella Rolls
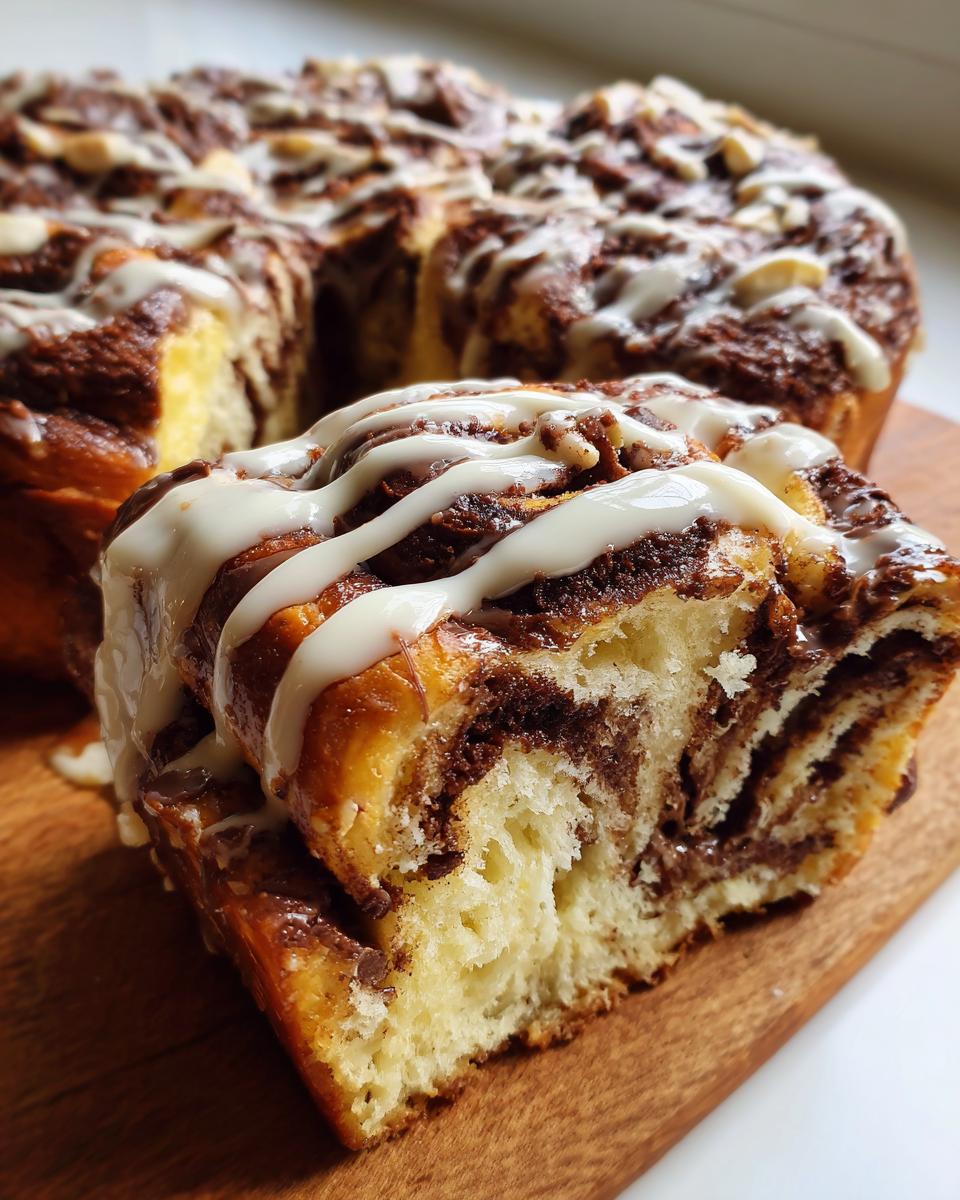
Once your dough has rested and puffed up—oh, the anticipation!—gently punch it down on a lightly floured surface. We are rolling this out into a perfect rectangle, about 12 by 18 inches. Don’t get too stressed about the size; just try to keep the edges as straight as you can. The rolling technique here is absolutely essential for getting those gorgeous, distinct swirls when we slice them later.
Now for the star: the glorious brown spread! You need to spread that full cup of Nutella evenly across the entire surface of that rectangle. But here is my number one secret for Nutella rolls that don’t squirt out all over the pan halfway through baking: leave about a half-inch strip completely clean along one of the long sides. That clean edge acts like a little sealer when you roll everything up.
Starting from the long edge opposite that clean margin, roll that dough up as tightly as you possibly can without tearing it. You want that log to be firm, a nice tight spiral inside. Once it’s fully rolled, pinch that clean seam closed—really press it to make sure it sticks. If you want to see how I achieve a perfect homemade chocolate topping for future bakes, check out my recipe for easy homemade chocolate ganache!
Baking the Best Nutella Swirl Bread
We’ve done the hard work: our beautifully filled log is ready for its final rest! After you slice that log into 12 even pieces—try not to squish them too much—arrange them in your greased 9×13 inch pan. When arranging them, leave a little space between each roll. This gives them room to puff up and rise again, and it ensures those beautiful sides stay soft and fluffy instead of getting crusty baking against each other. Cover the pan and let them rest somewhere warm for about 30 to 45 minutes until they look visibly puffy again. This second rise is critical for those airy, fluffy baked nutella treats!
When it comes time to bake, preheat your oven to 375°F (190°C). Pop those pans in! They usually take between 20 and 25 minutes. I am the first person to tell you to watch the timer closely, but trust your eyes more than the clock for any batch of Nutella rolls. You are looking for a lovely golden brown on top. I always check my rolls by gently tapping the center piece. If it springs back immediately without deflating, they are done! If you prefer a foolproof method for shiny toppings in the future, check out my guide for a perfect chocolate ganache recipe for drip.
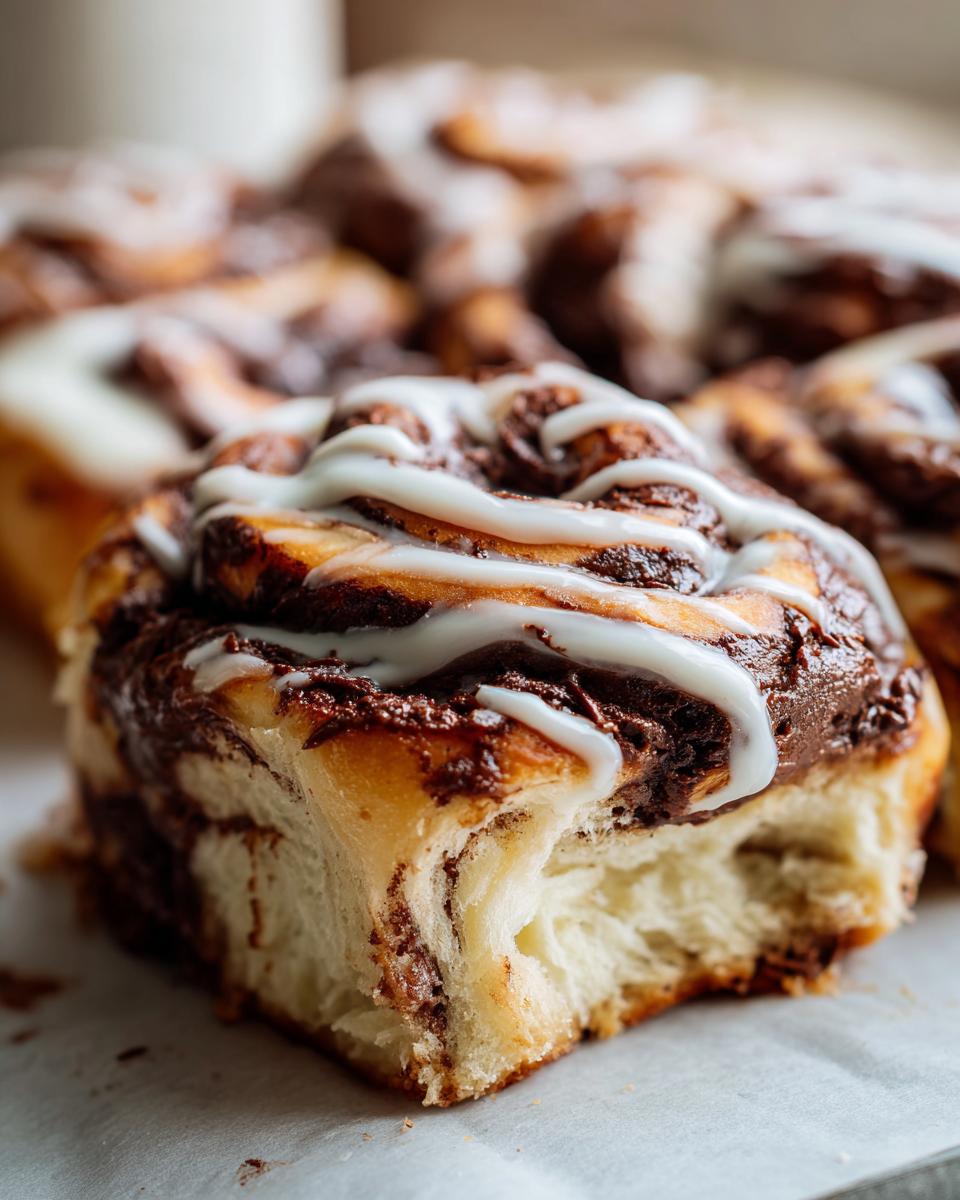
Finishing Touches: The Perfect Nutella Roll Glaze
Once those rolls wink at you from the oven, they need just a little something extra to make them pure heaven. The glaze needs to be made while the rolls are cooling slightly—not boiling hot, but definitely still warm! This helps the glaze melt just a tiny bit so it settles perfectly into all those lovely crevices.
To make the perfect nutella roll glaze, just whisk together your sifted powdered sugar, 2 tablespoons of milk or cream, and that splash of vanilla extract until it’s totally smooth. If it seems stiff, add milk just a drop at a time until it drizzles nicely off the whisk. Drizzle this generously over the top while the rolls are still warm. If you love exploring other classic frostings, my easy vanilla buttercream works wonders on any sweet bread!
Tips for Success Making Nutella Rolls
I’ve been making these sweet rolls for years now, and I’m going to share my hard-won wisdom so you don’t have to learn the same way I did! The biggest pitfall I ever encountered was when I tried to rush the process. I once used Nutella straight from the fridge, and because it was too firm, it tore the dough when I rolled it, causing the filling to squeeze out the bottom during baking. Oops! Now, I always let the Nutella soften just slightly—not runny, but spreadable—which lets you roll that dough up into tight, beautiful spirals. Remember, watch them closely at the 20-minute mark; these sweet rolls don’t like to be over-baked, or you’ll lose that fluffy texture we worked so hard for when making these Nutella rolls.
Make Ahead Sweet Rolls with Nutella
I know baking takes time, and we don’t always have a free morning for all the rising! The great news is that these rolls are wonderful candidates for prepping ahead of time, which means you can wake up to less work. Once you have sliced your filled log of dough and arranged the rolls in your baking pan, cover that pan very tightly with plastic wrap. You can stick this right into the refrigerator right now! They hold up happily for up to 12 hours in there. When you are ready to bake them the next morning, just pull them out, let them sit on the counter for about an hour (or until they look puffy), and then proceed with baking as directed. It’s the perfect way to serve make ahead sweet rolls with nutella!
Storage and Reheating Instructions for Your Nutella Rolls
Oh, the tragedy of having leftover sweet rolls! It’s never a tragedy when they taste this good, but you need to know how to keep them soft because no one wants a stale chocolate hazelnut treat the next day. Luckily, these Nutella rolls store like champions, provided you follow a couple of simple rules I learned the hard way. Keep them right there on the counter! I know we worry about keeping things cold, but airtight containers are your best friend here.
Make sure they are completely cooled before you cover them tightly—if you trap warm air in there, you’ll end up with a soggy top, and nobody wants that. Stored properly in an airtight container at room temperature, they stay wonderfully fresh for up to three whole days. I’ve had to test this extensively, you know, for science!
Now, if you want that glorious, melt-in-your-mouth texture back on day two or three? You need heat, and you need it fast. Forget the oven unless you’re reheating the whole batch! For just one or two rolls, the microwave is your secret weapon. Just take your roll, pop it on a plate, and give it about 8 to 15 seconds. You’ll see that chocolate hazelnut swirl soften right back up. It’s truly the fastest way to enjoy that fresh-baked goodness again!
Frequently Asked Questions About Baking Nutella Rolls
It’s natural to have questions when you’re venturing into baking with yeast and chocolate spread—I certainly did when I first started working on this rich chocolate hazelnut pastry recipe! I’ve gathered the most common things folks ask me about making these Nutella rolls below. Knowing these little tricks really helps ensure your end result is amazing.
Can I substitute the yeast dough for a quicker option when making nutella rolls?
Oh, I know those busy mornings! While I stand by this yeast dough—it’s what gives you those truly soft sweet rolls with chocolate hazelnut filling—you absolutely can take a shortcut if you’re in a pinch. My suggestion would be to use a high-quality refrigerated biscuit dough or puff pastry sheets. You just skip the whole kneading and rising process! Lay the dough out, spread the Nutella, roll it up, slice, and bake. It won’t be *quite* as cloud-like, but it’s a fantastic, quick base for a chocolate swirl treat.
My Nutella filling leaked out while baking my nutella rolls. What went wrong?
That’s the saddest sight when you open the oven door! Ninety-nine times out of a hundred, this happens for one of two reasons. First, you didn’t pinch that final seam tight enough when you rolled up your log. Make sure that final half-inch border you left without Nutella really seals shut! Second, and this is key for any baking chocolate spread rolls, your spread was too warm. If the Nutella is runny, it just slips out as the dough expands during the second rise and baking. If your kitchen is warm, try chilling the spread in the fridge for 20 minutes before you apply it to the dough.
What are good brunch ideas with chocolate swirls besides these rolls?
If you love that chocolate swirl but maybe want something different for a next weekend, you are in luck! If you happen to love pancakes, I have a recipe for easy breakfast recipes that includes a simple way to swirl chocolate chips or even a small dollop of Nutella right into the batter. It gives you that comforting, chocolatey flavor without the yeasty effort. They make for wonderful brunch ideas with chocolate swirls!
PrintFluffy Homemade Nutella Swirl Rolls

Make soft, sweet rolls filled with rich chocolate hazelnut spread using a reliable yeast dough recipe. These are perfect for brunch or a comforting treat.
- Prep Time: 30 min
- Cook Time: 25 min
- Total Time: 2 hr 35 min
- Yield: 12 servings 1x
- Category: Dessert
- Method: Baking
- Cuisine: American
- Diet: Vegetarian
Ingredients
- 1 cup whole milk, warmed to 105-115°F
- 2 1/4 teaspoons active dry yeast
- 1/4 cup granulated sugar plus 1 teaspoon for yeast
- 2 large eggs, room temperature
- 1/4 cup unsalted butter, melted
- 3 1/2 to 4 cups all-purpose flour
- 1 teaspoon salt
- 1 cup Nutella (chocolate hazelnut spread)
- 1/2 cup powdered sugar for glaze
- 2 tablespoons milk or cream for glaze
- 1/2 teaspoon vanilla extract for glaze
Instructions
- Activate the yeast: In a large bowl, combine the warm milk, 1 teaspoon sugar, and yeast. Let stand for 5 to 10 minutes until foamy.
- Mix wet ingredients: Whisk the remaining 1/4 cup sugar, eggs, and melted butter into the yeast mixture.
- Combine dry ingredients: In a separate bowl, whisk together 3 1/2 cups of flour and salt. Gradually add the flour mixture to the wet ingredients, mixing until a shaggy dough forms.
- Knead the dough: Turn the dough onto a lightly floured surface. Knead for 8 to 10 minutes, adding small amounts of the remaining flour only if the dough is too sticky. The dough should be smooth and elastic.
- First rise: Place the dough in a lightly oiled bowl, turning to coat. Cover the bowl with plastic wrap or a clean towel. Let the dough rise in a warm place for 1 to 1 1/2 hours, or until doubled in size.
- Prepare the filling: Once the dough has risen, gently punch it down. On a lightly floured surface, roll the dough into a large rectangle, about 12 by 18 inches.
- Spread the Nutella: Spread the 1 cup of Nutella evenly over the entire surface of the dough, leaving a small half-inch border along one long edge clean.
- Roll and cut: Starting from the long edge opposite the clean border, tightly roll the dough into a log. Pinch the seam closed. Slice the log into 12 equal rolls.
- Second rise: Arrange the rolls in a greased 9×13 inch baking pan. Cover and let rise again in a warm place for 30 to 45 minutes, or until puffy.
- Bake the rolls: Preheat your oven to 375°F (190°C). Bake for 20 to 25 minutes, or until the tops are golden brown.
- Make the glaze: While the rolls cool slightly, whisk together the powdered sugar, 2 tablespoons of milk, and vanilla extract until smooth. Add more milk, a drop at a time, if you prefer a thinner glaze.
- Glaze and serve: Drizzle the glaze over the warm rolls before serving.
Notes
- For soft sweet rolls with chocolate hazelnut filling, avoid over-baking. Check them at 20 minutes.
- If you want to make these ahead, assemble the rolls, place them in the pan, cover tightly, and refrigerate for up to 12 hours before the second rise and baking.
- Store leftover rolls in an airtight container at room temperature for up to 3 days. Reheat individual rolls briefly in the microwave for a soft texture.
Nutrition
- Serving Size: 1 roll
- Calories: 350
- Sugar: 25
- Sodium: 250
- Fat: 18
- Saturated Fat: 6
- Unsaturated Fat: 12
- Trans Fat: 0
- Carbohydrates: 42
- Fiber: 2
- Protein: 6
- Cholesterol: 45