
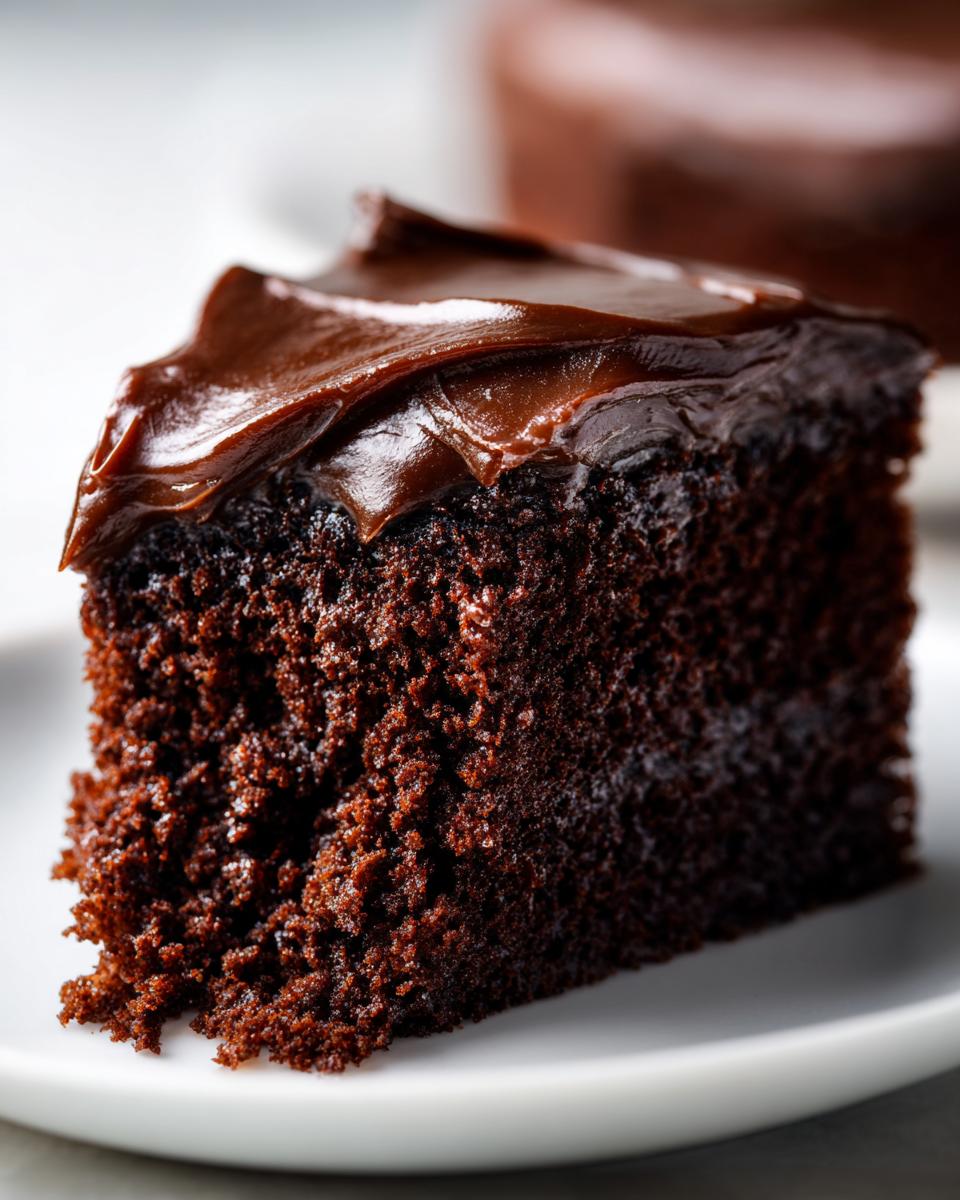
There’s just nothing that says ‘finished’ on a dessert quite like a gorgeous, glossy coating. Maybe you’re dreaming of a beautiful drip down the side of a cake, or perhaps a smooth, rich topping for those brownies you just pulled out of the oven. That’s where chocolate ganache comes in! I remember teaching my class how patience creates perfection, and that lesson applies right here. Good news, friends: making truly fantastic chocolate ganache at home is shockingly easy. I’m sharing my ultimate, no-fuss, 2-ingredient recipe that gives you all the ratios you’ll ever need for whatever topping you choose.
- Why This Easy Chocolate Ganache Recipe Is a Baker's Secret Weapon
- Ingredients for Silky Chocolate Ganache
- How to Make Chocolate Ganache: Step-by-Step Instructions
- Mastering Chocolate Ganache Uses: Ratios for Glaze, Filling, and Frosting
- Tips for Success with Homemade Chocolate Ganache
- Storage and Reheating for Your Chocolate Ganache
- Frequently Asked Questions About Making Chocolate Ganache
- Estimated Nutritional Data for Chocolate Ganache
- Share Your Homemade Chocolate Ganache Creations
Why This Easy Chocolate Ganache Recipe Is a Baker’s Secret Weapon
I love recipes that don’t ask you to buy a whole arsenal of specialty ingredients. That’s the beauty of a rich couverture that melts perfectly with just heavy cream. Once you master this sweet pair, you hold the key to dozens of desserts. Trust me, having this go-to chocolate ganache recipe in your back pocket saves the day!
- It’s fast! This basic chocolate ganache comes together in about five minutes once the cream is hot—I’ve used it as a last-minute dessert topping more times than I can count!
- Incredibly versatile: Glaze, filling, drip, or frosting—you decide the stiffness by simply changing the ratio.
- It tastes deep and luxurious, far better than any store-bought jarred sauce.
The Magic of 2 Ingredient Ganache
It truly is just two things: good quality chocolate and heavy cream. That’s it! Because we aren’t adding butter, egg yolks, or corn syrup, the flavor of the chocolate really shines through. This simple foundation is what makes this my favorite easy chocolate ganache recipe. If you want it to taste amazing, you have to start with chocolate you’d actually want to eat by itself. That makes all the difference!
Achieving Perfect Ganache Consistency Every Time
The biggest worry people have is texture, right? Will it be too runny? Will it seize up on me? Well, the simple secret here rests in the ratio of chocolate to cream. A little extra cream makes it pourable and glossy for a beautiful drip. More chocolate makes it firm enough for a decadent filling or even a lovely chocolate ganache frosting later on. Learning these basic adjustments helps you nail the perfect ganache consistency for whatever project you’re working on.
Ingredients for Silky Chocolate Ganache
When we keep things simple, quality really matters, doesn’t it? For our dark chocolate ganache, you only need two things. I’ve listed them out below. Make sure you measure precisely because, for this recipe, those small amounts truly dictate the finished texture!
- 8 ounces (225g) good quality dark chocolate, finely chopped
- 8 fluid ounces (240ml) heavy whipping cream (make sure it has at least 35% milk fat on the label!)
How to Make Chocolate Ganache: Step-by-Step Instructions
Alright, get ready, because this is where the magic happens! Don’t mess up the prep, and the rest is just patience. I promise, if you follow these few steps for your chocolate ganache, you’ll have the smoothest batch you’ve ever made. Remember how I taught my students patience? This resting period below is the most important part of the whole process.
Preparing the Chocolate and Cream Base for Chocolate Ganache
First things first: you need that chocolate finely chopped. I mean, really fine! If you use chunky pieces, the cream won’t melt them evenly, and we’ll end up with a sad, lumpy mess. Don’t even think about using those chips unless they are truly high quality; chopped baking bars melt much cleaner. So, get that chopped dark chocolate into a heatproof bowl.
Next, pour your heavy whipping cream into a small saucepan. Set it on the stove over medium heat. You need to watch this closely! We only want the cream to just start simmering around the edges. It might bubble tiny bit, but do not let it come to a rolling boil. Boiling the cream can scald it, and that ruins the smooth texture we are aiming for. Once you see those little wisps of steam and the edge movement, take it right off the heat!
Creating the Silky Chocolate Ganache
Now for the real test: pour that hot cream right over your waiting chocolate. And here is the cardinal rule: Do nothing! Resist the urge to touch it or stir it right away. Let that heat do its job for a full five minutes. This resting period is non-negotiable, whether you reference my notes or check out other great guides like the one from The First Year Blog here. Trust Carla on this!
After five minutes, grab your whisk. Start in the very center of the bowl and whisk gently, moving slowly outward in small circles. Keep stirring slowly and steadily until everything blends together and the mixture looks gorgeously glossy and totally uniform. If you want a beautiful fudge-like texture later, this shiny base is where you start!
Mastering Chocolate Ganache Uses: Ratios for Glaze, Filling, and Frosting
See, the batch of chocolate ganache we just made is actually your base layer, and depending on what you need it for, you just have to let it hang out for a little while! That’s the secret to its amazing versatility, and it’s what separates a good baker from a home cook who always gets compliments. You just need to know which ratio works for which job. I rely on ratios for everything, especially when making my white chocolate creations! For the expert breakdown on ratios, sometimes I like to check out the chart Baran Bakery has over here.
Using Chocolate Ganache as a Pourable Glaze or Drip
If you want a stunning, mirror-like finish—maybe for a beautiful ganache drip recipe—you use the mix almost immediately after whisking it smooth while it’s still warm. If it cools down too much, it thickens too quickly. For a perfect, drippy consistency, if it seems thick, just warm it back up gently over a warm water bath. Don’t microwave it unless you are very careful; a gentle warm-up is always better for that glossy shine!
Preparing Chocolate Ganache Frosting and Filling
This is where patience comes back into play. If you want a thick chocolate ganache frosting that you can spread all over a cake or use as a delicious layer filling between cake rounds, it simply needs time to set up. Let that bowl just sit on the counter for at least two or three hours. It will thicken up into something wonderful and spreadable. You’ll know it’s ready because it stops looking like a sauce and starts holding its shape against the side of the bowl.
Making Whipped Ganache Frosting
Now, if you want something lighter and airier—a real fluffy whipped ganache frosting—you have to let the mixture cool completely. And I mean completely! If there is even a little warmth left, it will melt your electric mixer beaters! Once it’s fully set and firm (I often chill mine briefly to speed this up), you beat it vigorously. It triples in volume, turns totally opaque, and feels like the richest, silkiest buttercream you’ve ever tasted. It’s unbelievable!
Tips for Success with Homemade Chocolate Ganache
Even with the simplest recipe, sometimes things just don’t go exactly as planned. That’s part of baking, isn’t it? Don’t panic if your gorgeous chocolate ganache looks a little off when you first whisk it. I’ve seen nearly everything happen over the years! My best advice—honed by years of baking and teaching—is to address separation gently rather than tossing the whole bowl.
If your mix looks grainy or separated, that usually means the ratio got knocked out of whack, or perhaps the cream wasn’t hot enough or was too hot. The fix is simple: put the bowl over a pot of *barely* simmering water—low heat is key. Whisk gently, and I mean gently! It should come back together into that beautiful, silky texture in just a moment. You can find some great ideas on troubleshooting here, or sometimes looking at Sugar Geek Show’s comprehensive guide helps too. Just remember, gentle warmth is your friend when rescuing a temperamental ganache!
Storage and Reheating for Your Chocolate Ganache
Now that you’ve made the most glorious, silky chocolate ganache, you’ll want to keep it perfect until you’re ready to use it. If you have any leftover glaze or sauce, just pop it into an airtight container on the counter for a few days. If it’s meant to be a frosting and you put it in the fridge? It’ll firm up hard, which is fine!
When you pull out that firm ganache, don’t reach for high heat! To bring back that beautiful, pourable texture, just chop it up a bit and warm it slowly. Let it sit in a bowl over barely simmering water, or pulse it gently in the microwave for just 10 seconds at a time. You want it soft and drippy again, not hot and broken. A little patience here keeps it silky smooth!
Frequently Asked Questions About Making Chocolate Ganache
It’s natural to have questions when you try a new technique, even one as straightforward as this chocolate ganache! When I first started teaching this method, I got so many questions about ingredient swaps. Don’t hesitate to ask! I want you to feel totally confident stepping into the kitchen. If you are looking for a simple chocolate sauce that isn’t ganache, I have a recipe for an easy homemade chocolate syrup that might fit the bill!
Can I use chocolate chips instead of chopped chocolate for my chocolate ganache recipe?
Oh, that’s a classic question! Most chocolate chips are designed to hold their shape while baking, which means they have extra stabilizers and less cocoa butter in them. If you use them, you might end up with a grainy mixture that never fully smooths out. For that true, silky chocolate ganache, I really push for chopped baking bars. If chips are all you have, go ahead, but please know that the result might not be as beautifully glossy as the recipe promises. Sometimes convenience costs us that perfect finish!
What is the best way to get smooth ganache if mine looks grainy?
If you look down and your beautiful mixture looks gritty or separated—don’t despair! This is exactly why I teach the gentle warming trick. The best way to get smooth ganache is to bring the heat back, but very slowly. Place your bowl over a pan of water that is just barely simmering—not boiling hard, just warm. Whisk quietly and patiently until those little solids melt back into the cream. It usually only takes a minute or two for that glossy, perfect ganache consistency to return. It’s a lifesaver, honestly!
Can I use milk instead of heavy cream for a quick dessert topping?
I totally get wanting a quick dessert topping, but please don’t swap the heavy cream for regular milk here! Heavy cream has that high fat content—at least 35%—which is what emulsifies with the chocolate solids to create that stable, rich coating we adore. If you use regular milk, you’ll end up with something thin, watery, and likely separated once it cools. For this recipe, the cream is essential for structure, whether you plan to use it as a drip or let it set up for a filling. For a thinner sauce, you could always thin the finished ganache slightly with a dash of warming milk, but the base needs the heavy fat!
Estimated Nutritional Data for Chocolate Ganache
Now, when we talk about this rich, decadent chocolate ganache, we have to remember that this is pure indulgence! The values below are estimates, and they are based specifically on that dark chocolate ganache recipe we just made using the 1:1 ratio. If you switch to milk or white chocolate, those numbers will certainly change, so keep that in mind when you’re counting things up!
As a home cook, I believe in moderation, and this fudge-like topping is certainly best served in small, perfect portions. Here’s the breakdown for a serving size of about 1/4 cup:
- Serving Size: 1/4 cup
- Calories: 450
- Fat: 35g (Of which 20g is Saturated Fat)
- Carbohydrates: 30g (3g Fiber, 25g Sugar)
- Protein: 5g
It’s a treat, friends! It’s meant to bring joy to your dessert, and I always say that a little bit of quality, rich, homemade chocolate makes any celebration better. Enjoy it responsibly!
Share Your Homemade Chocolate Ganache Creations
I truly hope this recipe gives you the confidence to whip up the richest, silkiest chocolate ganache whenever the craving hits! Honestly, seeing what all of you create in your own kitchens is the absolute best part of running this community forum. It makes all the testing and teaching worthwhile.
Did you use it as a beautiful drip on a cake? Or perhaps you whipped it up into the world’s fluffiest chocolate ganache frosting? I want to see it all! Please give this easy chocolate ganache recipe a star rating down below—it helps other home cooks know they can trust this method, too.
And if you have any questions that popped up while you were making it, drop them in the comments, too! I read every single message, and I’m here to help you troubleshoot or get those ratios dialed in perfectly. If you need a private question answered, you can always reach out directly through my contact page. Happy baking, friends, and I can’t wait to see your beautiful chocolate creations!
PrintThe Ultimate Easy 2-Ingredient Chocolate Ganache: Ratios for Glaze, Frosting, and Drip
Learn how to make rich, silky chocolate ganache using only two simple ingredients. This guide gives you the perfect ratios for using it as a glaze, a smooth filling, or a whipped frosting for your desserts.
- Prep Time: 5 min
- Cook Time: 5 min
- Total Time: 10 min
- Yield: About 1.5 cups 1x
- Category: Dessert Component
- Method: Stovetop/Melting
- Cuisine: American
- Diet: Vegetarian
Ingredients
- 8 ounces (225g) good quality dark chocolate, finely chopped
- 8 fluid ounces (240ml) heavy whipping cream (at least 35% milk fat)
Instructions
- Place the finely chopped dark chocolate into a medium, heatproof bowl.
- Pour the heavy whipping cream into a small saucepan. Heat the cream over medium heat until it just begins to simmer around the edges. Do not let it boil rapidly.
- Immediately pour the hot cream over the chopped chocolate. Let it sit undisturbed for 5 minutes to allow the heat to melt the chocolate completely.
- After 5 minutes, gently whisk the mixture starting from the center and working outward until the ganache is completely smooth, glossy, and uniform. This creates a basic, pourable ganache.
- For a glaze or drip: Use immediately while warm.
- For a filling or frosting: Let the ganache cool completely at room temperature until it thickens to a spreadable consistency (this may take 2 to 4 hours, depending on your room temperature).
- For whipped ganache frosting: Cool the ganache completely (at least 4 hours or chill briefly until firm but not hard). Transfer the cooled ganache to a mixing bowl and beat with an electric mixer on medium-high speed until light, fluffy, and doubled in volume, about 2 to 3 minutes.
Notes
- For a milk chocolate ganache, use a 2:1 ratio (12 ounces chocolate to 6 ounces cream).
- For a white chocolate ganache, use a 3:1 ratio (12 ounces white chocolate to 4 ounces cream) and use low heat to avoid scorching the white chocolate.
- If your ganache separates or looks grainy, place the bowl over a pan of barely simmering water and whisk gently until it comes back together.
Nutrition
- Serving Size: 1/4 cup
- Calories: 450
- Sugar: 25
- Sodium: 10
- Fat: 35
- Saturated Fat: 20
- Unsaturated Fat: 15
- Trans Fat: 0
- Carbohydrates: 30
- Fiber: 3
- Protein: 5
- Cholesterol: 100