
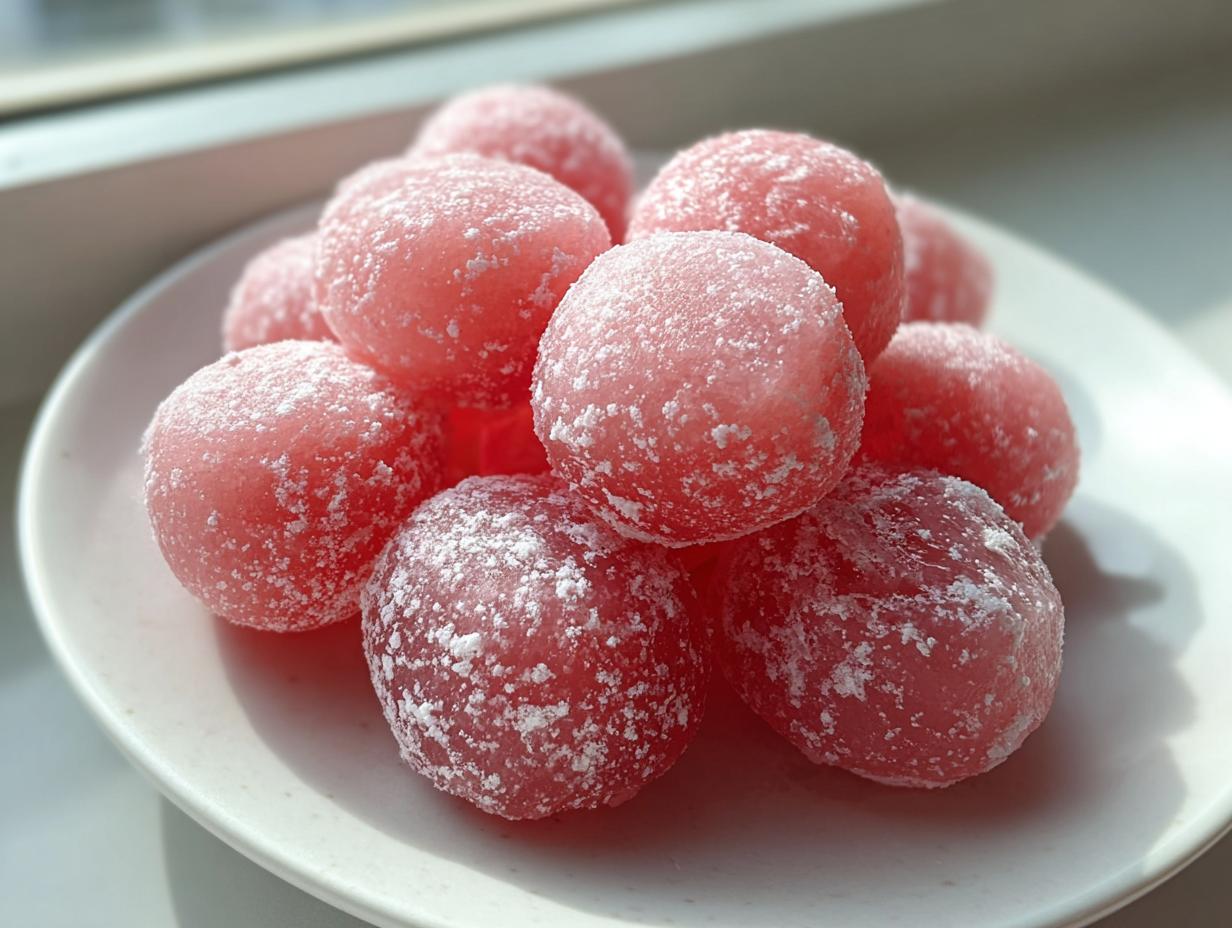
When the summer heat just won’t quit, sometimes you need a dessert that feels cool, happy, and just a little bit magical. That’s when I reach for my recipe for watermelon mochi. Oh, my dears, these little bites are just the answer! They have that wonderfully soft, satisfyingly chewy texture that makes mochi so addictive, but with a burst of fresh, juicy watermelon flavor. It’s like holding a tiny, cooling cloud in your hand. I love making these because they remind me of the simple joys of summer afternoons when the kids were little, and we didn’t need fancy tools—just a few ingredients and a little bit of stirring to make something truly special. You’ll be surprised how easy this refreshing fruit mochi comes together!
- Why This Easy Watermelon Mochi Recipe is Your New Summer Favorite
- Gathering Ingredients for Perfect Watermelon Mochi
- Step-by-Step Instructions to Make Watermelon Mochi
- Tips for Success with Your Homemade Mochi Bites
- Variations for Refreshing Fruit Mochi
- Serving Suggestions for Watermelon Mochi
- Storage and Reheating Instructions for Watermelon Mochi
- Frequently Asked Questions About Watermelon Mochi Recipe
- Nutritional Estimate for This Sweet and Chewy Snack
Why This Easy Watermelon Mochi Recipe is Your New Summer Favorite
If you’re looking for the ultimate cool-down treat, stop right here! This watermelon mochi recipe hits every mark—it’s incredibly refreshing, super sweet, and nails that perfect soft, satisfyingly chewy texture that makes every bite worthwhile. The best part? It requires very little work. Seriously, it’s a fantastic no-bake snack, which means I don’t have to fire up the oven and heat up the kitchen when the sun is blazing. If you are looking for other quick bites, you can look at my list of easy appetizers and snacks.
Here’s what makes this my go-to dessert when summer rolls around:
- It delivers unbeatable chewiness thanks to the simple cooking method.
- It uses fresh, vibrant watermelon flavor, making it light and not too heavy.
- Preparation is really quick—much faster than waiting for something to bake!
- It’s just so cute! These bite-sized summer sweets look wonderful on a platter.
Quick Facts for Your Watermelon Mochi Bites
I always like to have the key timings written down so I can plan my afternoon. You’ll find all the essentials for this homemade mochi below:
- Prep Time: 15 min
- Cook Time: 10 min
- Total Time: 25 min (plus chilling)
- Yield: About 18 pieces
- Method: Microwave
- Cuisine: Japanese Inspired
Gathering Ingredients for Perfect Watermelon Mochi
Now, let’s talk about what you need to make this truly delightful **watermelon mochi**. Unlike some fussy desserts that require a whole shopping trip, this recipe is wonderfully straightforward. We are focusing on making that amazing chewy texture, and that starts with getting the right flour. Don’t skimp on quality here; it makes all the difference between a good little snack and a great one!
Here is exactly what you’ll need for your sweet treat:
- 1 cup glutinous rice flour (This is key! Don’t swap it out.)
- 1/4 cup granulated sugar
- 3/4 cup cold water
- 1/2 cup fresh watermelon juice, strained really well
- 1 tablespoon cornstarch, plus extra for dusting when we finish up
- 1 teaspoon watermelon extract (only if you want that flavor to really sing!)
Ingredient Notes and Substitution Tips
I want to give you a quick heads-up, especially about the flour. When you go to the store, look specifically for glutinous rice flour, which they often label as sweet rice flour. Regular rice flour just won’t give you that signature soft and chewy texture we’re aiming for. If you forget to grab the extract or don’t want to add it, that’s perfectly fine; the fresh juice adds plenty of flavor!
Now, about that beautiful pink color! We want this to look like a slice of sweet melon, right? The recipe often gets its color naturally from the watermelon juice, but if your juice is pale, you’ve got options. If you want to avoid artificial dyes—which I often do—my mother used to suggest adding just a tiny bit of beet juice concentrate. It sounds odd, but it blends right in and gives you that lovely pink dessert color without any fuss.
Step-by-Step Instructions to Make Watermelon Mochi
Alright, let’s get mixing! Making this watermelon mochi is satisfying because you watch the dough transform right before your eyes, usually right there on the counter. The microwave is our best friend here, making this a super speedy process perfect for when you need a sweet and chewy snack fast. Just follow these steps carefully, and you will have soft, beautiful bites ready for chilling in no time.
- First things first, let’s get your flavor base ready. Take that lovely strained watermelon juice and whisk in the optional watermelon extract if you decided to use it. Keep this mixed liquid close by!
- Now for the dough foundation. Grab your microwave-safe bowl. Whisk your glutinous rice flour and sugar together so they are nice and acquainted. Then, pour in the cold water slowly while whisking continually until you don’t see any dry patches left. It should look like a thin, watery batter.
- Time for the magic! Cover that bowl loosely with plastic wrap—you need some steam to escape. Pop it into the microwave on high for exactly one minute.
- Pull it out! It will look a bit strange, but stir it vigorously. Cover it again and microwave for one more minute. Stir once more. Repeat this cycle—microwave for 1 minute, stir well—usually one or two more times until the dough is visibly thick, sticky, and starting to look translucent around the edges.
- Once it’s hot and thick, carefully stir in that bright watermelon juice mixture. Mix, mix, mix until the color is uniform and the dough is smooth.
- We need to cool this down so we can handle it. Dust a clean surface generously with cornstarch. Scoop that hot, sticky dough right onto the cornstarch pile. Dust the top lightly too! Let it sit there for about 15 minutes—just long enough to handle it safely.
- When cool enough, roll the dough into a long log, about the size of a thick dowel rod. Cut it into small, bite-sized pieces, aiming for about 1 inch each. Try to roll each piece gently between your hands into a smooth, sweet little ball.
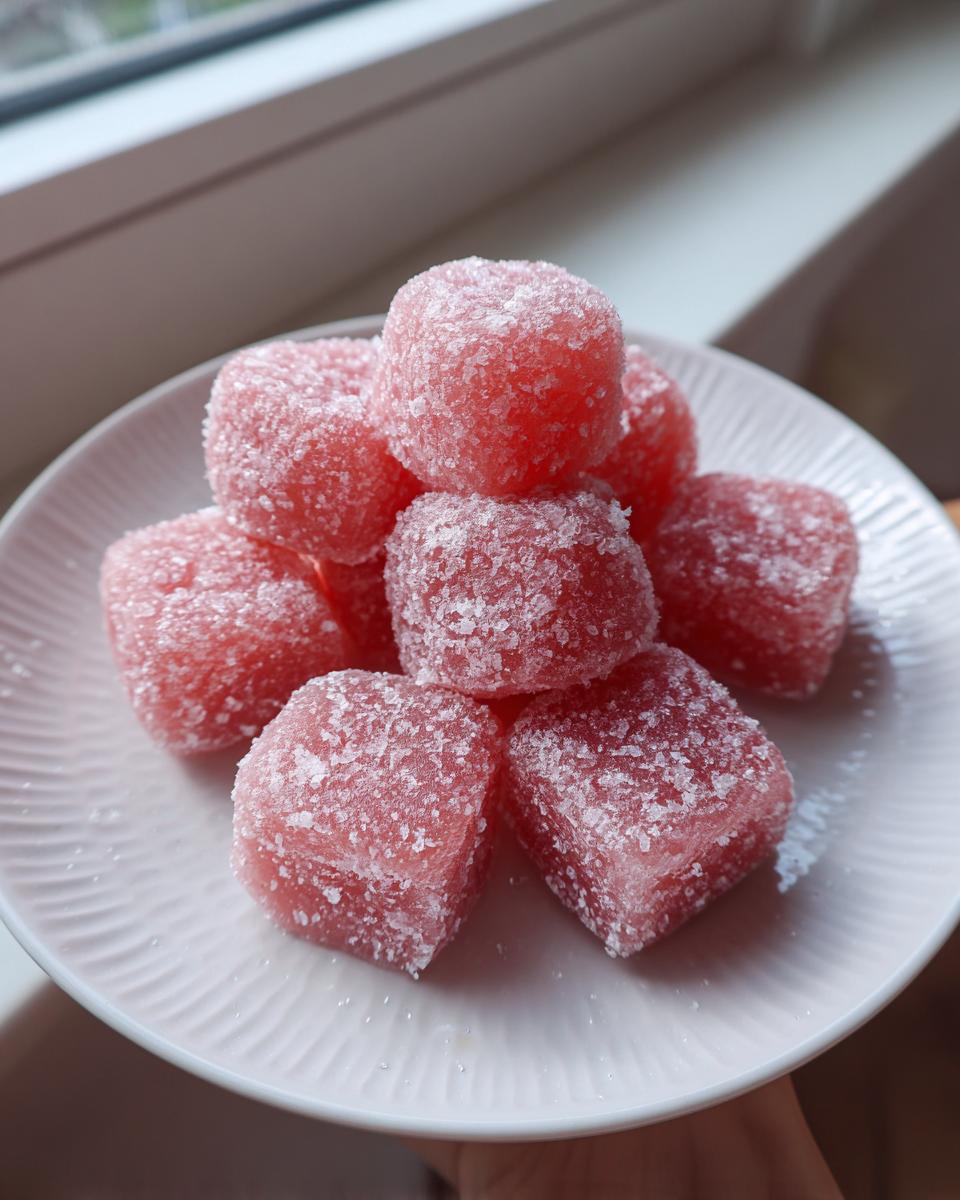
- Give them one last quick roll in the excess cornstarch to make sure they don’t stick to anything. If you want that extra surprise filling, this is the time to gently press a tiny cube of fresh watermelon into the center and seal the dough around it!
- Line a plate or tray with parchment paper. Place all your finished homemade mochi bites on it and pop them into the fridge for at least 30 minutes to firm up before serving them chilled.
Achieving the Ideal Chewy Summer Dessert Dough
I cannot stress this enough: the microwaving steps are where texture is made or ruined! You are looking for that dough to become opaque and thick, not soupy or dry. Because every microwave cooks a bit differently, you must stir between those one-minute bursts.
If you keep going too long—say, past four minutes total on high power—you risk cooking out all the necessary moisture. That turns your beautiful dough into something tough and rubbery, and we want chewy, not tough! Stop as soon as it pulls cleanly away from the sides of the bowl when you stir it. That slight stickiness remaining means it’s perfect for absorbing the juice without becoming slimy later on.
Tips for Success with Your Homemade Mochi Bites
Making mochi for the first time can feel a little bit intimidating, but trust me, these tips will make sure your handling process for this watermelon mochi goes smoothly. The biggest challenge people run into is stickiness! Once the dough cools slightly, it becomes much easier to manage, but you have to use enough cornstarch.
When you roll out the log and cut those little pieces, keep your hands dusted lightly, but don’t bury the dough in starch—that will upset the texture we worked so hard to create in the microwave. A gentle dusting is all you need.
If you are making these ahead of time for a party, the dusting is doubly important. Use a thin layer of parchment paper when you store them, even in the airtight container, just as a safety measure. If you don’t want to stick to the counter, you might also look at my tips for another easy-to-handle snack, like my no-bake bars.
Remember, if they start feeling too sticky while you are rolling them into balls, don’t panic! Just dust your hands again, and you’ll be back in business.
Variations for Refreshing Fruit Mochi
While this pink treat is wonderful just as it is, sometimes it’s fun to play around, especially when the season is bursting with fresh produce! If you love the idea of making this Japanese rice dough dessert but want to switch up the flavor, the method works beautifully with almost any strained fruit puree. Think soft peach or maybe even a vibrant raspberry puree!
To address that desire for a truly juicy inside, remember I mentioned tucking a fresh piece of watermelon in before sealing it? That makes for the best bite-sized summer sweets experience! If you want even more ideas for fruity desserts, you can check out this recipe on another site for inspiration. This whole process is so adaptable; you’re basically making a simple mochi recipe that you can flavor however you like!
Serving Suggestions for Watermelon Mochi
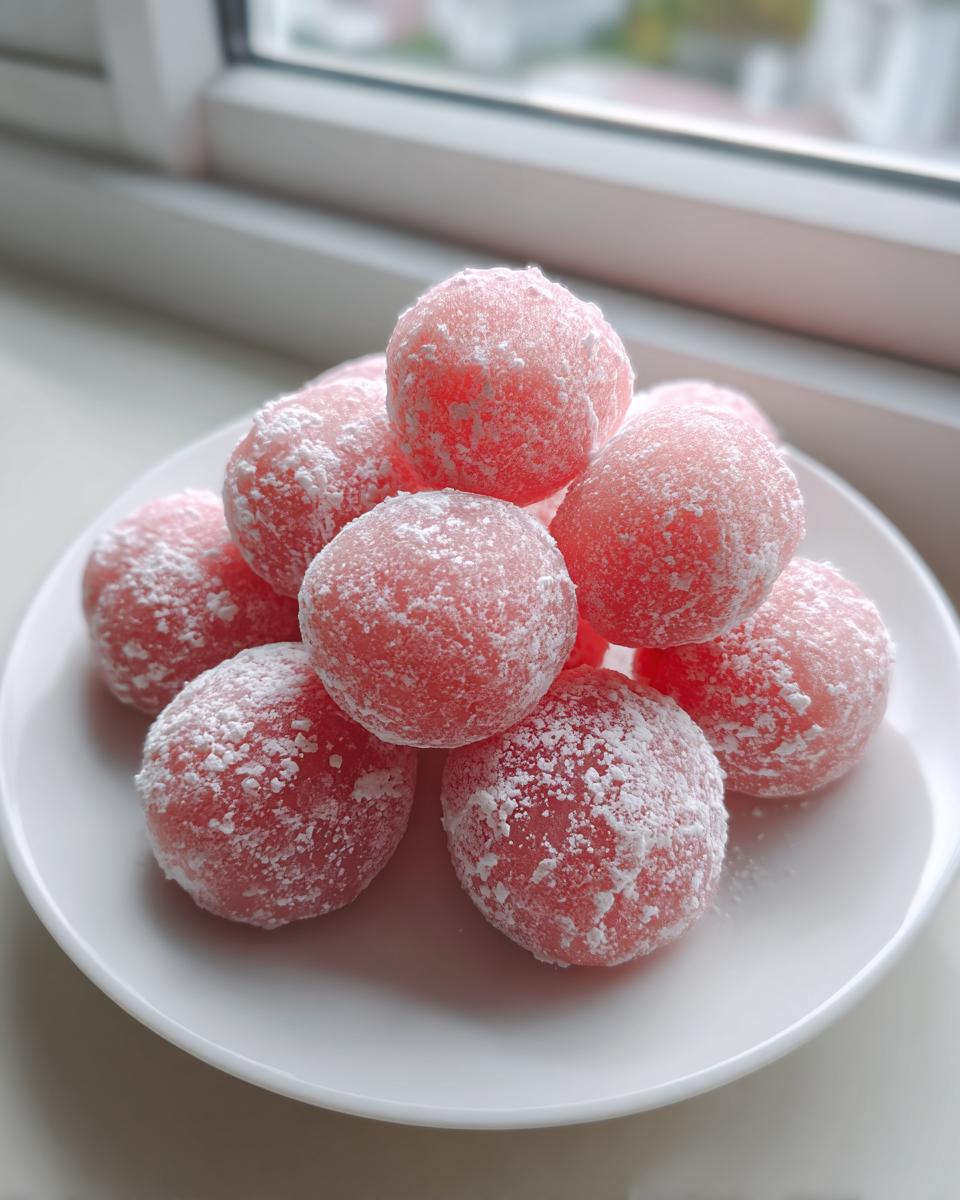
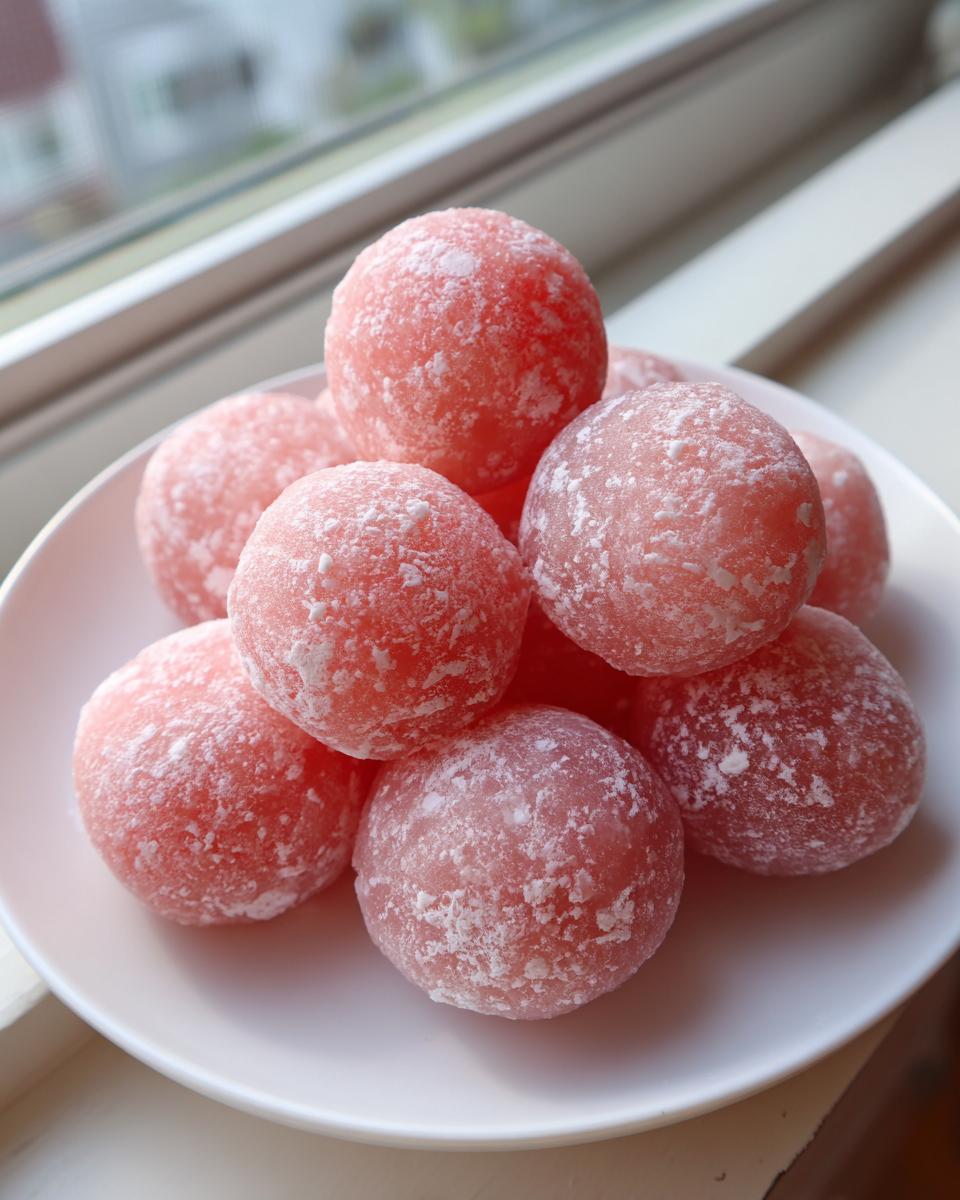
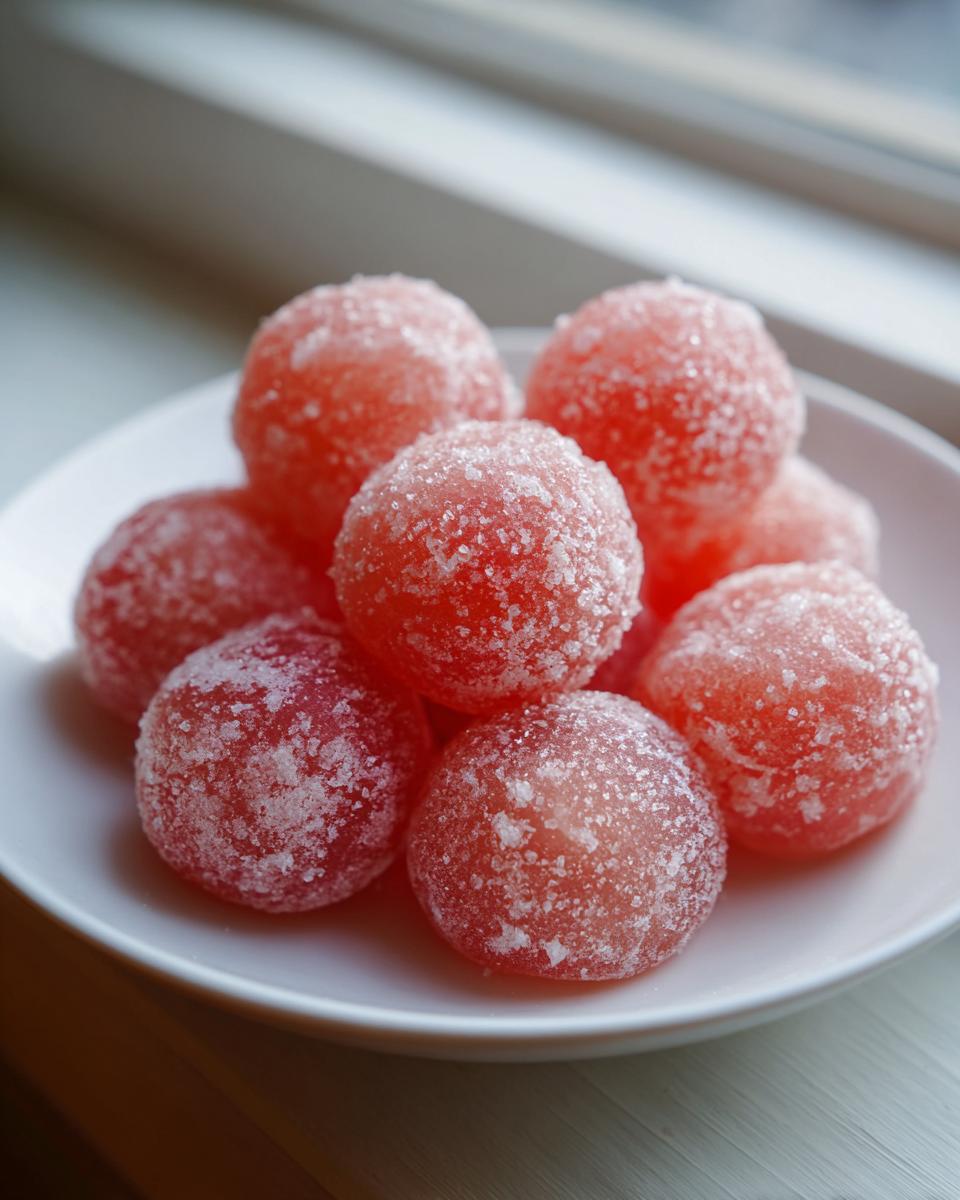
When these little gems are perfectly chilled, they are just beautiful to look at, aren’t they? The soft pink color just screams summer! I always try to serve my finished **watermelon mochi** on a simple white platter—it makes that fruity color really pop. They are designed to be eaten just as they are because they provide such a great sweet and chewy snack experience all on their own.
But if you’re having a gathering and want to offer a little spread, think light! Since these are so refreshing, heavy pairings just weigh them down. I adore serving them alongside a nice, ice-cold cup of lightly sweetened iced green tea or jasmine tea. The subtle earthiness of the tea cuts through the sweetness perfectly.
Another fun way I present them is alongside a simple summer fruit salad. Not a heavy one, mind you, just chunks of cantaloupe, blueberries, maybe some star fruit if you can find it. If you happen to be making a creamy side for other snacks, like my easy creamy fruit dip, you can put out a few of these mochi for a fun textural contrast!
Storage and Reheating Instructions for Watermelon Mochi
Now that you’ve made these lovely, soft little treats, you need to know how to keep them perfect. Mochi is definitely at its best the day you make it, but that’s okay! Luckily, these store beautifully in the refrigerator for a couple of days.
The secret to keeping them soft? Air is the enemy! You must store them in an airtight container. I usually line the container with a little parchment or wax paper on the bottom, just to be extra cautious, and then stack the mochi gently inside. They will happily stay good for up to two days in the fridge. Any longer than that, and the rice dough tends to get a little hard, though they are still safe to eat.
A common question I always get is about reheating. For this particular chilled fruit dessert, I strongly recommend against heating them up. Microwaving mochi dough is what we do to *cook* it initially, but reheating the already cooled, flavored dough can make it melt weirdly or get tough. For the best experience, just pull them out of the fridge about 10 minutes before you plan to eat them. That gives them just enough time to come slightly closer to room temperature so that soft, chewy texture really shines through!
Frequently Asked Questions About Watermelon Mochi Recipe
I always get asked questions whenever I share this recipe—and that’s wonderful! It means people are excited to try making this watermelon mochi at home. Here are a few common things folks ask me before they dive into making their own batches of these sweet and chewy snacks.
What exactly is glutinous rice flour, and can I use regular rice flour instead?
This is the most important question for texture! You really must use glutinous rice flour, which is also called sweet rice flour. It’s what gives mochi its signature stretchiness and that wonderfully soft and chewy texture. Regular rice flour is ground much finer, and it won’t give you that give; it will just end up being grainy or crumbly. Stick to the bag that says “Glutinous” or “Sweet Rice Flour”—you can usually find it in the Asian aisle of your bigger grocery stores.
Can I use fresh watermelon chunks instead of just the juice for the dough?
Oh, that’s a great idea for a fresh fruit mochi experience! While you use the strained juice for coloring and flavoring the dough itself, you absolutely can press a small, seedless cube of fresh watermelon right into the center *before* you seal the dough ball in the final step. Just be careful! You need to make sure you seal that dough completely around the cube before rolling it in cornstarch. That way, the fresh fruit stays protected inside our pillow-soft dough!
Do I absolutely have to use a microwave to cook the dough?
The microwave is the quickest way to make this easy mochi, especially since we want to keep the cooking time short! However, if you don’t have one, you can definitely steam it on the stovetop. You’d place the flour, sugar, and water mixture in a heatproof bowl, cover it tightly with foil, and steam it over simmering water for about 15 to 20 minutes, stirring halfway through. It takes a little longer and requires more attention than the microwave method, but you’ll still get delicious results for your homemade mochi bites.
How important is it that I strain the watermelon juice?
It’s essential, sweetheart! If you put pulp or too much water from the melon into the flour mixture, it throws off the ratio needed to set up properly in the microwave. We want the liquid to be mostly pure flavor, not too much actual water content. Strain it well through a fine-mesh sieve, maybe even pushing the pulp gently with a spoon, to make sure you get the smoothest base possible for this pink dessert recipe.
If you have any other questions about technique or need to get in touch with me, please feel free to head over to my contact page. Happy cooking!
Nutritional Estimate for This Sweet and Chewy Snack
I always feel it’s helpful to have a rough idea of what’s in our favorite treats. While I’m certainly not counting every single calorie when I’m making a fun snack like this, I know some of you appreciate knowing the breakdown. Since we are using very simple ingredients here—mostly rice flour and sugar—the numbers aren’t too wild!
Remember, this estimate is based on using the core ingredients listed, yielding about 18 pieces. If you add extra sugar or heavy fillings, those numbers will shift a little bit! This is just a general guideline for one of these delightful little bites.
Here is the nutritional breakdown per serving (1 piece):
- Calories: 55
- Sugar: 4g
- Fat: 0.1g
- Carbohydrates: 13g
- Protein: 1g
- Cholesterol: 0mg
See? It’s pretty light! That’s one reason I love having these chilling in the fridge; they satisfy that craving for something sweet and chewy without derailing the whole day. It’s a lovely, light dessert choice for warm weather!
PrintEasy Watermelon Mochi Bites: Soft, Chewy Summer Dessert

Make soft, chewy Watermelon Mochi at home. This recipe delivers a refreshing, fruity Asian dessert perfect for warm weather, using simple steps to achieve the ideal texture.
- Prep Time: 15 min
- Cook Time: 10 min
- Total Time: 25 min
- Yield: About 18 pieces 1x
- Category: Dessert
- Method: Microwave
- Cuisine: Japanese Inspired
- Diet: Vegetarian
Ingredients
- 1 cup glutinous rice flour (sweet rice flour)
- 1/4 cup granulated sugar
- 3/4 cup cold water
- 1/2 cup fresh watermelon juice, strained
- 1 tablespoon cornstarch, plus extra for dusting
- 1 teaspoon watermelon extract (optional, for stronger flavor)
Instructions
- Prepare the Watermelon Flavoring: Mix the strained watermelon juice with the watermelon extract, if using. Set aside.
- Make the Mochi Dough: In a microwave-safe bowl, whisk together the glutinous rice flour and granulated sugar. Gradually whisk in the cold water until the mixture is smooth.
- Cook the Dough: Cover the bowl loosely with plastic wrap. Microwave on high for 1 minute. Stir the mixture well. Cover and microwave for another 1 minute. Stir again. Repeat this process until the dough becomes thick, sticky, and translucent (usually 3 to 4 minutes total, depending on your microwave).
- Color and Flavor: Carefully stir the prepared watermelon juice into the hot mochi dough until the color is uniform and the dough is fully incorporated and smooth.
- Cool and Thicken: Dust a clean surface or cutting board generously with cornstarch. Transfer the warm mochi dough onto the cornstarch. Dust the top of the dough lightly. Let it cool for about 15 minutes until it is cool enough to handle.
- Shape the Mochi: Once cool, roll the dough into a long log. Cut the log into small, bite-sized pieces (about 1 inch each). Roll each piece gently into a smooth ball.
- Final Dusting: Roll each ball lightly in cornstarch to prevent sticking. You can optionally press a small piece of fresh watermelon into the center before sealing if you want a fresh fruit filling.
- Chill and Serve: Place the finished Watermelon Mochi Bites on a plate lined with parchment paper. Chill in the refrigerator for at least 30 minutes before serving this refreshing summer treat.
Notes
- For the best chewy texture, use high-quality glutinous rice flour.
- If you want a deeper pink color without artificial dye, use a few drops of natural red food coloring or beet juice concentrate.
- Store leftover mochi in an airtight container in the refrigerator for up to 2 days.
Nutrition
- Serving Size: 1 piece
- Calories: 55
- Sugar: 4
- Sodium: 1
- Fat: 0.1
- Saturated Fat: 0
- Unsaturated Fat: 0
- Trans Fat: 0
- Carbohydrates: 13
- Fiber: 0.2
- Protein: 1
- Cholesterol: 0