
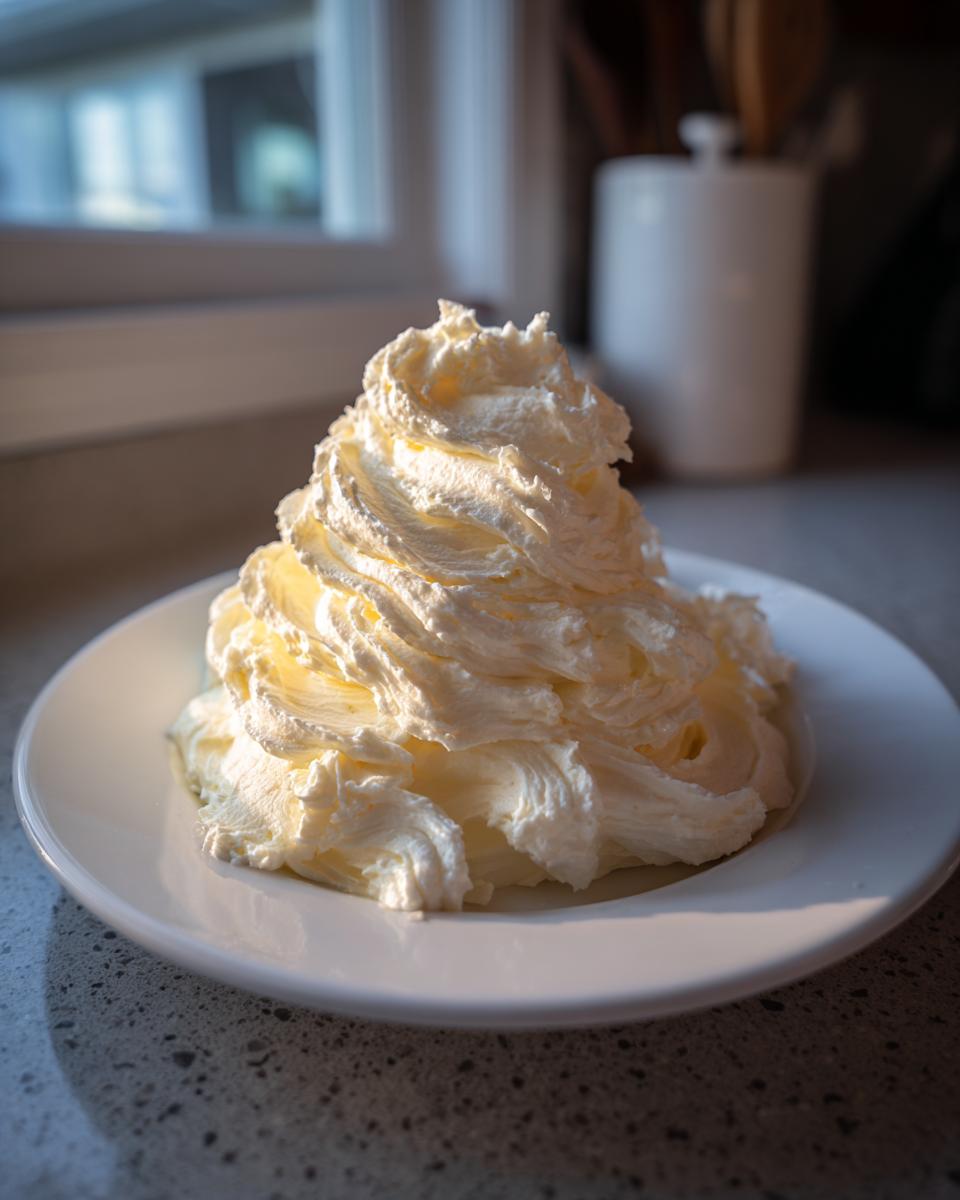
If there’s one element that can make or break a beautiful cake, it’s the frosting. Believe me; I know! After years of teaching youngsters how to bake the basics, I can tell you that the difference between stiff, crumbly icing and rich, pure magic is just technique. That’s why I’m sharing my absolute favorite **vanilla buttercream** recipe. This isn’t just any frosting; it’s the ultimate 10-minute, fluffy, and wonderfully stable batch of American buttercream you’ll ever make. Decades spent testing recipes in my own Midwest kitchen have shown me that simplicity, paired with good whipping time, delivers that creamy, bakery style frosting we all dream about!
- Why This is the Best Homemade Vanilla Buttercream Recipe
- Gathering Ingredients for Your Fluffy Vanilla Buttercream
- How to Make Vanilla Buttercream: The Quick and Creamy Vanilla Icing Tutorial
- Tips for Success with Your American Buttercream Tutorial
- Serving Suggestions for Your Vanilla Buttercream for Cakes and Cupcakes
- Storage and Reheating Instructions for Creamy Vanilla Icing
- Frequently Asked Questions About Making Vanilla Buttercream
- Estimated Nutritional Data for Classic Vanilla Frosting
- Share Your Fluffy Vanilla Buttercream Creations
Why This is the Best Homemade Vanilla Buttercream Recipe
I’ve taught hundreds of kids how to make a proper roux or fold egg whites, but nothing seems to inspire more joy than when they realize how easy it is to make amazing frosting from scratch. This recipe is proof that you don’t need hours or complicated pastes to get that gorgeous, professional look. Trust me, this is the **best homemade buttercream** I keep coming back to, and here’s why you will too:
- Ready in a Flash: Seriously, we are talking about a **quick buttercream recipe** that takes about 10 minutes from start to finish. Perfect for when you need a last-minute dessert topping!
- Fluffy Texture Guaranteed: The magic comes from beating the butter just right, resulting in a ridiculously **fluffy buttercream frosting** that tastes light, not heavy.
- It Holds Its Shape: If you’ve ever struggled with frosting melting off your cupcakes or collapsing on a layer cake, this is your fix. It’s a **stable frosting for piping** intricate swirls and borders.
- Incredible Flavor: We use pure vanilla to ensure you get that wonderful, **rich vanilla flavor frosting**—no synthetic tastes here!
- Simple Ingredients: It relies only on pantry staples, making it the most reliable **easy vanilla buttercream recipe** you’ll find.
It’s the essential frosting recipe you’ll use for everything, from a simple sugar cookie icing vanilla touch-up to layering a giant vanilla layer cake frosting between the tiers. You can even check out my guide on making homemade mayonnaise if you want another example of how simple staples make the best things!
Gathering Ingredients for Your Fluffy Vanilla Buttercream
When we talk about a truly great **creamy vanilla icing**, it all comes down to respecting a few simple ingredients. This recipe is designed to be straightforward—no funny business here—but choosing the right quality makes a huge difference in achieving that silky finish.
Here is what you need to pull together your batch of rich **vanilla buttercream**:
- 1 cup unsalted butter, softened to room temperature
- 4 cups powdered sugar, sifted
- 1 teaspoon pure vanilla extract
- 2 to 4 tablespoons heavy cream or milk
- Pinch of salt
You absolutely must sift that powdered sugar. I know it seems like an extra chore, but if you skip it, you will end up with little hard sugary pebbles in your perfectly smooth frosting. We want smooth, not grainy! Also, make sure your butter is at true room temperature—soft enough that your finger leaves an indentation, but please, please, don’t let it get greasy or melted. Greasy butter is the enemy of a stable frosting texture!
Ingredient Notes and Substitutions for Classic Vanilla Frosting
Let’s talk specifics, because these little details turn good frosting into great frosting. For that truly luxurious taste, you need pure vanilla extract, not the imitation stuff. That’s where that deep, **rich vanilla flavor frosting** comes from.
Now, the butter temperature is probably the most important part after sifting the sugar. If the butter is too cold, it won’t incorporate air properly, leaving you with a heavy frosting. If it’s too warm, you just end up whipping melted fat, and your frosting will look soupy.
As for the liquid—heavy cream is my first choice because its fat content helps stabilize the whole mixture, keeping our **vanilla buttercream** perfect for decorating. However, if you’re looking for a substitution, whole milk will work in a pinch! Just start with less of it (maybe only one tablespoon to begin) because milk is thinner than cream, and we don’t want to accidentally drop this excellent **easy vanilla buttercream recipe** into soup consistency!
How to Make Vanilla Buttercream: The Quick and Creamy Vanilla Icing Tutorial
Alright, let’s get to the fun part! Making this **classic vanilla frosting** is fast, which is fantastic when you’re looking for a **quick buttercream recipe**. Remember what I taught you about teaching? Patience within the process, but speed when you know what you’re doing! We are using an electric mixer here because, well, we only have 10 minutes, and my arms appreciate the help!
- First things first, get that room temperature butter into your big mixing bowl. Beat it on medium speed until it looks completely smooth and almost whipped—about 2 minutes is perfect. Don’t forget to scrape down those sides so everything gets mixed evenly.
- Now, start adding your 4 cups of **sifted** powdered sugar. Do this slowly, one cup at a time, keeping the mixer on *low* speed until it’s just incorporated. If you dump it all in, you’ll end up wearing frosting, and nobody wants that!
- Once the sugar is mixing without spraying everywhere, toss in your vanilla extract and that tiny pinch of salt to balance the sweetness.
- Here’s our big moment for maximum fluff: Add 2 tablespoons of heavy cream or milk. Now, crank that mixer up to medium-high and just let it go for a solid 3 to 5 minutes. This whipping time is absolutely crucial for getting that light, **whipped vanilla frosting** that looks like it came from a magazine!
- See how that looks? If it’s still a little too stiff for your taste, add the remaining cream one teaspoon at a time until your consistency is just right for spreading or maybe trying out some cookie icing. Give it one final minute of beating after any liquid addition.
That’s it! You’ve got yourself the dreamiest **vanilla buttercream** possible. For a little more inspiration on creamy toppings, you can peek at this great resource on creamy vanilla icing guides!
Achieving Stable Frosting for Piping: Buttercream Consistency Secrets
Sometimes, even after that 5-minute whipping session, the **buttercream consistency** isn’t quite what you pictured for those intricate swirls. Don’t panic! This is the easiest fix in the world.
If your **vanilla buttercream** seems a bit runny or too soft for sharp piping, stop adding liquid and add a quarter cup more of sifted powdered sugar. Mix it on low first, then bring it up to medium speed for a minute. That extra sugar will stiffen it up right away, giving you that **stable frosting for piping**.
On the flip side, if you went overboard and it’s too firm—it happens to the best of us, even me!—add just one teaspoon of heavy cream (or milk) at a time. Beat it until it loosens up. The key word here is *slowly*. You want to introduce moisture gradually so you don’t suddenly turn your perfect batch into soup. Remember, that long, vigorous whipping time (Step 4) is what incorporates the air that keeps it fluffy and stable, so always give it that dedicated whipping time!
Tips for Success with Your American Buttercream Tutorial
I’ve learned a few things in my home kitchen over the decades, usually through trial and, well, slightly messy error! When you’re aiming for that light, decadent **classic vanilla frosting**, a few small habits really pay off. These aren’t just random guesses; these are the hard-won principles that ensure every batch of this **vanilla buttercream** tastes like a win.
My biggest lesson? Temperature reigns supreme. Oh, my goodness, the first time I tried making a batch super fast for a birthday party, I microwaved my butter. Just twenty seconds, I thought! It turned into a greasy, watery mess that would never whip up correctly. I learned that day that you can speed up *most* steps, but you cannot rush the butter softening. It needs to be uniformly soft so it can create those air pockets we need for a **fluffy buttercream frosting**.
Here are a few absolute must-dos for making the **best homemade buttercream**:
- Sift Your Sugar, Always: I mentioned it before, but I have to say it again because it’s critical for that smooth texture. I used to think, “It’s just sugar, who cares?” until I frosted a cake for my sister, and discovered tiny, hard lumps hiding in the swirl I piped on top! Now, I never skip using the sifter for this **easy vanilla buttercream recipe**.
- Start Slow, Finish Fast: When you add the powdered sugar, always start on the lowest speed on your mixer. If you don’t, you’ll create a sugar cloud that covers your entire kitchen! Once it’s incorporated and not flying out, crank up the speed for those crucial 3-5 minutes to get it light and airy.
- Vanilla Quality Matters: Since this is a *vanilla* frosting, and we aren’t hiding the flavor with chocolate or lemon, use the best pure vanilla extract you can find. It really makes a noticeable difference in the depth of the final taste.
- Use It Right Away or Store Properly: This frosting is perfect for a smooth cookie icing right away, but if you save it, make sure it’s sealed well. You can find some great ideas on perfecting your icing techniques in guides like those found over at Natasha’s Kitchen.
Serving Suggestions for Your Vanilla Buttercream for Cakes and Cupcakes
Now that you have this beautiful, **creamy vanilla icing** sitting in your bowl, you’re probably wondering what it’s going to adorn! Honestly, the possibilities are endless once you have a reliable **vanilla buttercream** on hand. It’s my go-to topping for nearly every celebration because it’s simple but absolutely decadent.
Here’s where I love to use this batch:
- The Perfect Vanilla Layer Cake Frosting: This is what I always use when I make my classic moist vanilla layer cake. The sweetness of the frosting balances the soft cake perfectly.
- Cupcake Swirls: Load it into a piping bag fitted with a large star tip—you’ll be amazed how easily this **stable frosting for piping** creates those gorgeous, tall swirls on top of your favorite cupcakes.
- Sugar Cookie Icing Vanilla Touch: If you leave the consistency slightly thicker, it works beautifully as a rich topping for sugar cookies. It spreads nicely but sets up just enough so they aren’t a sticky mess when you stack them.
- Simple Dessert Topping: Even just swirled on top of a simple bowl of fresh berries or used to sandwich thin shortbread cookies, this frosting elevates everything with its **fluffy buttercream frosting** texture.
Seriously, once you master this **easy vanilla buttercream recipe**, you’ll find yourself looking for excuses to bake just so you have an excuse to make more frosting!
Storage and Reheating Instructions for Creamy Vanilla Icing
It’s rare that I have leftover **vanilla buttercream** in my house because, let’s be honest, who can resist it? But just in case you made a triple batch or you’re saving some for later—maybe for a quick batch of cupcakes tomorrow—you need to know how to store it correctly so it stays dreamy and not crusty.
The golden rule for storing this **classic vanilla frosting** is airtightness. Butter loves to absorb smells from your fridge, and nobody wants a hint of last night’s leftover onion soup in their **creamy vanilla icing**!
Here are my simple instructions for keeping your frosting happy:
- Room Temperature Storage: If you plan on using your **whipped vanilla frosting** within a day or two, you can keep it covered tightly at cool room temperature. Make sure the container or bowl is fully protected with plastic wrap pressed right against the surface of the frosting to stop that dry skin from forming.
- Refrigeration is Best for Longer Storage: If you need it to last longer than two days, pop it into the fridge. Again, seal it up tight! When stored properly in the refrigerator, this **easy decorating icing** is good for up to two weeks.
Now, the tricky part: bringing refrigerated frosting back to life. If you try to use that hard, cold block of **vanilla buttercream** straight from the fridge, you’ll break your mixer, or worse, you’ll end up with stiff, grainy icing that won’t spread. Patience here is vital!
Reviving Your Refrigerated Frosting:
- Take your sealed container out of the fridge and let it sit on the counter for at least two hours, maybe even three, until it’s completely softened back to that room-temperature softness we talked about earlier (soft but not greasy). Do NOT try to microwave it!
- Once soft, transfer it to your mixing bowl, but don’t just stir it. You need to re-whip it! Start on low speed just to break it up, then beat it on medium-high for a full 3 to 4 minutes. This step reintroduces all that lovely air we beat in initially, restoring the light, **fluffy buttercream frosting** texture.
If you find that all that beating brought back a little too much air and it feels slightly too soft (almost like it’s warming up too fast), just sprinkle in one extra tablespoon of sifted powdered sugar and beat it for 30 seconds. That little bit of stability should firm it up just enough for excellent **buttercream for cakes and cupcakes**!
Frequently Asked Questions About Making Vanilla Buttercream
I always get asked when the kiddos come over to bake: “Carla, what do I do if…?” If you’re making a big batch of this **vanilla buttercream**, you probably have a few questions buzzing around. Don’t you worry one bit! These questions are exactly why I love sharing my home-tested tips. When you follow this **easy vanilla buttercream recipe**, you usually avoid most issues, but here are the answers to the most common concerns I hear about flavor, color, and keeping that perfect texture.
Can I make this easy vanilla buttercream recipe ahead of time?
Oh, yes, absolutely! I’ve definitely made my **creamy vanilla icing** a day early when I know I’m going to be rushed decorating the next day. The key is proper storage, which we covered, but know that it will need a little wakeup call when you pull it out of the fridge. It will be rock hard!
When you’re ready to use it, let it sit on the counter until it’s totally soft—no shortcuts here! Then, you must re-whip it. Take that softened, but not greasy, frosting and beat it on medium-high speed for about 3 to 5 minutes again. That whipping process is what reinstates the air bubbles and fluffiness, turning it back into **fluffy buttercream frosting** ready for spreading thick on your cake. Think of it like giving your **classic vanilla frosting** a little spa treatment before it goes on the final dessert!
How do I get my vanilla buttercream perfectly white?
That’s a great question, especially if you are going for a bright white look, maybe for Christmas cookies or certain wedding cakes. The primary culprit for a yellow hue is usually the butter itself; butter is naturally yellow! If you need it whiter, you have two main options, though neither is my personal favorite because I love that slight yellow tint that shows the richness of the butter.
First, ensure your butter is very pale yellow to start. Secondly, and this is the big one, the extract matters. If you use dark, aged vanilla extract, it will definitely color your frosting slightly brown. Switching to clear vanilla extract will give you a much brighter white finish, though I find the flavor less “wow” than pure extract. If you stick to this **no-fail vanilla frosting** recipe but use clear vanilla, you’ll get the color you want without sacrificing texture!
What is the difference between this and bakery style frosting?
In my experience, when people ask for **bakery style frosting**, they are usually looking for two things: stability for piping and that light, almost cloud-like texture that isn’t overly sweet. Guess what? That’s exactly what this American buttercream is designed to be!
The difference isn’t usually the ingredients—it’s the *time* we spend mixing them. The bakeries spend a long time whipping the butter and then whipping it again after the sugar is added. That long, high-speed beating process is what incorporates the maximum amount of air into the fats and sugars. That’s why in Step 4 of my recipe, I emphasize beating it for that full 3 to 5 minutes. That extended whipping time transforms standard, heavy icing into that **whipped vanilla frosting** that holds sharp edges beautifully for your cakes and spreads like silk. It’s the secret to making it a **stable frosting for piping** without needing stabilizers!
If you ever want to troubleshoot other techniques, I have a fun little post about making garlic bread where I talk about similar patience points in the yeast handling!
Estimated Nutritional Data for Classic Vanilla Frosting
Now, I always tell folks around here that knowing the basics of what goes into your food is just as important as knowing how to make it taste delicious! Since this **vanilla buttercream** is made from simple fats and sugars, it’s certainly a treat rather than an everyday staple. The nutritional information I’m sharing here is based on standardized calculations for the recipe provided, assuming a serving size of 1/4 cup.
Please keep in mind these are estimates derived from the ingredients listed. Every brand of butter or sugar can vary slightly, so take these numbers as a good ballpark figure for your deliciously rich **vanilla buttercream**!
- Serving Size: 1/4 cup
- Calories: 350
- Fat: 18g
- Saturated Fat: 11g
- Trans Fat: 0g
- Cholesterol: 55mg
- Sodium: 35mg
- Carbohydrates: 48g
- Fiber: 0g
- Sugar: 45g
- Protein: 1g
There you have it! A beautiful, **creamy vanilla icing** that tastes like the best part of any party. Enjoy sparingly on your favorite treats!
Share Your Fluffy Vanilla Buttercream Creations
Well, we did it! We made magic in about ten minutes flat, creating a **vanilla buttercream** that is fluffy, stable, and absolutely bursting with pure vanilla flavor. I truly hope you found this **American buttercream tutorial** simple and that you’re excited to use this **best homemade buttercream** on your next project.
Now comes my favorite part: seeing what you all whip up! Baking is always better when it’s shared, isn’t it? That’s the philosophy behind everything I do here at Cooking by Carla; it’s about community and the joy of making something delicious with your own two hands.
I would be so tickled if you’d take a moment to tell me how it went! Did you use it as a **vanilla layer cake frosting**, or perhaps decorate some crisp sugar cookies? Please leave a star rating right below this post and let me know in the comments what you frosted. Your feedback helps other home bakers feel confident trying this **quick buttercream recipe** too!
And if you captured a picture of your perfectly piped swirls or your amazingly smooth icing job, please feel free to share it on social media and tag me! When you do, it lets me see all the wonderful ways you’re putting this **creamy vanilla icing** to good use.
Thank you so much for baking with me today. You can always learn more about my approach to simple, honest cooking by reading up on my story here. Happy frosting, friends!
PrintThe Ultimate 10-Minute Fluffy Vanilla Buttercream Frosting Recipe
Make the best homemade vanilla buttercream frosting that is creamy, smooth, and stable for piping cakes and cupcakes. This quick American buttercream recipe delivers rich vanilla flavor every time.
- Prep Time: 10 min
- Cook Time: 0 min
- Total Time: 10 min
- Yield: About 3 cups 1x
- Category: Dessert Topping
- Method: Mixing
- Cuisine: American
- Diet: Vegetarian
Ingredients
- 1 cup unsalted butter, softened to room temperature
- 4 cups powdered sugar, sifted
- 1 teaspoon pure vanilla extract
- 2 to 4 tablespoons heavy cream or milk
- Pinch of salt
Instructions
- Place the softened butter in a large mixing bowl. Beat the butter with an electric mixer on medium speed until it is completely smooth and creamy, about 2 minutes. Scrape down the sides of the bowl.
- Gradually add the sifted powdered sugar, one cup at a time, mixing on low speed until incorporated. Increase the speed to medium and beat until combined.
- Add the vanilla extract and the pinch of salt. Mix well.
- Add 2 tablespoons of heavy cream or milk. Beat on medium-high speed for 3 to 5 minutes until the frosting becomes light, fluffy, and pale. This whipping time is key for a stable, bakery-style texture.
- If the frosting seems too stiff for spreading or piping, add the remaining cream or milk, one teaspoon at a time, until you reach your desired consistency. Beat for one final minute after adding liquid.
- Use immediately to frost cakes, cupcakes, or cookies.
Notes
- For the best results when piping, use room temperature butter that is soft but not greasy or melted.
- Sifting the powdered sugar prevents lumps and helps achieve a smoother frosting texture.
- If you need a stiffer frosting for intricate piping designs, reduce the liquid slightly or add a tablespoon more powdered sugar.
- This classic American buttercream is perfect for vanilla layer cake frosting and sugar cookie icing.
Nutrition
- Serving Size: 1/4 cup
- Calories: 350
- Sugar: 45g
- Sodium: 35mg
- Fat: 18g
- Saturated Fat: 11g
- Unsaturated Fat: 7g
- Trans Fat: 0g
- Carbohydrates: 48g
- Fiber: 0g
- Protein: 1g
- Cholesterol: 55mg