
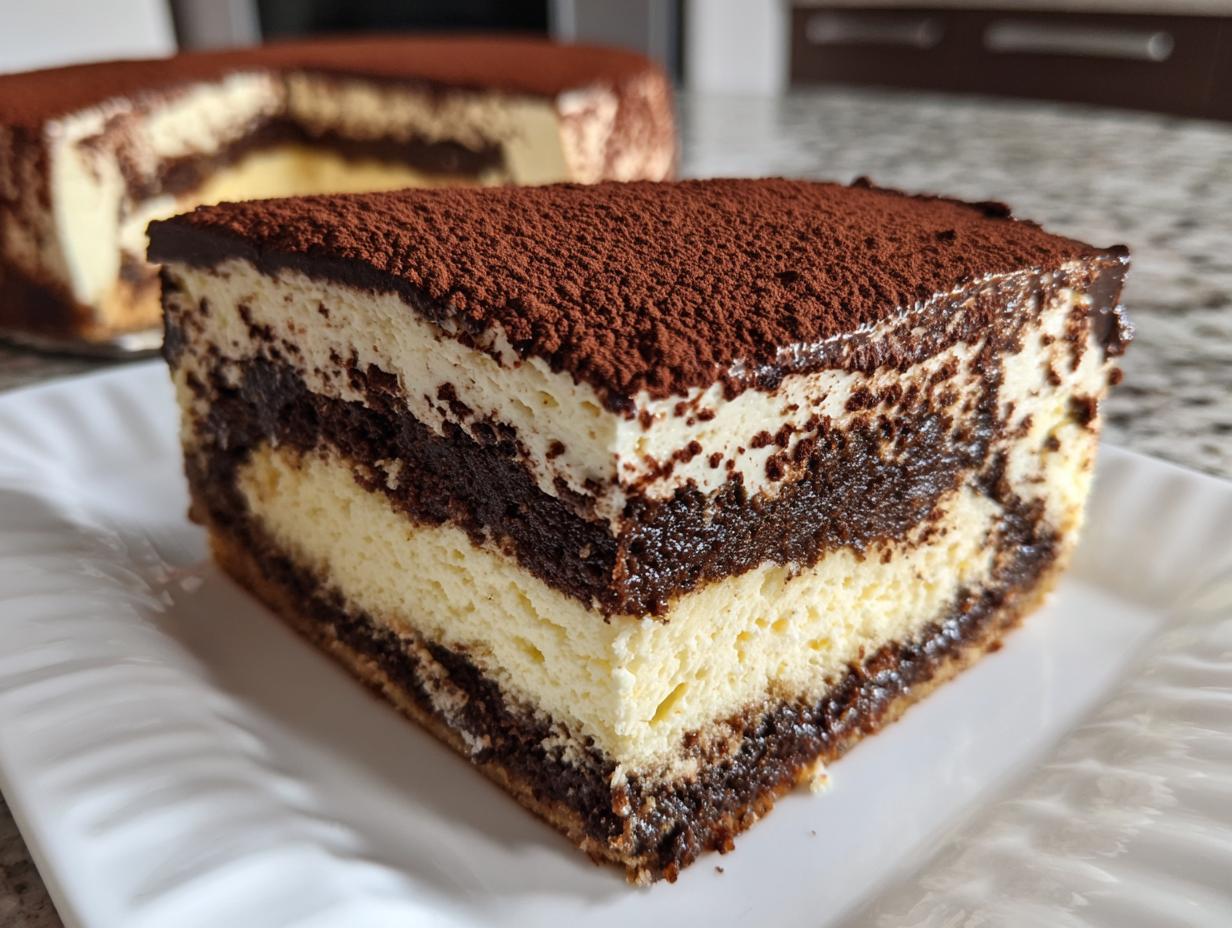
Oh, I just love it when two wonderful desserts decide to become best friends in the oven! Fusion baking can go wrong sometimes, I agree, but when it works? Magic! That’s exactly what happens when you make this incredible **tiramisu cheesecake**. We’re taking the creamy, dense lift of a perfect cheesecake and infusing it with that gorgeous, bold Italian coffee flavor. Since I started teaching my grandkids how to bake, I’ve learned that the simplest desserts often make the biggest impression at family dinners. This one? It screams elegance, but honestly, it’s just a few straightforward steps to get that perfect texture. You can read more about my philosophy of simple, shared food over on the About Page. Trust me, this recipe will be a showstopper at your next special occasion.
- Why This Baked Tiramisu Cheesecake Recipe Is a Must-Try
- Essential Ingredients for Your Tiramisu Cheesecake Recipe
- How to Make Tiramisu Cheesecake: Step-by-Step Instructions
- Tips for Success with Your Ladyfinger Cheesecake Recipe
- Variations on the Classic Tiramisu Cheesecake
- Serving Suggestions for This Decadent Espresso Dessert
- Storage and Reheating Instructions for Tiramisu Cheesecake
- Frequently Asked Questions About Tiramisu Cheesecake
- Estimated Nutritional Data for This Rich Coffee Dessert Idea
- Share Your Homemade Tiramisu Cheesecake Experience
Why This Baked Tiramisu Cheesecake Recipe Is a Must-Try
When I set out to create this fusion, I knew I didn’t just want something that *looked* nice. I wanted that deep, comforting flavor in an unbelievable texture. If you’re looking for a showstopper dessert without fuss, this is it. Why choose this baked **tiramisu cheesecake**? Because it delivers elegance and taste that lasts!
- It provides that signature, rich coffee punch of real tiramisu.
- The baked texture holds up beautifully for slicing and serving.
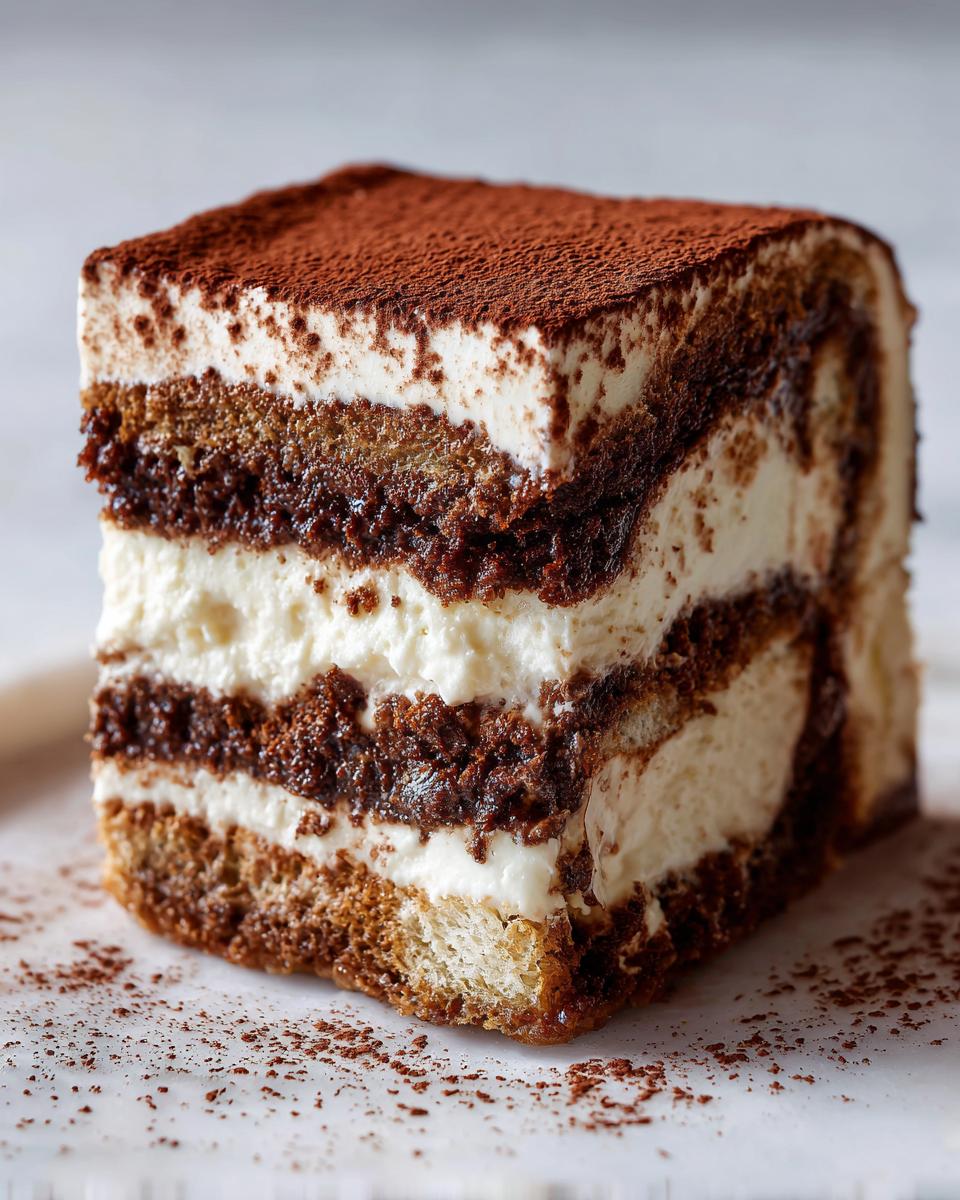
- It looks absolutely stunning when finished with that dusting of cocoa.
Flavor Profile: Creamy Tiramisu Dessert Perfection
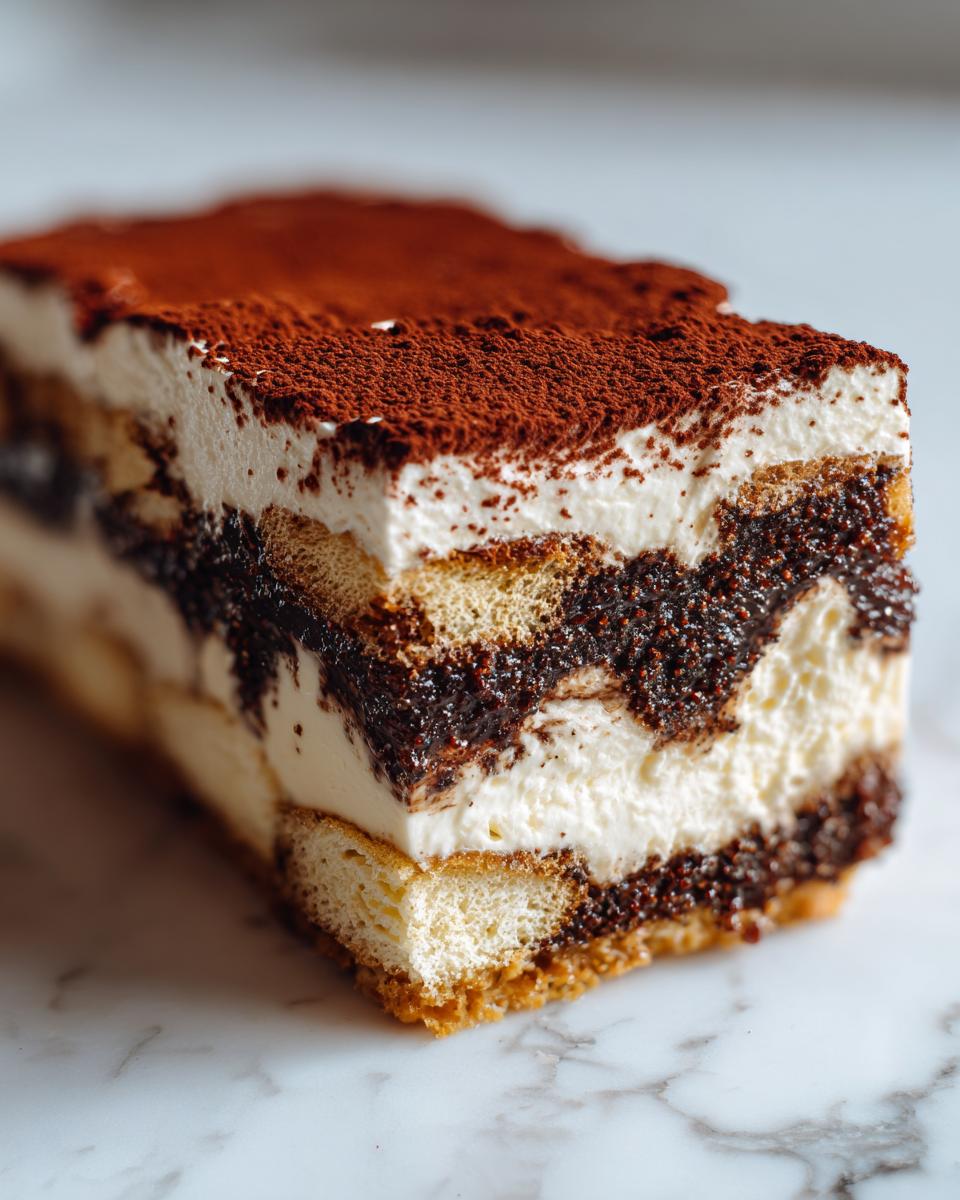
The flavor is what sells it, really. We aren’t skimping on the coffee here at all. Once those ladyfingers soak up the espresso, they melt right into the creamy base. Then you get that lovely contrast from the unsweetened cocoa we dust over the top. It’s a true **Creamy Tiramisu Dessert**, balanced perfectly between bitter coffee and sweet mascarpone cheese.
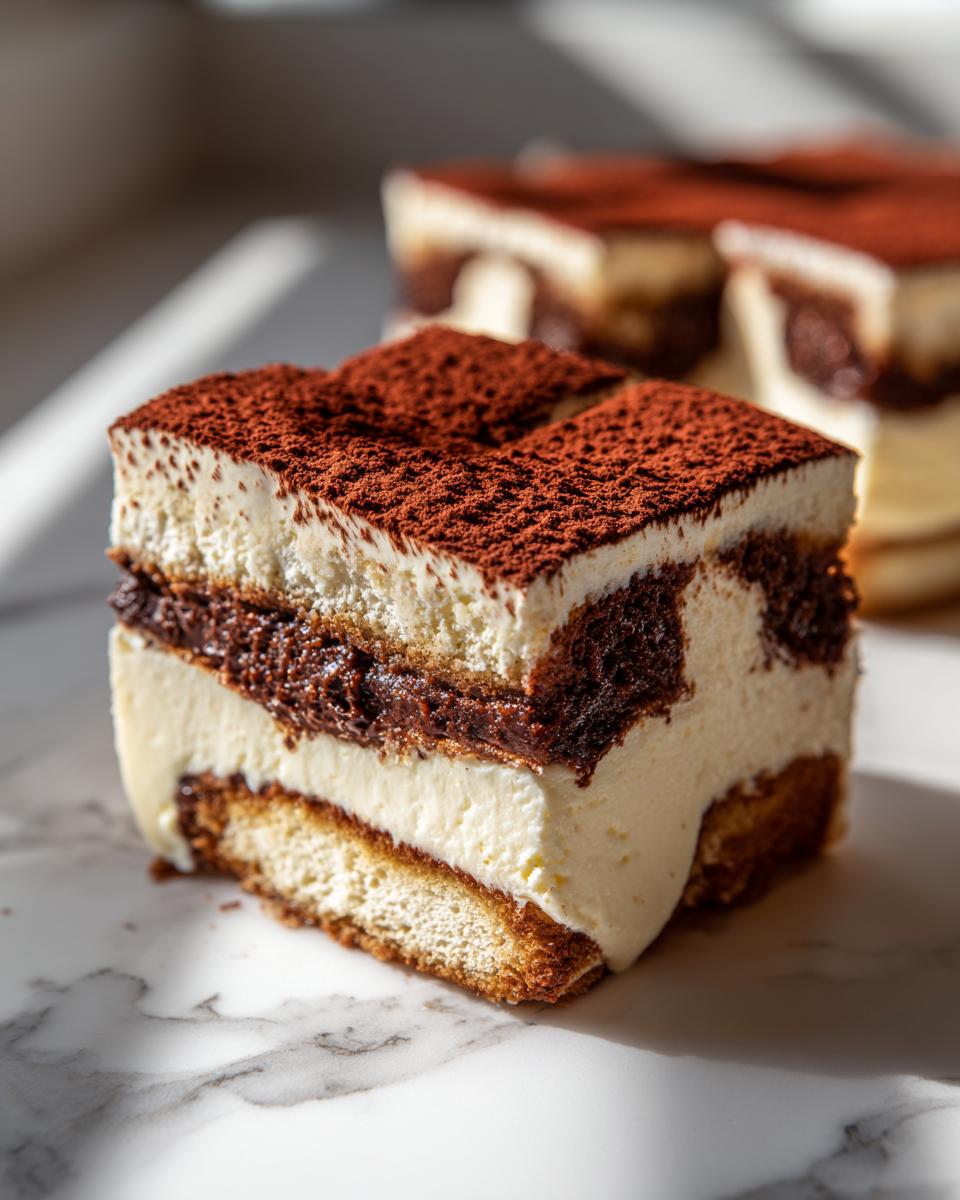
Texture: Velvety Mascarpone Desserts Achieved Through Baking
Now, you see a lot of no-bake versions out there, and those are fine for a quick fix! But for that melt-in-your-mouth silkiness, baking is key. Baking the cream cheese and mascarpone mixture gives you the sturdiness a good slice needs, but keeps the inside smooth and tender. That combination is what makes these **Velvety Mascarpone Desserts** so memorable.
Essential Ingredients for Your Tiramisu Cheesecake Recipe
We’ve got the blueprint, now we need the building blocks! Because this **Tiramisu Cheesecake Recipe** is all about layering deep Italian flavor with that rich cake texture, ingredient quality really does matter. Pay special attention to the temperatures—we want everything soft and ready to blend beautifully!
Crust Components
We’re skipping the standard graham cracker for a deeper flavor base here. You’ll need:
- 1 1/2 cups chocolate wafer crumbs
- 1/4 cup granulated sugar
- 6 tablespoons unsalted butter, melted
The Rich Coffee Mascarpone Cake Filling
This is where the magic (and the richness) comes from. Just remember, if your cream cheese or mascarpone is cold, you’ll get lumps! Pull these out about an hour ahead of time.
- 1 1/2 pounds cream cheese, softened
- 1 1/2 cups granulated sugar
- 1/4 cup all-purpose flour (just a little bit for structure!)
- 1 teaspoon vanilla extract
- 1/4 teaspoon salt
- 1 cup sour cream
- 8 ounces mascarpone cheese, softened
- 4 large eggs
For the Espresso Soak and Finish
This step is non-negotiable for that authentic taste. You need strong coffee, not weak drip, for this part. Also, work fast with the ladyfingers!
- 1/2 cup strong brewed espresso, cooled
- 1 package (7 ounces) ladyfingers
- 1/4 cup coffee liqueur (I only use this when the grown-ups are around!)
- Unsweetened cocoa powder, for dusting
How to Make Tiramisu Cheesecake: Step-by-Step Instructions
Now that we have all our beautiful ingredients ready, let’s put this amazing **tiramisu cheesecake** together. Baking a cheesecake can feel a little intimidating, but I promise, if you take your time with the mixing and use that water bath trick, you’ll nail it. Read through these steps before you even touch the mixer!
Preparing the Crust and Espresso Soak
First things first, crank that oven to 325°F (160°C). Wrap that 9-inch springform pan really well in heavy-duty foil—you don’t want any sneaky water getting in later! Mix up the crumbs, sugar, and melted butter, press it tight into the bottom, and bake that crust for 10 minutes. While it cools down a tiny bit, mix your cooled espresso and optional liqueur in a shallow dish. Dip those ladyfingers lightning fast—literally one second per side! They should be moist, not falling apart. Lay a neat, single layer of those dipped beauties right over your cooled chocolate crust.
Mixing the Creamy Cheesecake Batter
This is where patience pays off, so don’t rush it! Start by creaming that softened cream cheese until it’s perfectly smooth—no lumps allowed! Then, beat in your sugar, flour, vanilla, and salt. Next, mix in the sour cream and the all-important mascarpone until it’s just combined. Now, listen to Aunt Carla: add your eggs one at a time. Mix gently after each addition; we aren’t looking to whip air in there. If you overmix the eggs, we ruin the structure of our **Baked Cheesecake with Tiramisu Flavor**!
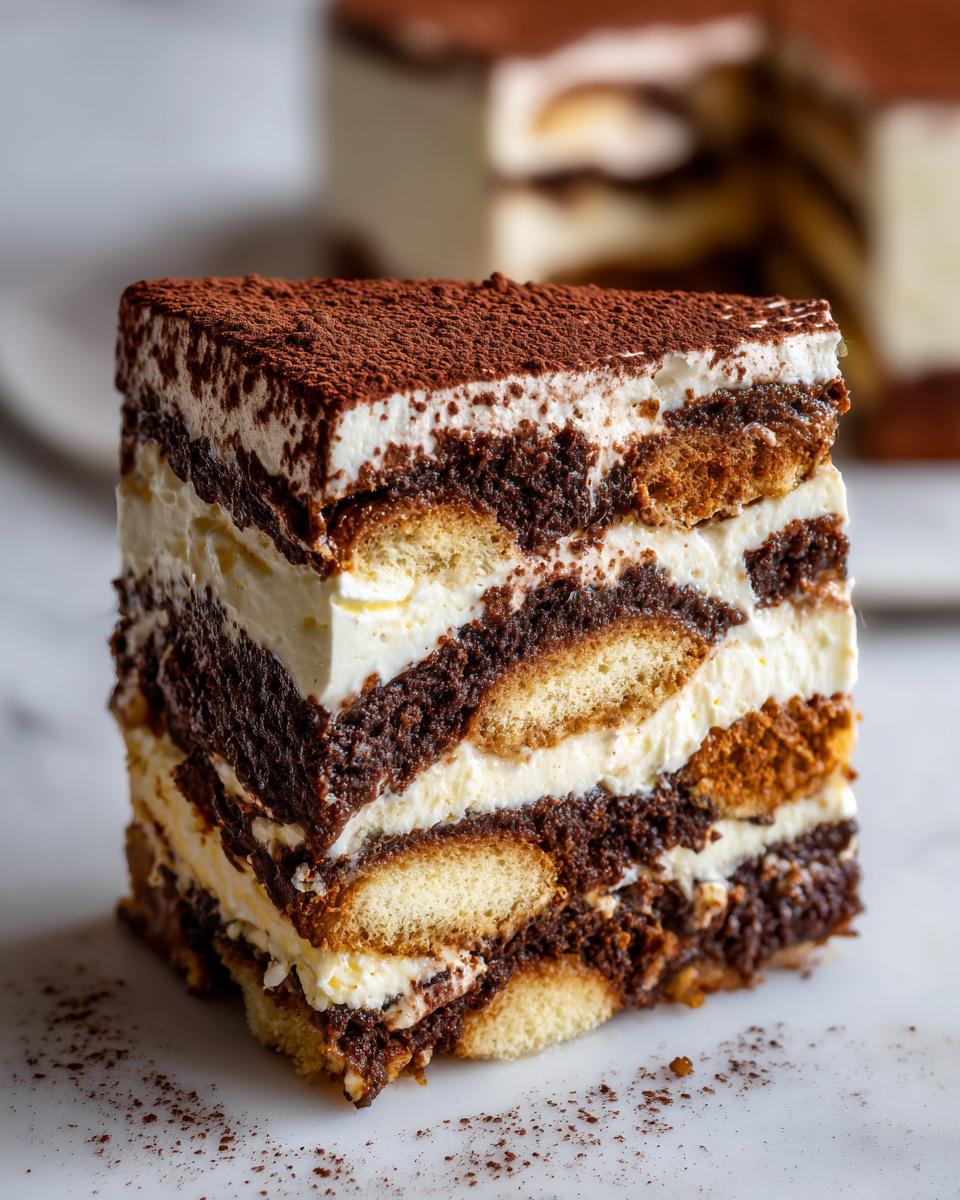
Assembly and Water Bath Technique for Your Tiramisu Cheesecake
Once the batter is ready, pour about half of it gently over that first layer of soaked ladyfingers. Smooth it out. Don’t squish those cookies underneath! Lay down the second layer of delicate, espresso-soaked ladyfingers. Then, pour the remaining batter right on top and smooth the surface. Time for the shield! Set your foil-wrapped pan inside a larger roasting pan. Carefully pour hot water into the *outer* roasting pan until it comes about halfway up the sides of your springform. That warm bath keeps things gentle while baking.
Baking and Cooling for a Perfect Finish
Slide that whole setup into the oven for about 60 to 75 minutes. You’re looking for edges to be set but watch the center—it should still have a tiny wiggle when you gently nudge the pan. Once it looks done, turn the oven OFF. Crack the door open just a bit—maybe stick a wooden spoon in the door—and just let it hang out in that warm oven for a full hour. This slow cool-down prevents cracking on your **Homemade Tiramisu Cheesecake**. After that hour, take it out, let it come to room temperature, and then it absolutely needs to chill in the fridge for at least six hours! We can grab my contact information here if you have questions during the process!
Tips for Success with Your Ladyfinger Cheesecake Recipe
Even though this is a pretty straightforward recipe once you get the hang of it, there are always a few things I insist on doing to make sure this **Ladyfinger Cheesecake Recipe** turns out absolutely flawless. Cheesecake texture is temperamental, but if you follow these expert steps—I learned these the hard way—you’ll never have a sunken or cracked top again!
Achieving Deep Espresso Notes in Your Tiramisu Cheesecake
If you can get your hands on a really high-quality espresso roast, use it! But if you’re using plain brewed coffee, you need to boost that flavor. I suggest dissolving a teaspoon of instant espresso powder right into your cooled espresso before you dip your ladyfingers. This gives you that deep, almost bitter background note that makes this feel authentic. If you skip the optional coffee liqueur entirely, try adding just a small splash of good rum extract to the soaking liquid instead. It really rounds out the flavor profile beautifully for those **Rich Coffee Dessert Ideas**.
Preventing Cracks on Your Cocoa Dusted Cheesecake
Listen, cracks happen to everyone, but we are trying to avoid them! The water bath we used during baking is step one—it keeps the cheesecake environment humid and gentle. Step two, which is just as important, is the slow cooling inside the oven. Don’t rush that part! Once your cheesecake is totally cool and has had its minimum six-hour chill, you can take it out of the pan. However, only dust it with cocoa powder right before you serve it. If you dust it too early, that moisture from the fridge can make the cocoa look damp and spotty!
For more foolproof tips on getting that perfect finish, you might even check out what others are doing at Next Level Baker—it never hurts to know what other bakers are focusing on!
Variations on the Classic Tiramisu Cheesecake
I truly believe a recipe should be flexible enough for your pantry and your mood! While I adore baking this version, I know sometimes you need something that sets up in the fridge rather than the oven. It’s so easy to put an Easy Tiramisu Twist on things if you swap out just a couple of elements here.
Exploring a No Bake Tiramisu Cheesecake Option
If you’re sweltering outside or just don’t want to turn on the oven, you can certainly make a no-bake version! Skip all the foil wrapping and the water bath, obviously. You will need to use a different crust—I suggest swapping the chocolate wafers for thick graham crackers, crushed well. Then you just chill that whole creamy filling for at least eight quiet hours until it’s firm as a rock. It’s much quicker prep!
Alternative Crust Ideas for Your Italian Cheesecake Fusion
Don’t have chocolate wafers on hand? No problem! The chocolate offers a nice counterpoint to the coffee, but you can definitely get away with using simple shortbread cookies or even vanilla wafers instead. It just changes the overall profile slightly, making it a lighter Italian Cheesecake Fusion. Either way, just crush them finely and mix them up with that melted butter. They all work!
Serving Suggestions for This Decadent Espresso Dessert
We worked hard on this beautiful **Decadent Espresso Dessert**, so we want to show it off! For presentation, serve this on a simple white cake stand—the deep cocoa topping looks just fantastic against plain white porcelain. It makes such an Elegant Party Dessert.
To complement the rich coffee flavor, I love serving it with a small dollop of lightly sweetened whipped cream on the side, maybe with a tiny splash of Kahlúa mixed in. Or honestly, just a perfect, strong cup of black coffee next to the slice is all you need. Don’t forget to check out how others are styling their holiday treats over at Yum in the Kitchen!
Storage and Reheating Instructions for Tiramisu Cheesecake
We’ve made this gorgeous **tiramisu cheesecake**, and you want it to stay perfect, right? The good news is that cheesecake actually gets better after a full night in the fridge—the coffee flavors really meld into that creamy body.
Keep the cake tightly covered. I wrap the entire springform pan (if I haven’t removed the sides yet) or place my slices in an airtight square container. It needs to chill for at least six hours, but honestly, storing it overnight is best. You should leave it refrigerated for up to five days.
And look, this one’s tricky: we don’t reheat cheesecake! Cheesecake is meant to be served chilled or maybe just slightly cooler than room temperature. Heating it up just turns that lovely mascarpone blend into soup, so keep this one cool for serving!
Frequently Asked Questions About Tiramisu Cheesecake
I always get questions when I post this recipe because baking two classics together raises a few eyebrows! It’s natural to wonder about the timing or the best way to serve something this fancy. Don’t worry, I’ve got the tips right here to make sure your **tiramisu cheesecake** experience is smooth sailing.
Can I make this Tiramisu Cheesecake Recipe ahead of time?
Oh, yes, please do! In fact, I insist on it. This **Tiramisu Cheesecake Recipe** truly shines the next day. The longer it chills—ideally overnight—the better the espresso soaks into those ladyfingers, and those deep coffee flavors marry perfectly with the creamy mascarpone. It’s honestly better on Day Two!
What is the best way to serve this Coffee Mascarpone Cake?
You must serve this chilled! Take it right out of the refrigerator when you plan to cut into it. If you notice the cocoa dusting got a little fuzzy from the cold air, just grab a fine-mesh sieve and dust a *tiny* bit more fresh cocoa on top right before serving. This **Coffee Mascarpone Cake** is always best when it’s cold and firm.
Is this recipe similar to Cheesecake Factory Style Tiramisu?
That’s such a great question! People often ask because they love that signature richness. I certainly aimed for that level of decadence! While every bakery has its own version, I think the combination of quality mascarpone and the slow bake gives this dessert the dense, luxurious mouthfeel you expect from a top-tier **Cheesecake Factory Style Tiramisu**.
Estimated Nutritional Data for This Rich Coffee Dessert Idea
Now, I always want to be upfront with you about the details, because when we’re indulging in something this lovely, it’s nice to know what we’re dealing with! Please keep in mind that because this is a homemade **tiramisu cheesecake**, and depending on whether you use the optional liqueur or a different type of chocolate wafer, these numbers are just an estimate.
I based these figures on using the ingredients list detailed above, aiming for twelve generous slices for this **Rich Coffee Dessert Idea**. Think of this as a guideline, not a hard rule!
- Serving Size: 1 slice
- Calories: 450
- Sugar: 35g
- Fat: 30g (with about 18g saturated)
- Carbohydrates: 40g
- Protein: 10g
- Cholesterol: 120mg
Baking is done with love, not spreadsheets! If you want to check out my policies on data handling and privacy, you can find that information here. Enjoy every single bite of this decadent treat!
Share Your Homemade Tiramisu Cheesecake Experience
We’ve wrapped up the steps for making this amazing **tiramisu cheesecake**, but honestly, the best part for me is hearing from you! Did this **elegant dessert fusion** become a star at your dinner table? Did your family gasp when you brought out that rich cocoa-dusted creation?
I truly hope you loved making this! If you followed my steps and ended up with a smooth, creamy, coffee-kissed delight, please come back and leave a star rating below. Your feedback helps other bakers feel confident tackling this recipe next time.
And if you took a beautiful picture of your finished cheesecake—especially if you caught the light just right on that cocoa dusting—I’d love to see it! Tag me on social media or leave a comment describing how it went. Happy baking, friends, and thank you for letting my family recipes become part of your special moments!
PrintBaked Tiramisu Cheesecake with Espresso-Soaked Ladyfinger Layers
Create a rich and creamy baked cheesecake that perfectly fuses the classic Italian flavors of tiramisu, featuring mascarpone, espresso, and cocoa.
- Prep Time: 30 min
- Cook Time: 75 min
- Total Time: 9 hours 45 min
- Yield: 12 servings 1x
- Category: Dessert
- Method: Baking
- Cuisine: Italian Fusion
- Diet: Vegetarian
Ingredients
- 1 1/2 cups chocolate wafer crumbs
- 1/4 cup granulated sugar
- 6 tablespoons unsalted butter, melted
- 1 1/2 pounds cream cheese, softened
- 1 1/2 cups granulated sugar
- 1/4 cup all-purpose flour
- 1 teaspoon vanilla extract
- 1/4 teaspoon salt
- 1 cup sour cream
- 8 ounces mascarpone cheese, softened
- 4 large eggs
- 1/2 cup strong brewed espresso, cooled
- 1 package (7 ounces) ladyfingers
- 1/4 cup coffee liqueur (optional)
- Unsweetened cocoa powder, for dusting
Instructions
- Preheat your oven to 325°F (160°C). Wrap the outside of a 9-inch springform pan with heavy-duty aluminum foil.
- Prepare the crust: Mix the chocolate wafer crumbs, 1/4 cup sugar, and melted butter. Press the mixture firmly into the bottom of the prepared springform pan. Bake for 10 minutes. Let cool.
- Prepare the espresso soak: In a shallow dish, combine the cooled espresso and coffee liqueur, if using. Quickly dip both sides of the ladyfingers into the liquid, working quickly so they do not become too soggy. Arrange a single layer of soaked ladyfingers over the cooled crust.
- Prepare the cheesecake batter: In a large bowl, beat the softened cream cheese, 1 1/2 cups sugar, flour, vanilla extract, and salt until smooth. Beat in the sour cream and mascarpone cheese until just combined. Beat in the eggs one at a time, mixing only until each is incorporated. Do not overmix.
- Pour half of the cheesecake batter over the layer of soaked ladyfingers. Gently spread.
- Arrange a second layer of espresso-soaked ladyfingers on top of the batter.
- Pour the remaining cheesecake batter over the ladyfingers. Smooth the top.
- Place the springform pan into a larger roasting pan. Carefully pour hot water into the roasting pan until it reaches halfway up the sides of the springform pan (this is a water bath).
- Bake for 60 to 75 minutes, or until the edges are set but the center still jiggles slightly.
- Turn off the oven, crack the door open, and let the cheesecake cool inside the oven for 1 hour.
- Remove the cheesecake from the water bath and let it cool completely on a wire rack. Once cool, cover and refrigerate for at least 6 hours, or preferably overnight.
- Before serving, carefully remove the sides of the springform pan. Dust the top generously with unsweetened cocoa powder.
Notes
- For a richer coffee flavor, use espresso powder dissolved in hot water instead of brewed espresso.
- If you skip the coffee liqueur, add 1 teaspoon of rum extract to the espresso soak for depth of flavor.
- For a no-bake option, use a graham cracker crust and chill the mascarpone filling for at least 8 hours until firm.
Nutrition
- Serving Size: 1 slice
- Calories: 450
- Sugar: 35
- Sodium: 250
- Fat: 30
- Saturated Fat: 18
- Unsaturated Fat: 12
- Trans Fat: 0.5
- Carbohydrates: 40
- Fiber: 1
- Protein: 10
- Cholesterol: 120