

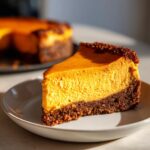
Oh, listen to me, friends—I know we all adore sweet potato pie when the leaves start turning, but sometimes, don’t you just crave something a little more… substantial? Something that says ‘holiday centerpiece’ louder than a simple slice of pie? That’s why I am thrilled to share my absolute favorite recipe for a decadent, rich, and incredibly creamy sweet potato cheesecake! This recipe is the perfect spiced alternative for Thanksgiving or any fall gathering. After thirty years of teaching kids how to map out their history projects, I’ve learned that patience and clear steps build confidence, and that’s exactly what makes this cheesecake foolproof. Trust me, it’s a showstopper.
- Why This Creamy Sweet Potato Cheesecake Recipe Works for Your Holiday Table
- Gathering Your Ingredients for the Perfect Sweet Potato Cheesecake
- Step-by-Step Guide: How to Make Baked Sweet Potato Cheesecake
- Tips for the Best Homemade Cheesecake Experience
- Sweet Potato Dessert Recipes: Variations on This Cheesecake
- Storage and Reheating Instructions for Your Sweet Potato Cheesecake
- Frequently Asked Questions About Sweet Potato Cheesecake
- Serving Suggestions for This Decadent Cheesecake
- Estimating the Nutrition for Your Sweet Potato Cheesecake Slice
- Share Your Baking Success
Why This Creamy Sweet Potato Cheesecake Recipe Works for Your Holiday Table
This isn’t just another fall dessert; this is the ultimate upgrade for your dessert table! When you’re looking for something beyond the usual pie, this sweet potato cheesecake delivers on texture and flavor.
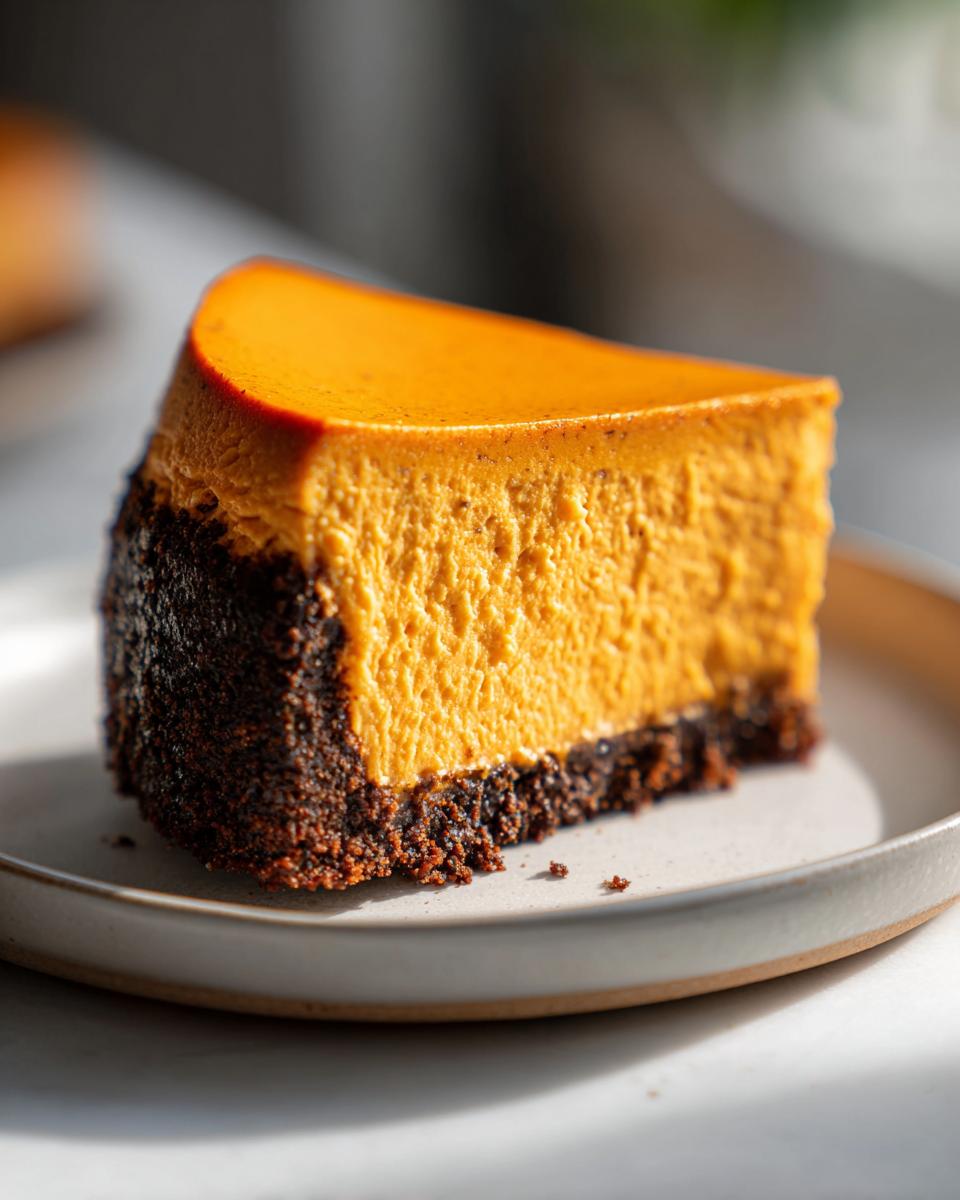
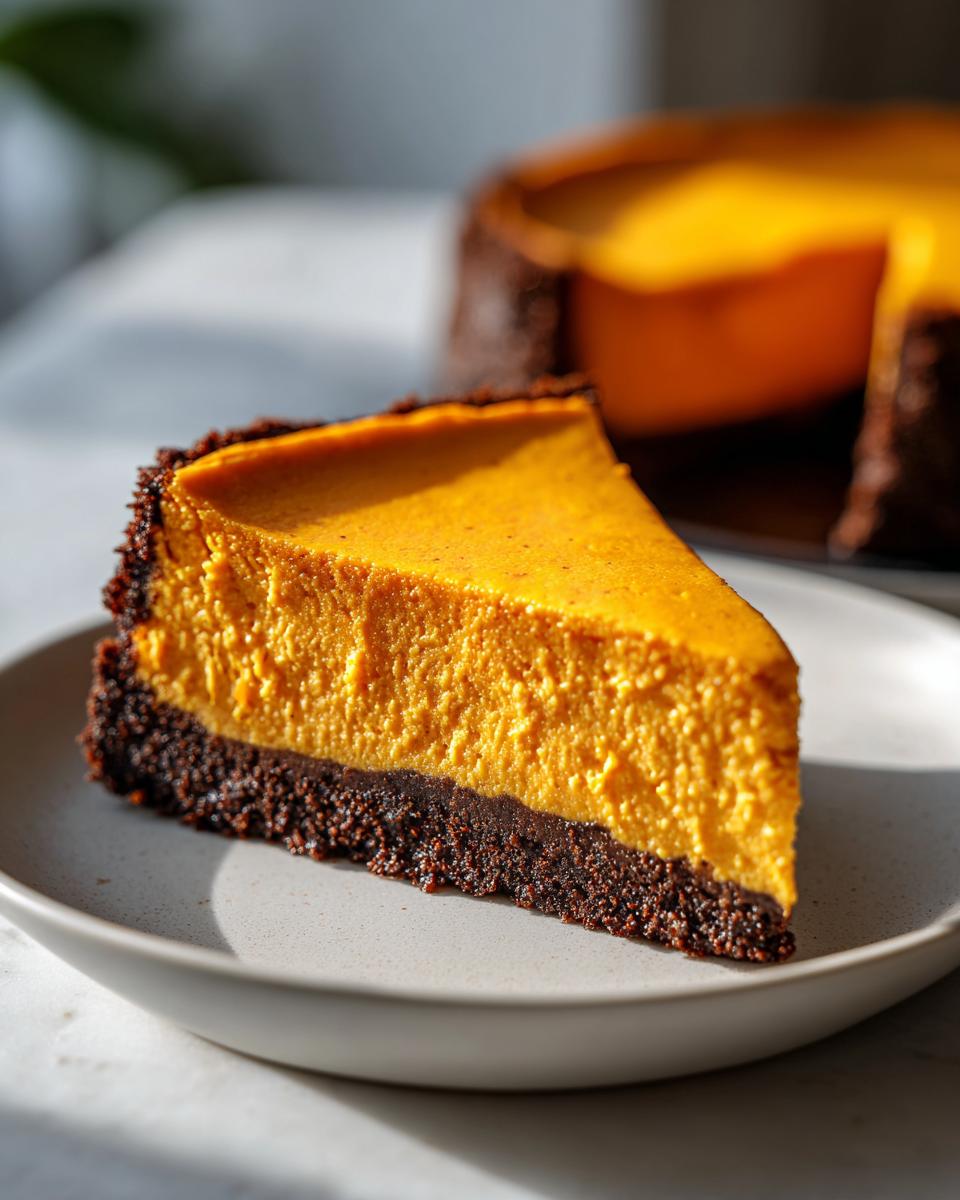
- It’s unbelievably creamy—so much smoother than any standard sweet potato pie you’ve ever had.
- The filling is deeply spiced, leaning into those cozy cinnamon and ginger notes you love.
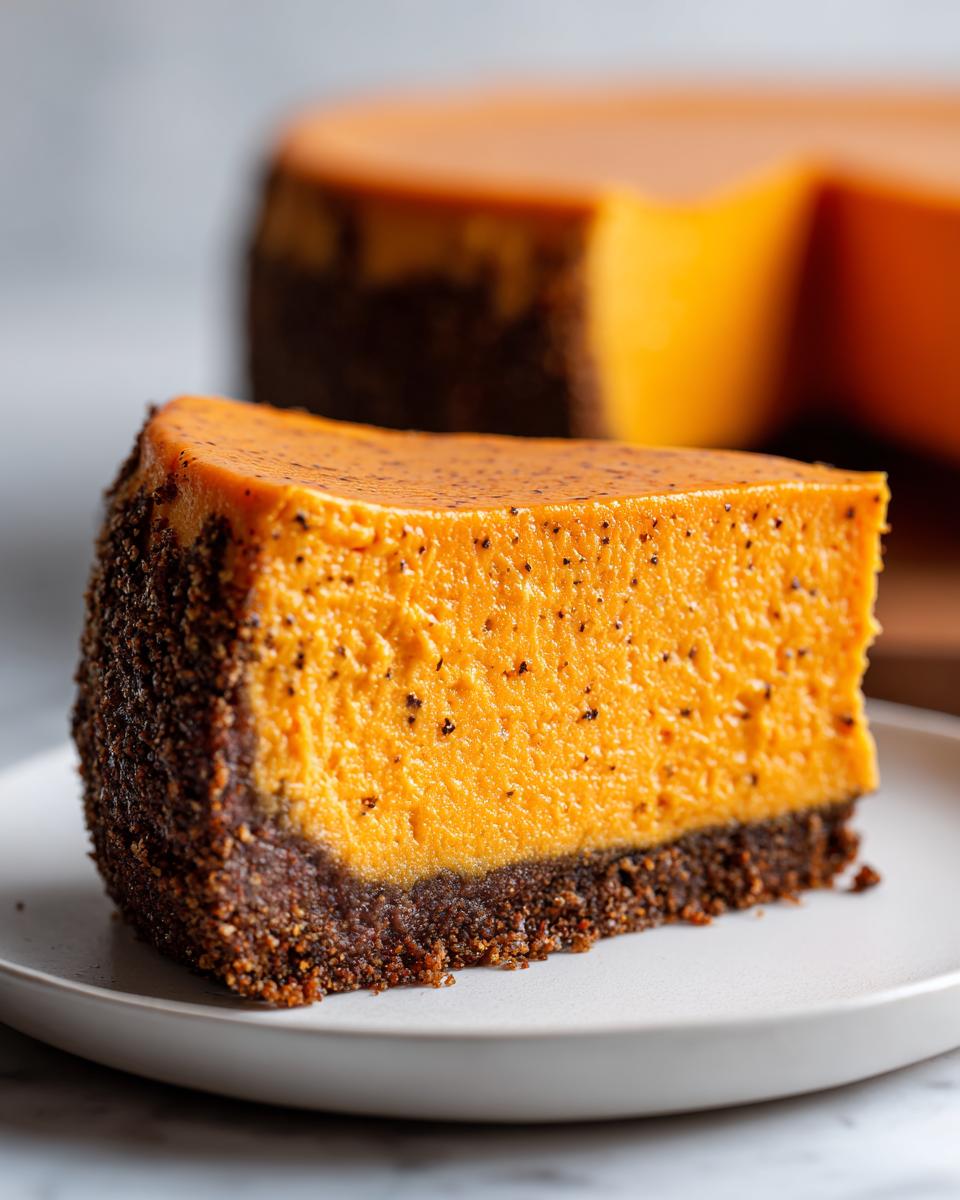
- That crunchy gingersnap crust gives you the perfect salty-sweet contrast.
- It’s substantial enough for Thanksgiving but special enough to make any fall evening feel like a celebration!
Gathering Your Ingredients for the Perfect Sweet Potato Cheesecake
The key to any truly creamy sweet potato cheesecake is starting with ingredients that are ready to cooperate! When I teach my grandkids how to approach a delicate recipe like this, the first thing I stress is temperature. Don’t rush the dairy or the eggs; that’s how you end up with lumps, and we absolutely do not want lumps in this rich sweet potato dessert.
When you look at this list, you’ll notice a few things—like the gingersnap crust offering a real aromatic kick, which is one of my favorite holiday twists. If you ever feel like trying a different base, I have a wonderful butter pie crust recipe that works nicely too, but stick to the gingersnap here! I’ve laid everything out below, broken down by where they go. Make sure you have your sweet potatoes already baked and pureed smooth—that makes the whole process much faster!
For the Gingersnap Crust
- 1 1/2 cups gingersnap cookie crumbs
- 1/4 cup granulated sugar (for crust)
- 6 tablespoons unsalted butter, melted
For the Spiced Sweet Potato Cheesecake Filling
Remember I said everything needs to be room temperature here? It’s true! Soft cream cheese, eggs that have sat out for an hour, and room-temperature sour cream are your best friends for a smooth batter. No one wants to spend extra time beating lumps out!
- 2 (8 ounce) packages cream cheese, softened
- 1 1/2 cups mashed sweet potato (about 2 medium sweet potatoes, baked and pureed)
- 1 cup granulated sugar (for filling)
- 1/4 cup packed light brown sugar
- 1 teaspoon vanilla extract
- 1 teaspoon ground cinnamon
- 1/2 teaspoon ground ginger
- 1/4 teaspoon ground nutmeg
- Pinch of salt
- 3 large eggs, room temperature
- 1/2 cup sour cream, room temperature
Optional Maple Whipped Cream Topping
You can skip this if you prefer just a simple dusting of powdered sugar, but oh my goodness, the maple flavor truly takes this over the top!
- 1 cup heavy whipping cream
- 2 tablespoons maple syrup
- 1/2 teaspoon vanilla extract
Step-by-Step Guide: How to Make Baked Sweet Potato Cheesecake
Now that we have our gorgeous ingredients ready to go, we tackle the actual baking! Don’t you worry one bit about cheesecake being tricky; we are using a water bath, which is my secret weapon for getting the most creamy sweet potato cheesecake possible. Since this is a baked dessert, the timing is everything, but I’ll walk you through every turn. We want that velvety smooth finish, not a cracked landscape! You can find more notes on keeping things smooth in my easy homemade crack-free cheesecake recipe tutorial.
Preparing the Crust and Oven Setup
First things first, let’s get the oven ready for action. Preheat it to 350°F (175°C) right away. Next, take your 9-inch springform pan—you know, the one with the removable bottom—and wrap the outside of it super tightly with heavy-duty aluminum foil. I mean triple layers! This keeps any sneaky water from our bath seeping into the crust. For the crust itself, mix those crumbs, the sugar, and the melted butter until it looks like wet sand. Press it firmly into the bottom of that foil-wrapped pan. Pop that into the oven for about 8 minutes just to set it up. When you pull it out, reduce your oven temperature way down to 325°F (160°C); that lower heat is key for baking cheesecake evenly.
Mixing the Creamy Sweet Potato Cheesecake Filling
This part is where all that room-temperature magic pays off! Grab your electric mixer and beat the softened cream cheese until it’s totally lump-free and looking fluffy. Don’t rush this step; it builds the structure! Now, gently mix in your perfectly smooth sweet potato puree, the brown sugar, the regular sugar, vanilla, and all those lovely spices—cinnamon, nutmeg, ginger, and salt. Once that spice smell is filling your kitchen, it’s time for the eggs. Add the eggs one single egg at a time, making sure to mix only on low speed until it disappears before adding the next one. We stop mixing once they are barely incorporated! Finally, give the sour cream one last slow mix in until you have a beautiful, uniform, spiced cheesecake filling.
Baking and Slow Cooling for a Crack-Free Sweet Potato Cheesecake
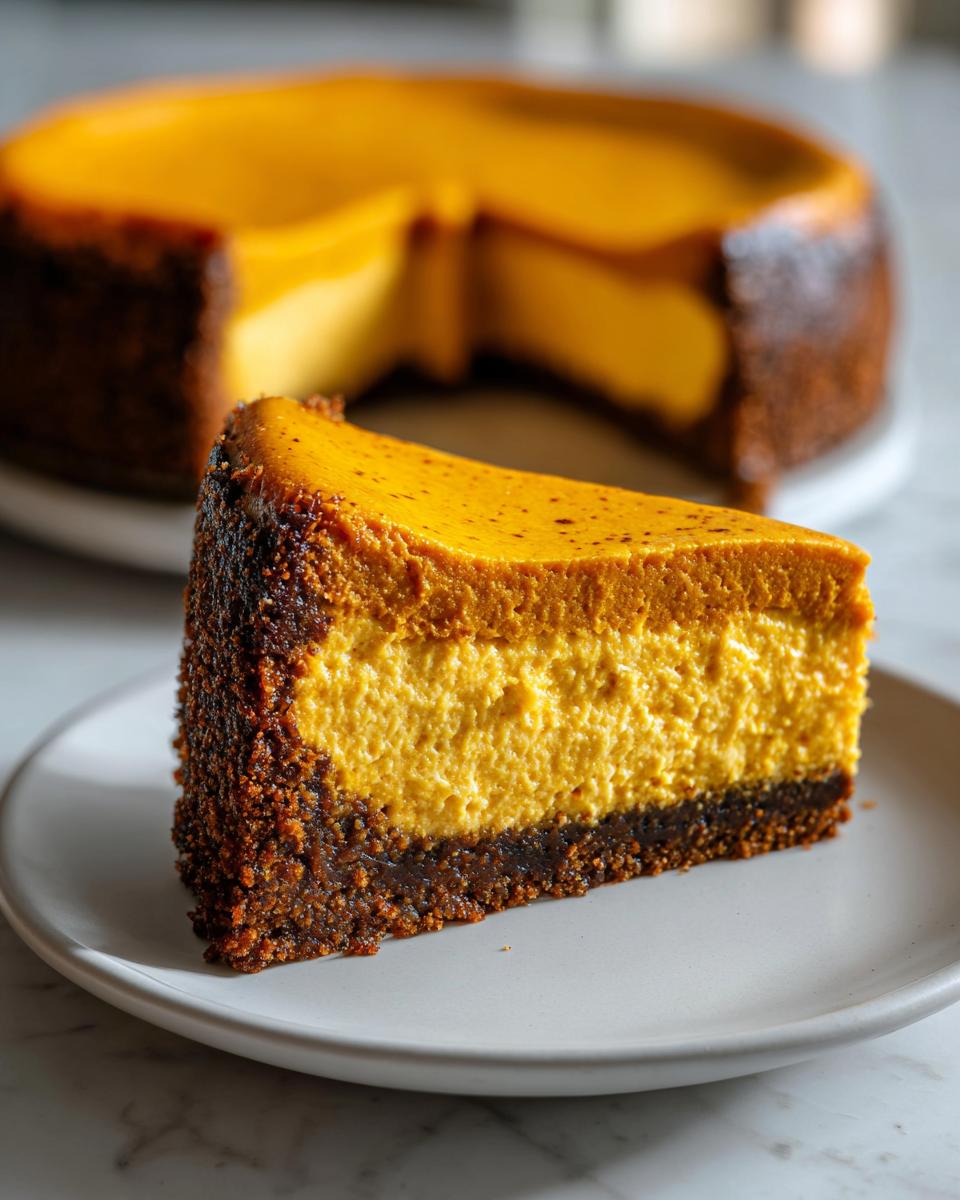
Pour your filling right over that cooled gingersnap base. Now for the water bath—this is non-negotiable for the best texture! Set your springform pan inside a larger roasting pan. Heat up some water on the stove, and then carefully pour that hot water into the roasting pan until it comes halfway up the sides of your cheesecake pan. Place the whole setup gently into the 325°F oven. Bake this beauty for about 55 to 65 minutes. You are looking for the edges to seem firm, but that very center—about 2 inches wide—should still have a tiny jiggle, like gelatin. The second it’s done, turn the oven OFF! Prop the door open about an inch—a wooden spoon works perfectly—and just let it sit in that warm oven for a full hour. This slow temperature drop is how we prevent cracks on our lovely sweet potato cheesecake.
Chilling and Final Topping
After that hour in the oven, carefully take the cheesecake out of the water bath and let it cool completely on the counter. Once it’s room temperature, wrap it up tight and move it to the fridge. You must chill this masterpiece for a minimum of 6 hours, but honestly, overnight is when the flavors truly marry. If you decide to use the maple whipped cream, whip those ingredients up right before you are ready to serve it. Don’t dollop it on too soon, or it might weep!
Tips for the Best Homemade Cheesecake Experience
I’ve baked enough cheesecakes in my day to know that little details make all the difference when you’re striving for that perfect, creamy sweet potato cheesecake. My biggest piece of advice, which I mentioned before, is temperature. If your cream cheese is cold, or your eggs are straight from the fridge, the batter just won’t blend as smoothly, and you risk that dreaded grainy texture—we want velvet!
Another thing to decide early is your presentation style. If you’re worried about the springform pan or if you simply want to make this ahead for a big crowd, consider turning it into sweet potato cheesecake squares. Just line a 9×13 pan with parchment paper, letting the edges hang over like little handles. That makes cutting and serving so much easier! No water bath is needed for squares, but just watch that baking time because they cook faster.
Sweet Potato Dessert Recipes: Variations on This Cheesecake
Now, I know this baked sweet potato cheesecake is fantastic, but sometimes you might be craving something a little different, right? That’s the joy of sweet potato dessert recipes—there are so many ways to enjoy those cozy fall spices! If gingersnaps aren’t your favorite, you can easily swap them out for classic graham cracker crumbs. You’ll just need that 1/4 cup of sugar and the melted butter, same as written.
And what about those folks who really lean towards a traditional sweet potato pie? You can certainly try making a sweet potato pie cheesecake hybrid! Instead of the full cheesecake top, you could top half your filling with a layer of pecan praline or even a drizzle of caramel sauce right before the final cool down. For more ideas on changing up your fall baking, this other recipe I saw out there does some wonderful things with toppings too!
Storage and Reheating Instructions for Your Sweet Potato Cheesecake
Since this wonderful sweet potato cheesecake is such a decadent, rich sweet potato dessert, it actually tastes even better the next day! That long chill time really lets those warm spices settle down into that creamy filling. You absolutely have to plan ahead for this one; it needs at least 6 hours in the fridge, but I always make mine the day before Thanksgiving. That way, the morning of the holiday, all I have to worry about is the turkey!
To store it, make sure it’s completely cool first. Then, cover the springform pan tightly with plastic wrap, or gently slide an actual cake dome over it. It will keep beautifully in the refrigerator for up to four or five days. Now, while you *can* reheat dessert, cheesecake really is meant to be served cool. If you must serve it slightly warmer, just let a slice sit out on the counter for 20 minutes before serving—don’t try to microwave it, dear!
Frequently Asked Questions About Sweet Potato Cheesecake
It’s natural to have questions when you’re trying a gorgeous holiday centerpiece like this! I want you to feel confident when you try this baked sweet potato cheesecake. Baking is about practice, but starting with the right technique really makes all the difference. Here are a few things folks ask me most often when they are planning their fall holiday baking.
Can I make a no bake sweet potato cheesecake instead?
That’s a great question, especially if you need to save oven space during Thanksgiving! This particular recipe is designed to be baked because baking sets the cream cheese and eggs just right for that firm, but unbelievably creamy cheesecake texture we are looking for. A no bake sweet potato cheesecake is certainly possible, but it would need stabilizers like gelatin or whipped topping folded in differently, and honestly, the texture just won’t be the same—it won’t have that rich, dense body of this recipe. Stick to the oven for this one!
What is the best way to sweeten the sweet potatoes?
When it comes to sweet potatoes, how you treat them really affects the final flavor! I strongly recommend baking or roasting your sweet potatoes whole until they are completely soft. When you boil them, they soak up water, which dilutes that lovely earthy sweetness we are trying to capture here. Roasting them concentrates the flavor beautifully and keeps your puree nice and thick. If you need a refresher on getting that perfect roast, I talk about my method in detail when I make my sweet potato side dish!
Is this recipe considered a sweet potato pie cheesecake hybrid?
Yes, absolutely! That’s what makes it so special and why it’s such a fantastic addition to holiday tables. It takes the familiar, warmly spiced filling flavor of a classic sweet potato pie and marries it with the structure and luxurious texture of a proper, baked cheesecake. If you are curious about other famous versions, I heard great things about Gladys Knight’s take on the classic pie filling!
Serving Suggestions for This Decadent Cheesecake
This rich sweet potato dessert is hearty enough to be the star of the show, but pairing it right just elevates the whole experience, doesn’t it? I love serving a generous slice of this alongside a steaming hot cup of strong black coffee—the bitterness cuts through that creamy sweetness just perfectly.
If we are serving this after a big meal, say Thanksgiving dinner, I often offer a light glass of Tawny Port or maybe a sweeter dessert wine. For a little crunch on the side, skip the heavy crust toppings and just sprinkle a few toasted, salted pecans right over the top of your slice. If you adore pecan flavors as much as I do, you might enjoy my recipe for pecan pie cheesecake sometime soon!
Estimating the Nutrition for Your Sweet Potato Cheesecake Slice
Now, I always tell folks that when you’re baking something this decadent, you aren’t looking for a spa cookie—you’re looking for joy! That said, I know some of you plan menus carefully, so I’ve pulled together the estimates for one slice of this divine sweet potato cheesecake. Please remember, these numbers are just starting points, based on the ingredients listed in the recipe. They aren’t certified medical advice, so just use them as a helpful guide for your big holiday planning!
| Component | Amount Per Serving |
|---|---|
| Calories | 450 |
| Sugar | 35g |
| Fat | 28g |
| Protein | 7g |
Share Your Baking Success
Well, that’s my very best recipe for the perfectly creamy baked sweet potato cheesecake! I truly hope you give this a try for your family this fall. Honestly, seeing your bakes and hearing about your holiday tables is the highlight of my day!
Once you’ve had a chance to chill it overnight and slice into that gingersnap crust, please, please come back and leave a little note below. Did you love the maple cream? Does your family prefer no topping at all? A star rating tells me if I’ve done my job, and your comments help other home cooks feel confident trying this recipe too. I always read every single one!
And if you want to learn a little more about what makes this kitchen tick, you can always pop over to my About page. Happy baking, dear ones!
PrintPerfectly Creamy Baked Sweet Potato Cheesecake with Gingersnap Crust
Make this rich, creamy sweet potato cheesecake, a wonderful twist on classic holiday desserts. It features a spiced sweet potato filling over a crunchy gingersnap crust, perfect for your fall gatherings.
- Prep Time: 30 min
- Cook Time: 65 min
- Total Time: 8 hours 35 min
- Yield: 12 servings 1x
- Category: Dessert
- Method: Baking
- Cuisine: American
- Diet: Vegetarian
Ingredients
- 1 1/2 cups gingersnap cookie crumbs
- 1/4 cup granulated sugar (for crust)
- 6 tablespoons unsalted butter, melted
- 2 (8 ounce) packages cream cheese, softened
- 1 1/2 cups mashed sweet potato (about 2 medium sweet potatoes, baked and pureed)
- 1 cup granulated sugar (for filling)
- 1/4 cup packed light brown sugar
- 1 teaspoon vanilla extract
- 1 teaspoon ground cinnamon
- 1/2 teaspoon ground ginger
- 1/4 teaspoon ground nutmeg
- Pinch of salt
- 3 large eggs, room temperature
- 1/2 cup sour cream, room temperature
- Optional Topping: 1 cup heavy whipping cream, 2 tablespoons maple syrup, 1/2 teaspoon vanilla extract
Instructions
- Preheat your oven to 350°F (175°C). Wrap the outside of a 9-inch springform pan tightly with heavy-duty aluminum foil to prevent water seepage during the water bath.
- Prepare the crust: In a medium bowl, combine the gingersnap crumbs, 1/4 cup granulated sugar, and melted butter. Press the mixture firmly and evenly into the bottom of the prepared springform pan. Bake for 8 minutes. Remove from the oven and let it cool while you prepare the filling. Reduce the oven temperature to 325°F (160°C).
- Prepare the sweet potato puree: Bake sweet potatoes until soft. Scoop out the flesh and mash until completely smooth. Measure out 1 1/2 cups.
- Prepare the cheesecake filling: In a large bowl, use an electric mixer to beat the softened cream cheese until smooth. Add the mashed sweet potato, 1 cup granulated sugar, brown sugar, vanilla extract, cinnamon, ginger, nutmeg, and salt. Beat until just combined and smooth. Do not overmix.
- Beat in the eggs one at a time, mixing on low speed after each addition until just incorporated. Mix in the sour cream until the batter is smooth.
- Pour the filling over the cooled gingersnap crust. Place the springform pan into a larger roasting pan. Carefully pour hot water into the roasting pan until the water reaches halfway up the sides of the springform pan. This water bath helps the cheesecake bake evenly.
- Bake for 55 to 65 minutes. The edges should look set, but the center 2 inches should still have a slight wobble.
- Turn off the oven, prop the door open slightly (about 1 inch), and let the cheesecake cool inside the oven for 1 hour. This slow cooling prevents cracking.
- Remove the cheesecake from the water bath and let it cool completely on a wire rack. Once cool, cover and refrigerate for at least 6 hours, or preferably overnight, before serving.
- If using the topping: Beat the heavy whipping cream, maple syrup, and vanilla extract until stiff peaks form. Spread or pipe over the chilled cheesecake before slicing.
Notes
- For the smoothest filling, make sure your cream cheese, eggs, and sour cream are truly at room temperature before mixing.
- If you do not have a springform pan, you can make this as Sweet Potato Cheesecake Squares using a 9×13 inch baking dish lined with parchment paper.
- This recipe makes a rich sweet potato dessert that pairs well with coffee or a light dessert wine.
Nutrition
- Serving Size: 1 slice
- Calories: 450
- Sugar: 35g
- Sodium: 310mg
- Fat: 28g
- Saturated Fat: 17g
- Unsaturated Fat: 11g
- Trans Fat: 0.5g
- Carbohydrates: 45g
- Fiber: 2g
- Protein: 7g
- Cholesterol: 115mg