
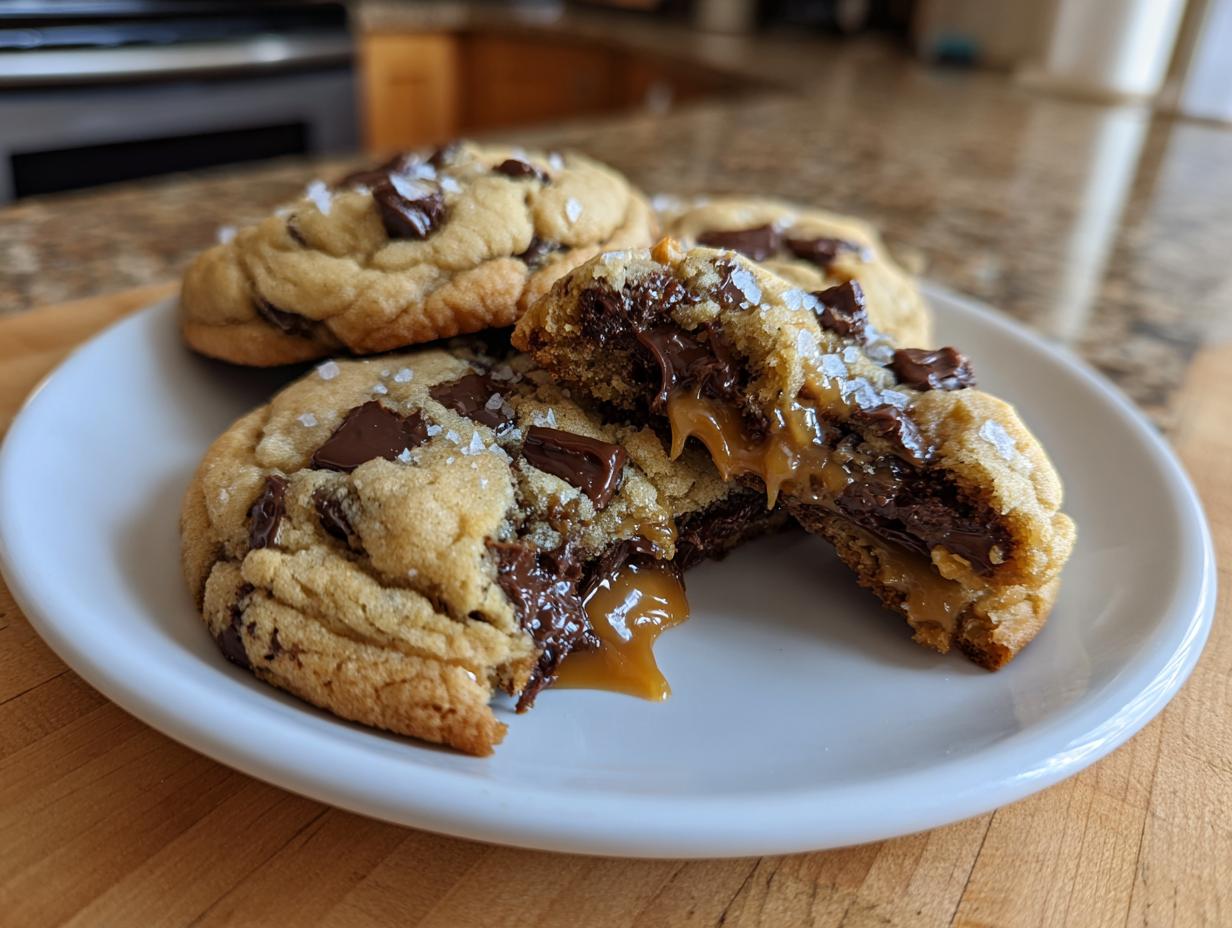
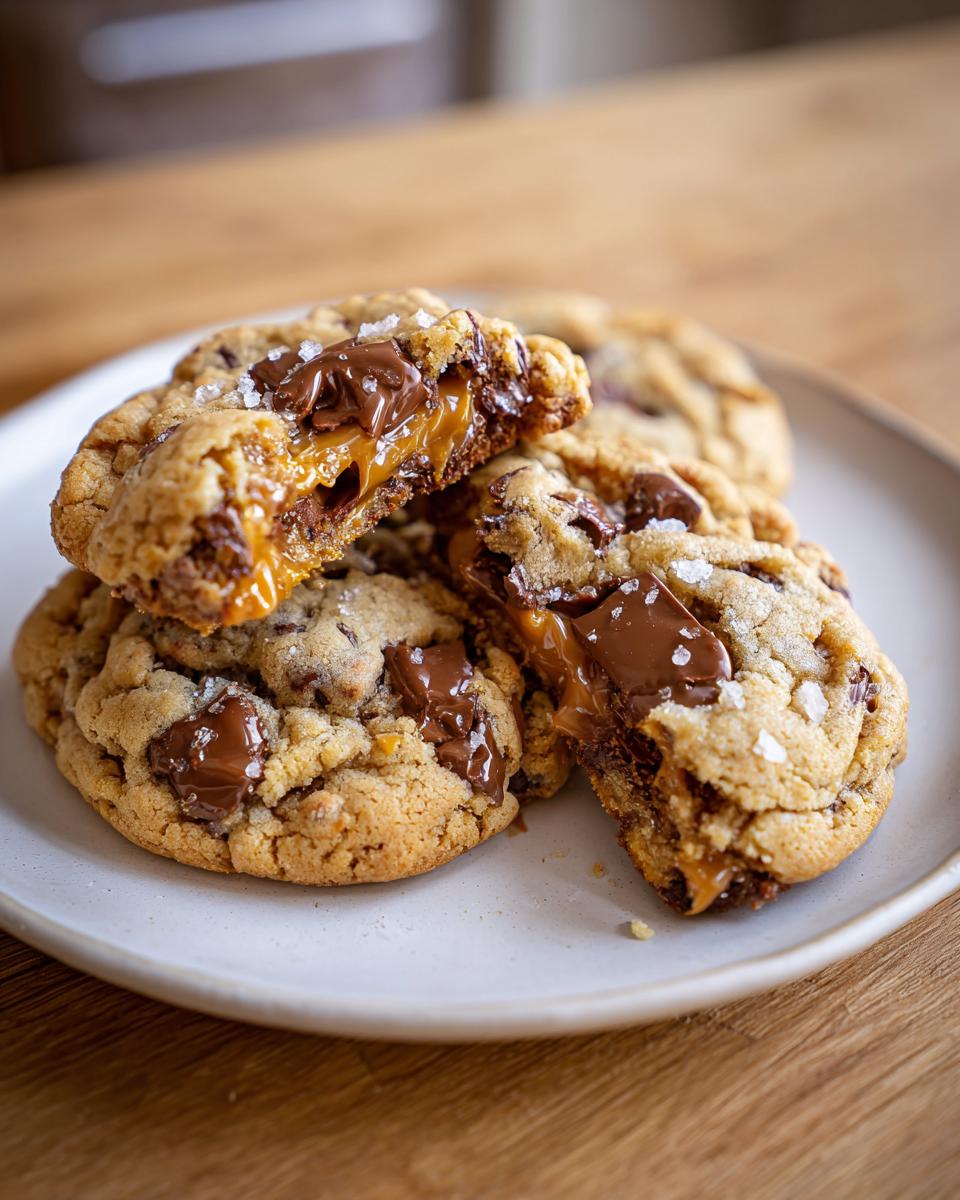
There’s just something about pulling a soft, warm cookie out of the oven that instantly makes everything feel right with the world, isn’t there? For me, the ultimate comfort bake has always involved that perfect marriage of deep, buttery sweetness with the slightest kiss of salt. And let me tell you, once you master the art of the homemade salted caramel cookies, well, there’s no turning back! These aren’t just cookies; they are the very definition of indulgence.
After decades spent teaching, then years perfecting my own family recipes, I’ve finally landed on what I truly believe is the very best combination for texture and flavor balance. We’re ditching the flat, overly sweet cookies you find everywhere else. These babies are thick, wonderfully chewy, and they hold that gooey caramel center like a treasure. Trust me, this recipe for salted caramel cookies is the one you’ll hand down to your own grandchildren someday.
- Why These Are the Best Salted Caramel Cookie Recipe You Will Make
- Gathering Ingredients for Homemade Salted Caramel Cookies
- Step-by-Step Tutorial for Easy Salted Caramel Cookie Tutorial
- Ingredient Notes and Substitutions for Gourmet Caramel Cookies
- Tips for Success: Bakery Style Salted Caramel Cookies
- Storing and Reheating Your Soft Baked Salted Caramel Cookies
- Frequently Asked Questions About Making Salted Caramel Cookies
- Estimated Nutritional Data for Salted Caramel Cookies
- Share Your Ultimate Salted Caramel Goodness Cookies
Why These Are the Best Salted Caramel Cookie Recipe You Will Make
I know there are a million recipes out there, but I promise you, this one is different. If you’re tired of cookies that spread into thin, sad puddles or taste like pure sugar, you’ve found your answer! This is my tried-and-true, Best Salted Caramel Cookie Recipe because it focuses on two things: real texture and true flavor balance. We use dark brown sugar heavily, which keeps the cookies soft, and the final sprinkle of flaky sea salt cuts through the sweetness perfectly.
These are genuinely Chewy Caramel Cookies with Sea Salt that look like they came from a gourmet bakery. I’ve spent years getting the ratios just right so the caramel stays inside where it belongs!
Achieving the Perfect Thick and Chewy Caramel Cookies
The secret to bakery-style height and chewiness isn’t a fancy ingredient; it’s patience! You absolutely must chill that dough. Seriously, this prevents the butter from melting too fast in the oven, which stops the cookie from spreading sideways. Also, notice we use both granulated and brown sugar. The brown sugar holds moisture, giving you that incredible, soft chew everyone craves. Don’t skip that chill time—it’s how we keep these beauties thick!
Gathering Ingredients for Homemade Salted Caramel Cookies
Now that you are convinced these will be the best cookies you’ve ever baked, let’s get our supplies ready. Baking is always a little easier when everything is measured out beforehand, especially when dealing with sticky caramel! This list will set you up perfectly to make about 18 glorious, rich cookies. If you are looking for a classic chocolate chip base recipe to adapt, I have my tried-and-true version right here, but this salted caramel version requires a few special considerations.
The most important rule, and I can’t stress this enough: your salted caramel sauce needs to be thick and, most importantly, chilled—ice cold if you can manage it! If the caramel is room temperature, it’s going to melt the minute it hits the room-temperature dough and immediately leak out into the oven, turning your gorgeous cookie into a sticky mess. We want that delicious, gooey center, not a caramel stain on our sheet pan!
We need that lovely mix of brown and white sugar for the right texture, 2 1/4 cups of flour, and of course, a sprinkle of flaky sea salt on top for that final salty punch that just elevates the whole experience.
Step-by-Step Tutorial for Easy Salted Caramel Cookie Tutorial
Alright, grab your mixer—or if you’re feeling ambitious, your wooden spoon! This process is wonderfully straightforward, but we need to pay attention to a couple of key spots to ensure we get those gooey centers. Remember, we are making Homemade Salted Caramel Cookies here, not cookies that leak all over the place. Follow these steps exactly, especially around the chilling phase, and you’ll have success.
When I taught third grade, I always told my students that following directions carefully is the secret to most great endeavors—baking is no different! I want you to feel completely confident making these rich cookies at home, which is why I approach this tutorial methodically. If you’ve ever looked at my recipe for cookies I make with pudding (which is another favorite!), you know I stress the importance of gentle folding at the end.
Creaming Butter and Sugars for Rich Caramel Cookie Recipe
This is truly where texture begins! Start by getting your softened butter, light brown sugar (packed well!), and granulated sugar into your mixing bowl. You want to beat this mixture until it’s genuinely light, pale yellow, and fluffy. I mean it—don’t stop too soon! If it still looks dense or grainy, you aren’t done yet. That fluffiness incorporates the air which will help keep your final cookie thick. It should look almost creamy, not just vaguely mixed.
Assembling and Stuffing the Salted Caramel Cookies
Once your butter mixture is perfect, add those eggs one at a time—making sure each one is fully incorporated before adding the next—then mix in that vanilla. In another bowl, whisk your dry ingredients (flour, baking soda, and salt) together. Now, add the dry mix to the wet mix on low speed. You are aiming for ‘just combined.’ I always stop my mixer just before the last bit of flour disappears so I can fold in the chocolate chips by hand. This stops us from overdeveloping the gluten, which is the enemy of a soft cookie!
Here comes the fun, delicate part: the stuffing! Scoop out a rounded tablespoon of the dough and flatten it gently in your hand. Put about half a teaspoon of that cold, chilled salted caramel sauce right in the middle. Now, gently fold the edges of the dough up and over the caramel, completely encasing it. Roll it lightly between your palms into a nice, neat ball. If you seal it well, that caramel stays put!
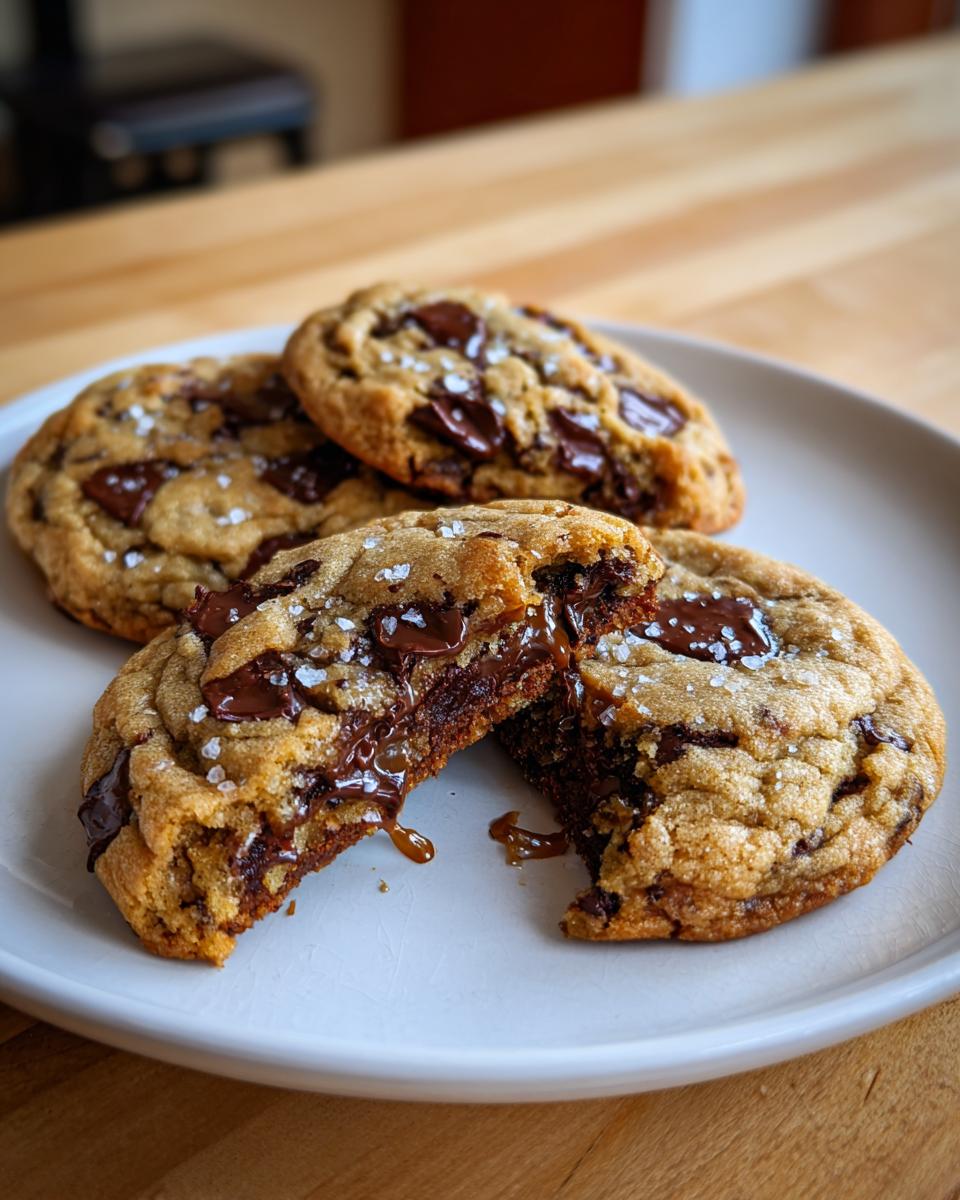
Baking and Cooling Your Thick and Chewy Caramel Cookies
Before these babies see the oven, they need a rest. Place those stuffed dough balls onto your parchment-lined sheet tray and pop them in the fridge for at least 30 minutes. This crucial step is what ensures we get those beautiful, thick edges for our Thick and Chewy Caramel Cookies.
Once chilled, preheat your oven to 375 degrees Fahrenheit. Place them about two inches apart on the tray. Drizzle just a tiny bit more of that glorious caramel over the top of each one—just for looks!—and then sprinkle generously with flaky sea salt. Bake them for 10 to 12 minutes. How do you know they are done? The edges should be set and starting to look lightly golden brown, but the very center should still look a tad soft and underdone. I promise you, they keep cooking on the hot pan!
Let them rest right there on the baking sheet for about five minutes. This allows the centers to firm up just enough so they don’t fall apart when you move them. Then, gently transfer them to a wire rack to cool completely while you try (and fail) not to eat them all warm.
Ingredient Notes and Substitutions for Gourmet Caramel Cookies
We’ve made the dough, but now let’s talk details. Even in my years teaching, I learned that the success of a recipe often hinges on choosing the right components. When you’re aiming for Gourmet Caramel Cookies, the quality and nature of those few specialty ingredients really matter. I want you to have the best outcome, which means paying attention to the sauce and the mix-ins. Don’t rush this part; a quick decision here saves you from a gooey disaster later!
Choosing the Right Caramel Sauce for Salted Caramel Cookies
I want to bring up that caramel sauce one more time because it is the number one reason cookies leak. If you use a thin, runny caramel—the kind you might drizzle straight over ice cream—it just doesn’t have the backbone to hold up against the heat of the oven. It will seep out, spread, and essentially turn into hard candy around the base of your cookie. Ask yourself, when you stir your sauce, does it coat the back of a spoon thickly?
If it is too thin, you have two options. First, you can gently heat a small amount of your caramel in a saucepan for just a minute or two over low heat, stirring constantly, until it thickens up slightly. The goal is to evaporate just a little bit of water content. Be careful not to let it scorch!
Or, if you are feeling ambitious, you can try making your own. While I don’t have a dedicated, separate post for homemade sauce right here, I use a method I learned from an old friend of my mother’s that ensures a thick, perfect texture every time. The results for Rich Caramel Cookie Recipe are worth the extra effort when you control the thickness yourself!
For the chocolate chips, semi-sweet is my standard because it plays nicely with the sweet caramel, but feel free to substitute! If you love that rich, deep chocolate flavor, use a good quality dark chocolate chip. If you want to go super decadent, try chopping up some soft, chewy caramel candies—like Rolo candies, minus the filling—and mix those in alongside the chips instead of using the sauce stuffing. It gives you little pockets of pure caramel flavor throughout the whole cookie, not just one center burst.
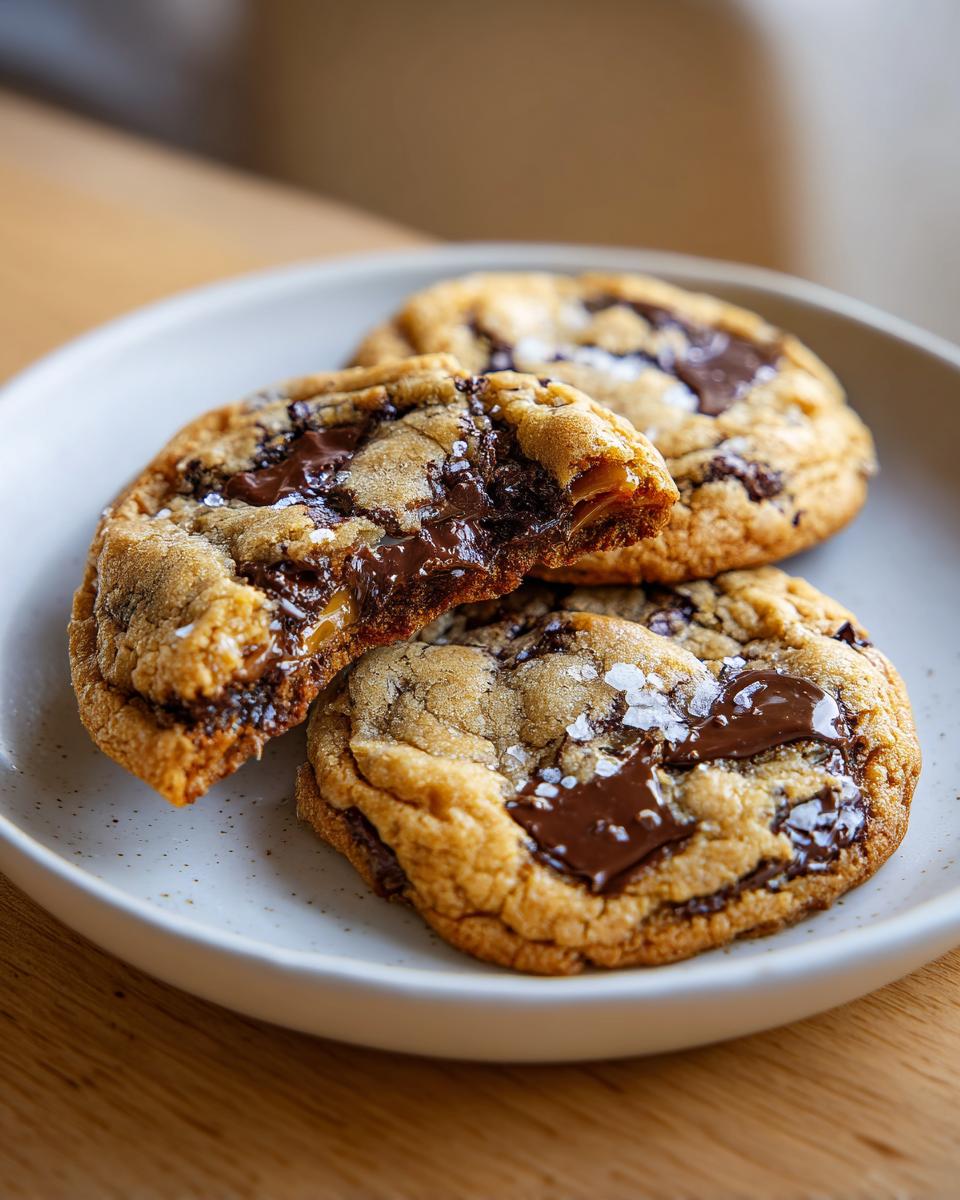
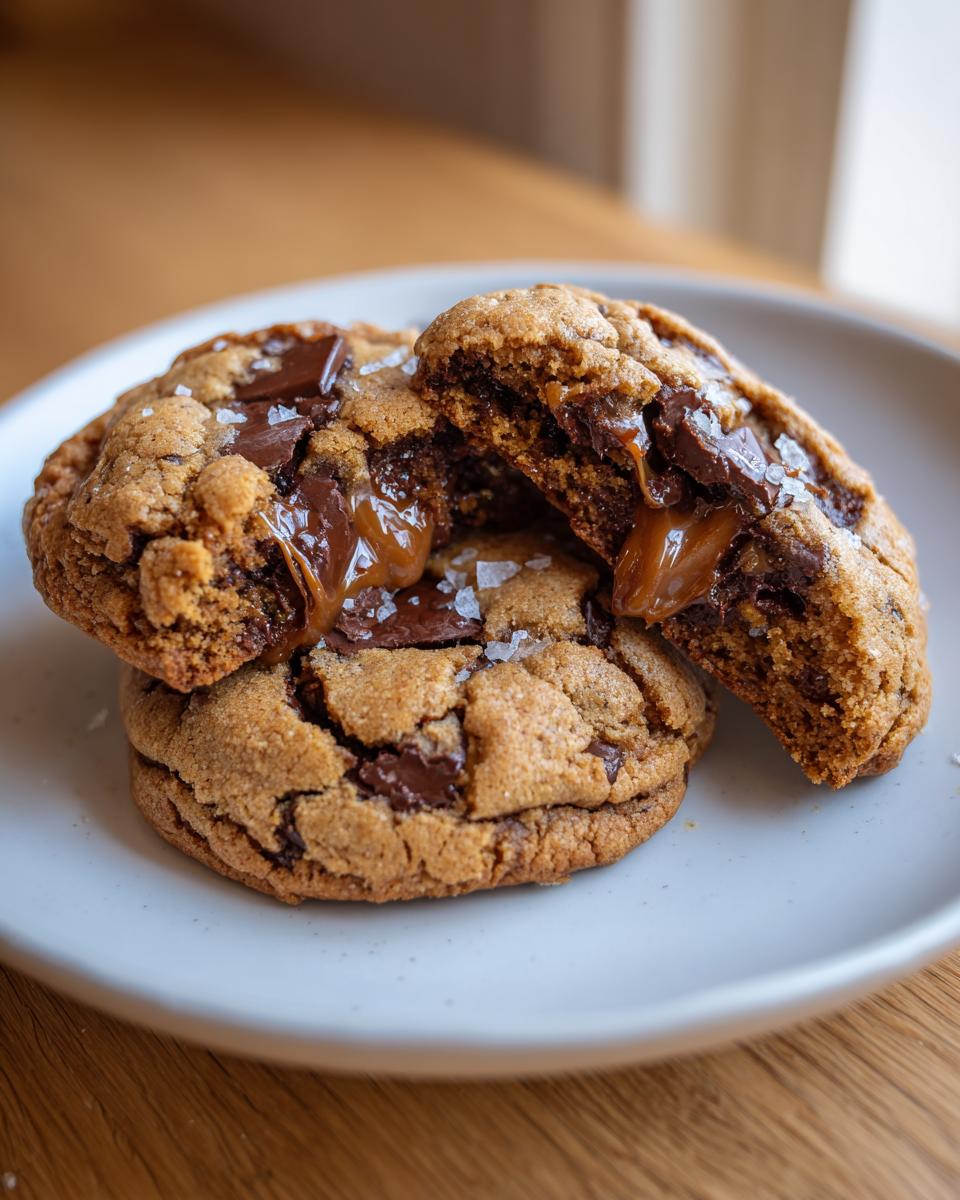
Tips for Success: Bakery Style Salted Caramel Cookies
When you’re trying to achieve that perfect, Bakery Style Salted Caramel Cookies look—thick edges, soft center, and that stunning, salty finish—a few extra steps make all the difference. I learned these tricks over years of trial and error, and they are the reason my cookies always look taller and chewier than the batch next door!
Don’t skimp on the prep time; it’s truly vital, especially for a rich cookie like this that has filling inside. If you want the secret to consistently gorgeous results that match my Ultimate Bakery Style Cookies guide, pay close attention to these four points. They separate an okay cookie from an absolutely unforgettable one.
- Don’t Overmix Once the Flour is In: I mentioned this before, but I’m saying it again! Once you introduce the flour mixture, turn your mixer speed way down and only mix until you stop seeing streaks of white flour. Stop! Overmixing develops gluten, which causes your cookies to spread thinly instead of puffing up nicely. A few tiny flour streaks are fine; the folding takes care of the rest.
- The Cold Caramel Center is Non-Negotiable: This sounds simple, but it saves the bake! If your dough balls are warm or room temperature when they go into the oven, the caramel inside liquefies instantly and melts right through the dough. By using rock-hard, chilled caramel centers, you give the dough enough time to set up its structure (thanks to the chilling period!) before the candy melts.
- Use a Cookie Scoop for Even Baking: If you are free-handing your dough balls, they will all be slightly different sizes, meaning they will all bake at different rates. I highly recommend using a medium-sized cookie scoop (about 1.5 tablespoons) to ensure every single cookie is identical in mass. Uniformity guarantees that they are all perfectly baked simultaneously.
- The Maldon Sea Salt Finish: For that gourmet touch and the essential salty balance, you must use the flaky sea salt *after* baking, right when they come out of the oven. Table salt mixes right into the dough and disappears. Flaky salt sits right on top, offering that satisfying crunch and immediate salty burst that cuts through the richness of the butter and caramel. It’s the final flourish for a professional look.
Follow those tricks, and I guarantee you’ll be serving up cookies that look and taste like they came straight from a high-end bakery!
Storing and Reheating Your Soft Baked Salted Caramel Cookies
Oh, this is a great topic! Because these are such rich, full cookies, sometimes we can’t eat them all in one sitting—though I wouldn’t blame you if you tried! The good news is that these Soft Baked Salted Caramel Cookies hold up beautifully, but you need to store them correctly to maintain that wonderfully soft, chewy texture we worked so hard to create.
If you manage to have any leftovers (which might require hiding them from my grandkids!), here is exactly how Carla recommends keeping them fresh. We want to protect all that buttery goodness and keep that caramel gooey!
Room Temperature Storage Tips
For short-term storage—say, the next 3 or 4 days—keeping them on the counter is just fine. But you simply cannot leave them exposed to the air! Air is the enemy of soft cookies; it dries them out fast. You need an airtight container. I prefer a cookie tin or a good glass container with a tight-fitting lid.
Here’s a little trick for keeping them extra soft: If you are worried about them drying out by day four, pop a slice of plain white bread—just a half-slice—into the container with the cookies. The cookies will gently absorb the moisture from the bread, keeping them wonderfully pliable and soft. Change the bread slice every couple of days if you store them longer.
Freezing for Later: Making Ahead and Keeping Quality
If you’re like me and like to bake big batches to have on hand for unexpected visits or just those moments when a craving hits, freezing is the way to go! These cookies freeze fantastically well. You can freeze them either baked or as raw dough balls, which is honestly the ultimate make-ahead tip for a busy week.
For Baked Cookies: Make sure they are completely cool first—no warm cookies in the freezer! Wrap them tightly first in plastic wrap, making sure each cookie (or small stack of two) is completely sealed off. Then, place those wrapped cookies inside a heavy-duty freezer bag. Squeeze out all the air you can. Stored this way, they will stay perfect for up to three months. That’s plenty of time to enjoy your Homemade Salted Caramel Cookies whenever you need one!
For Raw Dough Balls: If you chilled the dough (remember we talked about how much that helps?), you can roll them into balls, place them on a parchment-lined tray, and freeze them solid for about an hour. Once they are hard little nuggets, transfer them to a freezer bag, sealed tight. This way, you can just pull out exactly how many you need, no measuring required later!
The Best Way to Reheat for That Fresh-From-the-Oven Feel
Reheating is the secret to getting that soft center back without burning the crisp edges. If you’re eating them cold or room temperature, they will certainly be tasty, but they won’t have that just-baked magic.
For the best experience, pop the cookie on a microwave-safe plate and heat it for just 8 to 10 seconds. That’s it! You aren’t trying to cook it again; you’re just warming it enough to soften the butter slightly and make the caramel gooey again. If you are heating a frozen dough ball, just add 5 minutes onto the original baking time and don’t use the flaky salt topping until after they come out of the oven.
A few seconds in the microwave, and you’ll have that perfect bite of chewy cookie surrounding warm, glorious, gooey caramel. Enjoy!
Frequently Asked Questions About Making Salted Caramel Cookies
When I first started serving these beauties at neighborhood events, I got so many questions about the process—especially about keeping that caramel sealed tight! It’s natural to have questions when you’re working with a fancy ingredient like caramel. Don’t worry, teaching for thirty years made me great at troubleshooting! Here are a few common things folks ask me about making this Perfectly Balanced Salted Caramel Dessert at home.
Can I make these Chocolate Chip Salted Caramel Cookies ahead of time?
Oh, absolutely, and honestly, I encourage it! Making the dough ahead of time is one of the best things you can do for your sanity on a busy baking day. I mentioned freezing the dough balls above, which is a fantastic option. If you plan to just refrigerate the dough rather than freezing it solid, make sure you don’t let it sit for more than 24 to 36 hours.
The dough will get very firm after a day in the fridge, which can sometimes make it crumbly when you try to make the balls. If that happens, just let the dough sit on the counter for 10 or 15 minutes until it’s slightly pliable again before you proceed with stuffing the chilled caramel centers. This is the easiest way to have the foundation for Holiday Salted Caramel Cookie Ideas ready to go!
How do I get the perfect salty flavor in my salted caramel cookies?
This is where you control the balance. Salt should play two different roles in this recipe, and they can’t be confused! First, you have the salt mixed into the dough itself (about half a teaspoon). This salt is foundational; it enhances the flavor of the butter, the vanilla, and the chocolate—it makes everything taste *more* like itself.
The second, and most important, salty hit comes from the finishing touch: the flaky sea salt sprinkled on top right before baking. This salt dissolves slightly but leaves little crunchy, intensely salty bursts in your mouth when you bite into the cookie. That contrast is everything! If you want a spectacular flavor profile, don’t skimp on that final sprinkle. It’s what truly makes these Gourmet Caramel Cookies sing.
If you love the caramel flavor but aren’t sure about the salt balance, you could experiment with my recipe for Caramel Apple Cookies sometime, which leans a bit sweeter overall. But for this chewy version, that top layer of crunchy salt is the key to making sure it isn’t ‘too sweet’!
Estimated Nutritional Data for Salted Caramel Cookies
When I share a recipe I love, people are often curious about what goes into it nutritionally, especially when we use rich ingredients like butter and caramel sauce. While I was a teacher, not a nutritionist, I always used the information provided on the ingredient labels to estimate what a finished batch looks like. Keep in mind that since we are dealing with homemade items—especially if you make your own caramel or use different chocolate chips—these numbers are just helpful estimates for one cookie!
This information is based on this recipe yielding 18 cookies. If you make your cookies a little bigger or smaller, naturally, the numbers per serving will change. This is just a good snapshot to keep on hand for planning!
- Serving Size: 1 cookie
- Calories: 250
- Sugar: 20g
- Sodium: 150mg
- Fat: 14g
- Saturated Fat: 8g
- Unsaturated Fat: 6g
- Trans Fat: 0g
- Carbohydrates: 30g
- Fiber: 1g
- Protein: 3g
- Cholesterol: 50mg
Please remember that these figures are calculated estimates based on standardized ingredient databases. The exact values may vary depending on the specific brands of butter, sugar, and especially the type and amount of caramel sauce you choose to use in your Rich Caramel Cookie Recipe. Baking should always be enjoyable, and while knowing the numbers is handy, the joy of that first buttery bite is what truly matters!
Share Your Ultimate Salted Caramel Goodness Cookies
Well, friend, we’ve done it! We’ve taken simple pantry staples and transformed them into what I truly believe is the most decadent, perfectly balanced treat: my Ultimate Salted Caramel Goodness Cookies. I really hope you enjoyed the process as much as I do every time I bake a batch. I know that because you followed the steps—especially chilling that dough—you now have some truly thick, bakery-style cookies waiting for you.
Now, I’ve shared all my secrets with you, from the importance of using cold caramel centers to why flaky sea salt is non-negotiable! But baking is a conversation, and I absolutely love hearing about your successes and how you customized this recipe in your own kitchen.
I always say that my kitchen community is built on sharing, and I invite you to join in! If you made a batch of these wonderful cookies, please pop down below in the comments section and let me know how they turned out. Did you make them plain, or did you fold in pecans, maybe? Did you manage to get that perfect gooey center?
Leaving a Rating and Review
If this recipe has earned a spot in your regular rotation—and I certainly hope it has!—I would be thrilled if you gave it a five-star rating right below the recipe card. Those ratings really help other home cooks like you find reliable recipes they can trust. I pour years of experience into these dishes, and seeing that five-star consensus shows me that the tried-and-true methods still win out!
Connecting with Carla
Don’t forget, you can always learn a little bit more about my philosophy on simple, joyful American cooking on my About Me page. Whether you’re a beginner or a seasoned baker, I promise to keep sharing dependable recipes that bring your family around the table.
Happy baking, and enjoy every last salty, chewy, caramel-filled bite!
PrintChewy Salted Caramel Chocolate Chip Cookies
Make bakery style salted caramel cookies that are thick and chewy. This recipe balances sweet caramel with flaky sea salt for a perfectly flavored cookie.
- Prep Time: 20 min
- Cook Time: 12 min
- Total Time: 32 min
- Yield: 18 cookies 1x
- Category: Dessert
- Method: Baking
- Cuisine: American
- Diet: Vegetarian
Ingredients
- 1 cup (2 sticks) unsalted butter, softened
- 3/4 cup packed light brown sugar
- 3/4 cup granulated sugar
- 2 large eggs
- 1 tablespoon vanilla extract
- 2 1/4 cups all-purpose flour
- 1 teaspoon baking soda
- 1/2 teaspoon salt
- 1 cup semi-sweet chocolate chips
- 1/2 cup thick, homemade or store-bought salted caramel sauce, chilled
- Flaky sea salt, for topping
Instructions
- Beat the softened butter, brown sugar, and granulated sugar together in a large bowl until light and fluffy.
- Add the eggs one at a time, beating well after each addition. Mix in the vanilla extract.
- In a separate bowl, whisk together the flour, baking soda, and salt. Gradually add the dry ingredients to the wet ingredients, mixing on low speed until just combined. Do not overmix.
- Gently fold in the chocolate chips.
- Take about 2 tablespoons of dough and flatten it slightly in your palm. Place about 1/2 teaspoon of the chilled salted caramel sauce in the center. Fold the dough around the caramel and gently roll it into a ball. Place the dough balls on a baking sheet lined with parchment paper.
- Drizzle a small amount of extra caramel sauce over the top of each dough ball and sprinkle generously with flaky sea salt.
- Chill the dough balls for at least 30 minutes. This helps prevent spreading and creates a thicker cookie.
- Preheat your oven to 375 degrees Fahrenheit.
- Bake for 10 to 12 minutes, or until the edges are set and lightly golden brown. The centers should still look slightly soft.
- Let the cookies cool on the baking sheet for 5 minutes before transferring them to a wire rack to cool completely.
Notes
- For the best texture, use a thick, chilled salted caramel sauce. Thin sauce may leak out during baking.
- If you prefer a richer flavor, use dark brown sugar instead of light brown sugar.
- To achieve a bakery style thick cookie, chill the dough for at least one hour, or up to 24 hours.
Nutrition
- Serving Size: 1 cookie
- Calories: 250
- Sugar: 20g
- Sodium: 150mg
- Fat: 14g
- Saturated Fat: 8g
- Unsaturated Fat: 6g
- Trans Fat: 0g
- Carbohydrates: 30g
- Fiber: 1g
- Protein: 3g
- Cholesterol: 50mg