
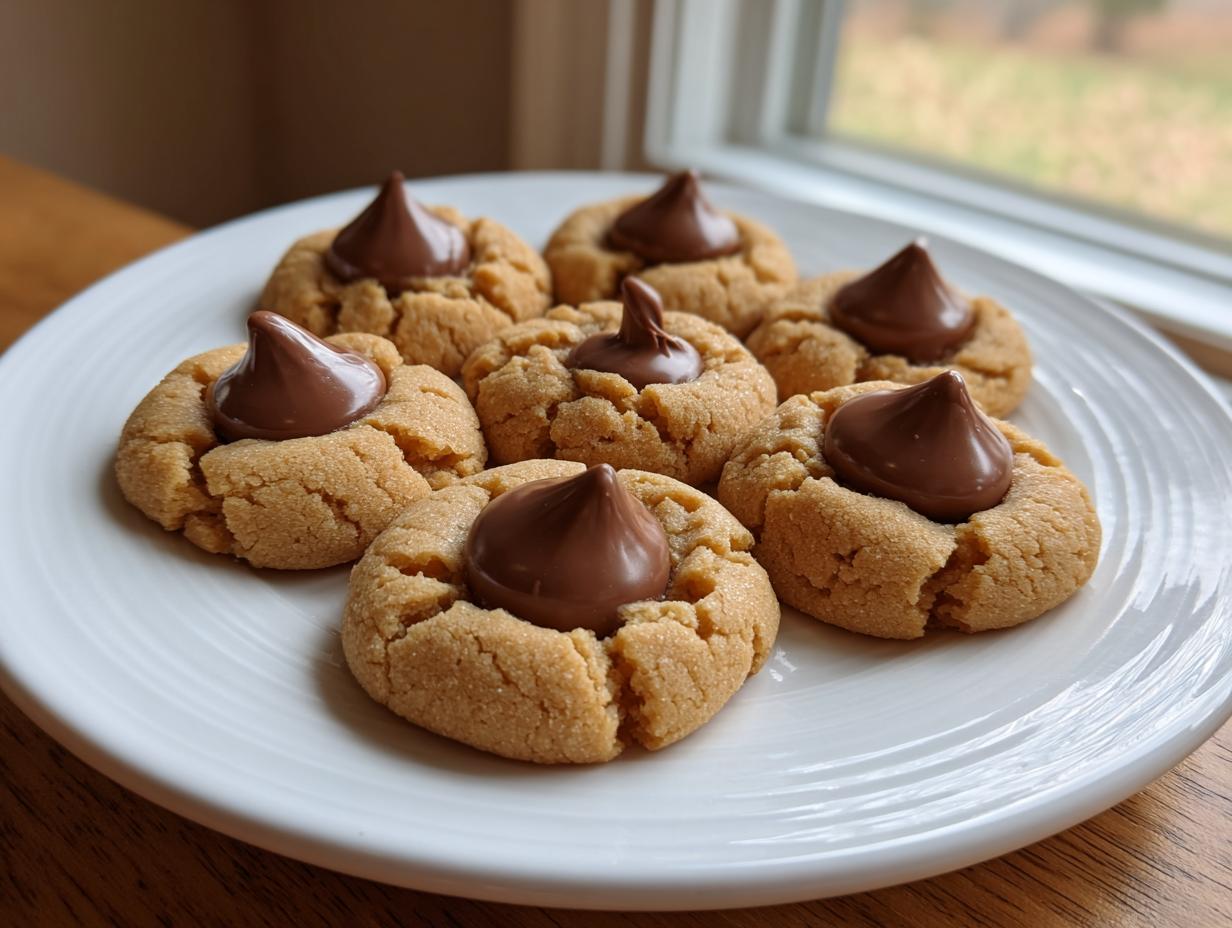
Oh, the smell of the holidays baking! Does anything bring back warmer memories than the scent of spices mixed with warm sugar? When I look at my recipe box, the card for these peanut butter drops—everyone calls them kiss cookies—is dog-eared and stained. It should be! This is one of those absolute classics that never fails, especially when I need a Quick & Easy Dessert but still want something that feels special.
As a former teacher and now a grandmother to five, dependability is my top priority in the kitchen. You can trust this recipe completely. We aren’t doing any fancy techniques here; just simple steps, pantry staples, and you end up with the fluffiest peanut butter base crowned with that beautiful, melted chocolate hat. If you’re looking for reliable, delicious Iconic Holiday Bakes, you’ve found your winner right here. We’ll make sure these turn out perfectly every single time. You can find more of my tried-and-true favorites in my roundup of the best dessert recipes.
- Why This is the Best Classic Peanut Butter Kiss Cookies Recipe
- Gathering Your Ingredients for Homemade Chocolate Kiss Cookies
- Step-by-Step Instructions for Making Classic Kiss Cookies
- Tips for Perfect Peanut Butter Blossom Kiss Cookies Success
- Blossom Cookie Variations: Beyond Peanut Butter Kiss Cookies
- Storage and Keeping Your Kiss Cookies Fresh
- Frequently Asked Questions About Hershey Kiss Cookie Recipe
- Estimated Nutritional Data for Classic Kiss Cookies
- Share Your Favorite Kiss Cookies Creations
Why This is the Best Classic Peanut Butter Kiss Cookies Recipe
Listen, I’ve taught hundreds of children how to read, and I apply that same clarity to my baking instructions. That’s why this recipe for Peanut Butter Blossoms is such a standout winner. These are truly a Quick & Easy Dessert because we skip that tedious chilling step entirely! You mix it, roll it, bake it, and top it.
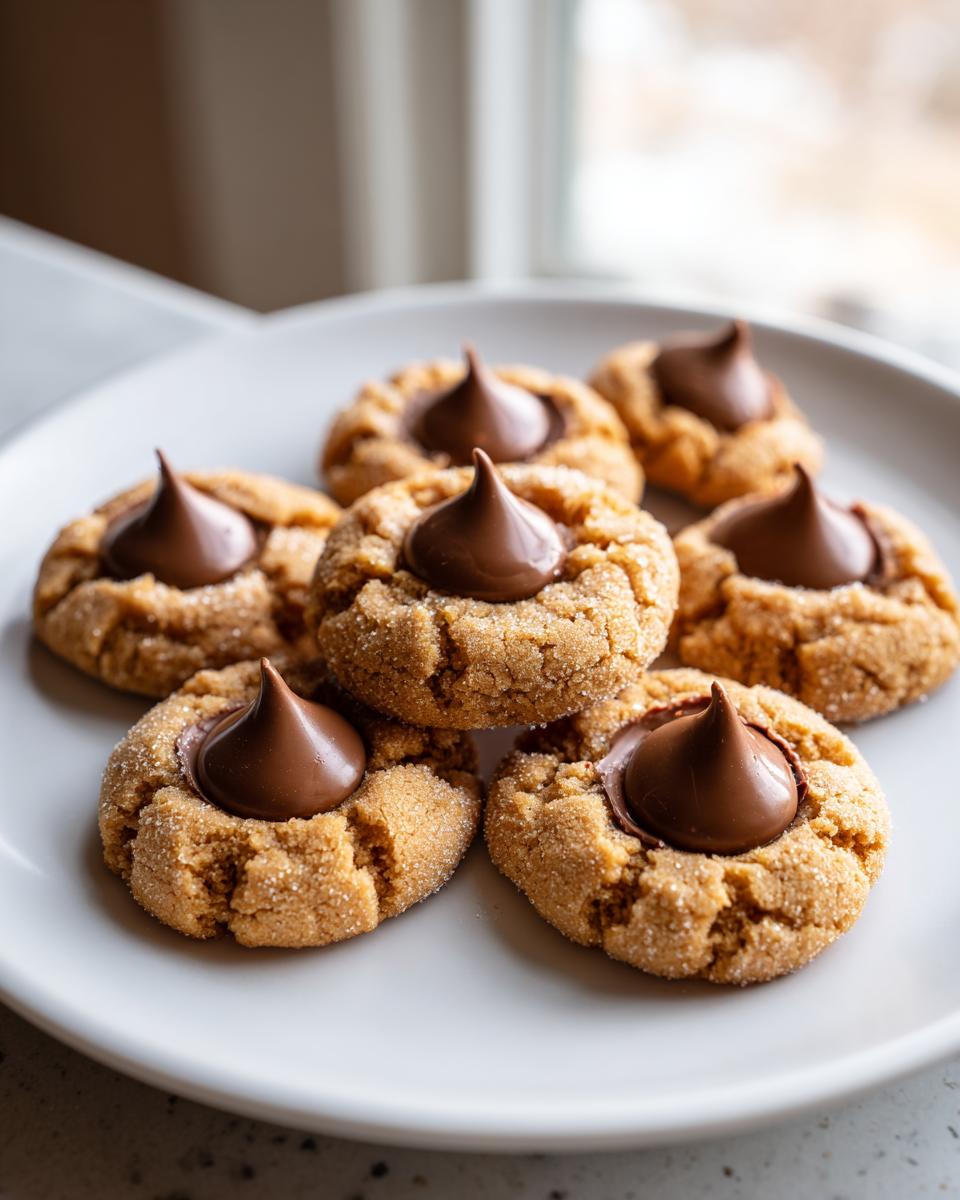
I promise a soft and chewy texture every single time. It’s the combination of creamy peanut butter and the perfect ratio of flour and leavening that creates that signature crackle on top when they bake. They look fancy, but they are honestly one of the simplest Holiday Baking Recipes you’ll ever pull together. If you’re looking for other dependable recipes, you might enjoy my easy peanut butter fudge.
Simple Ingredients for Perfect Kiss Cookies
What I love most about these chocolate kiss cookies is that there’s nothing unusual hiding in the pantry. No complicated extracts or rare spice blends needed here! Everything we use is standard, meaning you can whip up a batch of these iconic treats whenever the craving strikes or when company drops by unexpectedly. We are relying on the goodness of butter, sugar, and that creamy peanut butter base.
Gathering Your Ingredients for Homemade Chocolate Kiss Cookies
Alright, let’s talk about what you need. When you gather your supplies for these classic candy center cookies, make sure everything is accessible. It makes the mixing process so much smoother when you aren’t scrambling mid-recipe! I always lay everything out on the counter first—that’s my little teacher trick for keeping things orderly.
Because the success of these buttery kiss cookies depends on everything mixing beautifully, pay close attention to the state of your butter and peanut butter. They need to be soft enough to blend into something fluffy, not melted or greasy!
- 1 cup unsalted butter, softened just right
- 3/4 cup creamy peanut butter (don’t use the natural kind; we want the smooth stuff for this recipe!)
- 3/4 cup granulated sugar
- 3/4 cup packed brown sugar (make sure you pack it firmly into your measuring cup)
- 2 large eggs, room temperature is best, but straight from the carton is fine if you’re in a rush
- 1 teaspoon vanilla extract
- 2 1/4 cups all-purpose flour
- 1 teaspoon baking soda
- 1/2 teaspoon salt
- 1/4 cup extra granulated sugar, just for rolling outside the dough balls
- 1 bag (12 ounces) milk chocolate Hershey’s Kisses, freshly unwrapped and ready to go
See? Nothing too complicated! Having those Kisses unwrapped ahead of time is crucial, trust me. Trying to unwrap a Hershey’s Kiss while balancing a scoop of cookie dough is just asking for a mess.
Step-by-Step Instructions for Making Classic Kiss Cookies
Now that we have our ingredients ready—and those Hershey’s Kisses unwrapped!—let’s get these beauties mixed up. Remember, baking is chemistry, but it’s *fun* chemistry! We’re working our way toward that perfect, crackled cookie base that holds that beautiful dab of chocolate. Since this dough doesn’t need to chill, these truly come together quickly. We’ll start with the wet stuff and end with the dry, which is the secret to great, tender cookies. You can check out my recipe for classic butter cookies if you need practice with creaming methods!
Mixing the Dough for Your Kiss Cookies
In your big bowl, you’ll start by creaming the softened butter, that creamy peanut butter, and both sugars together until it looks light and fluffy. Don’t rush this part! Creaming incorporates air, and that air is what gives us a softer cookie. Next, beat in your two eggs, one at a time, and then stir in your vanilla. In a separate bowl, quickly whisk your flour, baking soda, and salt together so everything is evenly distributed. Now, this is important: add the dry ingredients to the wet mixture gradually. Mix on low speed or stir gently until you *just* see the flour disappear. If you overmix here, those cookies will get tough, and we want them melt-in-your-mouth soft!
Baking and Adding the Chocolate Kiss to Kiss Cookies
Get your oven set to 375 degrees F and have those baking sheets lined with parchment paper. Take about one tablespoon of that dough and roll it between your palms into a 1-inch ball—they should be uniform so they bake evenly. Give each ball a light roll in the reserved granulated sugar for that classic sparkly look, and place them about two inches apart on your sheet. Bake them for just 8 to 10 minutes until the edges look set. They shouldn’t look deep brown or crispy!
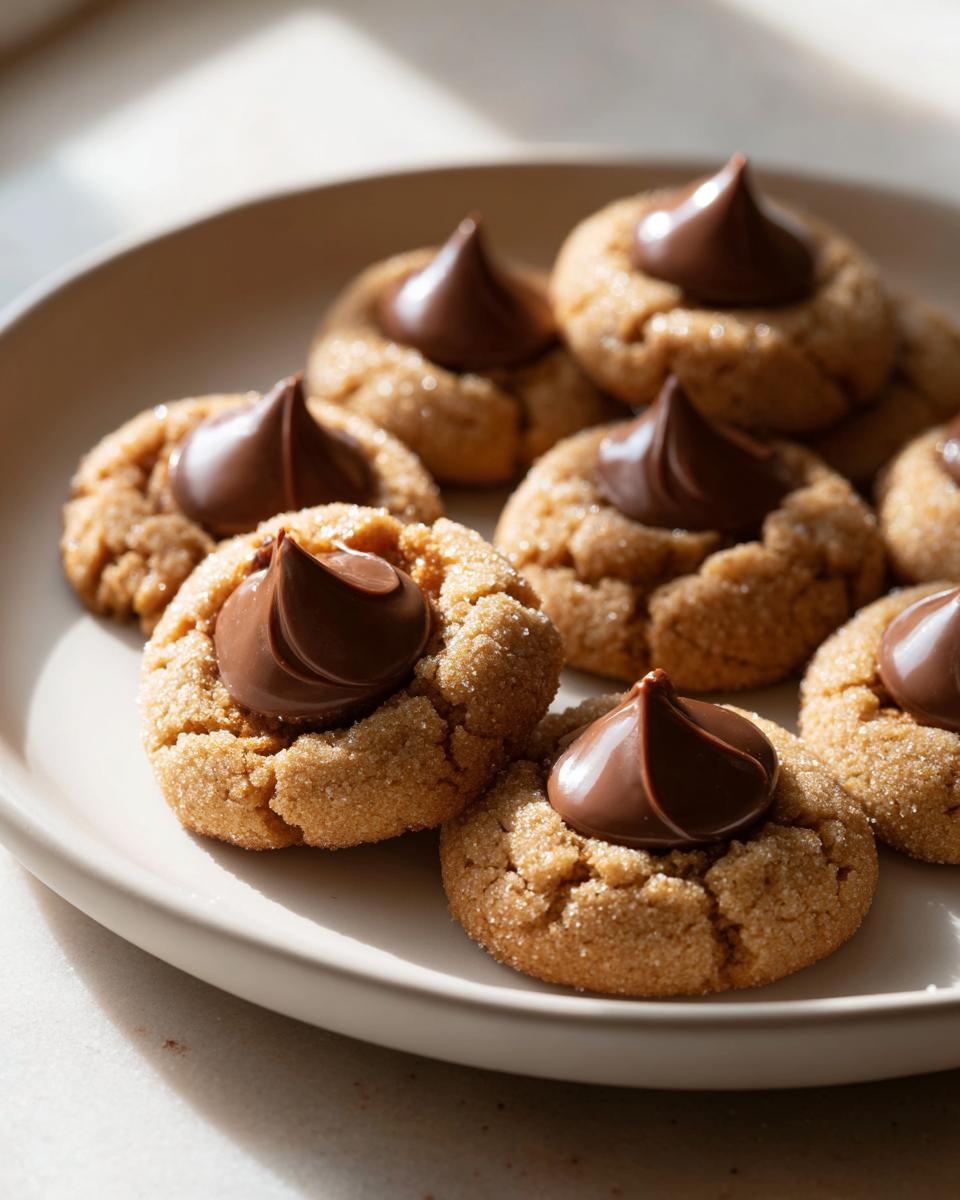
This next part is the showstopper, so be ready! As soon as those trays come out of the oven, grab your unwrapped Kisses. Gently press one right into the center of each warm cookie. You have to press it in right away because the oven heat softens the chocolate just enough so it melts slightly into the cookie without cracking the surface. Let them sit right there on the hot pan for about five minutes—this lets them set up a bit—and *then* you can move them carefully to a wire rack to finish cooling completely.
Tips for Perfect Peanut Butter Blossom Kiss Cookies Success
Okay, you managed the mixing and the pressing—fantastic! But knowing a few little tricks beforehand saves you from that heartbreaking moment when a cookie cracks or the chocolate sits on top like a hard, cold cap instead of sinking in gently. My number one rule, which I mentioned before, is the timing of the chocolate. You simply must press that Kiss in right out of the oven. If you wait even five minutes too long, the chocolate hardens too fast, and when you press, the cookie cracks right around the base of the candy. It’s a delicate balance!
Another pro tip from my days teaching is room temperature ingredients. Make sure your butter is actually softened—it should yield slightly when gently pressed. If it’s too cold, it won’t cream up right and your texture suffers. If you want more inspiration on keeping those soft centers perfect, you can check out what my friends over at Molly’s Home Guide have to say about soft peanut butter cookies!

Ingredient Substitutions for Your Kiss Cookies
While I absolutely adore the classic milk chocolate Hershey’s Kiss, this recipe is flexible! If you want to mix things up for Valentine’s Day or just because you love dark chocolate, feel free to swap in the dark chocolate Kisses. Hershey’s Hugs—that sweet and white chocolate striped delight—work beautifully too, giving you a lovely swirled look when slightly melted. Just be sure to unwrap them all first, please!
Now, about the peanut butter itself. I always recommend creamy for the smoothest dough possible, which helps those little balls roll out nicely and bake evenly. If you use crunchy peanut butter, you’ll still get a tasty cookie, but the texture of the base will be chunkier, and it might not roll quite as perfectly into that round shape.
Blossom Cookie Variations: Beyond Peanut Butter Kiss Cookies
When you master the classic Peanut Butter Blossom, you unlock a whole new world of possibilities for kiss cookies! The basic concept—a soft, slightly warm cookie base topped with that melted chocolate—works with so many other doughs. This is where you get to be really creative and use those festive flavors you love, especially if you are looking for unique Festive Cookie Ideas.
If peanut butter isn’t everyone’s favorite at your holiday gathering, don’t worry! We can easily pivot to other bases. Think about making Soft Sugar Cookies with Kisses. They are just as tender, but they offer a simpler, sweeter backdrop for whatever flavor of Kiss you choose—vanilla Kisses, or even peppermint ones if you can find them!
For those who love a deep, rich flavor, you absolutely have to try making Red Velvet Blossom Cookies. That beautiful, slightly tangy cocoa flavor with the sweet chocolate center is unbeatable. I’ve seen fantastic versions of these used for Christmas cookies and they look gorgeous on a platter. If you’re exploring red velvet, you might also want to check out my tips for lemon crinkle cookies for another colorful addition.
We also have wonderful alternatives that are more jam-focused in structure, like a classic thumbprint, but with a chocolate twist. You can adapt any basic butter cookie recipe using the technique of pressing the candy center in right away. Head over to see how I handle raspberry thumbprint cookies—the same gentle handling applies when pressing in your chocolate!
Creating Snickerdoodle Kiss Cookies
This variation is so easy, and it is one of my family’s favorite ways to twist up the basic Hershey Kiss Cookie Recipe during the fall and winter months. If you already have a favorite snickerdoodle recipe, use that as your base! The key adaptation here is in the rolling sugar. Instead of just plain sugar, you’ll want to make a generous mix of cinnamon and sugar—about two tablespoons of cinnamon to every half cup of sugar.
Roll your snickerdoodle dough balls in that cinnamon sugar mix heavily before baking, just like you normally would. When they come out of the oven, immediately press in your chocolate Kiss. The warm, spiced cookie dough combined with the melting chocolate creates a flavor that is just heavenly. It has that wonderful tanginess that you get from the cream of tartar in a classic Snickerdoodle Kiss Cookies.
Storage and Keeping Your Kiss Cookies Fresh
These kiss cookies are such an iconic holiday bake, and you want them perfect for days, right? The good news is that the peanut butter base keeps them wonderfully soft. I usually store them in a single layer in an airtight container on my counter at room temperature—no need to refrigerate these!
They stay moist and delicious for about four or five days that way. Now, about that chocolate top—if you stack them too high, or if your kitchen is very warm, the Kisses might start to get a little soft or smudge onto the cookie above it. If you end up with a towering pile, just slip a little square of wax paper between the layers. That keeps your chocolate neat and tidy until you’re ready to serve them!
Frequently Asked Questions About Hershey Kiss Cookie Recipe
When you’re tackling a classic like this, sometimes questions pop up right when you need them! Since these are such a staple for Easy Christmas Cookies and general Holiday Baking Recipes around here, I’ve gathered the ones I hear most often from my grandkids and my readers. Dealing with the chocolate part of these Homemade Chocolate Topped Cookies is usually where people need the most reassurance.
Can I make Kiss Cookies dough ahead of time?
That’s a great question, especially if you’re planning a big baking day! Since this recipe uses no-chill dough, you can absolutely make the balls ahead of time and keep them organized on a baking sheet in the refrigerator for a few hours. Just make sure you roll them in the sugar right before they go into the oven. If you try to chill them overnight once they are rolled and sugared, sometimes the sugar coating gets gummy. If you need to totally prep ahead, roll them, place them on parchment, cover them tightly, and refrigerate for up to 24 hours. Just know they might need one or two extra minutes in that hot oven!
What is the difference between these and Peanut Butter Blossoms?
Oh, that’s the simplest one! There is no difference at all, bless your heart! When people talk about these kiss cookies, they are almost always talking about the original, classic Peanut Butter Blossoms. That’s the official name for the peanut butter-based cookie topped with a milk chocolate Hershey’s Kiss. We just use the term “kiss cookies” because it’s easy shorthand for any cookie that has that famous chocolate centerpiece. If you’re making these for a bake swap, putting “Peanut Butter Blossoms” on the label will let everyone know they are getting the real, iconic deal!
If you’re looking for more reliable holiday baking ideas, make sure to browse my guide to easy Christmas cookies for more dependable recipes!
Estimated Nutritional Data for Classic Kiss Cookies
Now, I’m not a nutritionist, so please take this next bit with a grain of salt—or maybe a pinch of sugar! These values are just estimates based on the standard measurements I used in the recipe above. Since we are making such wonderfully indulgent holiday baking recipes, we know they aren’t exactly health food, but they are worth every single bite!
When I was teaching, we always made sure the kids knew that treats enjoyed in moderation make for a happy life. Here is what you can generally expect from one glorious chocolate kiss cookie, based on a yield of about 3 dozen cookies:
- Serving Size: 1 cookie
- Calories: 180
- Sugar: 14g
- Sodium: 110mg
- Fat: 10g
- Saturated Fat: 4g
- Unsaturated Fat: 6g
- Trans Fat: 0g
- Carbohydrates: 21g
- Fiber: 1g
- Protein: 4g
- Cholesterol: 20mg
I always remind folks that the exact sugar and fat content can shift a bit depending on the exact brand of peanut butter you use or whether you use milk or dark chocolate Kisses. But honestly? When you are enjoying one of these beautiful classic candy center cookies, I hope you focus more on the joy of eating it than the grams of fat! Enjoy these simple holiday treats!
Share Your Favorite Kiss Cookies Creations
Now that you have the ultimate guide to making the most reliable and delicious kiss cookies, I want to hear all about it! This is where the fun really begins for me. Did you stick to the classic peanut butter version, or did you get adventurous and turn them into Snickerdoodle Kiss Cookies?
Please, tell me how they turned out! Head down to the comments and let me know what you thought of the texture—soft and chewy, just like I promised? If you made these for a special occasion, I would love to hear the story behind them. Sharing our kitchen adventures is what Cooking by Carla is all about, and you can always learn more about my journey in the kitchen right here on the site.
Don’t forget to give this recipe a star rating if it made your holiday baking list a success! I read every comment, and your feedback helps me keep these recipes dependable for everyone who visits.
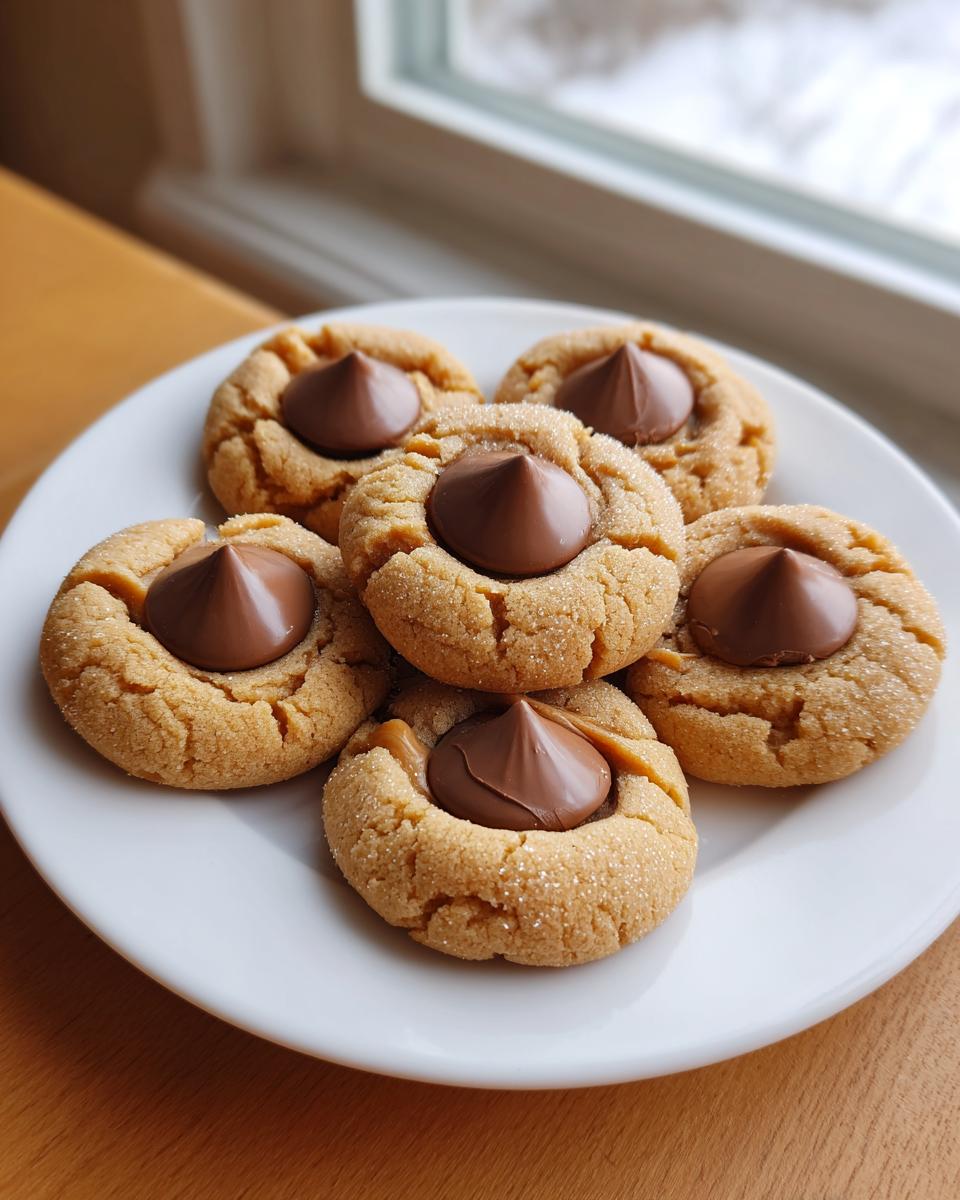
PrintClassic Peanut Butter Kiss Cookies (Peanut Butter Blossoms)

Make the classic Peanut Butter Blossoms, a soft and chewy peanut butter cookie topped with a melted milk chocolate Hershey Kiss. This recipe is simple and perfect for holiday baking.
- Prep Time: 15 min
- Cook Time: 10 min
- Total Time: 25 min
- Yield: About 3 dozen cookies 1x
- Category: Dessert
- Method: Baking
- Cuisine: American
- Diet: Vegetarian
Ingredients
- 1 cup unsalted butter, softened
- 3/4 cup creamy peanut butter
- 3/4 cup granulated sugar
- 3/4 cup packed brown sugar
- 2 large eggs
- 1 teaspoon vanilla extract
- 2 1/4 cups all-purpose flour
- 1 teaspoon baking soda
- 1/2 teaspoon salt
- 1/4 cup granulated sugar, for rolling
- 1 bag (12 ounces) milk chocolate Hershey’s Kisses, unwrapped
Instructions
- Preheat your oven to 375 degrees F. Line baking sheets with parchment paper.
- In a large bowl, cream together the softened butter, peanut butter, granulated sugar, and brown sugar until light and fluffy.
- Beat in the eggs one at a time, then mix in the vanilla extract.
- In a separate medium bowl, whisk together the flour, baking soda, and salt. Gradually add the dry ingredients to the wet ingredients, mixing until just combined.
- Place the remaining 1/4 cup of granulated sugar in a shallow dish.
- Roll the cookie dough into 1-inch balls. Roll each ball in the sugar to coat lightly.
- Place the sugared dough balls about 2 inches apart on the prepared baking sheets.
- Bake for 8 to 10 minutes, or until the edges are set. Do not overbake.
- Immediately upon removing the cookies from the oven, gently press one unwrapped Hershey’s Kiss into the center of each warm cookie. The heat will soften the chocolate.
- Let the cookies cool on the baking sheet for 5 minutes before transferring them to a wire rack to cool completely.
Notes
- For the best chocolate center, press the Kiss into the cookie right after it comes out of the oven. If the cookie cools too much, the chocolate may crack when you press it in.
- You can substitute milk chocolate Kisses with Hershey’s Hugs or dark chocolate Kisses for variations.
- This dough does not require chilling, making this a quick and easy dessert.
Nutrition
- Serving Size: 1 cookie
- Calories: 180
- Sugar: 14g
- Sodium: 110mg
- Fat: 10g
- Saturated Fat: 4g
- Unsaturated Fat: 6g
- Trans Fat: 0g
- Carbohydrates: 21g
- Fiber: 1g
- Protein: 4g
- Cholesterol: 20mg