

Oh, the joy of walking out to the garden when the tomatoes are finally bursting red! There is simply nothing better than turning that fresh bounty into something that tastes like summer sunshine all winter long. If your shelves look empty after harvest season, I’ve got the absolute winner for you today: this tested, perfectly safe, chunky, water-bath tomato salsa recipe. It is the gold standard for homemade salsa for canning, and you can trust it because it comes straight from my mom’s methods. Good food starts with the land, and preserving it beautifully is what we do best here!
- Why This Homemade Salsa for Canning is Your Go-To Recipe
- Gathering Everything for Your Homemade Salsa
- Step-by-Step Instructions for Safe Canning Salsa
- Ingredient Notes and Substitutions for Spicy Garden Salsa
- Tips for Perfect Homemade Salsa Every Time
- Storing Your Sealed Canned Salsa Recipe
- Frequently Asked Questions About Water Bath Tomato Salsa
- Estimated Nutritional Data for Homemade Salsa
- Share Your Experience Making This Chunky Salsa Preserve
Why This Homemade Salsa for Canning is Your Go-To Recipe
I know what you’re thinking when you look at a canning recipe: Is it safe? That’s my number one concern too! When you’re dealing with tomatoes from the garden, you need reliable science in your corner. This recipe is designed specifically for the water bath method, giving you peace of mind while delivering unbeatable flavor. Forget those bland, overly smooth jarred options; this is the homemade salsa you’ll want to show off.
- Tested for Safety: This recipe uses only tested ingredient ratios to ensure the perfect acidic balance for boiling jars.
- Flavorful & Fresh: It’s packed with garden goodness—onions, peppers, and fragrant spices—making it taste miles better than anything store-bought.
- Just the Right Texture: We keep it delightfully thick, avoiding that watery nonsense.
Achieving Safe Water Bath Tomato Salsa
Safety first, always! The most crucial rule for any tomato canning recipe is that you must control the acid level. That’s why I insist on bottled lemon juice. You cannot substitute fresh lime juice or skip it! Bottled lemon juice is standardized to ensure it has the exact 5% acidity we need. Always follow the processing times listed—they have been tested precisely against spoilage risks. Trust me on this; I learned early on that skipping steps in canning just isn’t worth the risk!
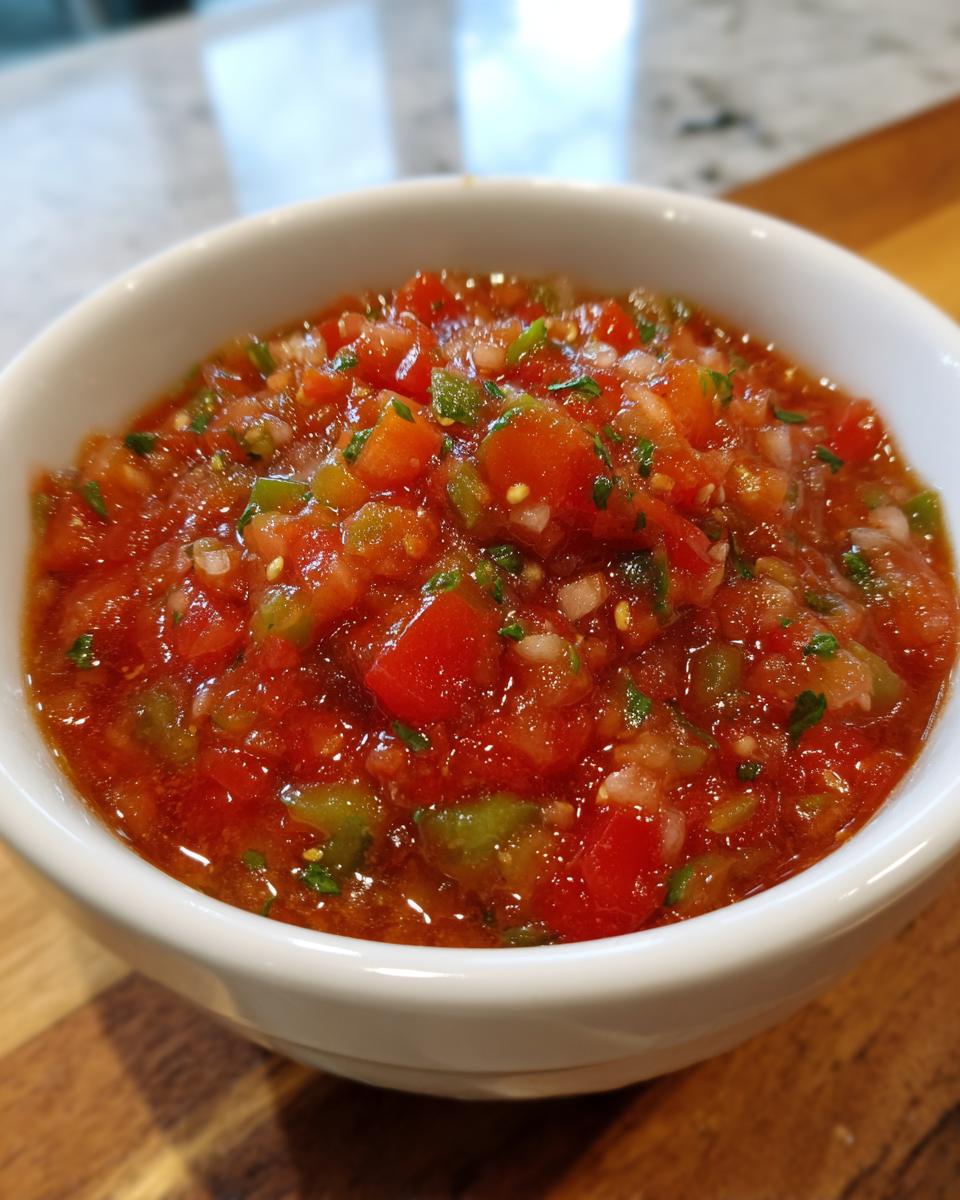
The Perfect Chunky Salsa Preserve Texture
Now about that texture! This recipe is fantastic because it naturally results in a satisfyingly chunky salsa preserve. You get real pieces of onion and pepper in every scoop. If you prefer it super smooth, you can use a food processor for a fast pulse, but I love biting into those recognizable veggie pieces. It holds its texture beautifully after processing, which is exactly what you want in a great jarred salsa.
Gathering Everything for Your Homemade Salsa
Before we light the stove burner, let’s talk timing and what you need to collect. Getting everything chopped and ready is half the battle when you are managing large stovetop batches. This recipe gives you a fantastic yield—about five pints—which is a solid haul for your pantry shelves! Prep time is about 30 minutes for all that chopping you’ll be doing, and then only about 20 minutes next to the hot pot while it simmers. You get that full batch of delicious *homemade salsa* done in under an hour, which is fantastic for a weekend preservation project.
Ingredient List for Water Bath Tomato Salsa
I’ve listed everything right here. Make sure you measure everything precisely, especially the acidic components. I’ve also dropped in a crucial tip at the bottom about salt—don’t ignore it!
- 6 cups peeled, cored, and chopped tomatoes (that’s roughly 3 pounds worth!)
- 1 cup chopped onion
- 1/2 cup chopped green bell pepper
- 1/2 cup chopped jalapeño peppers (pull those seeds out if you are serving anyone who has a low spice tolerance!)
- 1/4 cup bottled lemon juice (This MUST be the standard 5% acidity bottled kind!)
- 1 tablespoon canning salt (Only canning salt, please! Table salt has additives that can make your jars cloud up—we want clear jars full of flavor!)
- 1 teaspoon ground cumin
- 1/2 teaspoon dried oregano
- 2 cloves garlic, minced
Step-by-Step Instructions for Safe Canning Salsa
Okay, we have our list, and we have our hot jars heating up. This is where I lean heavily on my years of teaching! Canning needs clear, sequential steps, or things get messy fast. We are going to walk through this together so your batch of homemade salsa comes out perfect and shelf-stable. Remember, the jars need to be hot when they receive the hot salsa—it prevents cracking them when you transfer them in and out of the boiling water!
Canner Preparation and Initial Cooking
First up, make sure your water bath canner is heating up and that your jars, lids, and bands are ready to go according to the manufacturer’s directions. Seriously, get those jars hot now! While that’s happening, grab your biggest, non-reactive pot—we don’t want any weird reactions with the tomatoes. Toss in all your chopped veggies, the required bottled lemon juice, the canning salt, cumin, oregano, and garlic. Now we are in business!
Simmering and Flavor Development for Your Canning Salsa Recipe
Turn that heat up high and get everything boiling hard, stirring constantly at the bottom so nothing scorches! Once it hits a rolling boil, cut the heat back down to a good, steady simmer. We need this salsa to cook, uncovered, for a full 20 minutes. This simmering time does two things: it melds those beautiful garden flavors together, and it thickens the mixture just a bit. If your garden tomatoes were extra juicy this year, don’t panic; just let it simmer an extra 10 minutes until it looks right. Don’t forget your peek reference over at the About Page to see how I learned patience!
Jarring and Processing the Water Bath Tomato Salsa
When that 20 minutes is up, give it a quick taste. Make sure the acidity level tastes right to you, but don’t go crazy adding more salt—we need to keep the proportions safe! Ladle that piping hot salsa into your hot jars, but stop filling when you have exactly 1/2 inch of space left at the top—that’s called headspace. Wipe those rims clean with a damp cloth—any stickiness will stop the seal from forming. Place the lids on and screw bands down until they are just fingertip tight. Now, carefully lower the jars into the boiling canner and process them for exactly 15 minutes. If you live high up in the mountains, you *must* add extra processing time for altitude; check your safety charts! Let them cool completely, undisturbed, for a full day.
Ingredient Notes and Substitutions for Spicy Garden Salsa
When you’re making a truly great batch of spicy garden salsa, you want to customize it just a bit for your family, right? Since this is a tested canned salsa recipe, most of the ingredients are non-negotiable for safety and texture, but we absolutely have wiggle room on flavor enhancements—especially the heat level!
I always encourage people to use what they have in their garden or pantry, provided the core safety elements (tomatoes, lemon juice, salt) stay accurate to the recipe. Don’t be afraid to experiment with extra peppers or dried herbs once the basic recipe is nailed down.
Controlling Heat in Your Homemade Salsa
This is the number one question I get! How hot do I make it? The heat comes entirely from those jalapeños, and you have complete control. Remember when we chopped them? If you like a mild salsa that lets the tomato sweetness shine through, scrape out every single seed and membrane—that’s where most of the fire lives. If you want a real kick in your jarred salsa, leave about half the seeds in. For the super brave, you can even chop a few serrano peppers right along with the jalapeños; just keep the ratio tight!
Also, don’t forget, if you do decide you actually wanted a smoother consistency for your jarred salsa, this is the point *before* the 20-minute simmer where you can pulse the whole batch a few times in the food processor until it’s just right for you. Don’t turn it into baby food, though—we still want some body to this amazing homemade salsa!
Tips for Perfect Homemade Salsa Every Time
I’ve spent so many hours standing over my canning pots over the years, and I’ve learned a few little tricks that can save you headaches later on. These tips aren’t in the formal instructions, but they are the keys to getting that high-quality, clear, delicious jar of homemade salsa every single time you process a batch. Think of these as little nuggets of wisdom passed down from Mrs. Peterson’s kitchen!
Here are my must-dos:
- Never Pack the Jars Too Tight: When ladling your salsa in, fight the urge to mash it down with a spoon. Remember, we need that 1/2 inch of headspace for expansion during processing. If you pack it tight, you’ll push the liquid out as it boils, which compromises the seal, and nobody wants to waste perfectly good jars!
- Use Only Canning Salt: I mentioned this once, but it bears repeating. Regular table salt contains iodine and anti-caking agents that hurt the clarity of your preserving liquid. Canning salt is pure, and it dissolves cleanly, so stick with that for crystal clear results in your jarred salsa.
- The Heat Test is Crucial for Sealing: Before you even put the lids on, give the salsa jar a little wiggle test after you wipe the rim. If any chunky bits or soap residue are left, the seal won’t catch. A clean rim equals a happy seal. Always finger-tighten the bands—over-tightening traps too much air and can prevent a proper vacuum even if the contents are perfectly processed.
- Don’t Rush the Cooling Process: Patience after processing is key! Once the jars come out of the canner, they need 12 to 24 hours to cool down completely and form that satisfying pop seal. Don’t meddle, don’t tighten the bands, and don’t stack them. Let the vacuum do its magic undisturbed for the best results for your homemade salsa shelf life.
Storing Your Sealed Canned Salsa Recipe
The hard part is over—your jars have survived the water bath, and now you get to hear that wonderful symphony of popping lids as they cool! That ‘ping’ is the sound of summer preserved forever. Once everything has cooled completely—and I mean truly cool, which usually takes a full day—it’s time for the seal check.
To check if your canned salsa recipe is good to go for the pantry, gently press down in the very center of the jar lid. If it doesn’t move or flex under your finger pressure, you got a great seal! If you find a lid that didn’t seal, don’t worry at all. Just pop that jar into the fridge right away and eat that salsa over the next few weeks. You worked too hard on it to waste it!
For the jars that sealed perfectly, storage is super simple. Keep them somewhere cool and dark. Heat and light break down the colors and can slightly affect the texture of your beautiful homemade salsa over a long period. If you keep them shielded from the sun in a basement or pantry cupboard, they should stay tasting wonderfully fresh for at least a year. Honestly, ours never seem to last that long, but knowing they are safe and ready to use anytime is the best feeling!
Frequently Asked Questions About Water Bath Tomato Salsa
I always know what questions folks have right after they finish reading the instructions, usually centered around safety or texture! When we are working with preserves, little details matter so much. Here are a few things I hear often about making sure this safe canning salsa turns out perfectly every time.
Can I use fresh lime juice instead of bottled lemon juice in this safe canning salsa?
Oh, that’s a tempting swap, since limes smell so wonderfully bright! But the answer has to be a firm no for this water bath tomato salsa. When we are canning, we depend on precise measurements for food safety, and fresh lime juice acidity levels can vary wildly depending on the fruit. That bottled lemon juice we specified is guaranteed to have that necessary 5% acidity required to safely process your jars in the water bath. Stick to the bottle for safety!
What if my homemade salsa doesn’t thicken enough?
If you simmered it for the full 20 minutes and it still seems a bit too liquidy, don’t stress out! Remember I mentioned that if you have super watery tomatoes, you might need extra time? Pull the pot back *off* the heat for a minute, let it cook down gently for another 5 to 10 minutes, stirring often. You want it thick enough to hold its shape a little bit on a spoon before you ladle it into the jars. This adjustment is key for a good chunky salsa preserve.
What is the general yield for this canned salsa recipe?
This amount of beautiful garden produce yields about five pints total. That sounds like a lot, but when you’re enjoying homemade salsa all winter or gifting jars at Christmas, they disappear surprisingly fast! It uses up a good, solid harvest of tomatoes, which is exactly the goal when we do a big batch of our canned salsa recipe.
Estimated Nutritional Data for Homemade Salsa
Now, while my focus is always on flavor and safe preserving practices (you know, the earthy, delicious part of cooking!), I know many of you like to keep track of what’s going into your bodies throughout the year. Since this incredible homemade salsa is packed full of fresh garden veggies, it’s naturally a nutritional powerhouse!
I pulled those numbers straight from the calculated recipe components. Please remember this is an estimate, as your specific tomatoes and peppers might vary slightly. This data is based on a standard serving size of 1/2 cup.
Here’s the breakdown for every hearty scoop of your freshly canned salsa:
- Serving Size: 1/2 cup
- Calories: Just 45—wow!
- Sugar: Around 5 grams (mostly natural vegetable sugars)
- Sodium: 350 mg (This can be lowered if you reduce the canning salt slightly, but be careful not to compromise acidity!)
- Fat: Zero fat, which is perfect for a clean preserve!
- Carbohydrates: 10 grams
- Fiber: 2 grams
- Protein: 1 gram
It’s just good, clean, vibrant flavor without any heavy additions. That’s the beauty of taking wonderful garden produce and turning it into a perfect, shelf-stable safe canning salsa!
Share Your Experience Making This Chunky Salsa Preserve
Well, that’s it! You have successfully transformed those beautiful garden tomatoes into jars of vibrant, safe, and wonderfully chunky salsa that will brighten up any meal from now until spring. Doesn’t it feel good to have those shelves stocked?
I truly hope this tested, chunky salsa preserve recipe gives you the confidence to put up many more batches next year. Putting food by is such a satisfying skill, and I’m so proud you took the time to preserve your harvest the right way.
Now, I’d love to hear how it went! Did you stick with the mild jalapeño heat, or did you go full-throttle spicy? Did your processing go smoothly? Please drop a rating below so other home cooks know just how reliable this homemade salsa turned out for you. If you have any lingering questions after you’ve cleaned up, feel free to send me a message over on my contact page. Happy canning, friends!
PrintSafe Water Bath Chunky Tomato Salsa for Canning
Follow this tested recipe to make safe, chunky salsa for water bath canning using garden tomatoes.
- Prep Time: 30 min
- Cook Time: 20 min
- Total Time: 50 min
- Yield: About 5 pints 1x
- Category: Preserves
- Method: Water Bath Canning
- Cuisine: American
- Diet: Vegetarian
Ingredients
- 6 cups peeled, cored, and chopped tomatoes (about 3 lbs)
- 1 cup chopped onion
- 1/2 cup chopped green bell pepper
- 1/2 cup chopped jalapeño peppers (remove seeds for less heat)
- 1/4 cup bottled lemon juice (5% acidity)
- 1 tablespoon canning salt
- 1 teaspoon ground cumin
- 1/2 teaspoon dried oregano
- 2 cloves garlic, minced
Instructions
- Prepare your water bath canner, jars, lids, and bands according to manufacturer instructions. Keep jars hot.
- In a large, non-reactive pot, combine the chopped tomatoes, onion, bell pepper, jalapeño peppers, lemon juice, salt, cumin, oregano, and garlic.
- Bring the mixture to a boil over high heat, stirring often to prevent sticking.
- Reduce heat and simmer, uncovered, for 20 minutes, stirring occasionally. The salsa should thicken slightly.
- Taste the salsa and adjust seasonings if needed. Remember, acidity is key for safe canning.
- Ladle the hot salsa into hot canning jars, leaving 1/2 inch headspace.
- Wipe the rims clean with a damp cloth. Center the lids and screw on bands until fingertip tight.
- Process the jars in the boiling water bath canner for 15 minutes, adjusting for altitude if necessary.
- Remove jars and let them cool undisturbed on a towel-lined counter for 12 to 24 hours. Check seals. Store sealed jars in a cool, dark place.
Notes
- For a smoother salsa, pulse the ingredients briefly in a food processor before simmering. Do not over-process; you want some texture remaining.
- If you are using very watery tomatoes, simmer the mixture for an extra 10 minutes to reduce liquid before jarring.
- Use only tested canning salt; do not use iodized table salt.
Nutrition
- Serving Size: 1/2 cup
- Calories: 45
- Sugar: 5
- Sodium: 350
- Fat: 0
- Saturated Fat: 0
- Unsaturated Fat: 0
- Trans Fat: 0
- Carbohydrates: 10
- Fiber: 2
- Protein: 1
- Cholesterol: 0