
Oh, those days when the only thing that mattered was the sheer, unadulterated joy of sinking your teeth into something gloriously sweet and wonderfully chewy! I hear you when you’re looking for that feeling again—that throwback moment without the fuss of complicated baking or the worry of dieting rules. That’s why I’m excited to share my approach to the classic glazed donut recipe. I’m Carla, and after thirty years of teaching kids patience and years of perfecting recipes for my own grandchildren, I promise you that making soft airy donuts at home is easier than you think. This batch of glazed yeast donuts is perfectly billowy inside, ready to soak up a sweet, simple coating. Let’s bring that little bit of nostalgic bakery magic right into your kitchen today.
- Why You Will Love These Glazed Yeast Donuts
- Essential Ingredients for Perfect Glazed Yeast Donuts
- Step-by-Step Instructions for Homemade Yeast Donuts
- Tips for Success with Homemade Yeast Donuts
- Variations for Your Glazed Yeast Donuts
- Serving Suggestions for Bakery Style Treats at Home
- Storage and Reheating Instructions for Glazed Yeast Donuts
- Frequently Asked Questions About Making Glazed Yeast Donuts
- Nutritional Estimate for This Classic Glazed Donut Recipe
Why You Will Love These Glazed Yeast Donuts
When I look at these, I remember trips to the local shop as a kid. Now, I get that feeling right here! You deserve a break, so here is why this classic glazed donut recipe is my go-to:
- They are truly soft airy donuts—light as a cloud once fried.
- You get the pure satisfaction of making bakery style treats at home without all the fuss.
- The texture is wonderfully chewy, hitting that perfect sweet spot that makes you slow down and savor every bite.
- It’s an act of mindful indulgence; you know exactly what goes into them.
- The simple vanilla glaze sets perfectly, giving you that wonderful crackle when you bite in.
Essential Ingredients for Perfect Glazed Yeast Donuts
Getting the ingredients right is step one for homemade yeast donuts that puff up beautifully. Remember as a teacher, I always stressed that preparation is half the battle! For yeast baking, temperature matters more than anything. You absolutely must have room temperature eggs—cold eggs chill the batter and slow down the yeast. Also, that whole milk needs to be right around 110°F; too hot and you kill the yeast, too cool and it just sits there doing nothing. Trust me on this warming step; it’s the difference between a slow flop and a gorgeous rise. If you’re looking for more easy breakfast ideas, I have plenty!
For the Classic Glazed Yeast Donuts Dough
This is the base for your soft airy donuts:
- 1 cup whole milk, warmed to 110°F
- 2 1/4 teaspoons active dry yeast
- 1/4 cup granulated sugar, plus 1 teaspoon for yeast
- 2 large eggs, room temperature
- 1/4 cup unsalted butter, melted
- 1 teaspoon salt
- 3 1/2 to 4 cups all-purpose flour
- Vegetable oil, for frying
For the Sweet Donut Glaze Recipe
The finish line! For the smoothest dip possible, make sure you sift that powdered sugar. Clumps are the enemy of a perfect coat on your glazed yeast donuts.
- 2 cups powdered sugar
- 1/4 cup whole milk
- 1 teaspoon vanilla extract
Step-by-Step Instructions for Homemade Yeast Donuts
Now we get down to the fun of making these homemade yeast donuts! Take your time with the rising periods; that’s where the magic happens to create that airy texture we are aiming for. Remember, this process takes a little patience, but I promise, the smell alone is worth the wait. And while you’re planning your cooking schedule, feel free to check out some easy weeknight dinner ideas for later in the week!
Activating the Yeast and Mixing the Dough for Glazed Yeast Donuts
First things first: wake up that yeast! Mix your warm milk, that tiny teaspoon of sugar, and the yeast together in a small bowl. You have to let it sit for about 5 to 10 minutes. If you see it turn lovely and foamy on top—like the head on a good root beer—you know your yeast is happy and ready to make magic happen. Next, get your eggs, remaining sugar, and melted butter combined in a large bowl, then stir in that bubbly yeast mixture and the salt.
First Rise and Shaping Your Soft Airy Donuts
Start adding your flour gradually, maybe one cup at a time, until you have a shaggy dough you can handle. Turn it out onto a lightly floured counter and knead it for about 5 to 7 minutes. You want it smooth and elastic, but don’t overdo it! It should feel *slightly* tacky—if it sticks horribly, add just a pinch more flour. Pop it into an oiled bowl, cover it up, and let it hang out in a warm spot for about an hour and a half. It needs to double in size for that beautiful lift.
Second Proofing and Frying Your Glazed Yeast Donuts
Once risen, gently punch the air out—the smell is wonderful! Roll that dough out to about half an inch thick. Use your cutters to shape your beauties and place them on parchment-lined sheets. Cover them again and let them get puffy for another 30 to 45 minutes. This second rise is crucial for soft airy donuts! Now, heat your oil to exactly 360°F. I cannot stress this enough! If the oil dips too low, you get sad, greasy donuts. Carefully drop in just 2 or 3 at a time. Fry them for just 1 to 1.5 minutes per side until they are a gorgeous golden brown.
Making the Donut Glaze Recipe and Finishing the Glazed Yeast Donuts
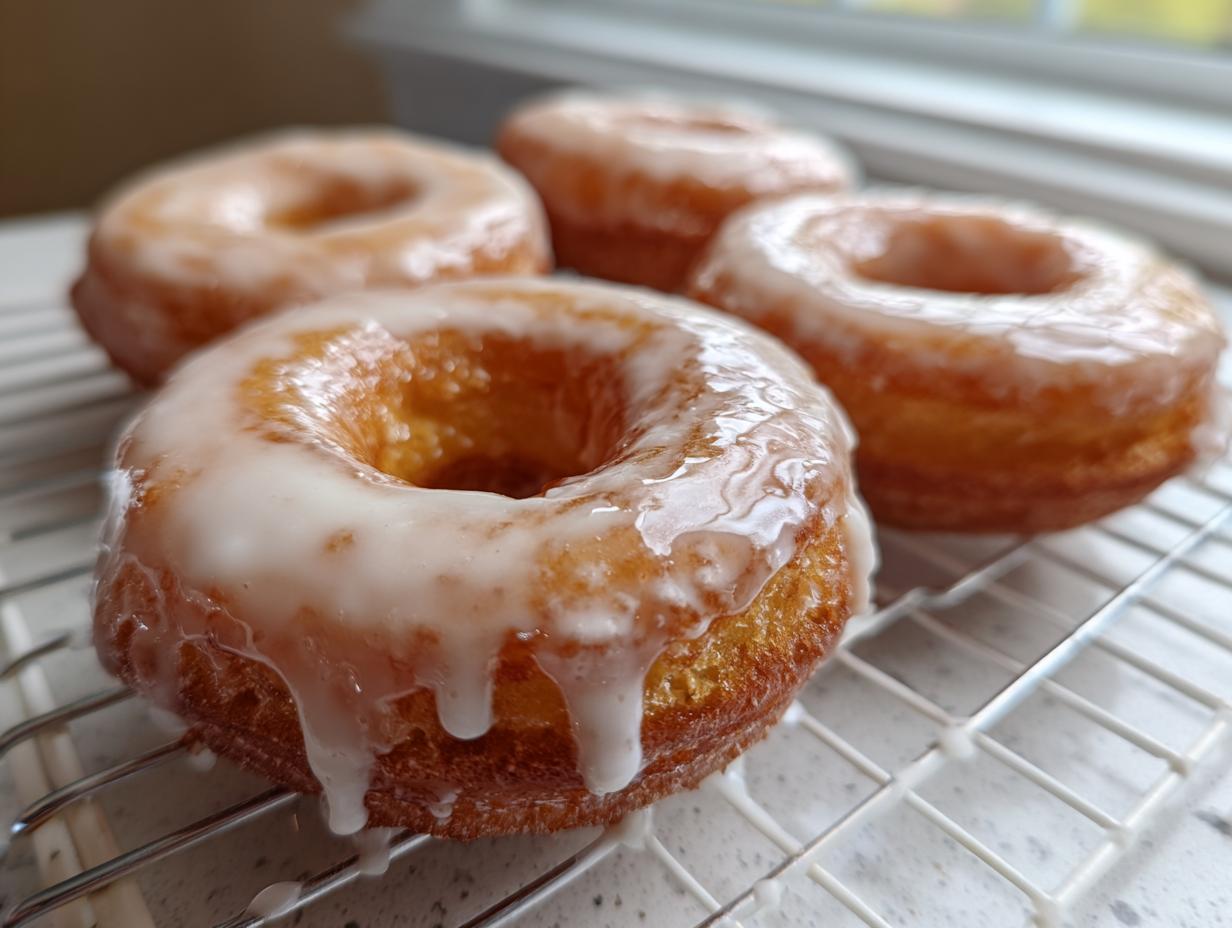
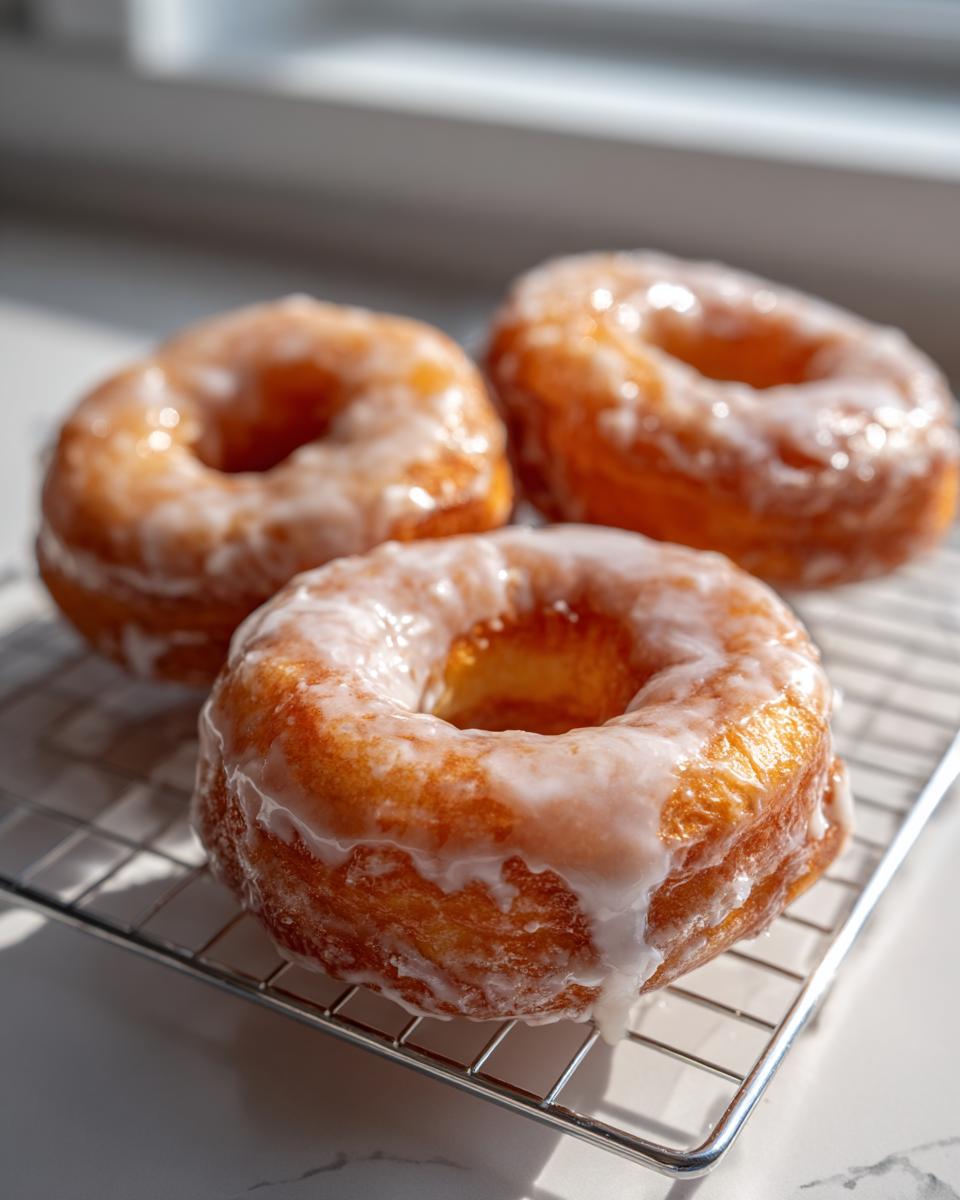
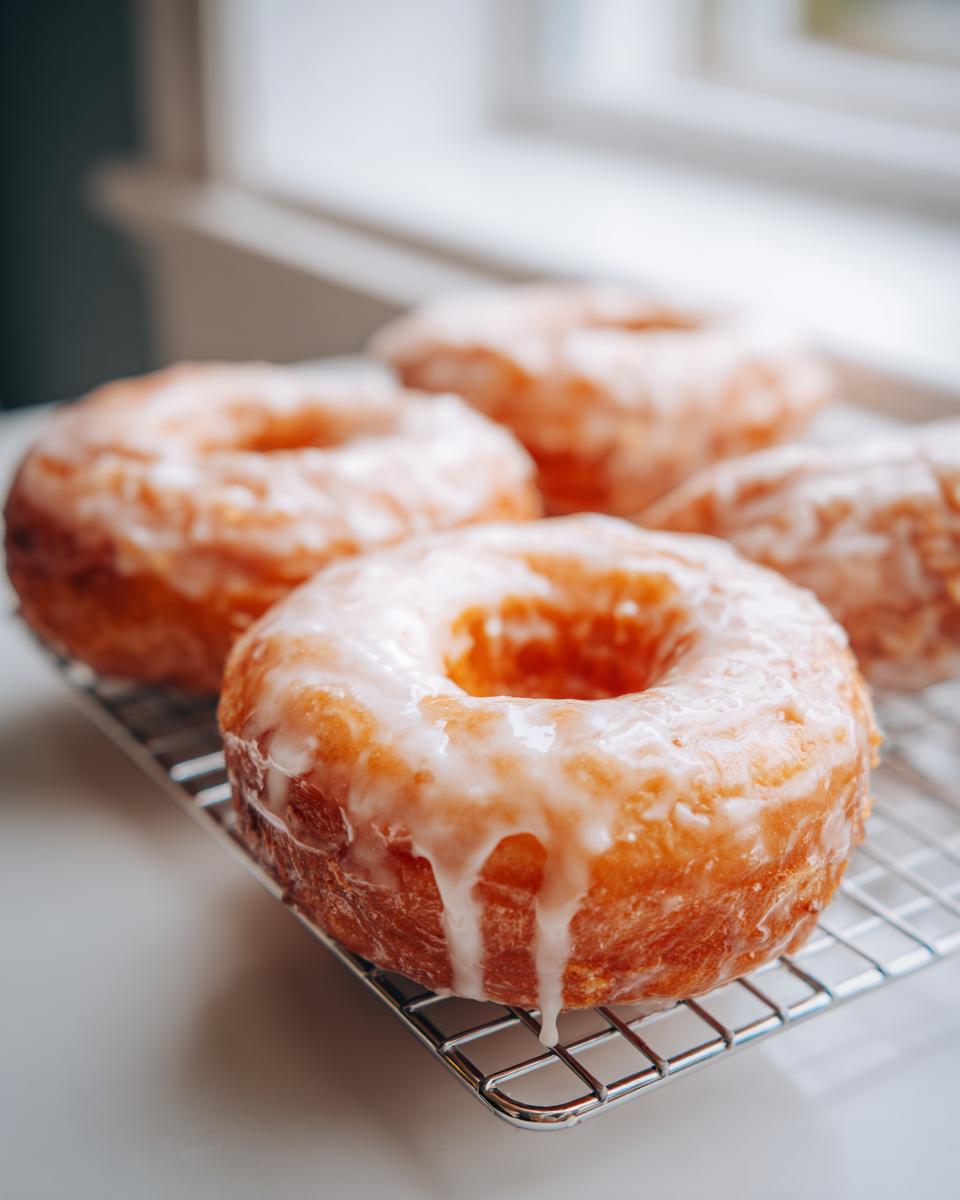
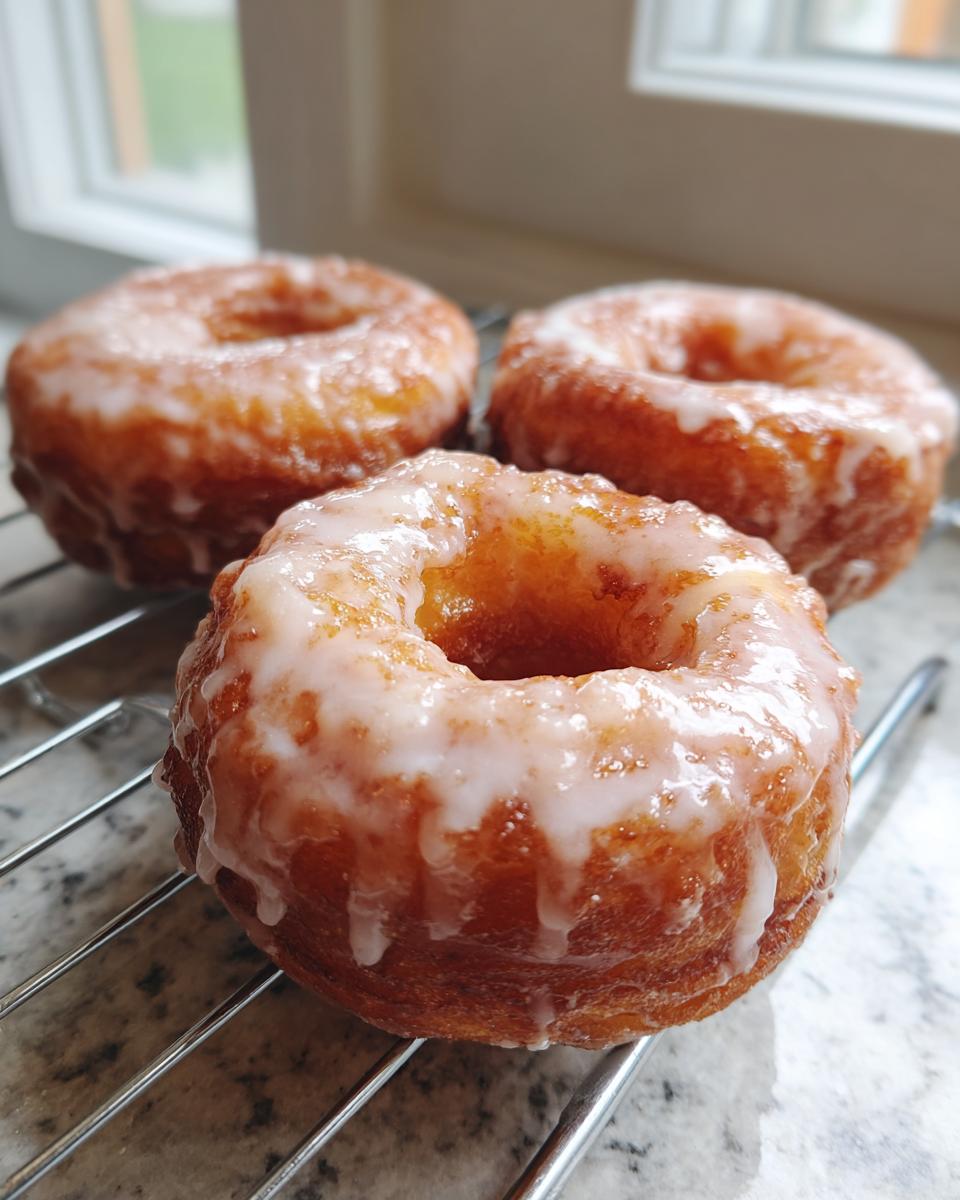
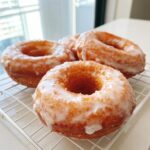
While those warm beauties drain on the paper towels, whisk up your glaze. Just mix the powdered sugar, milk, and vanilla until it’s silky smooth. Remember, dipping is best when the donuts are still warm—not piping hot, but definitely still warm. This helps that beautiful donut glaze recipe set up right. Dip both sides, let the excess drip off, and place them on the wire rack. In about ten minutes, that sugary shell will harden up perfectly.

Tips for Success with Homemade Yeast Donuts
I’ve made enough batches of homemade yeast donuts to know exactly where things can go sideways, so let me share the wisdom I gathered over many years! First, when activating your yeast, make absolute certain your milk is only warm, never hot. If you forget this, you’ll end up with nothing but warm, milky disappointment—I’ve definitely ruined a batch by rushing that part when I was teaching sixth grade and distracted!
The second big secret to getting those truly soft airy donuts is maintaining that oil temperature while frying. It needs to stay right between 350°F and 365°F. If the oil drops too low, the dough soaks it all up and you get heavy, greasy donuts instead of light ones. If it gets too high, they burn on the outside before the middle cooks. Keep that thermometer handy!
Also, don’t forget the little things: the donut holes are perfect for a little tester snack while you wait for the main batch. Don’t skip the second rise; those puffy donuts are the ones that really thank you in the fryer!
Variations for Your Glazed Yeast Donuts
While the classic vanilla coating is divine, sometimes you just need to switch things up a little bit! Once you master the base for these homemade yeast donuts, you can have fun with the toppings. Try this: instead of dipping them into the glaze, toss the warm donuts immediately into a mix of cinnamon and granulated sugar. It gives you a completely different texture!
Another real treat is melting high-quality dark chocolate. Dip half of the donut into the chocolate and let it set up on wax paper. If you’re looking for more quick snack ideas, sometimes a little drizzle over the vanilla glaze is just the ticket. It’s all about bringing joy to your table!
Serving Suggestions for Bakery Style Treats at Home
I think these bakery style treats at home taste best when you pair them with something simple that feels cozy. When I serve these glazed yeast donuts to my grandkids, they always have a tall, ice-cold glass of whole milk—the way I remember eating them! If you’re having these in the morning, a strong cup of coffee cuts through the sweetness perfectly. A small bowl of fresh berries brightens everything up nicely, too. It’s about making a special little moment out of an ordinary morning. Check out some other fun breakfast ideas while you plan your spread!
Storage and Reheating Instructions for Glazed Yeast Donuts
Yeast donuts are always best the moment they cool down from the glaze, let’s be honest! Because they are so light and airy, they do get a little stale if you leave them sitting out overnight. For short-term storage—say, the next morning—just keep your glazed yeast donuts in an airtight container at room temperature. Don’t try to refrigerate them; the cold just makes them hard!
If you absolutely must refresh them, try this trick: pop one donut on a paper towel and microwave it for just 5 to 8 seconds. It brings back that soft, pillowy inside beautifully. Just don’t forget them in there, or you’ll end up with a weirdly hard, hot mess!
Frequently Asked Questions About Making Glazed Yeast Donuts
I gathered these questions from folks who were trying out the recipe for the first time. Don’t feel silly if you’re wondering the same thing—we all start somewhere when learning the tricks for homemade yeast donuts!
Can I bake these Glazed yeast donuts instead of frying them?
You certainly *can* bake them, but I have to warn you: you won’t get that classic, pillowy texture we talked about. Baking creates a more bread-like or cake-like donut. If you want those truly soft airy donuts—the kind that feel like biting into a sweet cloud—you need the quick burst of heat from the frying oil. Keep frying for the authentic bakery feel!
How long does the dough take for the second rise?
Time is tricky; temperature is the real boss here. After you cut out your shapes, cover them loosely and leave them somewhere warm for about 30 to 45 minutes. You aren’t watching the clock so much as you are watching their appearance. They are ready when they look visibly puffy, maybe even fragile. If they don’t puff up, they won’t float nicely during frying!
What is the best way to get a smooth Donut glaze recipe finish?
The key to a flawless coating for your glazed yeast donuts is making sure that powdered sugar is sifted right into the bowl—no exceptions! Then, whisk it vigorously with the milk and vanilla until it looks totally smooth. If you see any lumps, just keep whisking until it’s glossy. Dip the donuts while they are still wonderfully warm; that heat helps the glaze melt just slightly onto the surface perfectly.
Nutritional Estimate for This Classic Glazed Donut Recipe
Now, friends, while these glazed yeast donuts are meant to be enjoyed as a cheerful indulgence—and I certainly hope you do without counting every crumb!—I know many of you like to see the general numbers for anything you bring into your home. Here is an estimate for one of our delightful servings. Please remember these figures are based on my standard measurements and methods, so your final count might vary just a bit, depending on how heavy your hand is with that delicious glaze!
- Serving Size: 1 donut
- Calories: 280
- Sugar: 25g
- Sodium: 180mg
- Fat: 14g
- Saturated Fat: 4g
- Unsaturated Fat: 10g
- Trans Fat: 0g
- Carbohydrates: 35g
- Fiber: 1g
- Protein: 4g
- Cholesterol: 45mg
If you’re interested in pairing these with some lighter fare, you might want to look over my collection of easy breakfast recipes to balance things out later in the week. Enjoy every bite!
PrintSoft, Airy Glazed Yeast Donuts: A Classic Recipe
Make bakery-style soft airy donuts at home with this straightforward recipe for classic glazed donuts. This recipe brings the simple joy of childhood treats to your kitchen.
- Prep Time: 45 min
- Cook Time: 20 min
- Total Time: 165 min
- Yield: 12 donuts 1x
- Category: Dessert
- Method: Frying
- Cuisine: American
- Diet: Vegetarian
Ingredients
- 1 cup whole milk, warmed to 110°F
- 2 1/4 teaspoons active dry yeast
- 1/4 cup granulated sugar, plus 1 teaspoon for yeast
- 2 large eggs, room temperature
- 1/4 cup unsalted butter, melted
- 1 teaspoon salt
- 3 1/2 to 4 cups all-purpose flour
- Vegetable oil, for frying
- For the Glaze: 2 cups powdered sugar
- 1/4 cup whole milk
- 1 teaspoon vanilla extract
Instructions
- In a small bowl, combine the warm milk, 1 teaspoon of sugar, and the yeast. Let this stand for 5 to 10 minutes until foamy. This shows your yeast is active.
- In a large bowl, whisk together the remaining 1/4 cup sugar, eggs, and melted butter. Add the yeast mixture and salt. Mix until combined.
- Gradually add the flour, one cup at a time, mixing until a shaggy dough forms.
- Turn the dough out onto a lightly floured surface. Knead for 5 to 7 minutes until the dough is smooth and elastic. It should be slightly tacky but not sticky.
- Place the dough in a lightly oiled bowl, turning to coat. Cover the bowl with plastic wrap or a clean kitchen towel. Let the dough rise in a warm place for 1 to 1.5 hours, or until doubled in size. This is your first rise.
- Gently punch down the risen dough. On a lightly floured surface, roll the dough out to about 1/2 inch thickness.
- Use a donut cutter or two different-sized round cutters to cut out the donuts and holes. Place the cut donuts on parchment-lined baking sheets.
- Cover the cut donuts loosely and let them rise again in a warm spot for 30 to 45 minutes. They should look puffy.
- While the donuts rise, prepare the oil. Pour vegetable oil into a deep, heavy-bottomed pot or Dutch oven to a depth of about 2 inches. Heat the oil to 360°F. Use a thermometer to check the temperature.
- Carefully place 2 or 3 donuts into the hot oil, being careful not to overcrowd the pot. Fry for about 1 to 1.5 minutes per side, until golden brown.
- Use a slotted spoon or spider to remove the donuts and place them on a wire rack lined with paper towels to drain excess oil.
- While the donuts cool slightly, make the glaze. Whisk together the powdered sugar, 1/4 cup milk, and vanilla extract until smooth. If the glaze is too thick, add milk a teaspoon at a time.
- Dip the warm donuts into the glaze, coating both sides. Place them back on the wire rack to allow the glaze to set before you serve your homemade yeast donuts.
Notes
- For the best texture, make sure your milk is warm, not hot, to activate the yeast properly.
- Maintain the oil temperature between 350°F and 365°F while frying for soft, airy donuts. If the oil is too cool, the donuts will absorb too much oil and become greasy.
- You can use the donut holes for a quick snack while you wait for the main batch to cool.
Nutrition
- Serving Size: 1 donut
- Calories: 280
- Sugar: 25g
- Sodium: 180mg
- Fat: 14g
- Saturated Fat: 4g
- Unsaturated Fat: 10g
- Trans Fat: 0g
- Carbohydrates: 35g
- Fiber: 1g
- Protein: 4g
- Cholesterol: 45mg