
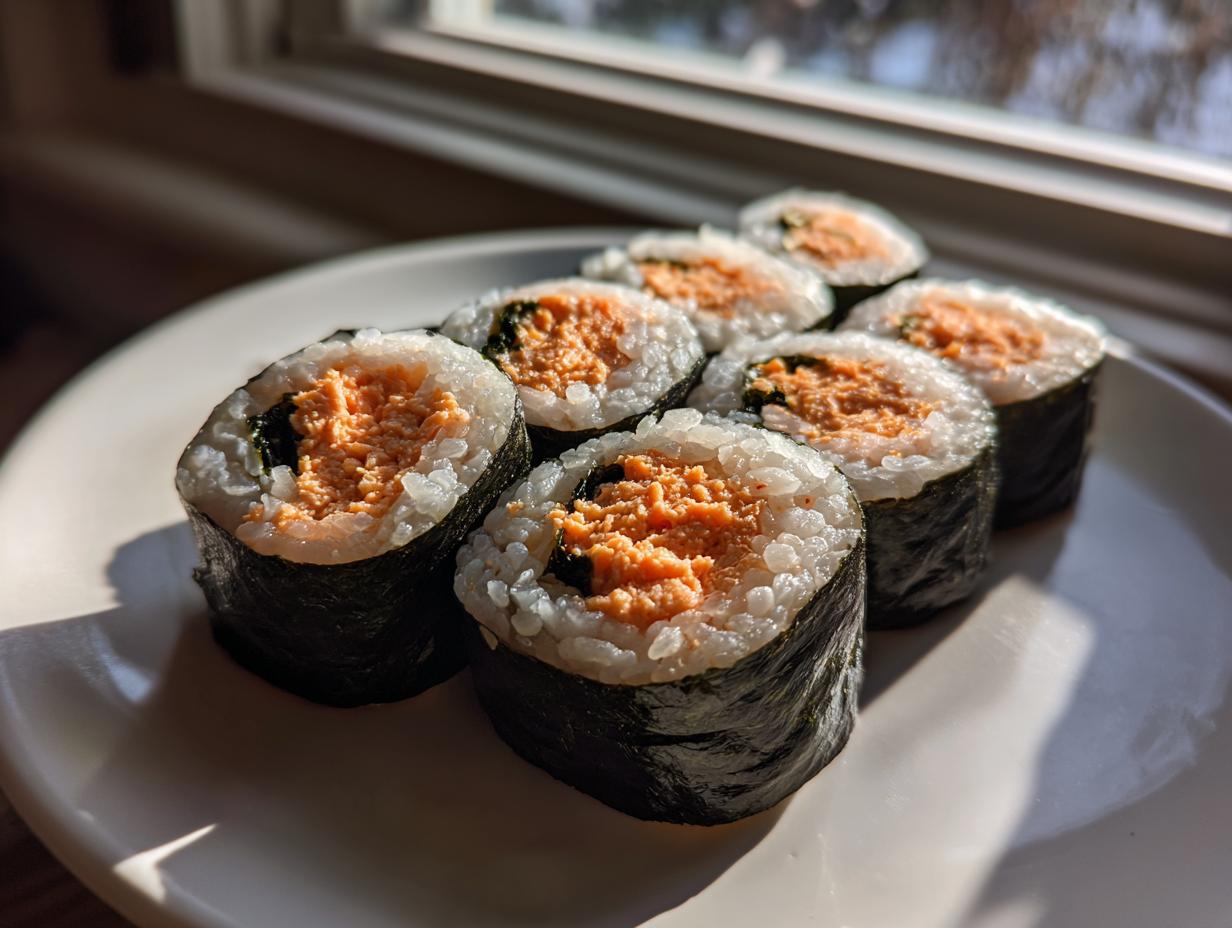
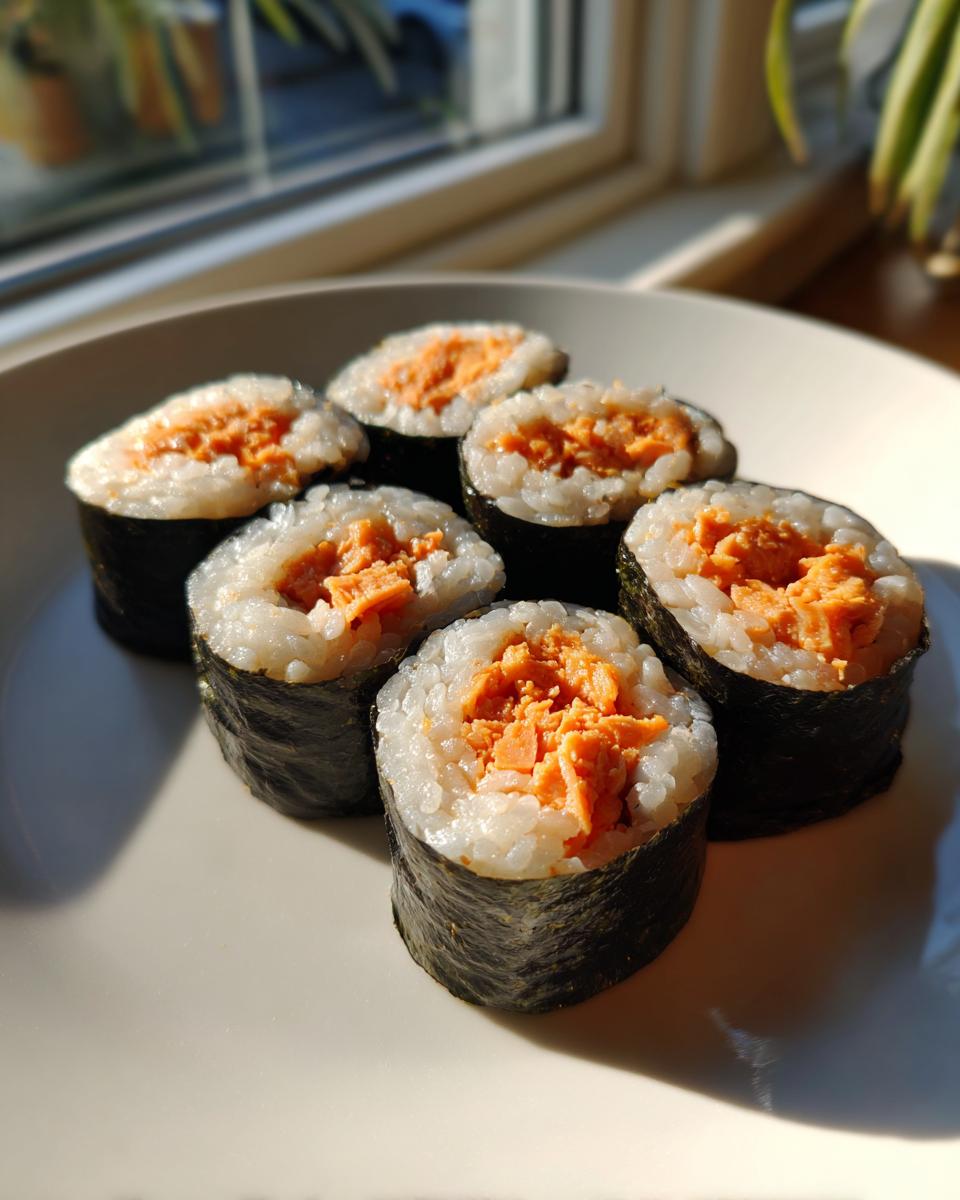
There is just something so satisfying about a perfect roll of Korean comfort food, isn’t there? When you need something that tastes homemade but only has 15 minutes of kitchen time, you turn to my Spicy Tuna Kimbap recipe. Seriously, this is a winner for school lunches, quick work meals, or packing up for a Saturday picnic. Believe me when I say that after teaching elementary school for thirty years, I know exactly how to break down a recipe so it’s crystal clear for everyone—even for rolling the seaweed the first time. Let’s get rolling! You can find more ideas in my post about quick healthy lunch ideas while you are here.
- Why This Tuna Kimbap Recipe Works for Your Kitchen
- Gathering Ingredients for Your Tuna Kimbap
- Tips for Perfect Homemade Kimbap
- Step-by-Step Instructions to Make Tuna Kimbap
- Serving Suggestions for Your Tuna Kimbap
- Storage and Reheating Instructions for Tuna Kimbap
- Frequently Asked Questions About Tuna Kimbap
- Understanding the Nutrition in Your Tuna Kimbap
- Share Your Easy Tuna Kimbap Experience
Why This Tuna Kimbap Recipe Works for Your Kitchen
You should absolutely trust this recipe for your fast-paced week. It was designed by someone who understands that reliable meals are the foundation of a happy home. Here is why this Korean classic is about to become a staple for you, too.
Quick Lunch Ideas Ready in Minutes
Honestly, who has time for elaborate meals during the week? Since we are already using cooked rice, this rolls up in about 15 minutes total. It is the definition of a useful quick lunch idea when you are running out the door.
Perfect for Bento Box Filling and Picnics
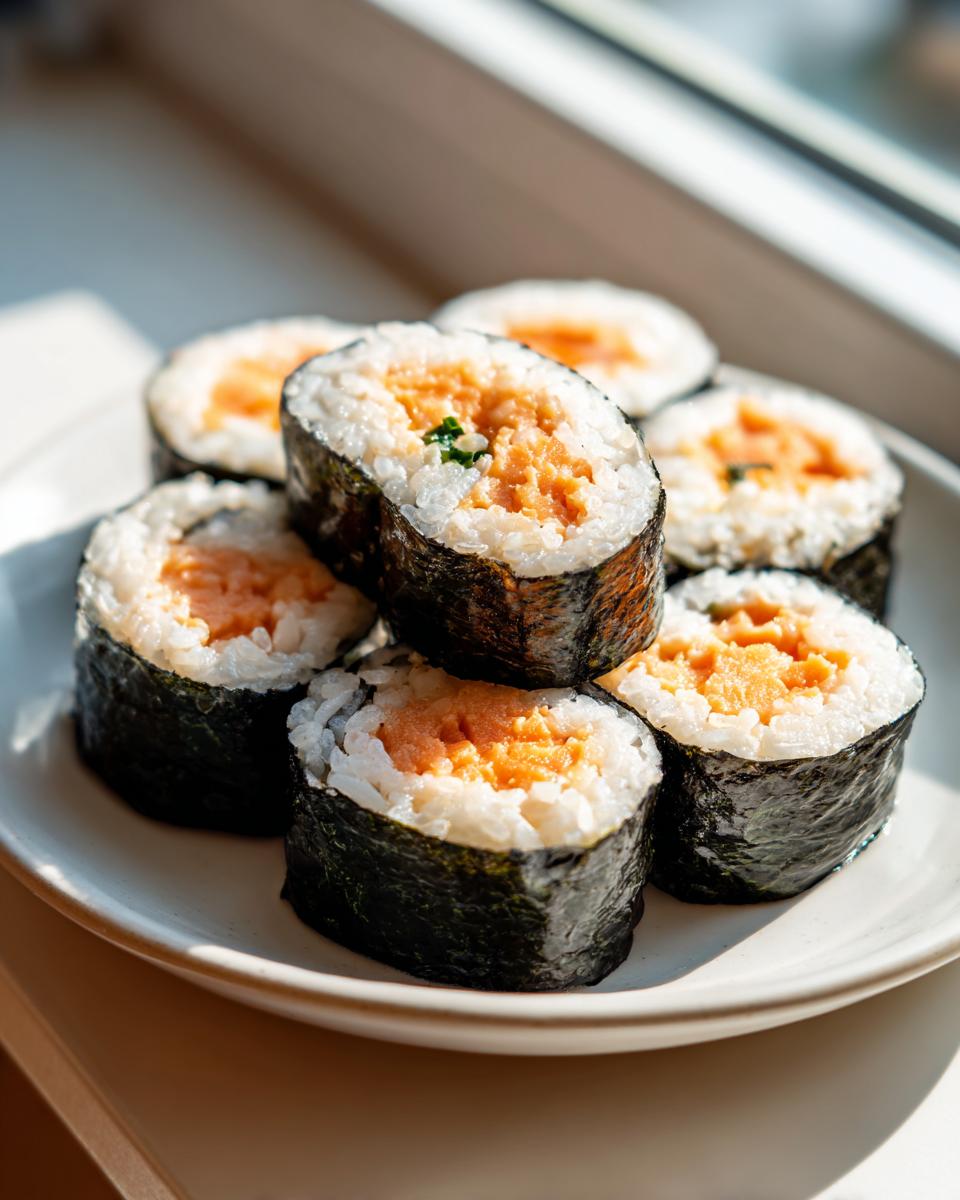
These rolls hold together beautifully because the filling isn’t watery, which is a huge bonus. They pack up perfectly and keep their shape whether they are going into a bento box filling or being shared at an outdoor picnic. They look colorful and inviting!
Beginner Kimbap Recipe Success
If you have never rolled these before, don’t you worry one bit. I walk you through the rolling part slowly, step by step. This isn’t some intimidating sushi class; this is a truly accessible beginner kimbap recipe that guarantees tasty results on your first try.
Gathering Ingredients for Your Tuna Kimbap
The wonderful thing about making tuna kimbap at home is that you probably have most of this sitting right in your pantry! We are relying on the simplicity of canned tuna and some key flavor boosters to make this filling taste incredible. If you want to skip the store-bought mayo this time, you can always check out my recipe for easy homemade mayonnaise recipe to use in your spicy mix!
For the Seasoned Rice
This is the glue that holds everything together, so don’t skip seasoning it well. You’ll need:
- 2 cups cooked short grain rice
- 1 teaspoon sesame oil (for mixing into the rice)
- 1 teaspoon sesame seeds (for mixing into the rice)
- 1 teaspoon salt (a nice pinch!)
For the Spicy Tuna Filling
This filling comes together in about two minutes flat, but it packs a punch! Remember we need that creamy texture:
- 1 (5.3 oz) can tuna packed in oil, make sure it’s well drained
- 2 tablespoons Japanese mayonnaise (Kewpie makes the best richness!)
- 1 tablespoon Sriracha sauce (adjust up or down based on your spice preference)
- 2 tablespoons green onion, very finely chopped
And of course, you need 4 sheets of roasted seaweed (nori or gim), and feel free to grab 4 perilla leaves if you want that authentic herbal note.
Tips for Perfect Homemade Kimbap
Making great homemade kimbap is all about getting those foundational elements right before you even think about rolling. These little details are what separates a soggy roll from a perfect picnic treat. If you handle your rice and your pantry items with care, the rest is just fun assembly! Pay attention here, because this is where my years in the kitchen really start paying off for you.
Rice Preparation Secrets for Tuna Kimbap
First things first: use short-grain rice, please! Long-grain just doesn’t have the right stickiness. When you mix in the sesame oil, sesame seeds, and salt, you have to be gentle. I use a wooden spoon and slice through the rice softly, turning it over just enough to coat every grain. If you mash it down with too much force, you’ll end up with sticky paste instead of individual grains held together—and nobody wants that mushy texture in their roll!
Ingredient Notes and Substitutions
Let’s talk about flair! If you can find perilla leaves, throw them in there—they add a lovely, cooling herbal note that just works with the spicy tuna. But if you can’t find them? No panic. Skip them! They are completely optional. Also, I really push for Japanese mayonnaise, like Kewpie. It has a richer flavor profile than what you might find in a standard jar, and that creaminess really smooths out the Sriracha spice layer perfectly.
Step-by-Step Instructions to Make Tuna Kimbap
Okay, the ingredients are prepped and ready to go—this is the fun part where it all comes together so fast! Remember, because this is such a quick recipe, you want everything ready on your counter before you start rolling. It moves fast once you get going. I’ve broken down the rolling process to make sure your tuna kimbap not only tastes great but looks fantastic, too.
Preparing the Rice and Spicy Tuna Filling
First, let’s get that rice seasoned exactly how we talked about. In a big bowl, gently mix your cooked short-grain rice with the 1 teaspoon of sesame oil, the 1 teaspoon of sesame seeds, and the salt until everything just looks happily combined. Don’t overwork it, or the texture goes funny.
Next, create that flavor bomb filling! In a separate bowl, take your well-drained tuna, the Kewpie mayo, the Sriracha, and that finely chopped green onion. Mix this until it’s totally uniform. I mean it—you want a consistent creamy mixture so every bite of your tuna kimbap has that perfect spicy kick. Don’t leave any pockets of unmixed mayo!
Assembling and How to Roll Kimbap
Now for the rolling technique! Lay your bamboo mat down, and place one sheet of seaweed on it, shiny side toward the mat. If you’re using those perilla leaves, lay one right on top of the seaweed now. Take about a quarter of your seasoned rice, and spread it thinly over the seaweed, but stop spreading about an inch away from the top edge—that empty strip is our seal!
Spoon a nice line of that spicy tuna filling right across the center of the rice. Now, lift the edge of the mat closest to you. Roll it up, folding it tightly over the filling, tucking that first edge underneath itself. Picture yourself rolling a cozy little sleeping bag! Continue rolling forward, gently pressing as you go to keep it compact. Once you reach that clear edge, moisten it just a tiny bit with water to seal the whole thing up.
Finally, brush the outside of your beautiful roll with that last bit of sesame oil and sprinkle on the final seeds. When you slice it—and this is key for presentation—use a sharp knife that you dampen with water between each cut. This stops the rice from sticking and tearing. You can find more detailed guidance on this technique in my guide on how to roll kimbap.
Serving Suggestions for Your Tuna Kimbap
Now that you’ve mastered rolling these spicy little beauties, the next question is, what should you serve them with? These rolls are fantastic on their own, especially if you made them for a picnic, but a classic pairing just elevates the whole experience. I always try to have one of these on hand when I’m putting together an assortment of easy appetizers and snacks for movie night.
Classic Korean Accompaniments
For the most authentic experience, keep it simple. A little dish of soy sauce mixed with a few drops of rice vinegar works perfectly as a dipping sauce, but honestly, the flavor is mostly in the roll itself. If you want that classic tangy, fermented crunch that cuts through the richness of the tuna mayo, you must serve this with some crisp kimchi. That sourness and spice combo is just what the doctor ordered when enjoying these wonderful Korean food recipes.
Pairing with Other Quick Seaweed Rolls
If you are feeling ambitious, but still want to keep the meal easy, try making a small batch of a different roll to serve alongside these. Maybe you make a veggie-only one, or perhaps you try a meat-free version. Having variety adds color to your plate! These rolls stand alone beautifully, but they also make excellent partners to any other simple Korean snack recipe you might enjoy preparing.
Storage and Reheating Instructions for Tuna Kimbap
You know, like most fresh rice dishes, this tuna kimbap is absolutely at its peak texture right after you make it. That beautiful, slightly chewy seaweed and the creamy filling just sing when they’re fresh.
If you have leftovers, try to eat them within 24 hours, tops. Wrap the uncut log tightly in plastic wrap or tuck it into an airtight container. Keep it in the refrigerator.
Now, here’s the thing: reheating kimbap is tricky. The seaweed gets tough and the rice can dry out fast in the microwave. I really recommend eating leftovers cold or at room temperature. If you absolutely must warm it up, just slice it first, microwave for only about 10 seconds total, and be ready for that texture change. Honestly, they are fantastic cold the next day!
Frequently Asked Questions About Tuna Kimbap
When you are learning something new in the kitchen, it is natural to have questions pop up. I get so many notes from folks trying this for the first time, and I want to make sure you feel totally confident! Here are a few common worries I hear about making these tasty Korean seaweed rolls.
Can I use regular mayonnaise instead of Japanese mayo for the spicy tuna rolls?
Oh, that’s a good question! Yes, you absolutely can substitute regular American mayonnaise for the Japanese (Kewpie) mayo if that’s what you have on hand. However, I have to tell you, the results just aren’t quite the same. Kewpie mayo is richer, slightly sweeter, and has an amazing tang because it uses just egg yolks. If you use regular mayo, you might find your filling needs just a tiny extra dash of something—maybe a pinch of sugar or a tiny bit more Sriracha—to match that deep creaminess we are looking for in these spicy tuna rolls.
What is the difference between kimbap and sushi?
This comes up all the time, and it’s such an easy thing to mix up because they look very similar! The biggest difference is actually in the rice seasoning. Sushi rice is seasoned with rice vinegar, which gives it that signature sharp, slightly sour bite. Our delicious chamchi gimbap, though, seasons its short-grain rice simply with sesame oil, salt, and sesame seeds. It’s savory, nutty, and richer—never vinegary. Kimbap fillings are also often cooked or cured, while traditional sushi relies heavily on raw fish.
Can I make this chamchi gimbap ahead of time?
You can certainly assemble the filling ahead of time. Mixing up that tuna mixture the night before is a huge time-saver! But, listen to me now: you must roll and eat them the same day if you want that seaweed wrapper to be perfect. Once the seasoned rice touches the seaweed and sits for too long in the cold, moisture wicks out, and that seaweed turns a little chewy or stiff. For the absolute best picnic food rolls, assemble right before you pack them up!
Understanding the Nutrition in Your Tuna Kimbap
Now, I know many families are watching what they eat, and I want to be clear about the numbers you see on recipe cards these days. When I teach cooking, whether it’s simple baking or rolling these savory Korean seaweed rolls, I stress that the numbers are only a starting point, not a guarantee!
A Note on Nutritional Estimates
Because we all use slightly different brands of tuna, different types of seaweed, and maybe you like a little more Sriracha than I do in your spicy tuna rolls, the exact nutritional facts can really dance around. The information provided in my recipe card is a carefully calculated estimate based on standard pantry items, but please know that portion sizes and ingredient specifics will change those numbers for your kitchen.
If you are counting calories or tracking specific macros, I always encourage you to plug the exact brands you use—especially your mayonnaise or oil—into your own tracking app. That way, you get the most accurate picture for what your family is enjoying. Cooking should be fun, and worrying over a few grams isn’t part of the joy I want you to have here!
Share Your Easy Tuna Kimbap Experience
When you try making this recipe for tuna kimbap, I just love hearing about it! Did the rolling go smoothly the first time? Did your kids gobble up these easy Korean seaweed rolls?
Please take a moment to leave me a rating right here on the page. If you have pictures or just want to say hello about your lunch box success, you can always reach out to me directly on my contact page. Happy cooking, everyone!
PrintEasy Spicy Tuna Kimbap (Korean Seaweed Rolls)
Make this popular Korean comfort food at home. This recipe for Spicy Tuna Kimbap is quick, perfect for lunch boxes, and uses simple pantry staples for a satisfying meal.
- Prep Time: 15 min
- Cook Time: 0 min
- Total Time: 15 min
- Yield: 4 servings 1x
- Category: Main Dish
- Method: Rolling
- Cuisine: Korean
- Diet: Vegetarian
Ingredients
- 2 cups cooked short grain rice
- 1 teaspoon sesame oil (for rice)
- 1 teaspoon sesame seeds (for rice)
- 1 teaspoon salt (for rice)
- 1 (5.3 oz) can tuna in oil, drained
- 2 tablespoons Japanese mayonnaise (Kewpie recommended)
- 1 tablespoon Sriracha sauce
- 2 tablespoons green onion, very finely chopped
- 4 sheets roasted seaweed (nori or gim)
- 4 perilla leaves, washed and dried (optional)
- 1 teaspoon sesame oil (for brushing rolls)
- 1 teaspoon sesame seeds (for sprinkling)
Instructions
- Prepare the seasoned rice: In a bowl, combine the cooked short grain rice, 1 teaspoon sesame oil, 1 teaspoon sesame seeds, and 1 teaspoon salt. Mix gently until everything is evenly distributed. Set aside.
- Make the spicy tuna filling: In a separate bowl, combine the drained tuna, Japanese mayonnaise, Sriracha sauce, and finely chopped green onion. Mix well until you have a creamy, uniform spicy tuna mixture.
- Prepare the rolling station: Lay a bamboo sushi mat on your counter. Place one sheet of seaweed, shiny side down, on the mat. If using perilla leaves, place one leaf directly on top of the seaweed sheet.
- Spread the rice: Take about one-quarter of the seasoned rice and spread it evenly over the seaweed, leaving about a 1-inch border clear at the top edge of the seaweed sheet. This clear border helps seal the roll.
- Add the filling: Place a line of the spicy tuna mixture horizontally across the center of the rice. Do not overfill the roll.
- Roll the kimbap: Lift the edge of the mat closest to you, folding it up and over the filling, tucking the edge of the seaweed tightly. Continue rolling forward, pressing gently to keep the roll compact. Moisten the clear edge of the seaweed with a little water to seal the roll completely.
- Finish the roll: Brush the outside of the finished roll lightly with the remaining 1 teaspoon of sesame oil and sprinkle with sesame seeds.
- Slice and serve: Using a sharp, damp knife, slice the roll into bite-sized pieces. Serve your homemade kimbap immediately or pack it for a quick lunch idea.
Notes
- If you do not have perilla leaves, you can skip them or substitute with a thin slice of cucumber for crunch.
- For easy slicing, wipe your knife blade with a damp cloth between each cut.
- This recipe is great for bento box filling or picnic food rolls.
Nutrition
- Serving Size: 1 roll section
- Calories: 280
- Sugar: 3
- Sodium: 450
- Fat: 10
- Saturated Fat: 2
- Unsaturated Fat: 8
- Trans Fat: 0
- Carbohydrates: 35
- Fiber: 1
- Protein: 14
- Cholesterol: 25