
Oh, friends, there is nothing quite like the moment you pull a fresh loaf of homemade bread from your oven. That sound—the crust crackling as it cools—is pure magic. If you’ve ever dreamed of having bakery-style, wonderfully crusty french bread right in your own kitchen, I want you to stop dreaming and start baking! After thirty years of teaching kids how to read, I’ve learned to explain baking with the patience they deserve. This recipe is my promise that even beginners can achieve that beautiful, artisan result without all the fuss or complicated steps the professionals use. Trust me, this classic french baking technique is surprisingly straightforward, and it is going to fill your home with the best smell imaginable.
- Why This Homemade French Bread Recipe Delivers Bakery Style Results
- Ingredients for Your Classic Crusty French Bread
- Step-by-Step Instructions for Homemade French Bread Recipe
- Adapting for Quick French Bread Recipe Under 2 Hours
- Tips for Success in Artisan Bread Baking at Home
- Storage and Reheating for Your Fresh French Bread
- Serving Suggestions to Pair with Homemade French Bread Recipe
- Frequently Asked Questions About Making French Bread
- Share Your Classic French Bread Baking Journey
Why This Homemade French Bread Recipe Delivers Bakery Style Results
You deserve bread that tastes like it came from a real artisan bread baking shop, not just something slapped together on a weeknight. This simple yeasted bread method uses trusted classic french baking principles but skips the overly long fermentation times a lot of recipes demand.
- It reliably delivers that beautiful, shop-quality crackle every time.
- It uses only four basic ingredients, keeping things perfectly straightforward.
- The result is a No-Fuss French Loaf that feels special but is truly easy.
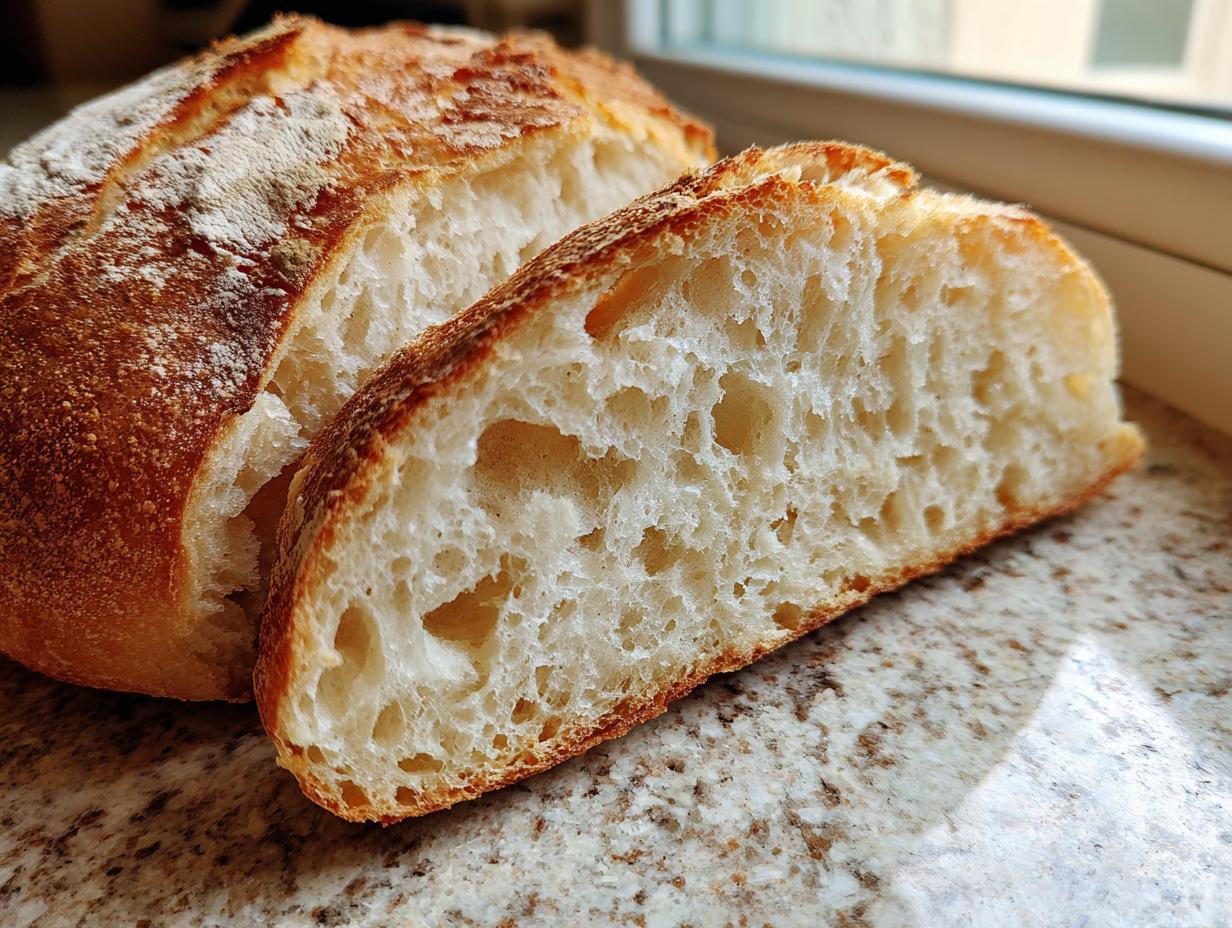
Achieving the Perfect French Bread with Crispy Crust
The secret to that deeply golden, crackly exterior everyone wants comes down to one simple thing: steam! When the hot water hits the hot pan in the oven, it creates a steamy environment for the first few minutes of baking. This keeps the surface of the dough flexible so the crust can fully expand before it sets hard.
An Easy French Bread for Beginners
Don’t you worry if you haven’t made a loaf before! As a former elementary school teacher, my goal is always clarity. I break down the steps so you feel confident moving from mixing to shaping. We’re going for genuine results without the intimidating complexity you sometimes see with artisan bread baking.
Ingredients for Your Classic Crusty French Bread
When making Homemade French Bread Recipe, quality matters, but we keep the list short. We rely on just four simple players here. You want to make sure your water is the right temperature—about 105 to 115°F—because yeast hates extremes!
- 3 cups all-purpose flour (measure lightly!)
- 1 1/2 teaspoons salt
- 1 teaspoon instant yeast (no need to stand on ceremony with this kind)
- 1 1/4 cups warm water (aim for that 105–115°F sweet spot)
Ingredient Notes and Substitutions for Great French Bread
Since we only have a few things in here, paying attention to these details really helps your final loaf. If you prefer a chewier crumb, you can certainly swap out the all-purpose flour for bread flour—it just has a touch more protein to grip onto those air bubbles we create. Also, I always just use regular table salt, but kosher salt works beautifully too; just make sure you measure it carefully so you don’t accidentally over-salt your dough!
Step-by-Step Instructions for Homemade French Bread Recipe
Alright, pull up a chair and let’s get this dough going! Baking artisan bread at home might sound fancy, but I promise this is easy. We’re going to mix it up, let it rest, shape it gently, and then bake it to perfection. Follow these steps exactly, and you’ll see why this crusty bread tutorial works so well.
Mixing and Initial Rise for French Bread Dough
First, grab a good big bowl. Whisk your flour, salt, and instant yeast right together so they get acquainted. Then, pour in that warm water. I want you working with a spoon here—mix until it just comes together into what looks like a shaggy mess. That’s right, don’t overmix it! Seriously, leave it alone. Cover that bowl up tightly and let it chill out on the counter for a full 90 minutes. You’ll know it’s ready when you see pretty bubbles all over the top and it looks noticeably puffier.
Shaping and Proofing Your French Bread Loaf
Gently turn that bubbly dough out onto a surface dusted *very* lightly with flour—we don’t want to deflate it now! Pat it into a rough rectangle. Now, think about folding a letter: fold the top third down toward the middle, then fold the bottom third over that. Flip the whole thing over and start tucking and rolling it gently until you create a tight, long log, maybe 15 inches long, like a classic baguette. Place it on your baking sheet lined with parchment, cover it loosely, and let it proof (rest) for another 30 minutes while your oven gets loud and hot.

Baking Your French Bread with Steam for a Crispy Crust Tutorial
Preheat that oven to 450°F about 20 minutes before the proofing time finishes. Make sure you put a shallow pan on the bottom rack while it heats up—this is for the steam! Right before you slide the loaf in, grab a really sharp knife and make three quick diagonal slashes across the top, just a little deeper than half an inch. That’s called scoring! Now, quickly and carefully pour about a cup of boiling hot water into that hot pan on the bottom rack, shut the door fast, and bake for 20 to 25 minutes. That initial blast of steam is what gives you that gorgeous, professional-looking, crackly crust!
Adapting for Quick French Bread Recipe Under 2 Hours
Now, I know sometimes life just won’t wait 90 minutes for a dough to wake up! If you need that wonderful homemade french bread recipe sooner, don’t worry; we can absolutely cheat a little while still keeping the flavor great.
To speed things up towards that quick french bread recipe under 2 hours goal, just shorten the resting times. You can cut that first long rise down to about 30 minutes. Then, for the final rest after shaping, only let it proof for 15 minutes instead of the full 30. It won’t get quite as deeply flavored as the long-rest version, but it’s still wonderfully soft and ready to eat much faster!
Tips for Success in Artisan Bread Baking at Home
Baking really excellent, classic french bread isn’t just about following steps; it’s about paying attention to the little things that bring it from “okay” to “why didn’t I bake this sooner?” Since I’ve spent so long teaching kids, I know that paying close attention to your environment makes all the difference in the final product. These are my little tricks that help me get that bakery-style perfection every single time.
Here are a few things I always triple-check before I even start:
- Don’t Skimp on Oven Preheating: This is probably my biggest tip for anyone trying to make great french bread. That 450°F needs to be fully established! I let my oven preheat for at least 20 minutes *after* it dings to ensure the interior is screaming hot, especially the bottom rack where our steam pan sits. A cold oven will just bake the loaf flat instead of giving it that immediate lift and crust development we want.
- Use Filtered Water if Your Tap is Harsh: While yeast is pretty tough, if you have very hard or heavily chlorinated water at home, it can sometimes slow down or even impede yeast activity. If you notice your dough isn’t rising quite as vigorously as it should, try using filtered or spring water just for the bread; it helps the yeast wake up happy.
- Practice Your Scoring Away From the Dough: When it comes time to slash the top of your loaf before it goes into the steam, don’t panic! If you’re nervous about deflating the loaf or cutting too shallow, practice your motion on a piece of scrap paper first. Hold that very sharp blade—a simple razor blade works better than most knives—at a shallow 30-degree angle to the dough’s surface. You want a quick, decisive slice, not a deep stab. This lets the bread expand beautifully, just like you see in the best homemade bread recipes.
Storage and Reheating for Your Fresh French Bread
You’ve finished baking, and now you want to keep that lovely crust crisp! Here’s what I do. As soon as the loaf is completely cool—and it has to be cool, or you’ll trap moisture—I turn it cut-side down onto a clean wooden cutting board. Don’t wrap it tightly in plastic; that guarantees a soft crust immediately. If you need to keep it for more than a day, wrap it loosely in a paper bag instead.
To bring back that fresh-from-the-oven glory, warm slices briefly! Just place the piece you want revived directly on the oven rack at 350°F for about three minutes. It wakes up that crispy crust beautifully!
Serving Suggestions to Pair with Homemade French Bread Recipe
Honestly, once you have smelled this amazing crusty bread tutorial coming out of the oven, you’ll just want to eat the whole thing standing over the cooling rack! But if you manage to wait for it to cool down a bit, this fresh french bread is the perfect supporting actor for almost any meal. It’s simple enough not to overpower the main dish, but sturdy enough to stand up to anything you put on it.
For soups, oh my word, this is where this loaf shines. Forget dry crackers! This bread is made for dipping. I love using it with my creamy roasted garlic soup—the crust soaks up all that creamy goodness without immediately dissolving into mush. It keeps its integrity, and that’s what we want in a good, hearty dinner companion.
And when you’ve got leftovers (if you even *have* leftovers!), this is the ultimate foundation for sandwiches. Whether you’re making a quick ham and cheese or something fancy with roast beef, the firm structure means your sandwich won’t get soggy halfway through lunch. Plus, slicing it thick makes for the best garlic bread you’ve ever had!
Frequently Asked Questions About Making French Bread
Baking bread always brings up questions, doesn’t it? It doesn’t matter if you are aiming for a perfect baguette or just a simple loaf for dinner; there are always little things that pop up along the way. I’ve gathered the most common things folks ask me, especially those new to artisan bread baking, to make sure your journey to a homemade french bread recipe is smooth sailing!
Can I make Soft and Fluffy French Bread instead of crusty?
Absolutely, you can! I know sometimes you want a tender crumb that melts in your mouth, especially if you are making little dinner rolls ideas homemade instead of a long baguette. The crusty texture we get comes 100% from that steaming hot water we pour into the oven just before baking. If you skip that steam step entirely, your loaf will bake up with a much softer crust. You can also check the ‘Notes’ section right below the main recipe instructions; I put in the specific instruction there about brushing the loaf with water instead of using the steam for a softer finish!
What if I don’t have instant yeast for this French bread recipe?
That’s a common kitchen situation! You can absolutely use active dry yeast instead of the instant kind in this simple yeasted bread recipe. The main difference is that active dry yeast is dormant and needs a little wake-up call first. Don’t just throw it straight into the flour mixture with the salt! You need to ‘proof’ it. Take the 1 1/4 cups of warm water from the recipe, sprinkle your active dry yeast over it, maybe add a tiny pinch of sugar if you have it, and let it sit for about 5 to 10 minutes until it gets foamy on top. Once it’s bubbly, you use that proofed mixture exactly where the recipe calls for the warm water!
How long does the dough really need to rise for authentic French bread?
Here is where my teaching background really kicks in: forget the clock sometimes and watch the dough! While the recipe calls for 90 minutes for that first essential rise, what you are truly looking for is a visual cue. The dough must double in volume, look puffy, and have lots of tiny bubbles showing through the surface. If your kitchen is chilly, it might take an extra 15 minutes, and that’s okay! Conversely, if your kitchen is baking hot, it might be ready in 70 minutes. Always trust how your dough looks and feels over a set time when you are going for that authentic, airy texture.
Share Your Classic French Bread Baking Journey
Now that you have made your very own crusty, bakery-style french bread, I truly want to hear all about it! Baking is always so much more fun when we can share the results, isn’t it? Did you score the top perfectly? Did the crust crackle the way you hoped it would with that steam trick?
Please take a moment to leave a star rating right here on the recipe page—it helps other home cooks know this simple yeasted bread recipe is dependable. And if you snapped a picture of your beautiful loaf, I would be thrilled if you shared it with me over on social media! Tagging me lets me see the delicious memories you’re making in your kitchen. Happy baking, dear ones!
PrintClassic Crusty Homemade French Bread (Baguette Style)
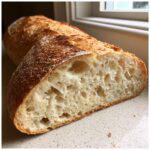
Learn to bake bakery-style French bread at home. This recipe yields a loaf with a crisp, crackly crust and a soft, airy interior, perfect for any meal.
- Prep Time: 15 min
- Cook Time: 25 min
- Total Time: 2 hours 10 min
- Yield: 1 large loaf 1x
- Category: Baking
- Method: Baking
- Cuisine: French
- Diet: Vegetarian
Ingredients
- 3 cups all-purpose flour
- 1 1/2 teaspoons salt
- 1 teaspoon instant yeast
- 1 1/4 cups warm water (about 105-115°F)
Instructions
- In a large bowl, whisk together the flour, salt, and instant yeast.
- Pour in the warm water. Mix with a spoon until a shaggy dough forms. Do not overmix.
- Cover the bowl with plastic wrap and let the dough rest at room temperature for 90 minutes. The dough will become bubbly and increase in volume.
- Gently turn the dough out onto a lightly floured surface. Shape it into a rough rectangle.
- Fold the dough into thirds, like a letter. Turn it over and gently shape it into a long, tight log, about 15 inches long, resembling a baguette.
- Place the shaped loaf on a baking sheet lined with parchment paper or a baker’s couche. Cover loosely with plastic wrap or a clean kitchen towel. Let it proof for 30 minutes.
- Preheat your oven to 450°F (232°C) about 20 minutes before the end of the proofing time. Place a shallow pan on the bottom rack to create steam later.
- Just before baking, use a very sharp knife or razor blade to make three diagonal slashes across the top of the loaf, about 1/2 inch deep.
- Carefully pour 1 cup of hot water into the preheated shallow pan on the bottom rack to create steam. Quickly close the oven door.
- Bake for 20 to 25 minutes, or until the crust is deep golden brown and sounds hollow when tapped.
- Remove the bread from the oven and let it cool completely on a wire rack before slicing.
Notes
- For a softer crust, omit the steam step and brush the loaf lightly with water halfway through baking.
- If you want a quicker option, reduce the initial rise time to 30 minutes and the final proof to 15 minutes for a total time closer to 2 hours.
- This recipe makes one large loaf, but you can divide the dough to make two smaller baguettes or several dinner rolls.
Nutrition
- Serving Size: 1 slice
- Calories: 150
- Sugar: 1
- Sodium: 250
- Fat: 0.5
- Saturated Fat: 0
- Unsaturated Fat: 0.5
- Trans Fat: 0
- Carbohydrates: 31
- Fiber: 1
- Protein: 5
- Cholesterol: 0