
Oh, I know that sinking feeling. You’re trying to make a lovely side dish, and instead, you end up with gummy, overcooked mush, or worse—you reach for that familiar blue box, knowing it’s just not the same as the real thing. Well, stop right there! We’re retiring the instant packets for good. Today, we are making my Ultimate Fluffy Homemade Rice Pilaf. It truly is a healthy and wonderfully easy weeknight version of the classic. After thirty years of teaching, I learned that giving clear, simple steps is the key to success, and that applies perfectly to making this rice pilaf. Trust me, once you see how easily fluffy grains come together, you’ll be serving this savory dish often. If you need more easy meals to go along with it, check out my tips for simple weeknight dinners!
- Why This Homemade Rice Pilaf Recipe is the Best Side for Chicken and More
- Ingredients for Your Ultimate Fluffy Rice Pilaf Recipe
- How To Make Perfect Rice Pilaf: Step-by-Step Instructions
- Tips for Success Making Your Savory Rice Dish
- Versatile Grain Side: Serving Suggestions for Your Rice Pilaf
- Storage and Reheating Instructions for Leftover Rice Pilaf
- Frequently Asked Questions About Making Rice Pilaf
- Nutritional Estimates for This Easy Side Dish
- Share Your Homemade Rice Pilaf Experience
Why This Homemade Rice Pilaf Recipe is the Best Side for Chicken and More
I hear from so many of you who just want a reliable, fluffy rice pilaf recipe that tastes like you spent all afternoon fussing over it. Well, this is it! You are never going back to those dry little cubes from the grocery store once you try this homemade version. It’s truly the best side for chicken, pork, or even just a big salad. I put together a whole post on my favorite things to serve with it, too; you can find my best side for chicken suggestions right here!
- You get that wonderful, light texture every single time.
- It uses simple pantry staples, making it a budget-friendly choice.
- It completely eliminates the need for any pre-packaged seasoning mix, focusing on a true Fluffy Rice Pilaf Recipe.
Achieving Restaurant Style Rice Pilaf Texture
The secret to that beautiful, separate-grain result—that Restaurant Style Rice Pilaf texture—is all in the start! We toast the orzo and the rice grains in fat first. Coating those starches before they hit the liquid means they won’t stick together later on. It’s a simple technique that makes a world of difference for our Rice Pilaf Without Box Mix.
Quick Rice Side Ready for Weeknight Rice Side
Don’t let the toasting steps scare you off; we keep this moving right along. Even with the resting time, you are looking at a total time under 45 minutes. That’s fast enough for any busy evening! This quick rice side is perfect when you need a satisfying weeknight rice side dish without resorting to something boring.

Ingredients for Your Ultimate Fluffy Rice Pilaf Recipe
Gathering your ingredients is the first step to turning out that perfect, fluffy result. When I write out a recipe, I want you to feel totally prepared, like you’re standing right here beside me in my kitchen. We are using just a handful of very standard items here. Remember, the preparation details are just as important as the ingredients themselves!
Here is what you will need laid out nicely on the counter:
- 1 tablespoon unsalted butter
- 1 tablespoon olive oil
- 1/2 cup orzo pasta
- 1 small yellow onion, finely chopped
- 2 cloves garlic, minced
- 1 1/2 cups long-grain white rice (like Basmati or Jasmine), rinsed
- 2 1/4 cups low-sodium chicken broth (or vegetable broth for vegetarian)
- 1/2 teaspoon salt
- 1/4 teaspoon black pepper
- 2 tablespoons fresh parsley, chopped (for garnish)
Ingredient Notes and Substitutions for Rice Pilaf
A little thought to the ingredients really boosts the flavor here. I always recommend using Basmati or Jasmine rice; they hold up so beautifully when cooked this way. If you need a vegetarian option, simply swap out the low-sodium chicken broth for a good quality vegetable broth. And listen to Carla on this one: please rinse your rice! It takes just a minute under cool water until the runoff looks clearer. This simple step washes away excess surface starch, which is crucial for avoiding that sticky mess and locking in that fluffy texture we are aiming for.
How To Make Perfect Rice Pilaf: Step-by-Step Instructions
Now that everything is prepped, let’s get cooking! Making truly perfect rice pilaf is all about a few decisive steps where you pay close attention. I know teaching taught me patience, and mastering this dish requires just a little bit of that same careful focus, especially when you’re working with different grains like the rice and orzo we use here. We’re aiming for that lovely, separated texture. For more on the exact method we are using today, I wrote a deep dive on how to make perfect rice pilaf.
Toasting the Orzo and Aromatics for Flavorful Rice Sides
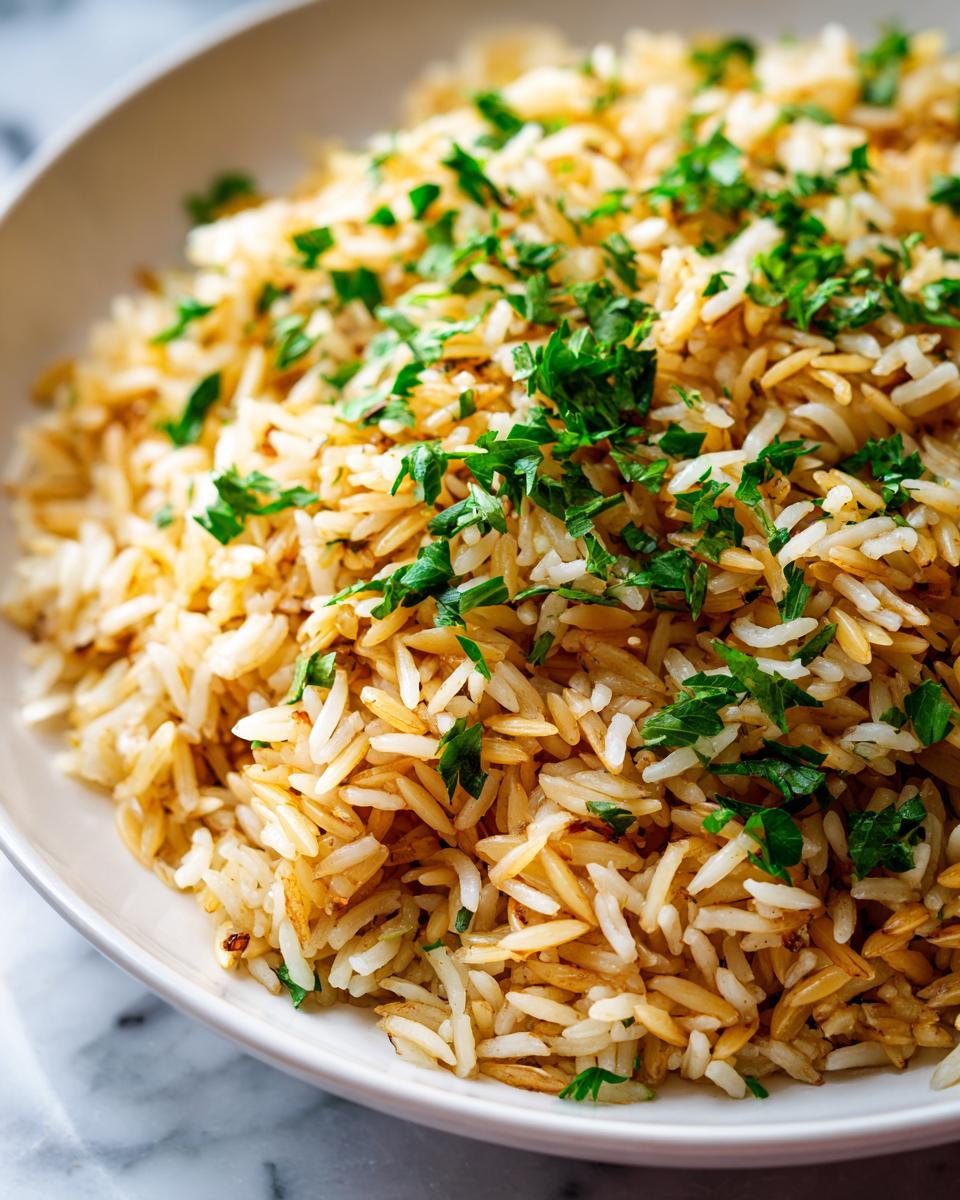
First, you need a good medium heat on your stovetop. Melt that butter right in with the olive oil in your saucepan—the one with the tight lid, remember? Toss in the orzo pasta. This is where the magic starts for those great Flavorful Rice Sides! You have to stir constantly here. You want that orzo to get just light golden brown, not burnt brown. That only takes 3 or 4 minutes, so don’t walk away! Once it’s toasted, toss in your chopped onion and cook it down until it’s soft, then add the garlic for just sixty seconds until you can really smell it. Remember, a little burnt garlic tastes bitter, so keep an eye on it! Trust me, making this yourself is so much better than the stuff in a box, just like you’ll see over at Home Cooks Classroom.
The Crucial Simmer and Rest for Fluffy Rice Pilaf Recipe
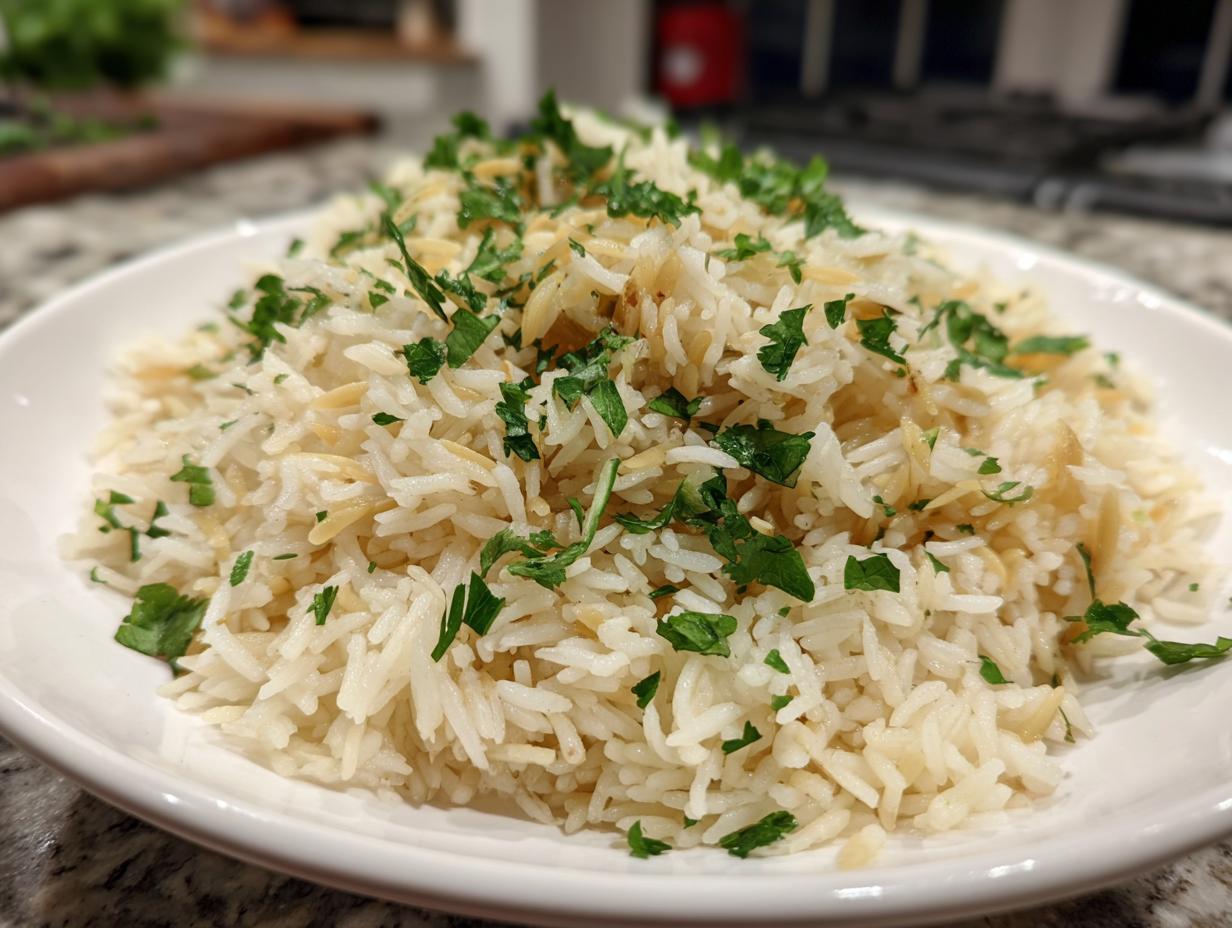
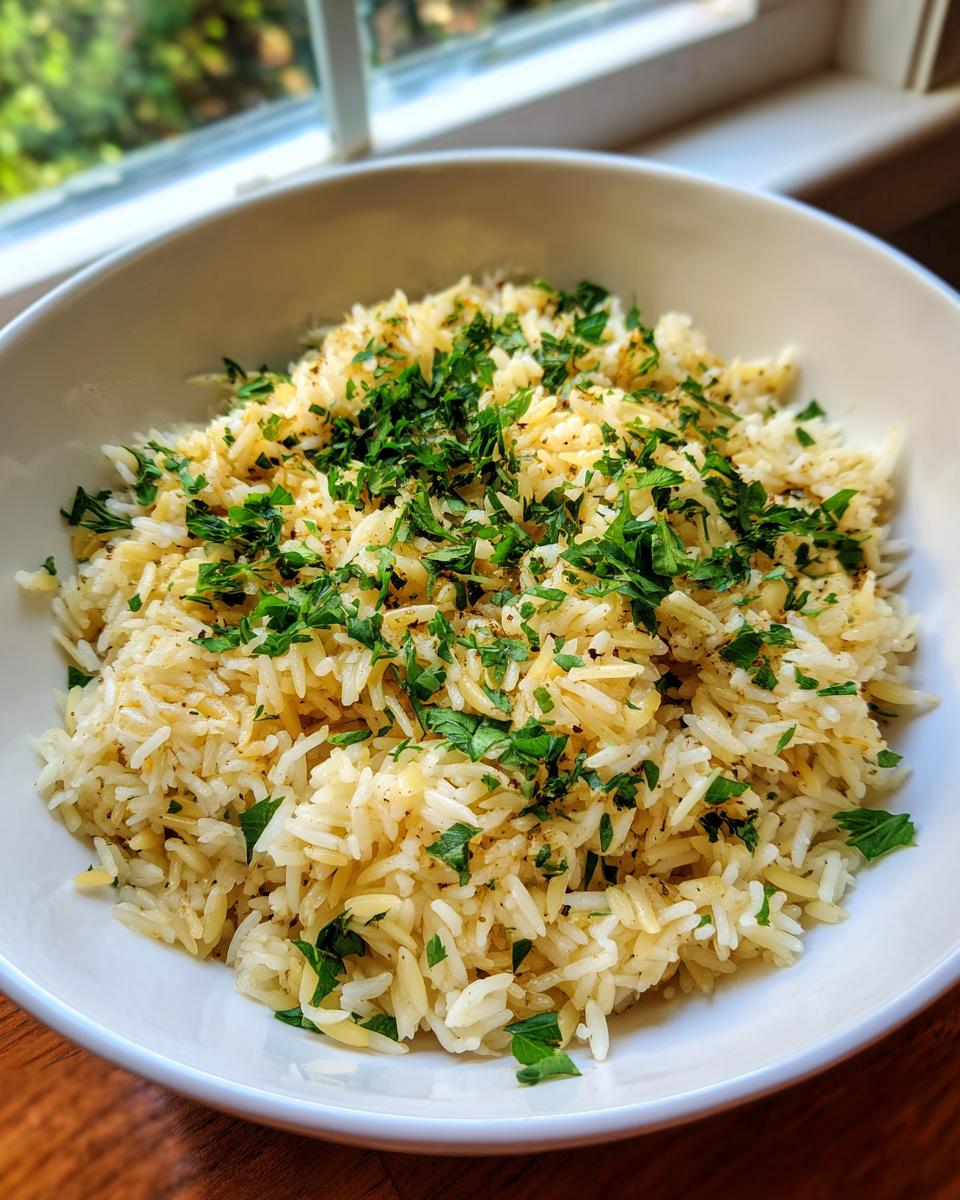
Next, add your rinsed rice and stir it around for a couple of minutes to coat it in the fat—this is another secret for that Fluffy Rice Pilaf Recipe! Pour in your broth, salt, and pepper, and bring it to a rolling boil. As soon as it bubbles up, drop that heat to the absolute lowest setting you have, slap that lid on tight, and walk away for *exactly* 18 minutes. No peeking! Once the time is up, turn the heat off completely but leave that container on the burner, lid still on, for a full 10-minute rest. This step is the secret to How To Make Perfect Rice Pilaf—it lets the steam redistribute perfectly. Finally, take the lid off and fluff it gently with a fork. You’ll see those beautiful, light grains!
Tips for Success Making Your Savory Rice Dish
Even with the best instructions, sometimes those little details make the difference between a good side dish and one that gets rave reviews. Since I’ve made this savory rice dish countless times—for potlucks, for the grandkids, you name it—I want to share the little things I learned along the way to guarantee success. These aren’t in the main instructions, but they are the things I tell my own kitchen helpers!
- Don’t Skip the Rinse: I mentioned rinsing the rice for fluffiness, but I have to emphasize it again. If you forget this step, that excess starch turns into glue. Think of it as washing off the dust before you start baking; it’s essential for a lovely Savory Rice Dish.
- Heat Management is Everything: When you reduce the heat after boiling, make sure it’s truly the *lowest* setting on your stove. If you think it looks too low, it’s probably just right. Too much heat during the simmer means you’ll end up with crunchy bottoms before the top is cooked through.
- Invest in a Good Lid: A tight-fitting lid seals in that critical steam. If your lid whistles or lets steam escape constantly, the water cooks off too fast. You can actually put a clean folded kitchen cloth between the pot and the lid to help trap moisture if your lid isn’t fitting perfectly.
- Explore Flavor Boosts: If you’re looking for something beyond butter and oil, I recently worked up a recipe for French Onion Butter Rice that has a similar base but kicks the savory flavor up a notch! Also, if you want to test out adding some other nice textured grains, check out the great tips from Dishicious on using orzo.
Versatile Grain Side: Serving Suggestions for Your Rice Pilaf
This is one of the reasons I love this rice pilaf so much—it’s the ultimate helper on your dinner plate! Because it’s buttery and savory but not overly spiced, it blends in beautifully with almost anything you are making for dinner. As I mentioned before, this versatile grain side is fantastic alongside juicy roasted chicken or maybe some tender pork chops. It’s sturdy enough to handle strong flavors but light enough that it doesn’t weigh down the whole meal.
I often serve it when I make a big batch of oven-baked chicken, but if your chicken dish is a little drier, like a baked breast, you absolutely need a beautiful gravy to go with it! I have the most reliable recipe for easy chicken gravy recipe without drippings that really brings this meal together. Serve the pilaf right next to your protein, spoon that savory gravy over both, and you’ve got a comforting meal that tastes like you worked for hours.
Don’t forget, you can also use this as a base if you’re building a grain bowl later in the week. It warms up beautifully the next day!
Storage and Reheating Instructions for Leftover Rice Pilaf
One of the greatest things about making a big batch of this rice pilaf is that the leftovers are almost as good as the first batch—if you store and reheat them correctly! This is where so many people go wrong; they either let the rice dry out in the fridge or rush the reheating and end up with something chewy. Trust me, nobody wants dry, sad rice for lunch the next day!
First things first: cooling and storage. Let the rice cool down on a clean plate for about 15 minutes after you fluff it. Don’t cover a hot pot of rice, or you’ll steam it and make it soggy! Once it’s just warm, transfer it into a shallow, airtight container. This saves space and helps it cool more evenly. I find this fluffy rice pilaf stays wonderful in the refrigerator for about three to four days.
Now, for reheating—this is the trick, and it’s so simple. You need a little extra moisture back in there to wake those grains up. Scoop out what you want into a microwave-safe bowl. Then, here’s the key: drizzle just a tablespoon or two of broth (chicken or vegetable works fine) or even just water over the rice, cover it loosely with a damp paper towel, and microwave it in short bursts. Heat it until it’s steaming hot all the way through. That damp towel keeps the steam in, and the added liquid keeps that incredible, light texture intact. Enjoy those leftovers!
Frequently Asked Questions About Making Rice Pilaf
It’s so fun to see all the questions you all have about making sure your rice pilaf turns out just right! It’s very common to have a few wobbles when switching from box mixes to homemade, so let’s clear those up right here. If you’re looking for something quick to whip up while that rice is resting, you might want to check out my list of easy appetizers and snacks!
Can I make this rice pilaf recipe in an Instant Pot?
That’s a great question, since the Instant Pot is a real time-saver! While this recipe, as written, is designed specifically for the stovetop—because the gentle evaporation during the simmer and rest is key to the texture—you absolutely can adapt the *toasting* principles for pressure cooking. You’d toast your orzo and rice in the pot first, then add your liquid and seal it. Just remember that pressure cooker times are different, so you’ll need to consult your machine’s manual for the pressure time and always let the pressure release naturally for that fluffiness!
What is the purpose of the orzo in this rice pilaf?
This is one of my favorite elements, and it’s what gives you that incredible texture that tastes so rich! That little bit of pasta, the orzo, toasts up beautifully alongside the rice. It adds another layer of textural interest so you aren’t just eating plain long-grain rice. Plus, the tiny bits of toasted pasta help give the final dish that gorgeous, slightly golden, Buttery Rice Pilaf appearance that you often see in restaurants. It just makes it feel special!

I want a very simple pilaf; can I leave out the orzo?
You certainly could! If you’re looking for a very Simple Pilaf, the dish will still be delicious using just the rice and broth foundation. However, I strongly encourage you to try it with the orzo at least once. It really does elevate the texture from simply ‘cooked rice’ to ‘pilaf’—it adds body and that lovely chewiness that balances out the soft rice grains perfectly!
Why does my rice pilaf come out sticky sometimes?
Sticky rice usually comes down to two main culprits when making rice pilaf: either you didn’t rinse the rice grains thoroughly enough (which leaves behind the starch), or you lifted the lid while it was simmering or resting. That lid needs to stay locked down tight! When you let the steam escape too early, the cooking process stops unevenly, and you get gummy sections mixed with hard sections. Always adhere strictly to those 18 minutes covered and the 10 minutes resting still covered!
Nutritional Estimates for This Easy Side Dish
Now, I never want cooking to be about worrying over every single calorie, especially when we are making something as comforting as this Easy Side Dish Recipes favorite! But since many of you ask about the nutrition of what you’re serving your families, I’ve pulled the estimates right from my prep notes. This information is helpful if you’re meal planning or tracking macros.
Keep in mind these are just ballpark figures! If you use a lot more butter than I called for, or maybe use a saltier broth, those numbers will shift slightly. These calculations are based on using low-sodium chicken broth and sticking closely to the recipe measurements provided.
- Serving Size: 3/4 cup cooked
- Calories: 280
- Fat: 6g (Saturated Fat: 2g)
- Carbohydrates: 48g (Fiber: 1g)
- Protein: 7g
- Sodium: 450mg (This is why I stressed low-sodium broth!)
- Sugar: 1g
- Cholesterol: 5mg
It’s a wonderful, balanced side dish that brings great flavor without loading up on unnecessary sugars or fats. If you are looking for more ways to keep your midday meals light and nutritious alongside your rice pilaf dinners, don’t forget to browse my collection of quick healthy lunch ideas!
Share Your Homemade Rice Pilaf Experience
That’s it! You’ve done it! You’ve swapped out the boxed stuff for real, flavorful, fluffy homemade rice pilaf, and I couldn’t be prouder of you. Cooking is always the most rewarding when we share what we’ve created, isn’t it? I so hope this recipe becomes a staple on your table, just like it is at mine.
Now, I truly want to hear from you! Did you manage to keep from lifting that lid during the rest time? Did you use chicken broth or veggie broth? Please hop down into the comments below and let me know how it turned out for you. I always love seeing what you pair this versatile grain side with—maybe you served it with that lovely chicken I mentioned, or perhaps you tried it with pork! If you have a picture of your beautiful, fluffy creation, feel free to send it my way via the contact page; I try my best to look at every single one!
If this recipe truly helped you conquer your fear of soft rice and you plan to make it again (and I know you will!), please give it a star rating right above the comments. Your feedback helps others in our community feel confident enough to give this wonderful, easy side dish a try!
PrintThe Best Fluffy Homemade Rice Pilaf (Easy Weeknight Side Dish)
Make perfect, fluffy rice pilaf without a box mix. This easy recipe uses toasted orzo and savory broth for a flavorful side dish ready for your weeknight table.
- Prep Time: 10 min
- Cook Time: 25 min
- Total Time: 45 min
- Yield: 4 servings 1x
- Category: Side Dish
- Method: Stovetop
- Cuisine: American
- Diet: Vegetarian
Ingredients
- 1 tablespoon unsalted butter
- 1 tablespoon olive oil
- 1/2 cup orzo pasta
- 1 small yellow onion, finely chopped
- 2 cloves garlic, minced
- 1 1/2 cups long-grain white rice (like Basmati or Jasmine), rinsed
- 2 1/4 cups low-sodium chicken broth (or vegetable broth for vegetarian)
- 1/2 teaspoon salt
- 1/4 teaspoon black pepper
- 2 tablespoons fresh parsley, chopped (for garnish)
Instructions
- Heat the butter and olive oil in a medium saucepan with a tight-fitting lid over medium heat.
- Add the orzo pasta and toast, stirring constantly, until it turns light golden brown, about 3 to 4 minutes. Watch closely to prevent burning.
- Add the chopped onion to the saucepan and cook until softened, about 5 minutes.
- Add the minced garlic and cook for 1 minute until fragrant.
- Add the rinsed rice to the pan. Stir and cook for 2 minutes, coating the grains in the fat. This step helps keep the rice fluffy.
- Pour in the chicken broth, salt, and pepper. Bring the mixture to a boil.
- Once boiling, immediately reduce the heat to the lowest setting, cover the saucepan tightly with the lid, and simmer for exactly 18 minutes. Do not lift the lid during this time.
- Remove the saucepan from the heat. Leave the lid on and let the rice rest undisturbed for 10 minutes. This resting period is key for perfect texture.
- Remove the lid and gently fluff the rice pilaf with a fork. Stir in the fresh parsley before serving.
Notes
- Rinsing the rice removes excess starch, which prevents the final dish from becoming sticky.
- For a richer flavor, use high-quality chicken broth instead of water.
- This versatile grain side pairs well with chicken, pork, or seafood.
Nutrition
- Serving Size: 3/4 cup cooked
- Calories: 280
- Sugar: 1
- Sodium: 450
- Fat: 6
- Saturated Fat: 2
- Unsaturated Fat: 4
- Trans Fat: 0
- Carbohydrates: 48
- Fiber: 1
- Protein: 7
- Cholesterol: 5