
When Mother’s Day rolls around, my family secretly hopes I skip the fussy layer cake and bring out Carla’s Classic Mile-High Coconut Cream Pie instead. Honestly, nothing screams comforting nostalgia quite like this dessert. Here at Carla’s Kitchen, we believe in recipes that work every single time, built on the kind of reliability I relied on when teaching third grade for thirty years!
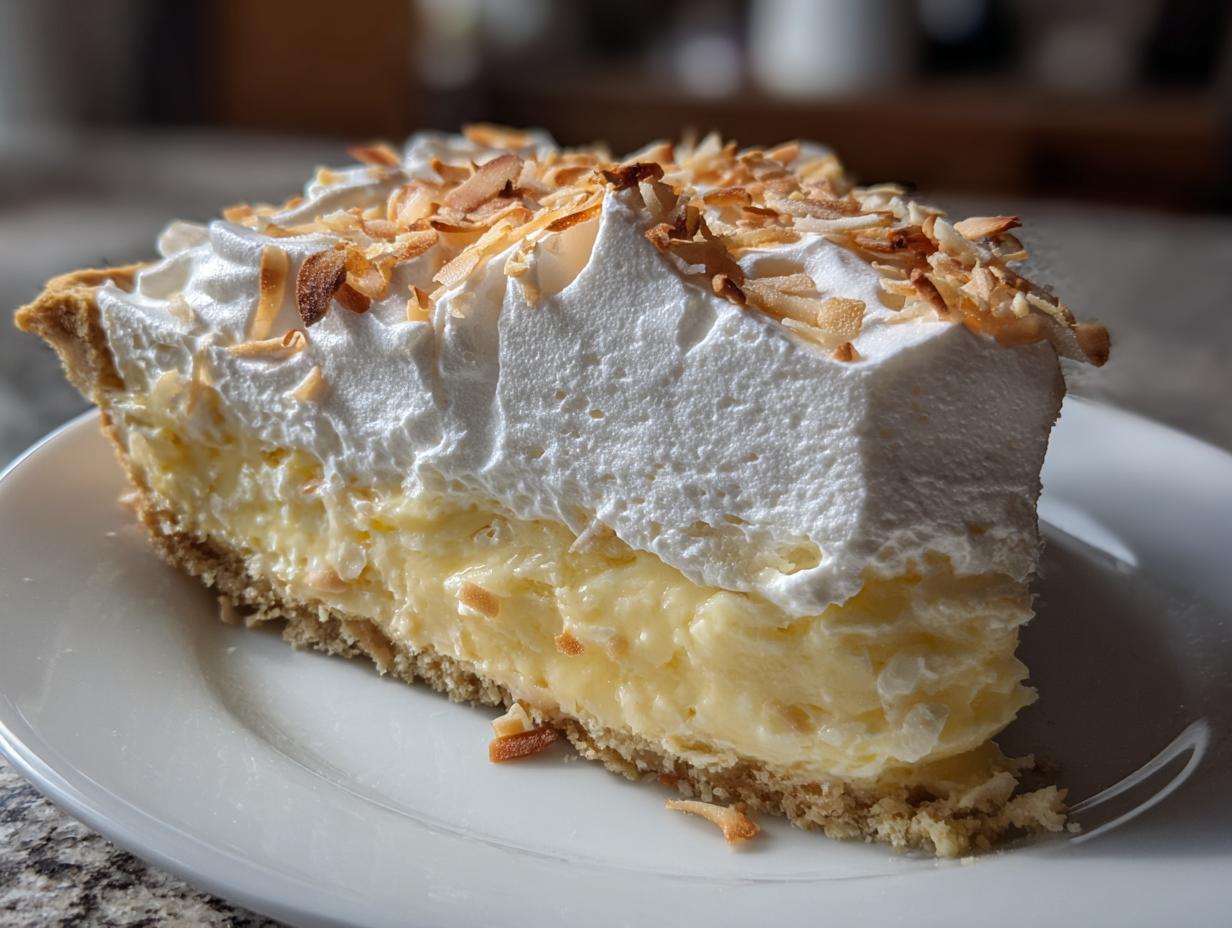
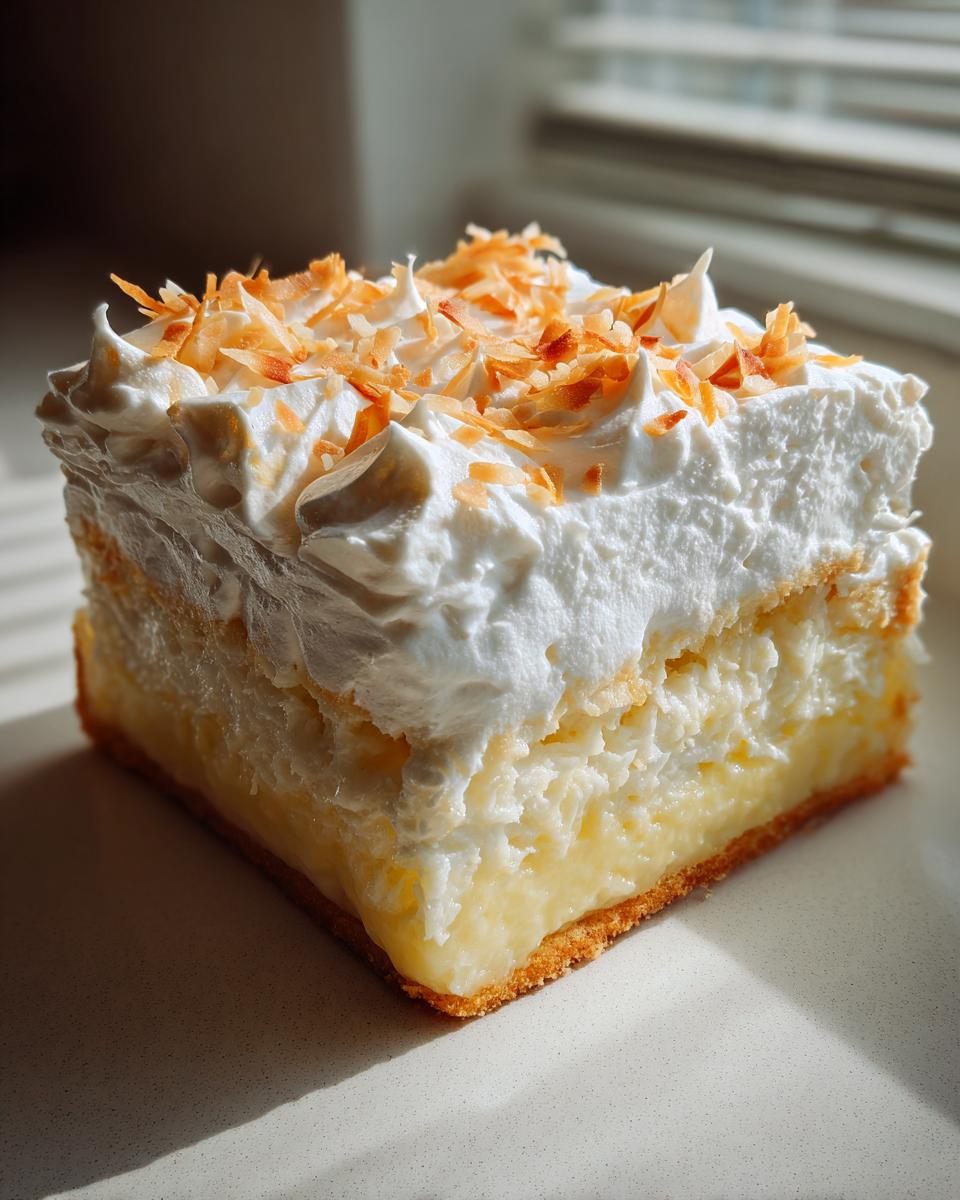
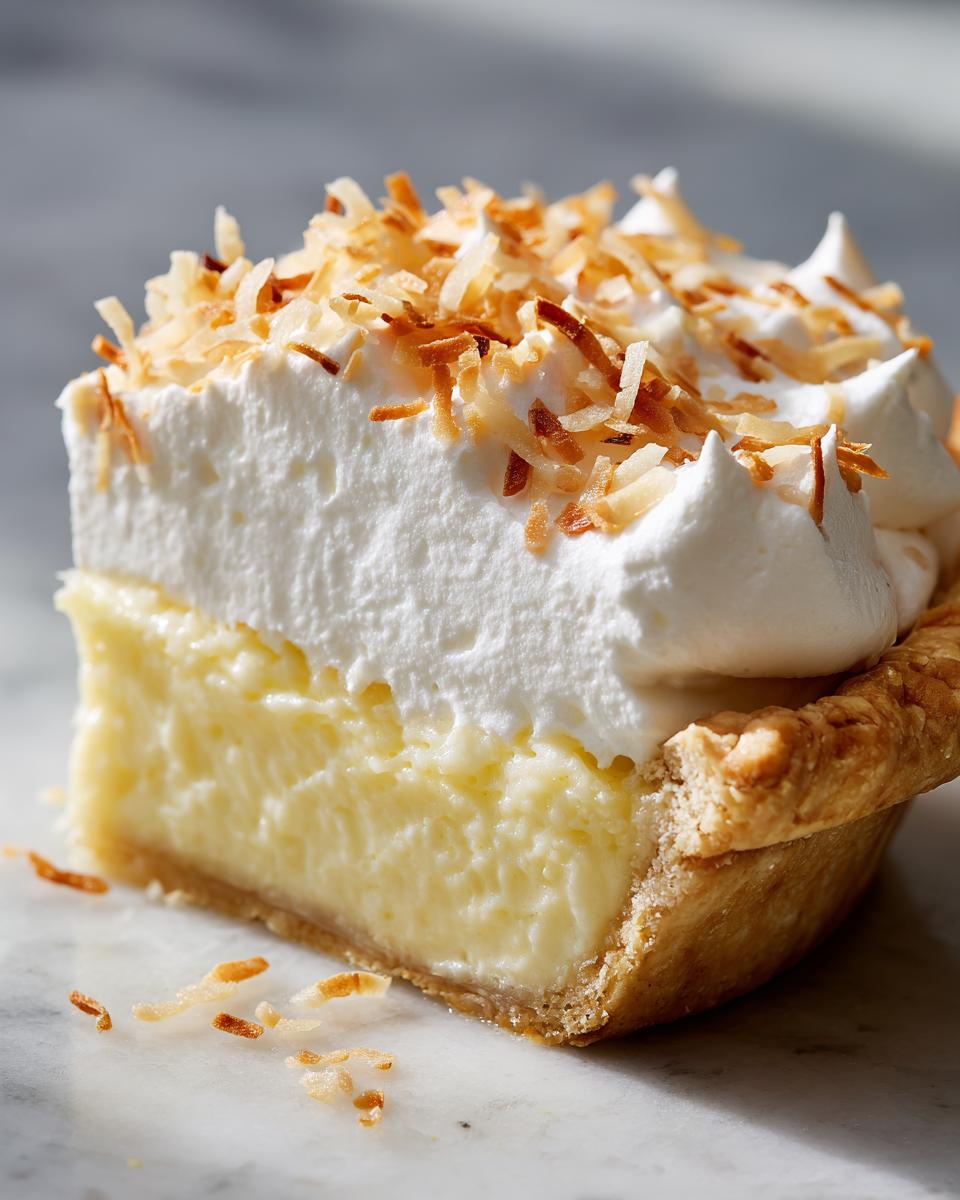
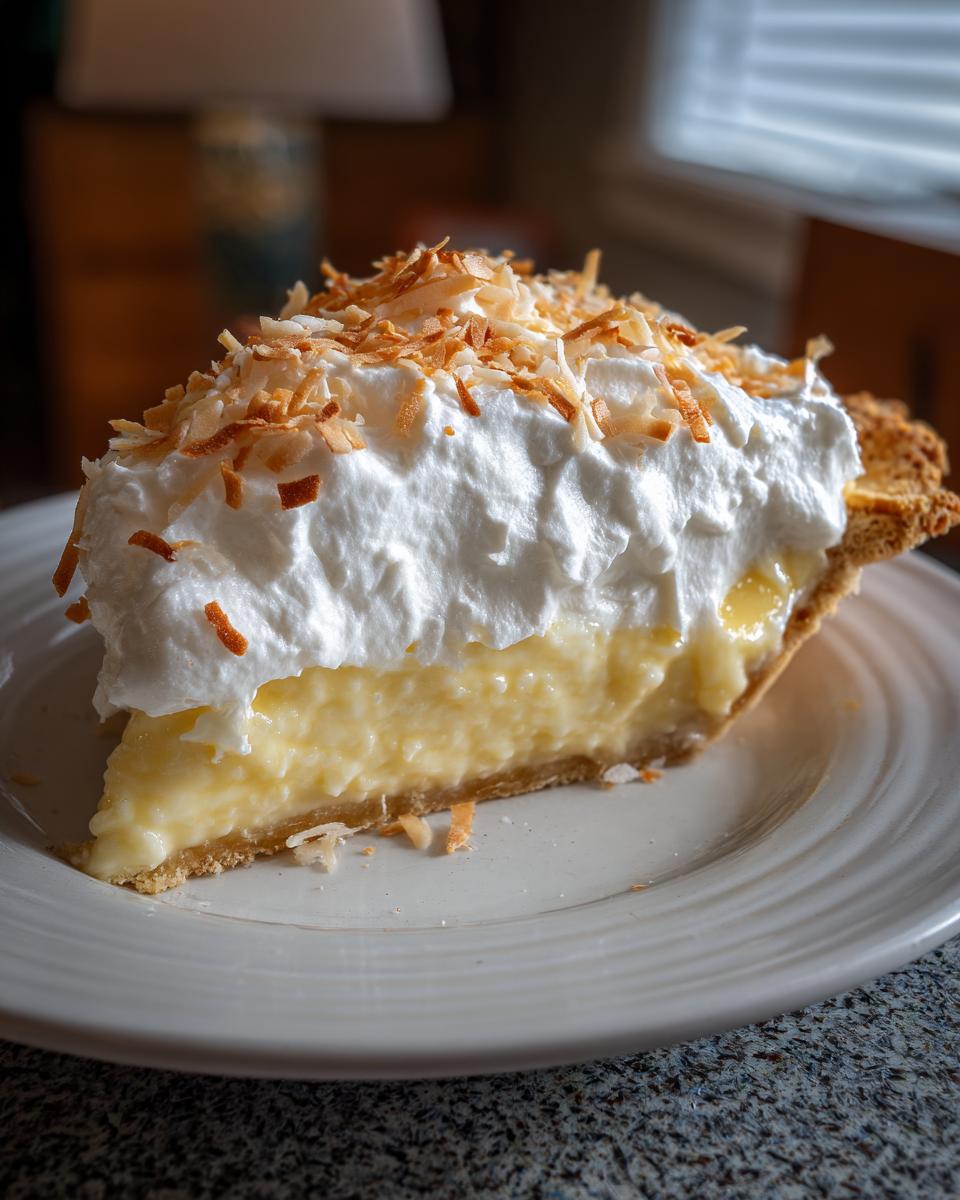
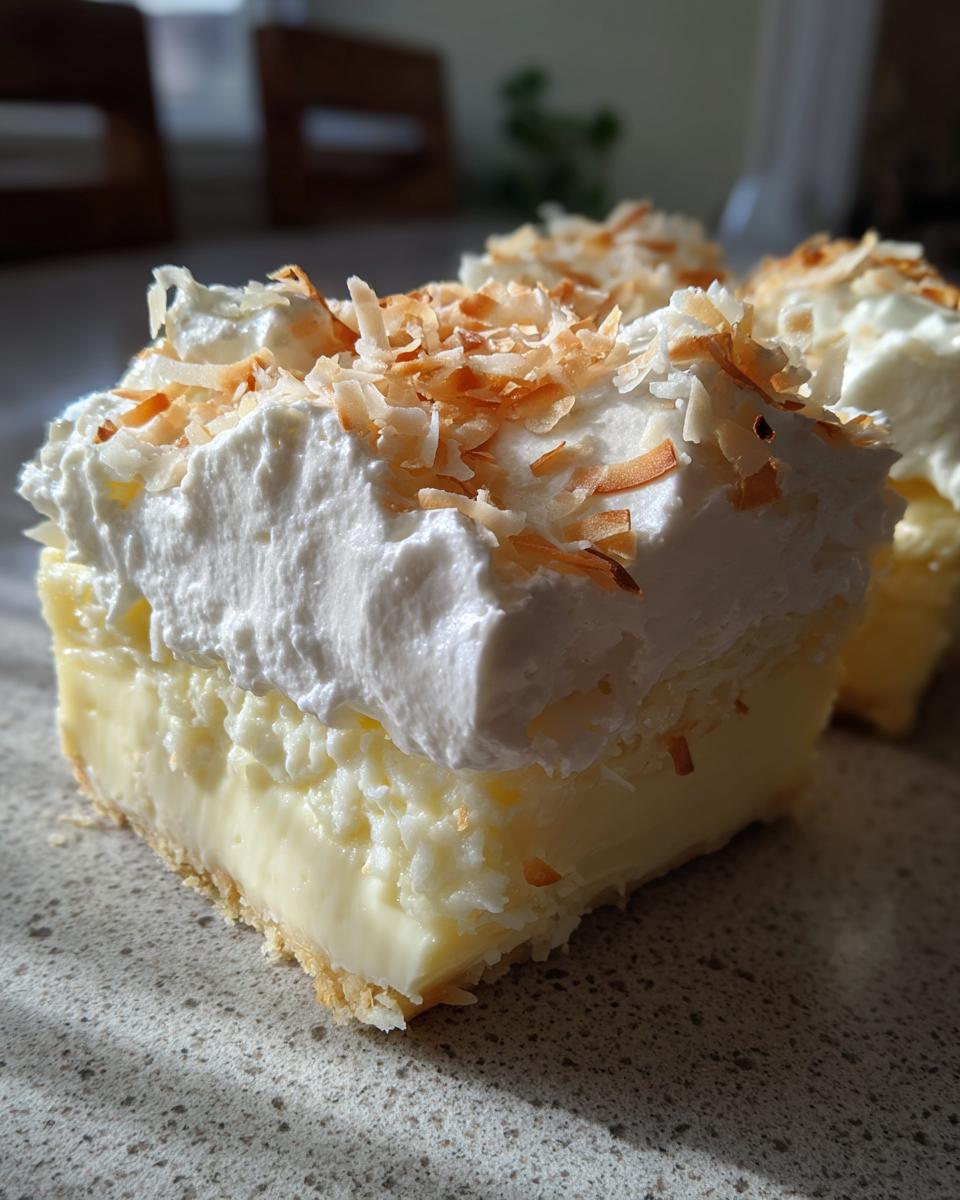
This isn’t some flimsy store-bought imitation, either. We’re talking about a truly thick, barely-jiggling coconut milk custard filling topped with a cloud of whipped cream so high it practically needs its own zip code. You deserve a dessert that holds up under pressure, and this recipe delivers that classic, decadent flavor without any fuss.
- Why This Homemade Coconut Pie is Your New Mother's Day Dessert Staple
- Gathering Ingredients for the Best Cream Pie Recipe
- Step-by-Step Instructions for Perfect Coconut Cream Pie
- Tips for Success Making Your Coconut Cream Pie
- Ingredient Notes and Substitutions for Coconut Cream Pie
- Make-Ahead and Storage for Your Homemade Coconut Pie
- Serving Suggestions for This Retro Dessert
- Frequently Asked Questions About Making Coconut Cream Pie
- Estimated Nutritional Information for Coconut Cream Pie
- Share Your Thoughts on This Classic Dessert
Why This Homemade Coconut Pie is Your New Mother’s Day Dessert Staple
If you’re looking for that perfect centerpiece for your Mother’s Day dessert celebration that screams pure, comforting indulgence, forget the fancy cake for one year! This homemade coconut pie is exactly what people picture when they think of old-fashioned, perfect baking.
It offers that beautiful, dramatic presentation people love, but it’s made with simple techniques that even my beginner students could master.
- It delivers that unmistakable, luscious texture that only a truly thick filling can provide.
- It looks incredible—tall, creamy, and begging to be photographed!
- It brings back all those wonderful memories of classic American baking.
Achieving the Perfect Thick Coconut Milk Custard
Listen, the number one reason people get nervous about cream pies is a runny filling. That won’t happen here, I promise! We use a careful balance of cornstarch and egg yolks, and the tempering step—where we slowly introduce hot liquid to the yolks—is simply non-negotiable. I learned in my teaching days that rushing the temperature change is a recipe for disaster!
That gentle raising of the temperature ensures the cornstarch fully sets up our rich coconut milk custard, resulting in a filling so stable you can slice it clean. Don’t rush it off the heat!
The Secret to a Mile-High Whipped Cream Topping
This topping is what makes the pie look like it belongs on a 1950s diner menu! To get that amazing height, you just need three things: cold bowl, cold whisk attachments, and cold heavy cream. When you beat the cream stiff, it holds its shape beautifully, creating those dramatic swirls.
It gives you that perfect visual contrast against the golden toasted coconut sprinkled on top. It’s simple elegance!
Gathering Ingredients for the Best Cream Pie Recipe
When you’re aiming for the very best cream pie recipe, you simply cannot compromise on quality or precision with your ingredients. This recipe is broken down into three distinct sections because each component plays a very specific role in achieving that perfect slice—the crust must be sturdy, the custard must be thick, and the topping must be light!
Remember, I learned from my mother that if you measure carefully, the steps take care of themselves. I want you to have success the first time you try this classic, so pay close attention to how we treat the coconut and the egg yolks. You can check out some of my simpler baking guides over at this collection if you need a refresher on basic mixing!
For the Baked Pie Crust
- 1 (9 inch) unbaked pie crust (Make sure it’s fully baked and completely cooled before we add the hot filling!)
For the Coconut Milk Custard Filling
- 1 cup granulated sugar
- 1/4 cup cornstarch
- 1/4 teaspoon salt
- 1 1/2 cups milk
- 1/2 cup heavy cream
- 4 large egg yolks, lightly beaten (Lightly beaten means just mixed until uniform in color, not frothy!)
- 2 tablespoons butter
- 1 teaspoon vanilla extract
- 1 cup sweetened flaked coconut, toasted (Don’t skip toasting; it deepens the flavor!)
For the Mile-High Whipped Cream Topping
- 1 cup heavy cream, cold (Seriously, put the bowl in the freezer for ten minutes first!)
- 2 tablespoons powdered sugar
- 1/2 teaspoon vanilla extract
Step-by-Step Instructions for Perfect Coconut Cream Pie
Now that you’ve got all your players lined up—crust cooled, coconut toasted—it’s time to make the magic happen on the stovetop. Don’t walk away from the saucepan once you start cooking the custard! This is where patience, which I learned so much about while teaching young children, really pays off. Follow these steps exactly, and you’ll have the most impressive Coconut cream pie ready for your table.
Preparing the Crust and Toasting the Coconut
First things first, make sure that 9-inch pie crust is baked until it’s beautifully golden brown and fully, completely cooled. We cannot put hot custard into a warm crust; it just makes for soggy bottoms, and we aren’t having that!
Don’t forget the coconut! Spread that sweetened flaked coconut onto a baking sheet. You want it lightly golden, so pop it in a 350°F oven for just 5 to 8 minutes. Watch it like a hawk, because it goes from perfect toast to burnt disaster in about thirty seconds flat. Smell that aroma? That’s success!
Cooking the Thick Coconut Milk Custard
In your saucepan, whisk the sugar, cornstarch, and salt together first, making sure there are zero lumps before you add any liquid. Whisk in the 1 1/2 cups of milk and 1/2 cup of heavy cream slowly. Keep stirring constantly over medium heat until it’s thick enough to coat the back of a spoon—this usually takes around 8 to 10 minutes. This constant stirring is key for that super smooth, thick custard pie consistency.
Once it thickens, remove it from the heat immediately! Now, temper those egg yolks. Slowly stream about a cup of that hot mixture into your beaten yolks while whisking furiously. Then, pour that tempered mix right back into the saucepan. Return it to low heat for just one or two more minutes, stirring constantly, until it’s really robustly thick. No boiling!
Chilling the Coconut Cream Pie Filling
Take it off the heat, stir in your butter, vanilla, and all that gorgeous toasted coconut until the butter melts right in. Pour that hot mixture quickly into your cooled crust. Here’s my biggest non-negotiable tip for pie perfection: take a piece of plastic wrap and press it *directly* onto the surface of the custard.
If you let air touch the surface, you get that awful rubbery skin forming. Press the wrap down tight! Then, pop the whole thing in the fridge. It needs a minimum of 4 hours—honestly, overnight is even better—to set up completely firm. If you’re already looking for great appetizer ideas while you wait, check out this collection.
Assembling the Mile-High Whipped Cream Topping
Only whip the topping when you are ready to serve the pie, or it might start weeping! Get your second cup of heavy cream, sugar, and vanilla into a chilled bowl. Beat it until you can lift the whisk out and the peaks stand straight up—stiff peaks! Taste it; it should be slightly sweet and perfectly vanilla-y.
Spread that glorious cloud of whipped cream high over the chilled filling. If you want a little extra flair, sprinkle a tiny bit of reserved toasted coconut on the very top. Then, slice it thick and enjoy the compliments!
Tips for Success Making Your Coconut Cream Pie
When you’re making something as classic as a Coconut cream pie, you want reliability above all else. I’ve spent years tweaking this recipe so it’s nearly foolproof, but a couple of extra pointers from my kitchen can really make the difference between good and spectacular.
If you find your custard is looking a tiny bit grainy when you temper the yolks, don’t panic! Just whisk it gently and continuously over low heat before you remove it from the stove. That constant motion smooths everything out again. Also, if you’re nervous about scorching the bottom while toasting your coconut, try using a lighter oven rack setting for that quick pass in the oven.
For stress-free chilling, sometimes I move the pie to the back of the fridge—it’s usually colder there, and it helps ensure that filling sets up firm for those beautiful slices. You can see how I handle other time-sensitive recipes in my dinner collection!
Ingredient Notes and Substitutions for Coconut Cream Pie
If you want an even more intense tropical vibe in your filling, we can certainly boost that coconut milk custard flavor! While I used standard dairy milk and cream for the primary liquid base in this recipe, you absolutely can substitute some or all of that with full-fat canned coconut milk. Just remember, canned coconut milk is thicker than regular milk, okay?
If you swap out liquid, you might need to add a splash of plain water or thin milk to keep the total liquid volume the same so the cornstarch activates correctly for your Coconut cream pie. When in doubt, err on the side of slightly thinner when mixing, because it thickens up substantially when cooked and chilled!
Make-Ahead and Storage for Your Homemade Coconut Pie
Now, I’m a firm believer that the best part of a gorgeous dessert is not having to worry about it on the big day! You can absolutely make the filling for this homemade coconut pie a day ahead. The key? Make sure that custard is COMPLETELY chilled and set—at least four hours, preferably overnight.
But here’s the real pro tip for your wonderful Coconut cream pie: wait until just before you plan to serve it before adding that beautiful whipped cream topping. If you cover a fully topped pie, the whipped cream gets squished! Leftovers (if you even have any) store best sealed tightly in the fridge, topping intact, but they taste freshest the day you assemble it.
Serving Suggestions for This Retro Dessert
This rich Coconut cream pie deserves the perfect partner! To really lean into that classic, comforting vibe, I always suggest serving it alongside a strong cup of freshly brewed black coffee—the bitterness balances the sweetness perfectly. For a lighter counterpoint, a side of fresh raspberries adds a pop of color and tart flavor that cuts through the cream beautifully.
Enjoying these simple pairings really completes the experience of these wonderful retro desserts.
Frequently Asked Questions About Making Coconut Cream Pie
It’s totally normal to have questions when you’re tackling a classic like this! Trust me, when I first started baking, I worried about every little wobble. Here are some common things folks ask about making the perfect Coconut cream pie.
Can I use canned coconut milk instead of regular milk in the custard?
Oh, what a great idea if you really want that flavor to sing! You absolutely can use canned coconut milk to make your coconut milk custard richer. Just remember that canned coconut milk is much thicker than regular milk. If you are swapping out, say, half a cup of regular milk, use half a cup of canned coconut milk, but you might need to add just a splash more plain water or thin milk to keep your total liquid volume similar so that cornstarch does its job right. That richness is divine, though!
How do I prevent the custard from developing a skin while chilling?
This is a classic problem, and the fix is so simple it feels like cheating! Remember when I told you to press plastic wrap directly onto the surface of the hot custard before chilling? That’s the trick! It blocks the air completely. Air touching the surface is what causes that rubbery skin to form on top of your filling. If you press the plastic wrap right down until it’s touching the custard everywhere, you won’t have any skin!
Is this the best cream pie recipe if I want to make it ahead of time?
Yes, this recipe is fantastic for planning ahead, which is perfect for busy holidays like Mother’s Day! You can make your custard filling, chill it until it’s completely firm—that’s crucial—and store it covered in the fridge for up to two days. But here’s the catch, and why this is the best cream pie recipe for party prep: Never top it early! You must whip the cream and add it right before you plan to serve the pie. That way, your topping stays perfectly crisp and lofty!
Estimated Nutritional Information for Coconut Cream Pie
Now, I always tell folks that when you’re baking with real butter and rich cream, you’re not exactly chasing a salad recipe here! The following numbers for Carla’s Classic Coconut cream pie are great estimates based on serving 8 generous slices. Just remember, because every scratch ingredient varies slightly, these are guidelines, not gospel.
- Calories: 410
- Sugar: 35g
- Fat: 24g
- Protein: 6g
Enjoy every bite guilt-free; this is comfort food at its finest!
Share Your Thoughts on This Classic Dessert
Well, that’s my whole heart poured out onto the page for you! I truly hope this Coconut cream pie brings as much joy to your family table as it does mine. Seriously, I’d love to know how it turned out for your special occasion. Did you manage that mile-high topping? Was it the hit of your Mother’s Day dessert spread?
Please leave a rating below using the little stars—it helps other home cooks know this recipe is super dependable! And if you have any questions or just want to share a sweet moment about making this pie, drop a line in the comments section over at the contact page. Happy baking, everyone!
PrintCarla’s Classic Mile-High Coconut Cream Pie

Make this homemade coconut pie for a rich, thick coconut milk custard filling and a towering whipped cream topping. It is a perfect retro dessert for your Mother’s Day table.
- Prep Time: 25 min
- Cook Time: 15 min
- Total Time: 4 hours 40 min
- Yield: 8 servings 1x
- Category: Dessert
- Method: Stovetop and Baking
- Cuisine: American
- Diet: Vegetarian
Ingredients
- 1 (9 inch) unbaked pie crust
- 1 cup granulated sugar
- 1/4 cup cornstarch
- 1/4 teaspoon salt
- 1 1/2 cups milk
- 1/2 cup heavy cream
- 4 large egg yolks, lightly beaten
- 2 tablespoons butter
- 1 teaspoon vanilla extract
- 1 cup sweetened flaked coconut, toasted
- 1 cup heavy cream, cold (for topping)
- 2 tablespoons powdered sugar (for topping)
- 1/2 teaspoon vanilla extract (for topping)
Instructions
- Prepare the pie crust according to your preferred method for a single crust pie. Bake until golden brown. Let the crust cool completely.
- In a medium saucepan, whisk together the granulated sugar, cornstarch, and salt.
- Gradually whisk in the 1 1/2 cups of milk and 1/2 cup of heavy cream until smooth.
- Cook over medium heat, stirring constantly, until the mixture thickens enough to coat the back of a spoon. Do not let it boil rapidly. This takes about 8 to 10 minutes.
- Remove the saucepan from the heat. In a small bowl, whisk the egg yolks. Slowly temper the yolks by whisking about 1 cup of the hot custard mixture into the yolks.
- Pour the tempered yolk mixture back into the saucepan with the remaining custard. Return to medium-low heat. Cook, stirring constantly, for 1 to 2 minutes until the custard is thick. Do not boil.
- Remove from heat. Stir in the butter, vanilla extract, and 1 cup of toasted coconut until the butter melts.
- Pour the hot custard into the cooled, baked pie shell. Press plastic wrap directly onto the surface of the custard to prevent a skin from forming. Chill for at least 4 hours, or until completely firm.
- When ready to serve, prepare the topping. In a chilled bowl, beat the 1 cup of cold heavy cream, powdered sugar, and vanilla extract until stiff peaks form.
- Spread or pipe the whipped cream generously over the chilled custard. Sprinkle the top with a little extra toasted coconut, if desired. Slice and serve cold.
Notes
- To toast coconut, spread it in a single layer on a baking sheet. Bake at 350 degrees Fahrenheit for 5 to 8 minutes, watching closely to prevent burning.
- For the thickest custard, make sure you cook the mixture long enough for the cornstarch to activate, stirring constantly.
- You can make this best cream pie recipe a day ahead, but add the whipped cream topping just before serving.
Nutrition
- Serving Size: 1 slice
- Calories: 410
- Sugar: 35g
- Sodium: 250mg
- Fat: 24g
- Saturated Fat: 16g
- Unsaturated Fat: 8g
- Trans Fat: 0.5g
- Carbohydrates: 48g
- Fiber: 2g
- Protein: 6g
- Cholesterol: 110mg