
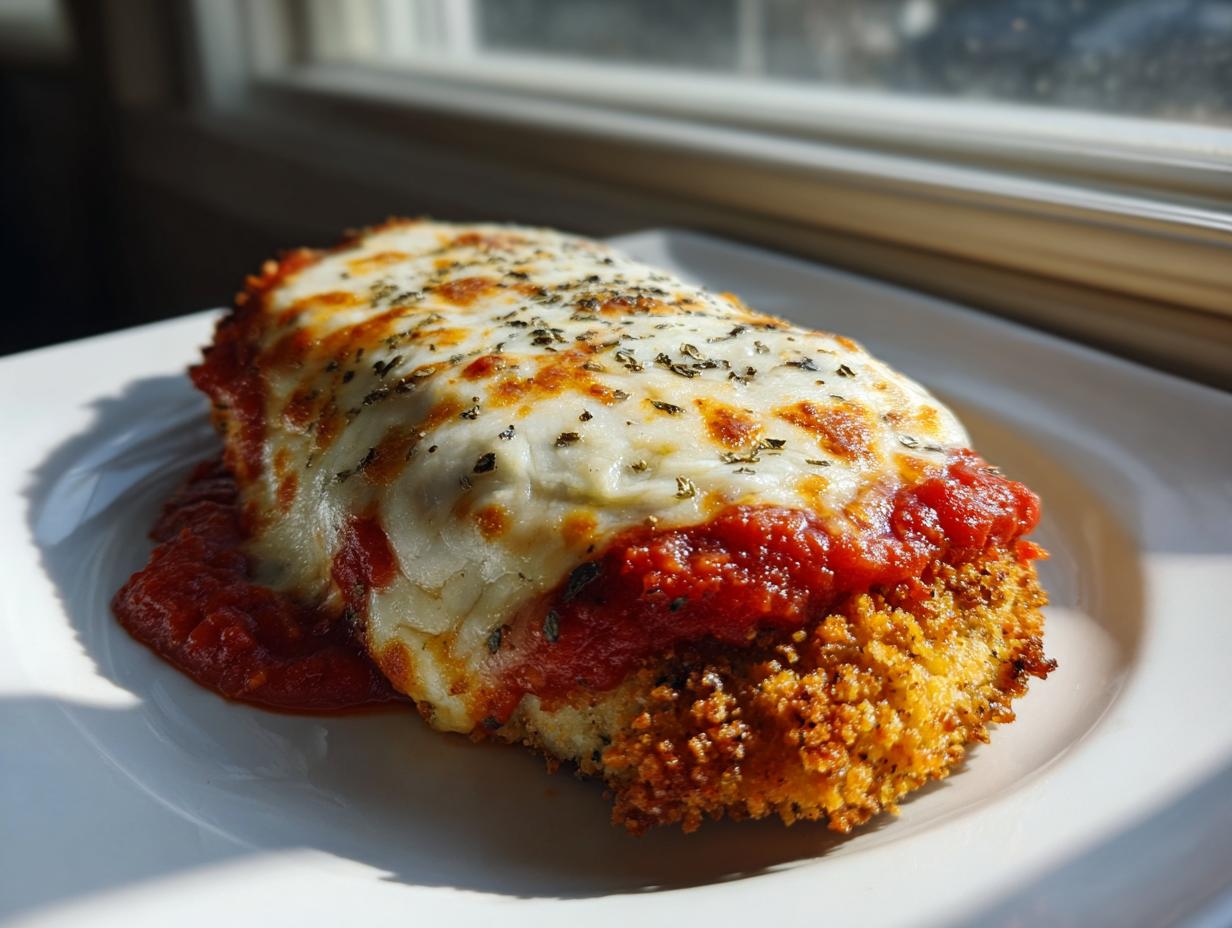
Oh, doesn’t that classic Italian-American flavor just call to you sometimes? You picture that crispy crust, the rich tomato sauce, and that blanket of gooey cheese on top. But then you remember the mess, the splattering oil, and trying to keep everything hot when you deep-fry. That’s where I step in! I promise you, you absolutely do not need to make a fuss to get that taste—especially on a Tuesday night. That’s why I’m sharing my tried-and-true chicken parmesan recipe easy baked. This is one of those dependable, straightforward recipes I perfected quietly right here in my home kitchen, just like I teach all my grandchildren. It delivers all the comfort with none of the hassle. Get ready for your new favorite weekday dinner solution.
- Why This Easy Baked Chicken Parmesan Is Your New Weeknight Favorite
- Gathering Ingredients for Your Easy Baked Chicken Parmesan
- Step-by-Step Instructions for the Oven Baked Chicken Parmesan
- Tips for Success with Your Easy Weeknight Chicken Parmesan
- Serving Suggestions for Your Family Friendly Parmesan Chicken
- Storage and Make Ahead Baked Chicken Parmesan Tips
- Frequently Asked Questions About This Chicken Parmesan Recipe Easy Baked
- Nutritional Snapshot of Your Cheesy Baked Chicken Dinner
- Share Your Simple Italian Chicken Experience
Why This Easy Baked Chicken Parmesan Is Your New Weeknight Favorite
I know what it’s like chasing kids and juggling work. You want that wonderful, hearty flavor, but you don’t have two hands free for frying after 5 PM. This Simple Baked Chicken Parmesan is designed just for that moment. It’s reliable, comforting, and it gets dinner on the table fast. Cooking by Carla means finding joy in the everyday, and this recipe is pure weeknight joy!
- It’s speedy! You are looking at only about 40 minutes total time, which is just stunning for a meal this flavorful.
- No deep-fry mess! We are ditching the oil splatters entirely.
- It feeds the whole family without requiring a culinary degree.
If you are looking for more speedy meals that keep the tradition alive, you might want to check out my collection of simple weeknight dinners.
Quick Preparation Time for Busy Evenings
When I say quick, I mean it. The prep time is just 15 minutes! That’s less time than it takes to unload the dishwasher, honestly. Because we pound the chicken thin and use Panko, we don’t have to wait around forever for it to cook through. This truly is a Quick Chicken Parmesan Recipe that respects your time.
A Healthier Baked Chicken Parm Option
We are swapping out the heavy fryer oil for a light spray of olive oil or cooking spray right on top of the breading. You still get that wonderful crisp texture that is so essential to great chicken parm, but without all the heavy lifting the deep fryer adds. It’s the satisfying crunch you crave in a Healthier Baked Chicken Parm.
Gathering Ingredients for Your Easy Baked Chicken Parmesan
Alright, let’s get things ready on the counter! Just like in my teaching days, precision matters here, especially when we want to keep our chicken breasts from getting dry. This recipe makes just four lovely servings, perfect for a family dinner tonight. Before you start setting up your breading station, make sure you’ve pounded those four boneless, skinless chicken breasts down evenly to about a half-inch thickness. If they are too thick, they won’t cook at the same rate as the breading.
Remember, cooking by Carla means using good materials; cheap ingredients make for sad results! For this Simple Baked Chicken Parmesan, you need exactly what’s listed. Don’t be tempted to swap out the Panko breadcrumbs for standard breadcrumbs, or you lose that specific crunch that makes this baked version so good.
Ingredient Notes and Substitutions
Now, a few little tidbits about what you’re working with. The Panko is essential because those large, irregular flakes toast up beautifully in the oven, giving you that satisfying crunch even without the full fry. Don’t skimp there, please!
And let’s talk sauce. You’ll need one cup of marinara, and I truly mean *marinara*. Since we aren’t adding much seasoning directly into the sauce layer, use the best quality jarred sauce you can find, or even better, one you made last weekend! A truly good sauce is the backbone of this Simple Baked Chicken Parmesan. Also, make sure your Parmesan cheese is freshly grated for the topping—that pre-shredded stuff just doesn’t melt with the same enthusiasm.
Step-by-Step Instructions for the Oven Baked Chicken Parmesan
Now for the fun part! Since you’ve taken the time to pound those chicken breasts evenly—which is step zero in my book—the breading process is going to go smoothly. I want you to imagine this as assembly work, not complicated cooking. It moves fast, so have everything ready right by the oven before you start.
First things first: get that oven hot, 400 degrees Fahrenheit. Also, make sure your baking sheet is ready; a light spray of cooking spray keeps things honest between you and the pan!
Setting Up Your Breading Station for the Chicken Parmesan Recipe Easy Baked
This is your assembly line, and organization here is the key to success. You need three shallow dishes lined up. In Dish One, go with your flour. Dish Two is for the eggs—just give them a cheerful whisk. And Dish Three is where the magic happens: mix those Panko breadcrumbs with your half-cup of that grated Parmesan, plus the oregano, salt, and pepper.
Take that first chicken cutlet and give it a good, thorough dredge in the flour. Don’t be shy, but then—and this is important—give it a firm shake! We want a light dusting to help the egg stick, not a heavy, pasty coat. Next, it dips into the egg bath, letting the excess thoroughly drip away. Finally, press it firmly into that Panko mix. Really press it in so you have a nice, thick layer of crunch all over both sides. See? That’s the foundation for a No Fry Chicken Parmesan!
Baking and Achieving Golden Perfection
Once all four cutlets are sitting on your prepared sheet, we need to help them brown up nicely since there’s no hot oil bath. Lightly spray the tops of the breading with cooking spray, or if you prefer, drizzle just a tiny bit of olive oil over them. This little step really helps achieve that lovely golden color.
Into the oven they go for 15 minutes exactly. We want them mostly cooked before we add the wet stuff. When they come out, spoon your warm marinara right over the top of each piece. Don’t overload it, or it will steam! Then, sprinkle on that final half-cup of Parmesan and top with the mozzarella. Back into the oven they go for another 5 to 10 minutes. You are looking for bubbly, melted cheese and, just as important for peace of mind, make sure the thickest part of the chicken reads 165 degrees Fahrenheit internally. That’s how we stay safe and ensure juicy results. For more tips on baking chicken breasts perfectly, take a look at my guide on tender baked chicken breasts.
Tips for Success with Your Easy Weeknight Chicken Parmesan
I always tell folks that the difference between an okay Easy Weeknight Chicken Parmesan and an absolutely fantastic one usually boils down to two small things you can check right at the start. Since we aren’t frying, we have to be a bit smarter about how we manage moisture in the oven. My mother always said, “Carla, dry goods need a friend, but wet goods need a shield.” That’s how we keep this breading from turning into sad, soggy mush.
First, if you haven’t already, take those chicken breasts and pound them out evenly. Getting them to that perfect half-inch thickness isn’t just about cooking quickly; it’s about making sure every piece gets an even, crispy crust all the way around. If you have a thin spot and a fat spot, the thin spot will dry out before the fat spot is done.
For extra juicy results down the line, sometimes I’ll give the chicken a quick soak in a simple brine or herb mix, though it’s optional for this quick recipe. You can see how I do that over here on my best chicken marinade guide if you have an extra five minutes.
Preventing a Soggy Bottom on Your Cheesy Baked Chicken Dinner
This is the number one concern when converting a fried favorite to an oven dish. If the breading sits directly on that baking sheet, the steam underneath has nowhere to go and just soaks right back into your beautiful Panko crust. It’s heartbreaking!
Here’s how we fight back against sogginess for this truly Cheesy Baked Chicken Dinner:
- The Rack Trick: If you own a wire cooling rack, place it directly on top of your greased baking sheet and set the breaded chicken right on the rack. This lifts the chicken up, allowing air (and steam) to escape below. Believe me, it makes a huge difference!
- Generous Spray: If you don’t have a rack, don’t just give the tops a light spritz—hit those bottoms too, just before they first go into the oven. A well-oiled bottom forms a bit of a barrier against the hot pan surface.
- Don’t Crowd the Pan: Make sure there is space between each chicken breast. If they are touching, they will steam each other instead of baking properly. Remember, we are aiming for individuality and crispness here!
Serving Suggestions for Your Family Friendly Parmesan Chicken
You’ve got this gorgeous, cheesy chicken resting on the counter—now what goes on the plate next to it? This Family Friendly Parmesan Chicken is a rich dish, so you want sides that complement it beautifully without competing with the sauce and cheese. Keep it simple; that’s my everyday motto!
Of course, the classic answer is pasta! A big bed of spaghetti or linguine soaking up just a little of that extra marinara sauce is always a winner. If you’re looking for something even less hands-on than boiling a separate pot of noodles, I highly recommend trying my one-pot garlic parmesan pasta. It’s creamy, cheesy, and you wash one pot when you’re done—a perfect match for the minimal cleanup of this baked chicken!

We also need some green on that plate to feel like a balanced meal. A simple green salad with a sharp vinaigrette cuts through the richness of the mozzarella perfectly. If you want a cooked side that’s effortless, try some roasted green beans or broccoli spears tossed with just a little olive oil, salt, and garlic powder. You can find my favorite way to make them shine in my garlic herb roasted veggies recipe.
And never forget the bread! A thick slice of crusty Italian bread or some warm garlic bread is absolutely necessary for wiping up any leftover sauce on the plate. Trust me, leaving that sauce behind is a culinary crime. Keep things straightforward, and you’ll have a comforting, complete plate ready in minutes.
Storage and Make Ahead Baked Chicken Parmesan Tips
I love that you’re thinking ahead! That’s the sign of a truly smart home cook. Whether you’re banking on leftovers for lunch tomorrow or prepping things on Sunday so Monday dinner is a breeze, this Easy Baked Chicken Parmesan holds up beautifully. It’s wonderful how a family favorite can still work around your busy life, isn’t it?
When it comes to leftovers, treat them right. Once the chicken has cooled completely—and I mean completely—store it in a shallow, airtight container in the fridge. It will keep well for about three to four days. Honestly, I think it tastes even better the next day when the sauce and cheese have really settled into the breading. To reheat, I really suggest using your oven or an air fryer at about 350 degrees instead of the microwave. The microwave is reliable, but it will definitely soften that Panko crust we worked so hard to achieve. A quick 10 minutes in the oven brings it right back to life.
If you want to get ahead of the game even more, you absolutely can prepare the breaded cutlets ahead of time. This is a lifesaver on a busy day! You just follow the breading steps exactly as written, but stop right before you spray them with oil. Lay the breaded chicken, separated by parchment paper squares, onto a baking sheet. Cover that tightly with plastic wrap and pop it into the refrigerator for up to four hours. This means when dinnertime rolls around, you skip the whole breading mess! You just pull them out (no need to let them warm up first), give those tops a good spray of oil, and pop them straight into the 400-degree oven. You might need to add 3 to 5 extra minutes to that initial bake time since they started chilled. For a deeper dive into prepping main dishes ahead of time, take a look at my tips on make-ahead baked chicken.
Frequently Asked Questions About This Chicken Parmesan Recipe Easy Baked
It’s wonderful how many of you are trying out this method! When you switch from frying to baking, you naturally have questions creep up. That’s how we learn, right? I’ve gathered the ones I hear most often below, especially from folks trying to make this a regular part of their rotation.
Can I use frozen chicken breasts for this Oven Baked Chicken Parmesan?
Oh, honey, please don’t put frozen chicken straight into the breading station! If you do, the flour won’t stick right, and you’ll end up with big patches of egg showing through where the breading just slid off once it hit the heat. For this Oven Baked Chicken Parmesan to work its magic, the chicken needs to be completely thawed.
The best way is to plan ahead! Pop them in the fridge overnight. If you are in a real pinch, you can thaw them in the microwave on the defrost setting, but you must cook them immediately after that. Remember, if you use thinner cutlets, you’ll need less time, even when thawing carefully.
What is the difference between this method and traditional frying?
This is the main point of this recipe! The traditional method dunking the chicken into hot oil cooks the crust very rapidly while also sealing in moisture. Our baked method is much gentler. It uses hot circulating air to dry out and crisp the Panko while baking it through.
The main difference is the texture and the clean-up. You get a wonderfully crisp exterior that’s much less greasy—making it a perfect Healthier Baked Chicken Parm. The crust might be slightly less rugged than a deep-fried one, but it holds the sauce and cheese beautifully, which is what we really want in a Beginner Chicken Parmesan Recipe.

Can I use thinner chicken cutlets for a Quick Chicken Parmesan Recipe?
You absolutely can, and if you want it faster, thinner is often better! If your chicken breasts are already pounded down to about a quarter-inch thick, you’re going to shave off a few minutes for sure. Since the Panko toasts so fast in the hot oven, you want to keep a close eye on it.
If your cutlets are very thin—say, under half an inch—I would reduce that initial baking time from 15 minutes down to just 10 or 12. Then, when you add the cheese and sauce, keep that second bake brief. It’s all about hitting 165°F internally quickly. If you ever need ultra-fast options, I’ve got some ideas for low-carb versions you might explore as well!
Nutritional Snapshot of Your Cheesy Baked Chicken Dinner
Now, I know some of you are watching the counts, and others just want to know what you’re feeding your family for dinner. Since this is an easy weeknight meal, I wanted to give you a quick look at what’s in a typical serving of this Cheesy Baked Chicken Dinner. Remember, since we are baking instead of frying, we’ve already saved a little bit on the fat content compared to the traditional version!
These numbers are estimates based on the recipe using standard ingredients, so they’re a wonderful guide, but remember that the quality of your marinara sauce or how much cheese you decide to sprinkle on top will change things slightly. It’s what I like to call good, honest home cooking nutrition!
- Serving Size: Just one chicken breast!
- Calories: Around 450 per serving.
- Protein: A whopping 48 grams! This is a real meat and potatoes kind of dinner.
- Total Fat: Approximately 18 grams.
- Carbohydrates: About 25 grams, mostly coming from that lovely breading and the sauce.
It’s a satisfying meal that packs a punch in protein while still keeping things reasonable compared to many takeout options. That’s the beauty of making your own Easy Italian Dinner Ideas right in your own oven!
Share Your Simple Italian Chicken Experience
Well, there you have it! You’ve managed an absolutely fantastic dinner with minimal fuss. That is what cooking by Carla is all about—making delicious, classic food feel completely achievable, even on the busiest nights. This Beginner Chicken Parmesan Recipe is meant to be made, enjoyed, and talked about!
I truly hope this baked version becomes a staple in your house. The best part of sharing these recipes isn’t just getting them into your hands; it’s hearing how they turn out for you and your family. Did the kids love the cheesy topping? Did you manage to sneak in a side of green veggies?
Please, if you loved this Simple Italian Chicken makeover, I would be so grateful if you’d leave a quick star rating right below this section. Tell me what worked well for you, or maybe if you tried swapping out the oregano for basil—all feedback helps the next cook!
And I absolutely adore seeing your creations on social media! If you snap a picture of that perfect, golden-brown slice, please tag me. Nothing warms my heart more than seeing my recipes sitting on your family tables. If you have a question that I didn’t cover in the FAQs, please feel free to reach out directly through my contact page, and I’ll get back to you as soon as I can. Happy cooking, dear friend!
PrintEasy Baked Chicken Parmesan

Make this classic Italian-American dish using your oven instead of a fryer. This recipe offers a simple, straightforward method for a cheesy, comforting weeknight dinner.
- Prep Time: 15 min
- Cook Time: 25 min
- Total Time: 40 min
- Yield: 4 servings 1x
- Category: Dinner
- Method: Baking
- Cuisine: Italian-American
- Diet: None
Ingredients
- 4 boneless, skinless chicken breasts, pounded to 1/2 inch thickness
- 1 cup all-purpose flour
- 2 large eggs, lightly beaten
- 1 1/2 cups panko breadcrumbs
- 1/2 cup grated Parmesan cheese, plus 1/2 cup for topping
- 1 teaspoon dried oregano
- 1/2 teaspoon garlic powder
- 1/2 teaspoon salt
- 1/4 teaspoon black pepper
- 1 cup marinara sauce, warmed
- 1 cup shredded mozzarella cheese
- Cooking spray or 2 tablespoons olive oil
Instructions
- Preheat your oven to 400 degrees Fahrenheit. Lightly grease a baking sheet or coat it with cooking spray.
- Set up a standard breading station with three shallow dishes. Place the flour in the first dish. Whisk the eggs in the second dish. In the third dish, combine the panko breadcrumbs, 1/2 cup Parmesan cheese, oregano, garlic powder, salt, and pepper.
- Take one chicken cutlet and dredge it thoroughly in the flour, shaking off any excess.
- Dip the floured chicken into the beaten egg, allowing excess to drip off.
- Press the chicken firmly into the breadcrumb mixture, coating both sides completely. Place the breaded chicken on the prepared baking sheet. Repeat with the remaining chicken.
- Lightly spray the tops of the breaded chicken with cooking spray or drizzle with olive oil. This helps with browning.
- Bake for 15 minutes.
- Remove the pan from the oven. Spoon about 1/4 cup of marinara sauce over the top of each chicken breast. Sprinkle evenly with the remaining 1/2 cup of Parmesan cheese and the mozzarella cheese.
- Return the chicken to the oven and bake for another 5 to 10 minutes, or until the cheese is melted, bubbly, and the chicken reaches an internal temperature of 165 degrees Fahrenheit.
- Let the chicken rest for 5 minutes before serving over your favorite pasta.
Notes
- To prevent sogginess, make sure your breading mixture is dry and press it onto the chicken firmly.
- For extra flavor, use a good quality marinara sauce.
- You can prepare the breaded chicken cutlets ahead of time and refrigerate them for up to 4 hours before baking.
Nutrition
- Serving Size: 1 breast
- Calories: 450
- Sugar: 8
- Sodium: 650
- Fat: 18
- Saturated Fat: 7
- Unsaturated Fat: 11
- Trans Fat: 0
- Carbohydrates: 25
- Fiber: 2
- Protein: 48
- Cholesterol: 140